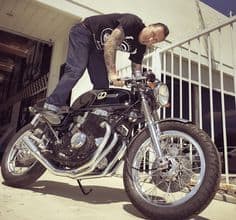
Summer is here and time to get back on 2 wheels

We are so lucky here in Southern California, we are blessed with Sunny days most of the year round, albeit the price we pay is we get Earthquakes and we got a couple of big buggers on July 4th and 5th, with a few aftershocks on their way.

But other than that, we are fortunate to have year round riding weather, but thats not the case for most of the other parts of the USA and the world etc, especially places like Canada etr.  They have a very short riding season and its this time of year that many riders are slinging their legs over the two wheeled creations and pounding the tarmac.

If you need parts, well I am here for you all, as well as any enquiries as to how to hopefully come up with an answer to a frustrating system on the bike, maybe Carburettor issue ? Bad coils? or what oil and plugs do you recommend etc.


My job is to help you get your machione on the road for the first time or, for the millionth time again, its all good and this really is the best time of year for the two wheeled industry.

I love what I do and if I can help you get you back on the road, then I am a happy Bloke, I can help you with many parts, I have been doing these cool Vintage Stke Tuck n Roll seat assemblys for the K series Honda’s for many years and they turn our great, fit well and are comfortable, but more than anything, made by me right here in California USA!

So, have a great Tuesday and if you need help you can email me at carpy@carpyscaferacers.com or even Text me on the same number for a faster response. I ship out the same day if I have the part in stock too.

I make parts for Triumphs too, so stay tuned to the website if you have a Twinline Motorcycle and need help with that as well, this seat style I make for the HONDA and the TRIUMPH and was the first to do this style many years ago and continue to push the enevelope in making new parts for the bikes out there .

Thanks for reading my Blog today, I try and keep you up to date with whats going on, if you have a 350 to a 1000 I can usually accomidate you and get you back on the road fast, but i also have a passion for Motorcycles, been into these bkes for decades and thats where I get a lot of experience from as I have ridden them for so long.

Have a fun Tuesday and hopefully you get some time to wrench or ride on your favorite machine out there.


How to clean up your S.O.H.C. Caliper

Many people email or call and some have the same problems, so I thought I might do a wee bit of a blog and show you what we do when you grab an old CB750 and fnd out that the front brake sticks and wont release, how can you over come this and get the old girl to function again.


Now- this is my way, someone else may in fact do theirs differently, but this is what I taught myself and so far it has helped me so many times and i did it all at the shop with a minimum of tools too.


As you can see, this one was nasty and to be honest, most of them are like this, but if you cannot even get the brake pad out, sometimes- if you are lucky, if you remove the brake hose and eave the bleed nipple closed, you can try and blow the thing out with compressed air.

But remember if you are going to do that, wear safety glasses and put the caliper in a bucket with a towel in it, as if that brake pad and piston comes out, it will be traveling faster than your bike can go, so make sure you have a safe area to do this.

Now, if like me, the bugger is stuck in there like a fat foot in a thing shoe, then the only real way to remove the brake pad and piston is to do what we do.


Get an old pair of handlebars and fit a working master Cylinder to the bars, then simply just bleed the caliper until fluid comes out of the bleed nipple, tighten off and then check the master cylinder for fluid, top off and screw the lid back on and start to pump the brake lever.

If you have bled the caliper the piston WILL start to move and slowly the brake pad will simply plop out, but- keep checking on the brake fluid as you will soon run out and don’t want an air blockage.


Fill reservoir with brake fluid and keep pumping and make sure that you have at least a towel under the caliper body as when the piston pops out, of course, all the fluid is going to be right behind it.

Plus the old fluid will be dirty and many times all gummed up and this makes a mess, so a towel is always a good thing, make sure you throw the towel away after as you dont want to use it for cleaning a freshly painted gas tank as brake fluid is brutal on paint.


Now the brake pad and caliper is out, you will see just how bad the piston has become, the main factor for this is that the Caliper body is aluminum and the Piston is steel, the steel sweats and then rusts and then it turns into pitting, thus when you press the brake, the pitts will catch against the seal and wont return and the brake sticks on, that’s why sometimes, if you have moved an old bike and the brake sticks and then you see the old boy who owned the bike, kick the caliper, its enough force to pop the piston back home but will always stick.


So, we now manufacture a Stainless steel piston to prevent this from happening again and we use them all the time.


Check our parts page out as we sell a reaming kit now to get the Caliper looking good and smooth.

I use a dremel and a rubber wheel and then I gently remove any of the oxidization around the caliper with the rubber wheel, but not harming the aluminum, this works very well and I must of done this to over 150 Calipers over the years.

It gets hot  on the caliper body but this is so worth it and you will be surprised at the end result to be honest.

But once you dremel the body, it will be nice and smooth, I clean her out with lacquer thinner and air dry, then fit a New Rubber seal in its groove, i usually dip it in brake fluid and fit, then use our Stainless Steel piston and put a little brake fluid on that and it will plop in the caliper nice and smoothly.

Then simply add your brake pads and then fit to the caliper bracket on your machine, just bleed the brake and you are done.

We sell the brake bleeders too and the Rubber seals, so we have ya covered with it all, as well as the brake lines too.


Now if you would like a little more insight, I made three videos with my little camera today, so check them out as these may help you as you go along with your brake rebuild.

Part 2

part3

REAR WHEEL RETAINER REMOVAL TOOL

 Well, I have struggled over the years with the front and rear wheel bearing retainers, as removing them was a royal pain in the dirt box- so after a wee bit of thought and a cup of PG tips- Eureka! I found a good way of helping me get around this issue and we came up with this tool.

 I also have the tool for the front retainer too, so I am now all sorted in any of the bearings that I have to get to and thought I would offer these to you lot as well.

 This is a great little set up and Chrome plated and will fit in your tool box easily until you need to use it.


 You will not understand how cool this is, until you try and get your bearing out and you use a chisel or screw driver to try and tap the retainer out and destroy it.


 So, have a look and see what you think, I have used mine a few times already as we have quite a few long term builds to finish and boy did this save me time.


 Below you will see the steps that I do for the rear, as you see, you can notice that Honda actually peened the retainer in 4 places, now this is just an extra safety precaution that they did, sometimes the tool can simply undo the retainer and not worry about the peened holes, but- if she does not want to budge, this is an easy removal if you have a drill and a small bit.

 Now, just use the smallest drill bit and drill straight down, this will release the pressure on the retainer and believe me, the retainer will undo and go back in, I have done this at least a Hundred times.

 Simply place the tool in place, push down a little and let your ratchet do the work and this will come undone and get that dame thing out.


 We have sold a few of these already and of course make super gifts for the old man for Birthday or chrimbo, a handy tool that takes no more room up in your tool box than another socket.


 Do not worry about the drilling, HONDA used to do it this way too and I was taught at a HONDA shop over 2 decades ago how to do this and have Never had an issue, just vacuum the swarf up and you are fine, either use your old retainer as it will wind back in, or use a New one, as we sell the retainers on the parts pages, so we have you covered for all your parts and tools you need for your inline Four.


 I did it on My last ride with no issues. So have a good long look and if you see this is just what you need, we have a shopping cart and off you go and order it- we ship usually the same day too and are open 6 days a week.


Hop Up Tricks – The Formula

First off get rid of that big plastic air box with the rubber intake runners and put on a set of air filters Pods. This does two thing right off the bat, cuts off 10 lbs of weight and lets the motor pull in more, cooler air. [Cooler + More = Horsepower] The reason this is better is the air behind the engine there is a lot cooler than the air being sucked in from under the seat above the exhaust pipes. Also you get the swirling action going down the hole from the individual air filters for each carburetor which intern cools the air charge even more, remember the formula [Cooler + More= Horsepower]

How To Mount Your Own Tire

Note We found this tip on a non-US website and translated it. So if there are a few word goofs it was because of the translation. Although we feel all tires should be mounted by a professional. Some of you bone heads are going to try it on your own. So at least this offers you some direction. But remember it’s on you!

Because any project that involves just you will save you money. If you buy mail order tires at a bargain price, you’ll have to find the nearest tire-fitting service, and nine times out of 10 you’ll be charged the earth to have another supplier’s tires fitted to your rims. It can also save a lot of time and grief carting loose wheels somewhere, then having to wait for them to be done, or pick them up later.

 Don’t I need special kit?

As a rule of thumb, bikes with small rim sizes – say up to three-inch front and four-inch rear – only need muscle power to ‘break the beading’. That is, to break the airtight seal between the tire and the wheel’s rim wall. Larger rims obviously run with bigger, wider tires, and ideally a hydraulic bead-breaking machine should be used for this job – not the sort of device you’d find in every biker’s garage. But, as you’ll read here, there are cheaper ways to get round this.

What is required is a set of tire levers that are suitable for the job and a tire valve key (available from any car/bike spares shop) or pronged-type valve cap. Bicycle tyre levers aren’t man enough for the job. A half-decent set can be bought from a mail order firm for about £10 a pair – get friends to chip in, as levers are always in demand. Hard plastic rim protectors (£5 a pair) are a good investment too, as they prevent scratching the paint and the aluminum beneath.

As for your own ability, muscle power isn’t everything. Like most things in life, first-time anticipation is more worrying than the event itself. Practice makes perfect, so we respectfully suggest practicing on something like a Honda C50/70/90 wheel first.

Tubed or tubeless?

Bikes with wire-spoked wheels (generally trail bikes and small commuter bikes) more often than not run with tubes – as wire-spoked rims aren’t airtight unless the spokes are mounted outside of the rim (as on some BMW GS models). More bikes today have cast or forged aluminum wheels that run tubeless-type tires and while the fitting of these and tubed tires is similar, the addition of a tube makes fitting trickier – more care is needed as ‘nipping’ a tube with a tire lever and putting a hole in it is easily done.

1. Deflate the tire by depressing the valve before removing it fully with a valve key – high pressure in the tire can cause the valve to fly out and disappear. If a tube is fitted, loosen the valve’s securing nut but do not remove, just unwind it to the top of the valve, so the tube can move away from the rim and won’t be trapped by a tire lever.

2. Several methods can be used to ‘break’ the rim/tire seal. On small-sized tires, the heel of a boot placed on the tire, as close to the rim as possible, and forced downwards to push the tire into the rim’s well (center) while pulling up on a spoke will suffice. Turn wheel over and repeat. Put down carpet or cardboard to prevent damage to rim or disc.

3. Breaking the beading in a vice is a cheap and safer alternative, and more suitable for larger tires. With the jaws open to the max, place the wheel in the vice so the top of the jaws are within 5mm of the rim. Holding the wheel in place, slowly and carefully (to avoid marking the rim) tighten the vice until the seal is broken. Repeat for the other side.

4. For around £60, a purpose-made bead breaker is the safest and easiest way to break any tyre rim seal without damage. They come in a variety of styles, ranging from elaborate scissor-like mechanisms to over-sized G-clamps. What may seem an unnecessary expense can quickly be recouped from friends, or even at trackdays.

5. Place the wheel flat on the floor, preferably on a mat to avoid any damage. With both hands either side of the tire, squeeze hard to help the tire drop in to the ‘well’ (middle) of the wheel. This makes fitting a tire lever and removal of the tire a lot easier – you won’t be trying to stretch the tire off the rim.

6. With one tire lever, carefully insert the tip between rim and tire, push it away from you and fit a rim protector. Lift the lever so the lip of the tire lifts over the rim. Hold this lever down with your knee and repeat with another lever 3-4 inches further along…

7. …Remove the first lever and lift the tire lip another 3-4ins further along from the second lever. Work the levers and protectors round the tire until its lip is clear of the rim. Stand the wheel up and feed a lever from the opposite side under the tire and through to the rim (with protector) and lift the lever to push the tire off the rim.

8. Take the new tire and paint some lubricant on to the outer lips of both sides of the tyre to aid fitting – especially when blowing the tire up – so it butts on to the rim easily. Professional tire services use ‘tire soap’. If this is not available, use a thick, soapy solution of liquid hand soap and water. Swarfega can be used if applied liberally.

9. Ensure the tire’s rotation of direction arrow (marked on sidewall) matches with the wheel’s (cast on rim). Slide, pull and push one side of the tire on to the rim by placing the rim on to the lower part of the tire, holding it in place with a foot and pushing the rim into the tire from the bottom – lubricant, levers and protectors are a must.

10. With the wheel flat on the floor and the open side of the tire facing up, carefully feed in the tube (if fitted). Blow it up slightly to assume its circular shape so it doesn’t get trapped between tire and rim. Don’t screw down the valve-securing nut yet as you need some slack when fitting the last part of the tire on the rim.

11. Starting at 180° from the valve, carefully start to lift the tire lip over and on to the rim, alternating from left to right, so the last part of the lip to go in to the rim is at the valve. Try to keep the fitted lip (underside) in the rim’s well to make fitting easier. When lifting the last part over, push the tube valve back into the rim to prevent it being trapped.

12. Inflating the tire requires a compressor. Garage forecourt pumps are fine. Keep inflating the tire until the sidewalls seat on the rim (molded lines on the tire will be visible all the way round, near the rim, and at an even distance). Finally, reset the pressure. Don’t ride until the wheel has been balanced.