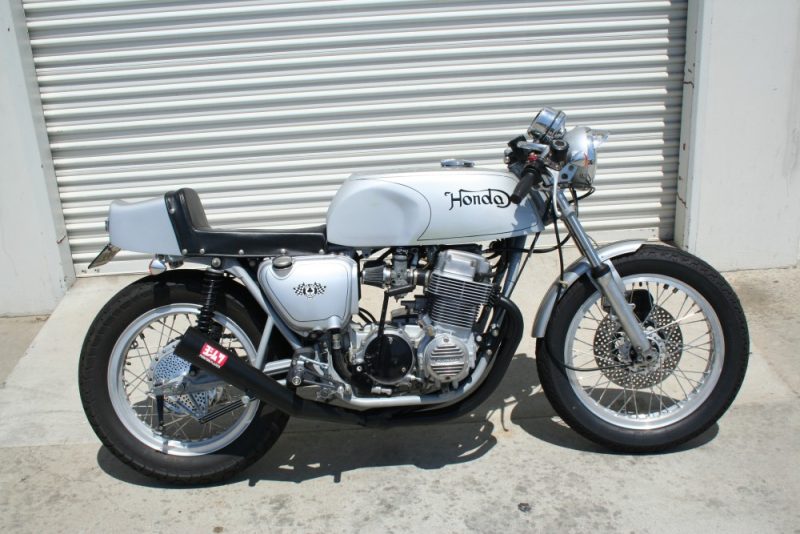
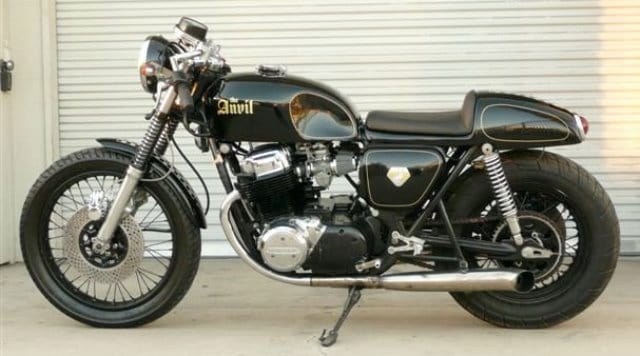
CB750 Silver Cafe Bike The Silver Manx

I have built so many Motorcycles over the years and its hard to keep track as to what I have turned out over these 24 years here in Southern California, but every now and again I will be reminded of a unique machine that I created and today is no different.

I created this machines from a bunch of parts that I had in my garage and I purchased about 15 bikes up in the desert 20 years ago and sored them in my garage, back garden and next doors garden, as the deal came up and I had to jump on it, so always had a few platform frames to use for future creations and this is just one of them that I came across on an old CD that I had discovered in the drawer of an old cupboard.

So, this was a conglomerate of parts ranginging from 1971 to 1976 and I just went ahead and built this as a fun homage to the Isle of man machines that I grew up watching and reading about as a teenager, this was something I wanted to be like my Black bike but a different color and exhaust etc, so with a head full of crazy ideas and a box full of old parts, I began my creation.

I had a New Old stock Paul Dunstall Fuel tank, in fact I did have 4 of them to be honest, I had already used one on my Black machine and I used one for the greenday bike and I wanted to use one on this creation to keep in that guise that had started to become popular a few years later.

I wanted to have this machine in a style very reminiscent of the Nortons of the day, hence me designing the Honda logo in a Norton font, but I was happy how this looked and so glad that I went with that idea, some 20 years later I am still selling that logo design, over 500 of them I have sold in numerous colors.

This bike had a lot of mixed up years parts and I knew this would be a fun machines to ride, it was big and bulky and fitted the Motor well as that inline four powerhouse always looked great hanging out of the frame, this was a Muscle style Motorcycle that would turn heads where ever it stood.

A fun bike to ride and plenty of zip, I did fit a lightened fly wheel to this so the motor would spin over faster and this would really pull hard through the gears as i used a set of old Kerker headers that had been sat in the rafters for a long time and I had picked up at a swap meet in Pomona many moons ago, I mated that to an old Action four megaphone muffler and kicked it up 20 degree’s for a more aggressive look and boy did it growl when you got on it.

This sat well on a set of 18 inch Vintage Borrani rims of which a I had 4 of and wanted to use them up, so re-laced to Honda Hubs and threw on some Bridgestone tires and these filled the chassis out nicely. I rebuilt and painted the Caliper and drilled the front rotor and painted middle and used stainless Hoses to make sure this machine would stop quickly when you needed to.

I also ditched the stock factory footpegs as I had Ace Bars on and wanted my feet further back, and chose some Tarozzi rear sets to give me the leg room that I needed for that leaning forward stance.

I used a Kawasaki H2 Race seat that I actually made a mold from my first one and that was then upholstered in Black Naugahyde and snaps fitted for that vintage look and, I could keep all my documents underneath that.

I also wanted to use some Vintage parts up I had and I had a few sets of Original Koni rear shocks, so cleaned them up and fitted them to the rear to give it that road race look of the day, and also polished and drilled the rear brake cover to dissipate heat and get rid of brake dust, you can see the rear brake stabilizer that I machined out of 6061 and suits the bike well.

A really fun bike that I enjoyed creating, I took some old original 1974 gauges apart and revamped them with new custom faces, painted the needles, re-chromed the lowers and tops.

This was a tall bike and even I was tippy toe and im 5’11 but I liked it that way as you got to respect the bike for what it was, it was not for the faint hearted that’s for sure and gave that late 60’s look even though its a 70’s bike.

Motor Cycle News from back home in the UK sent a journalist over to come and see the bike and test ride it and they did a smashing write up on what I do out here, to me that was so cool as I have read that Newspaper since 1973 and to have made it in there a few times was just a head spinning time for myself.

A professional stunt rider too, he did not hang about on that bike and was quite amazed at the powerband compared to most of the Modern machines he usually rides and was smiling all the time whilst perched high upon the pegs.

It was quite a responsive engine and soon got up to the magic ton with no problems at all and way more there but we kept running out of road lol, we both raced up and down Miraloma road where people like Robbie Gordon would thrash his Nascar rides or Baja trucks by my shop, so only fitting that we gave it some beans here too.

All in all I was super stoked at the way the bike turned out and glad to have found some old photos of it to show on the website.

I have no idea where it is now or who owns it but just another machine in my style that I really loved to create and enjoy, it may not be your cup of tea but you may appreciate the time and effort creating motorcycles just out of parts laying about?

Thanks for reading.


Classic Honda CB500-4 Cafe from Back Home now resides here

Well, its always great to add another ride to the stable here at home and this one is a real doozy, as this is a super cool Cafe Bike that was built a long time ago back home in England and is now all the way across the pond with me.

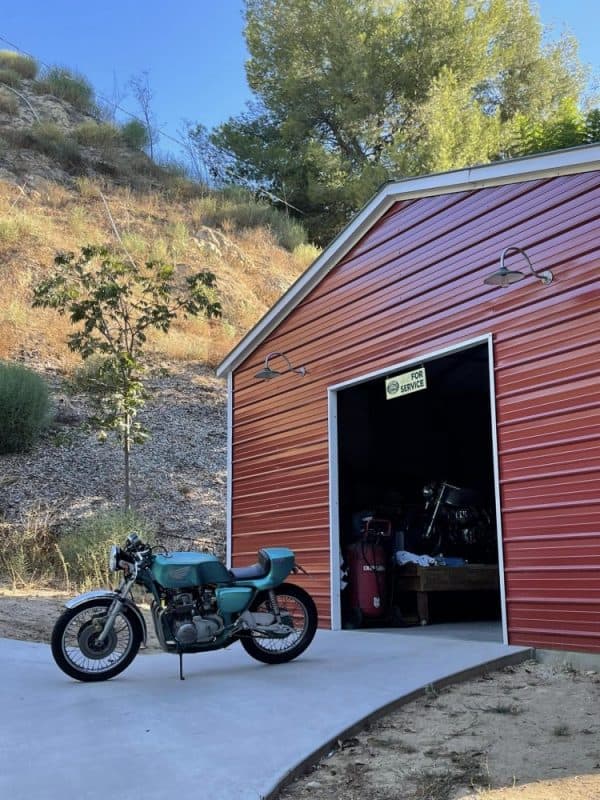
This 1972 CB500 Four still wears the original license plate from Back home and I love the fact it is still there as it brings back so many memories of my Motorcycles I owned when I resided in England and super stoked to have this with me now.

The bike is a time capsule in a way and really is how we built Café Bikes in my era of the 70’s, this is a very cool ride, not my favorite Color I must admit but a true old Café of my era that i saw everywhere that I rode to and hope to get this fired up soon.  This has not run for many many years, carbs are stuck, front brake is stuck and am sure the tank needs to be recoated inside as it is a Fiberglass version.

Bodywork is very reminiscent of the Bimota series of styled bikes and I will one day paint the whole bike again as the frame is painted that teal color and I thing a New Livery would be just what the doctor ordered, but that’s for way later on, as I need to get to work and see if I can get the 50 year Old inline four to breath a new lease of life once again.  She has never run in the USA so will be eager to get this sorted out and will be fun taking it for a run around the twisting roads in the canyons that I have here where I live.

I am super excited to get the old girl going and see how she handles around the country roads around here, the rear sets are pretty cool and set back nicely, so my legs will fit tine on this machine, I do have to source another Master Cylinder but no Biggy there and I know the brakes will need to be gone through and again, no worries there either just time and energy of which I have bags of.

The Carburetor’s are another story, as they are stuck and I will tear these ones down to see what the issue is and address the issue to get this running again, no idea what the wiring is like either so a full inspection is needed to see where the lay of the land actually lays and I can get some sort of List together of parts needed and work to be performed on this half century bike.

Its sits pretty level too which is nice has a made up 4 into one exhaust system, front header is stainless and rear is steel, interested to see how it sounds once she bursts into life, of course I need to get a new battery, new plugs and oil plus filter etc. but that is the same for any bike that’s not run in years.

You don’t see too many of the CB500 Models, mostly the slightly bigger 550’s, so its cool to have a 500 four here at the shop and look forward to kicking this back into life once more and seeing how she handles on the Southern California Tarmac.

These are a fun compact Powerhouse of a machine and back in the day, Several CB500 machines were entered in the Production TT races on the Isle Of Man in the early 1970s. Bill Smith won the 1973 500 cc TT Production race (four laps) riding one, 8.2 seconds ahead of second place Stan Woods mounted on a Suzuki Two Stroke Twin.

I remember doing this to my Side Covers back in the day to get the thing to breath, ha ha, so much fun back then trying all you could to squeeze extra power out of your Motorcycle, these carbs need to be totally over hauled but it will sound so nice when running again.

Something about home made Rear sets that I love and this is  a great little set up, no show chrome here, just road racing type rear sets that get you a more low down ride and faster gear changing etc.

I wont make any Modifications as such as this is a Classic Cafe with British Styling, but will make sure it runs well, Hard and sounds throaty for sure, I may change the headlight for an earlier style as that’s an aftermarket version and bring the headlight in more towards the frame and change turn signals to a stealthier look but early style.

Its a fun little Road Rocket and am sure with this Ohlins steering stabilizer, this will help with the wobbling in the tight bends that lay around where I live and will keep you updated on how this rides later on in a blog on the website.

So there she is, a great British Build Cafe Bike that oozes Nostalgia and I am happy that I will be able to ride this soon and remember the days I used to go to all the Road Races around the UK on my little Buzz Bomb.

Thanks for reading my Blog today, hope you fig this bike as Much as I do and I shall be doing follow ups as I go along as many of you ask if I can keep taking photos and writing what antics I have gotten up to with these Classic in line Four Machines.

I guess its time to get back into the Barn and turn some wrenches today, the Carburetor’s first, then the brakes, but love what I do and the challenges ahead, I will of course keep you posted on how I do here at Carpys Garage.


A CB500 Honda with a Tough Attitude

I sometimes have to kick myself to remind me that I have created all these Custom Motorcycles sometimes, its amazing that I still have a fluid creativity when it comes to two wheeled powered machines and the next bike i want to show you is a great stealthy bike that I sometimes wish I had kept.

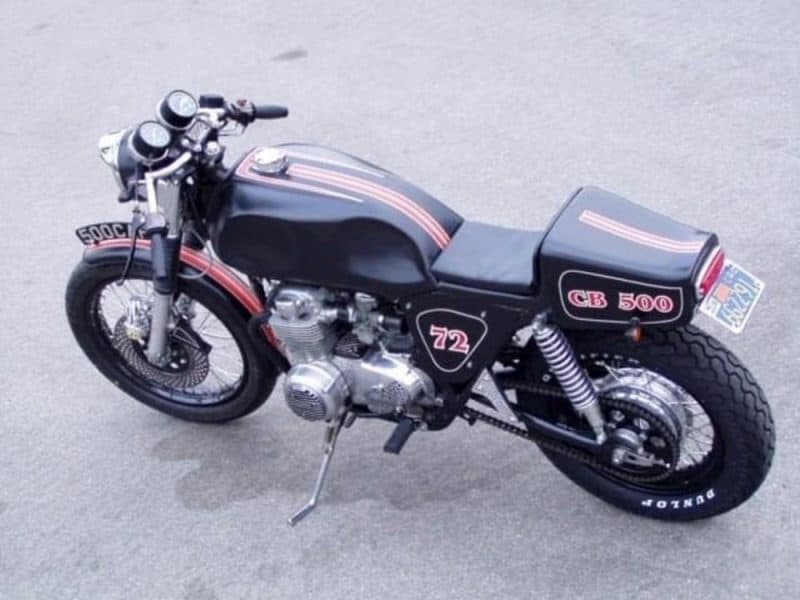
I dont have the best pics of this machine as I had a shitty camera, but at least I got some pics that you can make out what I did to this old 1972 CB500 Machine. It needed a lot of work and was a non runner and missing a lot of parts but I was sure I could build something fun and affordable with what I had as spare bits and bobs scattered around the garage.

The old girl needed some help and I used what I could with parts I had around my garage, this was many years ago now and I had a few 750 parts in the rafters, so thought I may as well use some of them and see how this goes, but nothing ventured, nothing gained is my saying and it was fun to piece this little 4 banger back together, of course in bigger clothes than it had stock, but thats what I liked about this challenge.

The Motor kicked over, so I cleaned up the carbs and she ran quite well, so I thought that I may as well have some fun on a budget and see what I can create in a short amount of time. The engine was really responsive to be honest and as I had a 48 Tooth CB750 sprocket on the back, I knew she would boogie along as soon as the flag dropped.

I had an old beaten up 1982 CB750F Gas tank that had seen better days, so I cut out the flap and gas tank lock and welded it closed, drilled a 2 inch hole and fitted a Monza Style Aluminum Gas cap and then set about and hand hammered the tank for that old Manx look, I was pleasantly surprised at the outcome of this big old tank.

I Polished the forks and rebuilt the internals, then laced some 750 rims up and drilled the front brake rotor as well as rebuilding and polishing the front brake caliper too.

Braided hoses on the brake made sure this puppy would stop when you grabbed a handful of Anchor, I pressed out the Curved license plate as I wanted the old school British look.

Like I said, a mish mash of parts but cost nothing to put together to be honest and this was almost 20 years ago now too, time sure does fly when you are having some fun with Motorcycle parts.

I used a Harley 16 New rim for the rear and Shod both rims with Bridgestone tires as I like the handling of those boots. The rear seat tail piece is off an old Kawazaki Z1 race bike.

I used the stock shocks and swing arm to save some money and had an old Mac system that I never used and was sat up in the rafters, so I threw that on and it sounded ok with a shortened baffle and rejetted Carbs.

The clubman handle bars and the long tank, gave for a fun lay down cafe feel to it and was a blast to ride, it had a taller rear sprocket, so it got out of the gate real quick.

Even all them years ago, I was using Oil pressure gauges as its a quick way to make sure your heart beat is pumping in the motor, had to make an extension pipe to be able to connect under finned cover.

She sits nice and high for a 500 and boy was it snappy off the line, the first three gears and you were almost at 80 mph, what a fun machine to blap about town on.

Hazy pic but glad I still had some images left of this old 500 Honda and hope you like it too?

I sold it to a guy in Pasadena who then phones me to say a car ran over it and dragged down the road for a few blocks, it no longer exists, big shame as it was a great little Bar hopper Cafe Machine.


The Vesco Honda SOHC 1974 CB750K Custom Built Brat Bike

Well, this was a super fun build that I did and it is not often that I purchase an old snotter and then, after building it, sell it back to the owner I purchased it from, but this was how it was, I saw that there was a SOHC 750 in a garage in the City of orange for sale and made arrangements to drive down and take a look at it.  once I got there and the garage door was lifted, I could see this sorry arsed looking inline four that was parked up, leaking a little oil and looking worse for wear.

I mean, it had everything there to make it look cool, but- it had not run for many many years and the young lad who owned it said he tried a few ties to get the bike to run but he lost interest and its been sat in the garage just collecting dust, so- we stood and kicked the tires for a while and eventually came up with a figure, shook hands and it took the three of us to push the old girl into the back of my van, but at last I had this old 750 in the Transit and had already worked out what I wanted to do with this 500 pounder machine.

The old girl is in my van and getting ready to drive home, I looked at the title and noticed his last name was Vesco- Your not related the the famous Don Vesco are you? I inquired.

Yes, he was my Grandfather, That is so cool as Don Vesco held many Land Speed records and had tons of 750 Honda’s back in the day, so I was super stoked to be able to own something with Vesco’s name to it, so, I drove home with a smile and half an hour later I pulled the old girl out and took a look at what I have to play with..

The Old girl was tired but, this is not my first 750 and as I have been creating Custom Motorcycles out of these here in the USA for over 20 years, I was quite eager to see what I had to work with but knew I had my work cut out if I was going to make a Custom creation out of this 1974 Honda.

Motor needs some love and had no idea if it would even turn over but I love these inline four engines and was going to see what it took to at least get to run and see where I can do with a full build on this 500 pounder.

The carburetors had seen rain, wind and snow by the look of it and the slides were stuck solid and as I have have rebuilt many of these rack of four set ups, I wasn’t too worried and thought I would strip the bike to where I need it to be and see where I am at.


I wanted to try and get this running, so I pilled carbs off and cleaned them up, fitted new jets etc and fitted new intake manifolds , as well as putting an old set of handlebars on as the clips on’s didnt fit right, I also hooped the frame as it was cut already and thought I would add my own style seat and see if I can at least fire it up, I had a 4 into 1 exhaust that I make that was in the rafters, so pulled the old rusty Kerker off and fitted mine, added an oil Pressure gauge so I can see where we are at if the old girl fires up.

The rims were too rusty, and was lucky to have an Original set of Lester wheels in storage that I could use on this bike, so fitted them and added some new Bridgestone tires and fitted one of my drilled brake rotors to the front end too. This bike went together really quickly and in the space of a week I was ready to fire this puppy up and see if it would even be able to move under its own power, I had spare parts in my garage or in my storage so it was a zero cost other than the tires to put this Honda together.

With rebuilt carbs and my 4 into 1 system cut down to a more aggressive loo, I was eager to see if this will fire up, it had compression and spark so I kicked her in the guts and she fired up right away with a nice brak from my exhaust system, I knew this would be a fun bike.

I made the handlebars and the seat too and this was probably the most comfortable bike I have ever ridden, I was so suprised how much fun this bike was and it had linear power too.

Well, I was happy at the way this bike was looking but the gas tank looked horrible just black and wanted a cool Custom 70’s flake look set of tins on this bike now.


So, I thought I would use the original tank that was on the bike, but wanted to get rid of the factory gas tank fuel cap and make a custom set up, just to be different.

I cut the old neck off and then ground it all down to make sure this was flat to the tank, I made sure there was no gas left in this tank before but it had been empty for about 7 years lol.

I make a gas cap kit now and this is how I did the conversion on this tank, as you can see, I fit the weld in Gas Cap Bung into the opening on the top of the petrol tank.

It sits in the original location really well, I simply ground all around the gas tank to make sure I have a good ground and then simply tig weld the bung in place, for a neat smooth Custom look.

All welded and to be honest, I do not need to grind the welds as I shall be doing a little body work on this to smooth everything out, so this will be covered up anyway.

I used a Harley screw in Gas cap and this really gave it a custom but Classic look, I was really happy at the end result of this and glad that I went this route on the bike.

Now that looks a lot better with the Custom 70’s style paint and am happy I went this route in the end, the 750 looks pretty tough like this.

This bike turned out great and even though I wasn’t finished with it, I wanted to get a few miles on this bike before I finally completed the other bits that I wanted to do. As you can see, the Vesco bike is on the Dry Lake at El Mirage where Don Vesco himself races bikes and broke records and the day this was fired up, Team Vesco did over 400 mph at Bonneville, so I thought this was fitting that i was at a SCTA meet in El Mirage with my Girlfriend Jennifer.

This has a great stance and is so comfortable to ride, the drive train works smoothly and my aggressive 4 into 1 barks like a scolded dog, I fitted an Led headlight that is 5-3/4 inches with internel led turn signals to make it all legal for the road. She sure looks swell out there in the Desert.

I like the meaty Bridgestone tires that were shoe horned onto the Lester Rims, those rims came of a CR750 Race bike and I had them in storage for almost 20 years.

I love it out here at El Mirage dry lake, if you can get a chance to get here for the SCTA racing, you should, I loved taking the Honda out here and I think it felt at home to be honest.

So there she is, the Vesco Honda Four, a brute of a bike and it looks pretty tough out there in the So Cal desert, I am so glad I went ahead and built this machine.

Now it was time to take the bike back home to Las Mirada but what a great time we had out on the dry lake, watching the Hot Rods and Motorcycles race on the Lake bed.

My Girl Jennifer takes the reins as I help a broken down Motorcyclist on the race track at El Mirage SCTA event.

So, I now get ready to put the Vesco bike in my Van and take it back home to my garage and figure out what I am going to do with this Motorcycle.

So, I sit the bike on the drive way and I am think of what else I might do to it, and I have to write a few emails to customers etc, it was when I got on the computer I see I got a message that I had been invited to the OG Bike Build show in LA and its in about 4 weeks, heck! I could maybe strip this bike and redo it to how I want to and show the bike, of which is a tall order but heck, why not eh?

So, even though it is a tall order, I had to come to the decision to take this bike and strip it to the bare frame and begin a cool build for the OG show, I shall still keep the Gas tank and side covers the same and the Handle bars etc but the rest will get some rework.

The strip down begins, I want this to be a trick frame when I am done and now is the time to take the bull by the horns and remove everything from this 500 pounder and make this a head turner.

I am taping the frame where I will be cutting and making quick release Custom Pieces that make engine removal and cylinder head removal way easier as the stock frame is so difficult to remove the motor when in the cradle.

Top frame removed and I shall be fitting my New  Steel tubing Frame kit that I now offer on my website for the 69-78 CB750 Chassis.

Heave ho and away we go, I have removed so many engines on my own over the years, there are many ways people do it, some lay the frame down etc, but I like the old school brute strength of removing the 230 pound behemoth, I always go this way and then put the motor on a milk crate as its about the same height as the lower frame rails, I am always knackered afterwards though.


Well she is out at long last, time for a cuppa and an Ibuprofen lol- But seriously, the Motor is out and now the hard work begins, you too will notice how dirty and grimy a frame becomes after being used for 40 years and this thing has more oil on it than the Tin mans Elbows.

I Have welded the New removable top Rails in the chassis, now time to cut the right Lower side of the frame, so I can make a removable side for the 750 Four.

As ypu can see, the top rails and side rails are now in place, looks bloody awesome and not seen this EVER done before, I wanted to really push the boat out in the short amount of build time that i have on the Vesco Honda, I bet people wont even notice it when I am done.

Make sure all the weld area’s are clean and my Kit that I sell will work great for all of your machines from 1969-1978 and glad I have made these kits to be honest.

See, all nice and shiny, and soon to be ready to media blast all the paint on, prep and paint for a Custom Color and this time I think I shall go with a metalflake Silver, to keep with the Custom 70’s paint style.

All media blasted, she is now ready for the start of paint, this will take some time as i want the thick flakes but this will look great in the Sun against the Gold of the tank etc.

The race is on, and as you can see, I have the Silver Flake paint on the Chassis and I went ahead and chromed the rear swing arm, just for that added Custom look.

I have to rebuild some front forks, I went ahead and machined the fins in the lowers and polished them, then I needed to add new seals to the old girl for new life.

I use a piece of Plastic tubing and gently tap the tubing onto the seal and this easily presses the fork seal into the stanchion with no damage at all, so easy to do like this.

Custom look and even have chrome topper caps on the Original black covers, just to give it some nice bling and look a little different from the rest out there.

New tubes, springs and I set the pre-load using 4 stainless washers, as I dont like using that Plastic shit that many fork places offer, washers is the old school way and I also use Automatic Transmission Fluid instead of gear oil, another old school way.

Time to work on a custom rear brake Hub Assembly and I shall strip these, clean it drill the holes for aeration and cooling the hub and then polish it and fit new brake shoes and actuator arm to it.

All done and am happy at the look I was after, a nice custom touch that I do and offer this service to many people and is available on the website.

Front brake rotor gets the same treatment, I do all this at home and use my old drill press to make all the holes and then countersink both sides, for me, its therapeutic to be honest and boy does it look good when finished.

Now I just need to clean it up, paint the center and I shall be ready to mount on the Original 1977 Lester mag wheel, now for the cool pics below.

You can see the Custom paint nicely, all seems to flow really nicely and am super stoked I got the job done in time and it runs like a top, this sure is a stunning Custom bike and am proud to have completed such a creation, I just went for it and there you go, I have never built a bike twice but it was well worth all the hard graft.

Rebuilt and polished Caliper, Rotor is polished and painted and braided brake lines too, I did all I could think of on this machine, it really is a head turner.

Vintage style metalflake Candy paint with fish fad aways, captures the spirit of the build and hope that you like the direction I took on this SOHC bike.

Custom master cylinder, new switches, hand made and triple chromed handlebars really do set this build apart from many but- I hope I have inspired you to have a go at your machine now?

I wanted something a little different on the exhaust set up and thats why I thought I would go with a stainless steel 4 into 2 into 1 performance set up and boy does it sound sweet.

I did so many tricks to this bike, I machines some upper fork covers to match the lowers and this time I went with a Custom headlight that is so different than the others that you see, it is pleasing to the eye and I just cannot stop looking at this bike.

You can see the detail and the quick release chassis rail too, hope you like what I achieved in such a short amount of time?

Custom drilled levers, hand made front fender and a machined bucket out of 6061 Alloy to house the GPS speedometer, all flows together on this 74 CB750 Honda.

The Devil is in the detail they say, I did as much as I could in the short amount of weeks I had, but so stoked the way she turned out in the end, well worth the hard work.

Riders view, thats a GPS speedometer and I had to hand make the housing , this really is so cool to look at from any angle, so many tricks on this ride.

Re-charged shocks with Custom machines finned covers and 2 inch allot risers,make this Brat bike sit to the height I needed to sit my fat ass on top of.

Oh yeah- I even painted a Vintage Skid lid to match the paint scheme of the bike and think it worked out pretty good.

The stainless exhaust systems has a deep bellow that gets your attention, and this breathes so well it gives you Linear power all the way through the band.

This has been a fun adventure, not sure I could warrant another build so fast but this was a fun challenge and the cool thing is that the original owner that I puchased it from loved it so much, he bought it back off me.

So many cool little Custom touches I did on this bike, I would have to take a long hard look to remember what I actually did.

Sitting in the parking lot in Downtown LA, I got many cool remarks about the Vesco Honda and so glad that I made it in time to show people what this bike is about.

Hard to top this build but, I love creating them and hope I can continue having fun with this old 750 Honda bikes of the Nineteen Seventies.

Just goes to show that with a little imagination, there is a lot that you can accomplish on something, I was certain I would get this completed for the show too.

Plenty of eye candy and color, hope that you like what I have managed to create.? The good old SOHC Honda Four.

Took me some time to figure out the finned aesthetics etc  but the long process worked out really well and all seems to flow very well on this Custom Build.

This bike does look really well in the sunshine too, all the nuts and bolts are stainless steel too so no rust ever.

The Vesco Honda sits pretty level and you will be surprised how comfortable this Motorcycle is, I sure miss it already. LOL.

A tough bike, super strong Motor and sits well, this will last many many miles and hope to see it again one day.

Thanks for taking your time to read about this Vesco Honda build, I hope you have enjoyed what I have created?

Sat in my driveway before I took it to the Original owner in the City Of Orange.

Well I guess its onto another build, hard to top this one though.

At the OG show in LA where the Vesco Honda made its Debut and many people gave me the thumbs up.


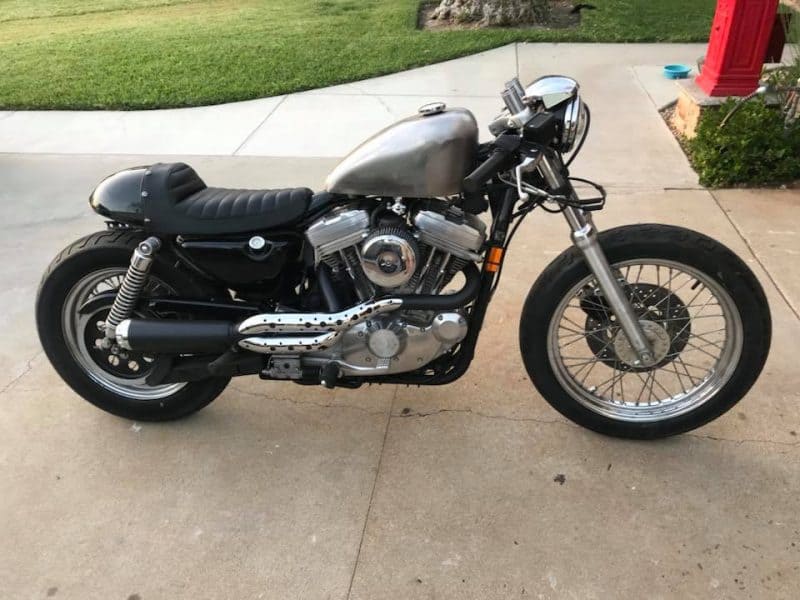
Harley 883 Caff Bike I am building to sell a little later.

Well, I have had a stock 1993 Sporty in storage for about 10 years now and thought I had better make a start on this machine, it will be for sale when completed and thought I would make a little Caff bike out of it, its going to be a fun ride for someone for sure. Got it running now.

I have a RSD 2 into 1 Tracker exhaust on her with a Dyna jet kit and an Arlen Ness Air filter set up and she seems happy that way.

many people have told me I am wasting my time with a bike such as that as they are Cruiser type machines or simply Choppers, and I so disagree whole hardheartedly, they are fun bikes and affordable and have a lot of torque, so I have a ways to go but it really is looking pretty aggressive already and I am enjoying wrenching on this Sportster right now.

As you can see by the photos I have taken, the bike isnt a huge heavy machine, this is an 883 Sportster with a 5 speed and Torquey as hell, now, the trick to get the power out of these is sinply change the cams and the thing will be a rocket, so maybe later I shall go that route, but right now I wanted to change the styling and what I have done is fit a different bigger gas tank anddropped the fork tubes 50mm up through the tree’s just to lower the front end a bit.

I shall be changing the foot pegs and painting the bike a little later, as I am not sure what design to come up with yet but I do have a few ideas of Candy Gold, Candy Flake Blue or a White with a stripe, but- until I get the bike to look how I want, the paint will be last of course. This is a belt drive and a lot quieter than a chain version, these are small bikes and was astonished to how little they are compared to the big twins.

I am not sure what to do rear wise but thinking of frenching a tail light into the cowl, that way it keeps everything clean and the lines will flow well, the rear will be as uncluttered as the front of the bike, but will drill and chrome the chain guard next week to give that a more Sportier look.

For now I shall stick with the Factory shocks, as I want this to be a fun, affordable motorcycle and who ever the new owner will be, they can easily change out shocks to give their twist to it, but plenty to do as I go along on this Caff bike project and now with the RSD 2 into 1 it sounds a lot more healthier and not too crazy loud where you will get pulled over all the time or be that annoying Motorcyclist thats letting car alarms go off as you ride by.

She sits way better now and am pleased with this look, I need to fit Grips to the Clip on’s and fit a speedometer and that will all come in time, right now I am in two minds on the stock head light or use a Custom bigger one about a 5-3/4 version with internal LED signals etc. I will remove passenger pegs and change pegs for maybe some mid controls but that all depends on budget right now.

She has a New battery and fires right up, I have just removed the stock fender and am going to cut and shorten it and then put back on. Jenn sat om it and likes the way it sits and feels, this was going to be her machine originally but I bought her a Bonneville instead.

So, she is taking shape and wanted to share these progress photos I took with you on my Blog, this WILL be up for sale once it is completed and painted, so let me know if you are interested?

It’s available as is for $4,800 with title right now, but the more I do, the more the price increases obviously. 714-598-8392 if you need to know more or carpy@carpyscaferacers.com you can even text me on the number too.

As you can see I have changed the rear shocks but I am going to be making some rear sets later on so you can have better leg room on the bike, but it is looking pretty good now and runs well.

I will most probably Paint the gas tank and I am looking at frenching (Recessing) a Tear drop tail light assembly into the Seat Cowl for a more Custom Cafe look.

Its a fun project and I shall post more pics in another Blog when I have finished some more of the work OK? Thanks for watching so far.

I may fit a different headlight also, still having fun with this 5 speed Sporty and its starting to resemble something that I had envisioned from the start.


The VESCO HONDA CB750 Brat Bike

Well, many of you have followed the Blog on this machine, right now I am just enjoying the build as its running pretty darn good, so will keep it as a runaround until such time as if it either sells, or I get some time and I can strip bare and make a full custom project from this Motorcycle. But it sure was a great find, I purchased the bike though a contact and headed just a few miles down the road to the city of Orange here in Southern California to check this 1974 CB750K Honda out that had  been in storage for many Many years and had not even run since the mid 1980’s.

I have purchased so many CB750’s in the past but, its always great when you have the unknown ahead of you, most of the times they are so badly damaged or neglected, that you need to take a foot pump with you and a Mallet, as the tires are usually flat and the front brake will always stick due to some corrosion inside the caliper and the Rubber mallet will release the piston so you can push the bike into your van or trailer.

Found out that the family’s last name was Vesco, I inquired not related to Don are you? “Yup sure am” he tells me about it and this bike is actually his lads and he ran out of time, money, patience and enthusiasm on this machine and has been sat a long while. And now it was time to make some room in the garage, so it has to go, I made an offer and after a little bit of haggling a price was agreed upon and there it was, this old snotter that had a hard life but for the last 30 odd years had sat used and abused in all sorts of places, and now it was coing home to my shop to see what I could do to at least resurrect this vintage piece of tin.

It sure was hard work loading it ion the van as everything was corroded or semi seized up, but managed to get her up and into my van and then we were on the way to its new abode- my place.

Back home in 20 minutes and took the bike out and placed on a wheel chock so I could have a look at what we got, it had good potential but many people go in head strong and then kind of lose their drive in completing their dream and I purchase many machine in this guise and much worse too.

Brakes were seized and it took sometime to be able to get the bike onto the driveway on my own, the kick stand would not function as it was too long and kept getting in the way, I knew I had my work cut out but needed to know if I could get this old girl to run, as I didn’t want to strip this right away, always best to see how the motor is first before you dive in. You can see the plug caps have electrical tape over them, a warning sign that this had issues back in the day right away.


The carburetors had seen better days, not only were the bodies of this rack of four corroded, the slides had stuck inside, so another issue to sort out, but it did have compression when I kicked it over and thats a great thing to know.

Old Mac exhaust wouldn’t of ran well as the underneath of the header was squashed flat, must of hit a speed bump years ago and no way would it run that well with a restricted collector.


I wanted to just have fun with this bike, as I said, not sure how I was going to go until I got her running, but to get to that stage there was a few things that I thought would be cool so I could at least ride it once I figured all the issues out on this honda, and as you have probably experienced, there were many issues, but, whilst I had her in my shop, i wanted to change the seat set up and make a fun Brat style machine just because, well I can.

OK, so I made a steel seat base and tried another gas tank too, as I needed to clean the inside of the other one as I always do when I get tanks that has sat for many years, I had to change out the wire harness and the handle bars and controls and glad that I did as the old ones were so badly corroded, they would of caused a fire for sure. And then with a New set of intake manifolds and rebuilt carburetors this machine w\was almost ready for a fire up.

Below is a little iphone video I did on Face book, not sure how the motor would go but I had compression and now spark, so, with gas, this should in theory fire up.

So, as you can see, I had the bike on my work table and I used an old lawn mower tank as an iv to feel the motor, I was pretty sure she would at least back fire but as I re-jetted it and cleaned bowls out, I was certain that with new coils, battery and plugs and of course New oil and filter, that this puppy would run, and was pretty stoked with the end result.

Carbs redone and all clean with new intakes and my stainless steel clamps too, fitted some spun aluminum Velocity stacks with gauze for that old style look and re-jetted once more.

To make sure all is well, I need to be physically able to take this bike for a little ride, as no idea how the clutch is, the gears etc and the general running of this bike, I fitted another headlight and then whilst I was there at my storage, I removed some Old Lester wheels I had, I had taken them off a Vintage CR750 AHRMA race bike and simply stored them, tires were a little hard but thought what the hell, lets bung them on as the wheels on this bike anyway were toast.

I also had to make some sort of tail light assembly up as riding up the road, I still want people to see that I am braking etc, so put this set up together and it works really well being LED.

As you can see, I fitted the Lester rims, 19 inch front and 18 back, I also upholstered the seat in a soft brown leather with Diamond stitching and its sure comfortable I was surprised, the gas tank needs some work but I shall address that no worries, I also cut my 4 into 1 down that I ceramic coated titanium color, as I wanted an aggressive look to it and think that this does come across quite well.

As the sun goes down I managed to fire this up and it felt good to hear the bike run and run quite strong, I fitted a 530 O-Ring red chain that I had and it looks pretty tough, as you can see, I made one of my side stands and now the bike sits up nicely, so many dont or need bits of wood under them.

I also fitted an oil pressure gauge kit to make sure that I had good pressure, and it did, it fired up to about 70 pounds, so am more than happy about that, exhaust looks really cool.

OK, now it is time to address that gas tank and it needs some love, i think I shall go all out 1970’s Candy Custom style on this one as it needs some color for sure, but I noticed it had pin holes, so- went back to the original tank that came with the bike and decided to cut off the neck and weld in a Harley Bung instead.

So, the best thing I do is use a sawzall and cut the neck as far down as I can first as this needs to be flush on the tank for the bung to weld in nice and smooth.

As you can see, it takes some time and of course, I made sure that there was no residual gases exiting from the tank, be careful and make sure you wash your tank out before emmiting any sparks near this thing. LOL

So, with the neck sanded smooth to the tank, I used a Harley gas tank bung, I sell this kit on my website, and wanted to use it for this build to be a little different as the original locks always break on the Honda and knew that this would like quite trick once finished.

This is perfect for the Honda Gas tank and there is enough room to be able to TIG weld the bung in place with no distortion to the surrounding areas of the filler neck.

Now all Tig welded and cooled down, this is ready to attach the screw in gas cap, I did this a long time ago on the Cobalt Special Honda I built, so was eager to see how this looked.

Well, that looks so much better than the stock configuration and once painted will really set off the gas tank from the others out there and a neat Custom touch to this machine.

With New rear shocks and a comfortable seat, this is taking shape as a cool little Muscle style Brat bike that will turn heads where ever it sits and the paint will make you need Sunglasses.

Here we are at El Mirage at a SCTA sanctioned meet, last races of the year – so wanted to attend and take a few photos of this Vesco Honda and I am so glad that I did.

There is still a lot more to do to this but right now it just needs to get a few miles under its belt, I always say the first 100 miles will tell you how the bike will perform, so a ways to go as I only have 14 miles on it so far but of course shall do many more on it.

Don’t want to take this apart yet anyway, i mean its fun right now, no show bike but easily could be if I took her down to the frame and started from scratch, but right now I want to have fun with it and what better place than El Mirage Dry lake.

She sits real well and is a blast to ride, she got plenty of looks as you cannot miss the paint job, no matter how fast you drive.

So I am happy with the way she is and looks to be honest and I love riding the bike around to be honest as it sits so well and not too low as many are these days.

Jennifer my Girlfriend loves it too, she has a triumph of her own and loves all Motorcycles, love seeing Girls with bikes too and we go out riding a lot together to be honest.

Final look at El Mirage before we head home, it is only 100 miles from our house so always fun to come out here and view world speed time trials record attempts

Gas Cap sets off the tank nicely and the paint job is so reminiscent of them Customs days of the 1970’s back home and around the world, I think its a nice balance in color.

Fish Gills and shadowing are becoming a lost art but this really came out well, using house Of Kolor Candy paints and Pearl bases with light flake added.

The bike sits well, I like the smaller headlight, they have L.E.D’s inside it for turn signals, so keeps everything neat and out of the way, the Lester Rims gives it that Old School period right away.


Added 2.5 inch mechanical Gauges to tidy top end out, of course my Hand Made and chromed Euro Bars really make this comfortable for your shoulders and Cole Foster grips soak up any Vibration that you may have.

I think the Man above digs it too, No thunderbolts when I stopped outside his place, Phew!

I really enjoy riding the bike around my Town, the roads are smooth and its a joy to blap about on and even though I want to do way more to it, I need to sit back and have fun riding it for a little while as it was and still is a super fun project.

Slowly clocking the miles up but amazing that this runs and hasnt since the mid 1980’s, and its a joy to jump on and take for a spin around town.

I used a Biltwell Mirror for legal reasons and it works pretty well to be honest, Id love to paint the frame later but not right now, The motor runs strong, the gear transition is really smooth.

Eventually the Motor will be painted and tricked out but as I am having so much fun on this, I will wait until later, unless someone buys it of course.

Thank you for following me and purchasing My parts for your projects, it means a lot, this is my Passion and life, so I really do appreciate all your business.

So, until next time I work on this, I will leave you with a list of things I changed, just in case you are curious as to what I did on this machine through the build up.

This was the Very First ride after it had not run since the mid 1980’s, so stoked to be able to experience great moments like this, unless you are a bike builder, you really wont understand the Euphoria that you feel when you click into first gear and ride off down the road.

Peace and Grease to you all.


Carpy


  1. Lester Rims 19″ front 18″ Rear.
  2. Drilled Front Rotor
  3. Euro Bars I made 7/8
  4. Cole Foster grips
  5. New Handlebar Controls
  6. New Throttle Cables
  7. New Clutch Cable
  8. New Speedo Cable
  9. New Tach Cable
  10. New Wire Harness
  11. New Coils and Caps
  12. New Iridium Spark Plugs
  13. New Battery
  14. New Red 530 Chain.
  15. New Custom Side Stand.
  16. Custom Gas Cap Kit.
  17. New Side Covers.
  18. New 2.5 Mini Gauges.
  19. New 4 into 1 exhaust Shortened and Ceramic Coated Titanium
  20. Rear Frame Hoop
  21. Rear LED tail Light assembly
  22. New Finned Piggyback Shocks.
  23. Rebuilt Carbs.
  24. New intake Manifolds
  25. Stainless Hose Clamps
  26. Braided overflow pipes.
  27. Custom 5 3/4 headlight with internal LED signals.
  28. New Horn.
  29. New Flat seat in Leather with Diamond Design.
  30. New Brake and clutch levers.
  31. New Biltwell Mirror
  32. New Chrome Fork Ears.
  33. New Oil Pressure Gauge kit.
  34. Chromed Rear Stabilizer bar.
  35. New Foot pegs and Rubber.
  36. New Custom Weld in Gas Cap Bung and Screw in Cap.
  37. Custom Candy Flake Paint.


Working on an old snotter that came from the Vesco Family

I pick bikes up from time to time that some owners just cannot get going, other shops have had a go and no joy, and I picked this old bike up a long time ago from the Vesco Family, Grandson of Don Vesco, I left it in storage for a while and wasn’t too bothered as this has not run since the early 1980’s.

Don Vesco was an American businessperson, motorcycle racer, and multiple motorcycle land-speed record and wheel-driven land speed record holder. He set 18 motorcycle and 6 automobile speed records during his life.

This bike is a real mess, no idea if it will run but am determined to get this inline four running again, need to know how the motor is before I begin to rebuild it into a cool ride once more.

It has had a hard life and has been from pillar to post and no luck getting this old 500 pound SOHC machine to run again, but I know I can get it sorted, just takes time and patience.

There seems to be leaks all over the Motor, the kick stand has seen better days and there is oil and dirt all over the bike, would love to know what life it has led.

Has a weird set of clip ons that wont stay clamped on it and the wiring harness is old and brittle as well as the usual repair using different colored wire etc, this is going to be a pain.

The tach cable looks like it ended its life a few years ago and the end cap drive unit is still stuck in the valve cover, thats a good thing else the oil would come out of there when it ran.

Some funky wiring going on with horrible plastic sleeve covering, thats all gotta come off right now, so strange what some people will do to their bikes in the shed.

Top triples had seen better days and someone had ground the handlebar clamps off so they can use some later clip ons, but they are about a millimeter to wide and wont clamp down hard, I shall go back to a standard triple tree and fit some scrambler bars I think, just to get this bike as a runner for a while and see how she fares, then- I can decide a little later to strip and build into a Custom Machine.

Everything seems to be covered in oil or grime and crappy clamps etc, its had a hard life, but my main objective is to first remove the shitty wiring and connectors etc and then fit a new harness, battery, coils etc and see if I can get this old girl to fire up again.

The coils had decided to crap them selves and the wire harness was as solid as a rock, the California Sun had dried it all out and this has to all be removed right now.

As you can see, there are different gauge wires that have been added to this harness, the Fuse box is knackered and temporary connectors all over the place, just really bad work.

The carbs will need tearing apart but for now I shall pull the bottom end out and fit New main jets and Idle jets and see where we go with a new battery and plugs etc.

So now its time to do what I like doing and will see if I can figure out all the bad things that have happened to this inline four over the years, hopefully I can resurrect this 70’s iconic machine.

And we begin, it does take a lot of patients but its worth it in the end, I have to see whats up with the Motor first as that at least gives me an idea at the cost involved to turn this into a great looking Custom Motorcycle and it sure warrants that, seeing it was in the Vesco family.

12 interesting facts about land speed racer Don Vesco

Don Vesco doesn’t fit neatly into a specific category of motorcycling, but the one thread that runs through his career is the quest for speed. He became famous for his land speed records in the 1970s and continued racing through the 1990s.

Here are a dozen facts you may not know about Vesco, who was inducted into the AMA Motorcycle Hall of Fame in 1999.

1. Vesco was born in 1939 in Loma Linda, Calif. During his lifetime, he was a dirt tracker, factory road racer, drag racer, motorcycle dealer, race-team owner and land speed record-holder.

2. He was mechanically inclined from a young age, tearing apart model airplane engines and making them faster by the time he was in third grade.

3. As a teenager, Vesco parlayed his mechanical skills into cold hard cash. He would buy old Cushman scooters for $20, fix them up and sell them for $25.

4. In his teens, Vesco fixed up a Triumph twin and entered his first official race, a local drag racing event. Then he took that same Triumph and started racing scrambles, TTs, and eventually road races on an old military airport outside of town.

5. One of Vesco’s riding buddies, and his archrival on the track, was future AMA Motorcycle Hall of Famer Cal Rayborn.

6. Vesco won a lot of local road races in the late 1950s and early 1960s. He caught the attention of Honda, which was just coming into the U.S. market. Honda hired him to race its rare and very expensive RC161, a 250cc, four-cylinder racer, to promote the brand.

7. Vesco’s relationship with Honda lasted until 1963, when he took an offer from Yamaha, which was also just getting started in America, to race at the United States Grand Prix (a non-points-paying international race) at Daytona International Speedway. He rode a works Yamaha RD56 250cc GP bike and won the 500cc class. Also loved his Norton Motorcycles too.

8. By the late 1960s Vesco had already been a factory rider for Honda, Yamaha and BSA. He was even a factory rider for the little-known Japanese maker Bridgestone in the 250 GP class for a short time.

9. In September of 1970, Vesco set the motorcycle land speed record of 251.66 mph at the Bonneville Salt Flats in a streamliner powered by twin Yamaha engines.

10. In 1975, Vesco broke the 300 mph barrier in the Silver Bird Yamaha (powered by twin Yamaha TZ750 motors). Then in 1978 he broke his own record, turning 318.598 mph in a twin Kawasaki turbo rig. That record stood for 12 years.

11. Vesco lost an eye after being hit by a rock while watching a sprint-car race in 1996.


12. He died on Dec. 16, 2002, after a long battle with cancer.

The B.B. Cafe

I have lost count of the Motorcycles that I have created here over the 18 years in business, some I have been lucky enough to take some photos of but many I have not, but I try and take pics where ever I can as many people ask about projects that I am creating.

I enjoy building bikes out of old rusty hunks of steel and this one is no exception, it was a non running machine and I am glad that I have resurrected this Classic 1974 Honda CB750K, as you can see, it had an old custom seat and a beaten up old Kerker exhaust, the desert does take a toll on any machine thats been parked up for a long time, but- iy can all be fixed and this was the start of the BB cafe project for my Customer in Australia.

It was a solid old machine but had had a hard time over the 40 years of its life and these get neglected when stored out of the way, so- a perfect opportunity to turn this old girl into a Thoroughbred once more.

I had a Customer fly in from Down Under as he wanted to discuss commissioning me to create a Cafe style Motorcycle to his requirements and then once built here, I will ship it off to Australia thats about 7,194.45 mi  from our house to his.

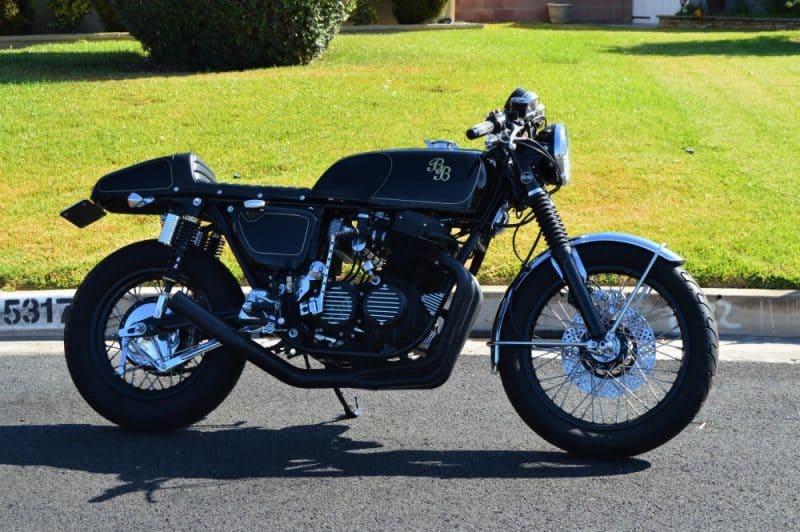
So this is how she came out, I have built this just as he wanted and I am stoked with the way she looks, a Thoroughbred of a machine and ready to open up on the Tarmac.

Plenty to look at but I shall try and explain some of the things that I did here at www.carpyscaferacers.com so you will be clear on the parts used to create this great machine you see.

I used many of My own parts that I have designed over the years and of course offer on my website, the headlight with the built in LED turn signals that Glow up Amber when used is a great addition to any machine, I was the First to ever go this route many years ago, have sold over 1000 of these units and still going strong, also has a Halogen bulb to help you at night.

I painted the bucket, Gas tanks, side Covers and the seat and fork ears a Gloss Black, as well as the head light Bucket, the Rims and some parts of the wheel hubs too. You can also see I removed the Original side reflectors that came from the factory and made my own screw in badge embelishers. New gators and Holders too, no expense spared on this build.

New cables as well and the whole frame was stripped, cleaned and coated with high Gloss Powder coating.

Motor was pulled apart and rebuilt, stock but new guides and internal cam chain etc, I then painted the engine in my own mix of High temp Engine paint and I too offer this product on the website, I put together with Stainless Steel Allen bolts to give a nice offset to the black. Made up my Custom Oil lines as well.

I have always loved the finned speed equipment as I am a Hot Rodder too, so machines a Finned cap for the oil Dip stick, I think it sets the bike off from the many out there.

Keeping with the Classic era, Brand New gauges added and my Custom Alloy Mount, I also added a neutral light in the middle of the steering stem nut and fitted my polished aluminum Bar clamps to hold my own set of Clubman handlebars, with new cables, adjuster and master cylinder.

A lot of attention to detail as you can see, I fitted Tarozzi rear sets, I sell them on my website too, I always fit one of my Custom Oil Pressure Gauges on the motor, that way you can see if you are getting good oil pressure all the time, finned covers and of course, my 4 into 1 Exhaust system that I have been selling for over 17 years now. The rear brake was rebuilt using non Asbestos EBC brake shoes and new springs with a polished outer hub, looks great as an offset to the black rims.

Rebuilt front forks and painted lowers, with New tires and front mudguard, this really has that Classic look of Cafe bikes back in the day when I rode them in the UK as a teenager, tearing up the streets with all my mates on various brand machines.

Totally rebuilt and tuned carburetors were fitted and these are fully detailed to match the motorcycle, then used Steel Dragons set up for Airbox and this runs great and smooth.

For show only, this kick starter was drilled and chromed, the rear sets prevent you from a full kick but this has an electric starter and I supplied another solid kick starter if he needs it, but this was for show and it does look very cool indeed, you can also see I fitted a breather filter to the bike with the chrome cap that runs from the valve cover.

I hand letter the tank, B.B. is for Black Beauty as thats what the Customer named it and I pin Lined around an old SS gas tank, I removed the original gas tank flat and filler and then used one of my Stainless Steel Aircraft gas caps for better styling, the tank was hammered by me and smoothed before adding the Gloss Black enamel paint.

Custom rear shocks that are also raised 2 inches with Finned Piggy backs help the bumps and my Clubman seat assembly that I make and offer is sat upon the frame that hides the battery etc, I used snaps on the Tuck n Roll cover, that way you can easily get to the battery and of course you can put your insurance card under the foam for easy access if needed.

Hand pounded tank and New wire harness, handlebar controls and new cables through out make sure that this bike is always on point in its life on the road in Australia.

Drilled front brake Rotor, rebuilt and polished front Caliper, custom parts all over the bike makes this a great head turner and the Customer is stoked to finally see the finish of the dream.

It turned out really well and runs true and strong, looking forward to showing some photos later when it is in Australia in a few weeks time, as I am getting ready to take this motorcycle to the shippers and let it get loaded up on the boat to take across the waters to the other side of the world.

Thank you for all your kind words and encouragement, means a lot and once again, another old bike is saved from the junk yard.

If I can help with a build or just parts for your inline four, just drop me a line carpy@carpyscaferacers.com or a dime or even a text at 714-598-8392 and I will do my very best to get you what you need.


The Harlequin Honda 1975 CB750F Super Sport

Well, here we are with the Harlequin Honda that I have created, its been a long build as originally the Motorcycle was bought down from Washington on November 4th 2015, Edwin Cooper was not well, he had Cancer and wanted to try and revamp his trusty old Steed that he had had for many years, he wanted me to do something cool with it and loaded this Motorcycle up in the back of his pick up and came down with his daughter and dropped the bike off.

I helped him unload the 1975 CB750 F Super Sport, it was heavy, the brakes were sticking and it really did need some love, but- thats what I do and was more than willing to bring this motorcycle back to life and breathe fire once more.

This would prove to be quite a challenging creation, as there was a lot of time and weather that had passed over this machine, I have been there many times but I am amazed at how many Motorcycles that I have built that were all in this condition, some a lot worse too.

He had started to Cafe the bike out a little, many moons ago, hence the Shortened Headlight ears and the Italian Tarozzi rear sets and an old 2 Four seat that dates back to the Mid 1970’s.

Have a look and you can see that there is a lot of stock parts still on the bike, like the chain guard Gas tank gauges etc and of course the old wiring, and that had seen better days for sure, the weather can totally destroy a wiring harness in just a few seasons, especially if the temperature gets hot then col, it dries the wires out and makes them fragile.

This also has an Old Yoshimura 4 into 1 system on it, seen better days but nice to see none the less, that is now fitted onto a AHRMA race bike and gets used all the time.

As you can see, the Birds nest wiring will need to be completely stripped out, soon as I see toggle tops and electrical tape, I know that it needs to be removed right away, else it will be a headache that you do not need.

You can see where Mother nature has taken a firm grip of this Motor, Oxidization is a mean Culprit by the look of it, the Plug caps were so weather beaten, as I tried to remove it, the cap cracked and fell into many pieces.

I wonder what sort of critters over the years had chosen this 1975 inline Four as its home? Nothing really surprises me these days but intrigue always does and if this bike could talk, well, I think we may have a fun movie in the making.

The Carbs were locked up, seemed to have dirt and grit from everywhere and a little wasp nest in the Carb body itself, Mother Nature really took a hold of this one.

I loved the 1960’s Hot Rod Stewart Warner Mechanical Oil pressure Gauge, I am also a Hot Rodder, so this made me smile when I clapped eyes on it, poor motor has a lot of oxidisation on it though and will take time to remove and clean all that up.

We have a multitude of issues here, the rear brake caliper is seized up, piston is stuck and seals are shot, Rear rim is toast, the same goes for the rear shocks too, the swing arm looks like it has come from the bottom of the Baltic Sea, this will be a down to the frame build for sure.

Low miles too but the weather makes it look a lot worse to be honest, nothing that cannot be fixed though and this Super Sport will see a Brand New life and Look forward to sharing the photos when she is completed.

Front Brake caliper is also seized up, the front forks need rebuilding, Rotor needs to be skimmed and New rim built.

Unfortunately the rims had rusted right through, so all that I shall use is the front hub, Rotor and Caliper body and will refurbish all that I possibly can to this grand Old steed.

All the wire harness was Rock hard from being baked in the Sun, the rectifier and the regulator will be discarded, and I shall be using a New Harness, along with a solid state rectifier module, as I use them on ALL the builds that I create, cant trust 40 year old electrical anyway.

I know that this will have a different look by the time I have finished, not sure how just yet but- It will look pretty cool none the less and of course, Function well too.

So there she sits, before getting transformed into a cool Custom Machine and I am looking forward to tearing into this to transform into some cool eye candy.

So it is time to push this 500 pounder, into the garage and start to take this motorcycle apart and figure out what I am going to do to this 1975 CB750F HONDA.

And so we begin, this will be a long Journey with some hiccups along the way , but I know that it will look a lot different by the time this comes back out.

I started to go the route he wanted, to go with his motorcycle, then all of a sudden from out of the blue, I had an awful phone call informing me that he had just been in a Motorcycle accident on his Harley and did not make it, I was gobsmacked, and, the family were too, they didn’t want another Motorcycle in the family and I understood that, so they gave me the bike and said do something cool with it.

Above, I hand bent Raw steel and then Rolled the rear, welded it and then began to do a little more to this seat base as I want it to be able to take a passenger, as all you see are single short seats these days.

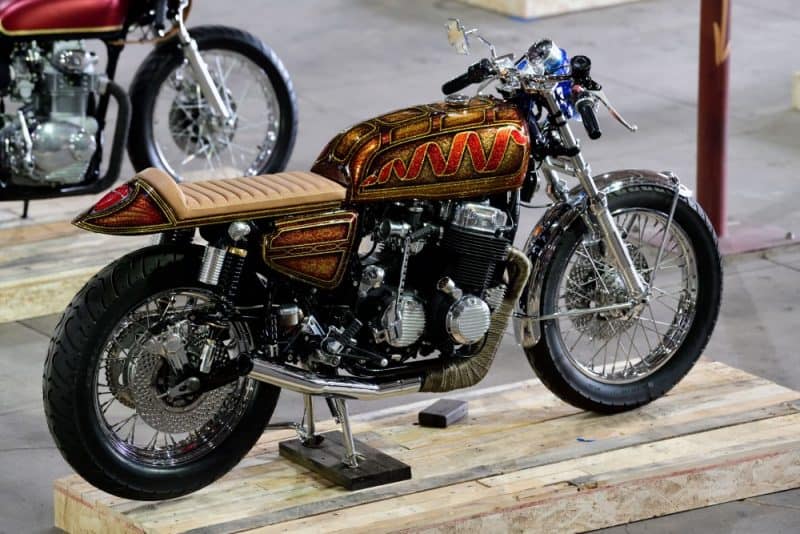
So the transformation began, slowly and I am happy at the end result, I named it the Harlequin as it has so many Colors and my Favorite Candy Bar is TWIX, so you can see that too right?

A lot of flake and detail but wanted that old school Low Rider flake that was about when I was a teenager back in the UK in the 1970s, when the Sun hits the Gallon of Clear coat, you will discover why metal-flake was so popular back in the day, a Kaleidoscope of Candy colors pleases the Cornea.

I have created over 50 Custom HONDA based Motorcycles since moving here in 2000 and every time I start a creation, I have to sit and ponder for quite some time, I am glad that I had no deadline, so the pressure was off and as and when I thought of something cool, I would just do a little bit to the bike and then back to work on other customers parts etc.

I fitted My Sidewinder exhaust system to this build but wanted to try my other sets ups as well, just to get the look and later, hear the different tones of my exhaust systems and decide which one I will like, this is ceramic coated but think I may end up using DEI Titanium Wrap on the header and maybe triple coating the tail pipe in Chrome, we shall see. Below is the Hot Rod tail pipe that fits to the Sidewinder header, a crisp and Velvet bark and as you can hear, very responsive to the throttle.

I have sold many Hot Rod, Side Winder and Razor systems through out the world, all made right here in California, none of that made in china crap.

I fitted a small 5-3/4 Chrome headlight to my Custom Fork Ears, and wanted to create a different look to the front end, so I went with a Biltwell Bubble Visor from their Helmet catalog and this worked out great as a mini nose fairing, even threading the clutch cable through the Plexi Glass.

I wanted to mix Old School with New and decided on using a GPS speedometer but with that old school Smiths looking gauge face and needle that still sweeps, this worked out so well.

Here is the old bucket I used and Tig welded to my custom bracket, just needs polishing and I shall also be fitting small LED Amber display lights for the turn signals to plug into.


I used a old Bucket and welded a bracket I water jet cut and it seemed to go right in and the great thing with this is that it has just a power wire and an anttena wire, you are all set to go, even has a LED red back light too.

This was the right look that i wanted and am glad that I chose to go this particular route, gives the machine just a little more character and style.

Here is the Harlequin outside out Home, so cool to see it in the sunlight and I am super stoked at the way the bike turned out in the end, a long but rewarding Project that really does turn a few heads.

Plenty of eye candy to look at on the bike, the Paint alone is super cool, and as the saying goes, “The Devil is in the Detail”

I am proud of this Build and being a steel tank and seat, this is a sturdy machine that is no light weight for sure, it stands tall too, many do not do that.

The Harlequin sports my Custom 4 into 1 Exhaust system, The Side Winder, I Ceramic coated the header, then wrapped DEI Titanium Heat wrap onto it, to give that Hot Rod styling, then I triple chromed the rear tail pipe and it sits nice and snug and close to the bike, this turned out so well and a system that I offer on the website for all SOHC Models.

A fun machine that was a real joy to create and will be on the show circuit around Southern California this year, hope you can come and check it out some time, be glad to see you.

I removed the old Super Sport Gas Tank Flap that used to hide an old tin cap, I then welded a Harley Bung and fitted a Custom Gas cap, looks so much smoother now.

I also did a few other changes to the bike by machining the forks and making a Brace bar out of 6061 T6, and of course a 1971 Rectangle fog light to show the European Spirit here.

So many New parts, this is like a Brand new Motorcycle now and the more you look, the more you see a little more custom touches throughout the ride.

Photo Credit: #RahoulGhose

This is a cool shot at the Outliers guild show in Down Town LA last week, stoked to see it on Display with other cool machines from around the state.

Photo Credit #RahoulGhose

Here she is sitting loud and of course proud to be representing, at the OG show in LA, a very cool event and I really enjoyed it.

A classic look of the Custom years back in the 1970’s when I was a Teenager, this came out so well and super stoked at the response I received at the Outlier Guild show.

The 1939 Ford Lincoln Mercury tear drop LED tail light set off well in the frenched pocket I created, I also had made the steel cowl and seat base.

Photo Credit #RahoulGhose

It has been an amazing year and to get the Harlequin completed is another notch in the post of creativity, I strive to do the best I can and hope that you liked the build?

Like I said, I had a great response for the bike and even the band that was playing loved it. Band- WOOLY BANDITS- Singer- Christa Collins.

Thanks you for everyone that came up and spoke to me, I was super stoked, this is a great creative family and super glad that I was a part of it, I look forward to attending more.

In Memory Of Edwin Cooper, I am sure he is smiling from above.

Below is  a list of of things done to the Harlequin.

  1. Machined and Polished Front Forks.
  2. Machined Aluminum Fork Brace.
  3. Polished Hubs.
  4. 19X40X1.85 Chrome Front Rim.
  5. 18X3.5×40 Chrome Rear Rim.
  6. Stainless Steel Spokes.
  7. Hand Drilled Rotors.
  8. Custom Piggy Back 14 Inch Shocks.
  9. Polished and Rebuilt Rear Caliper.
  10. Braided Steel Brake lines.
  11. New Chromed front Fender.
  12. 5 3/4 Chrome Headlight.
  13. Biltwell Helmet Visor.
  14. Custom filled and smoothed S.S. Gas tank with Harley Cap.
  15. Hand made Steel Seat with leather Tuck n Roll.
  16. Metalflake paint.
  17. Hand Made Clubman Bars 7/8.
  18. Biltwell Grips.
  19. Rebuilt Motor with Polished Covers and Wrinkle Paint.
  20. Restored Carburetors and synchronized.
  21. Drilled and Chromed Kick starter.
  22. Wrapped Sidewinder 4 into 1 exhaust with Chrome tail pipe.
  23. GPS Speedometer.
  24. New master Cylinder.
  25. New levers.
  26. Tarozzi Rear Sets.
  27. New Challenger tires and Tubes.
  28. 1939 LED Tear Drop Tail Light.
  29. LED RED rear Turn Signals.
  30. LED display lights.
  31. Polished upper triple tree.
  32. Powder Coated frame.
  33. Lithium 12 Volt EarthX Battery.
  34. New side covers.
  35. Chromed Center stand.
  36. Chromed Side Stand.
  37. 530 X Ring CXhain.
  38. New wire Harness.
  39. New handlebar switches.
  40. Oil Pressure Gauge.
  41. Battery Tender.


Send us some great Photos of your Machine and where you are from.

Almost 18 years ago I used to have a readers rides page, showing peoples machines etc, and I thought I would start to feature that again.

poster

If you have a bike you would like to show the world, share it with us by emailing some sharp clean images of your Motorcycles and a description of what work you did to get it to the standard it is now and of course where you are located.

bars9-2

People like to see other machines for inspiration etc, so if you have some good photos just email them to me with all the information to.

carpy@carpyscaferacers.com

teardrop1a


I look forward to featuring them.