Carpy’s Café Racers
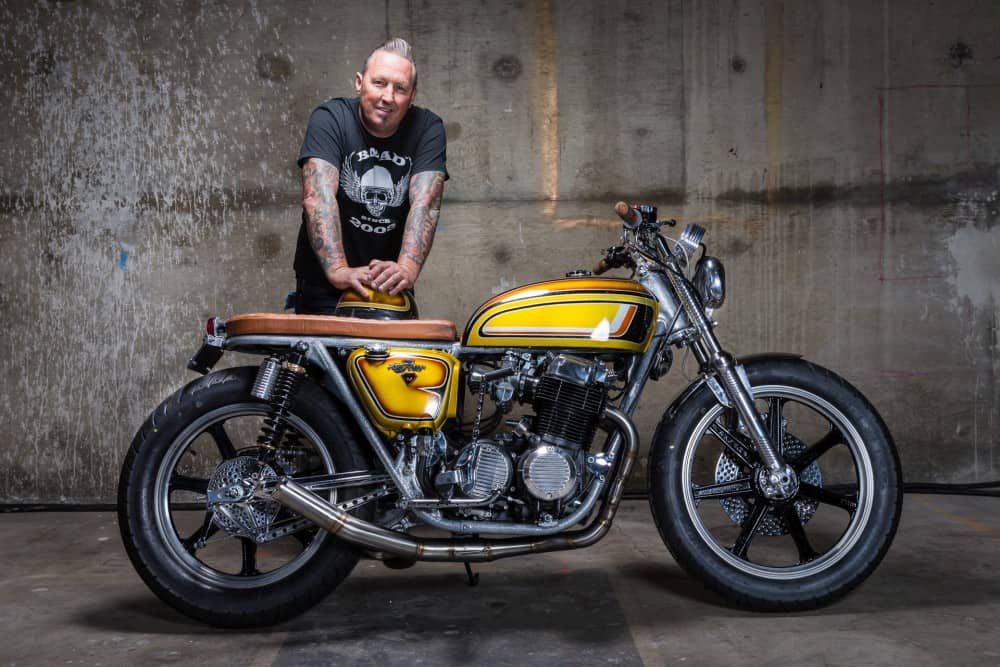
The Vesco Honda SOHC 1974 CB750K Custom Built Brat Bike
Mar
Well, this was a super fun build that I did and it is not often that I purchase an old snotter and then, after building it, sell it back to the owner I purchased it from, but this was how it was, I saw that there was a SOHC 750 in a garage in the City of orange for sale and made arrangements to drive down and take a look at it. once I got there and the garage door was lifted, I could see this sorry arsed looking inline four that was parked up, leaking a little oil and looking worse for wear.
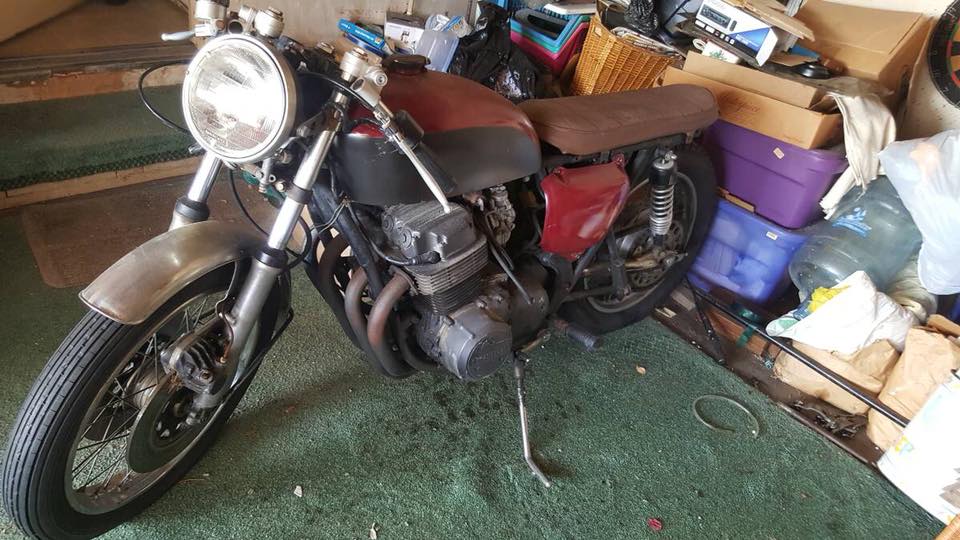
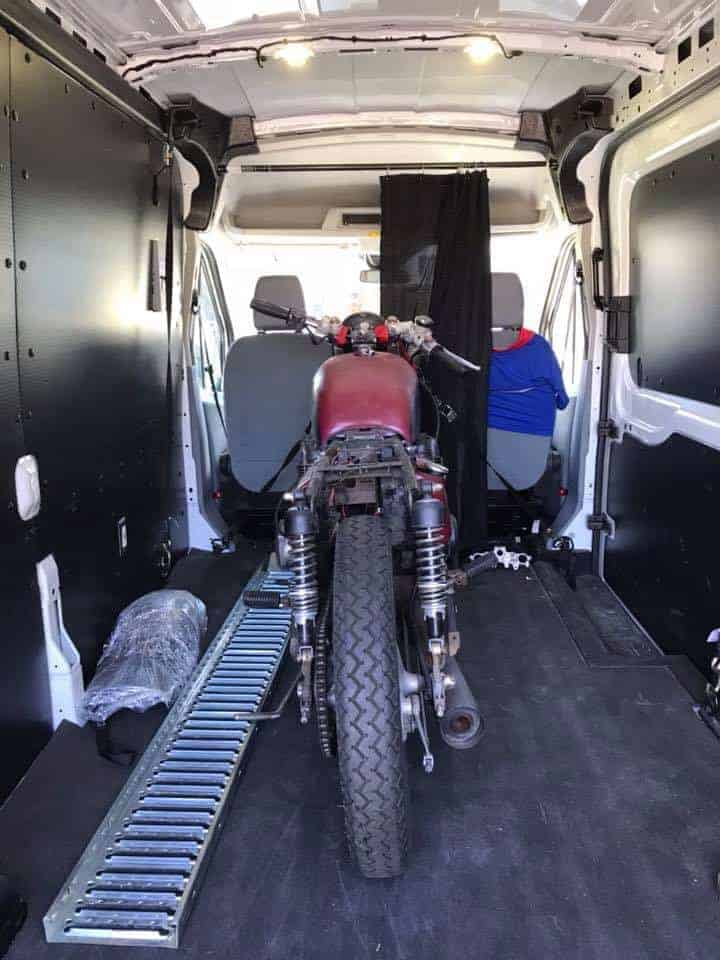
I mean, it had everything there to make it look cool, but- it had not run for many many years and the young lad who owned it said he tried a few ties to get the bike to run but he lost interest and its been sat in the garage just collecting dust, so- we stood and kicked the tires for a while and eventually came up with a figure, shook hands and it took the three of us to push the old girl into the back of my van, but at last I had this old 750 in the Transit and had already worked out what I wanted to do with this 500 pounder machine.
The old girl is in my van and getting ready to drive home, I looked at the title and noticed his last name was Vesco- Your not related the the famous Don Vesco are you? I inquired.
Yes, he was my Grandfather, That is so cool as Don Vesco held many Land Speed records and had tons of 750 Honda’s back in the day, so I was super stoked to be able to own something with Vesco’s name to it, so, I drove home with a smile and half an hour later I pulled the old girl out and took a look at what I have to play with..

The Old girl was tired but, this is not my first 750 and as I have been creating Custom Motorcycles out of these here in the USA for over 20 years, I was quite eager to see what I had to work with but knew I had my work cut out if I was going to make a Custom creation out of this 1974 Honda.
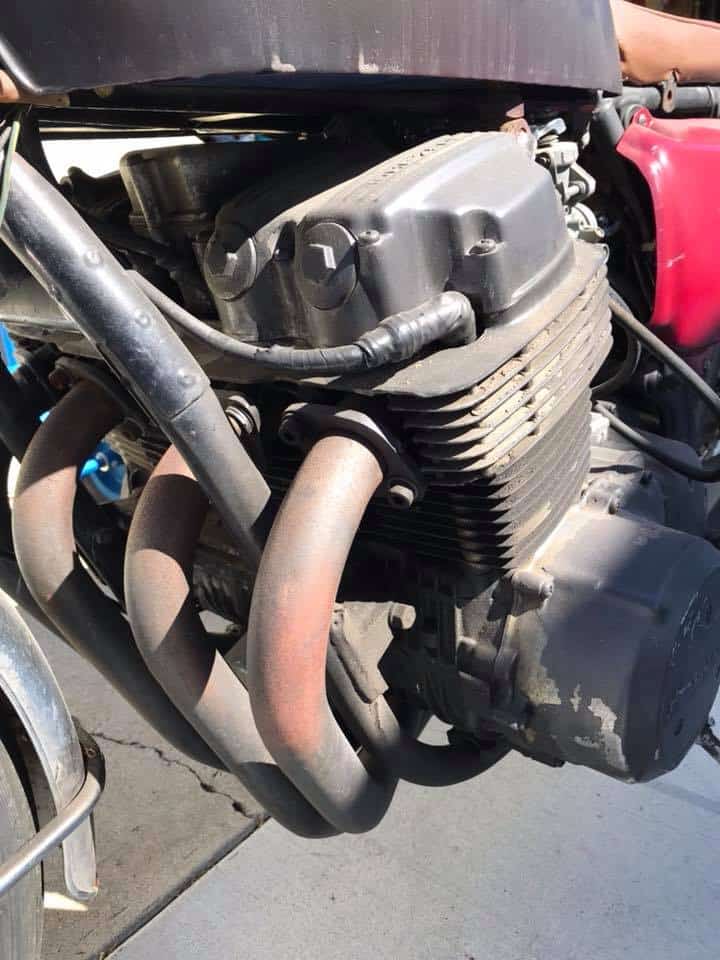
Motor needs some love and had no idea if it would even turn over but I love these inline four engines and was going to see what it took to at least get to run and see where I can do with a full build on this 500 pounder.

The carburetors had seen rain, wind and snow by the look of it and the slides were stuck solid and as I have have rebuilt many of these rack of four set ups, I wasn’t too worried and thought I would strip the bike to where I need it to be and see where I am at.
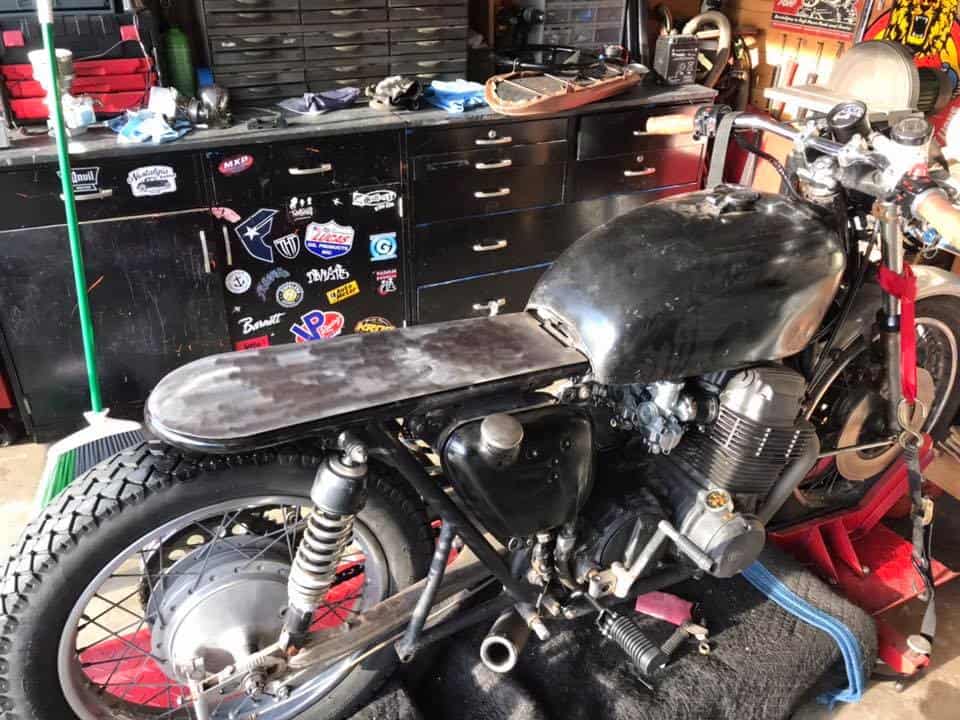
I wanted to try and get this running, so I pilled carbs off and cleaned them up, fitted new jets etc and fitted new intake manifolds , as well as putting an old set of handlebars on as the clips on’s didnt fit right, I also hooped the frame as it was cut already and thought I would add my own style seat and see if I can at least fire it up, I had a 4 into 1 exhaust that I make that was in the rafters, so pulled the old rusty Kerker off and fitted mine, added an oil Pressure gauge so I can see where we are at if the old girl fires up.

The rims were too rusty, and was lucky to have an Original set of Lester wheels in storage that I could use on this bike, so fitted them and added some new Bridgestone tires and fitted one of my drilled brake rotors to the front end too. This bike went together really quickly and in the space of a week I was ready to fire this puppy up and see if it would even be able to move under its own power, I had spare parts in my garage or in my storage so it was a zero cost other than the tires to put this Honda together.
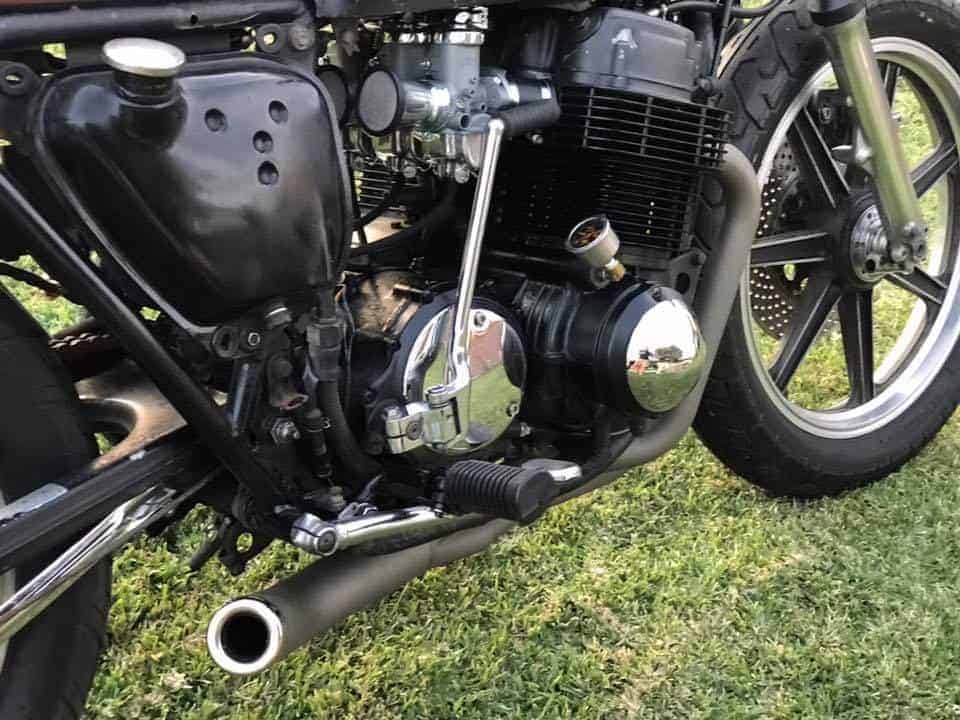
With rebuilt carbs and my 4 into 1 system cut down to a more aggressive loo, I was eager to see if this will fire up, it had compression and spark so I kicked her in the guts and she fired up right away with a nice brak from my exhaust system, I knew this would be a fun bike.
I made the handlebars and the seat too and this was probably the most comfortable bike I have ever ridden, I was so suprised how much fun this bike was and it had linear power too.
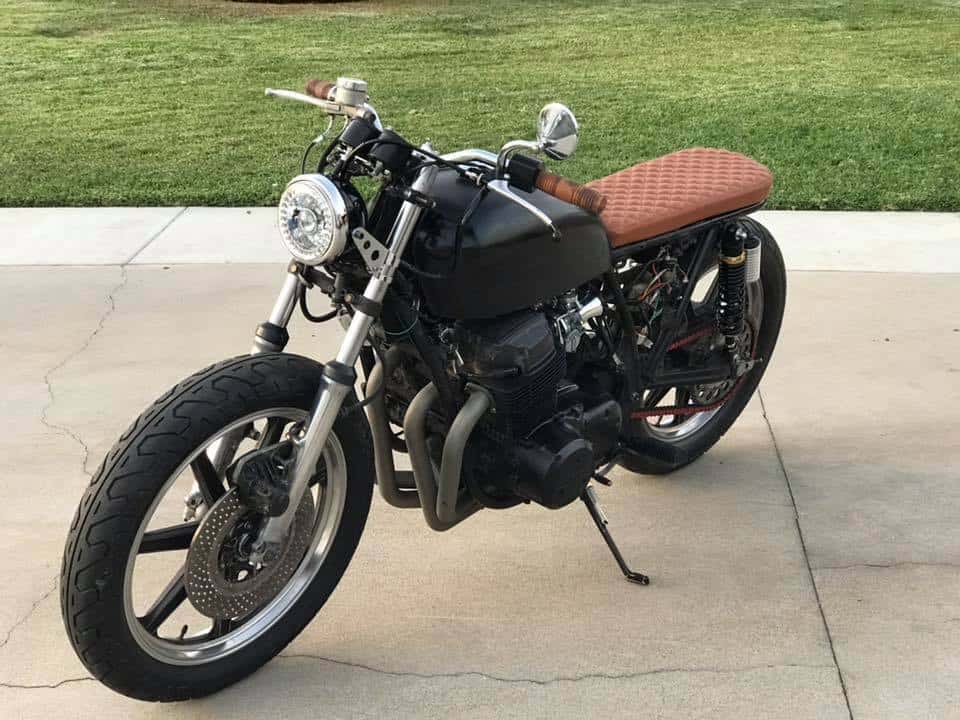
Well, I was happy at the way this bike was looking but the gas tank looked horrible just black and wanted a cool Custom 70’s flake look set of tins on this bike now.

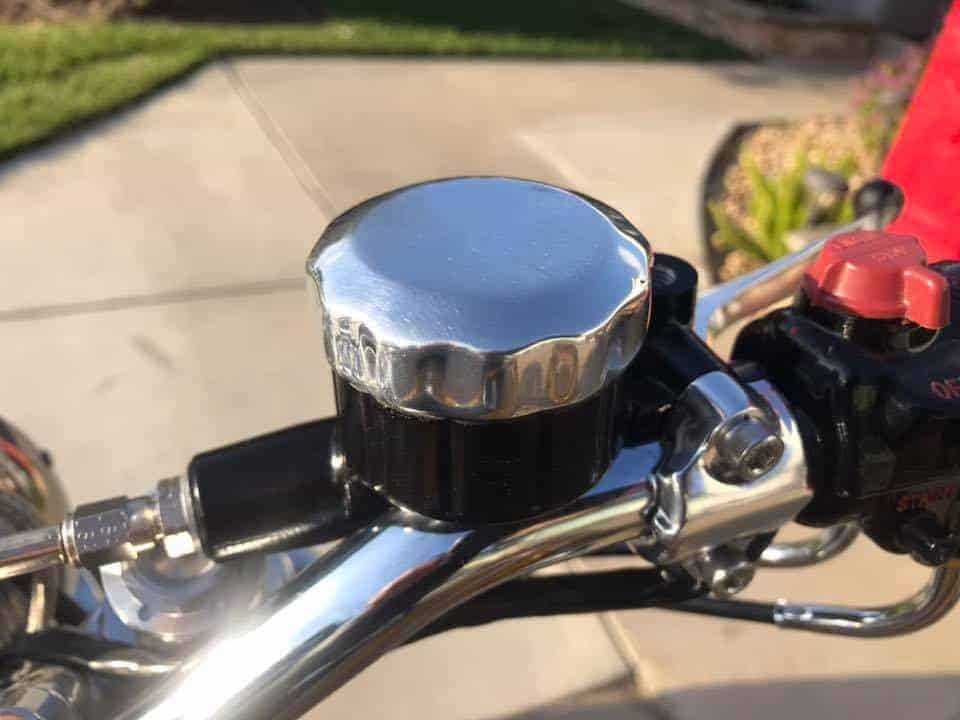
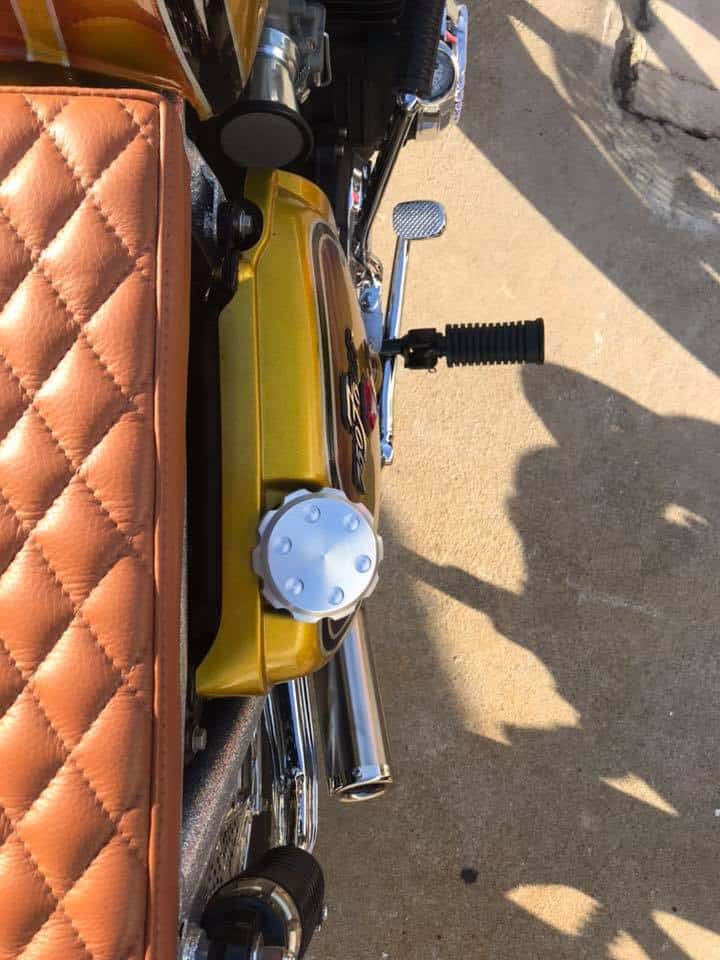
So, I thought I would use the original tank that was on the bike, but wanted to get rid of the factory gas tank fuel cap and make a custom set up, just to be different.
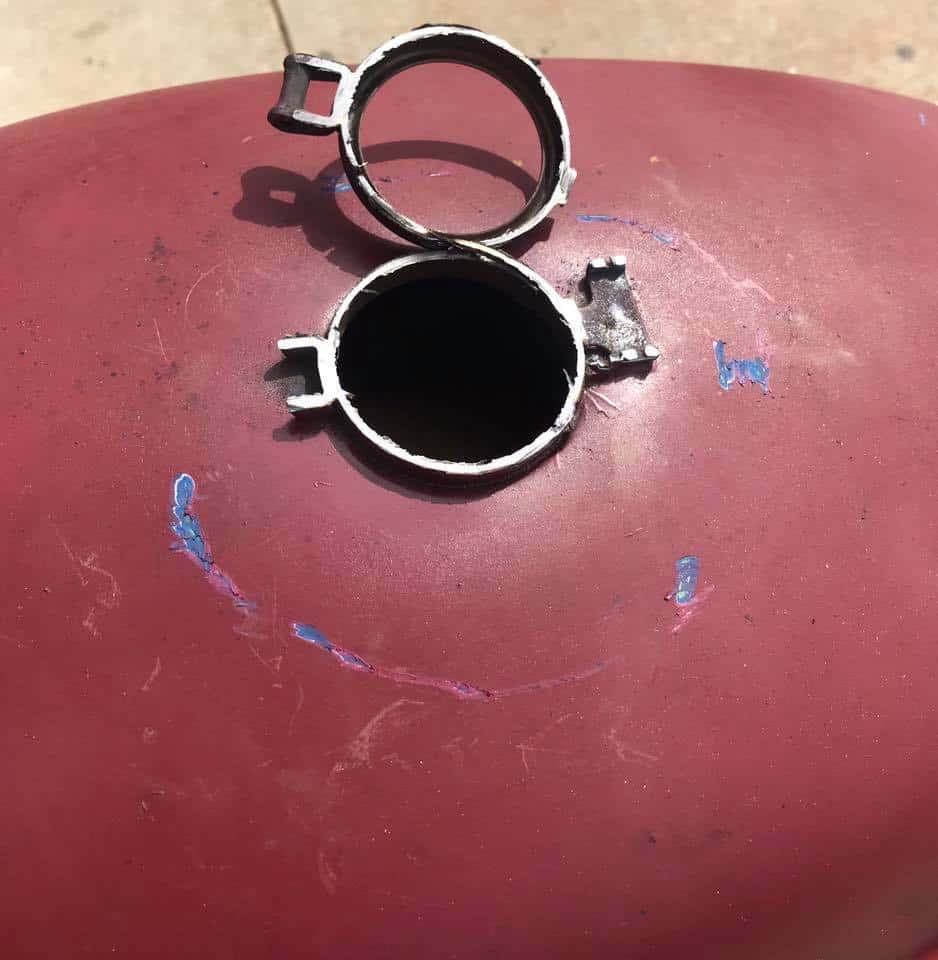
I cut the old neck off and then ground it all down to make sure this was flat to the tank, I made sure there was no gas left in this tank before but it had been empty for about 7 years lol.
I make a gas cap kit now and this is how I did the conversion on this tank, as you can see, I fit the weld in Gas Cap Bung into the opening on the top of the petrol tank.

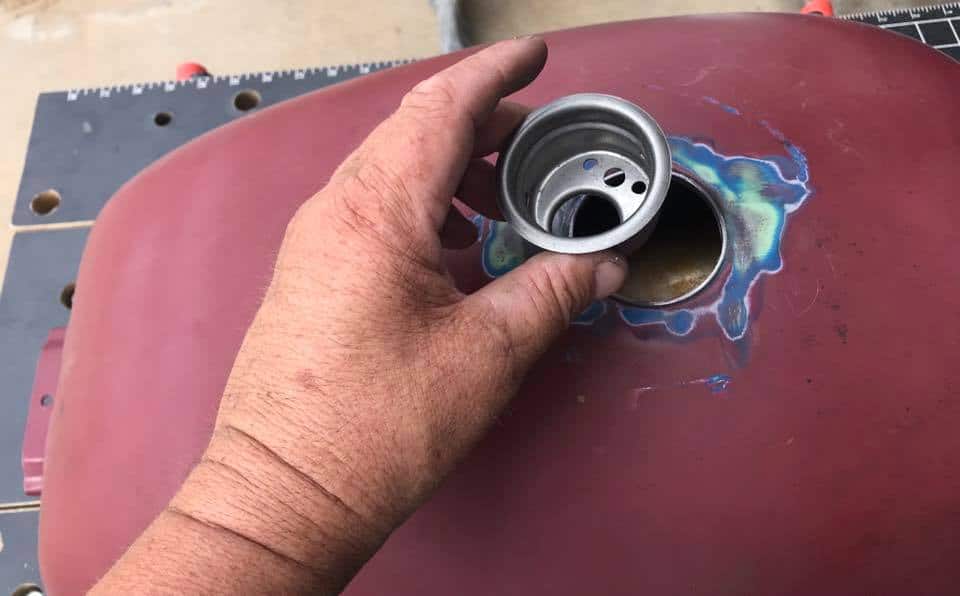
It sits in the original location really well, I simply ground all around the gas tank to make sure I have a good ground and then simply tig weld the bung in place, for a neat smooth Custom look.
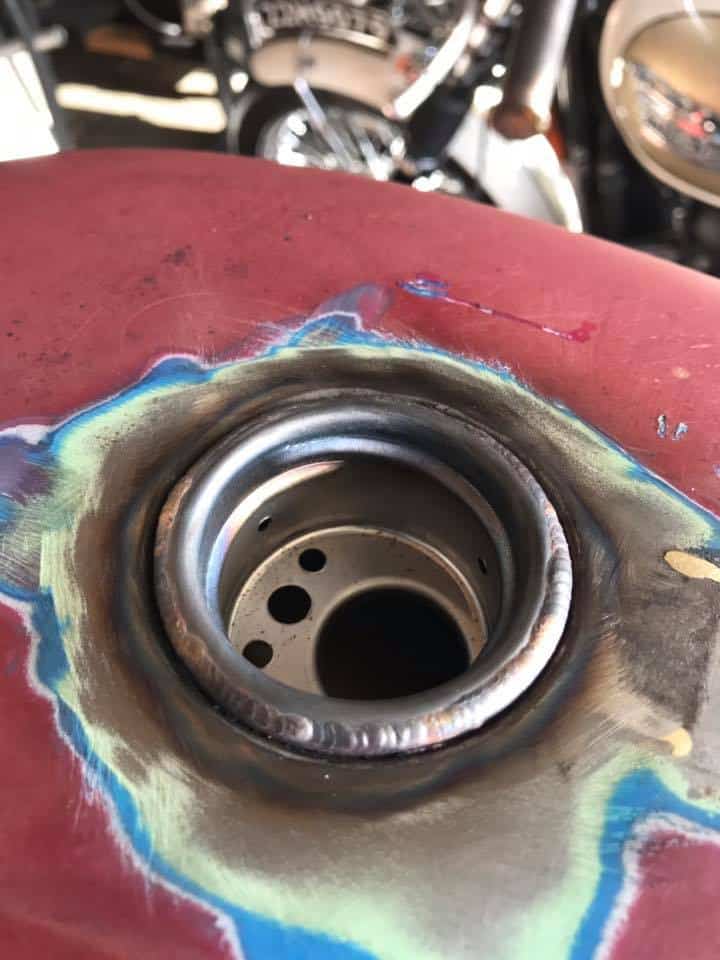
All welded and to be honest, I do not need to grind the welds as I shall be doing a little body work on this to smooth everything out, so this will be covered up anyway.
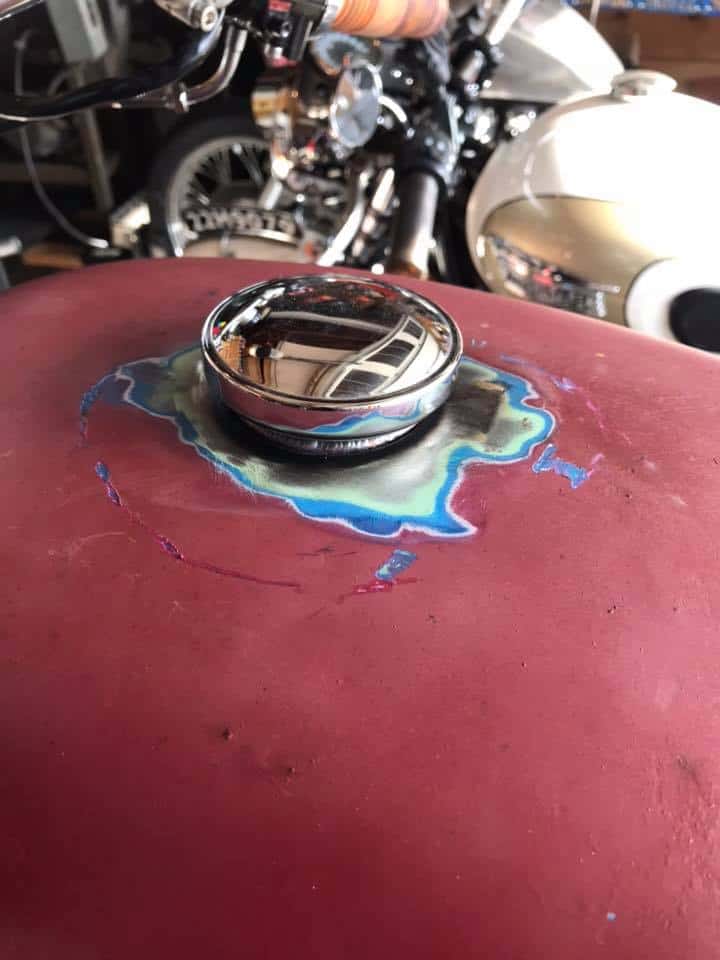
I used a Harley screw in Gas cap and this really gave it a custom but Classic look, I was really happy at the end result of this and glad that I went this route on the bike.

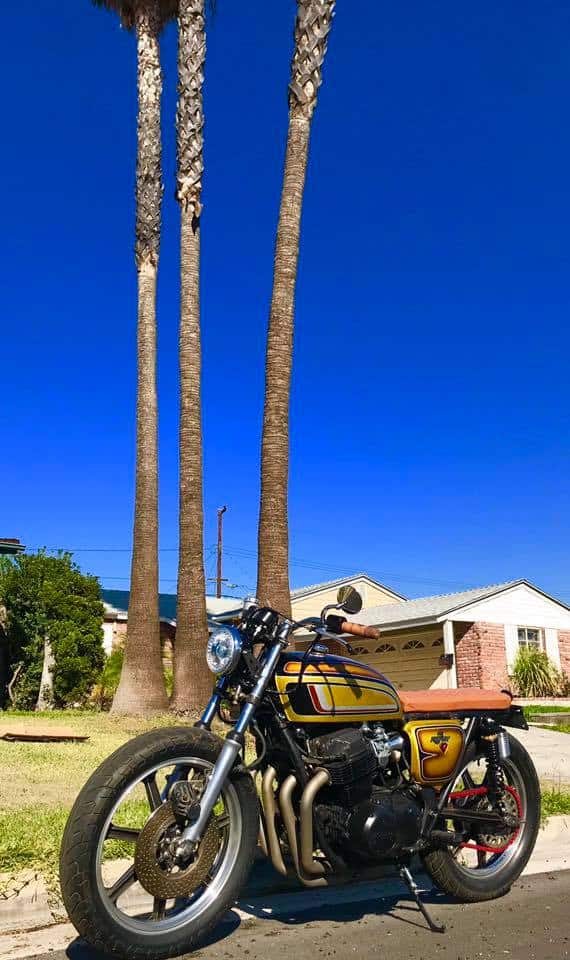
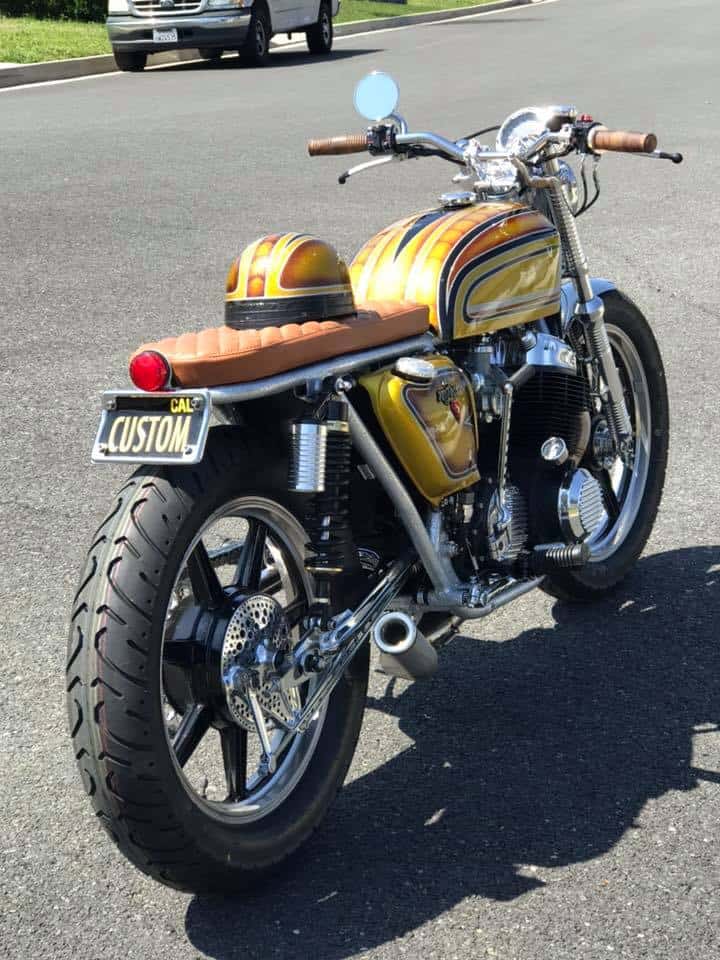
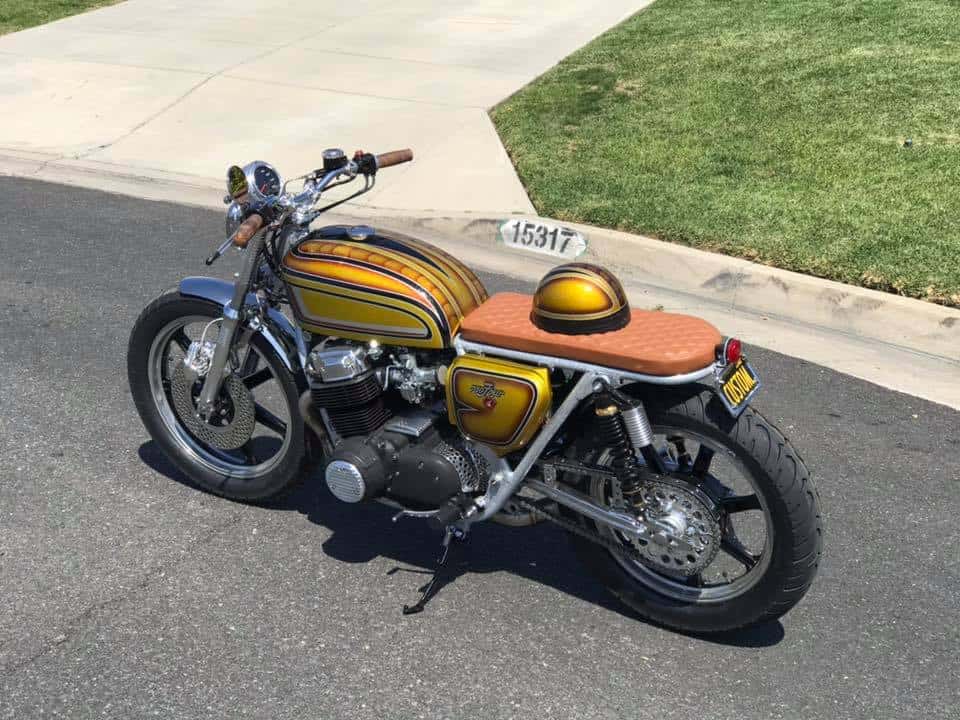
Now that looks a lot better with the Custom 70’s style paint and am happy I went this route in the end, the 750 looks pretty tough like this.

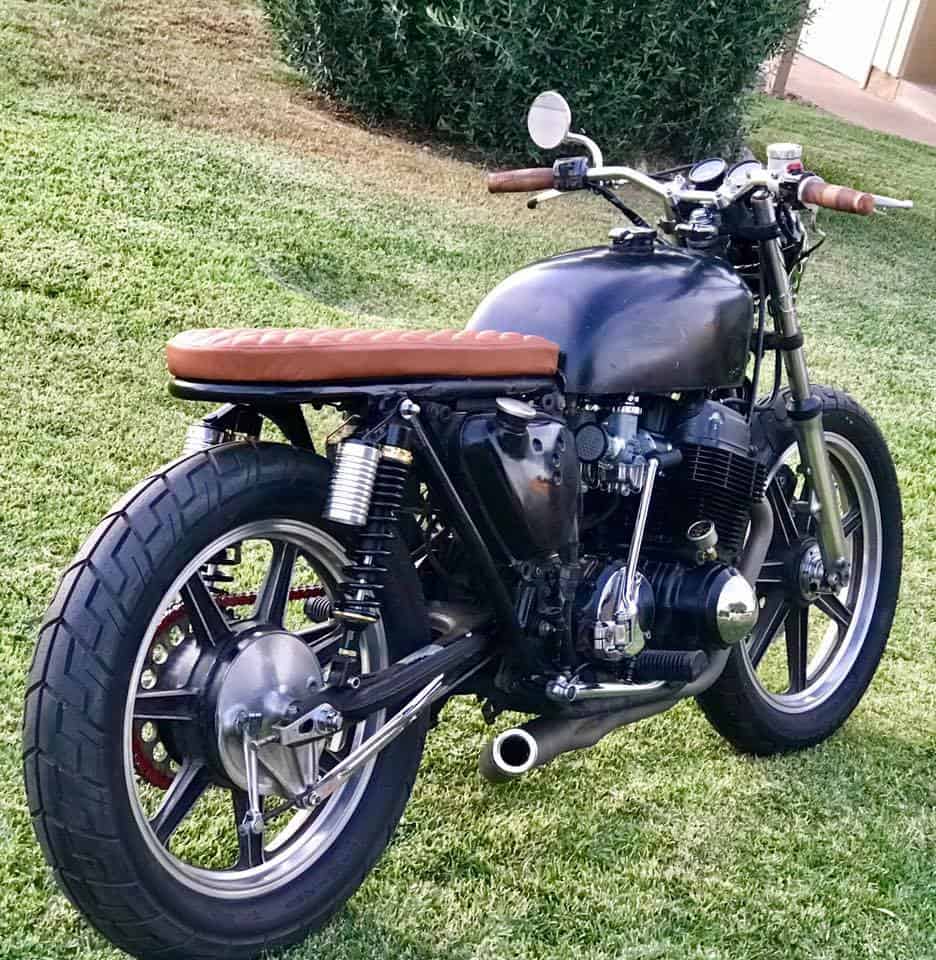
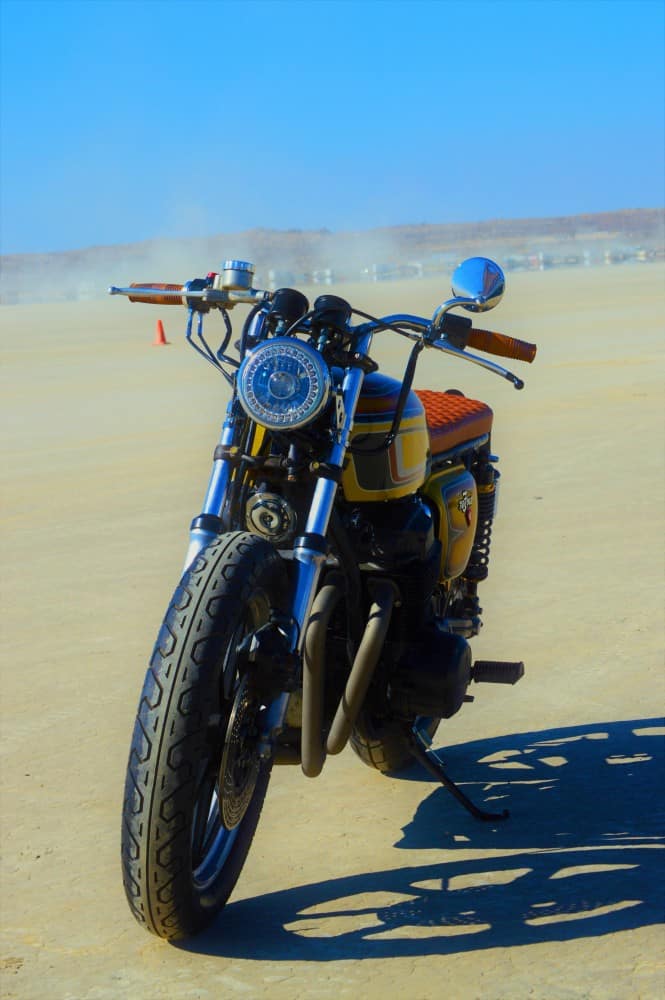
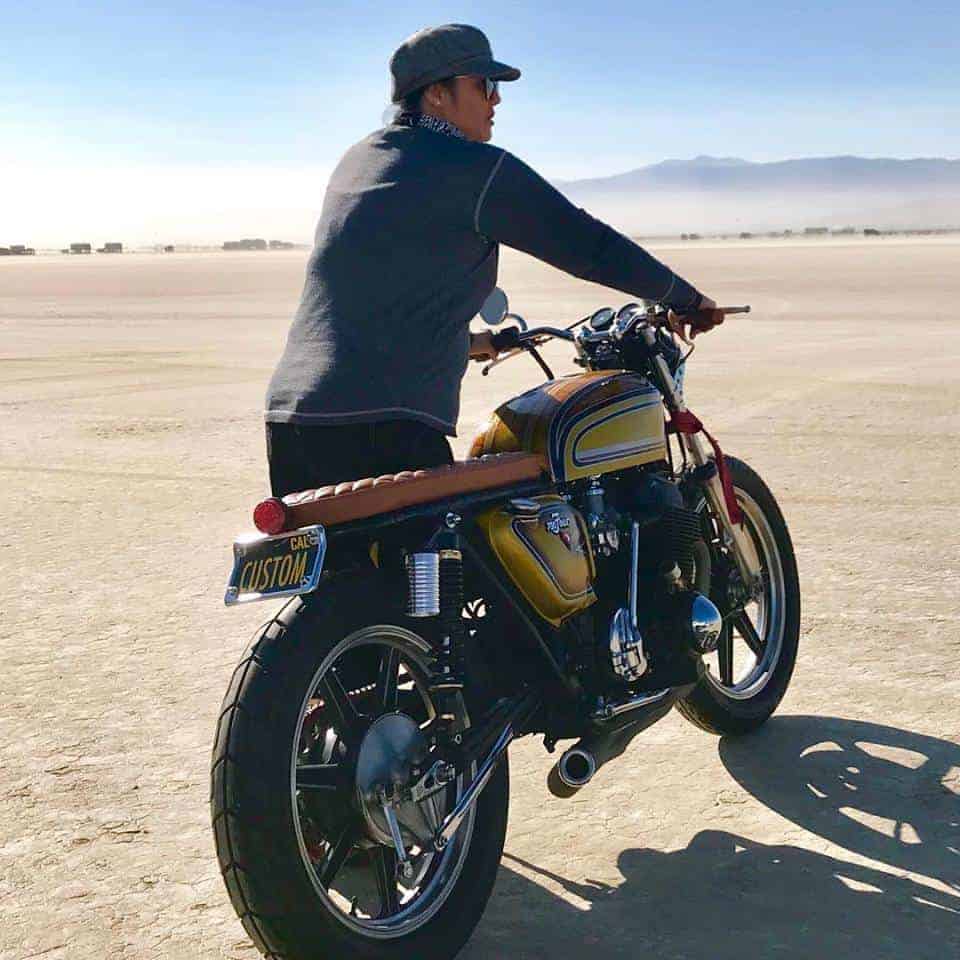
This bike turned out great and even though I wasn’t finished with it, I wanted to get a few miles on this bike before I finally completed the other bits that I wanted to do. As you can see, the Vesco bike is on the Dry Lake at El Mirage where Don Vesco himself races bikes and broke records and the day this was fired up, Team Vesco did over 400 mph at Bonneville, so I thought this was fitting that i was at a SCTA meet in El Mirage with my Girlfriend Jennifer.

This has a great stance and is so comfortable to ride, the drive train works smoothly and my aggressive 4 into 1 barks like a scolded dog, I fitted an Led headlight that is 5-3/4 inches with internel led turn signals to make it all legal for the road. She sure looks swell out there in the Desert.
I like the meaty Bridgestone tires that were shoe horned onto the Lester Rims, those rims came of a CR750 Race bike and I had them in storage for almost 20 years.

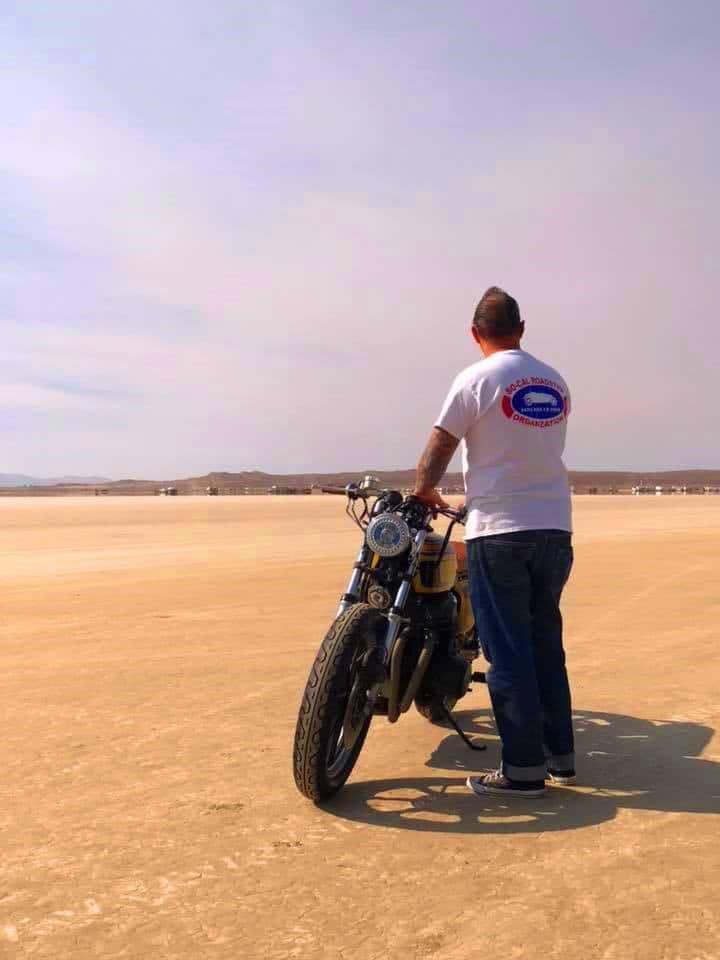
I love it out here at El Mirage dry lake, if you can get a chance to get here for the SCTA racing, you should, I loved taking the Honda out here and I think it felt at home to be honest.
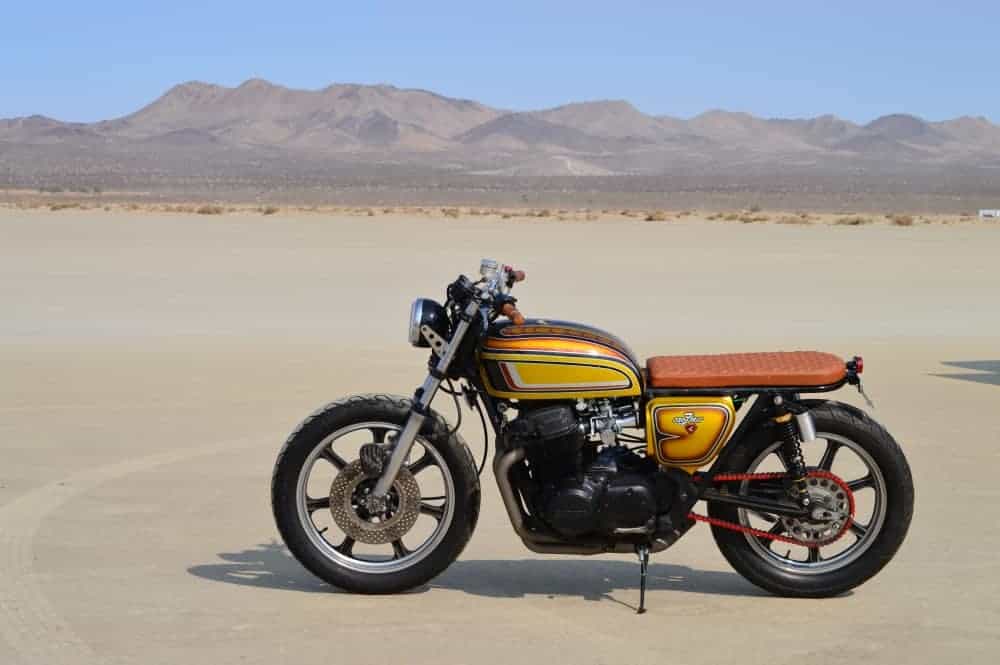
So there she is, the Vesco Honda Four, a brute of a bike and it looks pretty tough out there in the So Cal desert, I am so glad I went ahead and built this machine.
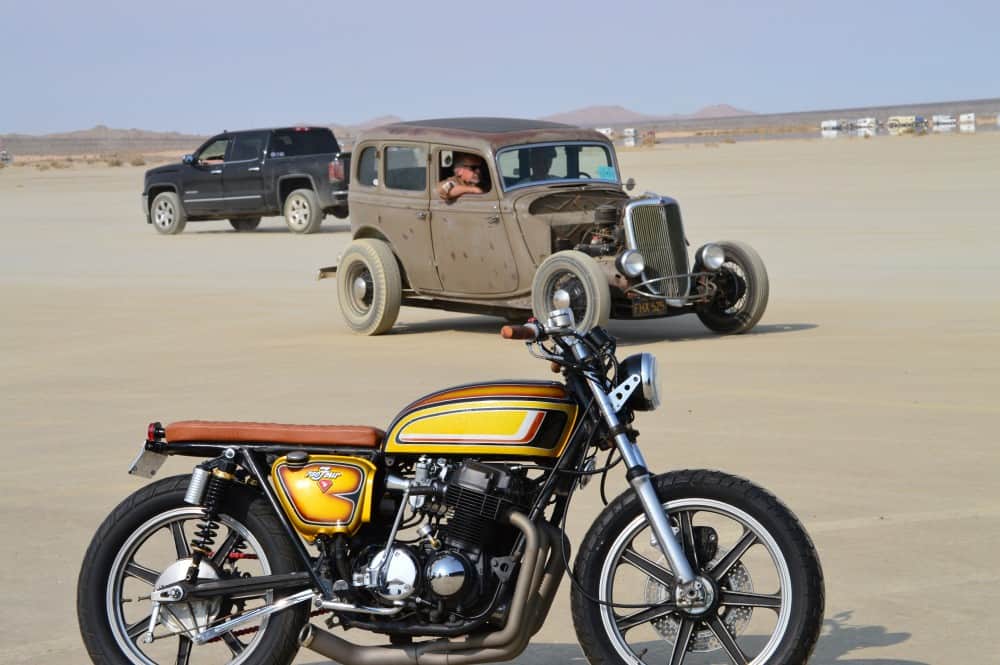
Now it was time to take the bike back home to Las Mirada but what a great time we had out on the dry lake, watching the Hot Rods and Motorcycles race on the Lake bed.
My Girl Jennifer takes the reins as I help a broken down Motorcyclist on the race track at El Mirage SCTA event.
So, I now get ready to put the Vesco bike in my Van and take it back home to my garage and figure out what I am going to do with this Motorcycle.

So, I sit the bike on the drive way and I am think of what else I might do to it, and I have to write a few emails to customers etc, it was when I got on the computer I see I got a message that I had been invited to the OG Bike Build show in LA and its in about 4 weeks, heck! I could maybe strip this bike and redo it to how I want to and show the bike, of which is a tall order but heck, why not eh?
So, even though it is a tall order, I had to come to the decision to take this bike and strip it to the bare frame and begin a cool build for the OG show, I shall still keep the Gas tank and side covers the same and the Handle bars etc but the rest will get some rework.
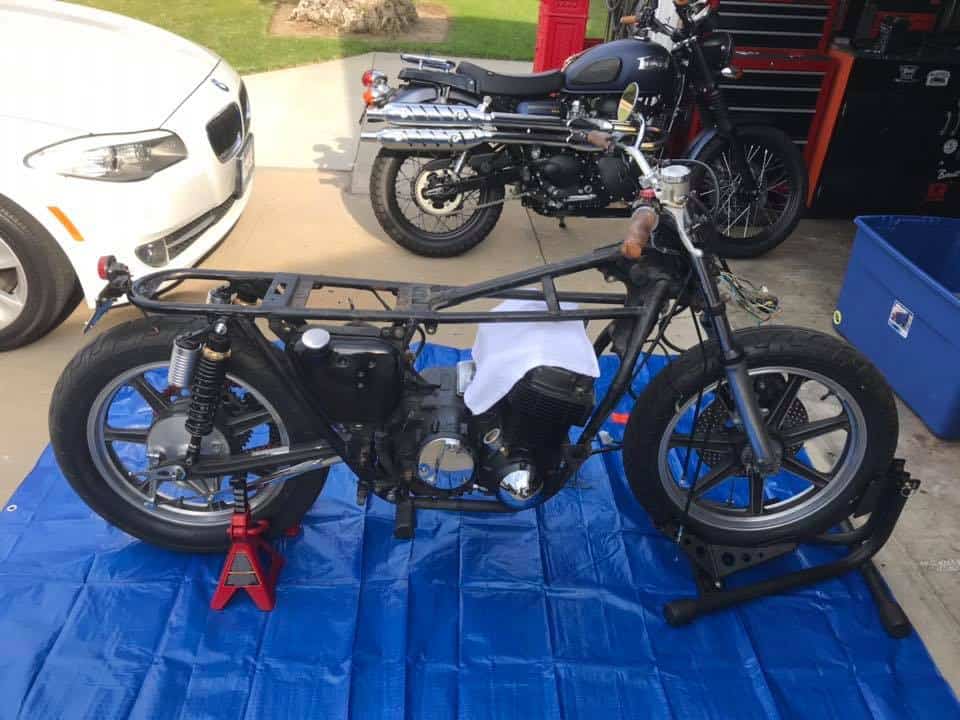
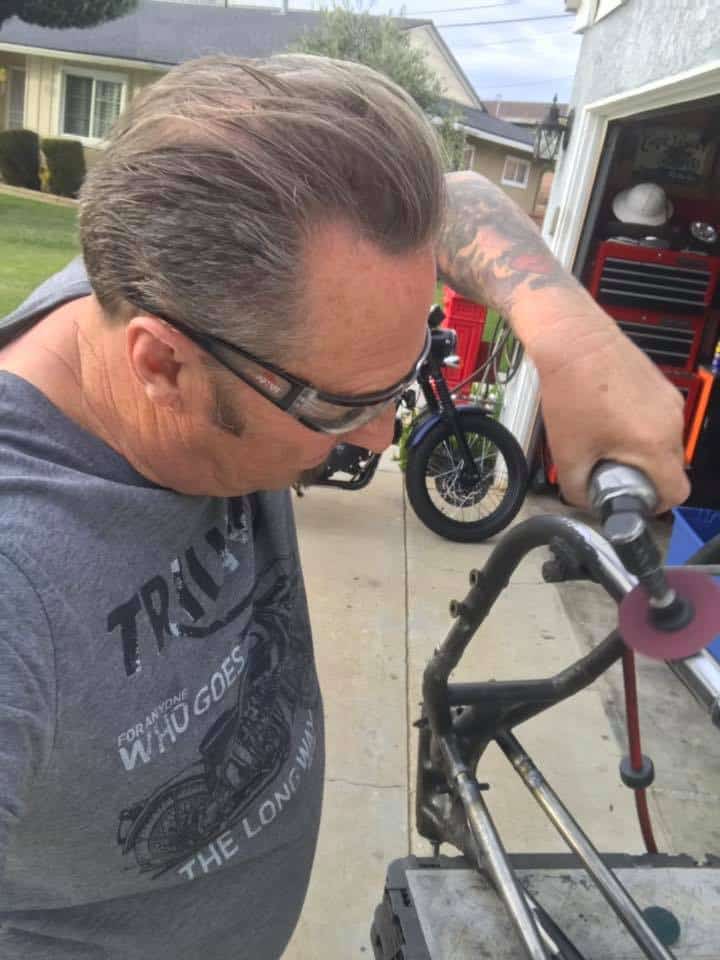
The strip down begins, I want this to be a trick frame when I am done and now is the time to take the bull by the horns and remove everything from this 500 pounder and make this a head turner.

I am taping the frame where I will be cutting and making quick release Custom Pieces that make engine removal and cylinder head removal way easier as the stock frame is so difficult to remove the motor when in the cradle.
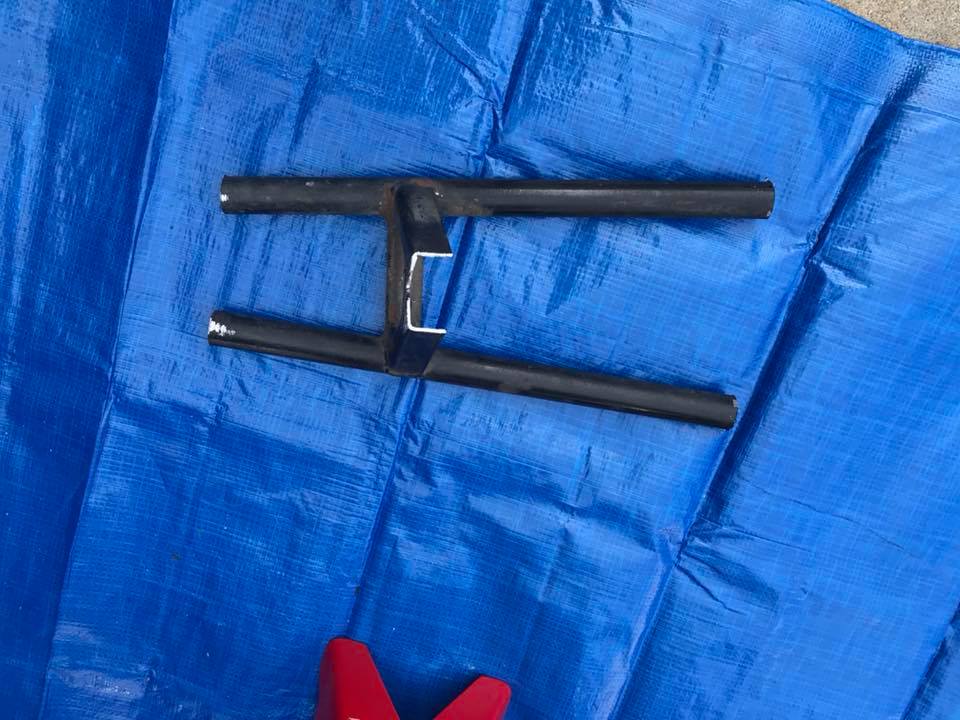
Top frame removed and I shall be fitting my New Steel tubing Frame kit that I now offer on my website for the 69-78 CB750 Chassis.

Heave ho and away we go, I have removed so many engines on my own over the years, there are many ways people do it, some lay the frame down etc, but I like the old school brute strength of removing the 230 pound behemoth, I always go this way and then put the motor on a milk crate as its about the same height as the lower frame rails, I am always knackered afterwards though.

Well she is out at long last, time for a cuppa and an Ibuprofen lol- But seriously, the Motor is out and now the hard work begins, you too will notice how dirty and grimy a frame becomes after being used for 40 years and this thing has more oil on it than the Tin mans Elbows.
I Have welded the New removable top Rails in the chassis, now time to cut the right Lower side of the frame, so I can make a removable side for the 750 Four.
As ypu can see, the top rails and side rails are now in place, looks bloody awesome and not seen this EVER done before, I wanted to really push the boat out in the short amount of build time that i have on the Vesco Honda, I bet people wont even notice it when I am done.

Make sure all the weld area’s are clean and my Kit that I sell will work great for all of your machines from 1969-1978 and glad I have made these kits to be honest.

See, all nice and shiny, and soon to be ready to media blast all the paint on, prep and paint for a Custom Color and this time I think I shall go with a metalflake Silver, to keep with the Custom 70’s paint style.
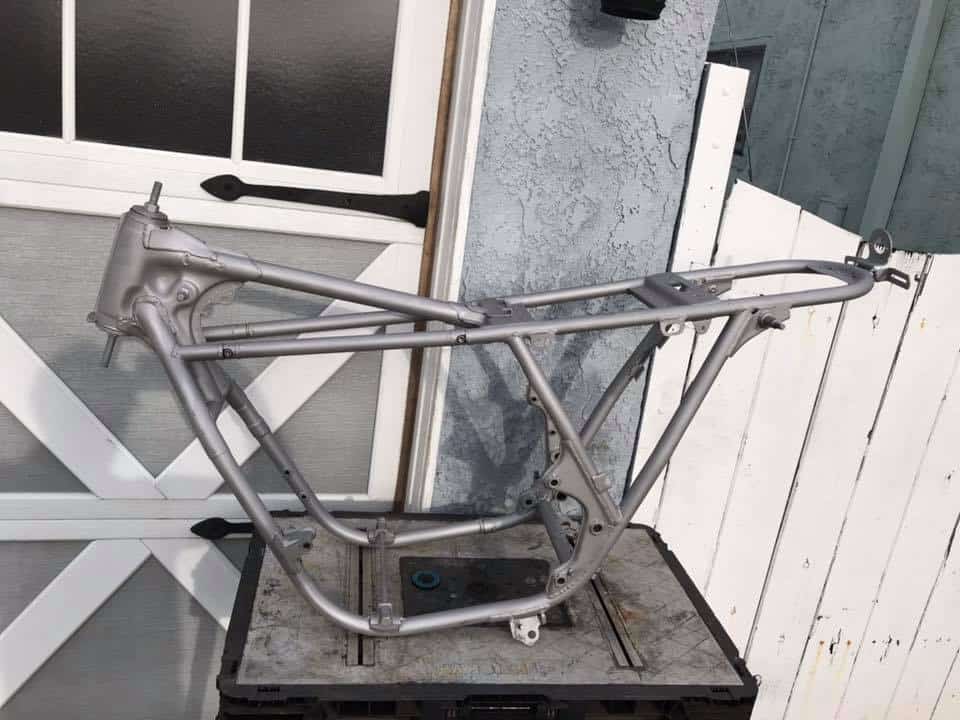
All media blasted, she is now ready for the start of paint, this will take some time as i want the thick flakes but this will look great in the Sun against the Gold of the tank etc.
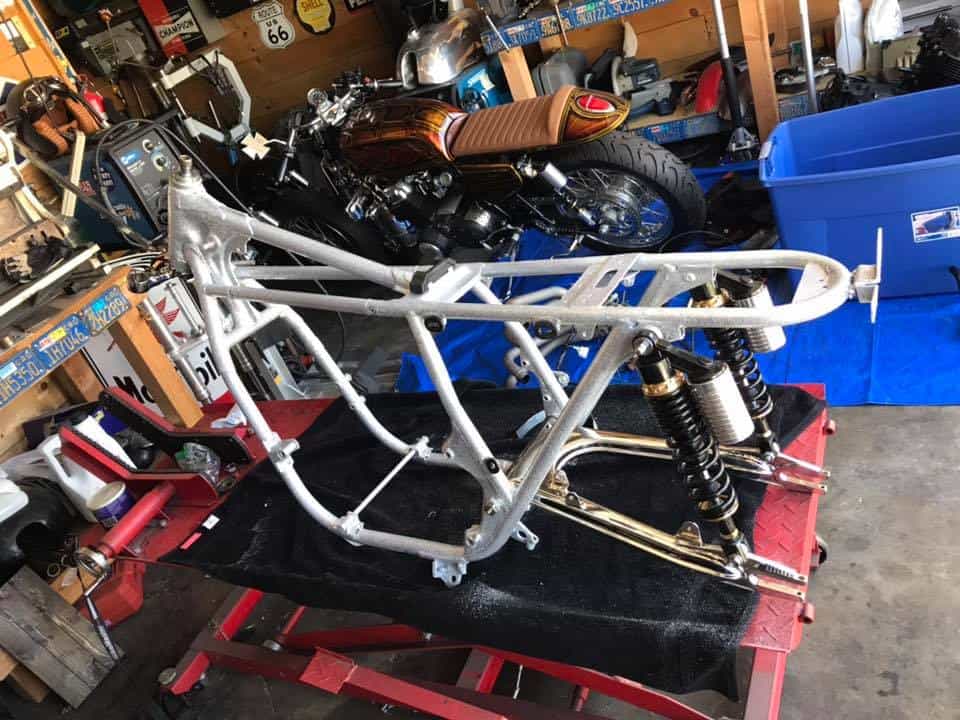
The race is on, and as you can see, I have the Silver Flake paint on the Chassis and I went ahead and chromed the rear swing arm, just for that added Custom look.

I have to rebuild some front forks, I went ahead and machined the fins in the lowers and polished them, then I needed to add new seals to the old girl for new life.
I use a piece of Plastic tubing and gently tap the tubing onto the seal and this easily presses the fork seal into the stanchion with no damage at all, so easy to do like this.

Custom look and even have chrome topper caps on the Original black covers, just to give it some nice bling and look a little different from the rest out there.

New tubes, springs and I set the pre-load using 4 stainless washers, as I dont like using that Plastic shit that many fork places offer, washers is the old school way and I also use Automatic Transmission Fluid instead of gear oil, another old school way.
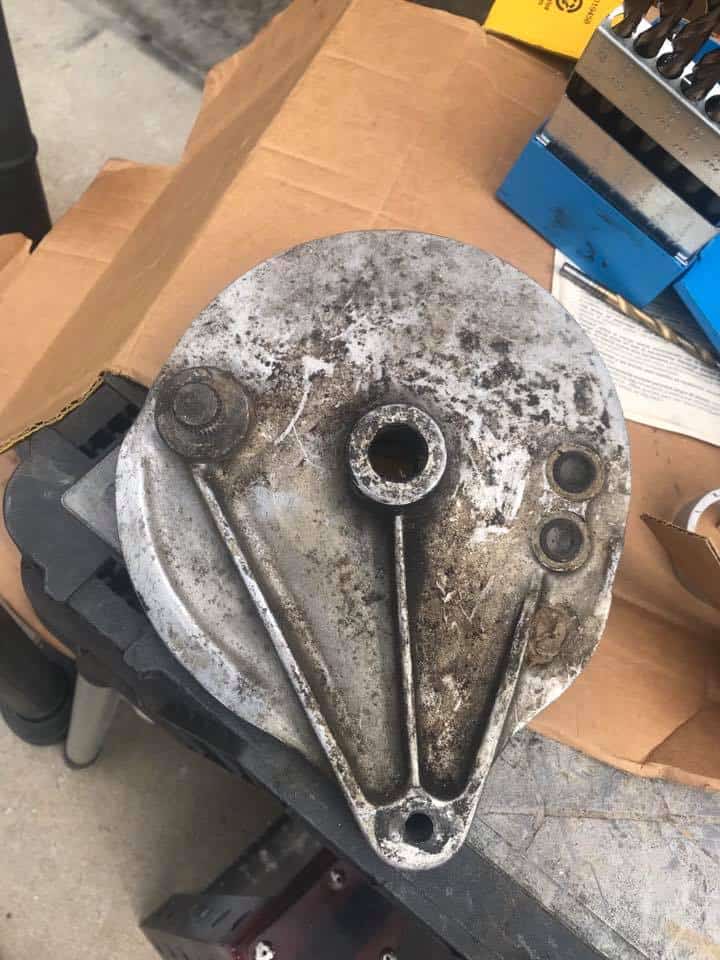
Time to work on a custom rear brake Hub Assembly and I shall strip these, clean it drill the holes for aeration and cooling the hub and then polish it and fit new brake shoes and actuator arm to it.
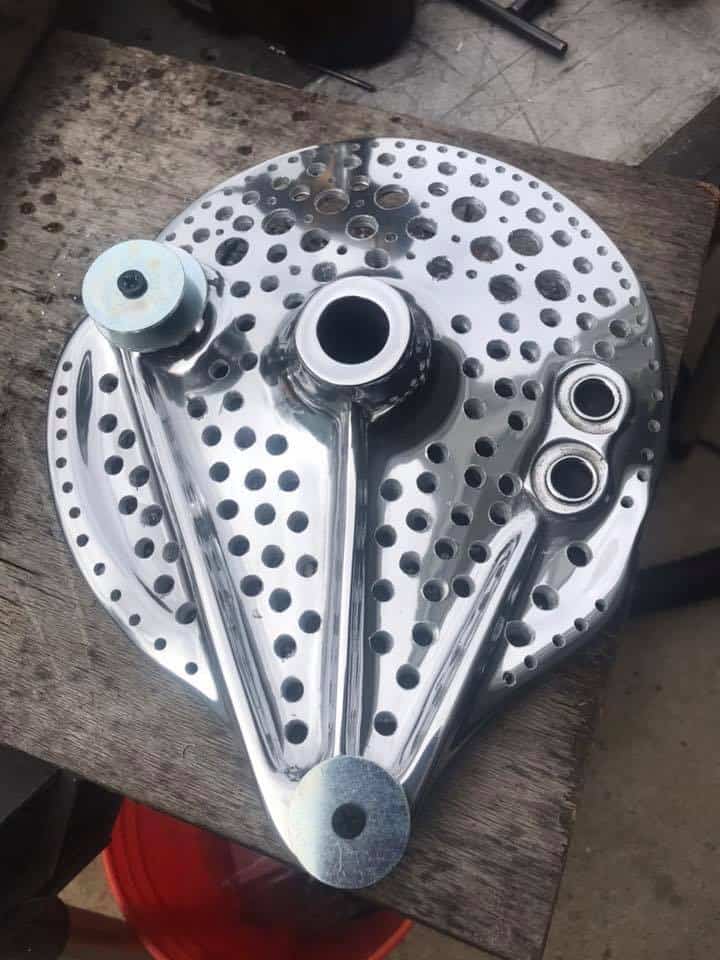
All done and am happy at the look I was after, a nice custom touch that I do and offer this service to many people and is available on the website.

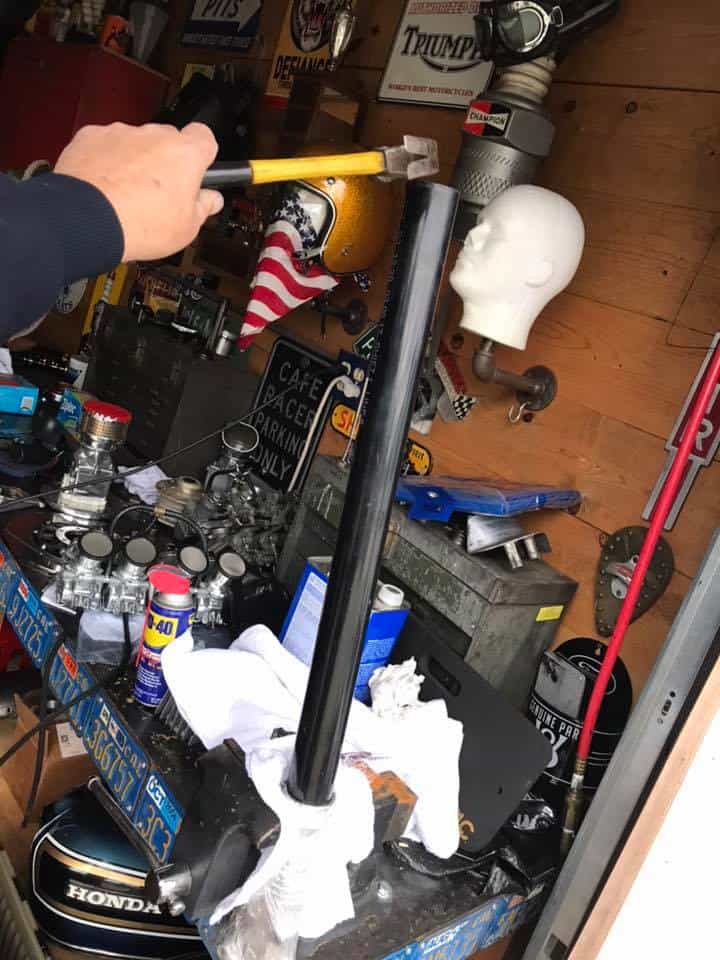
Front brake rotor gets the same treatment, I do all this at home and use my old drill press to make all the holes and then countersink both sides, for me, its therapeutic to be honest and boy does it look good when finished.
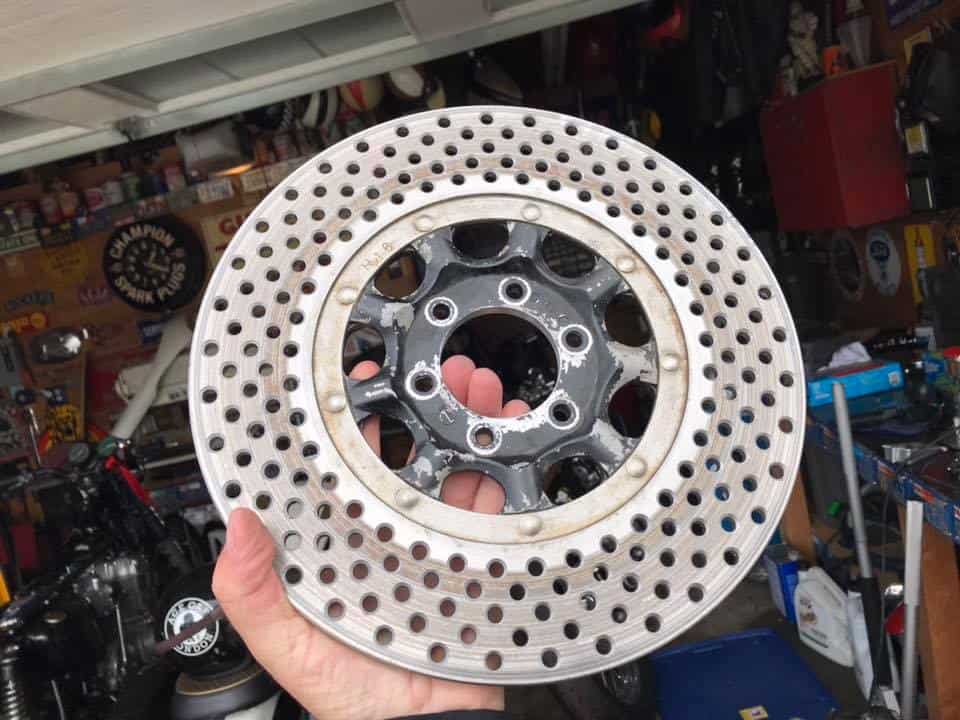
Now I just need to clean it up, paint the center and I shall be ready to mount on the Original 1977 Lester mag wheel, now for the cool pics below.

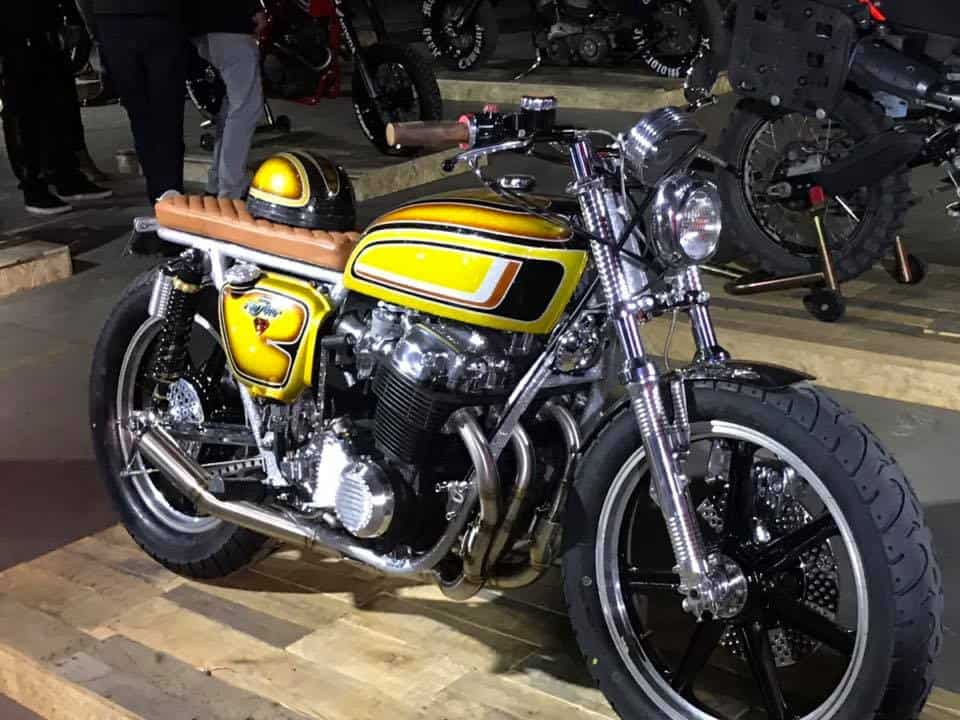
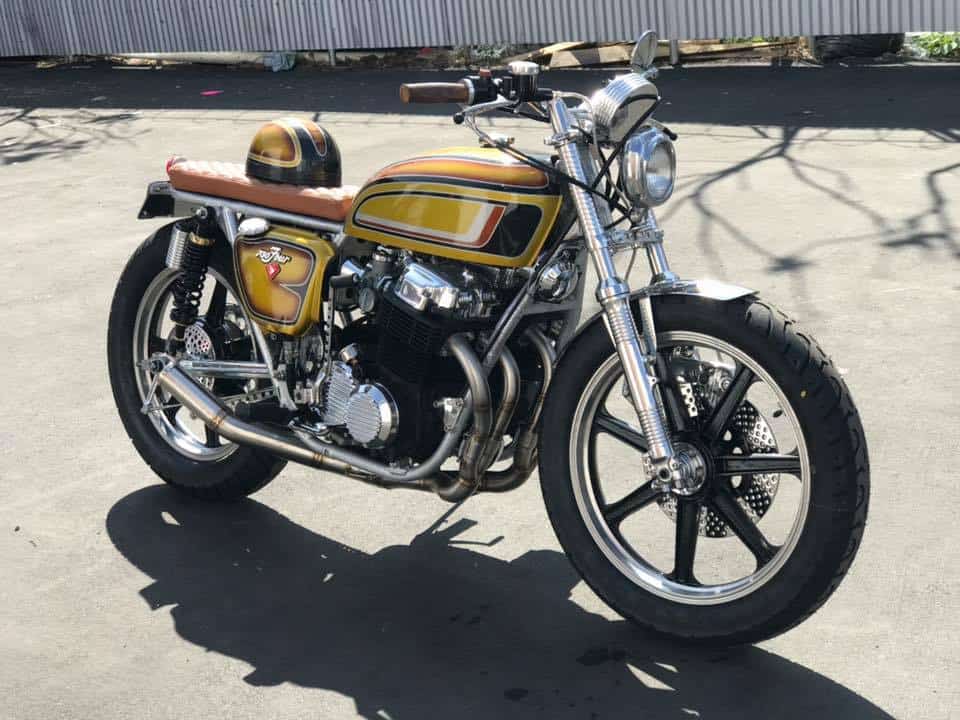
You can see the Custom paint nicely, all seems to flow really nicely and am super stoked I got the job done in time and it runs like a top, this sure is a stunning Custom bike and am proud to have completed such a creation, I just went for it and there you go, I have never built a bike twice but it was well worth all the hard graft.

Rebuilt and polished Caliper, Rotor is polished and painted and braided brake lines too, I did all I could think of on this machine, it really is a head turner.
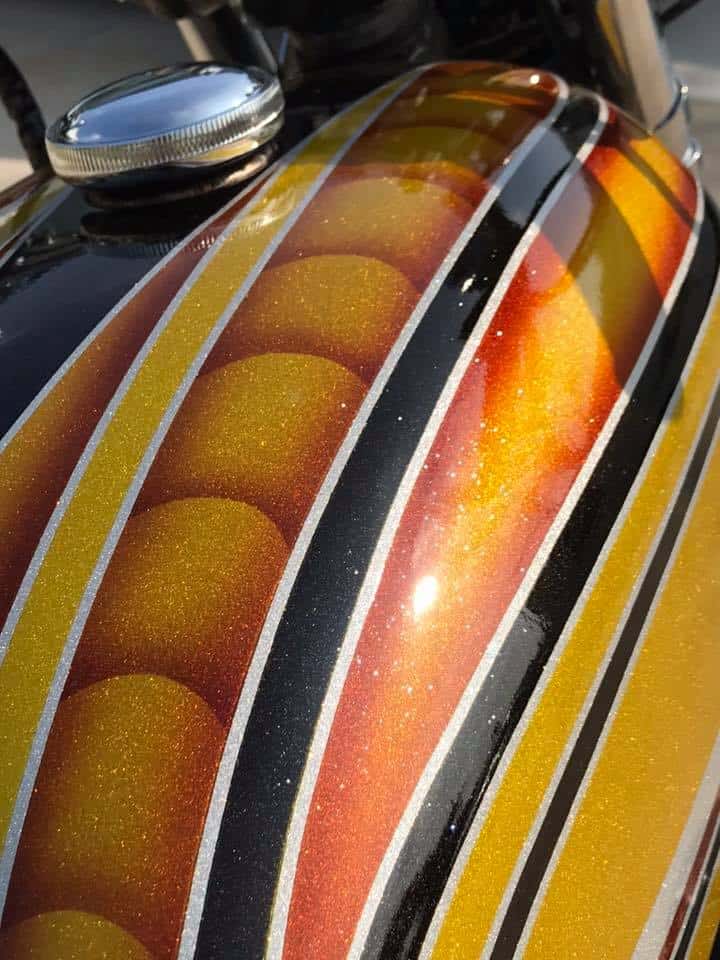
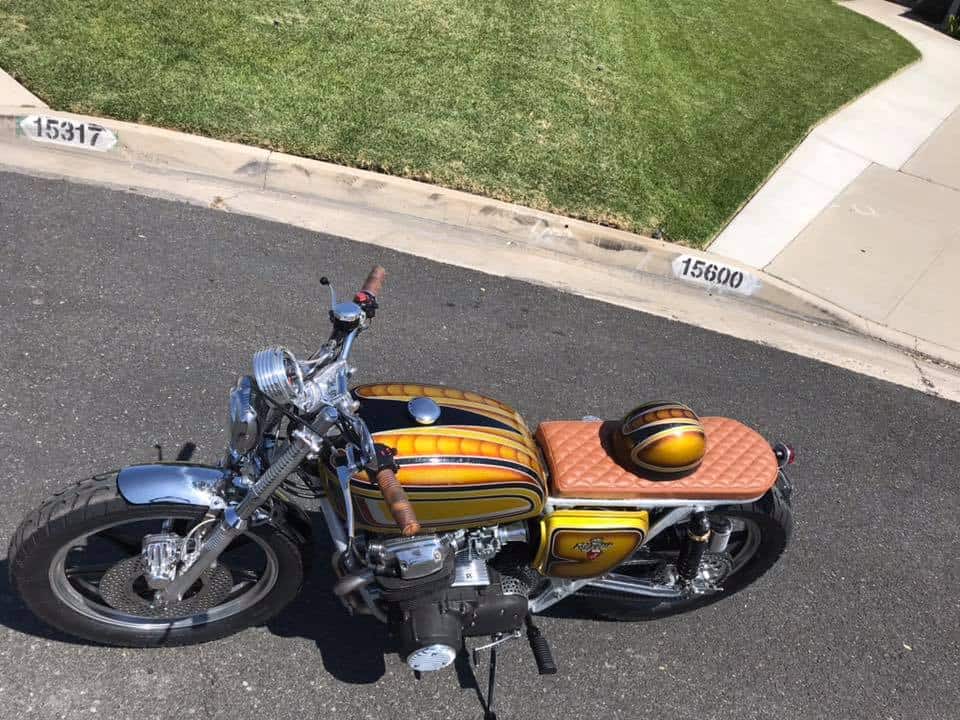
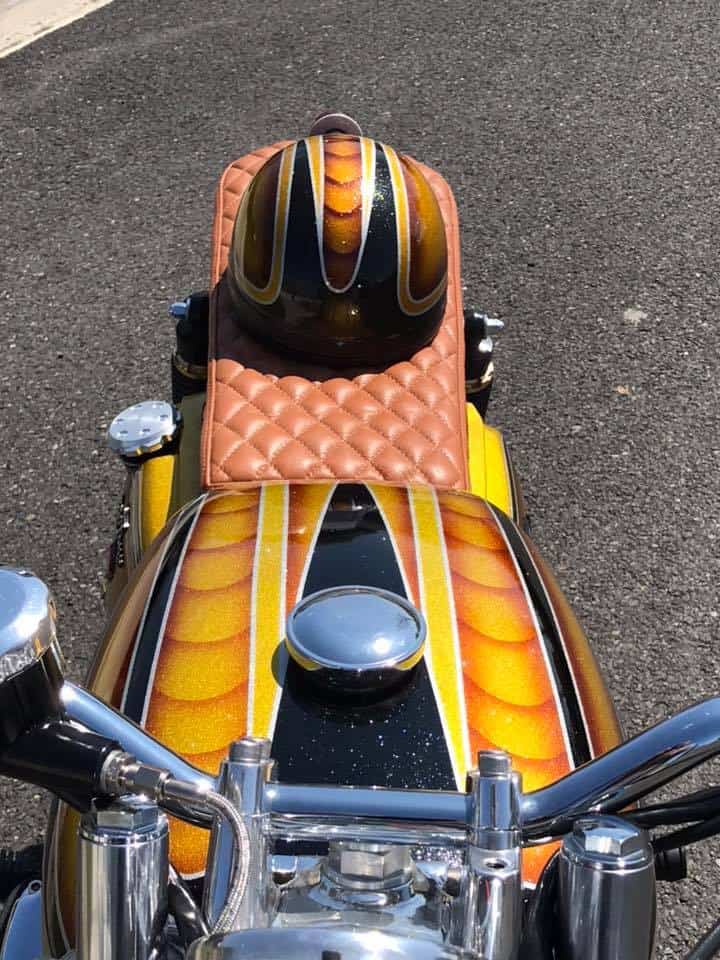
Vintage style metalflake Candy paint with fish fad aways, captures the spirit of the build and hope that you like the direction I took on this SOHC bike.
Custom master cylinder, new switches, hand made and triple chromed handlebars really do set this build apart from many but- I hope I have inspired you to have a go at your machine now?
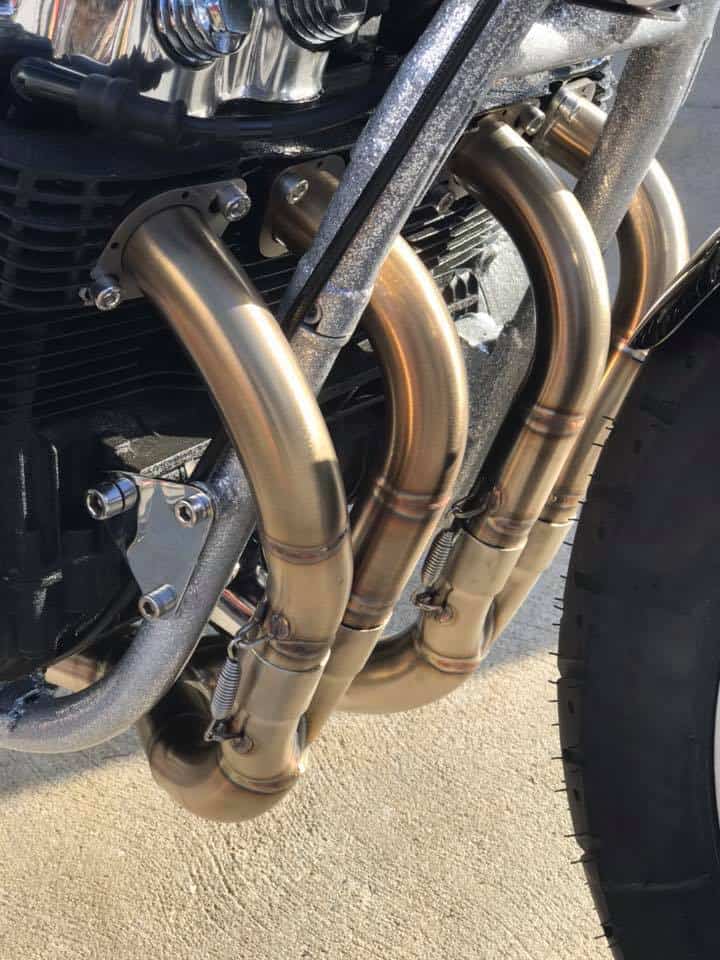
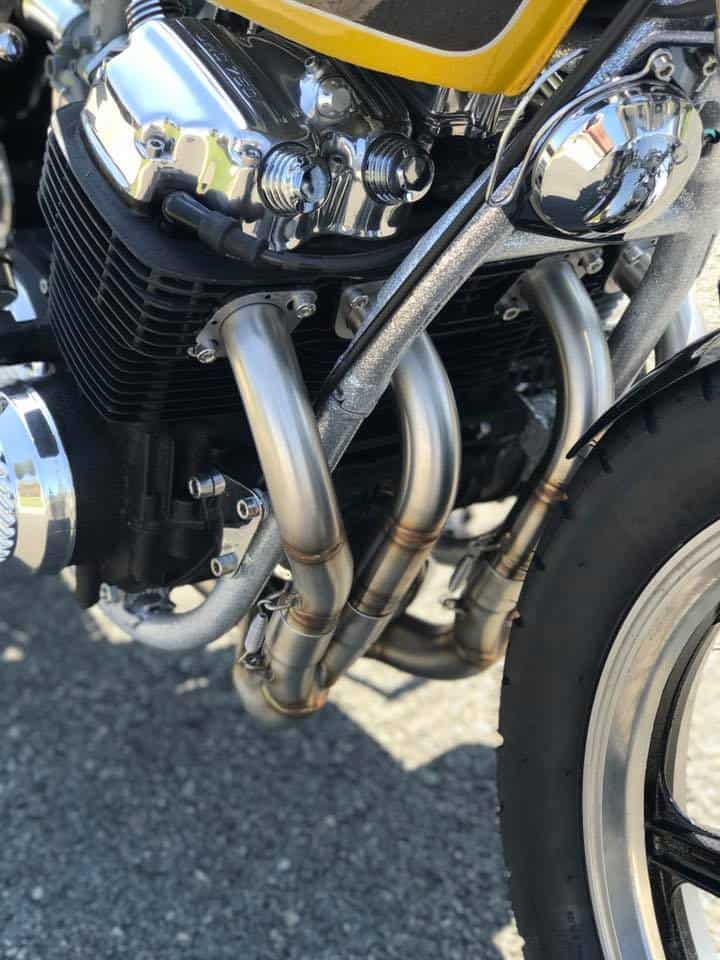
I wanted something a little different on the exhaust set up and thats why I thought I would go with a stainless steel 4 into 2 into 1 performance set up and boy does it sound sweet.
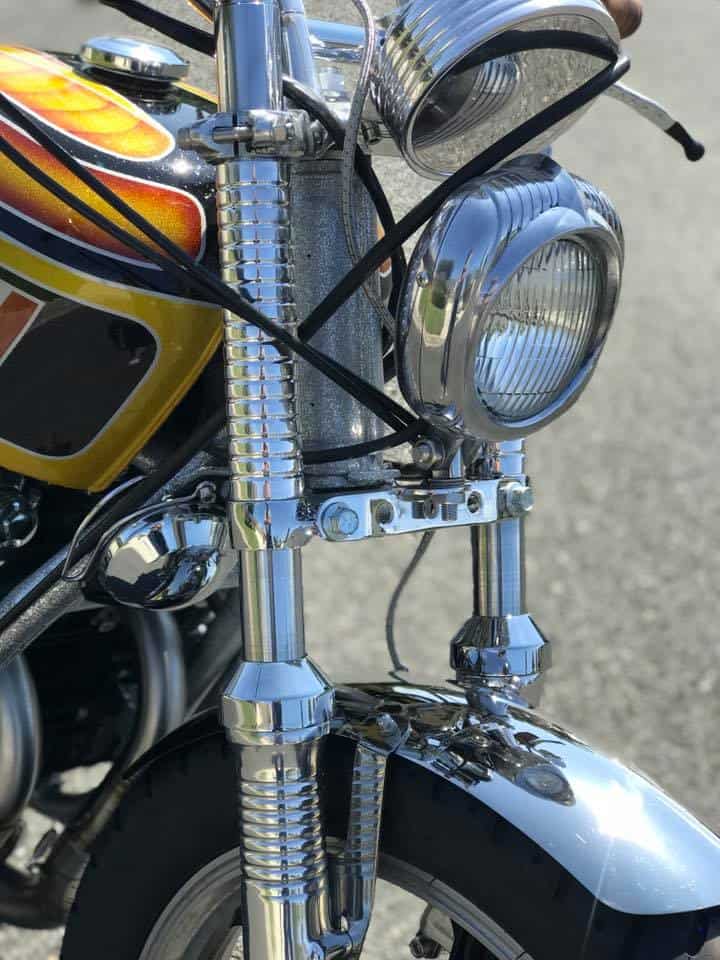
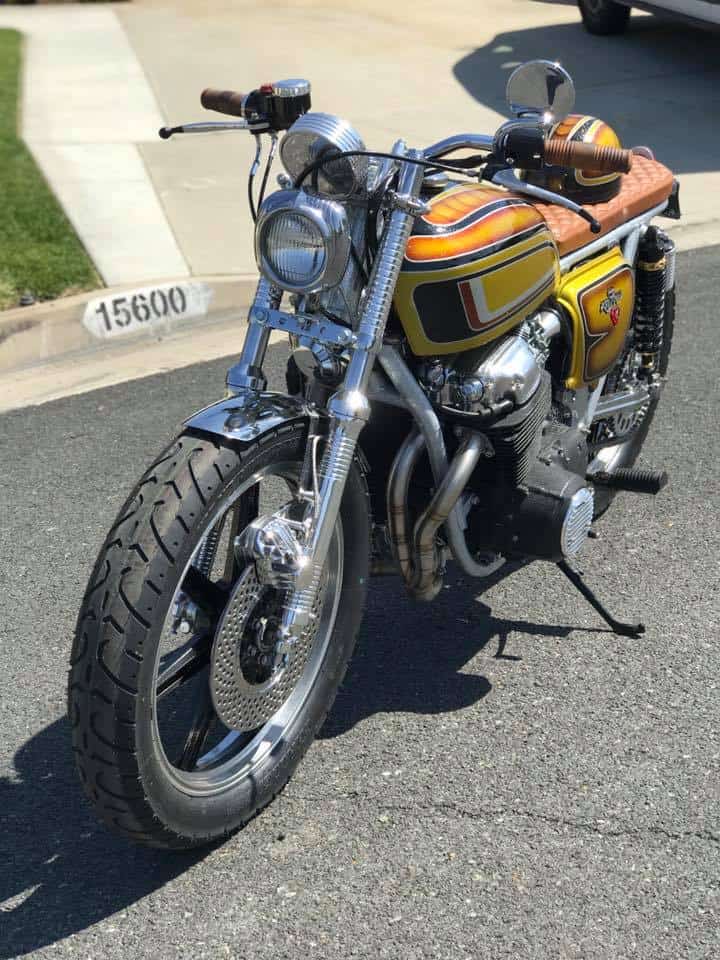
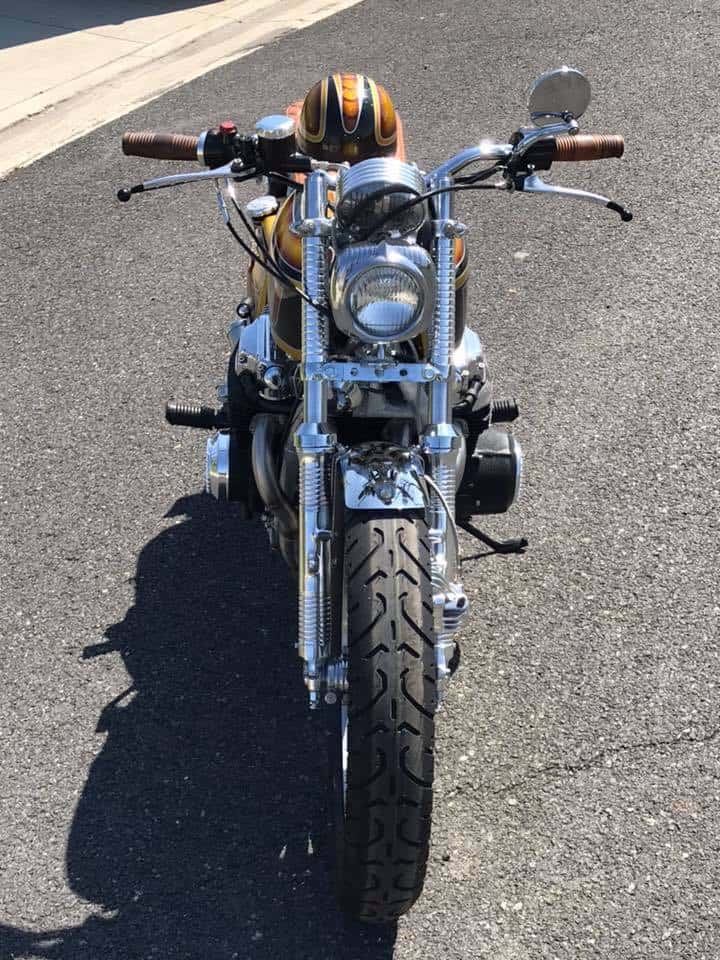
I did so many tricks to this bike, I machines some upper fork covers to match the lowers and this time I went with a Custom headlight that is so different than the others that you see, it is pleasing to the eye and I just cannot stop looking at this bike.
You can see the detail and the quick release chassis rail too, hope you like what I achieved in such a short amount of time?

Custom drilled levers, hand made front fender and a machined bucket out of 6061 Alloy to house the GPS speedometer, all flows together on this 74 CB750 Honda.
The Devil is in the detail they say, I did as much as I could in the short amount of weeks I had, but so stoked the way she turned out in the end, well worth the hard work.
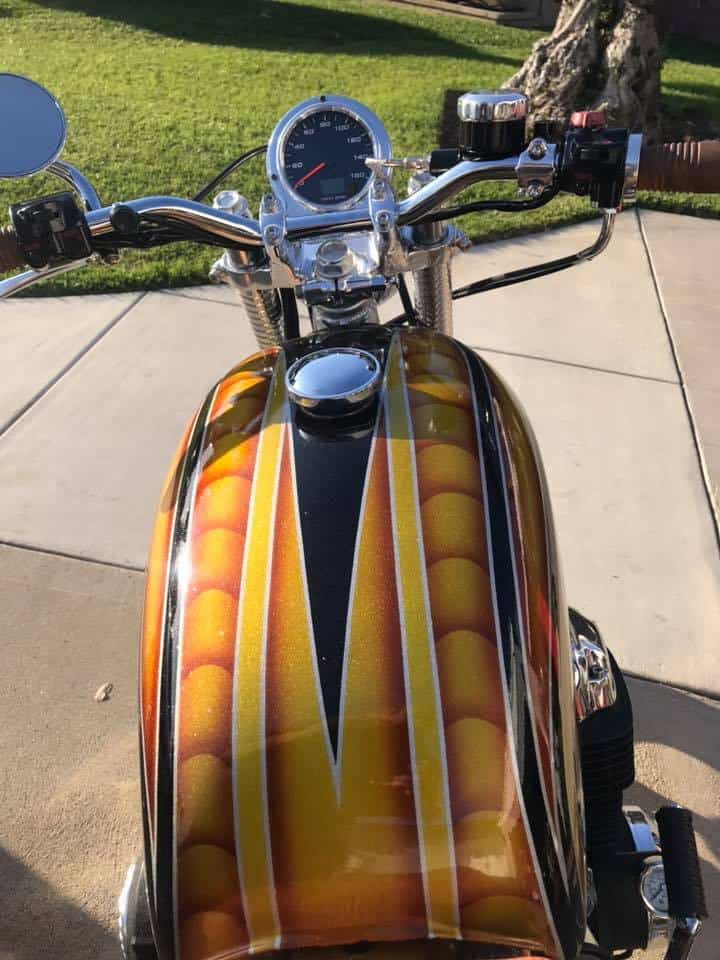
Riders view, thats a GPS speedometer and I had to hand make the housing , this really is so cool to look at from any angle, so many tricks on this ride.
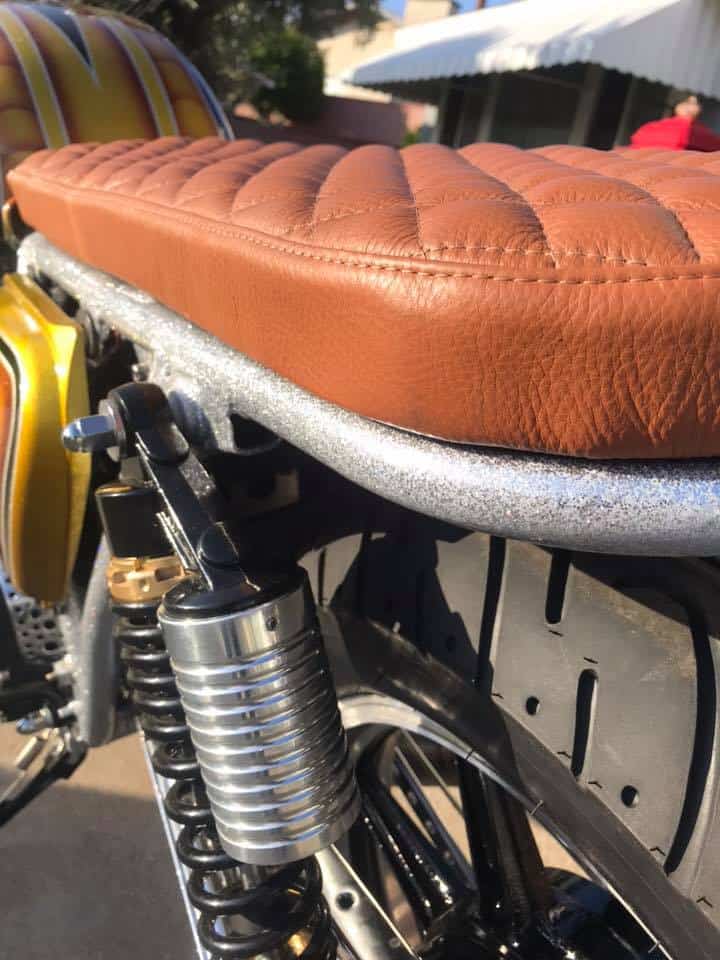
Re-charged shocks with Custom machines finned covers and 2 inch allot risers,make this Brat bike sit to the height I needed to sit my fat ass on top of.
Oh yeah- I even painted a Vintage Skid lid to match the paint scheme of the bike and think it worked out pretty good.
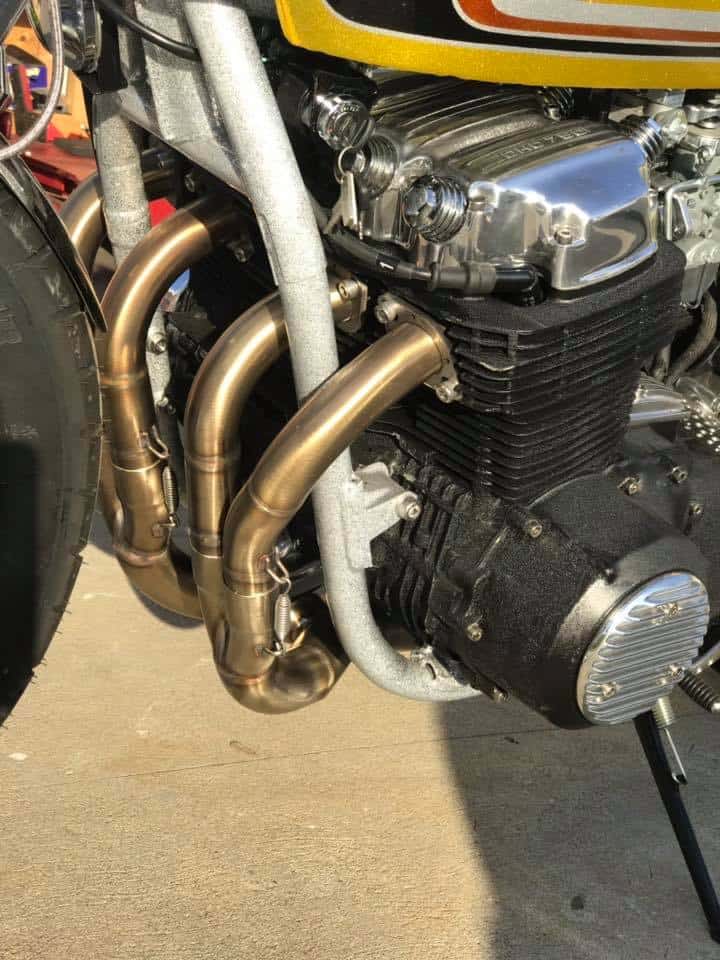
The stainless exhaust systems has a deep bellow that gets your attention, and this breathes so well it gives you Linear power all the way through the band.

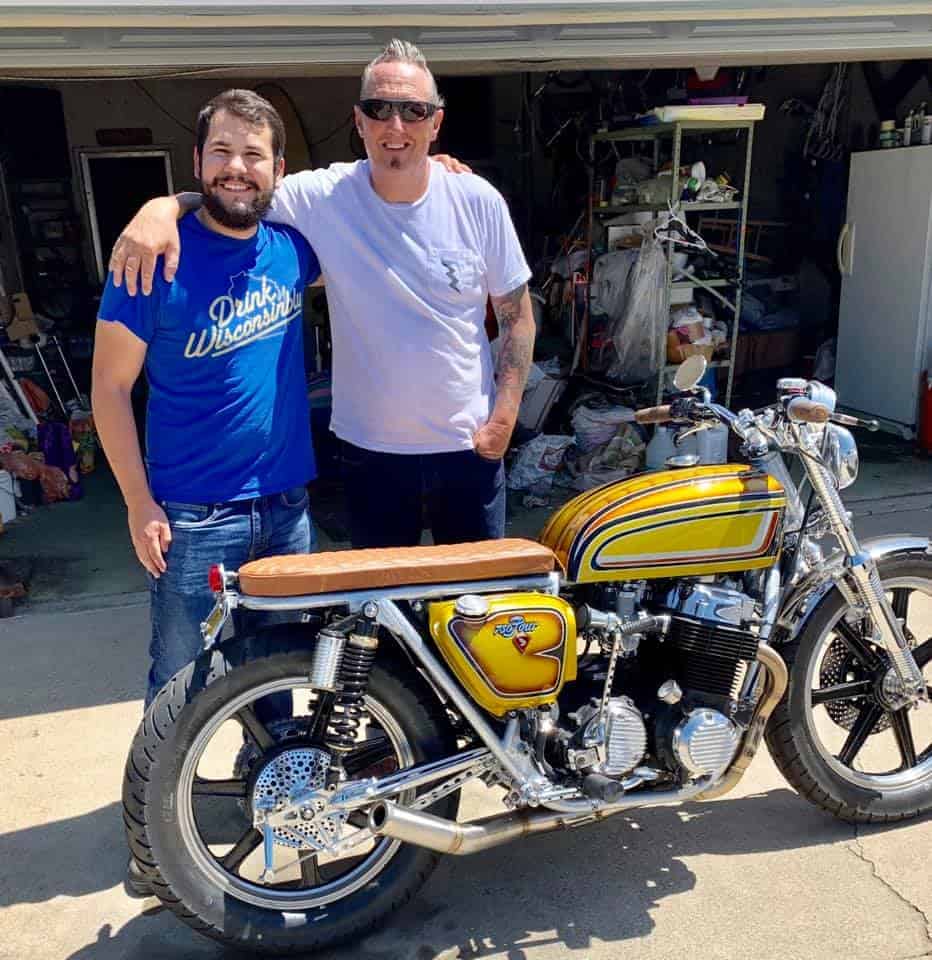
This has been a fun adventure, not sure I could warrant another build so fast but this was a fun challenge and the cool thing is that the original owner that I puchased it from loved it so much, he bought it back off me.
So many cool little Custom touches I did on this bike, I would have to take a long hard look to remember what I actually did.
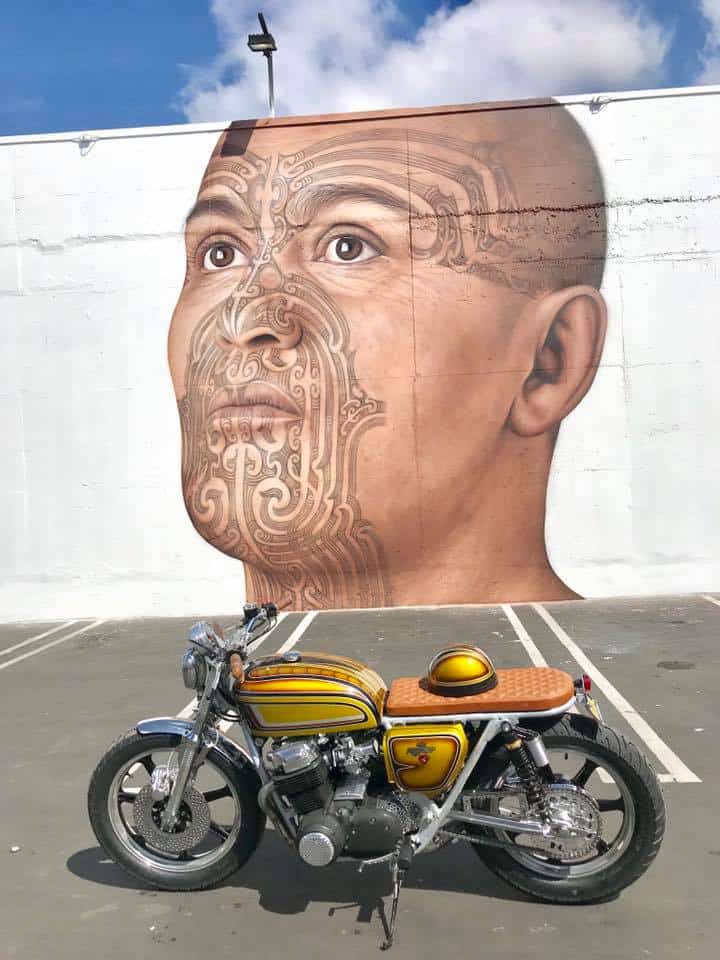
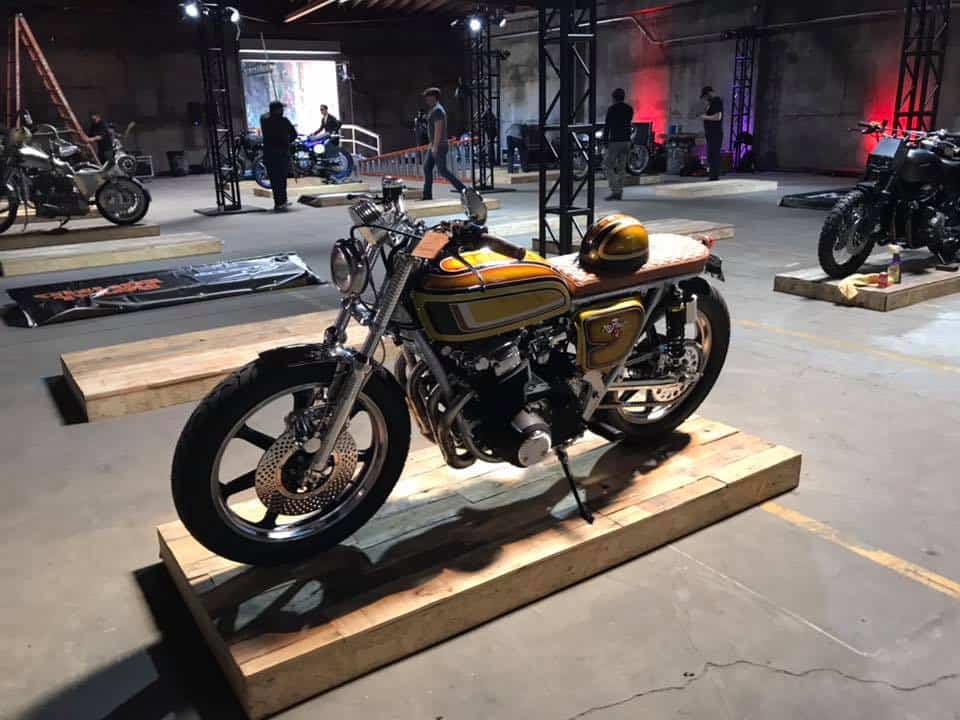
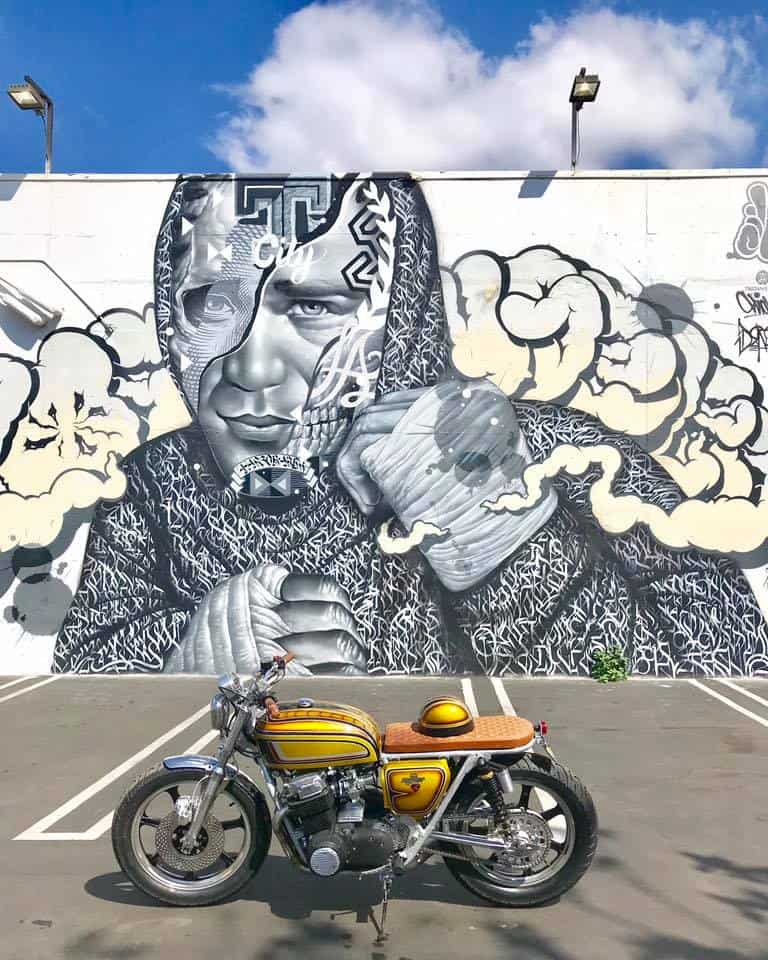
Sitting in the parking lot in Downtown LA, I got many cool remarks about the Vesco Honda and so glad that I made it in time to show people what this bike is about.
Hard to top this build but, I love creating them and hope I can continue having fun with this old 750 Honda bikes of the Nineteen Seventies.
Just goes to show that with a little imagination, there is a lot that you can accomplish on something, I was certain I would get this completed for the show too.
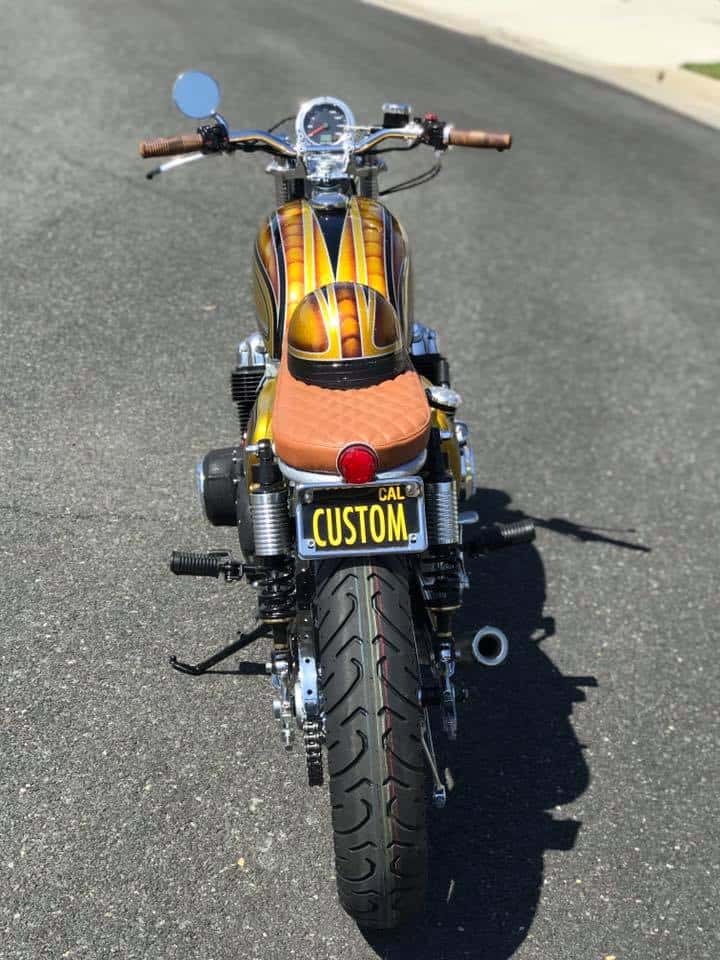
Plenty of eye candy and color, hope that you like what I have managed to create.? The good old SOHC Honda Four.
Took me some time to figure out the finned aesthetics etc but the long process worked out really well and all seems to flow very well on this Custom Build.
This bike does look really well in the sunshine too, all the nuts and bolts are stainless steel too so no rust ever.
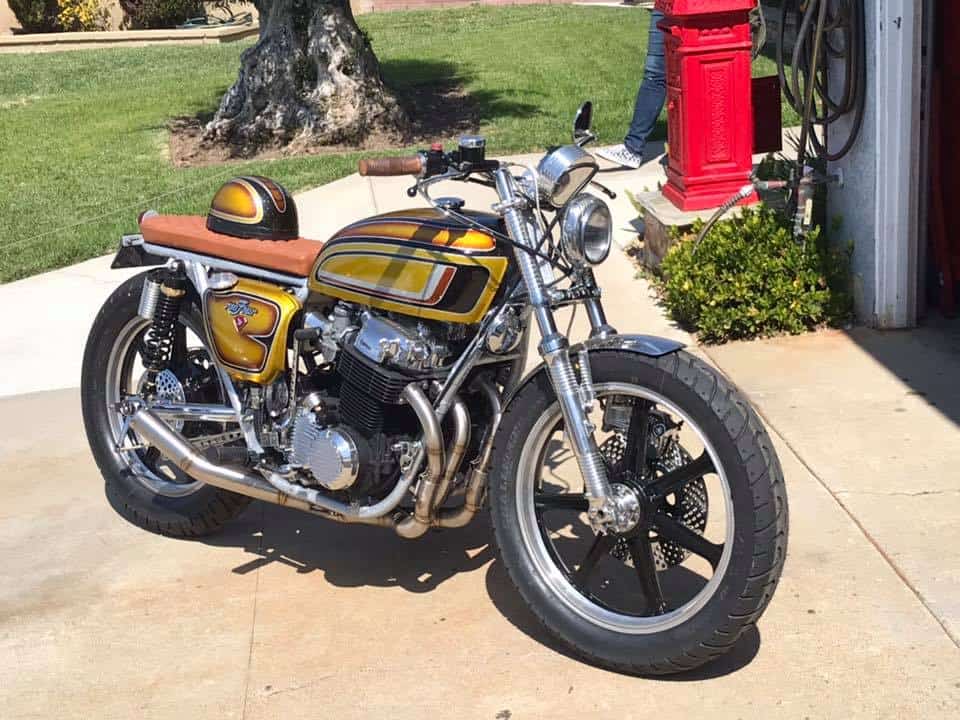
The Vesco Honda sits pretty level and you will be surprised how comfortable this Motorcycle is, I sure miss it already. LOL.
A tough bike, super strong Motor and sits well, this will last many many miles and hope to see it again one day.

Thanks for taking your time to read about this Vesco Honda build, I hope you have enjoyed what I have created?
Sat in my driveway before I took it to the Original owner in the City Of Orange.
Well I guess its onto another build, hard to top this one though.
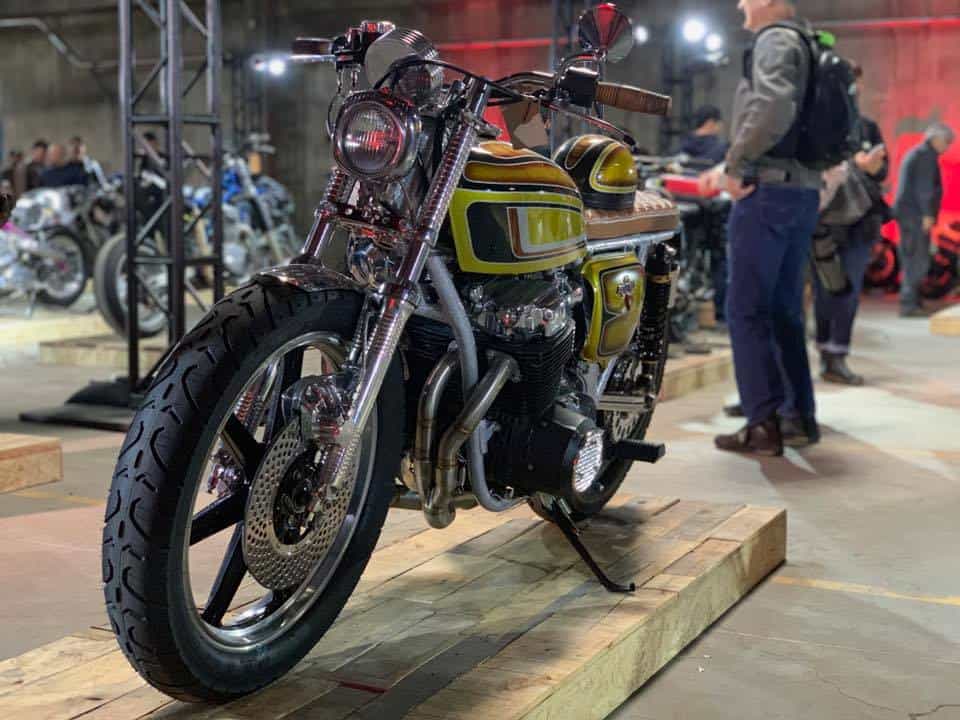
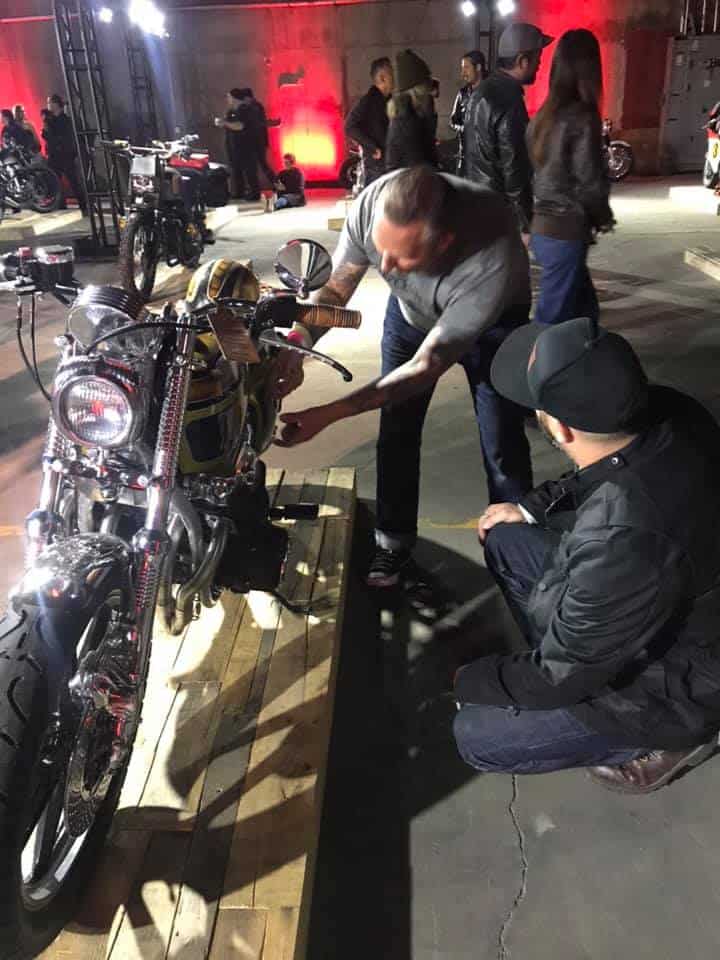
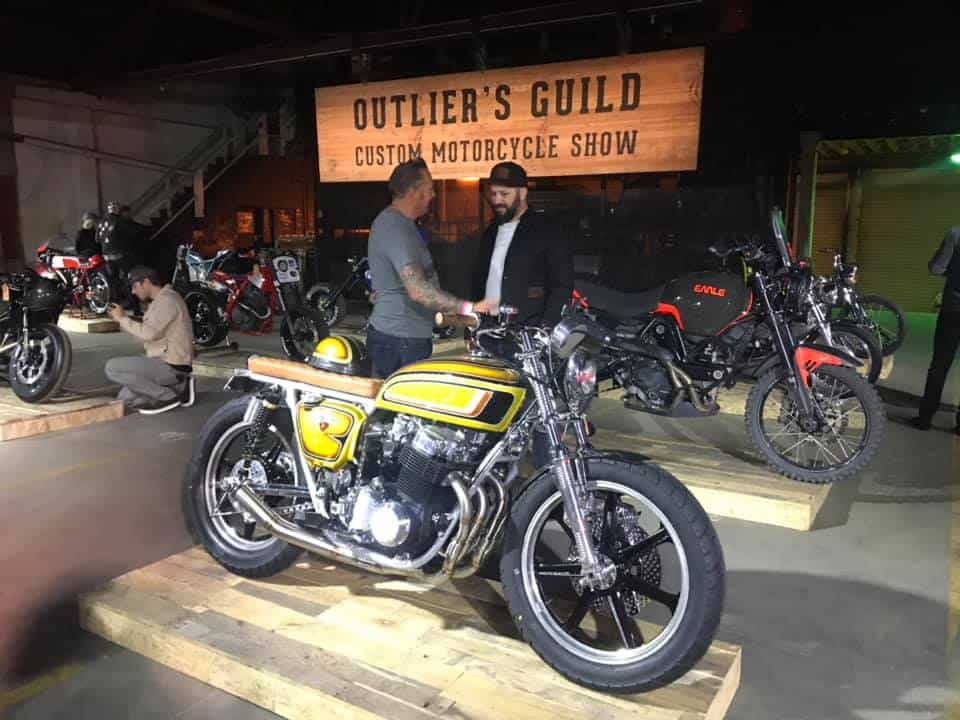
At the OG show in LA where the Vesco Honda made its Debut and many people gave me the thumbs up.