Honda Santee Chopper, replacing worn out engine covers

As you may know, I picked up an old Santee framed Honda Chopper in a Local Garage a while back, progress has been slow as I am making parts for it to offer to the Chopper builders that are all around the globe, but i noticed that the engine case covers were looking bad.

The covers had been chromed, and as these are aluminum, the material gets hot and then cold and sweats, causing the chrome to bubble as it can’t expand like aluminum does, so it had bubbled, peeled and then started to corrode the aluminum, so I thought I would try and repurpose some old spare covers I had by polishing them to a chrome finish . As you can see from the photo above, the transmission cover was removed and the old gasket was toast, so luckily I had a New one in my cupboard as well as other parts needed to refurbish this area of the bike.

I removed the stator cover, but it took me a while to get this sorted as that round dark blue plate that is on the starter collar, fell off and hid behind the crank sprocket, took me a bit to fish that puppy out but never lost hope and now it’s time to remove the coil winding and the infield coil that are screwed into the case, I also leant the bike over and placed a blue tarp on the floor, as I did not want to drain the New oil that’s in the bike that I put in when I got the bike running for the first time, I knew I would lose a little bit of oil, so placed a catch tray under the chassis to save any catastrophes that could occur on jobs like this.

Make sure that when you remove any Factory Phillips shaped screws on your Honda- That the screwdrivers are JIS models. ( Japanese Industrial Standard) as regular Phillips screwdrivers will most like round the screw heads off.

What is the difference between JIS and Phillips?
JIS, or Japanese Industry Standard screws are just different enough in shape that Phillips drivers will not fit well and slip/strip them. The difference is in the leading angle of the point of the driver. Phillips bits have a larger angle and therefore don’t bottom out in the JIS screws, causing slippage.
Also, make sure that you use OEM Factory Gaskets, as the aftermarket versions not only fit badly, usually the holes do not all line up and the gasket seems to be inconsistent in thickness, I did learn the hard way, thinking I would save a few bucks on the cheaper brand, only to find I had to take the case all apart and fit OEM ones to stop the leaks.
Glad that I managed to get some time to work on this old girl today, she was left in an old garage in La Mirada for many years, sat on a pile of dirt and then covered with years of hoarding, so I will be happy to have it running and use it for a bit, before I put her up for sale, its a good looking rig now and I am sure when I have the New Stainless exhaust system on, it will find a new home ok.
I have lost count of how many SOHC motorcycles I have built, let alone worked on but in the hundreds for sure and always something different to find on some, I love what I do and continue to offer service for customers all over the world.These inline four Motors are fantastic machines and have given me many miles of smiles once they are tuned right.
Covers are on now on this side of the bike, still got to add a finned cover on the stator and fit another gear shifter as the old one is a horrible welded thing that I do not want to use, then I need to turn the bike around and remove the clutch cover and give that the same treatment.
On closer inspection of the front drive sprocket, I see a couple of issues here, the offset is out a little as the sprocket is wearing against the side of the chain and secondly, the sprocket that is fitted is an earlier version 530 and 77 and 78 Motors had 650 chains, I will fit a 540 but will address the issue here and have a sprocket on the way as I do not want any dramas of the chain breaking and destroying the cases.  Also, Chops have super long chains so need to count the links so that I can buy a custom one to replace this tired version.
The Old girl was looking tired, dirty and in need of a good clean up before any polishing can take place on this part, I always like to vapor hone these, that way the material is super clean and ready for some serious polishing, using some good old Jewelers Rouge.
Time to change the look of this 40 year old girl and turn it into something fresh and clean and to be honest, look like a brand New factory part, now I could refit the part in its OEM look but want to polish the piece to a chrome finish seeing this is a Chopper and not a restoration bike.
Now you can see how different that the Clutch cover looks after a process of vapor cleaning and now this part is ready for another transformation and get it polished up for that Custom styling that is so popular.
I am going to try and vapor many parts before I polish, as it makes everything so much easier to buff with no oil residue or grime in the way when I begin the Polishing stage, I am sure that you agree that this way is way better than the old school way? Now, the stator cover that’s on the bike is chromed and all peeling off, I want to use a spare old Stator cover I have and will vapor hone it to make it clean before trying to polish it.
This  spare old stator cover was just as tired as the other parts on the inline Four, and I am sure that yours looks in the same way too???? This Chopper will not be a show winning machine but a traditional Custom bike that was created back in the day and want to try and show what was in the magazines in the 70’s and 80’s when these were seen all over the place.
There is a bunch of old dings and scratches in the stator cover but many will buff out luckily and then it will have an old Finned cover going on the outside to embellish the engine as I have other finned covers on the bike, also these parts are getting harder to locate and finding some parts in my boxes of old stash came in handy but of course, still needed a lot of work, but the other one on the bike had been chromed and was peeling off and oxidizing badly, so this is the better way to replace it i think?
There is still a ton of stuff to do on the bike but wanted to share this with you today as it’s almost the weekend. Here are a couple of little videos that I took with my phone to show you what I am doing as the weather was raining outside, hope you enjoy?

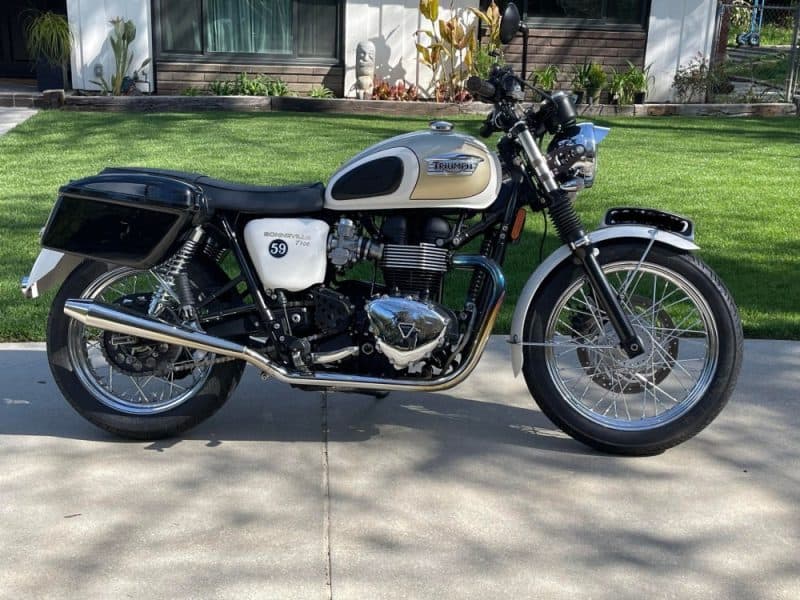
Triumph Bonneville 2014 T100 FOR SALE $6500

Up for sale is my Girls Triumph Bonneville T100 Special, this bike is a turn key model and ready to have fun on the tarmac this summer, cleaner than a cats arse and a lot of fun to ride, this twinline is a great all round Motorcycle that will give you many miles of smiles that’s for certain.

You are looking at a very well looked after and maintained Triumph Bonneville, this is Jennifer’s personal bike and I have made sure this has always been in great condition, fires right up and has a velvet tone that exits from my Own Stainless Steel Dunstall style megaphones that I hand made.

If you are looking for a well loved and treated Motorcycle, hard to beat this one, never thrashed, over revved or misused, this T100 runs like a well oiled Swiss Watch and it seems to be quite the head turner where ever it travels too.

This Bonneville has been regularly serviced and Recently had New Fuel Pump and New Battery installed at Triumph, the bike has always been garaged and not left to the elements that many are, so a great opportunity to have a low milage un abused Motorcycle that will not let you down.

This Motorcycle has had some upgrades, like Led Brake lights, Stainless Exhaust System, BC Handlebars, Custom Grips, headlight Visor,Pedestrian front fender License plate, Polished Front fork brace to give great stability. And of course engine side covers have been triple chromed and polished to show quality.

You will also notice that this bike has a set of Saddle bags attached, these are removable but so handy and they have been used many times on our travels, a god send to fit jackets, gloves and tools etc for long trips, I Used Triumph brackets for the bags and then fitted Black ABS Luggage bags to them. I was going to paint them to match the tank, but- they were so useful, we could never take them off lol.

The Triumph also has LED turn signals that get you noticed, a New Battery Just added too, a very clean bike that anyone would love to own and ride of course, the bike has been well looked after and will be missed when she is gone.

Comfortable Custom Metalflake grips give this machine that 1960’s feel and the exhaust tone is like no other Triumph out there, handmade by me and tuned to run to them, this bike is great on gas too.

Below is the Mileage as of right now.

A great Motorcycle for any rider, the power is smooth, linear throttle increase, makes this bike a cinch to ride and enjoyable all day long, this will look at home in any stable.

If you are interested then the bike is $6500 and have pink slip in hand, current tags too and ready to ride home wherever you are located, a fun machine that will make you smile right away.

Give us a call on 714-598-8392 or text on the same number or email me at carpy@carpyscaferacer.com

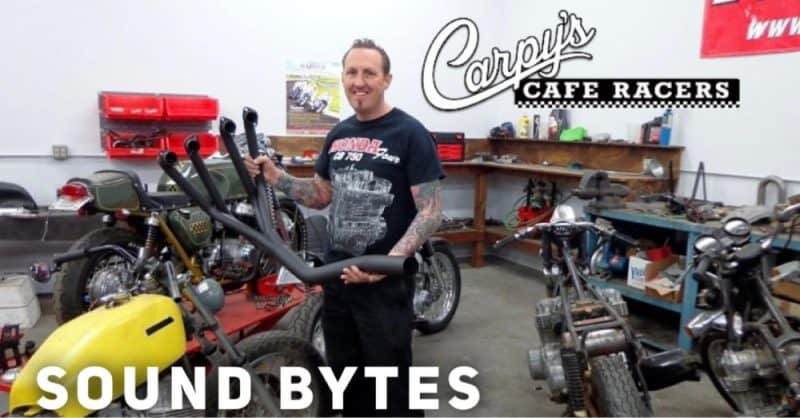
Exhaust Systems I manufacture- Sound Bytes From Customers

Howdy one and all

Here we are once more with a small Blog, this time I thought I would look about for some sound bytes of my exhaust systems for the Honda and Triumph etc, I have been selling these for 23 years now and continue to make more performance systems for other makes as I continue to help the Motorcycle fraternity with well made American Products.

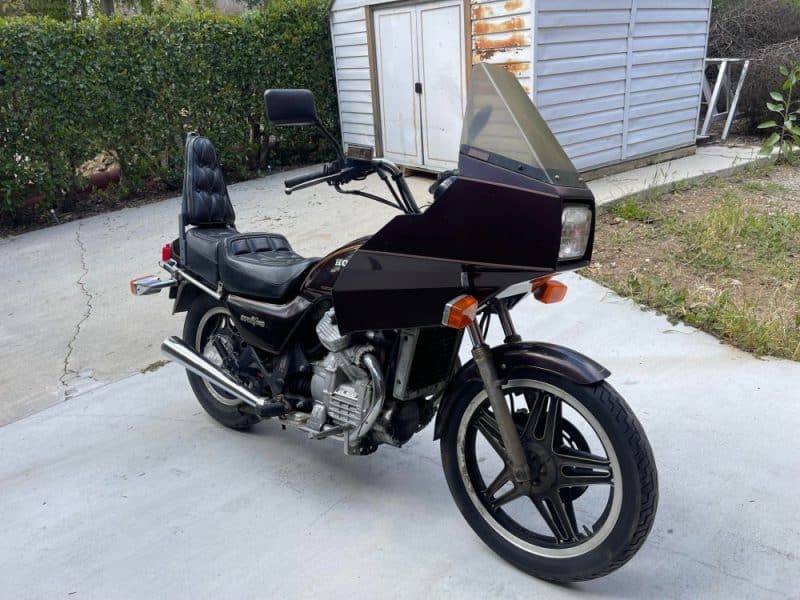
Honda 1981 Silverwing now running good.

Well, it took a little bit of fudging about etc, but the old bird is now running and idles well, all the white smoke has gone, no smoke at all, a real bonus.  I will probably have a go at adjusting the cam chain, but without a kick start its a pain in the arse, oh well, at least she runs now,

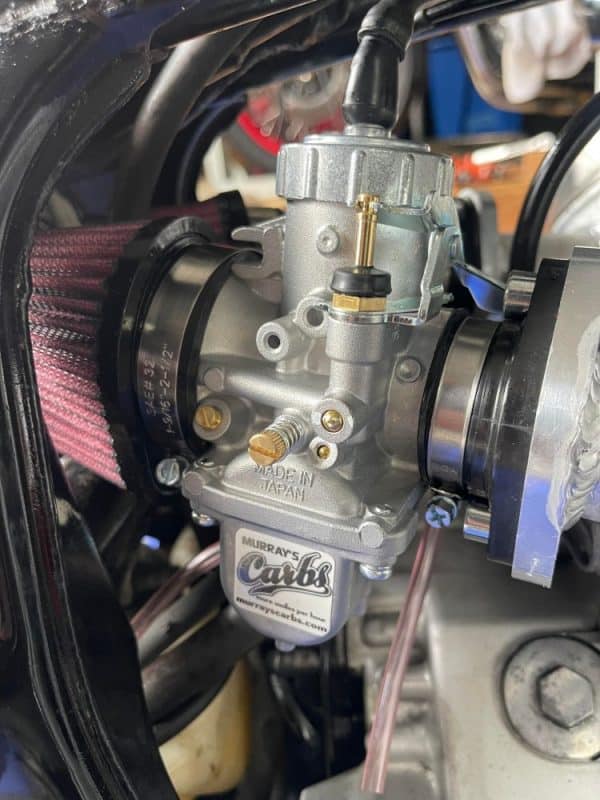
GL500 1981 Silverwing Carb replacement

Busy day and trying to beat the rain storm that keeps on coming in then out etc, but I was prepared for it and got a lot done today, considering this is my first GL500, no books, service tips or much info about on these 22 degree road machines, but the CX is similar so at least a fighting chance at getting the carbs off and new ones put in place.

With the old manifolds removed, I cleaned the intake face area up with Carb cleaner, I made sure also that I dabbed a little grease on the O Ring that seats into the new Aluminum intake and then hand tightened the bolts to see how the angle was for the carb kit to fit to.

I am sure glad that I did take the extra time to clean up all the area that had grease and grime and these intakes fitted like a glove, but now the fun begins as there is not a lot of space inside the frame rails to work with and the carbs plus air filters are going to make it tight to do anything but here goes.

I got the intake manifolds all sorted out, apparently the CX500 is even tighter in the frame and apparently I was lucky I had some maneuvering room to get these carbs to fit.

The trick for me was to put a little grease onto the rubber manifold, to allow the carb to slide in easier and this sure did help as I did try it dry and I struggled, so I was stoked when these plopped into the manifolds.

The same with the Air Filters, pretty tight inside the chassis but with a few curse words, a dab of grease and they fitted up no problem and look pretty cool.

Both these girls are in and I will hook up the new battery, add fuel lines and connect to an auxiliary gas tank that I have on a stand, as the old tank has bad gas in it from sitting for years, but I have not hooked up the throttle cable because I want to try and run this as the carbs are pre set, so they will idle high for a bit until I take both chokes off, so will leave one choke on and see if she runs. I am sure there will be a ton of white smoke coming out of the exhausts as I poured some Marvel Mystery Oil down the bores to lube everything.  Sometimes Piston rings will stick and marvel is great for bores, but it will have white smoke as I also put some WD40 in the bores to and left it for a few days.  I do this with all motors, it cant hurt it and eventually will burn clear.

HONDA GL500 SILVERWING, Carb removal

Well, the 22 Degree V Twin is in my workshop and now the  fun begins by removing the carbs, this bike has 47,000 Miles on the clock but no idea how many real miles are on the motor, but to be honest it does look fairly clean, except where the oil and grease tend to stick.

With the old plugs removed and New ones ready for later, I poured some Marvel Mystery Oil into the Bores as I have no idea when this last ran, the tags say 2006 but no idea when she ran to be honest, so thought that marvel will help the rings for sure as I use that in my Flathead Motor to keep the valves from sticking.

She has been sat for many years but I have seen way worse, I rode the CX500 for many years but never had a GL500 but pretty much the same motor, so now the fun begins as I have to remove the air box then attempt to get the carbs out, I did have a look on you tube but nothing like just jumping in and having a go, quite fun today, albeit dirty and oily but love this sort of stuff.

By the look of it, the frame is way more forgiving than the CX model as the airbox wasn’t too much of a struggle to get out and as I am not putting it back in, I can make a sigh of relief as the New carbs should just bolt right on.

Still, it is out now and whilst I was there I pumped the suspension up as it was on the ground almost and bunged 65 pounds of air in that Mono shock system, I really prefer twin shocks if truth be known but beggars cannot be choosers.

Well that’s that out of the way, right, next up is to make a start on these carbs, I’m used to a rack of 4 carbs these days so these seemed a little easier to get too but the cables were a bit of a pain comp[aired the CB750 and CB550 versions I usually work with.

I undid the hose clamps on the rubber intakes and then set about with an 8mm Ratchet wrench and undid the mounting bolts on the aluminum manifolds, te inners were a little awkward but I was persistent and got them to crack undone with no real issues.

I can see all that Oil and grime in between the cylinders and when I get the carbs off, I shall spray some st100 on it and remove it with cloths etc, may as well as thats the best time to get any sort of access to that area and with carbs on, its almost impossible to be able to reach your hand in that area.

After a few swear words and a good use of a screw driver, I managed to get the carbs out of the frame, way more room on a GL500 than a CX500 for sure, but still a bit of a struggle, the cables were the push pull variety with the 2 10mm hex nuts but a pain to remove the cable nipples from the arms, but managed to get them off, the choke was pretty easy as it is just a screw and bracket holding that.

Look at all that grime from years of riding etc, I am glad that I can now get in there with a rag and some ST100 cleaner to get the majority of it off and use a cloth as I dont want to use water, a long laborious job but I will clean it up and get it looking way better for sure.

From the right side you can see the oily substance that has sat itself here for many years, but usually if you can get it off, it kind of protects the casing underneath and it should come put quite clean after a bit of scrubbing.

Not show winning but so much better, I mean, how far should I go, I just want the bike to run, then make the new 2 into 1 exhausts for it, soon as the New Carbs arrive I can fit them.

So, I am now ready to top up the radiator reservoir tank and have some 50-50 in my Hot Rod, so will use that, and then I will call it a day and get on with some other stuff whilst I await New Carbs n Cables from Murrays.


HONDA 1981 GL500 Silverwing – Making 2 into 1 Megaphone Exhaust Systems

Hey Guys n Gals

Well, I picked up locally a 1981GL500 Silverwing the other day, Non running, purchased on a whim, not run for many years, Only just got it home last night as we had bad weather here, but it seems all there, the main reason is I think I may make some 2 into 1 exhausts for it and I think the CX500 is pretty much the same too? I have had a few enquiries so hope to make a start soon, let me know if you would like a set?

But this week I will tinker with this old girl to see what state the motor is in, if the carbs are goosed, I will invest in a New set that a buddy makes for these and see how that goes but, I will fit a new battery, New plugs etc, change Oil and filter and then see what we have as she rolls along fine, brakes work etc so may be lucky and get her to fire up if I run a seperate fuel cell to the carbs, if I have a spark, I am halfway there.

It is a liquid-cooled, 80-degree pushrod V-twin, with four valves per cylinder, displacing 497cc. Unlike some liquid cooled engines that are disguised to appear to be air cooled with bolt-on cooling fins, the GL 500 engine made no such pretense. The engine’s skin is the smooth exterior of its water jacket, with only a few minor ribs cast in on the rocker covers and lower crankcase.

The engine’s transverse orientation in the frame placed the cylinders protruding from the sides of the bike. This arrangement has obvious advantages for an air-cooled Moto Guzzi engine; it places the cylinders and heads out into the air stream for maximum cooling effect. For a liquid cooled engine where that air flow doesn’t matter, it creates a rather odd, lumpy appearance.

Adding to the oddness of the engine’s appearance, the cylinder heads were rotated 22 degrees from the axis of the crankshaft. This was done to create a straighter tract between the intake valves and the 34 mm Keihin constant velocity carburetors.

While this improved engine aspiration and performance, Honda made no attempt to conceal the design and as a result, it creates the appearance that the rocker covers were put on the engine askew.

For those of us brought up on vertical twins with nice, symmetrical barrels wrapped in cooling fins, all these angles, rotations and finless surfaces are a little radical. This set-up took some getting used to, but once done, it was easy to not only tolerate it, but to appreciate its surprising power and efficiency.

It’s even possible to get used to the torque reaction pulling the bike ever so slightly to the right when cracking the throttle at a stop sign.

 The GL-500 has an exceptionally light clutch that’s a joy to use on day-long rides. Power reaches the rear tire via a low maintenance drive shaft. The five-speed transmission is an easy-to-use, positive shifting thing that in my mind could have been improved in only one way—the addition of a sixth speed.

The engine’s excellent torque and willingness to rev has the rider constantly reaching for the clutch for one more upshift after fifth gear. The engine spins at about 5500 RPM at 60 MPH in fifth gear, making it seem to work harder than it should have to.

A six-speed overdrive arrangement would have given the Silver Wing a much more relaxed tone on the open road, and perhaps less vibration in the mirrors. This design might have caused an occasional downshift on long or steeper inclines, but for most flat highway work, it would have been an improvement. A sixth ratio may also have increased the bike’s already impressive fuel economy—routinely 55 MPG on the highway.

The GL 500’s instruments and rider controls are all first rate. Large dial faces on the tachometer and speedometer are easy to read. An engine coolant temperature gauge is built into the lower edge of the tachometer and a trip mileage meter is included in the speedo.

Large, easy-to-see indicator lights are carried in a separate panel between the gauges. The ignition switch, choke and front fork air valve are all up there in the cluster, as well. Even the fuses are up on the steering head beneath a flat black cover panel over the handle bar.

The double-piston disc brake up front generates just about as much braking force as you need on demand. Squeezing the lever gradually brings on gradual deceleration; pull hard, stop hard. The rear drum brake has a similar responsive feel to it, making it possible to stop the S-wing very hard in a straight line.

The interchangeable pillion seat and travel trunk make the bike more versatile in a way, as long as one has the option to pick between the added carry-along capacity of the trunk or taking a passenger; but you can’t do both.

The GL-500 wasn’t much of a pavement projectile when it was introduced and its position in the performance hierarchy of 30 cubic inch displacement bikes didn’t improve over the years. But, Honda didn’t design the bike for pulse-pounding, wheelie-pulling acceleration and top-end speed.

Over the years, the machines have proven themselves capable of accomplishing what Honda did intend them to: reliable, practical, long-term service in the mid-range touring and leisure riding class. In the U.K., many of these bikes are still in service as courier bikes and have astronomical mileage totals on them.

Its engine and drive-train combined some radical elements in terms of the transverse, finless, four valves-per-cylinder, V-twin engine with practical, proven elements like the age-old pushrod valve train.

Air-adjustable front and rear monoshock suspension was rather radical at the time for a 500 cc machine but the bike’s rake, trail and wide bars gave it a practical, well-mannered feel out on the road. Shaft drive added practicality for long, long highway miles with minimal maintenance.

1981 Honda GL-500 Silver Wing Specs:

    • Engine: Liquid-cooled 80°included angle pushrod V-twin, 4 valves per cylinder


    • Displacement: 497 cc (30.32 in.3)


    • Bore x stroke: 78.0 mm x 52.0 mm (3.07” x 2.05”)


    • Compression ratio: 10.0: 1


    • Carburetion: Two 34 mm Keihin constant velocity w/accelerator pump


    • Transmission: 5 speed, constant mesh, wet clutch, shaft drive
    • Electrics: 12 v transistorized


    • Frame: Steel tubing backbone, engine as structural member


    • Front suspension: Telescopic air-assisted coil spring, oil damped


    • Rear suspension: Mono-shock swing arm (Pro-link)


    • Front brake: Single disc hydraulic 11.0”


    • Rear brake: Single leading shoe drum 6.3”


    • Front tire: 3.50 S 19


    • Rear tire: 130/90 16


    • Wheelbase: 59.3”


    • Seat height: 30.4”


    • Fuel capacity: 4.6 US gal.

Old Video but was fun to look back at the shop in the City Of Orange

I had fun with this shop, had to build all the walls, move one wall 20 feet back, move stairs etc, paint floors and make a brick facade speed shop ewtc, it took a long time but sure did look good.

Lucky for me now I have my very own workshop/Barn, so no more renting premises, as so much money goes to a Landlord.

But wanted to share the old place to you lot, hopefully you will dig it?