Carpy’s Café Racers
The VESCO HONDA CB750 Brat Bike
Nov
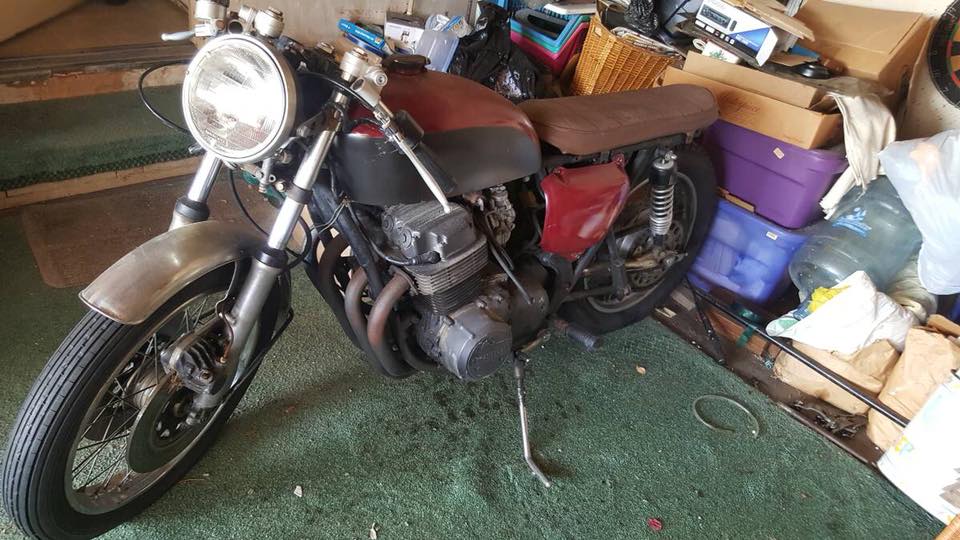
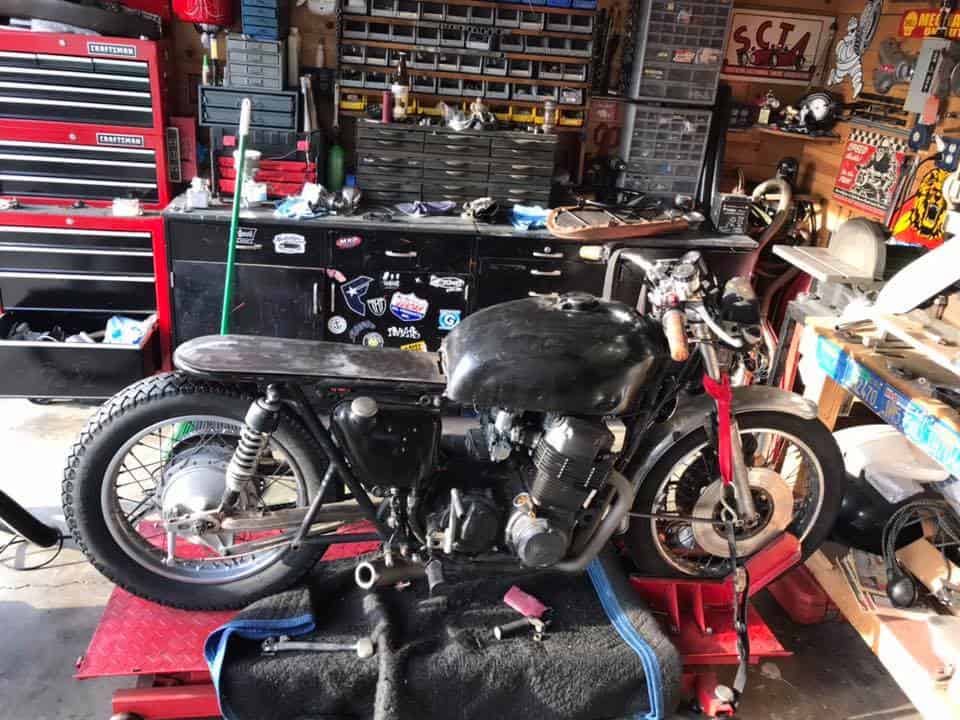
Well, many of you have followed the Blog on this machine, right now I am just enjoying the build as its running pretty darn good, so will keep it as a runaround until such time as if it either sells, or I get some time and I can strip bare and make a full custom project from this Motorcycle. But it sure was a great find, I purchased the bike though a contact and headed just a few miles down the road to the city of Orange here in Southern California to check this 1974 CB750K Honda out that had been in storage for many Many years and had not even run since the mid 1980’s.
I have purchased so many CB750’s in the past but, its always great when you have the unknown ahead of you, most of the times they are so badly damaged or neglected, that you need to take a foot pump with you and a Mallet, as the tires are usually flat and the front brake will always stick due to some corrosion inside the caliper and the Rubber mallet will release the piston so you can push the bike into your van or trailer.
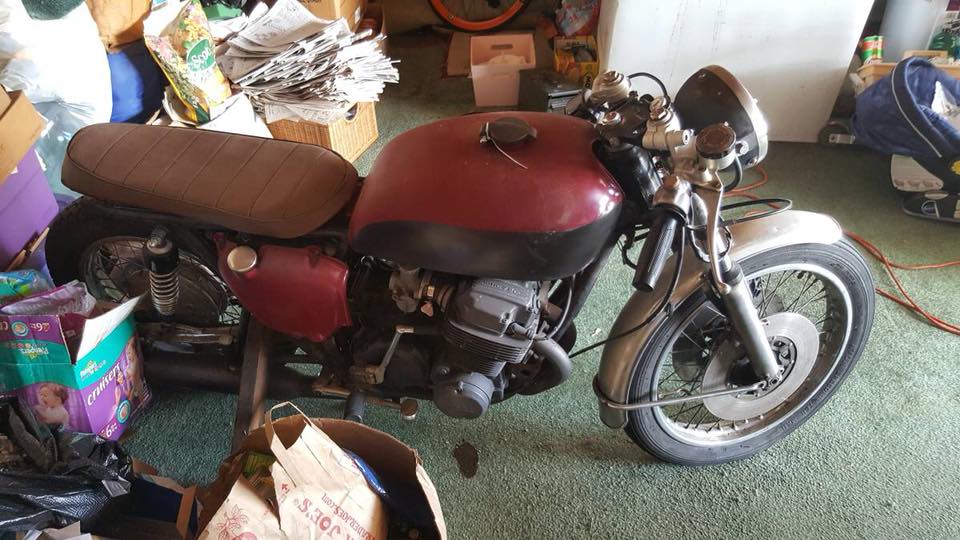
Found out that the family’s last name was Vesco, I inquired not related to Don are you? “Yup sure am” he tells me about it and this bike is actually his lads and he ran out of time, money, patience and enthusiasm on this machine and has been sat a long while. And now it was time to make some room in the garage, so it has to go, I made an offer and after a little bit of haggling a price was agreed upon and there it was, this old snotter that had a hard life but for the last 30 odd years had sat used and abused in all sorts of places, and now it was coing home to my shop to see what I could do to at least resurrect this vintage piece of tin.

It sure was hard work loading it ion the van as everything was corroded or semi seized up, but managed to get her up and into my van and then we were on the way to its new abode- my place.

Back home in 20 minutes and took the bike out and placed on a wheel chock so I could have a look at what we got, it had good potential but many people go in head strong and then kind of lose their drive in completing their dream and I purchase many machine in this guise and much worse too.
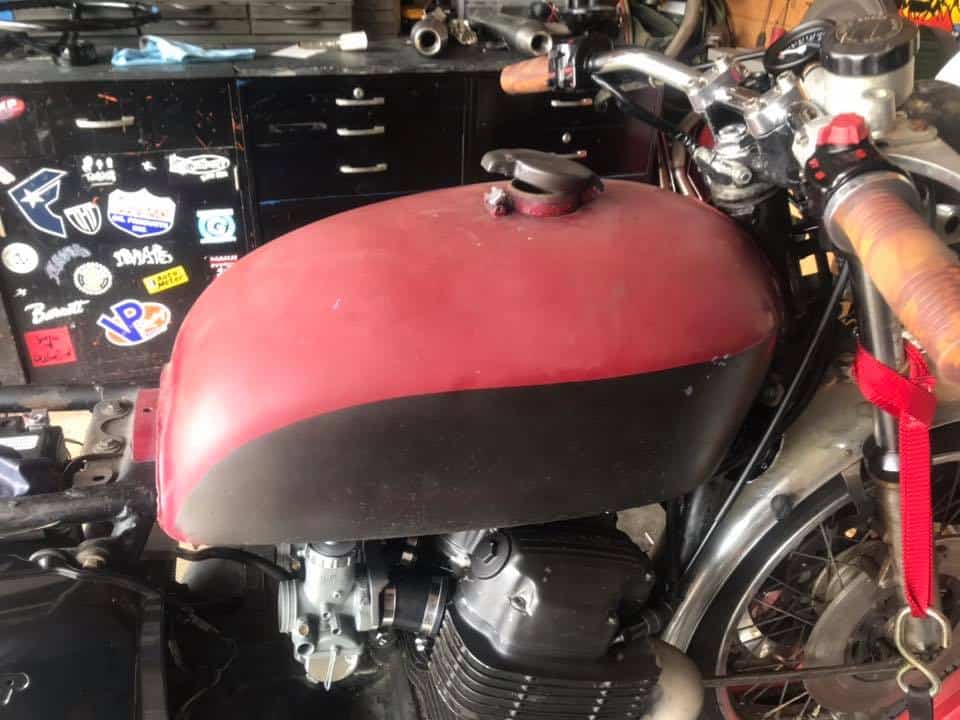
Brakes were seized and it took sometime to be able to get the bike onto the driveway on my own, the kick stand would not function as it was too long and kept getting in the way, I knew I had my work cut out but needed to know if I could get this old girl to run, as I didn’t want to strip this right away, always best to see how the motor is first before you dive in. You can see the plug caps have electrical tape over them, a warning sign that this had issues back in the day right away.

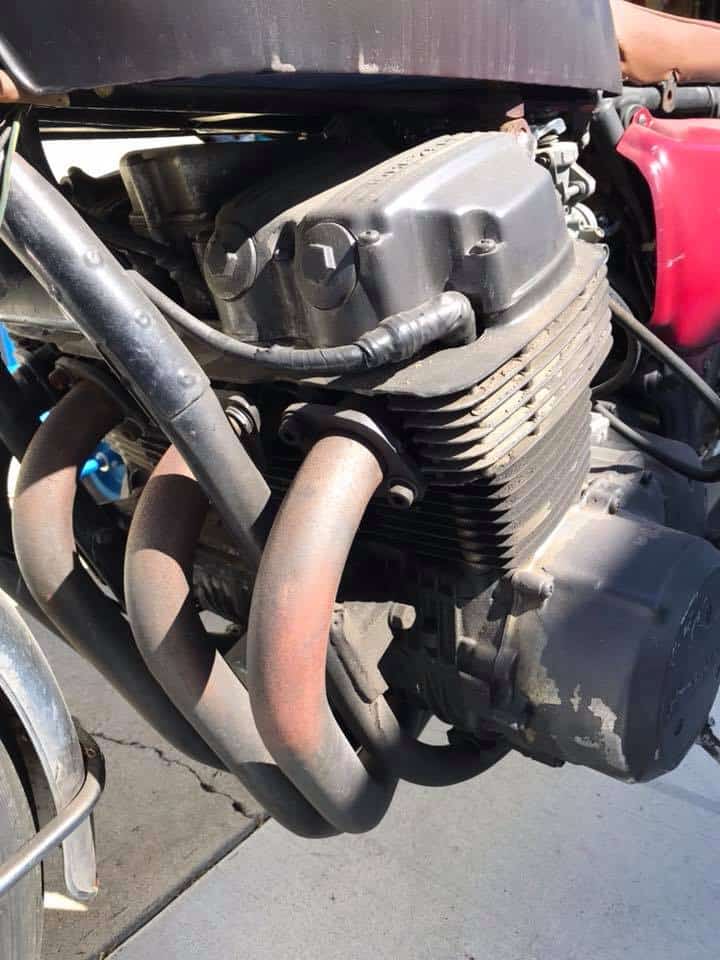
The carburetors had seen better days, not only were the bodies of this rack of four corroded, the slides had stuck inside, so another issue to sort out, but it did have compression when I kicked it over and thats a great thing to know.

Old Mac exhaust wouldn’t of ran well as the underneath of the header was squashed flat, must of hit a speed bump years ago and no way would it run that well with a restricted collector.
I wanted to just have fun with this bike, as I said, not sure how I was going to go until I got her running, but to get to that stage there was a few things that I thought would be cool so I could at least ride it once I figured all the issues out on this honda, and as you have probably experienced, there were many issues, but, whilst I had her in my shop, i wanted to change the seat set up and make a fun Brat style machine just because, well I can.
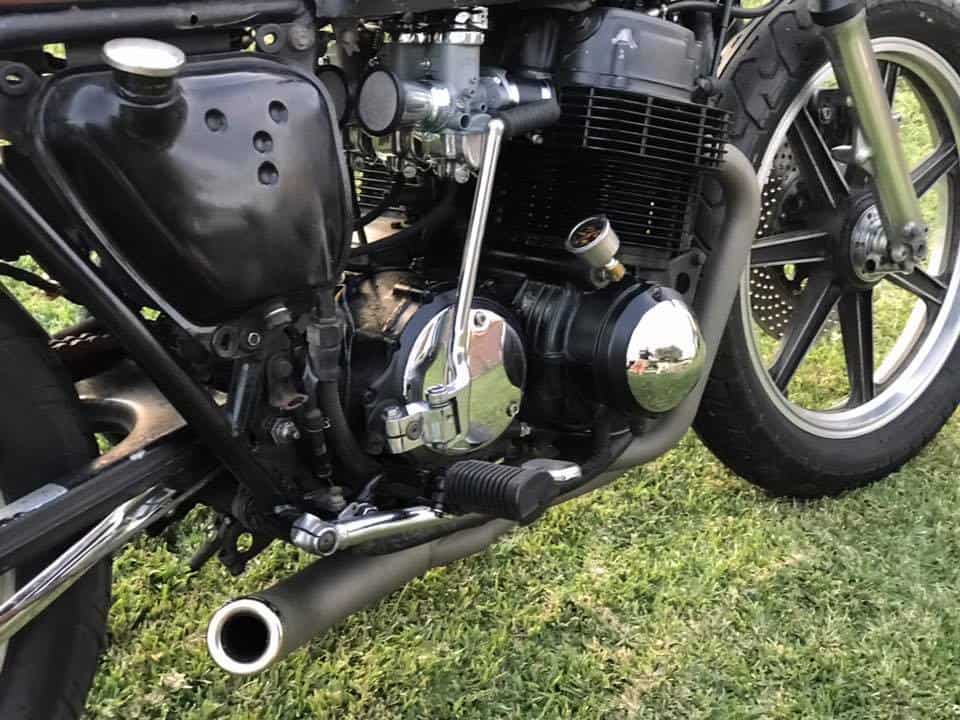
OK, so I made a steel seat base and tried another gas tank too, as I needed to clean the inside of the other one as I always do when I get tanks that has sat for many years, I had to change out the wire harness and the handle bars and controls and glad that I did as the old ones were so badly corroded, they would of caused a fire for sure. And then with a New set of intake manifolds and rebuilt carburetors this machine w\was almost ready for a fire up.
Below is a little iphone video I did on Face book, not sure how the motor would go but I had compression and now spark, so, with gas, this should in theory fire up.
So, as you can see, I had the bike on my work table and I used an old lawn mower tank as an iv to feel the motor, I was pretty sure she would at least back fire but as I re-jetted it and cleaned bowls out, I was certain that with new coils, battery and plugs and of course New oil and filter, that this puppy would run, and was pretty stoked with the end result.
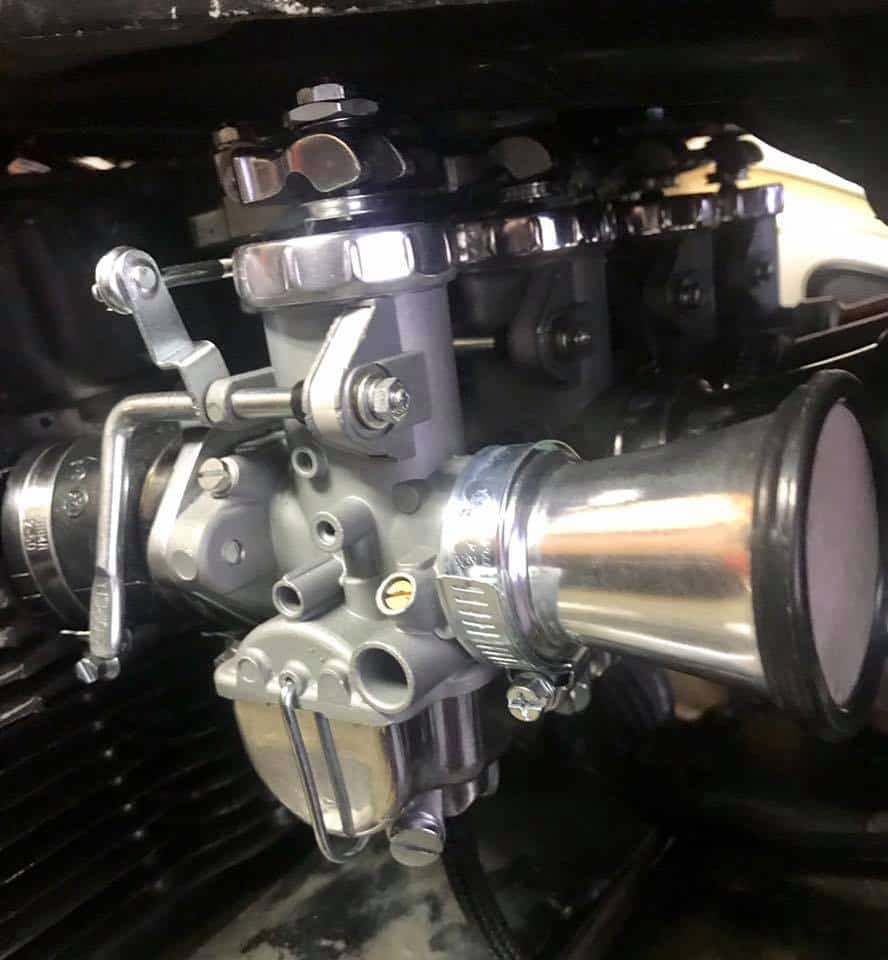
Carbs redone and all clean with new intakes and my stainless steel clamps too, fitted some spun aluminum Velocity stacks with gauze for that old style look and re-jetted once more.
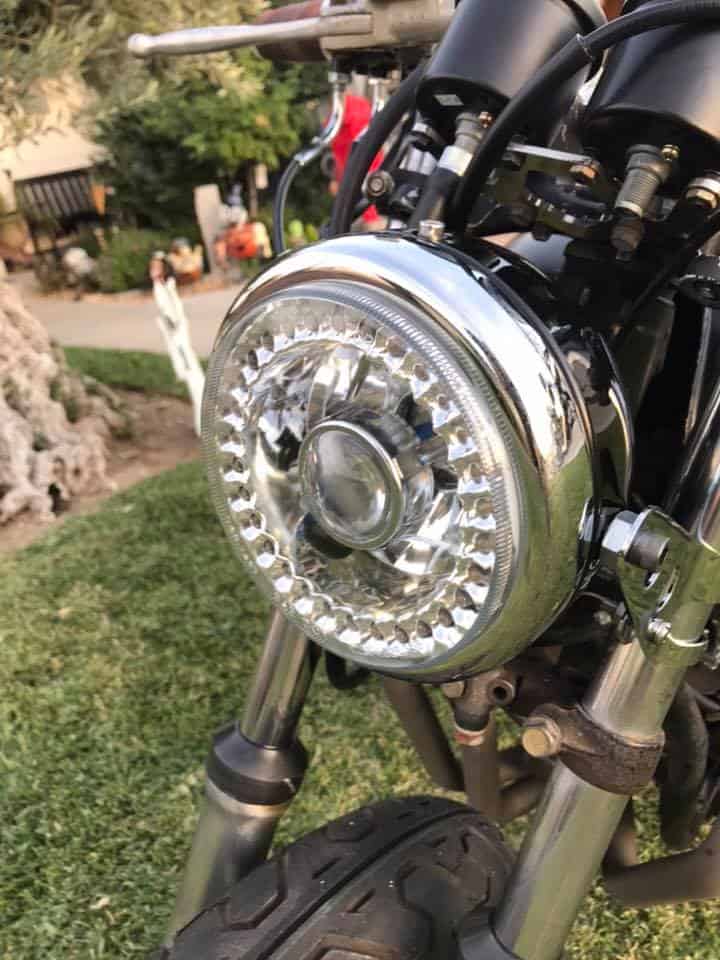
To make sure all is well, I need to be physically able to take this bike for a little ride, as no idea how the clutch is, the gears etc and the general running of this bike, I fitted another headlight and then whilst I was there at my storage, I removed some Old Lester wheels I had, I had taken them off a Vintage CR750 AHRMA race bike and simply stored them, tires were a little hard but thought what the hell, lets bung them on as the wheels on this bike anyway were toast.

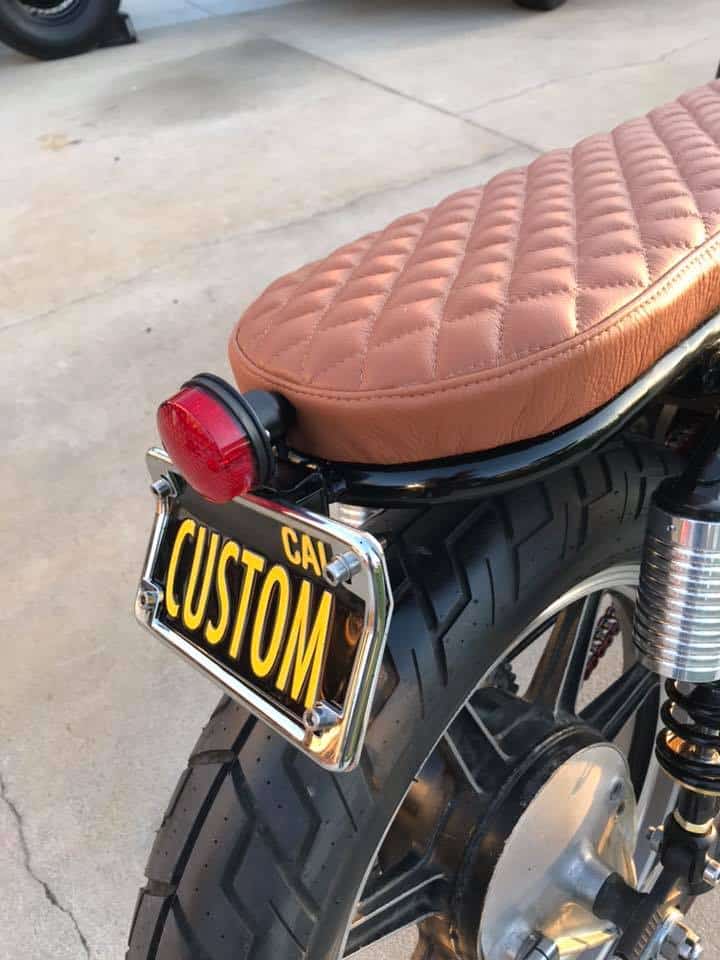
I also had to make some sort of tail light assembly up as riding up the road, I still want people to see that I am braking etc, so put this set up together and it works really well being LED.
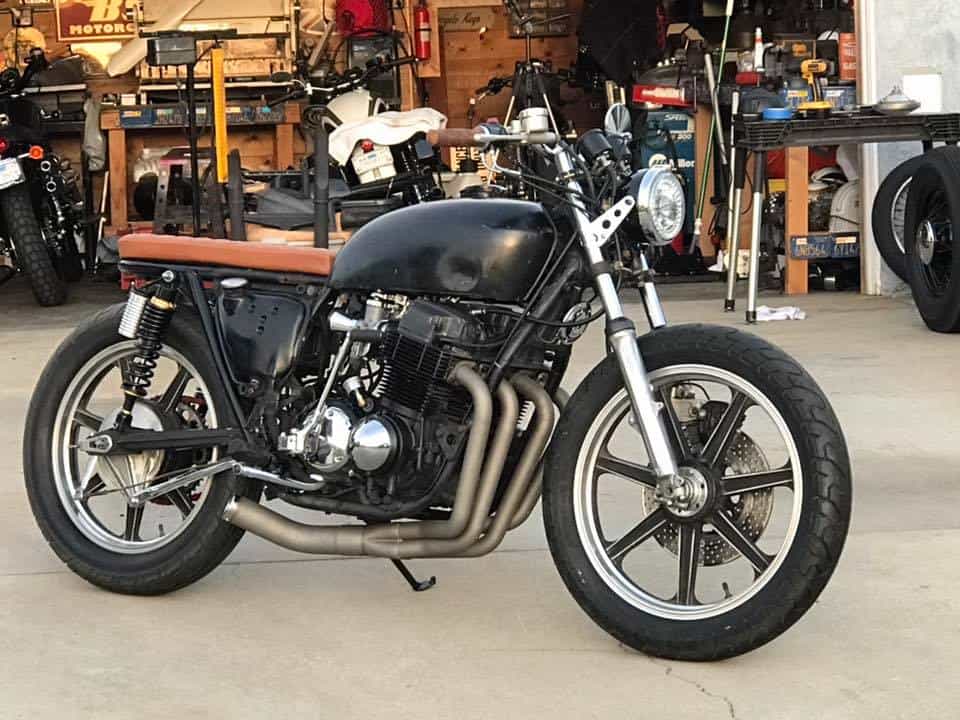
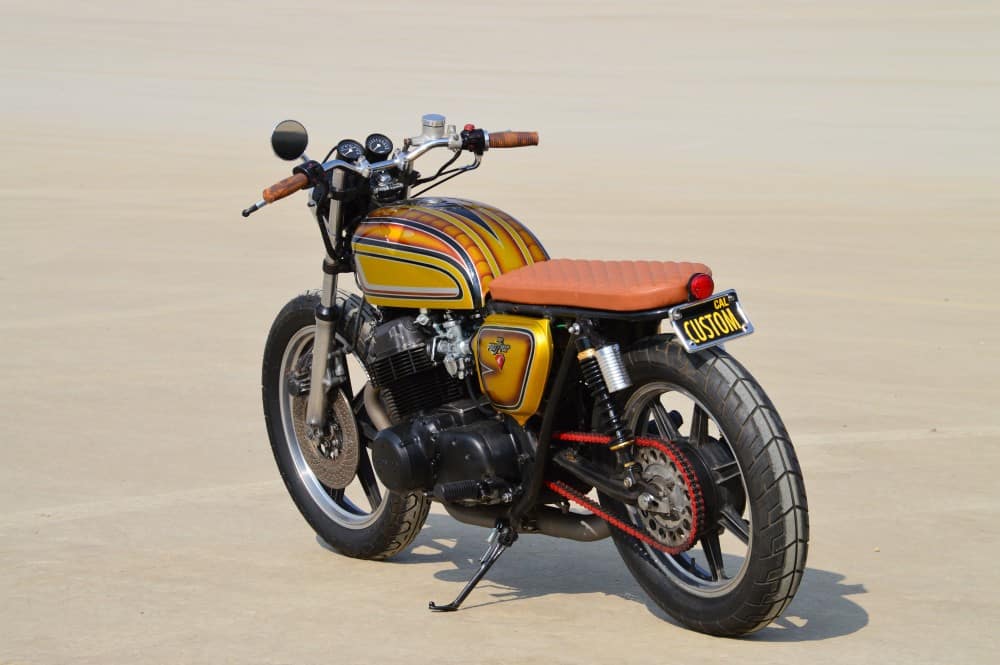
As you can see, I fitted the Lester rims, 19 inch front and 18 back, I also upholstered the seat in a soft brown leather with Diamond stitching and its sure comfortable I was surprised, the gas tank needs some work but I shall address that no worries, I also cut my 4 into 1 down that I ceramic coated titanium color, as I wanted an aggressive look to it and think that this does come across quite well.
As the sun goes down I managed to fire this up and it felt good to hear the bike run and run quite strong, I fitted a 530 O-Ring red chain that I had and it looks pretty tough, as you can see, I made one of my side stands and now the bike sits up nicely, so many dont or need bits of wood under them.
I also fitted an oil pressure gauge kit to make sure that I had good pressure, and it did, it fired up to about 70 pounds, so am more than happy about that, exhaust looks really cool.
OK, now it is time to address that gas tank and it needs some love, i think I shall go all out 1970’s Candy Custom style on this one as it needs some color for sure, but I noticed it had pin holes, so- went back to the original tank that came with the bike and decided to cut off the neck and weld in a Harley Bung instead.
So, the best thing I do is use a sawzall and cut the neck as far down as I can first as this needs to be flush on the tank for the bung to weld in nice and smooth.

As you can see, it takes some time and of course, I made sure that there was no residual gases exiting from the tank, be careful and make sure you wash your tank out before emmiting any sparks near this thing. LOL

So, with the neck sanded smooth to the tank, I used a Harley gas tank bung, I sell this kit on my website, and wanted to use it for this build to be a little different as the original locks always break on the Honda and knew that this would like quite trick once finished.
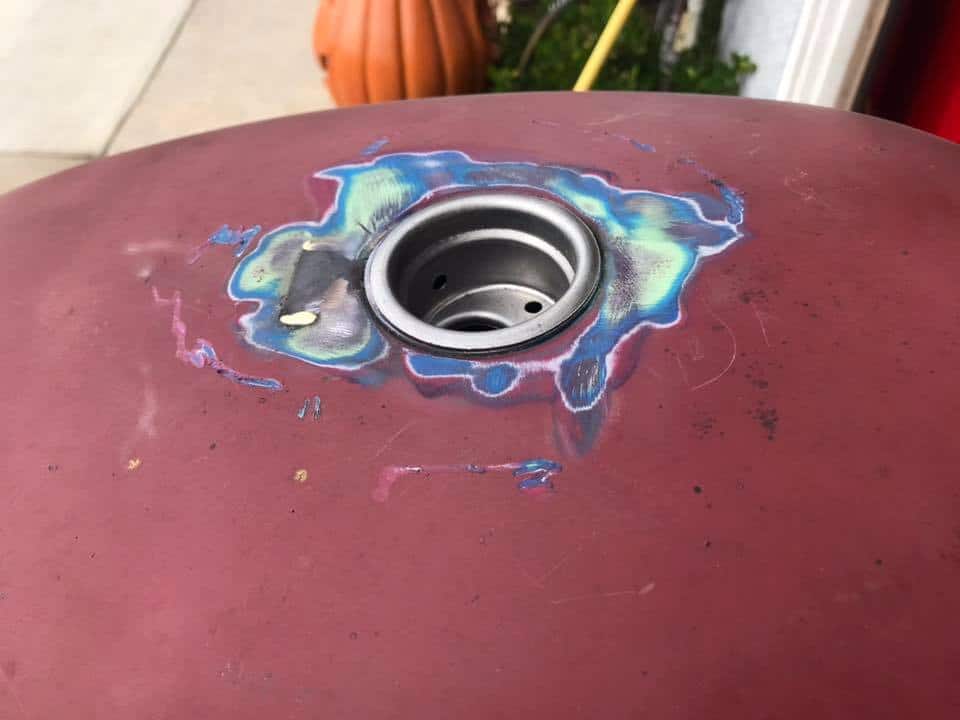
This is perfect for the Honda Gas tank and there is enough room to be able to TIG weld the bung in place with no distortion to the surrounding areas of the filler neck.
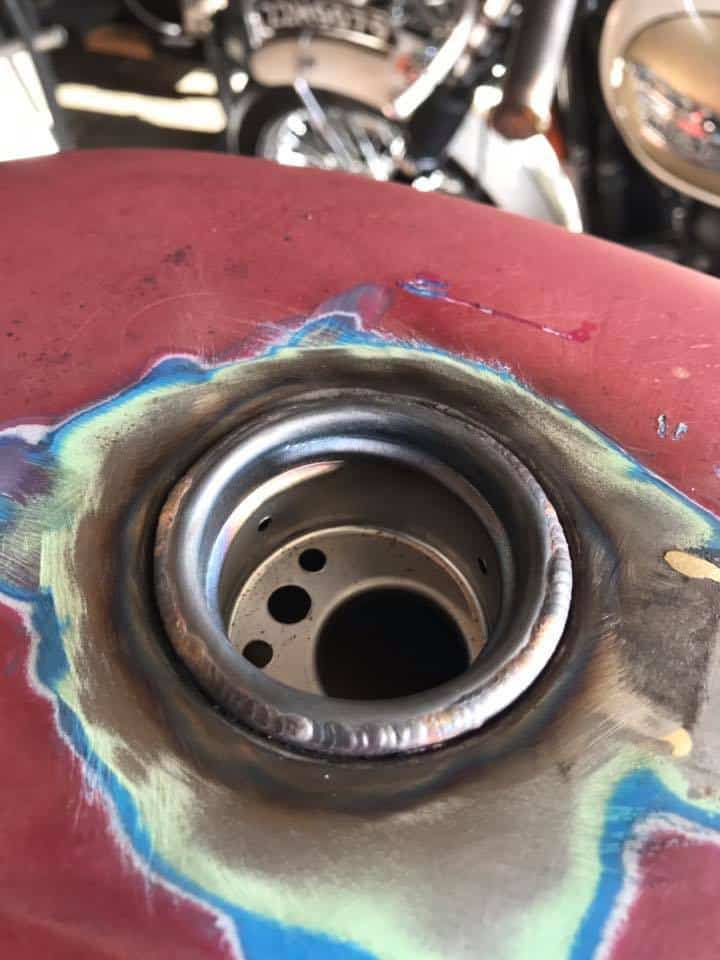
Now all Tig welded and cooled down, this is ready to attach the screw in gas cap, I did this a long time ago on the Cobalt Special Honda I built, so was eager to see how this looked.

Well, that looks so much better than the stock configuration and once painted will really set off the gas tank from the others out there and a neat Custom touch to this machine.
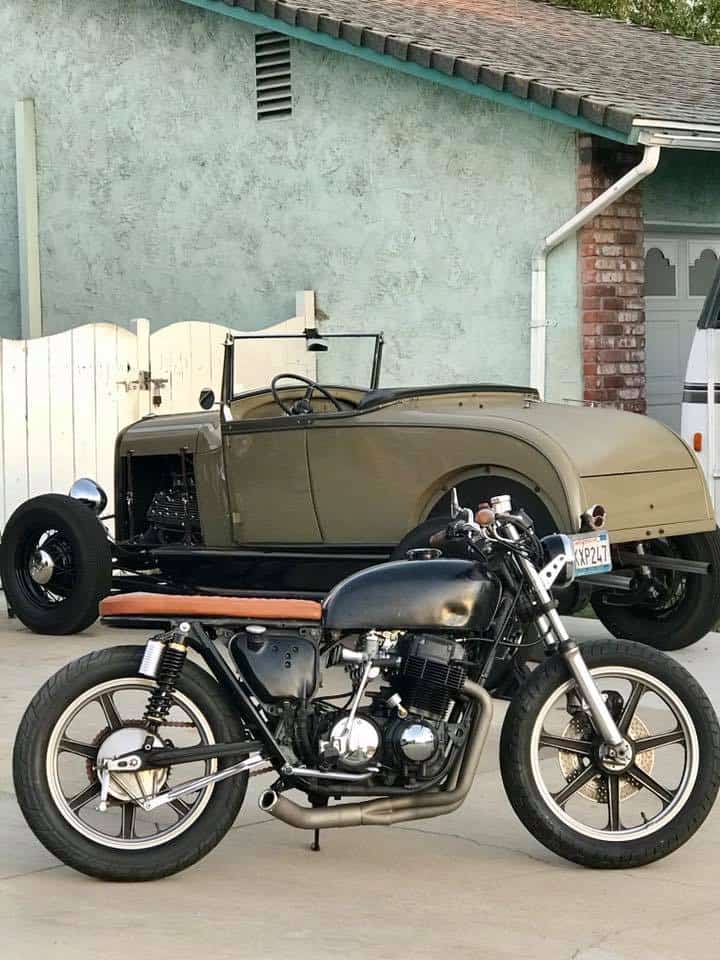
With New rear shocks and a comfortable seat, this is taking shape as a cool little Muscle style Brat bike that will turn heads where ever it sits and the paint will make you need Sunglasses.

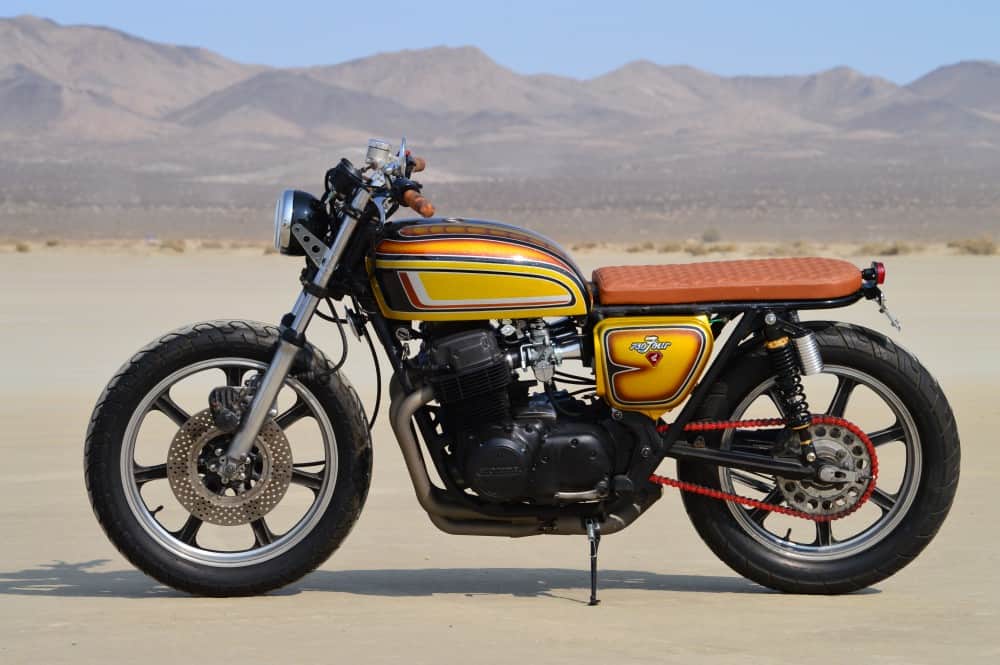
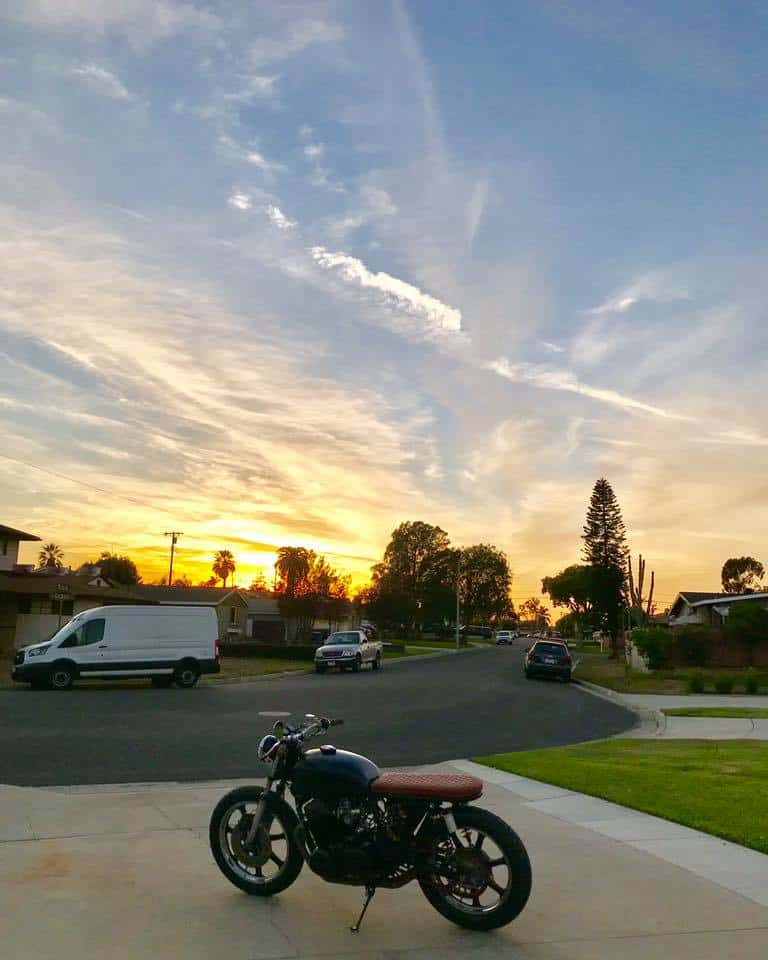
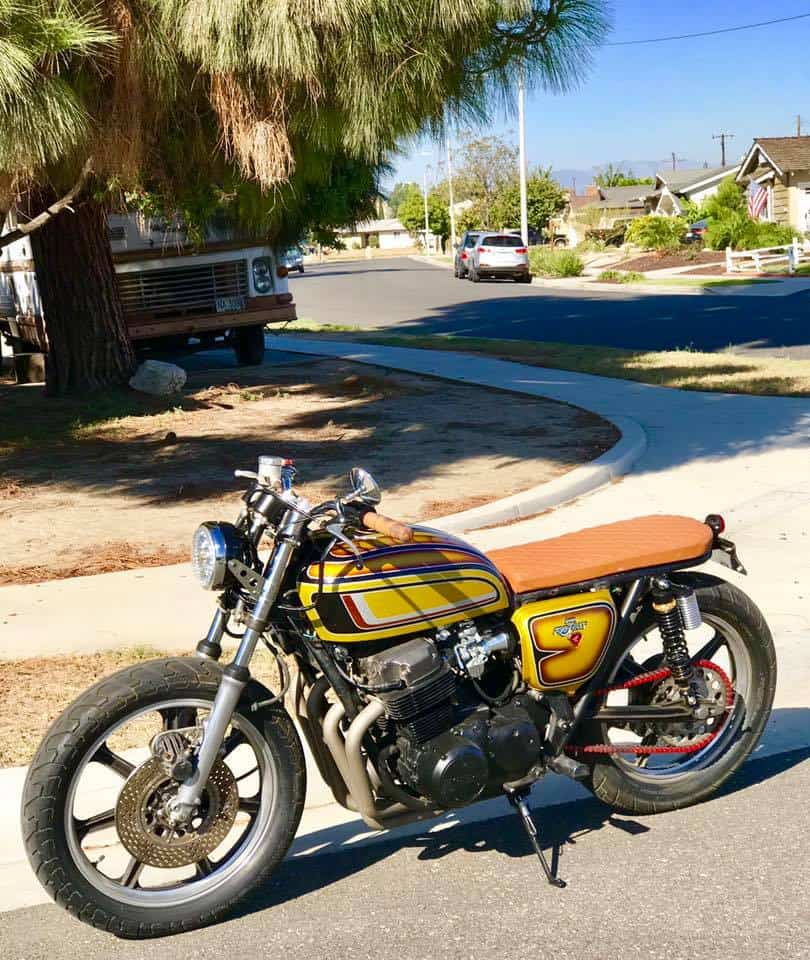
Here we are at El Mirage at a SCTA sanctioned meet, last races of the year – so wanted to attend and take a few photos of this Vesco Honda and I am so glad that I did.
There is still a lot more to do to this but right now it just needs to get a few miles under its belt, I always say the first 100 miles will tell you how the bike will perform, so a ways to go as I only have 14 miles on it so far but of course shall do many more on it.
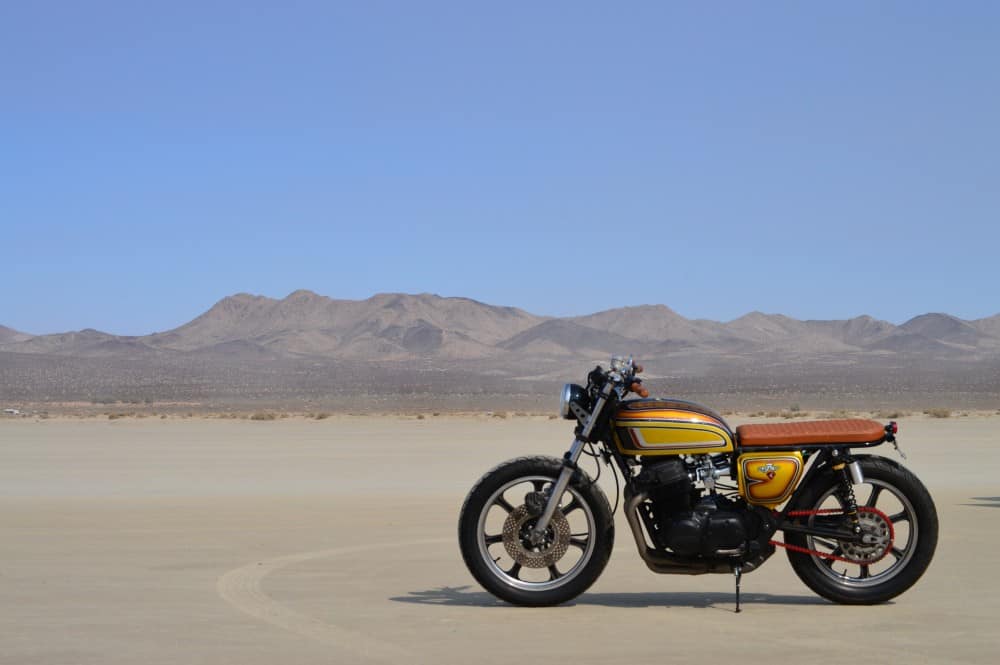
Don’t want to take this apart yet anyway, i mean its fun right now, no show bike but easily could be if I took her down to the frame and started from scratch, but right now I want to have fun with it and what better place than El Mirage Dry lake.
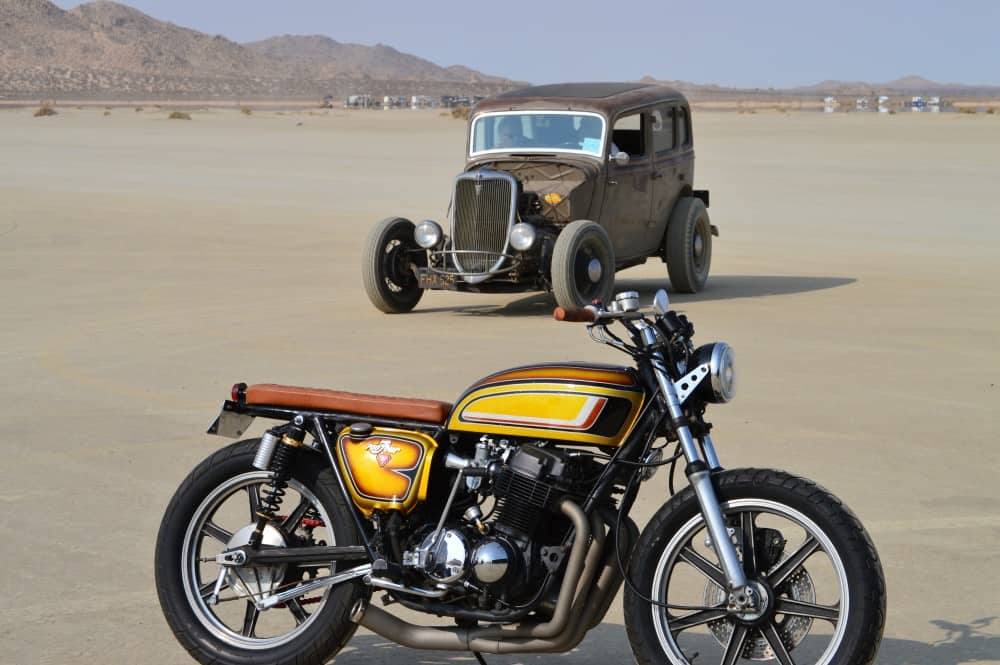
She sits real well and is a blast to ride, she got plenty of looks as you cannot miss the paint job, no matter how fast you drive.

So I am happy with the way she is and looks to be honest and I love riding the bike around to be honest as it sits so well and not too low as many are these days.
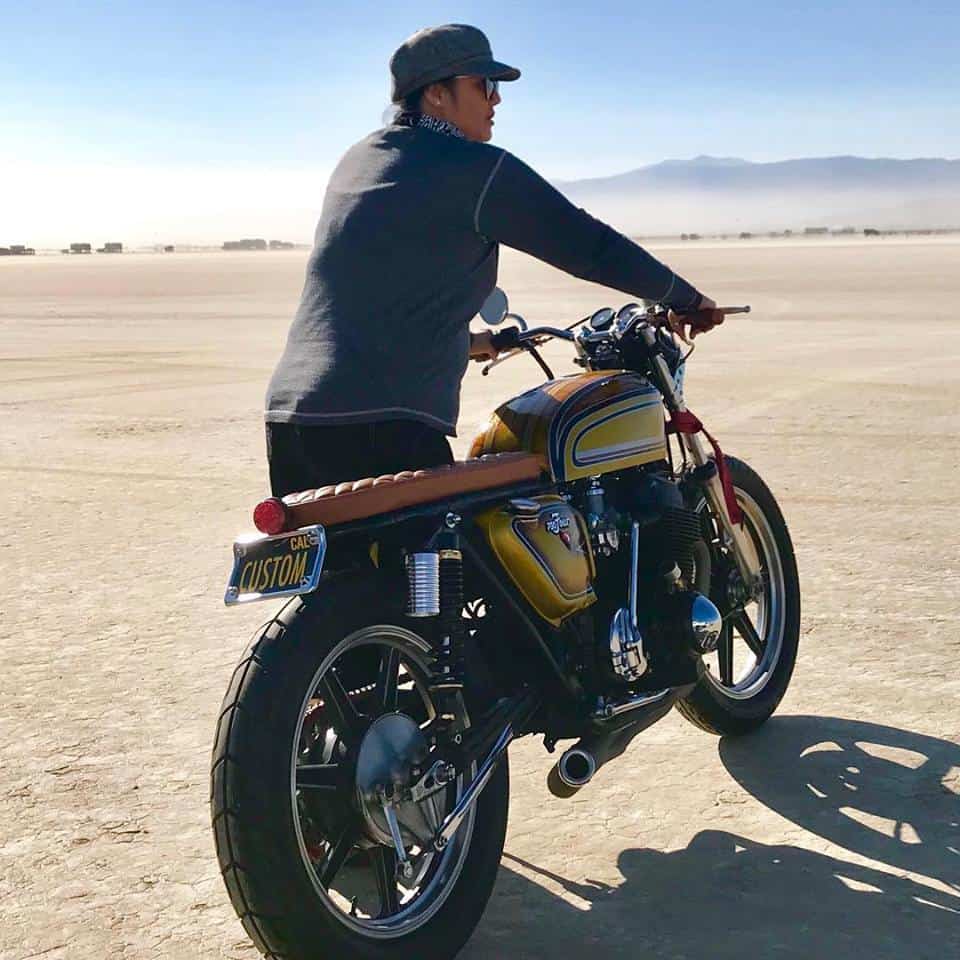
Jennifer my Girlfriend loves it too, she has a triumph of her own and loves all Motorcycles, love seeing Girls with bikes too and we go out riding a lot together to be honest.
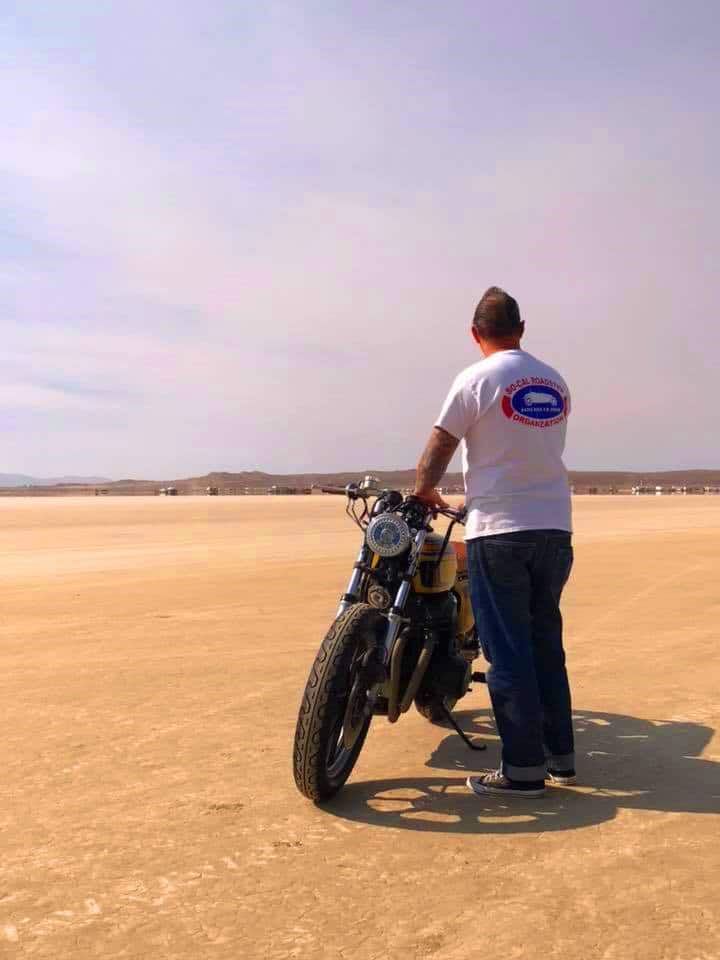
Final look at El Mirage before we head home, it is only 100 miles from our house so always fun to come out here and view world speed time trials record attempts
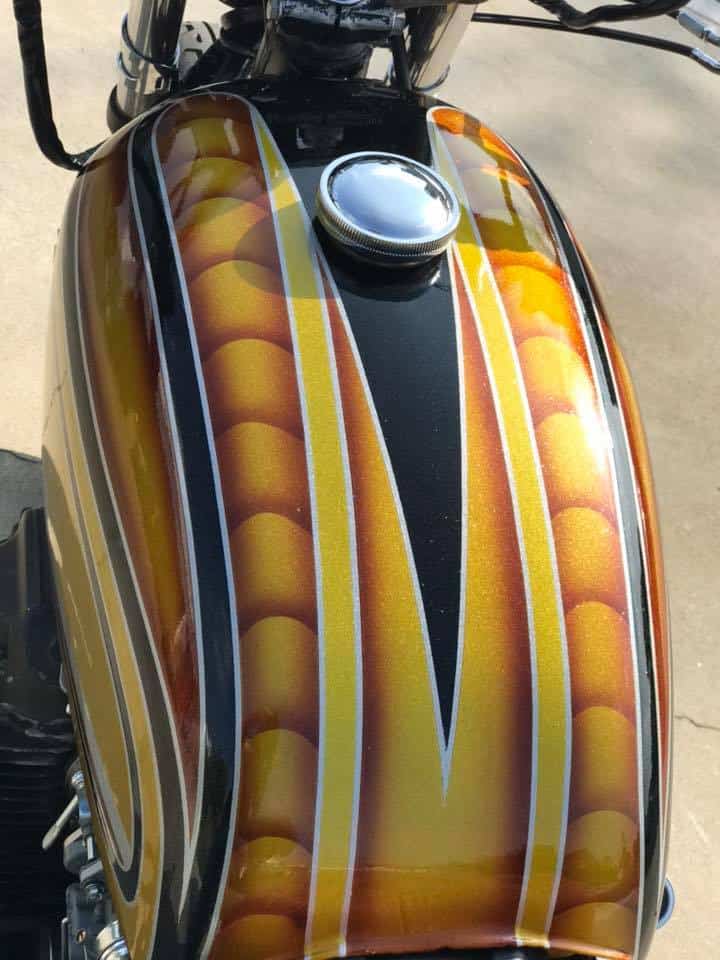
Gas Cap sets off the tank nicely and the paint job is so reminiscent of them Customs days of the 1970’s back home and around the world, I think its a nice balance in color.
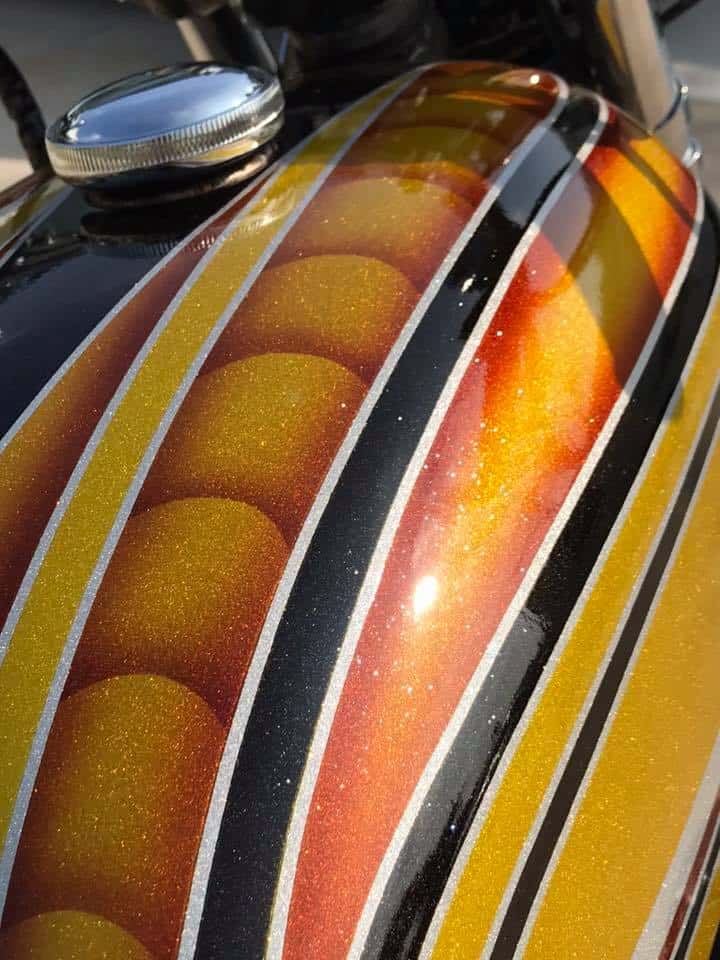
Fish Gills and shadowing are becoming a lost art but this really came out well, using house Of Kolor Candy paints and Pearl bases with light flake added.
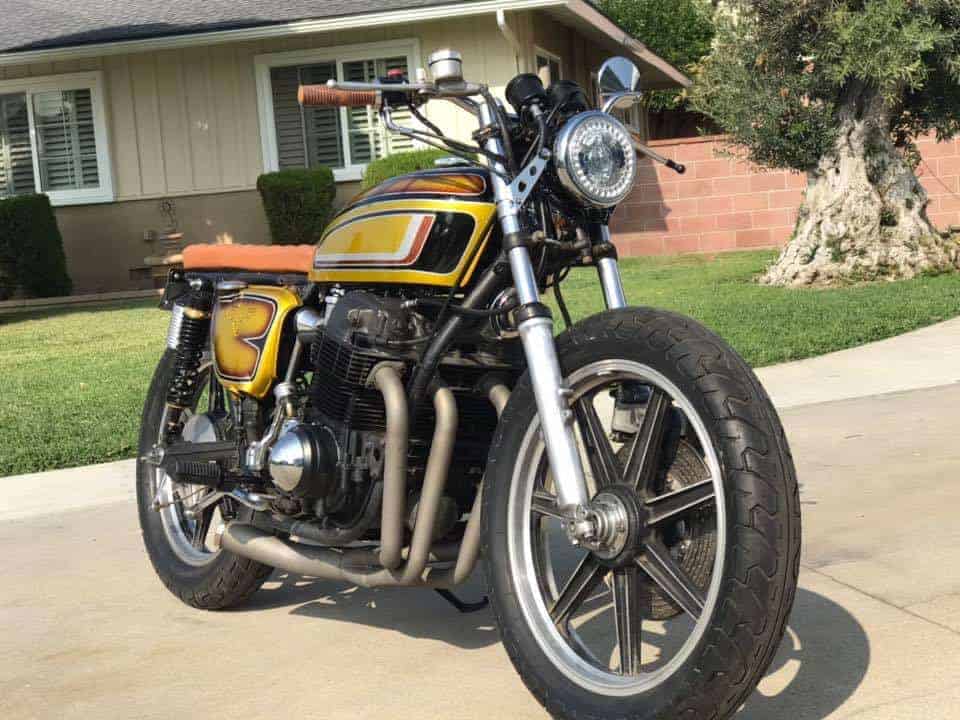
The bike sits well, I like the smaller headlight, they have L.E.D’s inside it for turn signals, so keeps everything neat and out of the way, the Lester Rims gives it that Old School period right away.
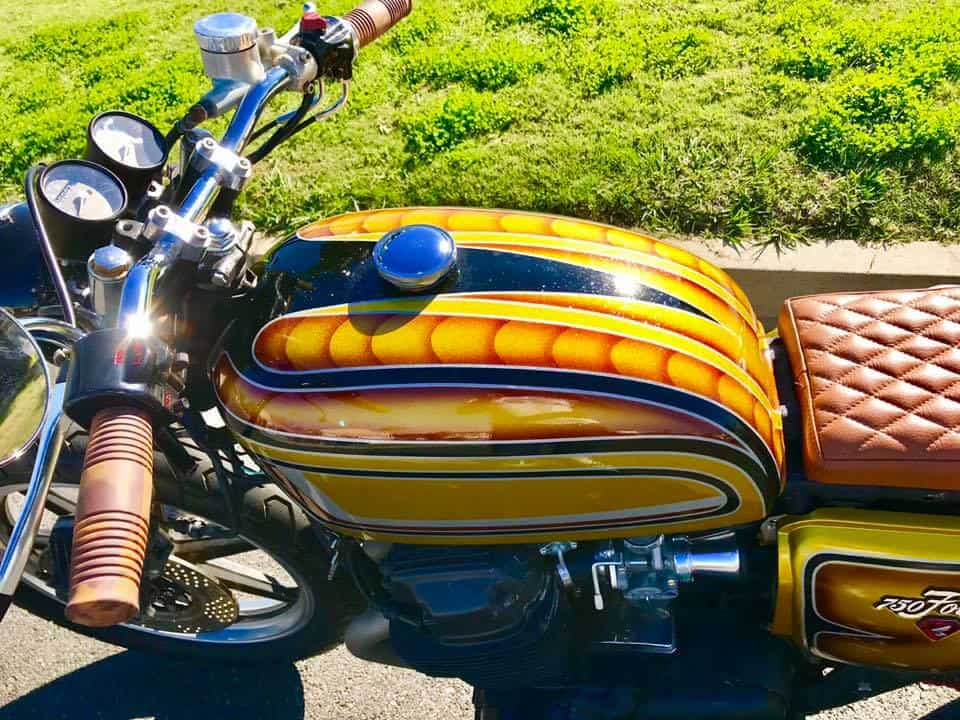
Added 2.5 inch mechanical Gauges to tidy top end out, of course my Hand Made and chromed Euro Bars really make this comfortable for your shoulders and Cole Foster grips soak up any Vibration that you may have.

I think the Man above digs it too, No thunderbolts when I stopped outside his place, Phew!

I really enjoy riding the bike around my Town, the roads are smooth and its a joy to blap about on and even though I want to do way more to it, I need to sit back and have fun riding it for a little while as it was and still is a super fun project.

Slowly clocking the miles up but amazing that this runs and hasnt since the mid 1980’s, and its a joy to jump on and take for a spin around town.

I used a Biltwell Mirror for legal reasons and it works pretty well to be honest, Id love to paint the frame later but not right now, The motor runs strong, the gear transition is really smooth.
Eventually the Motor will be painted and tricked out but as I am having so much fun on this, I will wait until later, unless someone buys it of course.

Thank you for following me and purchasing My parts for your projects, it means a lot, this is my Passion and life, so I really do appreciate all your business.
So, until next time I work on this, I will leave you with a list of things I changed, just in case you are curious as to what I did on this machine through the build up.
This was the Very First ride after it had not run since the mid 1980’s, so stoked to be able to experience great moments like this, unless you are a bike builder, you really wont understand the Euphoria that you feel when you click into first gear and ride off down the road.
Peace and Grease to you all.
Carpy
- Lester Rims 19″ front 18″ Rear.
- Drilled Front Rotor
- Euro Bars I made 7/8
- Cole Foster grips
- New Handlebar Controls
- New Throttle Cables
- New Clutch Cable
- New Speedo Cable
- New Tach Cable
- New Wire Harness
- New Coils and Caps
- New Iridium Spark Plugs
- New Battery
- New Red 530 Chain.
- New Custom Side Stand.
- Custom Gas Cap Kit.
- New Side Covers.
- New 2.5 Mini Gauges.
- New 4 into 1 exhaust Shortened and Ceramic Coated Titanium
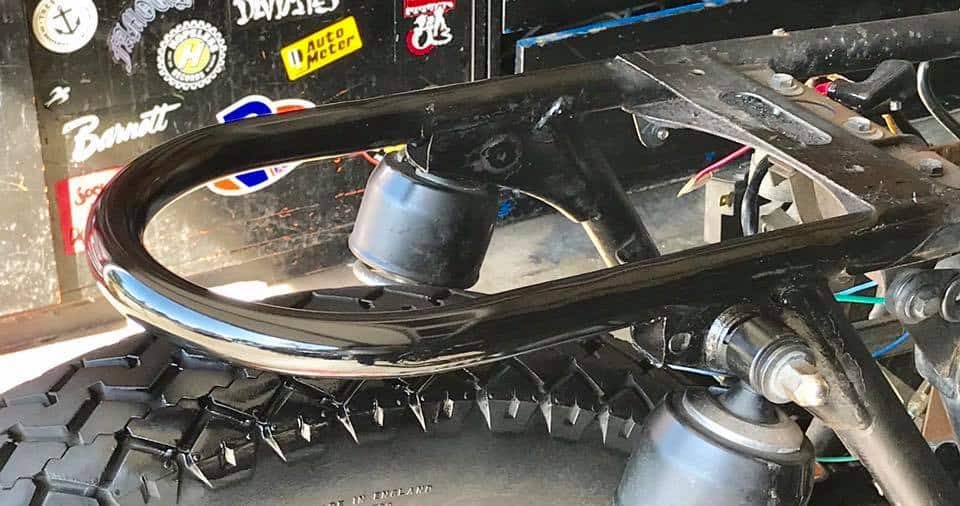
- Rear Frame Hoop
- Rear LED tail Light assembly
- New Finned Piggyback Shocks.
- Rebuilt Carbs.
- New intake Manifolds
- Stainless Hose Clamps
- Braided overflow pipes.
- Custom 5 3/4 headlight with internal LED signals.
- New Horn.
- New Flat seat in Leather with Diamond Design.
- New Brake and clutch levers.
- New Biltwell Mirror
- New Chrome Fork Ears.
- New Oil Pressure Gauge kit.
- Chromed Rear Stabilizer bar.
- New Foot pegs and Rubber.
- New Custom Weld in Gas Cap Bung and Screw in Cap.
- Custom Candy Flake Paint.
