Picked up some Original Chopper frames

Well, sometimes things come along and you think to yourself- ” I might have a pop at these later” And sure as eggs are eggs, I have them at my place.

These are some cool old pieces right out of the 1970s.

First off is the Black frame, A Denver Choppers frame, these were one of the best out there and built many frames over the years and I was lucky enough to locate this one not too far from me, its been sat in the desert for many years but later on, I think I can build something cool, may take time to find some period parts and have my own twist on it, so we shall see how this goes.


Since 1967

Denver’s Choppers was the first company to manufacture the long down tube stretch frames, or the Swedish style as they became known, which was actually Denver’s style. There is even a motorcycle club in Sweden called Denver’s Choppers, so named after the long stretch bikes.

Denver’s Choppers became famous worldwide in the early 1970’s, and their parts have been used by world renowned bike builders over the last three decades. Denver’s Choppers has been and will continue to be one of the leading trend setters in the industry.

They have quite an aggressive rake to their frames and that’s what I like about their chassis, now, this is just parts right now but in time, I hope to try and assemble it into some sort of cool 70’s style machine and be able to take it out around here and experience the trippy feeling of being a Chopper rider.

A long way from anywhere and even though I have owned a few of these frames in a while, I have always sold them to guys that want a chopper bike, but thought that it would be cool to have a couple of real customs, so it will take time but hopefully I can pull another machine out of the Barn later and see what these are like again, as it has been a long while since I have had one of these Iconic machines.

I am sure it will have a few different parts on it to get it rolling and still need to find adjusters, but dont see one in the rear rigid, so may drill the back to allow for a long wheel aligner bolt to be used.

Still has the Original OIL tank and Battery box, but may copy it with a New version if this is in bad shape, but its all fun and still a learning curve, so I really have my work cut out and it will be a long battle of which I hope to become the Victor in.

So the start begins for parts, bit by bit and then we shall see how I go about all this and enjoy another Denver Mullins Chopper frame for the good Old CB750 Honda.


This is something how I want it to look, this is a Denver  Chopper, similar frame.


Shop Tour of the East Coast company 1945 Speed and Custom

Well, we see many shops in Southern California, but its good to see what being built in other states and of course, all over the globe, today we look at a company way over there on the other side of the East coast, known as 1945 Speed and Custom. They are also in the Oilers Club, an original Hot Rod club that is still strong in their Vintage lifestyle as it is down here in California, I saw some of them Racing at TROG in NJ and it sure did draw a lot of spectators. So below is just a little blog on this great company on the East side of the country, if you over that way, drop in and see them.

Formula Drift Champion Chris Forsberg takes us on a tour of garages around the country, from professional outfits to grassroots backyard garages. In this episode we visit 1945 Speed And Custom in Troy, New York. Owner Jeremy Baye shares his love for building some of the coolest custom hot rods in the world. Baye is a master designer and fabricator creating classics reminiscent of a bygone era with a focus on high-quality metalwork, his 10,000 square-foot shop is in a renovated car dealership along the river. Baye tours us through finished works including a custom Rail Dragster, a late 40s Big Car, a 1927 Ford Model T, and Baye’s own ’51 Ford Flathead V8 Truck. After a tour through the garage checking out some works in progress, Forsberg heads out for a drive in the 1927 Ford Model T.

Located on River St in NY, this shop has been around a few years now and know their way round Vintage, Custom and race cars, they are a hands on fabrication shop and can go from a small modification to a turn key head spinning Hot Rod.

Custom Work

Taking a piece of history and transforming it into something entirely new is the ultimate form of innovative self-expression. 1945 has the ability to take that idea in your head and make it a reality. Our expertise in hot rodding and resto-modding automobiles from all eras is unmatched across the Northeast. Anywhere from period correct American hot rods, to Modern Day Imports, we have all the resources to make your custom work possible. “Customization” may range from simply adding power brakes to a car for better drivability, to completely innovating how a car looks, drives, and sounds.

Restoration Work

There are times when an automobile or bike is so neat or rare that a restoration is the best route to take. This is no simple process; it takes expertise and skill to complete a restoration to top quality. 

1945 has the abilities to authentically restore your automobile or motorcycle from any era. We are dedicated to doing work that stands out from the rest, work that makes our clients confident in their project’s development, and highly satisfies them with the outcome. The most important advice we can give is don’t bring your project to an auto-body shop who does restorations on the side. Choose an experienced and full service shop like 1945 for unparalleled craftsmanship in fine automobile restoration.

Refinishing

1945 Speed and Custom holds itself to the highest standards when it comes to refinishing automotive classics and masterpieces. With some of the best talent in the world on our team, our abilities in the refinishing sector of automotive work is unmatched in terms of quality and aesthetics. Anything from authentic looking paint jobs, to custom metal flaking, to flawless pinstriping, 1945 can turn your project into a true masterpiece. Visit our portfolio to see some of the wild paint jobs we have completed in the past.

MECHANICAL

Whether you are looking for a “juice” brake upgrade on your ’31 Model A or a full LS swap in your ’68 Camaro, 1945 has the abilities and skill to execute and complete any mechanically oriented task with ease and perfection. Anything from engines, transmissions, front and rear axles, suspension, and steering, to simple dashboard components and wiring,  1945 has the expertise to restore or customize your automobile or bike of any era to a flawless finished product.

We are sure there is no part of a vehicle’s mechanics that we can’t repair, restore, or customize – from any era or make.

©2017 by 1945 Speed And Custom.

1945 SPEED & CUSTOM

Tech Tip, how to Undo Tight Bolt by Hand.

Hey there, happy Friday to you all from an actually Rainy Southern California, something that is quite rare these days but we need to rain so I dont mind the H20 coming down in buckets right now.

So- As to make the most of this wet day I had a few things that I needed to do and one of them was to take an old Sprocket and chain Guard off a CB750K rear Hub.


Now- many people ask me for a few tips and I shall be answering a few of these questions over the next few days in blogs etc, but today I had to remove these parts of the Rear wheel Hub and the nuts on here were factory tightened.

Now, if you have no air tools and the Nuts on the hub or anything that you need to remove are tighter than a Scotsman Wallet, then, here is a little trick I do when I need to get something that tight undone and using minimum tools.

I use my regular socket and wrench and then I grab an old Fork tube and slip that over the wrench handle.

This Leverage now produces close to 2 Tons of pressure and is known as a Fulcrum.

This has worked for me for over 40 years now, my old man taught me and you may know an easier way if you don’t have power tools, but for me it is so easy to do and wanted to share today.
This works on ANYTHING, give it a go, you will surprise yourself.

Thanks for watching and have a great weekend.

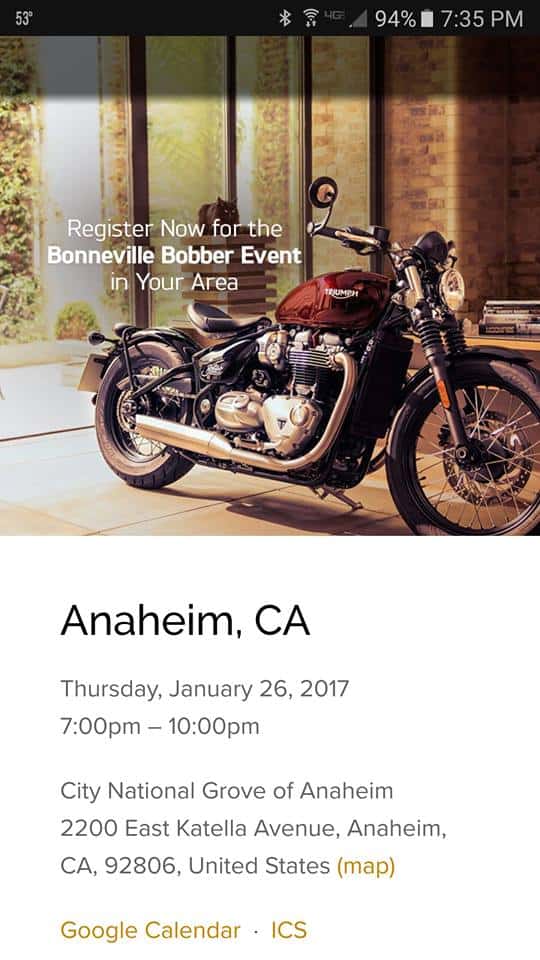
New Bonneville Bobber Launch Thursday 26th


See you at my shop or the show in Anaheim This Thursday 26th.

triumph-bonneville-bobber-details_827x510_71476960099

THE SPEEDMASTER I BUILT NOW LIVES IN AUSTRALIA


 OK, here we go with a Cafe bike that I created a little while ago here in Anaheim California, this CB750 HONDA was just a Rusty Hulk of a bike and needed some love, I was not sure what to do on this build but thought what would be cool is think of a name that I remember from back home in the UK when i was a Teenager and Cafe racers as well as many other Motorcycles were doing on the tracks and on the roads etc.

Now Speedmaster was a Tire brand that was synonymous with col bikes back in the day, be it Cafe racers or trials Bikes, so I thought that I would base this machine on them said tires and build the bike around that title, so, here is the build up of this bike that now resides in Australia and is on the tarmac there right now bombing about the curves of Melbourne, Victoria.


 I took the old rusty machine apart to see what I had, and what I did have was a bunch of corroded and rusty parts, so it was time to strip this right down to the skeleton.

 This bike took some time to dial it in, as I was always trying different set ups, this set up here was pretty much how I wanted it but I thought that I could use the Original Dunstall exhausts on another machine.


 The Motor was gone through and she seemed pretty good, the build up didn’t really take that long but I kept trying different parts to see how she would ride.


 I did a double drilled disc set up on this bike, using a few parts that I had in the garage and it seemed to work out good, but took some time to get the rotor just right.

 I went ahead and had a drilled Dresda style swing arm of mine fully chromed, as i think it would set the motor off well and I wanted to have a drilled swing arm to match the front Rotors.

 Obviously the Ace bars were a must and I think that I got the height of this machine to a good stance and was happy with it.


 Took some time to get good calipers and then strip all the old Black anodizing off them and then put the kit all together as the trick on these set ups is to get the off set bang on, else they would drag all the time.


 Original Dunstall headers here that I had in the original packaging, as i wanted to know how these fit and sound and boy did they look great.

 Looking at the rear tire you will notice that it is of course a Speedmaster which is from back home and Avon was a huge name in tires and racing when I was a teenager.

 The Chrome swing arm has Bronze bushes and I had a set of early Race shocks that I wanted to try on this puppy and i think I got the look I was searching for.

 I used a Harley rear wheel and laced it to a CB750K hub with new bearings and stainless spokes etc, I also make sure in New chains and sprockets too.

 You may notice that my signature sprocket cover gets the drilling and polishing look.


 I had a set of 29mm smooth bores that i wanted to try on this 836 engine and it ran pretty well, but can be a bare to set up sometimes.

 OK, here is the money-shot- as I love the way the rear end looks on this bike, should of made a poster of it.

 Of course, I went to town on the rear brake drum with new shoes and fittings this bike was like a new machine.


 Original finned speed parts I used as I had stored that stuff for some time for this bike and glad I managed to use it all on the bike.

 Original Beeston grips I have had for donkeys years ftted well and I wanted to start to detail the top end out, so I polished the master cylinder to a chrome finish.

 Nothing is better than polished aluminum or chrome, its just a fresh and clean look I believe.


 Oh yes, did I mention I polished the whole engine, not many people were doing this the and this took a long time.


 Plenty of lines to look at and I still was not sure if I was 100% into the overall look.


 Polished stainless steel Allen head bolts through out the bike, gave it some more detail and this sure was beginning to look sharp.

 I hand hammered and smooth the tank and then took the tank to a Radiator shop just to make sure it is all sealed and then had a coating laid inside and then pressure tested.

 A New Gas cap as well as a New Locking mechanism was needed for the freshly painted gas tank and sets it off nicely.

 I have lost count to how many of these I have polished in my back garden over the years but they sure look great when they are all buffed up.

 The switches had faded from the stock black to a dreary grey, so I had to polish these to look the best that they can, as originals are not cheap.

 The more I look at these photos, the more I sit back and say to myself, why did I sell this.

 Fun set of carbs once they were dialed in but a bear to get one of the throttle cables right but I sorted it out in the end.


 One of my New machined finned engine mounts set the right side of the motor off.


 The megaphones were a must and this did look reminiscent of the days gone by in London when speed to do the Ton was a must.

 I hand cut an alloy plate and drilled holes etc and made this rear engine mount, this was the first one I had made until I then got orders for them.


 I know, I know- Swiss Cheese, but I do get carried away but enjoy just making any pattern up and drilling by hand, takes some time and boy does it make a mess.


 Rebuilt front forks and the good old TRI-BAR headlight makes this stand out at the front end of the bike, as well as Alloy turn signals which are a must in California.

 New fork boots too that I bought from HONDA as I like gators, they kind of add Nostalgia.


 New cables of course are a must with any build as you want a smooth throttle when you take your bike out for the first time.

 I fitted a New horn and brackets to make sure that people know you are coming if for some reason you got to get on the loud button.


Original Cycle west Finned Points cover sets the scene for this Cafe Racer.


 Sat on the table at the shop for electrical and little bits and bobs.

 This time I went ahead and took the old megaphones off and fitted one of my performance 4 into 1 systems on and ceramic coated it Black.


 I changed the carbs as it was running a little rich for the 4 into 1 and it ran great, I added some old 1974 Velocity stacks that I had for years and like the look.


 Just chilling as now I have just sold this to a bloke in Australia and he too is English, so nice to have someone have this machine and enjoy it.

This was the last shot of the bike in the shop before we shipped it to Melbourne in Australia.


Well, here are some shots of the Speedmaster on the other side of the world in Australia and the Owner loves it, as he should. 

This is a great looking motorcycle that has gone through some guises but the bike looks tough and sounds even more.

Hope you enjoyed the pages about this Cafe Racer and it is still hard to comprehend that this is now on the otherside of the globe.

I am sure he will be bombing about the place and hitting them corners as hard as anyone here would be thats for certain.

Maybe one day when I get back out there, I will get the chance to sling my leg back over the machine and go for a burn up?


So, the Speedmaster has a New life in a new Country and I am glad its being used.