ELECTRICAL SYSTEM BASICS

Many emails over the years ask about electrical issues on their Honda’s, I thought that today I would try and add some information on here today to try and help you out a little.

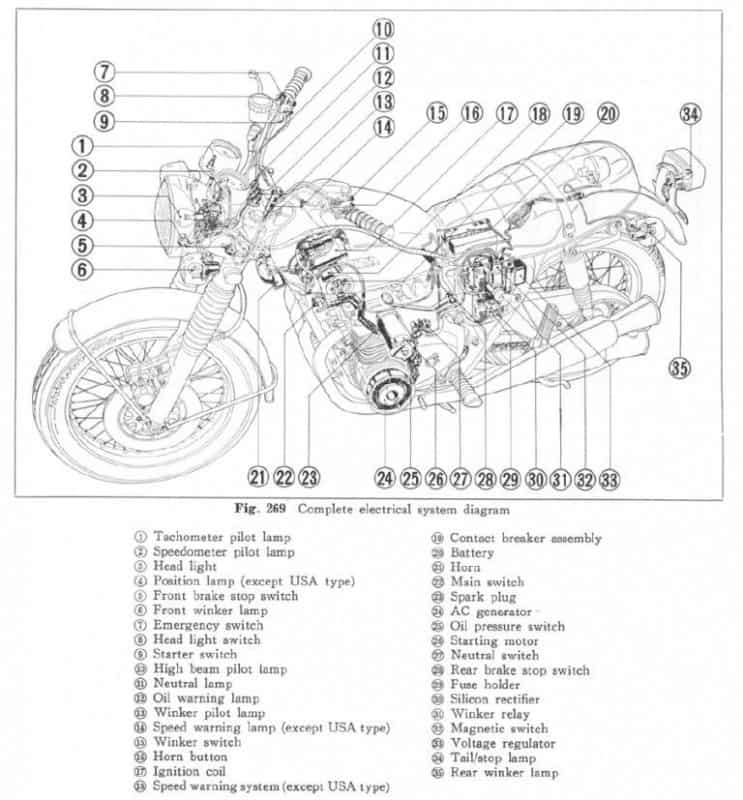
The vintage bikes from the 1970’s, such as the HONDA CB550, have a simple electrical system consisting of approximately 40 components altogether making it possible for anyone with some basic skills and tools to build their own electrical harness.

Here are all of HONDA CB550’s electrical components:

HONDA-CB550-ELECTRICAL-COMPONENTS

Even though such a set-up may be as basic as they come, to be able to work on any electrical system and/or to make a new harness, a clear understanding of the essence of the electrical system is a must.  For me, anyway.  I am not very good at simply following instructions like purchase these components and then do this and that.

I like to know how things work.

So, here is my take on what is going on in any electrical system that is employed in any motorized vehicle.

The heart of the electrical system is the battery.  It powers everything.  But its power diminishes with use and so it must be replenished.  Exactly like the battery in your phone or the battery in any of your power tools. To recharge a battery, we need a source of electricity.  At home, it is easy.  Plug your phone into the wall outlet and it all happens automatically.  In a vehicle, a different source of “battery recharging power” is needed.

Enter the alternator.  The alternator (and all electricity generating devices that send power to your home) operates on the same principle as the one first, reportedly, employed by Michael Faraday nearly 200 years ago in the 1820’s when he observed that rotating a magnet inside a stationary coil of wires (or moving a “magnetized” coil in and out of a stationary coil to be precise) produces pulses of electricity.  The electrical current so induced alternates from + to – and for this reason it is called alternating current, and hence the name of the device that produces it.

The take-home lesson here is “a magnetic field rotating inside a coil induces electricity in the coil”.

In the HONDA CB550 engine, the “rotating magnet” is a combination of a rotor bolted to the crankshaft and a coil called a“field coil”.  The stationary coil is called a “stator coil”.

Neither the rotor nor the field coil are magnets themselves and so they cannot generate a magnetic field.  In order for the alternator to work, the field coil must be magnetized.  When electricity from the battery is sent to the field coil, a magnetic field is generated, which, through the rotor, is effectively rotating inside the stator coil.  This induces electricity.  (Like the old adage “you have to spend money to make money”. ) Exactly the same kind of electricity that Michael Faraday observed in his experiments mentioned above.  The electricity produced in this way is then used to recharge the battery.

Fair enough.  But, there is a problem.  An alternating current cannot charge a battery.   We need direct (a constant + and a constant –) current for that.  So, a way must be found to turn the alternating current (AC) into direct current (DC).

Enter the rectifier. The rectifier is essentially a bunch of diodes inside a housing.  Diodes are “filters”.  They allow only positive or negative charges to go through.  So, the AC goes into the rectifier, the positive charges go through one set of diodes, the negative charges go through another set of diodes and as a result DC comes out.  Job done.

But, now, there is another problem. What happens when the load on the battery is low (you are riding on the highway in daylight and the only electrical current consumed from the battery is going to the coils, which fire the spark plugs and that is not much at all)?  The DC current coming from the rectifier will charge the battery completely and if that current is uncontrolled, the battery will eventually become overcharged.  That’s not good.

Enter the voltage regulator.  This gizmo is placed between the battery and the field coil.  When the battery is low, the voltage regulator sends plenty of the battery’s electrical current to the filed coil, which produces a strong magnetic field and consequently a strong current is induced in the stator coil, which then goes through the rectifier into the battery.  When the battery is fully charged, the voltage regulator reduces the electrical current going to the field coil consequently reducing the current that goes to the battery.

Lets’ put this into numbers to make it a little clearer.  When the battery’s voltage is below 12V, the voltage regulator sends plenty of the battery’s power to the field coil.  When the battery’s voltage is around 14.5V or so, the voltage regulator sends very little power to the field coil and the induced electricity is essentially like you battery charger at home going into battery maintenance mode.

Here is a very basic schematics showing how the alternator, voltage regulator and rectifier are connected.

Basic-Electrical-Schematics


Looking at that, a seemingly obvious question is, “Why are there three yellow wires going from the alternator to the rectifier?” That is because the alternator is designed to produce three separate “pulses” of alternating current called phases.  All 3 go into the rectifier and all 3 are turned into DC.

The two thick black vertical lines to the right of the alternator represent a connector.

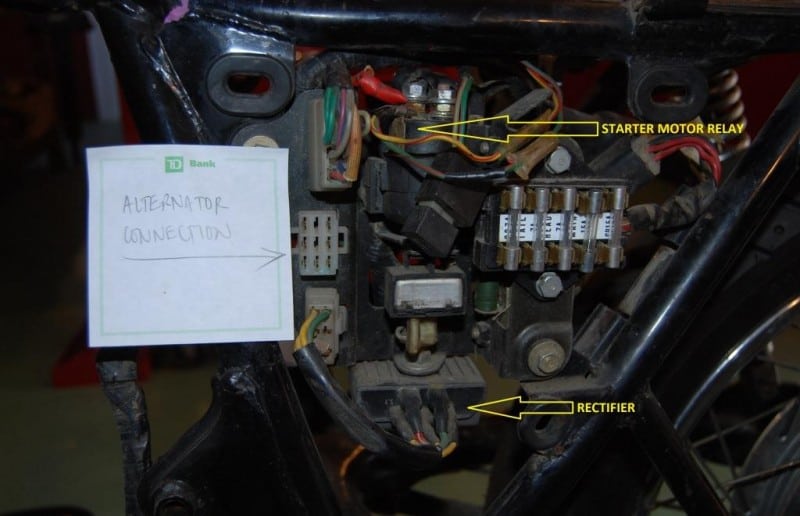
Now, let’s find out what these things actually look like.  Once the left side cover is removed, here is what we are going to see.

Electricla-box-with-rectifier-and-starter-relay-identified

The labeled connector in the photo is where the harness coming out of the engine is connected to (i.e. the connector mentioned above).  The three yellow wires coming out of that connector carry AC from the alternator.  That AC goes into the rectifier and DC comes out via the red (+) and green (-) wires.  The red wire is directly connected to the battery.

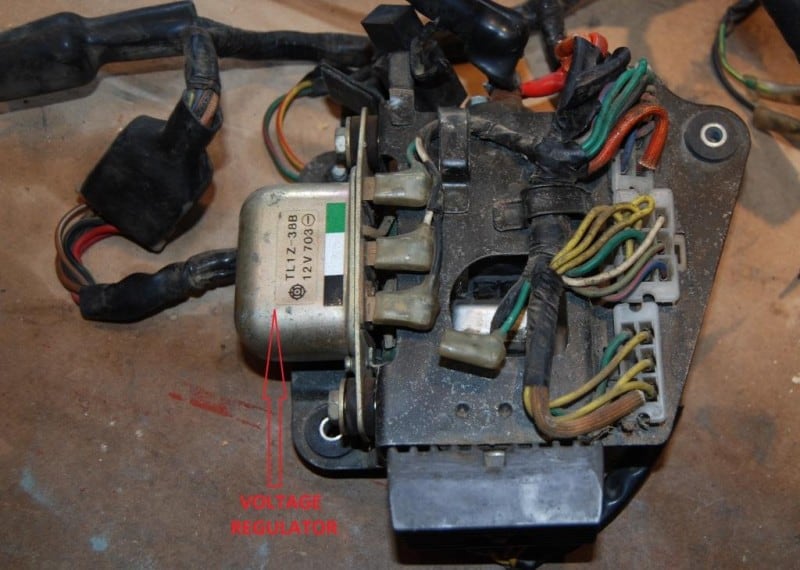
Taking a look at the back of the electrical components box, we can see the voltage regulator.


Voltage-regulator-identified cb550f

Power to it comes down the black wire once the ignition is switched on.  Power to the field coil is sent via the white wire.  The green is ground.

That’s all there is to it.

Let’s recap: When the ignition switch is turned on, power from the battery arrives at the ignition coils and the voltage regulator.  The ignition coils are energized.  The field coil is magnetized. Kick the kick start and the engine fires, the alternator starts producing electricity (AC), the rectifier turns it into DC, which goes to charge the battery.  Once the battery is fully charged, the voltage regulator makes the alternator produce less electricity so the battery is always optimally charged.  Cycle complete.  And we are back to where we started when we said, “The battery is the heart of the electrical system.  It powers everything”.

What this teaches us is that all that is needed for the machine to run is: ignition switch, battery, voltage regulator, alternator, rectifier, ignition coils and points.  None of these components can be eliminated without negative impact on performance.

Everything else is, more or less, optional.  A fuse or fuses are a prudent addition.  A headlight, tail light(s), brake light(s) and turn signals (as well as their associated switches and relay) may be required by law. If the electric start is to be retained, then the starter relay and a start switch will be needed.

And then come the “conveniences and luxuries” such as neutral gear switch, neutral gear light, oil pressure sensor and associated light, etc.

With this in mind, a brand new harness can easily be put together.  If the original components are not available or desired, many quality aftermarket parts can be used.  These days the rectifier and voltage regulator come in a single unit, which is the preferred solution for café racer and custom builders since it saves a little bit of space.

Thanks to: Kyril of Black Square Motorcycles, very informative.

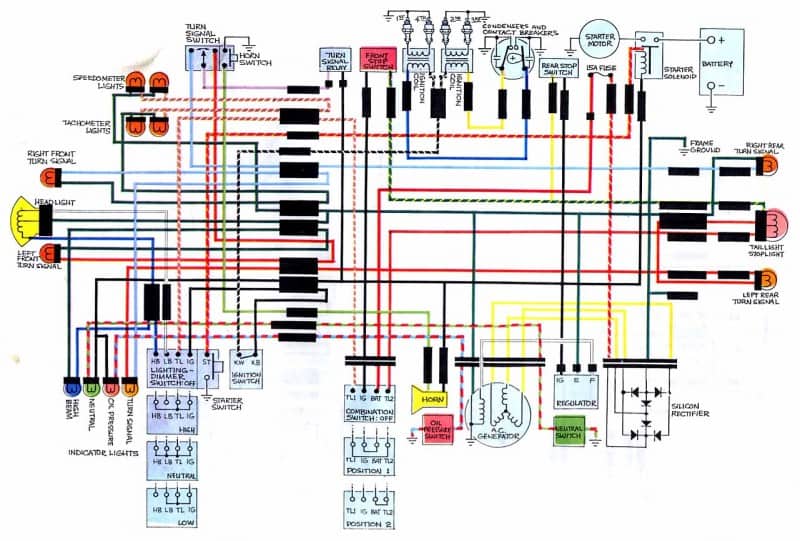
Below are some Schematics I have added to help you on your Honda CB750 Models. First is a KO-K1-K2

CB750k1

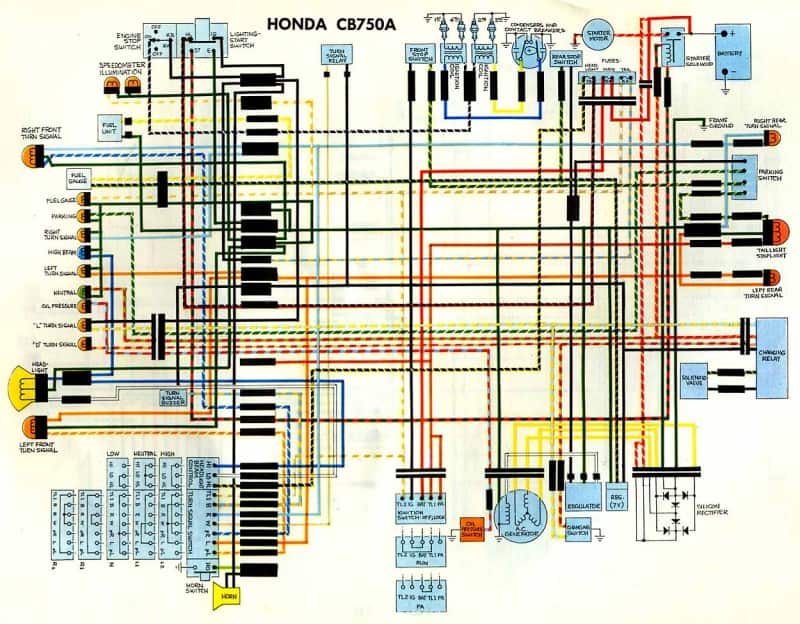
Then a CB750 Automatic Schematic.

CB750auto

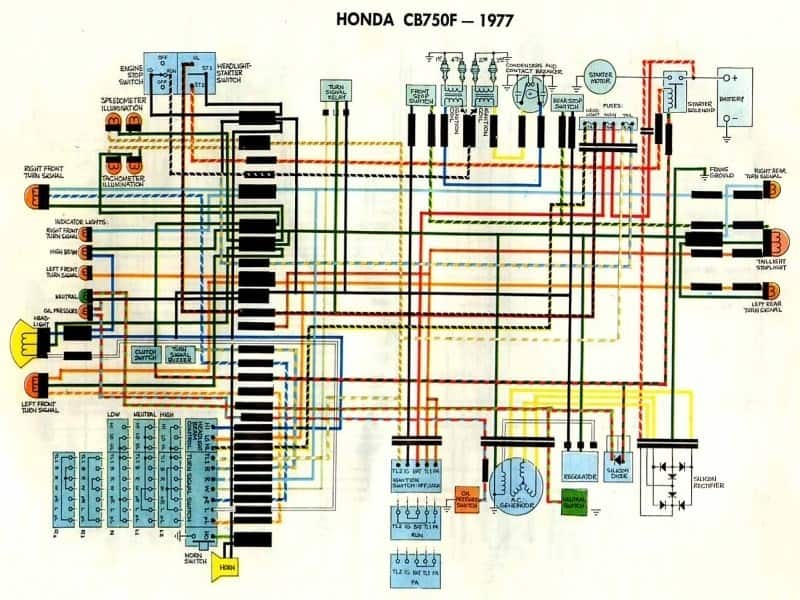
Below a CB750F 1977-1978 Diagram.
Honda Cb750 Wiring Diagram Honda Ca95 Wiring Diagram • Wiring Articles and Images - Automotive Wiring Diagram
Honda Cb750 Wiring Diagram Honda Ca95 Wiring Diagram • Wiring Articles and Images – Automotive Wiring Diagram

Little bit of work on Customers CB750F today

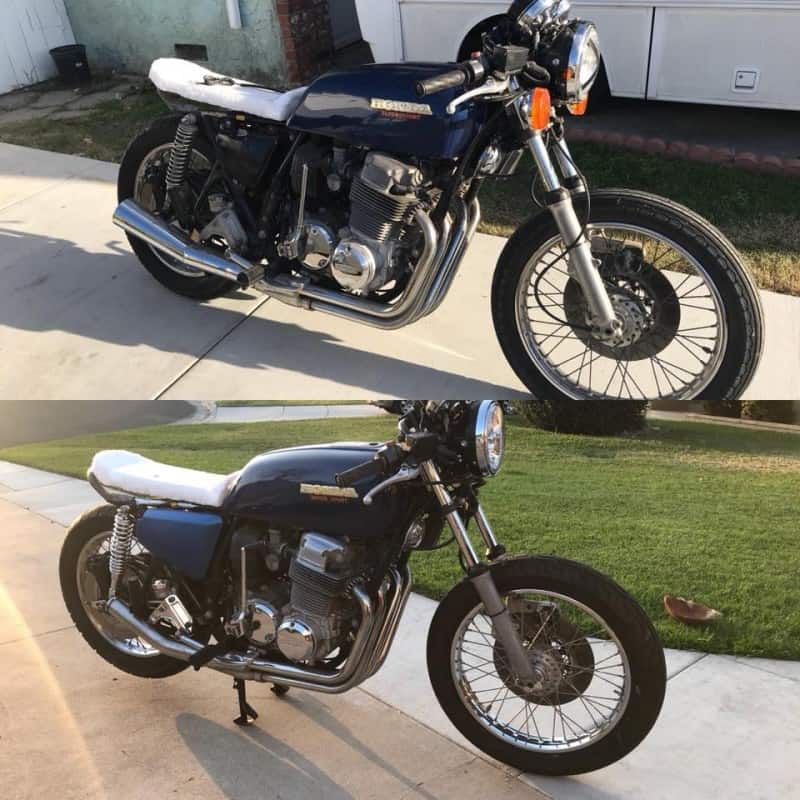
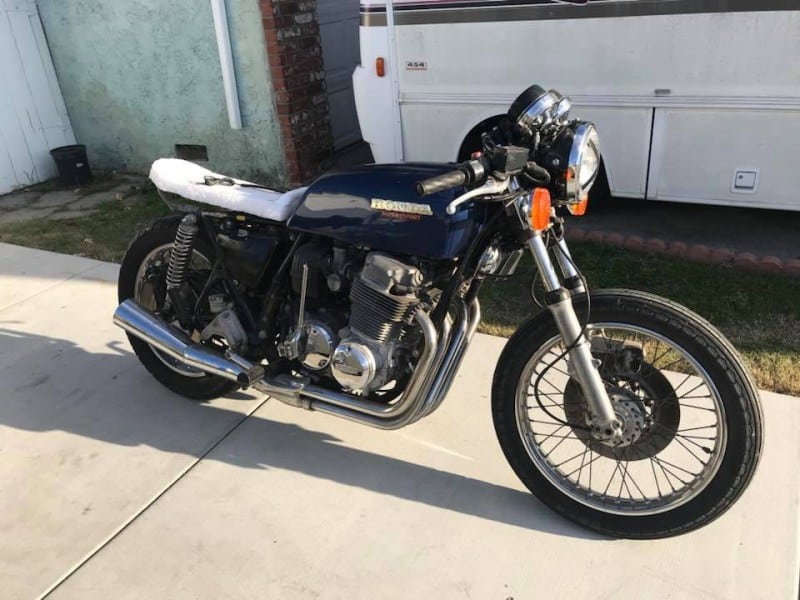
Had a customer come in with an old 1975 Super sport, just wants a few little things changed so he can ride for a while and then sell it, these jobs sometimes can get out of hand as you are dealing with unknown history and previous issues. Knackered exhaust, no side covers JB Weld on things, ugh! Some of these things do become a big task and would of been better if they left it alone, but, we all have to start somewhere and I know I can help this fella out and get this bike running and looking to how he wants it.  Working on a small income is hard, I have been there but this will be a fun machine and he will get miles of smiles once I have completed the tasks at hand on this Super Sport.

27459479_10156000263276760_4650784936631111679_n

Above is the before and after as you can see the bike had an old Chromed Kerker Muffler on the unit but, it had no Baffle at all and was so loud, it would let off peoples car alarms every time you fired the thing up, so I made a smaller custom one from steel and added a kick up and baffle, it now resonates nicely and looks a whole lot better I think.

27545115_10156000263216760_8008564208194141516_n

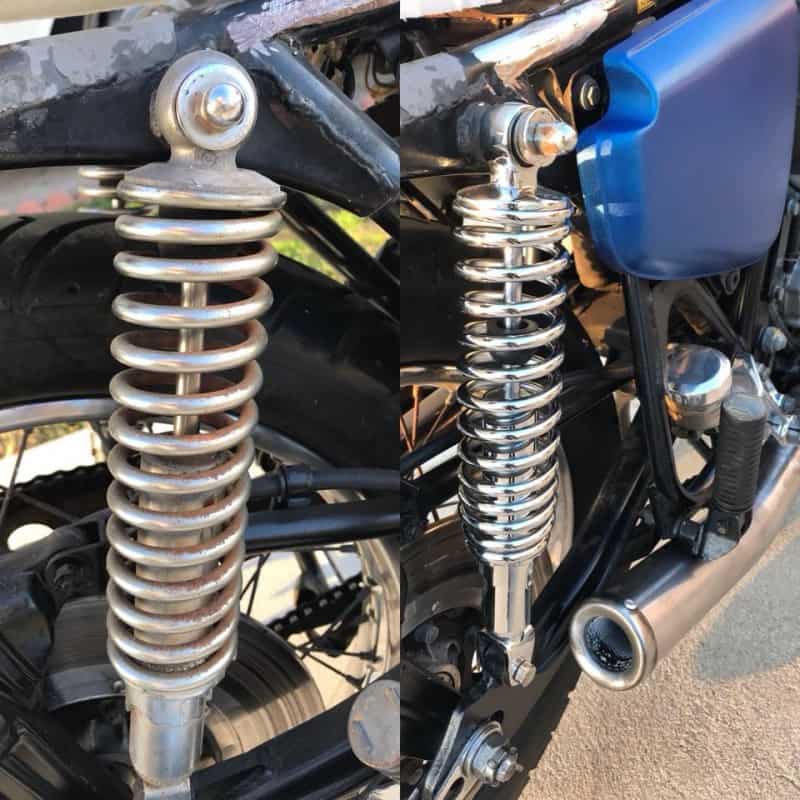
Above, you can see that I also changed out the rear shocks, as his ones were rock solid and rusty, so now he has some comfort on his machine that will soak any bumps up from the tarmac.

27654462_10156000263076760_4210414310045140770_n

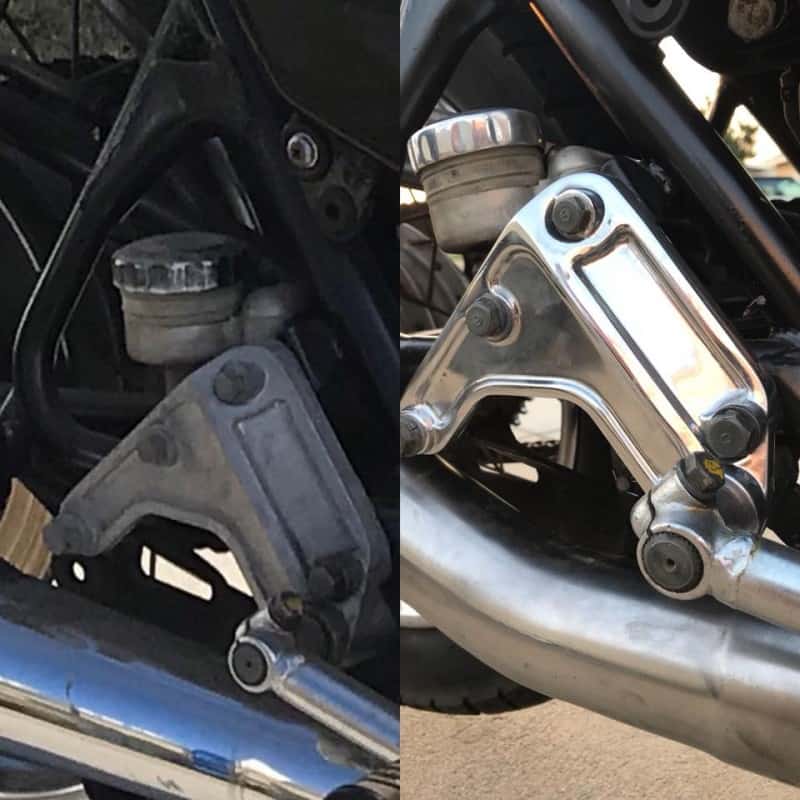
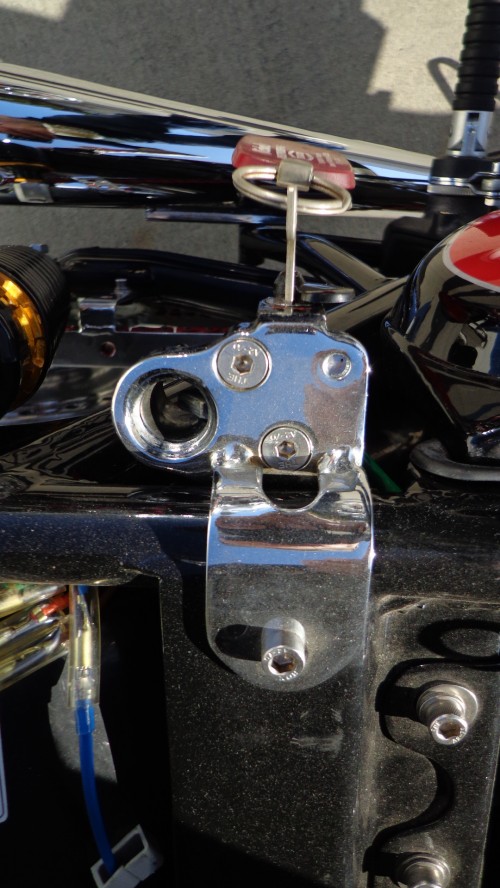
Removed the rear Master Cylinder bracket and Polished it to at least clean the area up a bit as well as polishing the reservoir cap too, makes a difference I think.

cb750

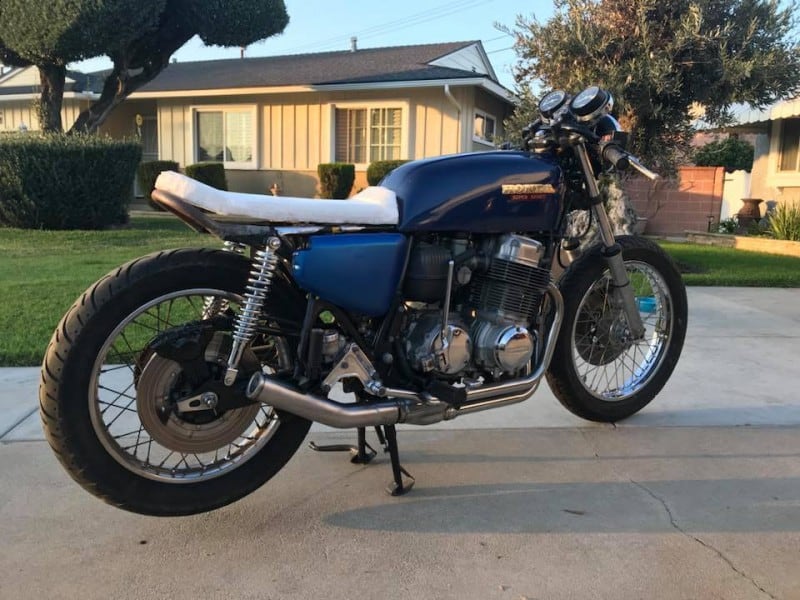
Above is before and below is how it is now but still more to do as I need to make a steel seat base and then cut some high density foam and upholster it, not sure what color material he wants but will call him once I get to that part of the work that is needed to be completed. I also have to figure out his tail light and turn signal situation as well.

27657427_10156000262971760_2537322673623165422_n

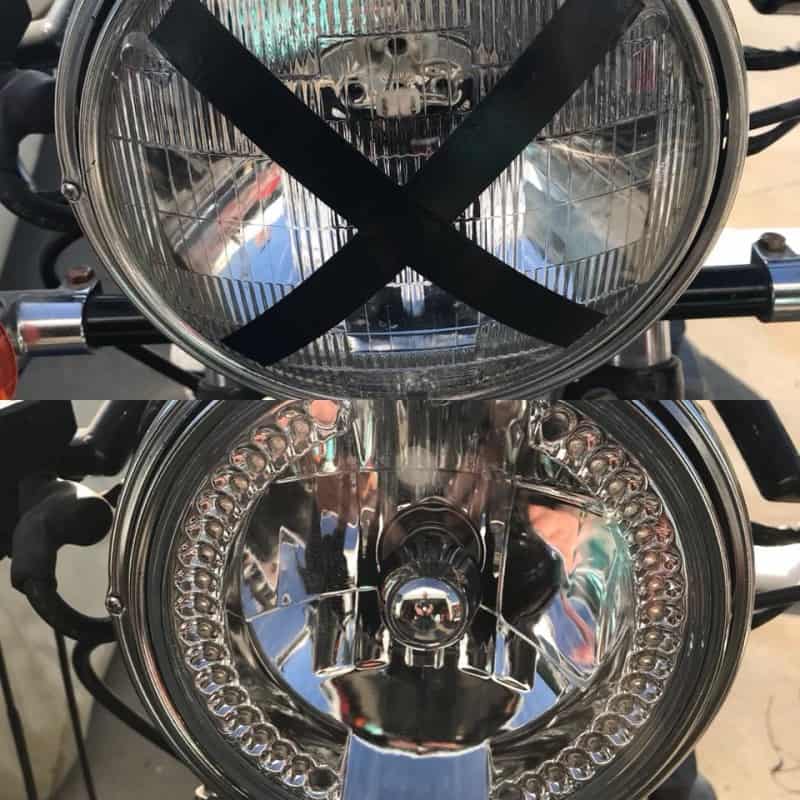
Next up was to remove the stock headlight and fit one of my LED versions that has the internal turn signals, this, not need the old bog ugly stock ones. be seen, be safe, thats the most important thing on a Motorcycle and with the halogen bulb and super bright Amber LED internals signals will make sure people know your intentions on the road.

27658082_10156000263241760_5938053602242579240_n

So there ya go, just a few little things I did, am now going to re-route the throttle cables as they said when they fitted them they tended to bind, so will address that next, I made some side covers and they are now on, just need to be painted to match tank when he repaints the stock tank later but so far I have got a lot of the issues out of the way.

book2

Seat next so hopefully I can do that soon and will keep you posted as to how that looks, if you need any parts, just drop me a dime or text us on 714-598-8392 and we hope to get you fixed up and back on the tarmac as fast as possible. I am here to help and love what I do its been a passion of mine since I was a Kid in Great Britain.

cARPY TURBO

Have a Great Wednesday everyone and thanks for reading my Blog.


For all your Motorcycle needs

Happy Tuesday Everyone

Rice Boiler


Fast approaching the 18 year Milestone here at Carpy’s Cafe Racers and have always enjoyed what I do here in Sunny California, and today is another great day and seeing as its Blog Tuesday, just wanted to than you all for purchasing from me and all the great emails and phone calls that I receive from you.

book


Trying to make New parts as well as sell the Classic ones too, I listen and if I get enough interest then I try and make the parts happen and so far it has worked out well.

Queen

So if you need Handle bars, to seats, to great Exhaust systems, I am here for you and once again thank everyone for all your support I really appreciate it.

Have a Great day and look forward to maybe one day meeting you at some of the shows we shall e attending this year, off to New Jersey in March, should be a Blast.

banner1a


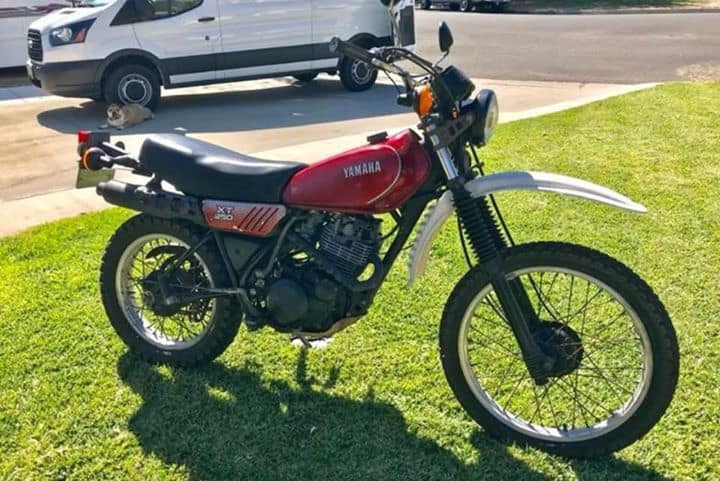
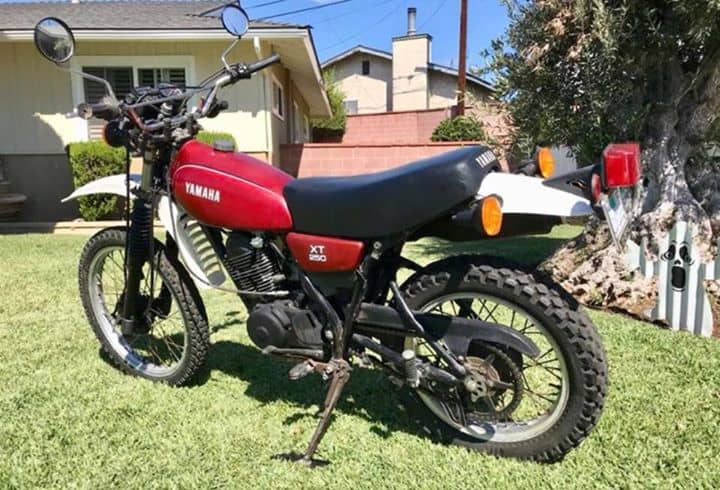
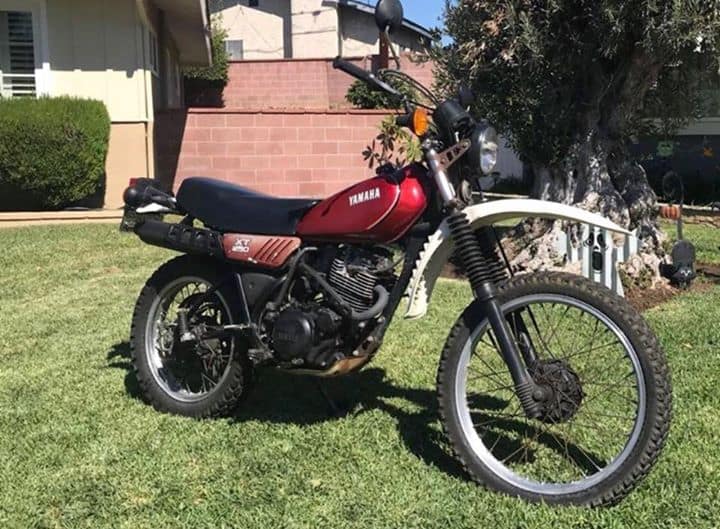
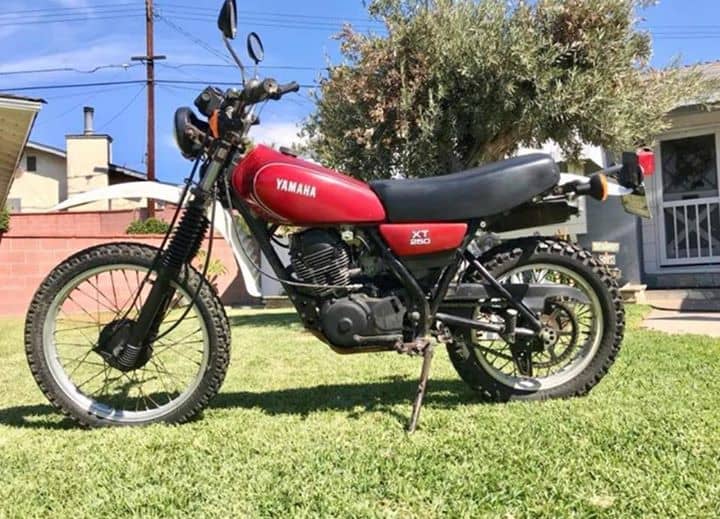
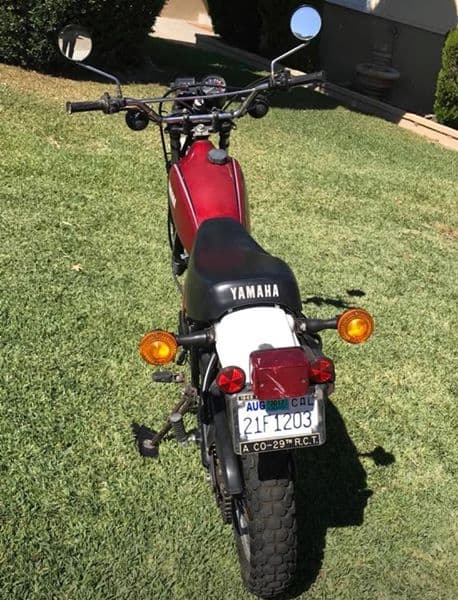
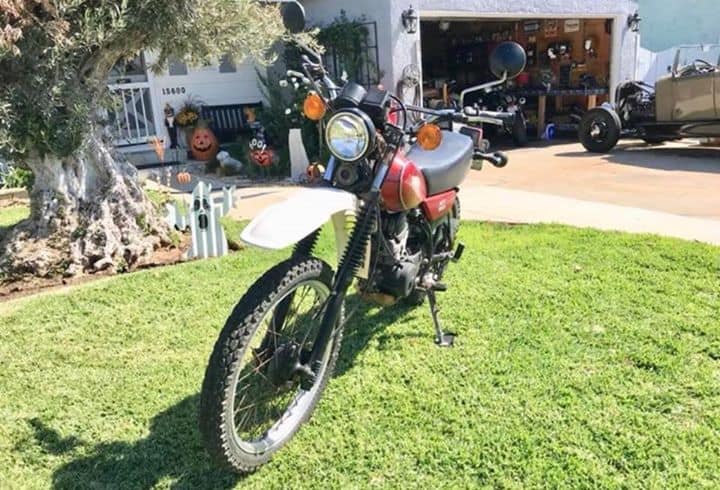
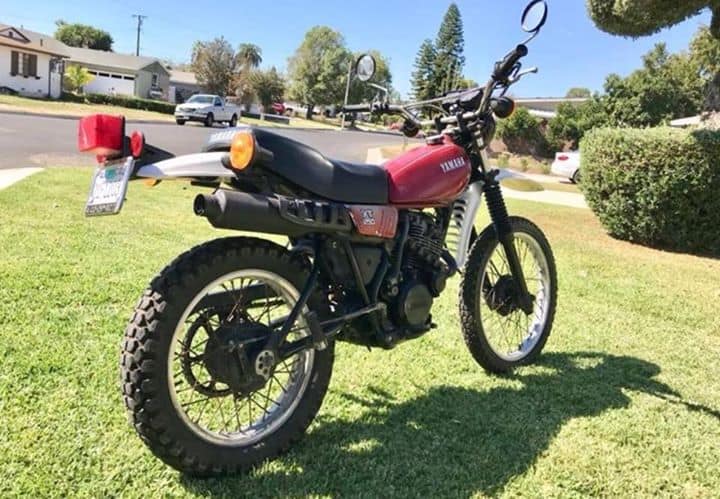
YAMAHA 1981 XT250 Trail Bike for Sale , Road Ready $1100

Here we are with a fun little trail bike, this is a genuine Original 1981 XT250 Yamaha and is Road legal, complete with headlight, tail light, turn signal and horn, this bike is registered on the road and would be a cheap form of transportation for anybody but still could go off road and check out the trails. Just $1100 will get you this fun machine.

yam5

Just changed Oil and fitted New battery, fun 250cc Motorcycle.

yam2


Comes with Title and registration.


yam1

The Bike starts up and goes through all the gears, all stock and in great condition for the age.


yam6

Located in La Mirada and can deliver withing 15 miles if you so wish.

yam4

It now has 2018 Tags on and ready to go, so a great price and a great little 250cc Yamaha.

yam3

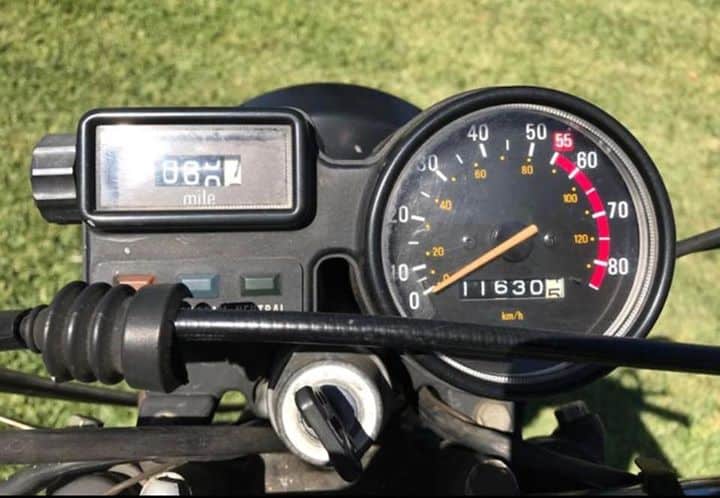
Original Mileage too.

yam10

Thanks for looking, if you are interested you can email me on carpy@carpyscaferacers.com

yam9

Great Learners bike too, 714-598-8392 Call or text.

If its good enough for Sylvester Stallone, then its good enough for anyone. ( First Blood )

The GHOST TRIUMPH ya either dig it or you dont.

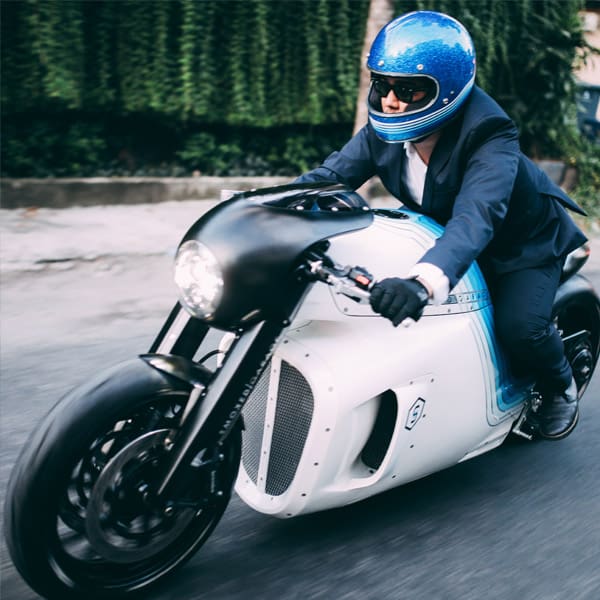
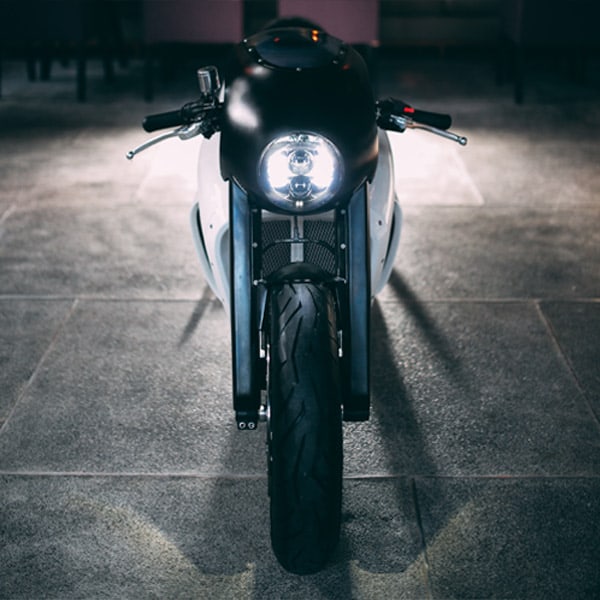
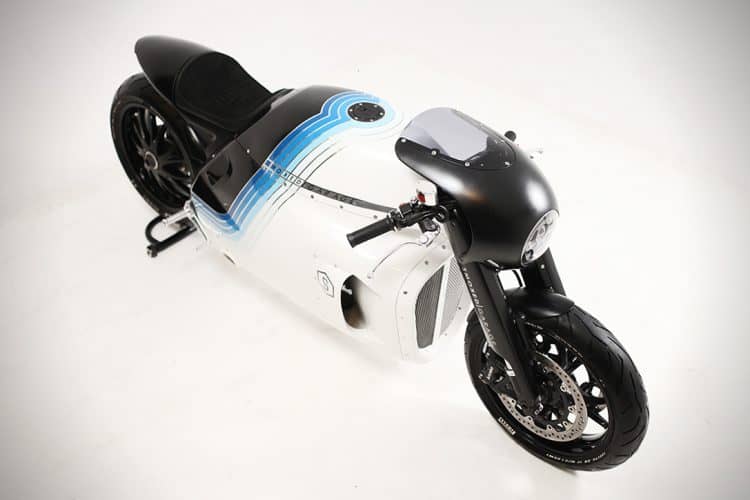
This creation is designed almost beyond practical function, but it’s not. This bike looks like it could contain a turbo fan jet engine and burn aircraft fuel, it doesn’t.
It looks forward heavy and maybe cumbersome for turns, it isn’t.

Triumph-Ghost-2
This bike looks like someone’s idea to test the land speed record at salt flats, it isn’t.
When you ride, this bike will not look like any other bike on the road anywhere near you, ever.

Triumph-Ghost-3

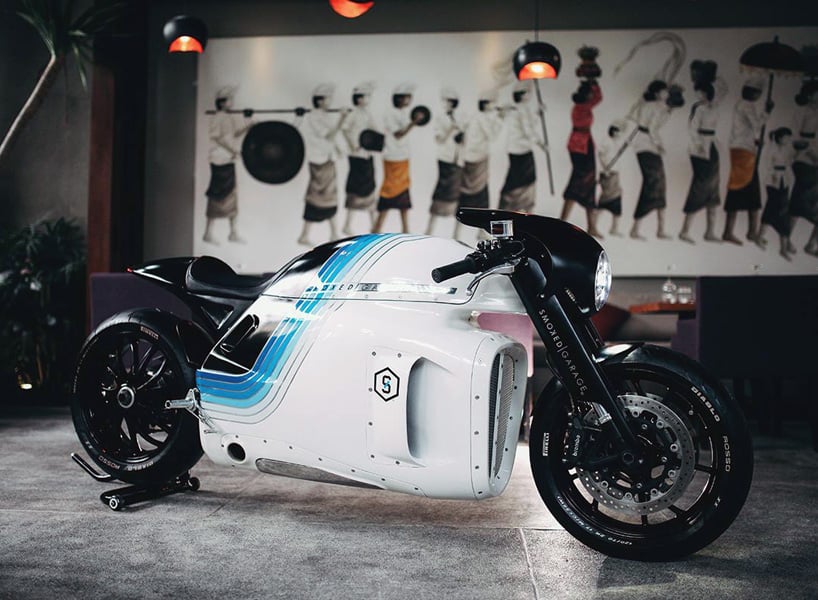
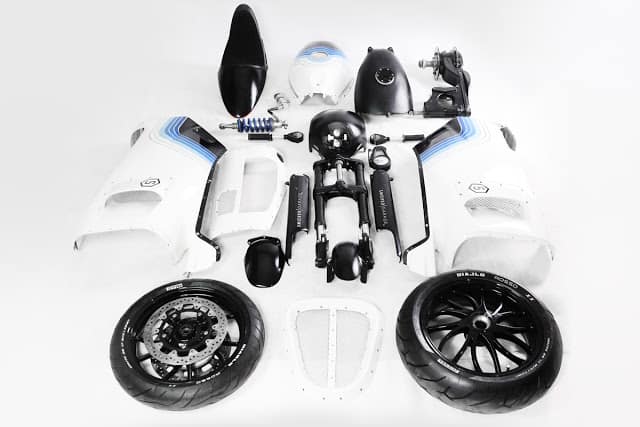
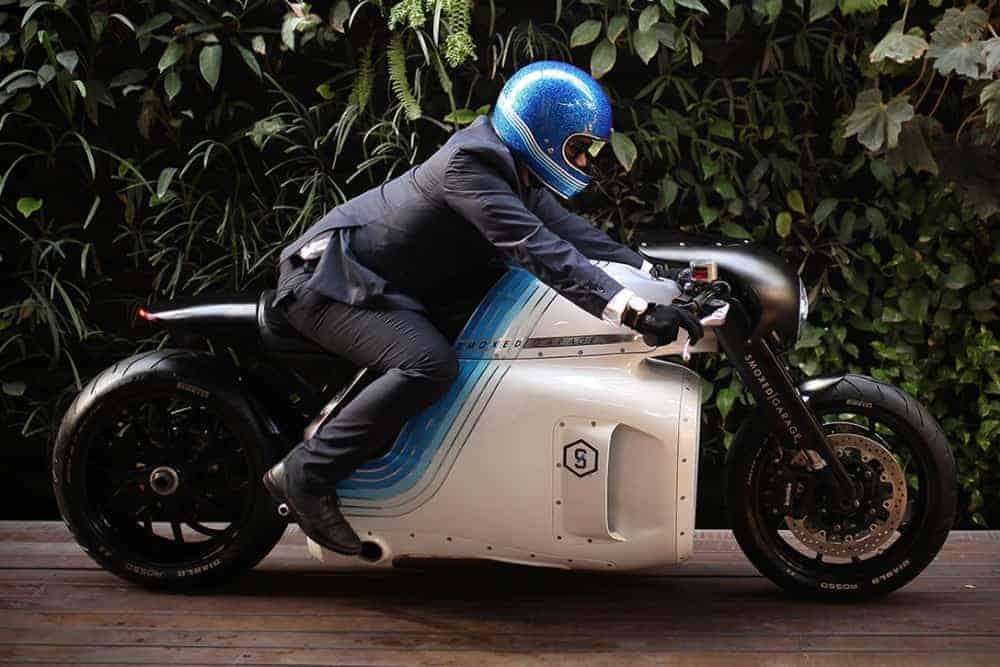
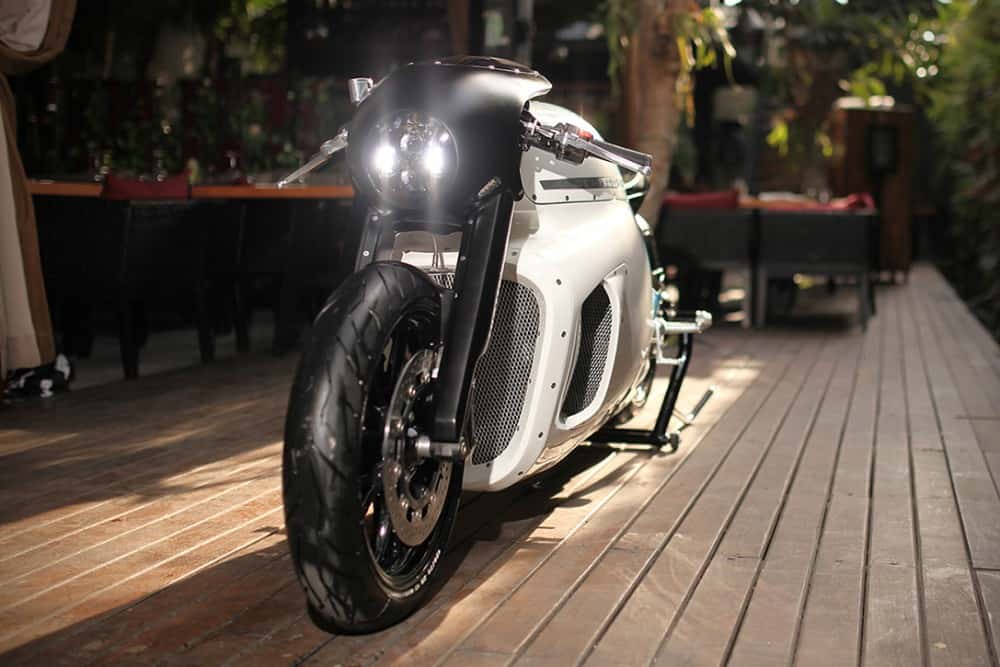
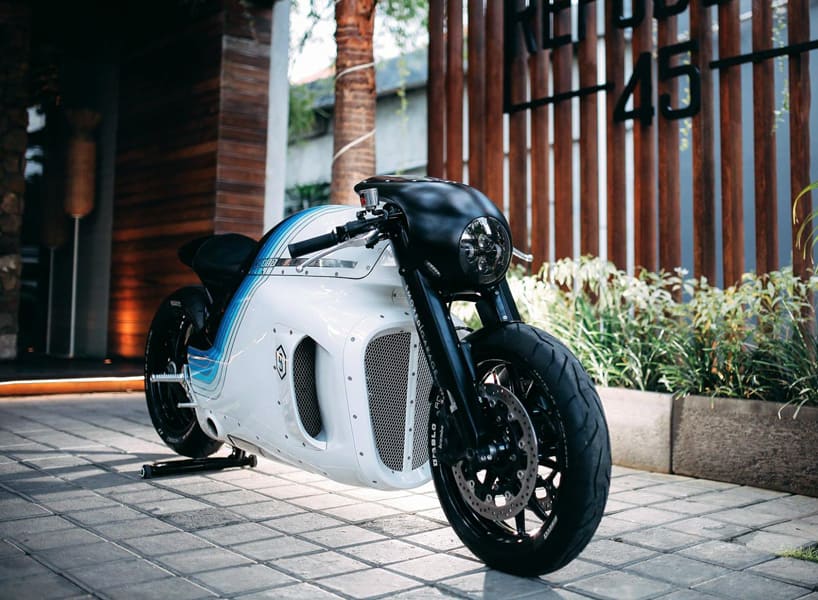
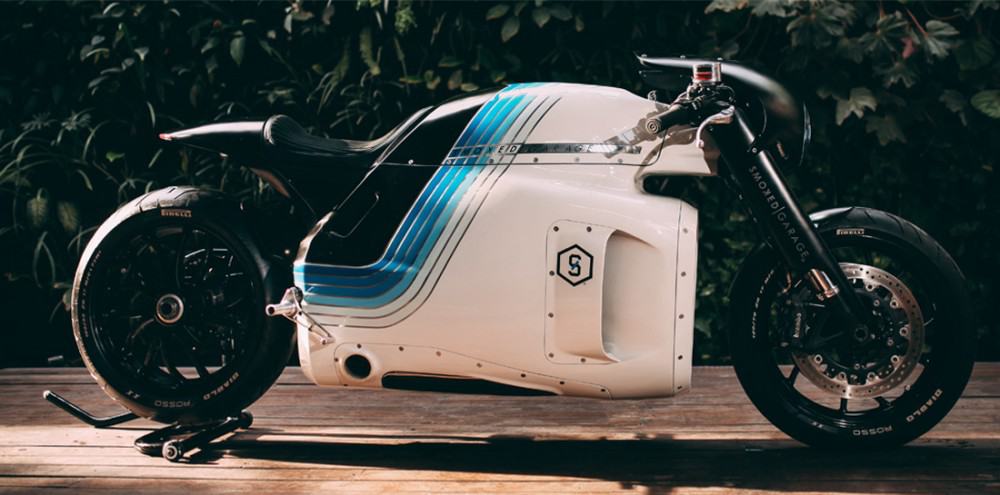
Inspired by the otherworldly lotus ‘C-01’ motorcycle concept, the triumph ‘ghost’ is an elegant build brought to life by indonesia-based workshop smoked garage. based on a 2005 triumph ‘speed triple’ bike, the ‘ghost’ now features a bespoke cooling system and frame geometry, housed in a full aluminium body.

triumph ghost7

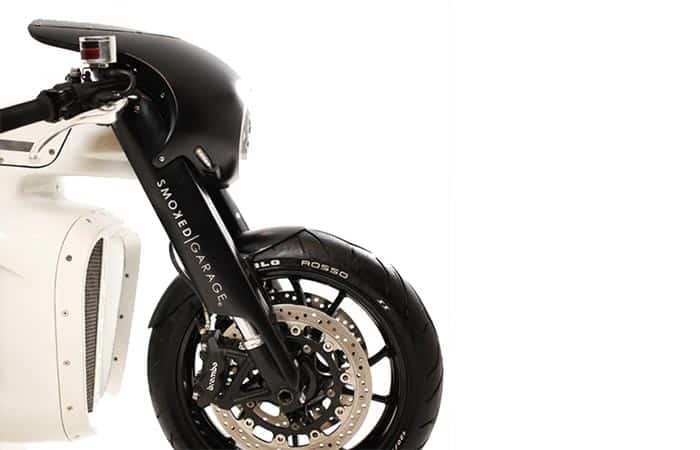
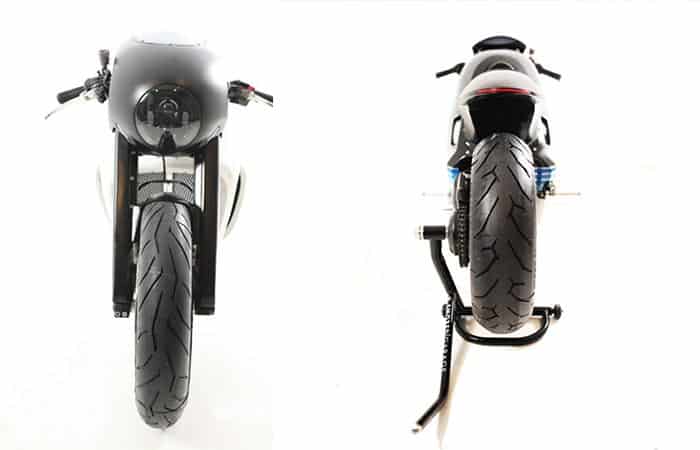
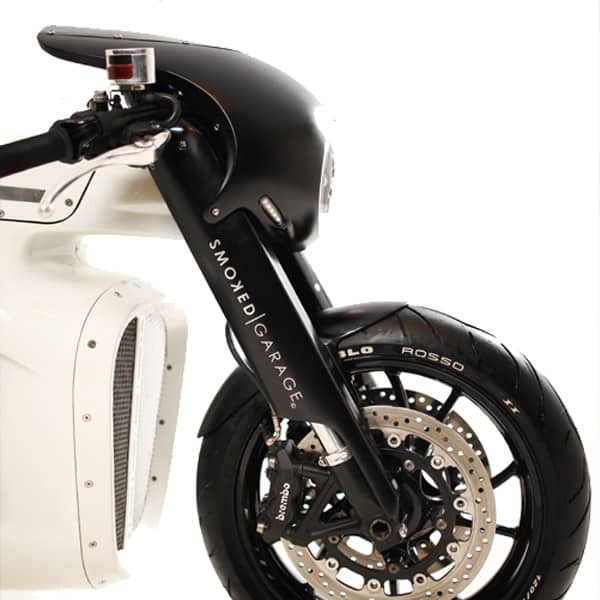
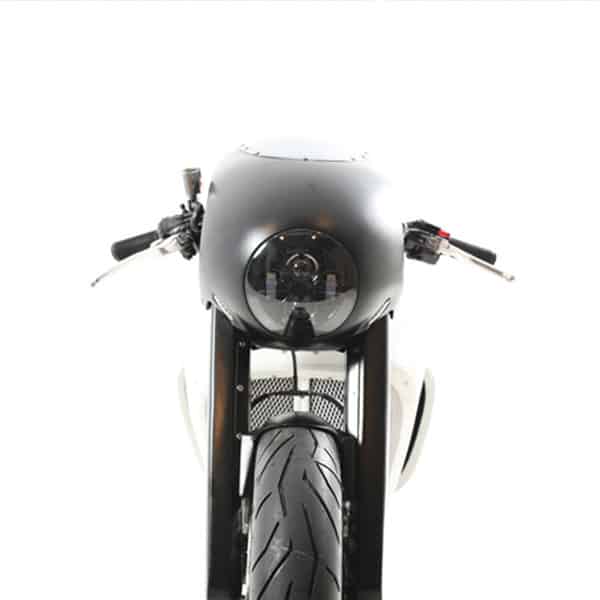
Once smoked garage had settled on the triumph as the donor bike, it didn’t waste any time stripping it back. as this was the garage’s second iteration of this futuristic bike, it was able to draw from previous experiences to improve upon the new build. it started by customizing the ‘speed triple’s’ frame and making new triple trees. it then assembled a new airbox and radiator, while adding a bespoke headlamp and custom fork sleeves to the front end.with the lightest result possible in mind, it then shaped the bodywork from five pieces of solid aluminum that join together with flush mounted bolts for an aeronautic aesthetic. smoked garage found cooling to be the biggest issue with its first bike, so it has revised the front grille and improved the scoops on the sides to draw-in more air around the engine. it also redesigned the mounting of the exhaust to help keep temperatures down.

triumph-speed-trile-ghost-10

The ‘ghost’ features a custom tail with an integrated LED light, with a pair of clip on bars and rear-set-footpegs to position the rider well for opening the throttle on the straight and narrow. the final finishing touch of the custom triumph is its minimalist paintwork–smoked garage found its final design after sketching over 40 different concepts–and when the paint was applied, it knew the ‘ghost’ had finally been brought to life.

triumph ghost6

TRIUMPH SPEED TRIPLE
1050 cc/64.07 cu-in engine
Custom cut and rebuild rear frame
Front Double Disk With 4 Piston Caliper BREMBO
Rear Single Disk with 2 Piston Caliper BREMBO
Handmade quality steel metal fenders, panels, headlight housing and fuel tank
Custom saddle
Custom paint color
LED lighting system for head, brake and turn lights
Original Triumph Speed Triple speedometer
Custom exhaust
Hand-turned brass and aluminum bushings and caps

triumph ghost4

ENGINE

Capacity : 1050 cc/64.07 cu-in
Engine type : Four stroke,transverse cylinder, DOHC, 4 valves cylinder
Power : 94.9 Nm / 131 hp @ 9100rpm
Torque : 105 Nm / 10.7 kgf-m / 78 ft.lbs @ 5100rpm
Compression : 12.0 : 1
Bore x stroke : 79 x 71.4 mm
Valves per cylinder : 4
Cooling system : Liquid -cooled
Transmission : 6-speed

triumph ghost1

CHASSIS

Custom by SMOKED GARAGE

SUSPENSION

Front : Ohlins
Rear : Monoshock with adjustable preload Ohlins

triumph ghost3

BRAKES

Front : 2x320mm Discs, 4 piston calipers Brembo
Rear : Single 220mm Disc, 2 piston calipers Brembo

WHEELS

Original Triumph Speed Triple

TIRES

Front : Pirelli 120/35 ZR17
Rear : Pirelli 190/60 ZR17

triumph ghost2

LIGHTING

Custom LED headlamp

triumph ghost5

FENDERS

SMOKED GARAGE custom fender

INSTRUMENTATION

Original Triumph Speed Triple

Triumph GhosT1a

I wouldn’t recommend riding this in a suit and I should think the emissions from the exhaust port exit by your foot would make that suit soak up all them lovely fumes.

Triumph Ghost2a

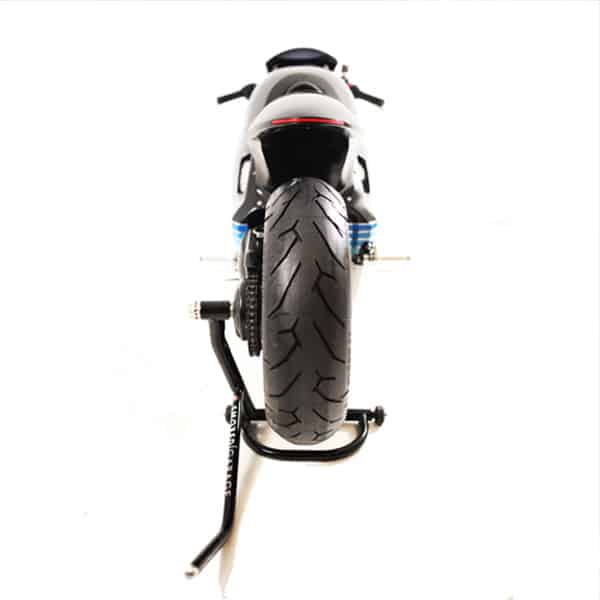
Unfortunately practicability has been bunged right out of the top floor window as there is no side stand and you would have to have a Support car carrying the Motorcycle rear stand for you when ever you wanted to park it up some place.

Triumph Ghost4a

Don’t get me wrong, I would ride the thing anywhere on a flat surface for sure, just wondering how the heat is under that Cowl and does it all dissipate around your body as you ride?

triumph ghost5a

At least that LED Lighting will let people know you are approaching them.
triumph ghost6a

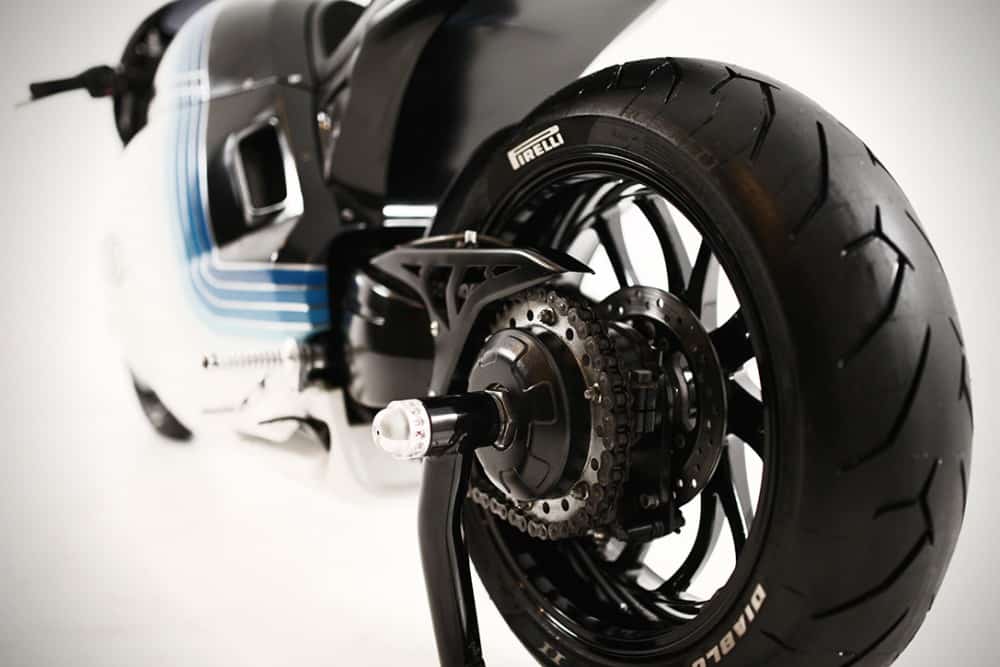
I loved the rear wheel set up and having the disc brake rotor Behind the sprocket but would be concerned that all the goop from the chain would spalsh all over that Rotor, making barking a frigging Nightmare.
Short Movie Bonnie Lass

Todays Blog is a short movie about a couple of fellas that ride from one cafe to another to meet a couple of Birds, along the way, riding through their town and a motorcycle garage, shame they didnt stop in there but, they head to the cafe and meet up with a couple of Girls, I guess they hook up and then they ride off into the sunset.

Worth a look, Good Music track though., make your own mind up, takes a lot of time to get a small production together, believe me, been doing that years and I take my hat or helmet off to the director for getting it completed.

It’s a short movie 3 minutes but worth a look, maybe a sequel coming?

bonnie lass2

This short movie celebrates our enduring and timeless passion for motorcycles. The attraction in this story is not limited to two-wheeled machines. If you are a biker you will surely understand. It features young Triumph owners and their friends and although this is a fictional story it sets out to capture the lasting enthusiasm for these British icons.

 The period black & white film style was chosen to reflect the era of classic 50s and 60s British motorbikes. In contrast, the 2017 soundtrack by Black Pistol Fire makes no secret that this is about today’s bikers, both young and old.

My aim was to capture the thrill of owning these beautiful machines through a nostalgic lens and hopefully inspire other young riders who are seeking to express their own individuality. 

 I am excited by the resurgence of café-racers and custom built bikes which remain popular to this day. The road scenes between the two cafés in my movie was inspired by the origin of the appropriately named café-racers of yesteryear.

bonnie lass3

This is a very personal project for several reasons. I took my motorcycle test in 1970 at the age of fourteen and I have ridden motorbikes ever since. Most of the bikes I’ve owned were manufactured in the Far East with one or two from Austria and Germany. It was only two years ago when I bought my first Triumph, a special edition Rocket X. In the past year I bought a 2011 Triumph Tiger 800. I really enjoy riding both these bikes, each one with its own special character.

It was a serendipitous moment when I found the backing track “Don’t Ask Why”. My daughter sent me a Spotify link to a completely different band and when I clicked ‘shuffle and play’ the Black Pistol Fire track came up instead. The title and beat suited the story perfectly and is just what I was searching for. After listening to a few tracks from the album Deadbeat Graffiti I immediately made a purchase and downloaded it. These two guys make a great sound so please check them out.


I hope you like the film and see if you can spot the “Time-Traveller” who features in it.


Bonnie Lass

Being an amateur filmmaker, the project was a new challenge for me, with scripted scenes, a cast, location planning and post-production editing. I am really grateful to the cast who got fully involved in the project and to everyone else who has given me advice and support.

A few cups of coffee was the total production costs so a really BIG THANK YOU to everyone who gave their time freely to take part or let us use their premises as film sets! If people like it then maybe we will make a sequel next summer.​

Starring

Jack Mourant

Drew Brackley

Joanna Rathband

Kath Innes


With special thanks to

Management and Staff of

– White Rock Cafe

– Di’s Diner

– BLP Motorcycles

– Island View Kiosk


Tim Davey – DroneGSY


Barry Gavey – Incidental Scenes

 Also taking part

Jeff Harris

Shannon Crew

Jade Ferbrache

Ben Le Page

Alain Branquet

Hannah-Marie Robins

Chris Robins

Claire Hurst

Dieter Hurst

Zak Robin

Colin Robin

Roy de Jersey

Martyn Lowndes


Music

“Don’t Ask Why” by Black Pistol Fire


Directed and Produced by

Dennis Le Prevost

CB500-4 Created by French Builders

Well if you think of France, usually what comes to minds is Wine, frog legs, snails, striped Tee shirts, Black berets and people riding push bikes with bunches of Onions and Garlic hanging off it.

pure2

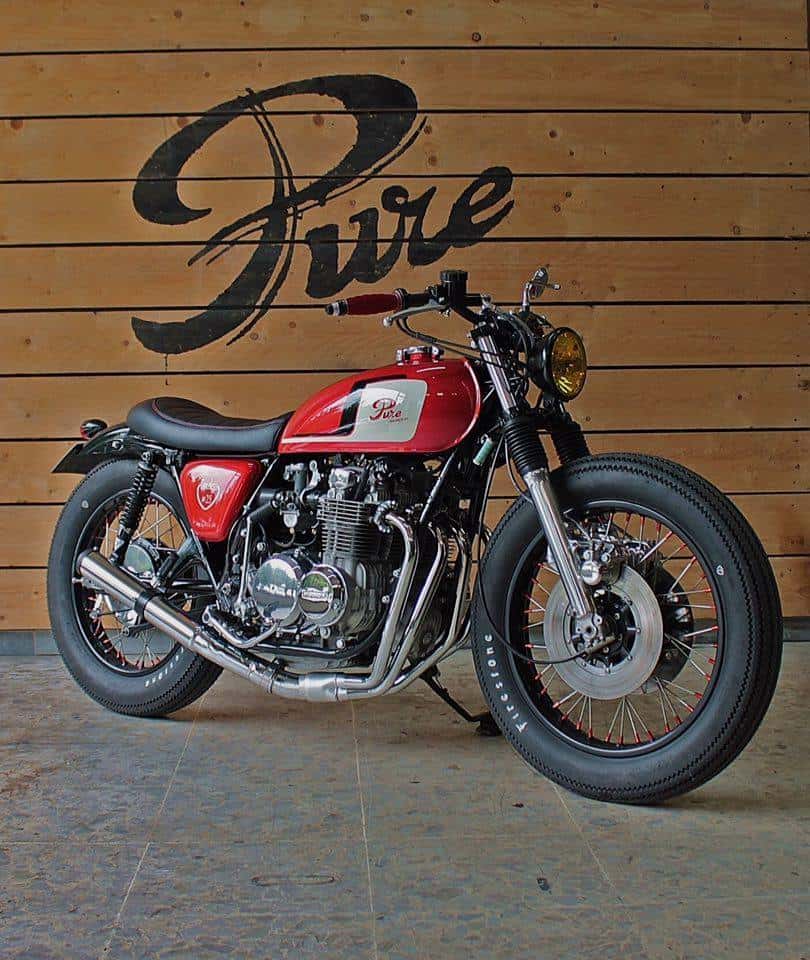
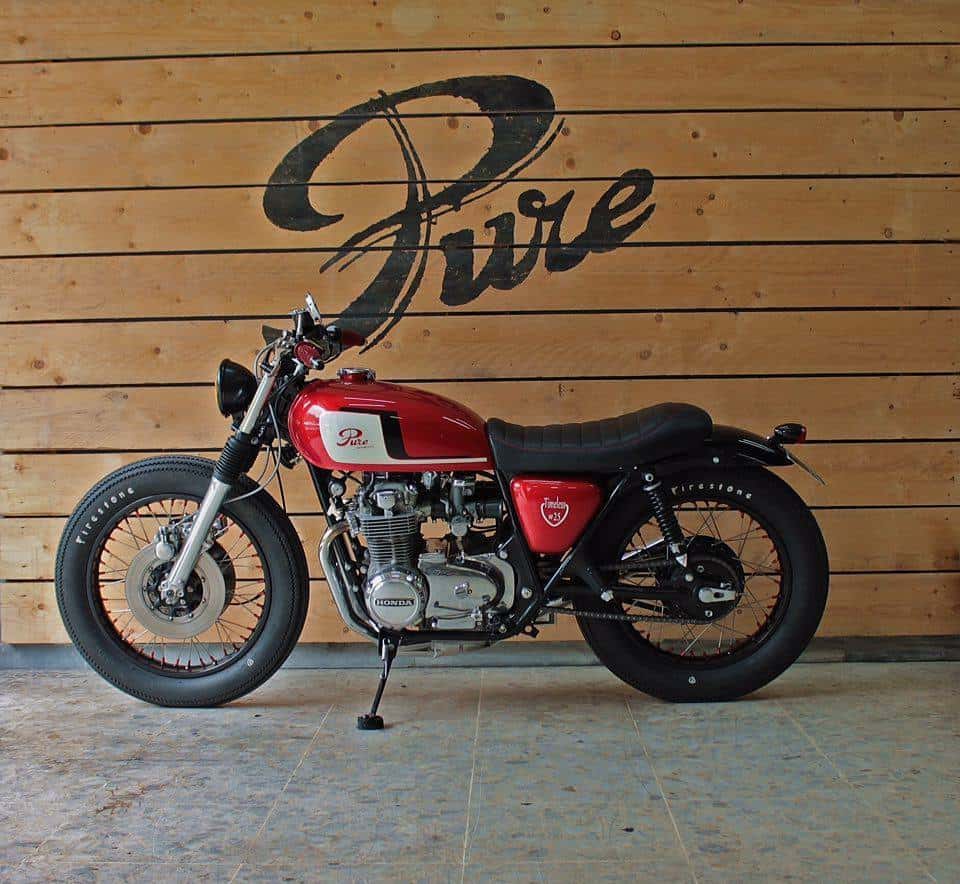
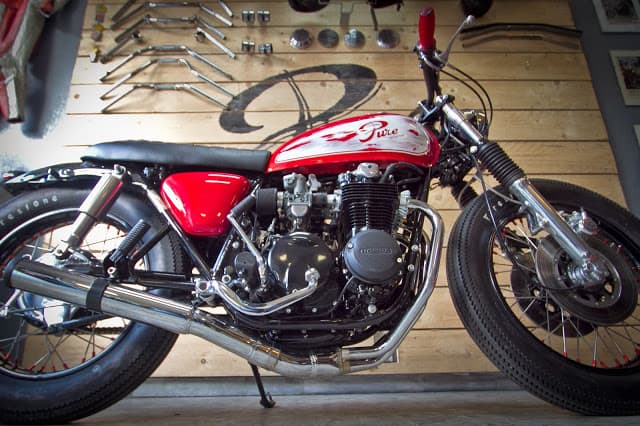
Thats very true, but, they bang out a few cool motorcycle too and this 1974 Honda CB500 Four is the result of these Garlic eaters and a great job too.

pure5

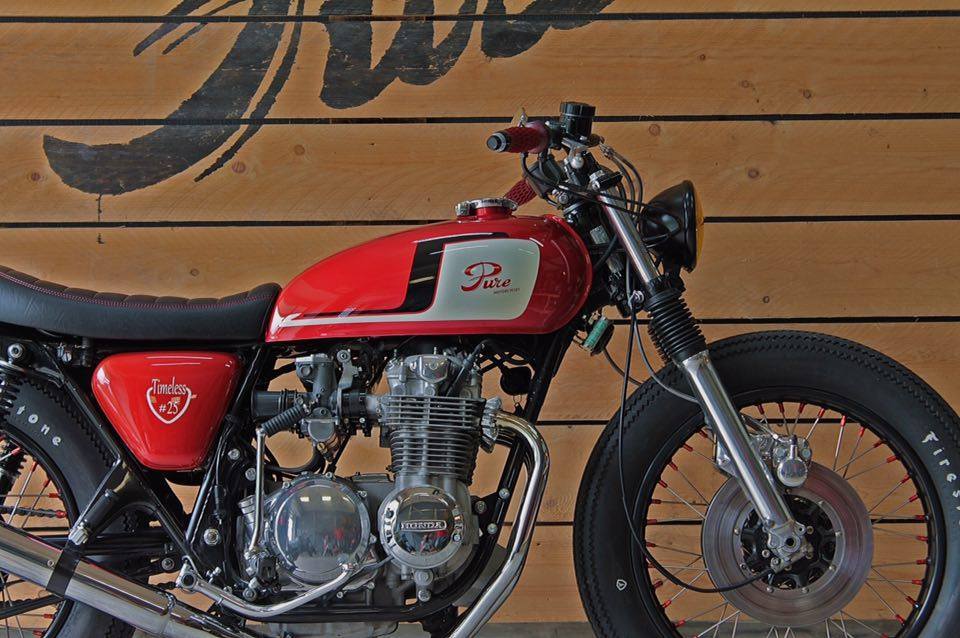
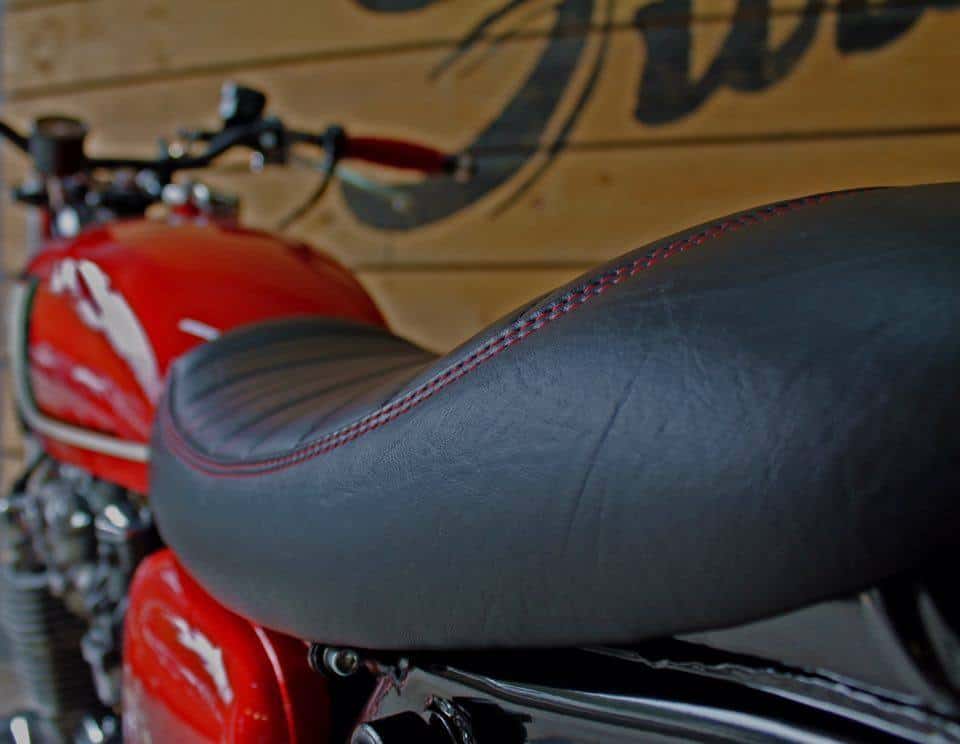
Pure motorcycle company has been around since this Honda originally came out, so when a Customer approached them to create a unique Brat style machine, it was a no big deal slam dunk for them and they got right into the stock bike. the seat was shortened 4 inches too and then reupholstered to give that Classic look.

pure6

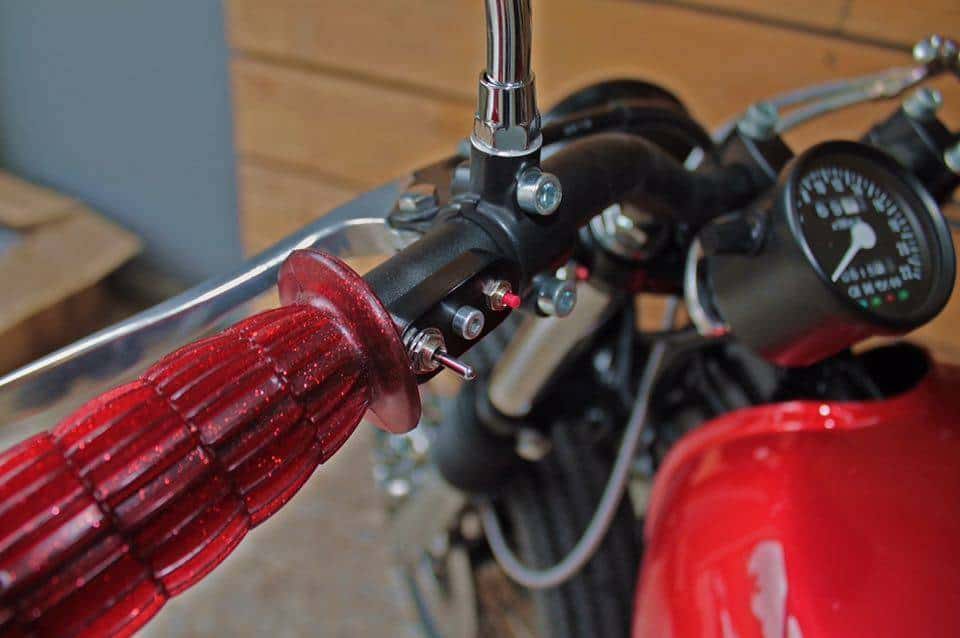
A clean look, Pure Motorcycles then hand bent some 7/8 Handlebars up and powder coated Black, then for minimal look, they made a small switch mechanism up which Incorporated the starter button and the headlight, of which works great, to add to the Brat look, this has a small 2.5 Speedometer that has all the led’s at the lower half to show neutral, Oil Light and turn signals. New stainless hardware will not get rusty in the damp European winters as well as using a set of old metal-flake GT grips from a Schwinn, dressed the bars up some what.

pure7

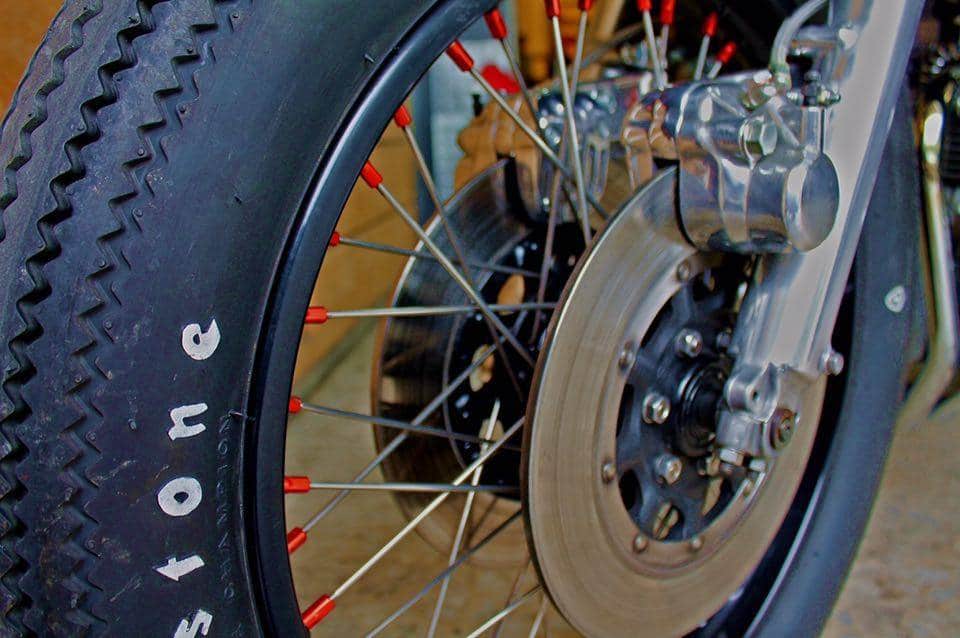
The front  forks were lowered by 2 inches and rebuilt, adding twin Rotors and then polished the lowers and calipers to a chrome finish, the Obligatory Fat Blackwall tires were fitted and although not the best Handling tires, they give the bike some Vintage styling.

pure4

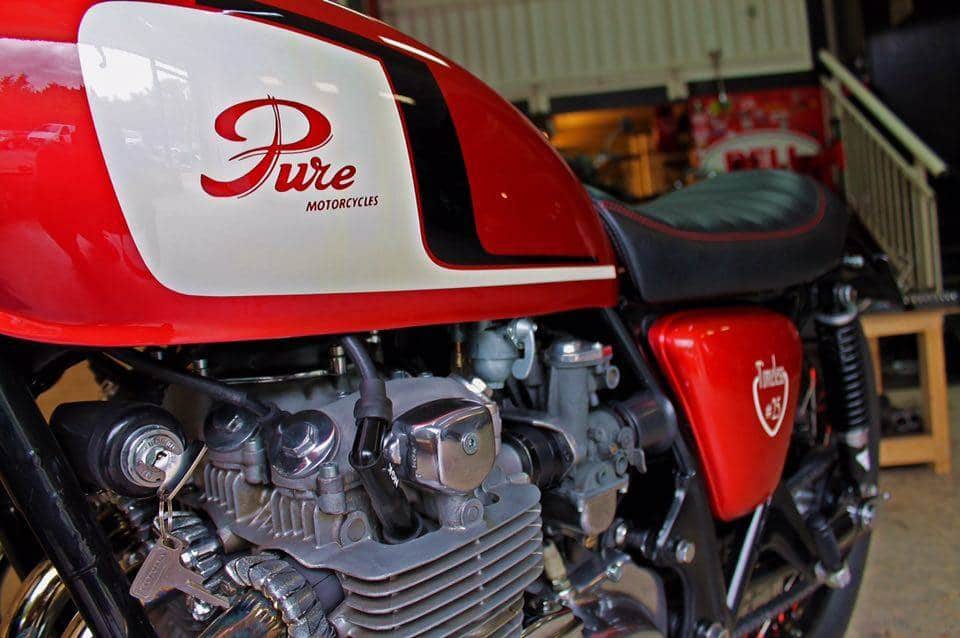
With a fresh rebuilt Motor and the Carbs synchronized, the engine is like New, the Gas tank got a cool retro look and this time they wanted to keep the original side covers to keep the Classic original lines and leave the stock battery and electrics where they were from the factory.

pure3

Bobbed rear fender, Bates style short LED tail light and a brand New Marving 4 into 1 exhausts gets this bike looking cool, Yamaha headlight, Polished cases and New X-Ring chain finishes this Brat style Honda off.

pure14

 Bien Joue my French freinds.

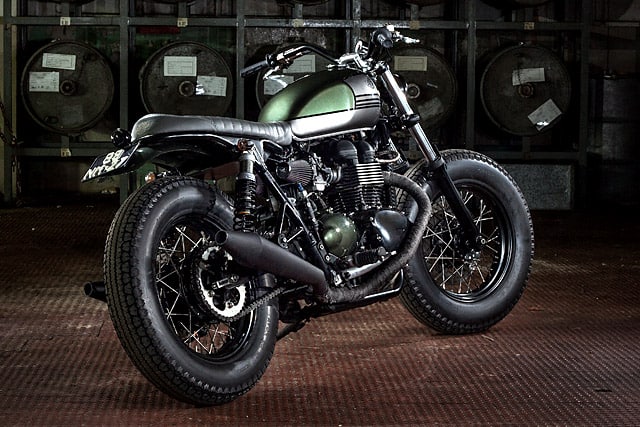
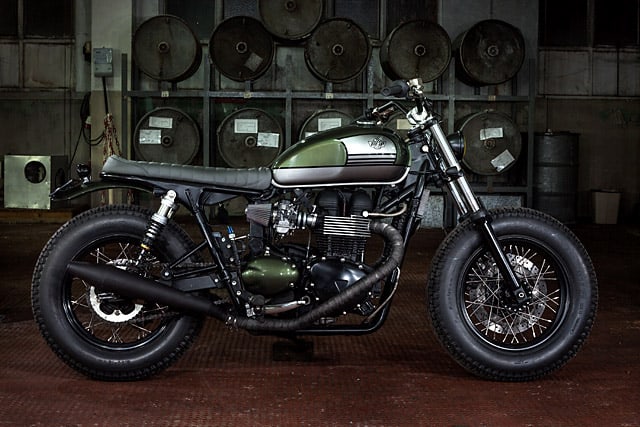
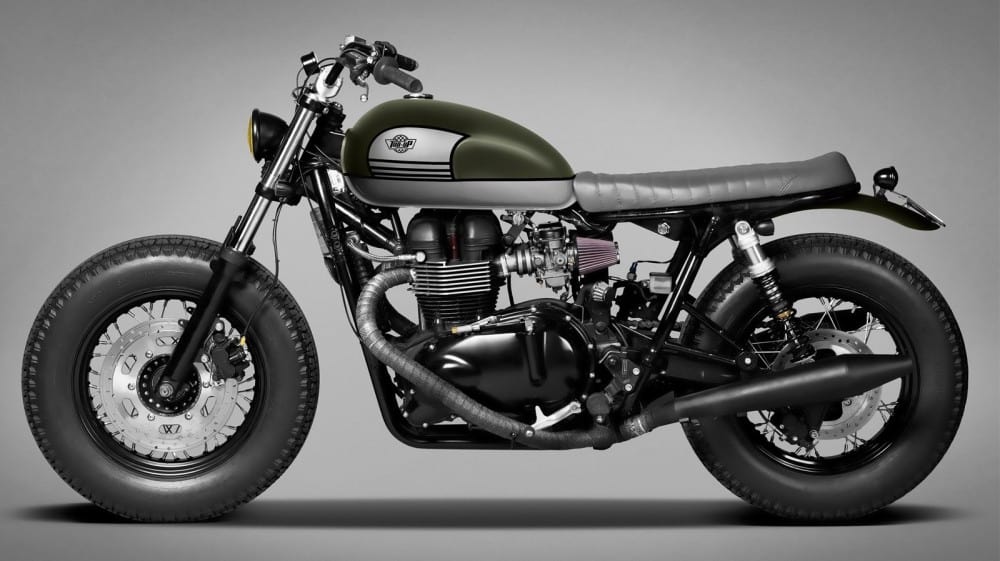
Hiawatha the Bonneville that’s Sharper than a Tomahawk!

Well, you see many different style of Motorcycles around the globe that have taken a good and strong foot hold on the Cafe Racer, Brat, Bobber, Tracker, Custom look, and this is no exception.

Hiawatha2

I obviously have been into these style bikes as a kid, when I was 12, me and my brother had a french Mobylette, Dad bought it for $20 and it had no seat, we removed the Mudguards, and headlight and fitted Dirt bike handle bars and use a skateboard deck for the seat and, a Brat was Born, and over 40 odd years later, they are still being created today.

Hiawatha1

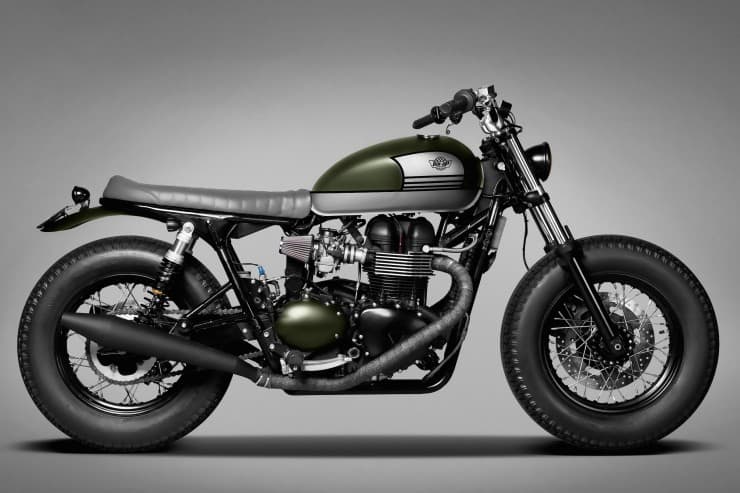
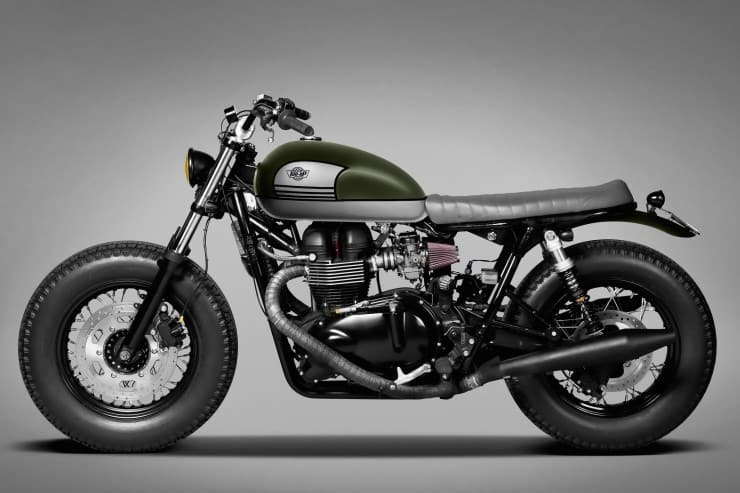
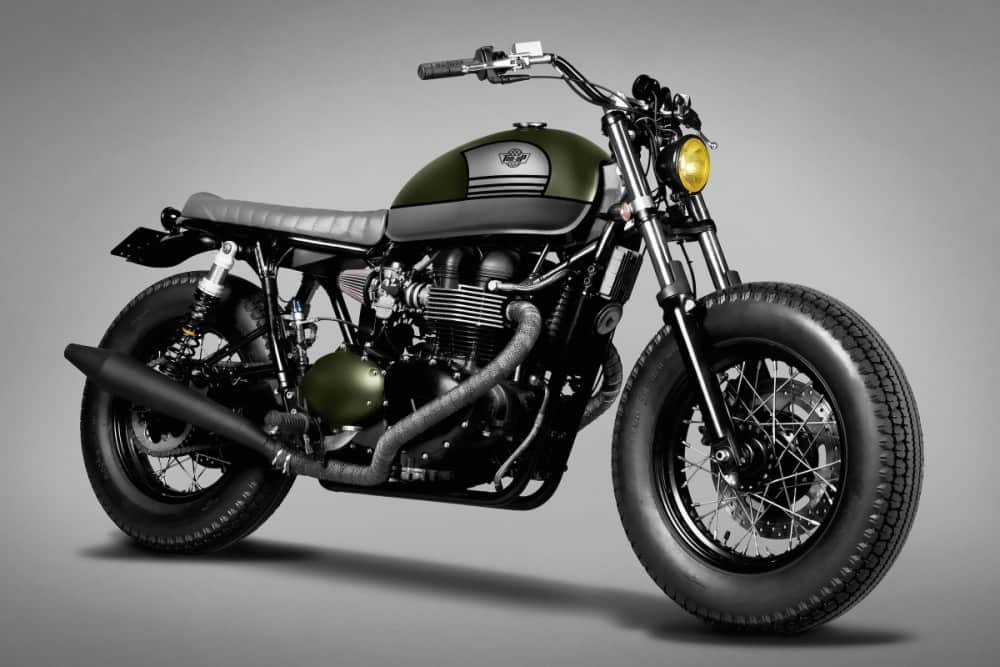
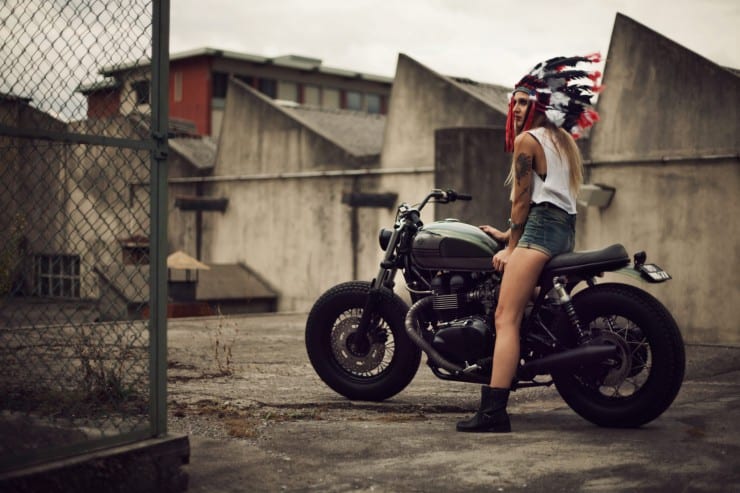
Dubbed the “Hiawatha” after the native Americans the platform of choice was a 2007 Bonneville, Not the last of the Mohicans but, the last of the carburetor motors as in 2008 the Fuel Injected models arrived.

Hiawatha6

This bike was being built by the Ton up garage for a Client out in Lisbon, and a second hand 2007 Bonny was located as the Platform to create a unique Brat style machine for the Customer.

Hiawatha5

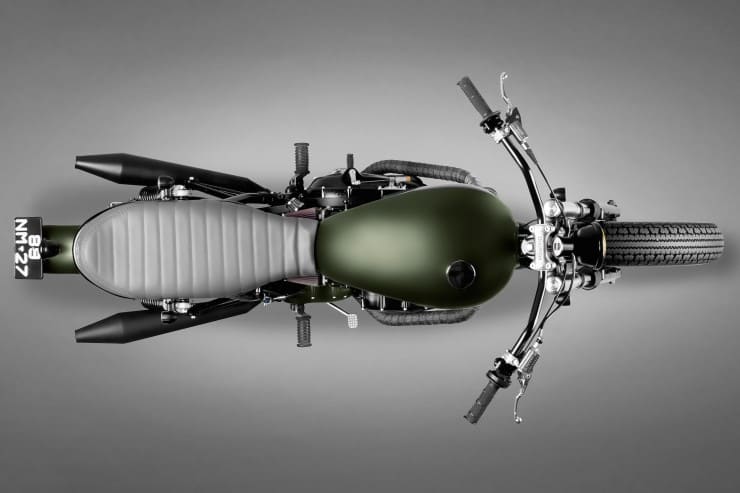
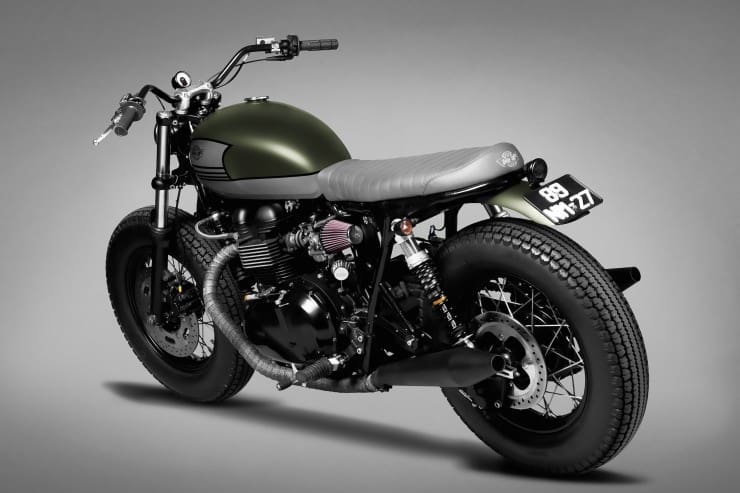
First off was to strip parts off the machine they no longer needed, the seat was taken off and the frame rails were altered to allow for a Custom seat base to be fabricated, once that was completed, it was upholstered with memory foam and stitched in the old school style Tuck n Roll, with a grey Naugahyde material for a long lasting comfortable ride, as well as being able to take his partner on the back as and when desired.

Hiawatha3

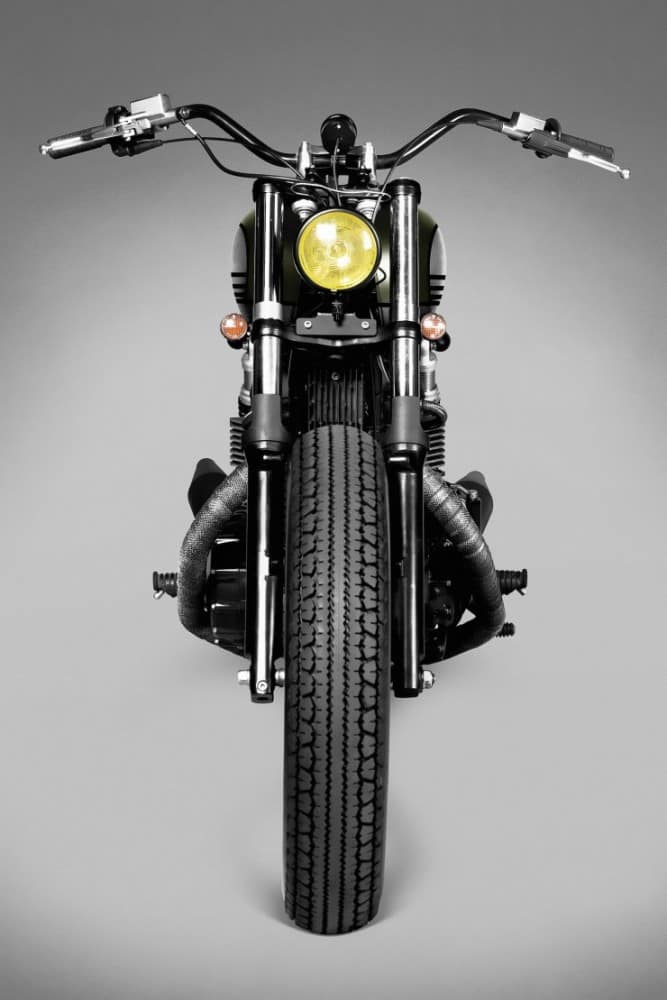
A set of much wider Western style Handlebars were fitted, as well as removing the old Master cylinder for the clutch and a hydraulic version fitted, this really cleans the front end up and with the smaller Speedometer and headlight, the bike has a really different stance.  Magura hydraulic master cylinder clutch and brake are a good quality set up and will help stop this machine way faster than the stock set up and with less hand pressure.

Hiawatha7

At this part of the blog I like to point out, “Each to their own” Some people will like what they have done, some may not, its all in the eye of the beholder, I hear many complain about the big bulbous tires and small head light, its a style, like some of you like wear hoodies and Converse, so give this bike a chance.

Hiawatha8

Many complain that it will ride so badly, well, unless you have built and ridden one, you will never know, I have built many and, although way different to modern tires, you get used to drop off in corners. This is a Custom Brat style build, not a T.T. machine, so a slower speed to take the area in, rather than a Ton Up Rocket.

Hiawatha9

I personally love this Custom created machine from a work of art, its unique and very well thought out, I love fat tires, just look back to early 1940’s Harleys, they had fat tires, I think that these do have a certain equal proportion to the machine and sitting on 16 inch tires will sit level now.

Hiawatha10

The engine had a little bit of tune up and then painted black, of which I like, the carbs were re-jetted as Up-swept Megaphones were fitted and the headers were wrapped for that old race track look, I like this too, many dont, like I said, “each to their own”. Also New K&N Filters were added to help these Carbs breath more easily.

Hiawatha11

The wire harness was modified and the battery was replaced with a smaller Lithium model and hidden with the rest of the electronics under the seat, this keeps everything neat and tidy and having the Rims and hubs painted Black sets the whole motorcycle off big time.

Hiawata_lefth_1600x900-cr-1600x898

Suspension was sorted out with an expensive set of rear Ohlins and re-springed front end, made sure that this beast is a comfortable ride and soaks up any of the bumps on the Lisbon Tarmac.

Hand fabricated rear fender is Bobbed to make this machine look bigger and the small bates style tail light may be small but LED lighting is brighter than Einstein.

The Olive Drag green with a flattening Agent works well against the Silver Base and even though I personally am not a fan of Green, this works really well, I mean the Thruxtons  came out in BRG, and this color concept does indeed work very well against the Black of the frame, exhaust and wheels.

Thanks for looking and, if I can help locate or sell parts for you and your machine, just let me know.

carpy christmas


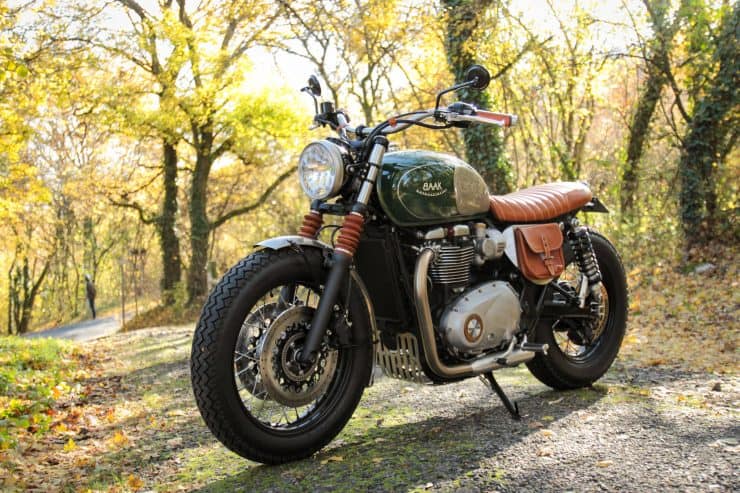
BAAK MOTORCYCLES CUSTOM TRIUMPH BONNEVILLE T120


THE TRIUMPH BONNEVILLE T120 More fun that watching a dozen frogs in a Fly factory.

The Triumph Bonneville T120 made its debut in 2016, the motorcycling world had been expecting some big announcements from Triumph so it wasn’t a complete surprise, but the T120 was perhaps a little more than most were anticipating.

baak3

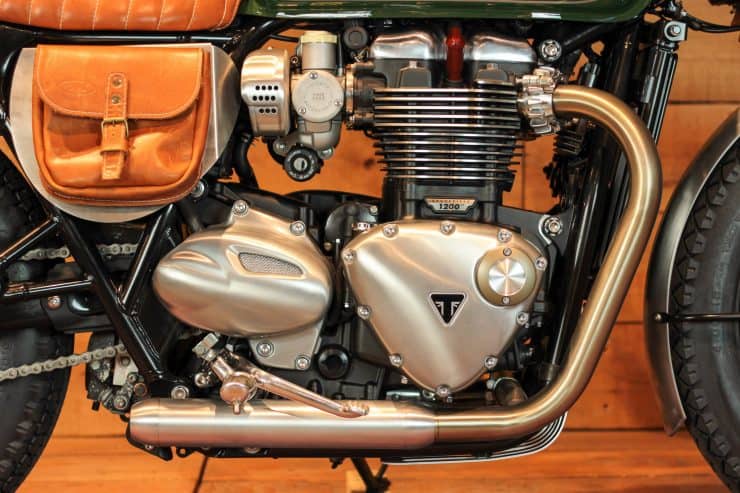
At its heart the Bonneville T120 is fitted with an all-new liquid-cooled parallel twin with a SOHC, 8 valves, a capacity of 1200cc, a bore / stroke of 97.6 mm / 80 mm, a compression ratio of 10.0:1, multipoint sequential electronic fuel injection, and a 270° crank. There’s 79 bhp (at 6550 rpm) and 77 lb-ft of torque (at 3100 rpm), fed to the rear wheel via a 6-speed gearbox and an X-ring chain.

baak18

Reviewers overwhelmingly loved it. There was a clear and distinct improvement in build quality throughout, and rival motorcycle manufacturers like Harley-Davidson, BMW, and Moto Guzzi had been put on notice.

BAAK MOTORCYCLES

baak16

BAAK Motorcycles was founded in Lyon, France in 2012 by Rémi Reguin, it’s since grown to employ five, and the company enjoys a global reputation both for their custom motorcycle builds, and for their in-house developed motorcycle parts for Royal EnfieldMoto Guzzi, and Triumph.

baak15

THE BAAK MOTORCYCLES BONNEVILLE T120

baak5

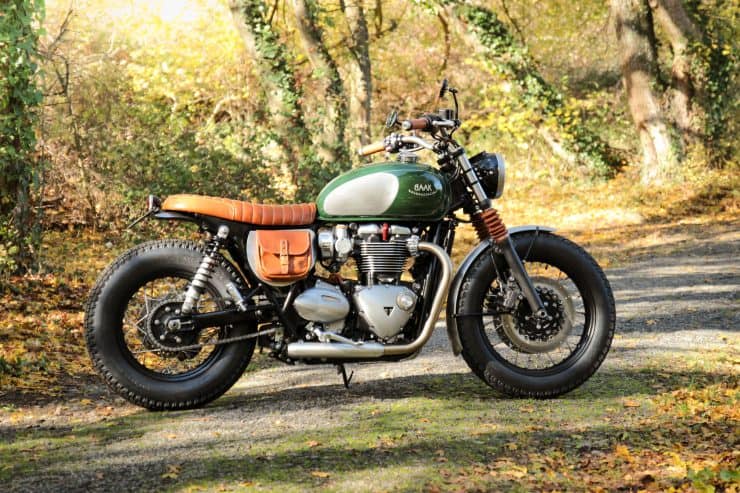
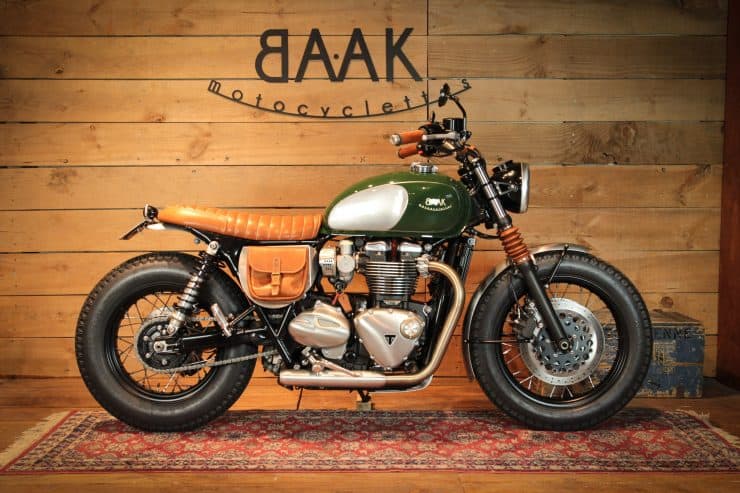
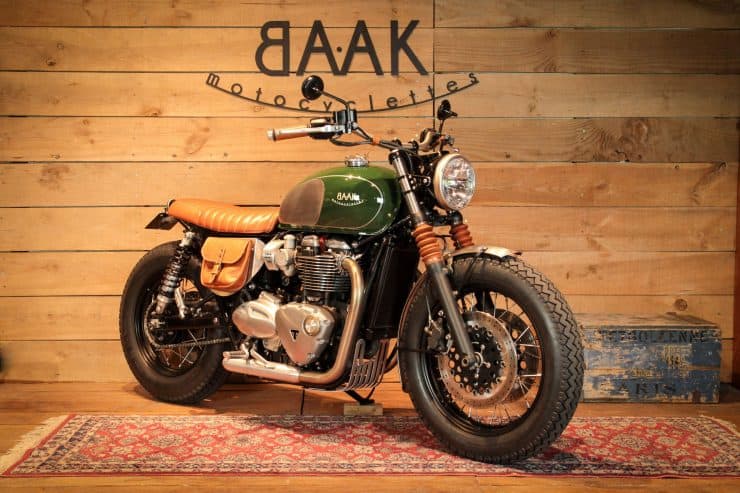
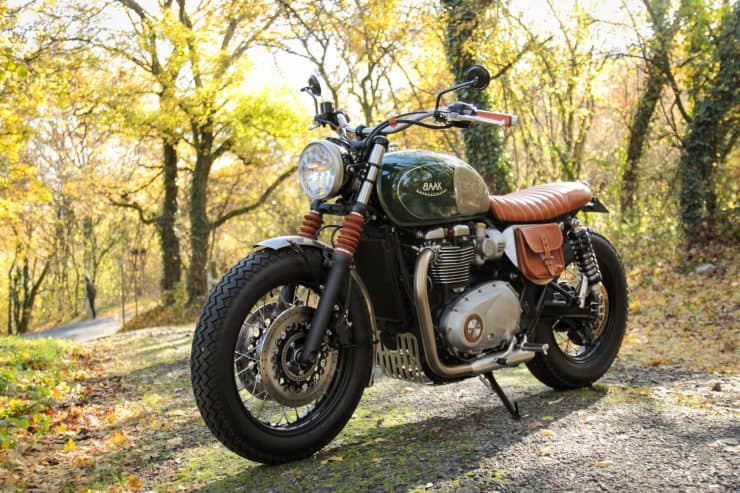
The new T120 is the current motorcycle of choice for BAAK, in fact they’ve probably built more customs using it as a platform than any other garage in the world. They built this bike for a customer in Spain, his main request was to use a British Racing Green on the fuel tank, as a hat tip to the cars of his childhood.

baak6

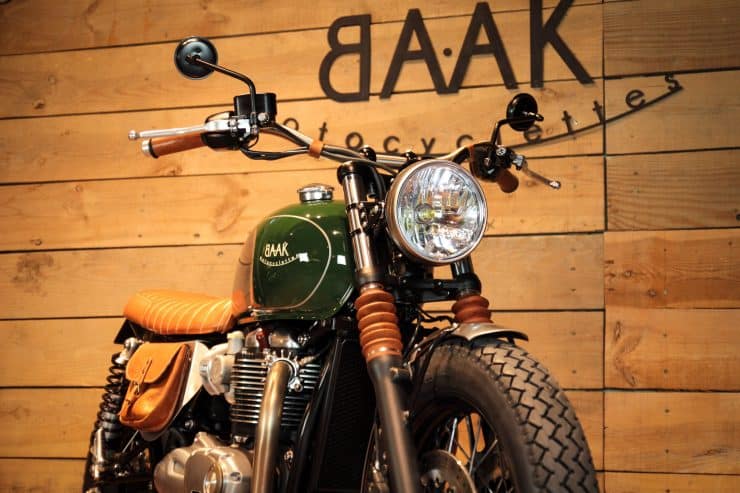
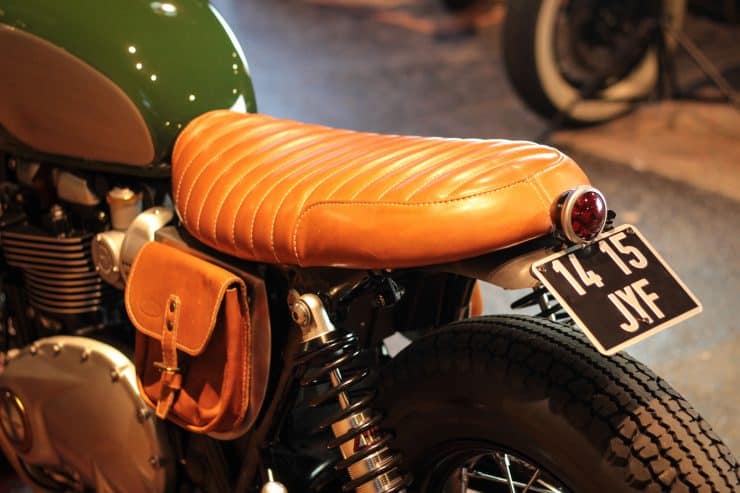
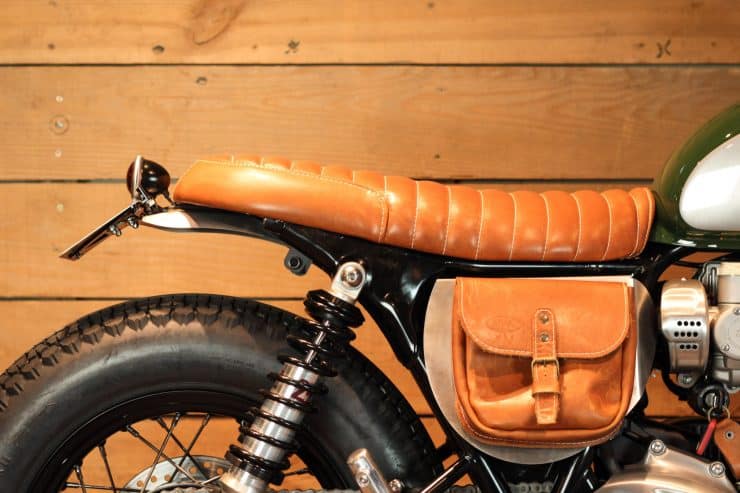
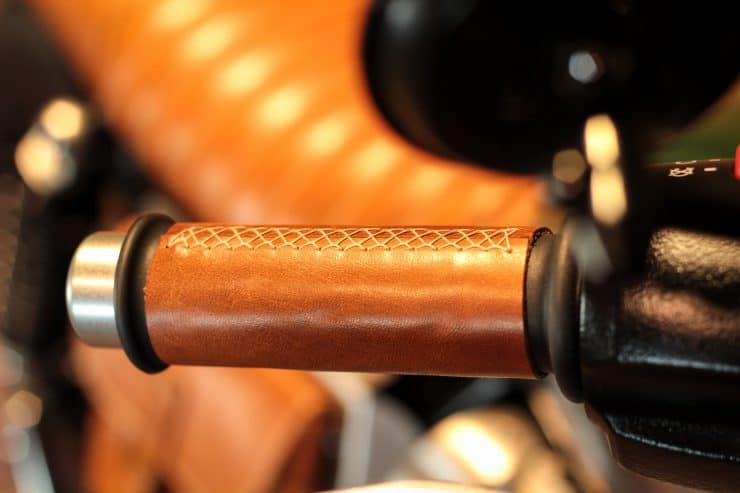
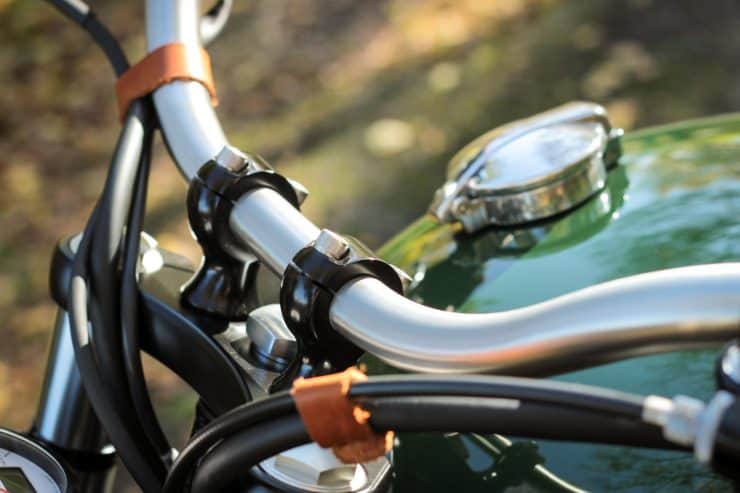
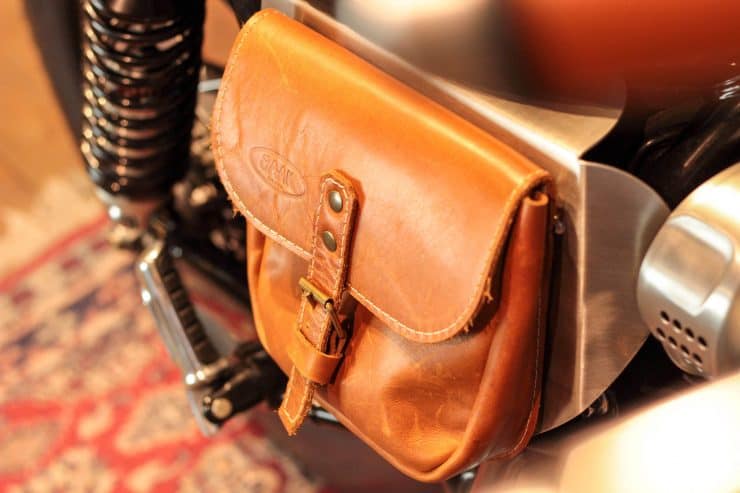
British Racing Green, commonly abbreviated as BRG, is a perfect color for a British motorcycle with heritage like the Bonneville. The team at BAAK matched the fuel tank with a medium tan leather seat, side bag, grips, and gators, with brushed steel knee-indents on the tank.

baak7

The plan was to lower the bike a little and tighten up the handling, so a pair of Shock Factory -20mm shocks were fitted in the back, and a machined aluminium flat triple trees were fitted up front to proportionally lower the front end.

baak8

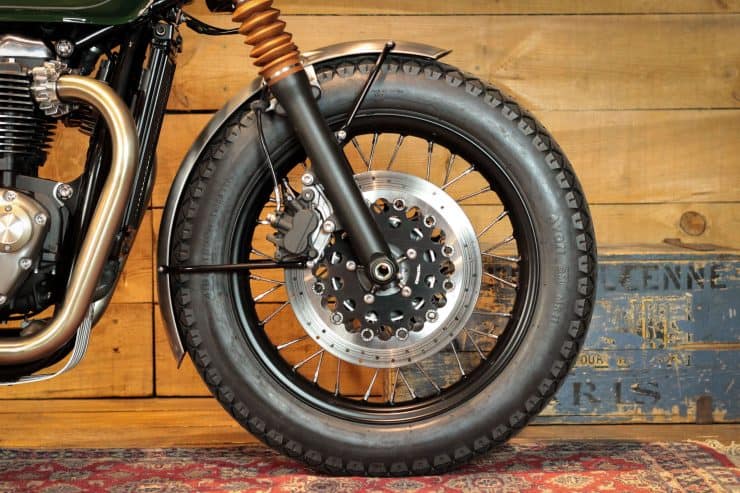
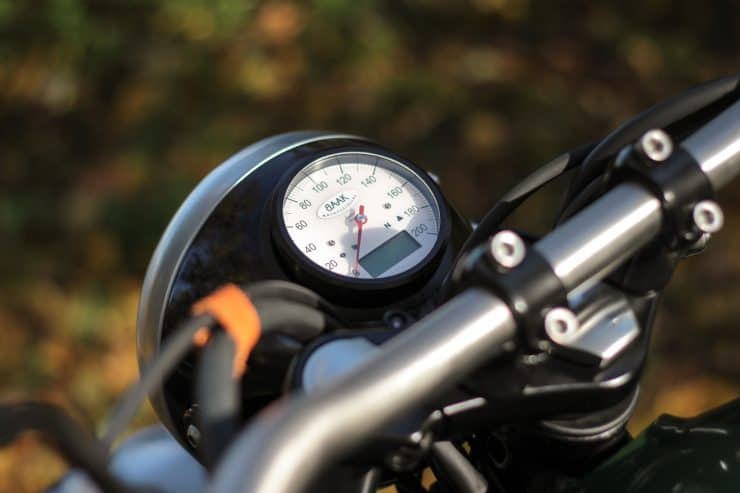
A new 16″ rear wheel was installed and both ends were fitted with Avon MKII tires, giving the bike and vintage look with the benefit of modern tire compounds. A MotoGadget ChronoClassic dial was fitted carefully into the back of the headlight unit, a nice reference to instrument fitment on vintage British motorcycles, and the team at Baak are currently working on a plug-and-play system for others who want to replicate the look.

baak10

The original handlebar was swapped out for the Baak N°1 wide stainless steel unit, with machined aluminium handlebar clamps, and a mini brushed stainless steel rear mudguard with license plate support – significantly better looking than the factory fitted unit.

baak20

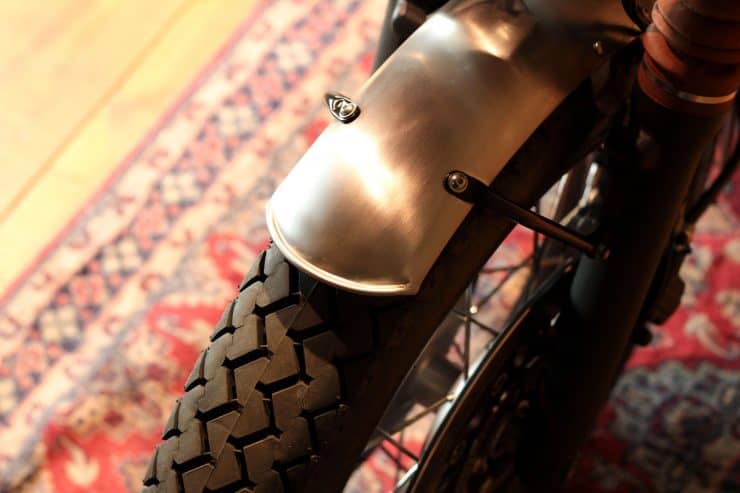
Up front theres a longer stainless steel front mudguard with aluminium supports, Mini LED blinkers from Motogadget, a Monza-style gas tank cap, Beringer Aeronal front brake discs, and proper mirrors left and right.

baak21

The completed bike is a tasteful custom, Bobber-like in some respects, with combined British and French heritage, and a future that will be based in Spain. Also this is a very unique machine and wanted to share this with you as a blog today on my website. www.carpyscaferacers.com

baak12

It takes a lot of thought and sketches before you even come close to a final phase drawing of how you want a machine to look and also, the budget of the customers is a huge part of any project, but this time, the froggies got it right on the money.

baak9

So as I close this for Thursday, hope you all have a great day, the weekend is not too far away now and I know you are itching to either ride your 2 wheeled machine, or jump in the shed and start wrenching to produce your own creation.

baak

Thanks for stopping by and if I can help with anything for your machine, even if it is advise, I am here. 714-598-8392 and you can even Text me on that to save more time too.

baak3

Right I am off to the shed myself as I am building a project, so, as the Terminater used to say.          ” I’ll be BAAK”


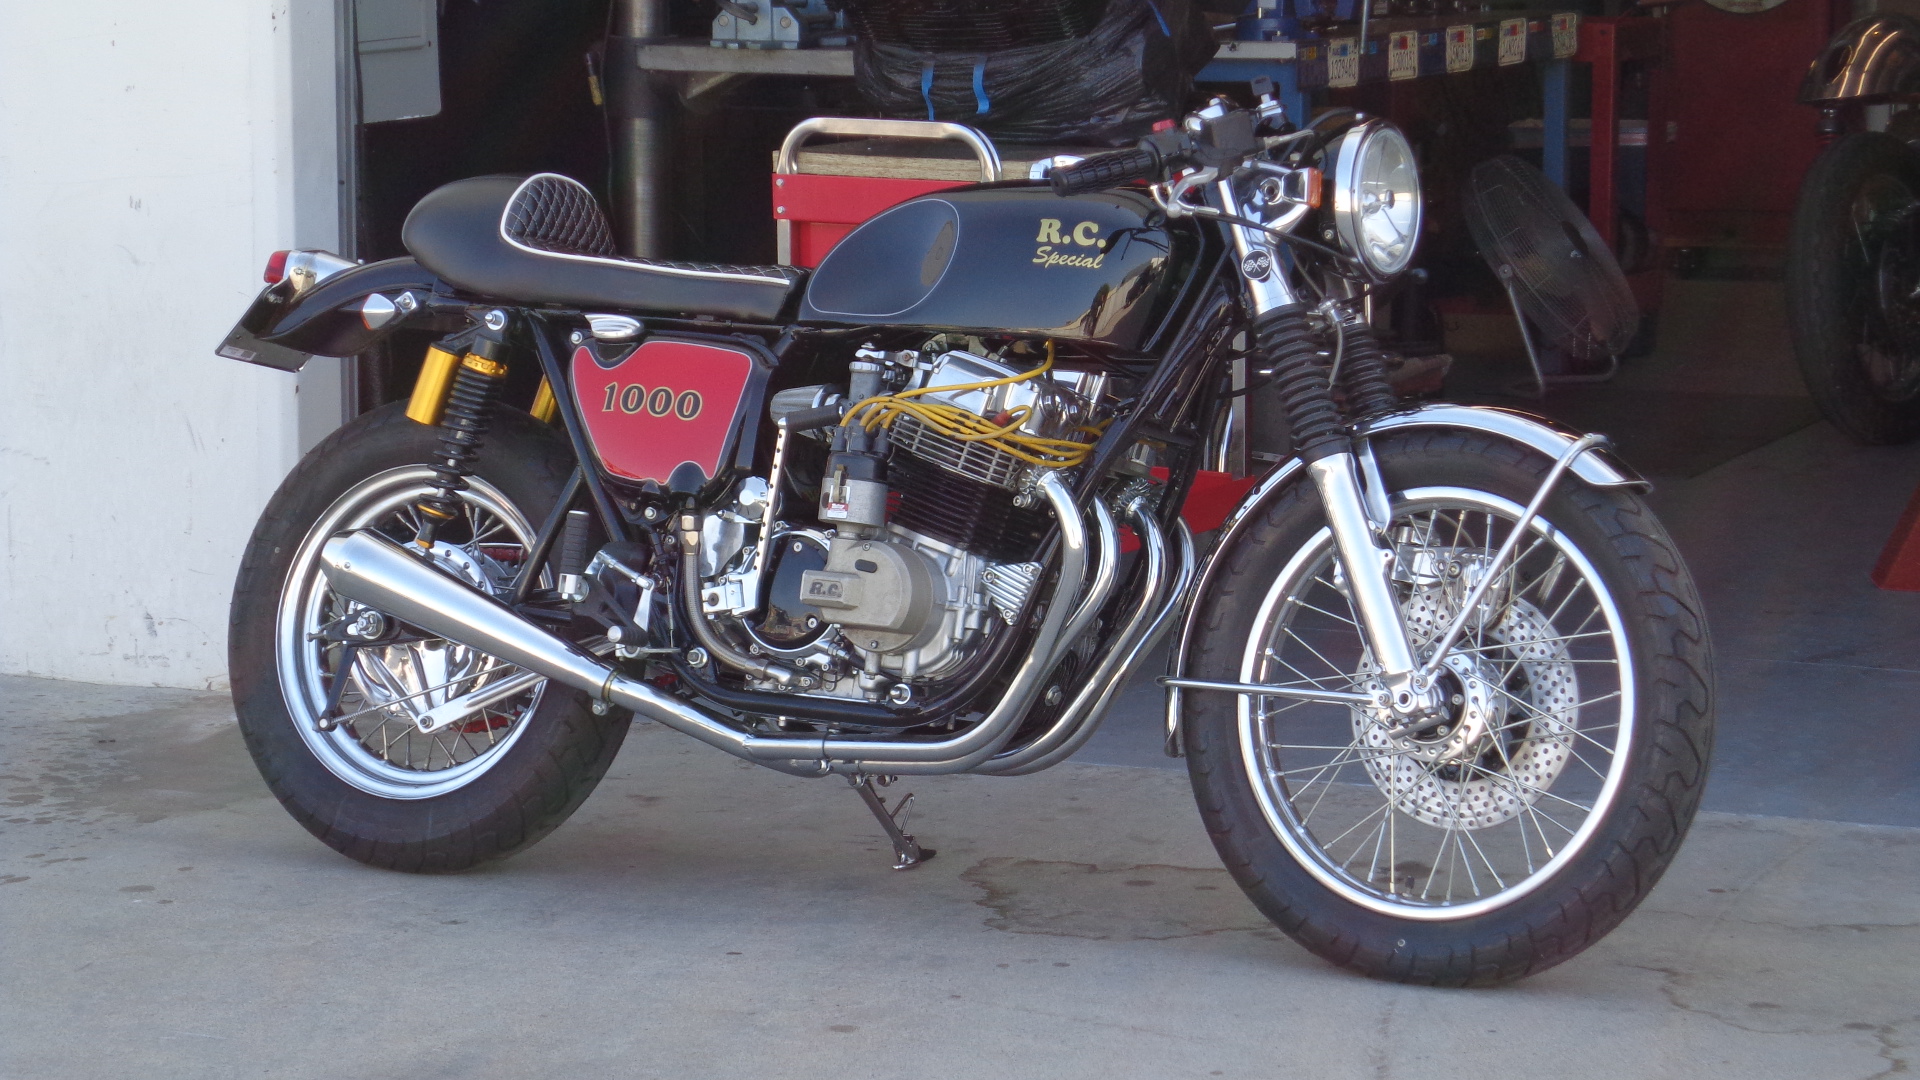
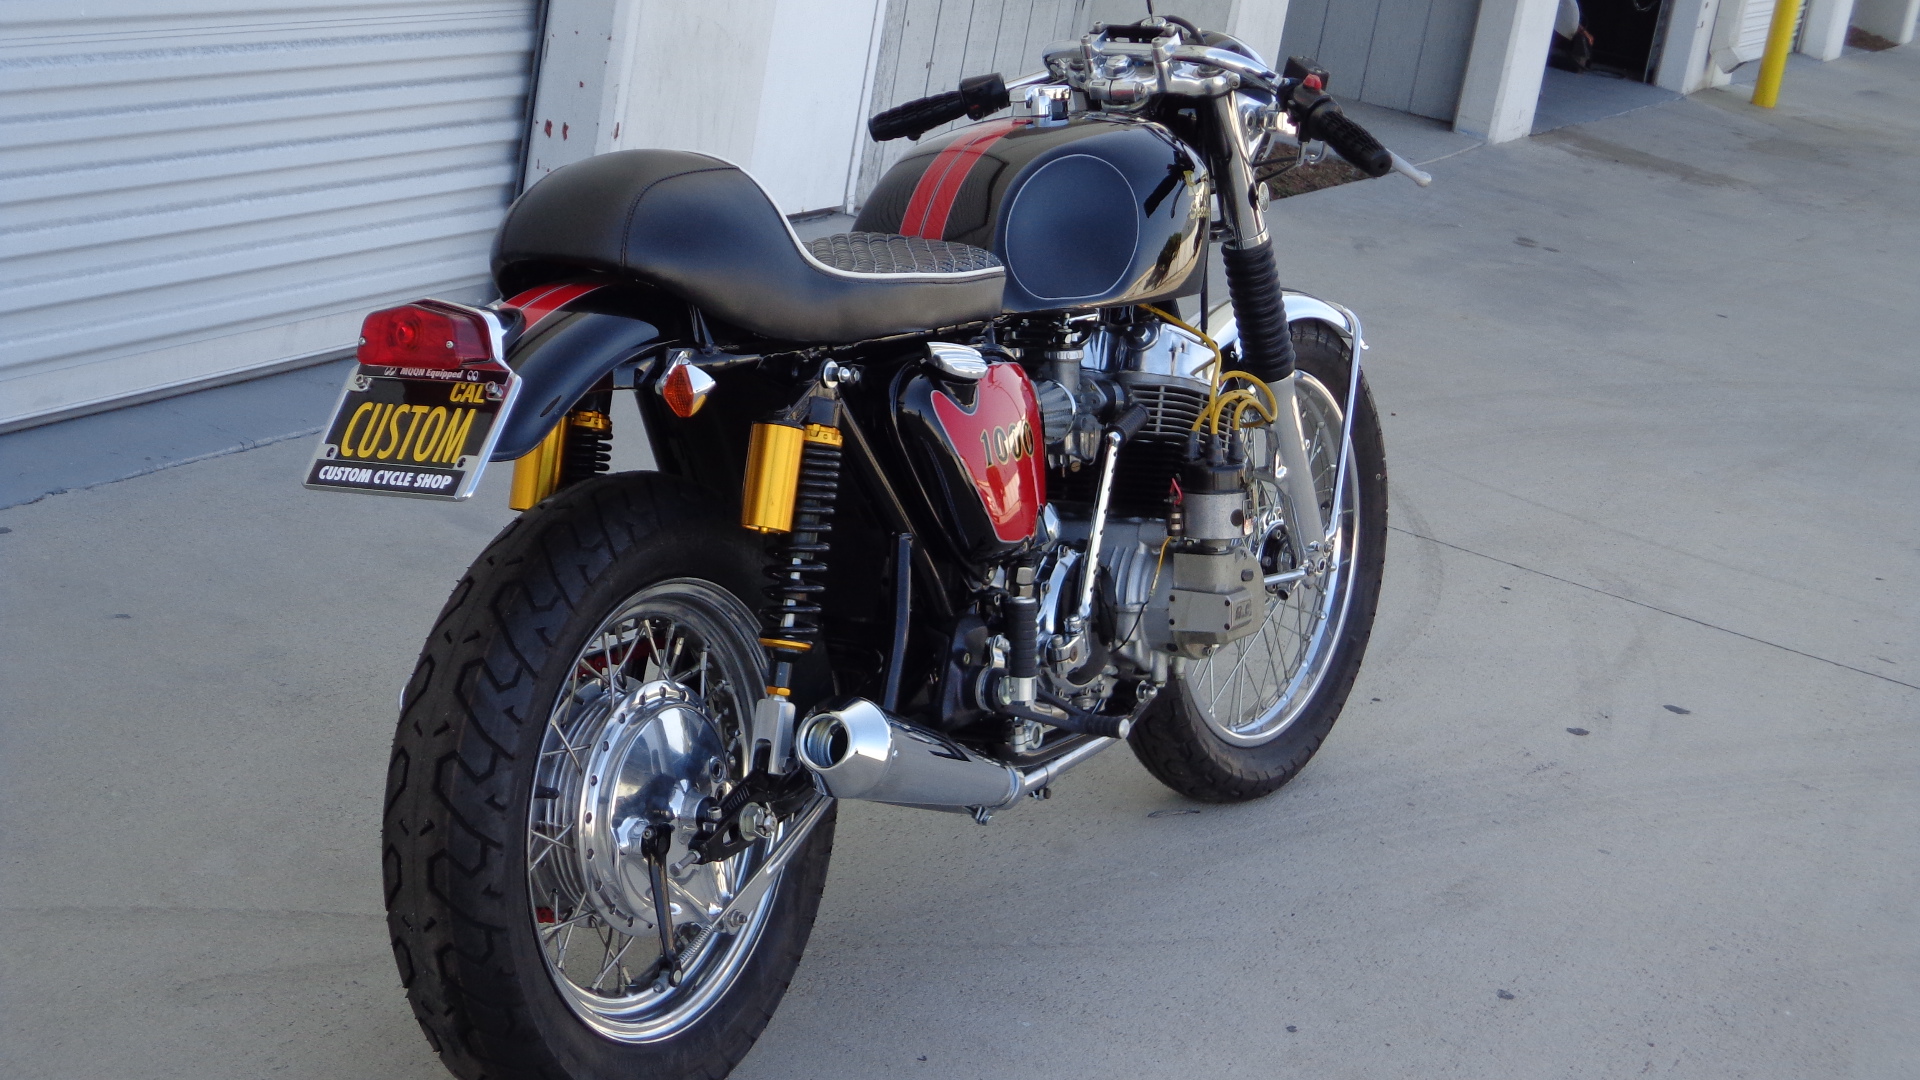
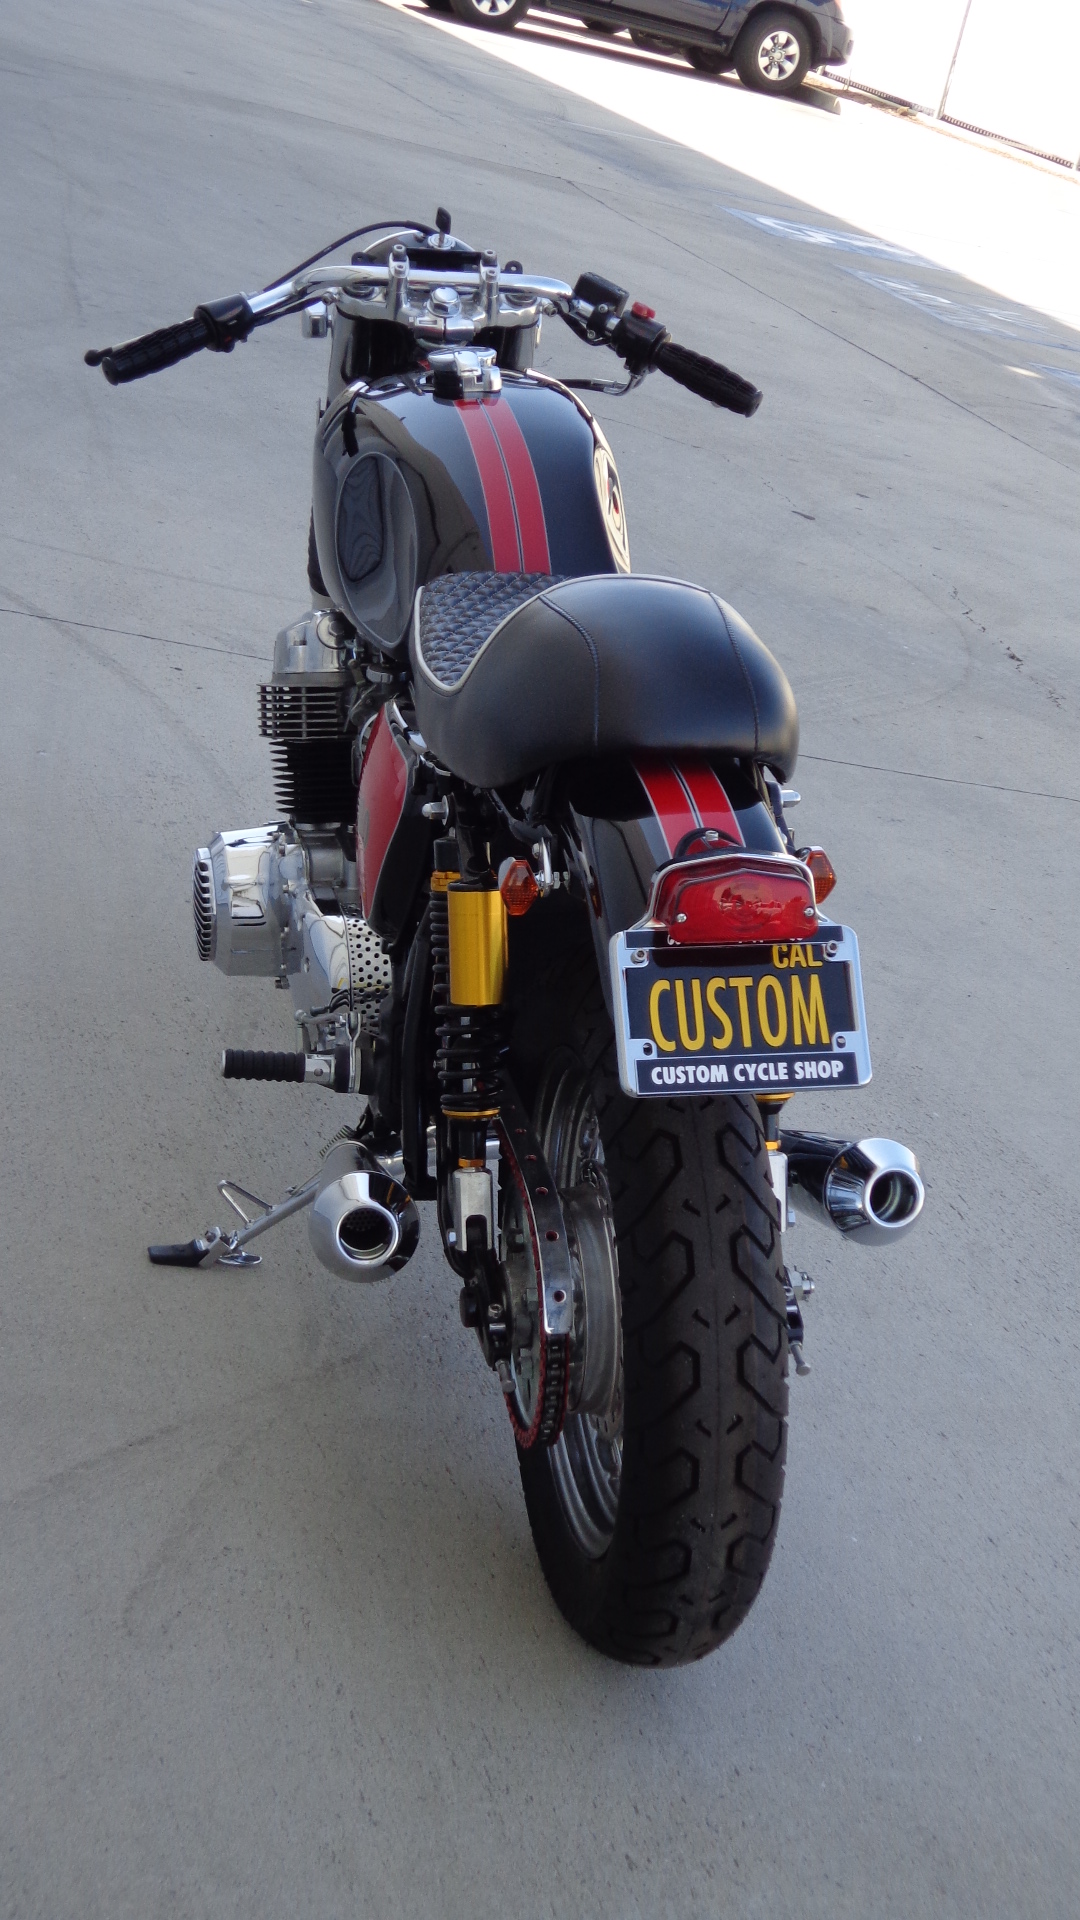
CAFE RACER 1970 CB1000 RUSS COLLINS SPECIAL

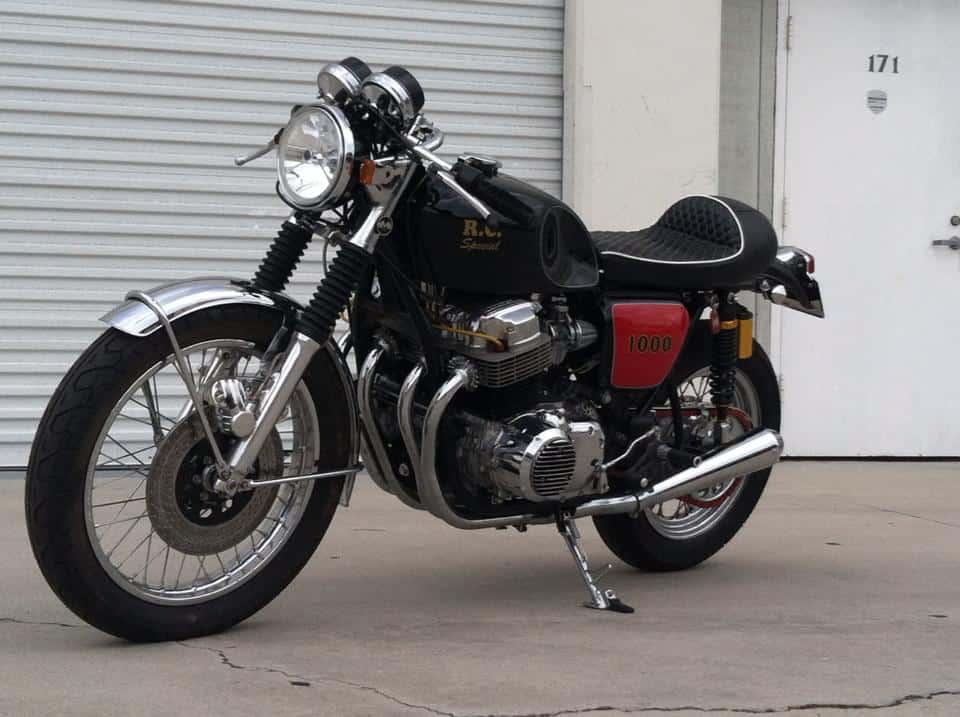
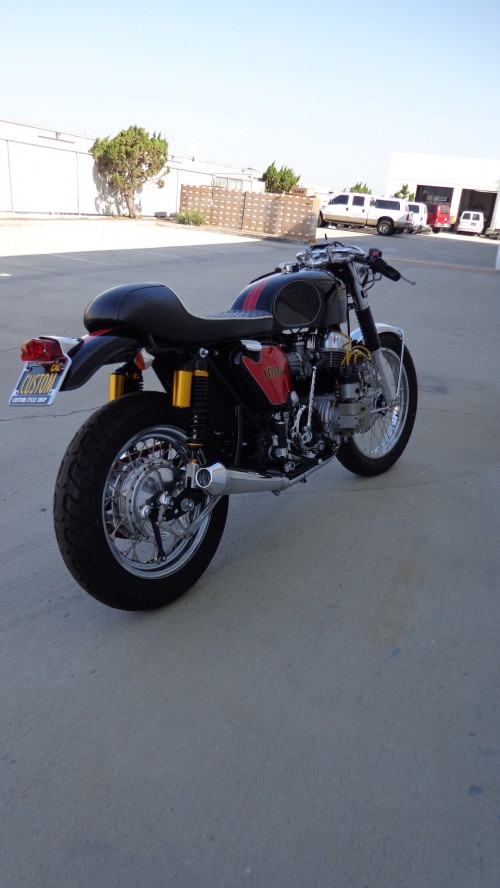
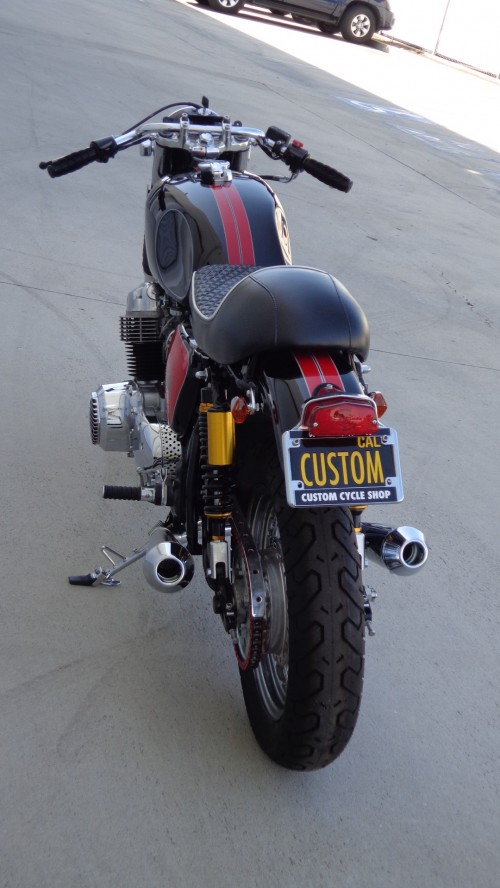
This is the Old Russ Collins Bike I created from parts.

Below is a Video but hard to hear as the old Powder coating shop behind us is loud as hell, but it was a tight motor and loved to ride it, hard to hear but this is the only video I have of it.

This machine was just a frame sat in the garage at home and boxes of old parts, and I wasn’t sure how i was going to go about this build but, as I had a russ collins Magneto I thought, what the heck I will be a traditional Cafe bike for fun.

This bike has so much work but for me it is fun and I enjoy every bike I create, sure, people say why not restore but heck, its not a sand-cast and plenty of these later K models around, I had a bucket load of parts and wanted to put something together and here it is at long last.

I started with a stock 1970 KO frame that had been sitting for many years in the back yard with 15 other CB750 Honda’s that I had acquired from an old guy out in the desert some years ago.


Then I started to get a few parts together and the light bulb came on and that was it, lets build a great looking Caff bike with a 1000cc Russ Collins Motor, what a Hot Rod that would be.

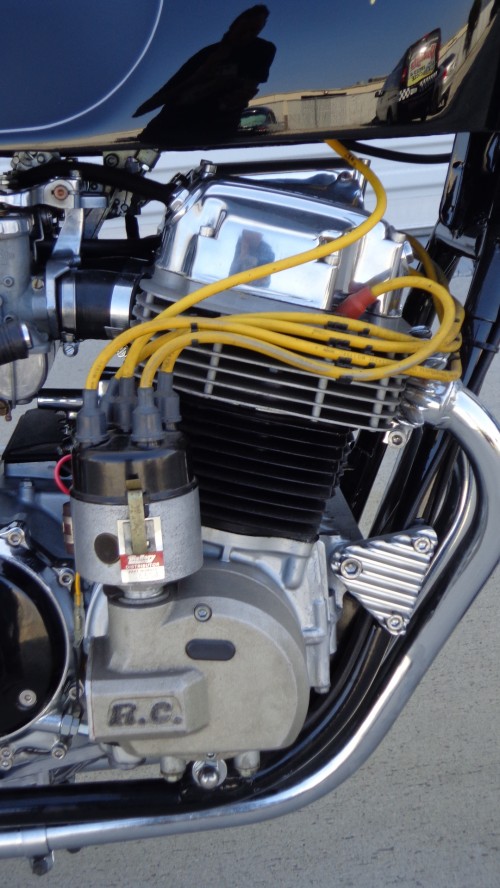
Motor was really good and came out of a running bike, compression was 185 all the way through so no point on a full rebuild, just a freshen up on gaskets and get her running.


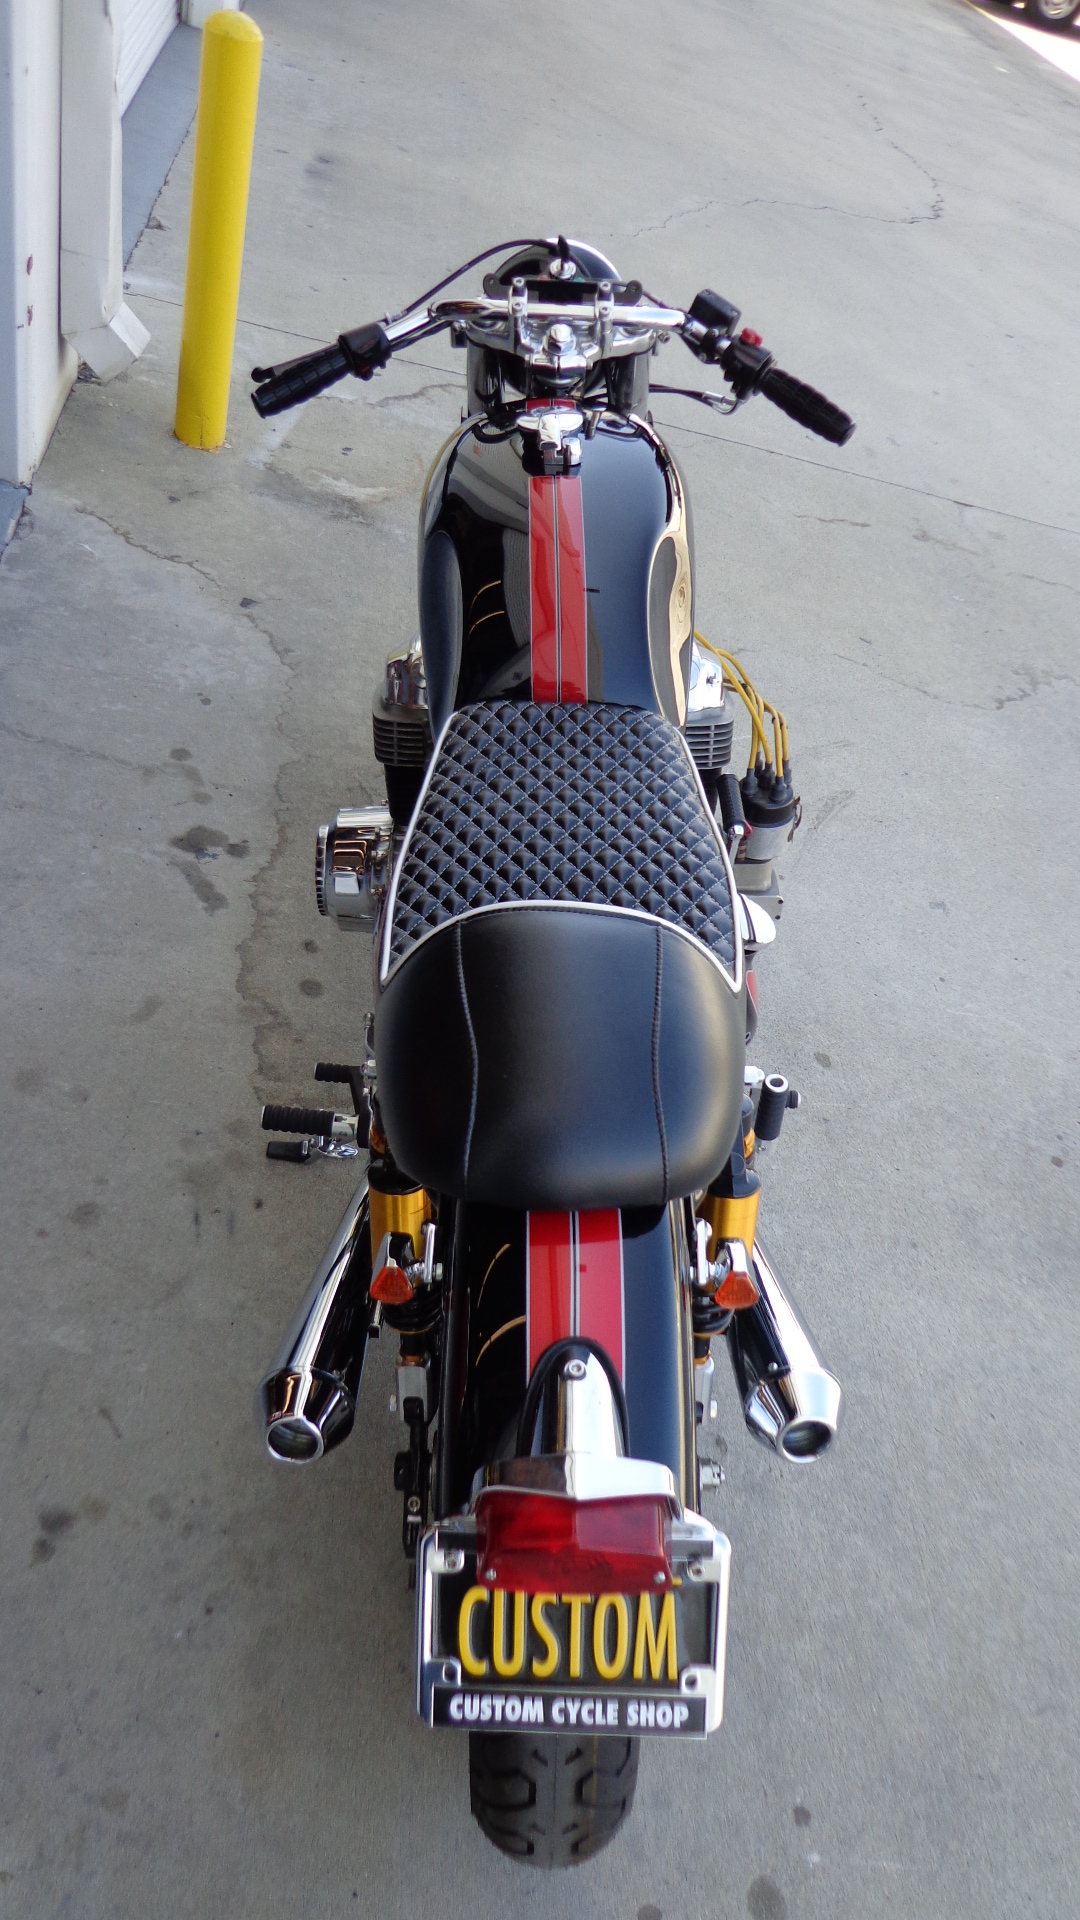
New Chrome rims and used stainless spokes to Polished hubs I did, along with the frame being powder coated, the swing arm was too, New bridgestone Spitfires give the bike a more traditional look and really hold the road well.

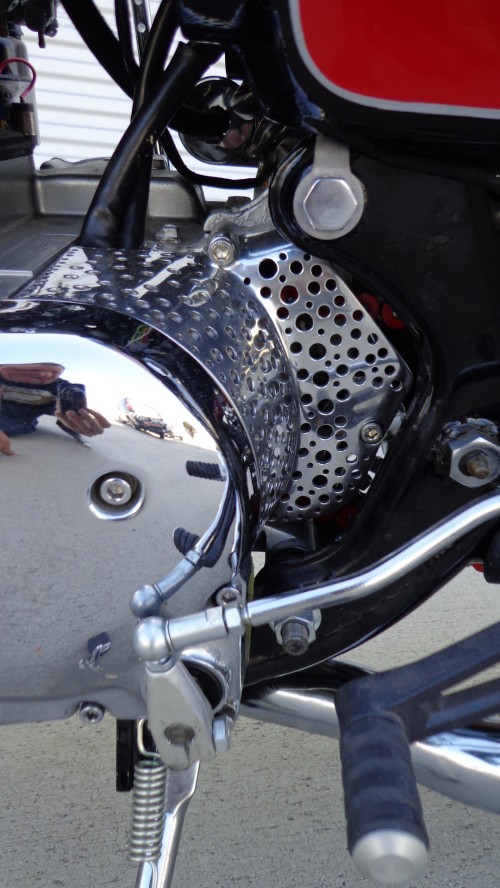
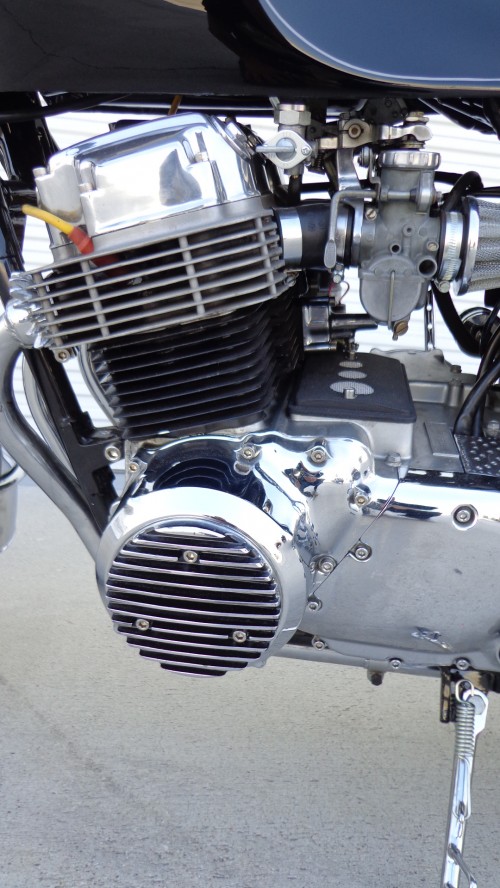
Original 1970’s finned speed equip covers adorn this motorcycle and gives it the unique richness that shines from afar, I chromed the cases this time andwent throught the Whole bike with Allen headed stainless bolts.

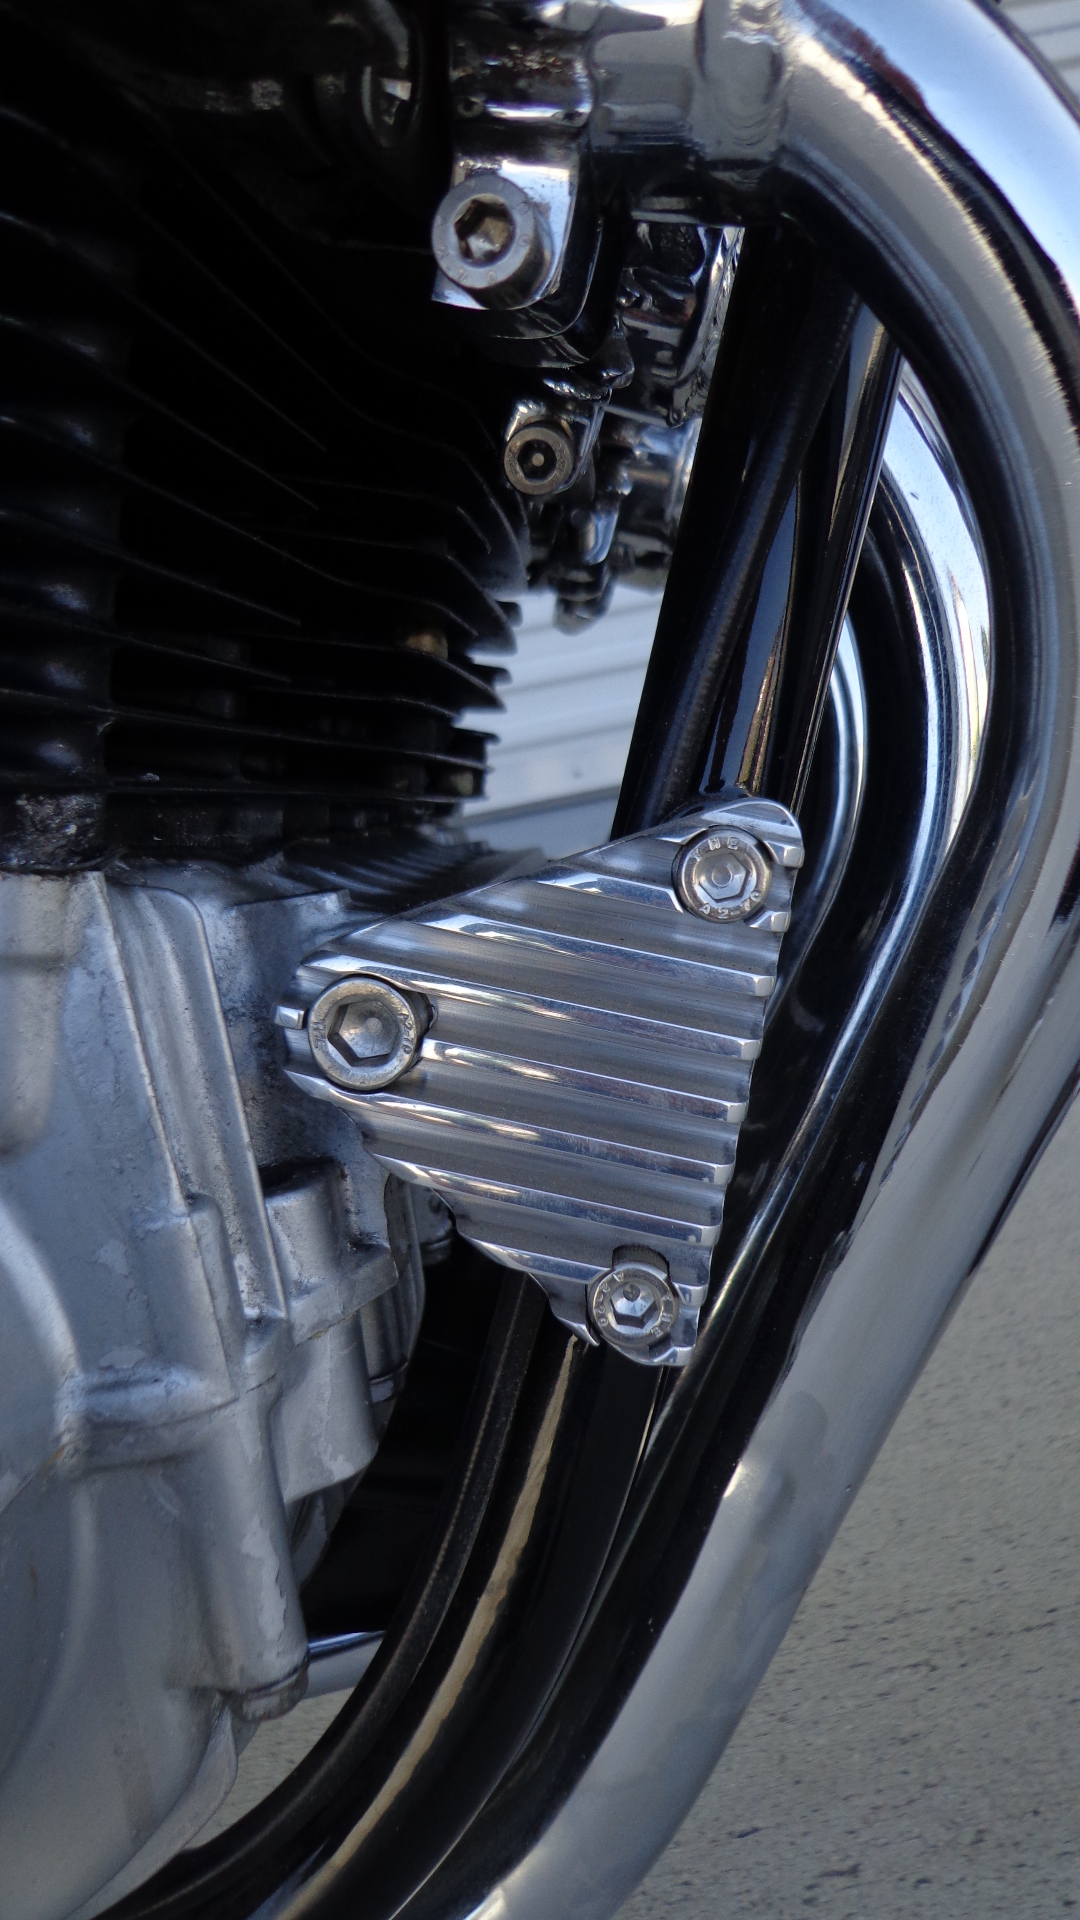
I machined a Custom Finned Engine Bracket up to flow with the rest of the finned speed equipment that is on this bike..

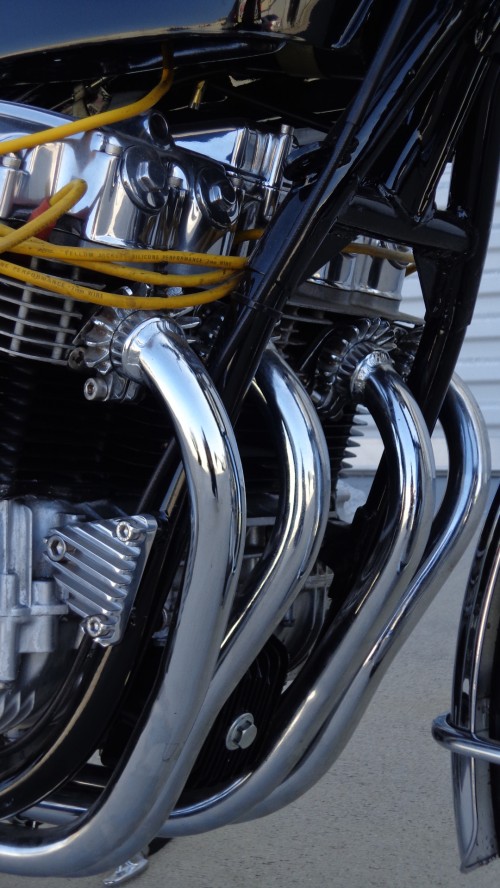
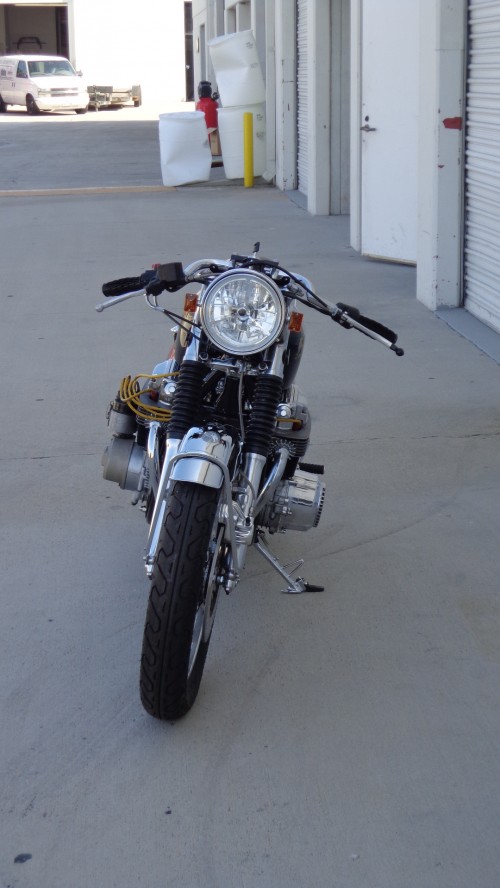
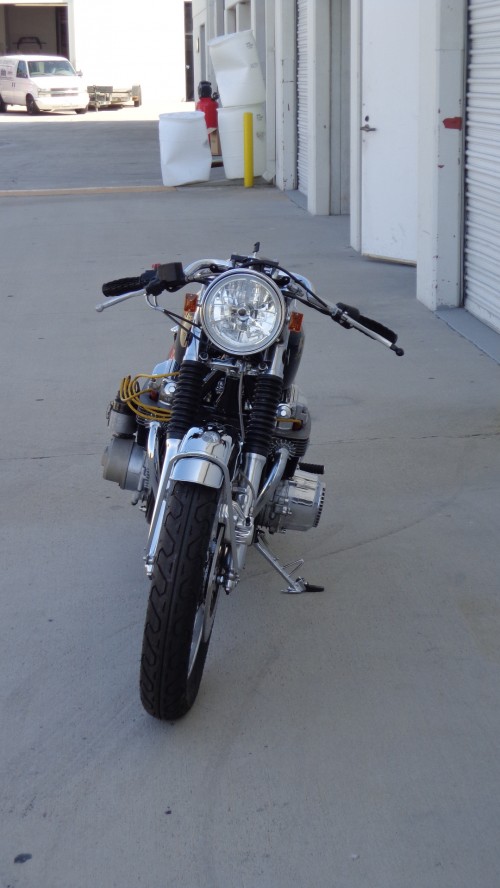
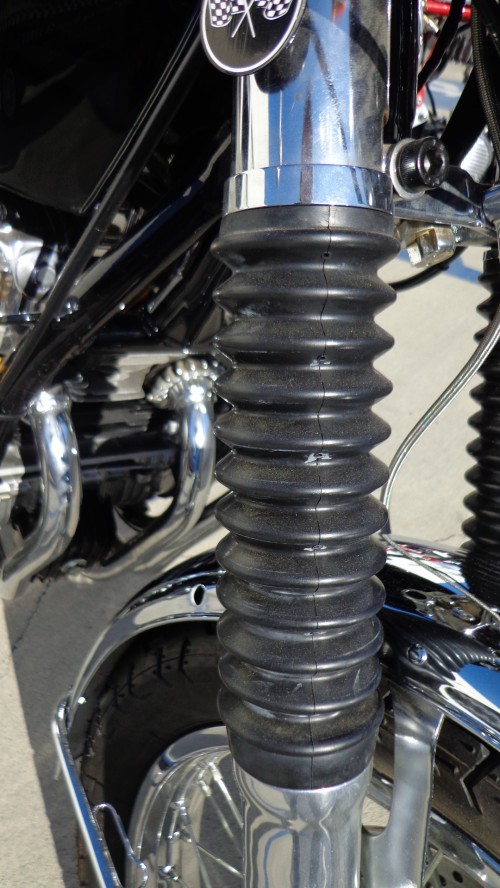
This has an Original never used and out of the BOX, Paul Dunstall header set up from 1974 and this is the genuine article too. I have the trick Tri-Bar set up at the front to show you which way you are heading. Brand New OEM Fender, and I polished the fork lowers, fitted new uppers and resealed, also added the old school OEM Ribbed Gators too.

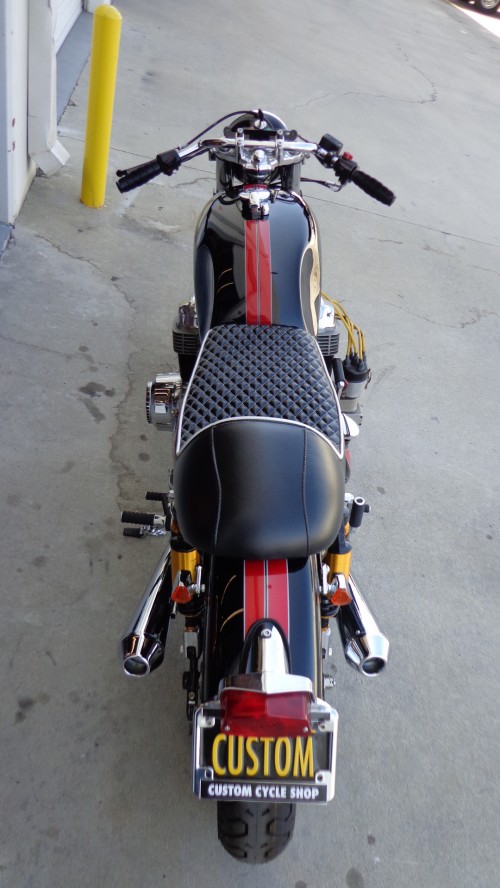
CI made my own seat, of which I made a mold from an old steel seat and then fitted the steel plates to allow for the stock Hinges to be used, then refoamed and Diamond stitched the seat for the old cafe racer look with the proverbial hump on the back, but also I made a Bobbed rear fender and fitted a old style Lucas Tail light, all of which I sell on my website www.carpyscaferacers.com and have sold many too.

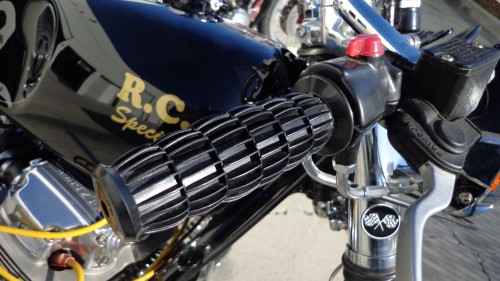
I hammered and painted the tank- New side covers and new paint and has the 1000 logo on the side covers to show them what she really is. I loved the whole concept and with New petcock and Gas cap, this really looks factory to many, until they see the numbers on the side cover.

I used a set of TEC rear piggy back shocks that are 14 inches eye to eye and the rear tire is a Bridgestone Spitfire 130/90 to give it that beefy look and handles so well.

Oh yes, it has a Brand New Guilerri style diamond stitched seat base and that is a new base and foam too and I believe enhances the look of this machine.

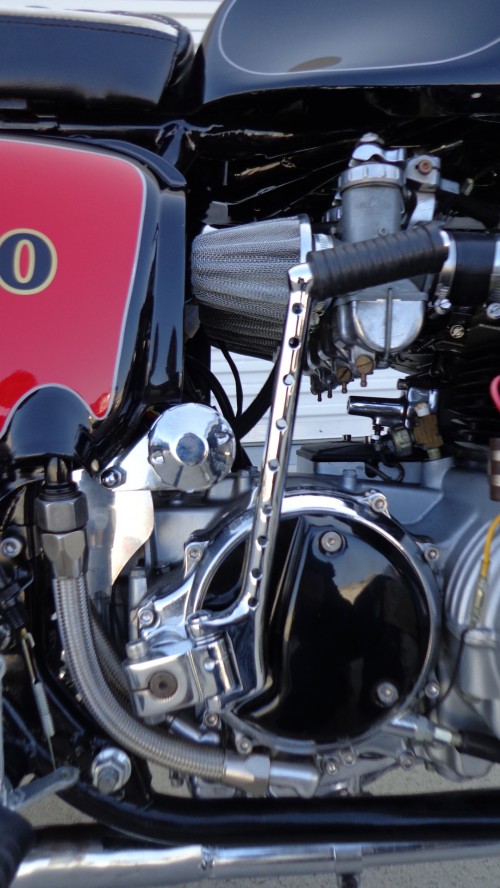
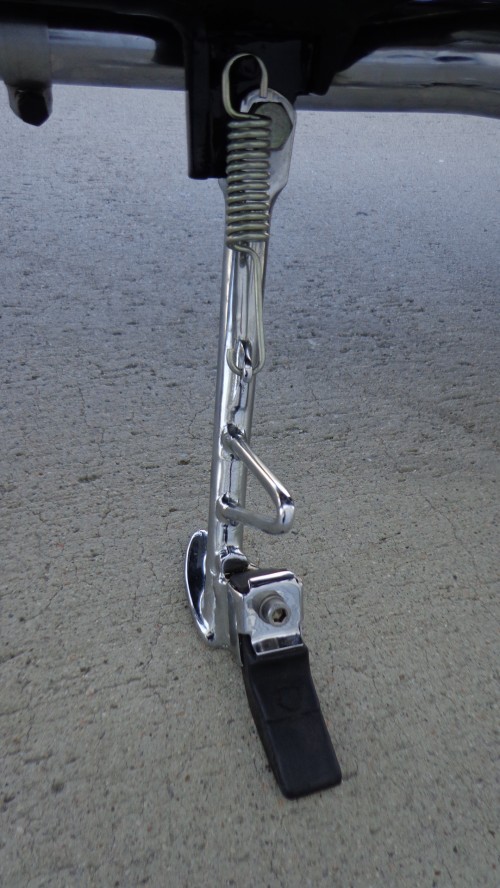
Also- Lots of polished Aluminum, like the valve cover and caps, the clutch cover and stator and gear shift cover too.  With Braided oil hoses as well. I even chromed the kick stand, but look at the front Rotor, I drilled that, rebuilt the Caliper and polished that to a Chrome look and the front rim is new with stainless spokes and a bigger front tire to fill that fender out nicely.

Brand New Non maintenance  battery, Solid state rectifier, makes sure this fires up and of course with the original RC Magneto, this has so much spark, I fitted iridium spark plugs too. You will also notice that I made New oil Lines from Braided steel hose and Drilled and chromed Kick starter for a Custom look.

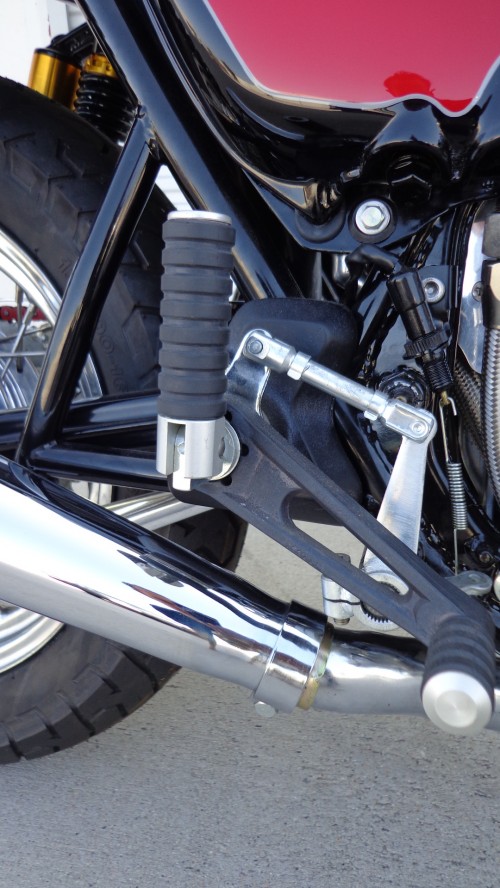
You want detail? Well she has loads of it, just check out the kick starter I drilled and re-chromed and the clutch cover set up. As well as the Italian Tarrozi rear sets added for a real comfortable ride as these set your feet back about 7 inches from the stock position and perfect for the Clubman handlebars up front.

New cables help this puppy along and I rebuilt the Carbs, bench synchronized them and then once running synchronized with a Mercury stick and it purrs now.

I have hours and hours and hours into this machine, I even chromed the kick stand as it looked to dull before.

Oh yeah- Do you like my Oil tank Dip stick? I machined this from a solid piece of 6061 T6 Aluminum to dress the cap up as thats always missed on builds so wanted to cover all the bases.

This is a really cool head turning machine, as where ever you loom there is cool stuff. like polished rear brake hub, with new brake shoes and actuator. Yes new brake shoes as well.

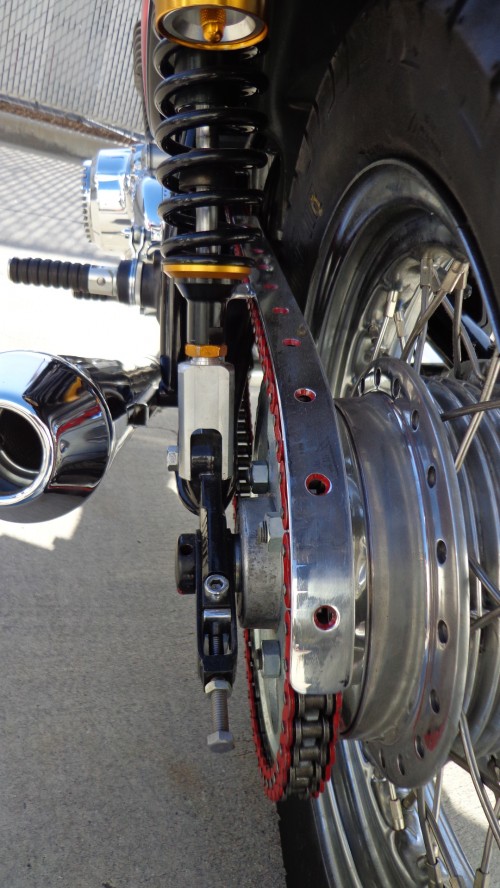
Yes, these New tires, on the back there is what I use most of the time, the Bridgestone 130x90x16 and at the front I use a 110x90x19. Custom RED X-Ring Chain, flows with the red on the gas tank and side covers etc and this bike sits so well, them Original Dunstall exhausts are a real piece of History as they were still in the original box when I had them as they were sat in my loft for many years.

Such a period looking Caff from back home and I remember as a kid, and I am glad that I went this route, its truly a fun machine and with 1000cc it does not hang about and is really Torquey.

I love the way the bike sits, it is a good, tough looking machine and with Brand new wire harness and handlebar switches, this is reliable as hell, I am very proud of this machine and it styling.

It has a New rear brake rod, spring and adjuster to make sure this thing stops at the rear, and a New 530 Chain and new sprockets 48 rear,17 tooth front.

The RC Special is a one off and I loved doing the build, I also made up stainless braided Brake hoses for the front brake and added a 14mm Master cylinder too.

The front brake caliper is rebuilt and polished to a chrome finish and I fitted a Brand New $400 genuine HONDA front fender.

To help this bad boy stop at the front end, I fitted a New BREMBO master cylinder to the Clubman bars.

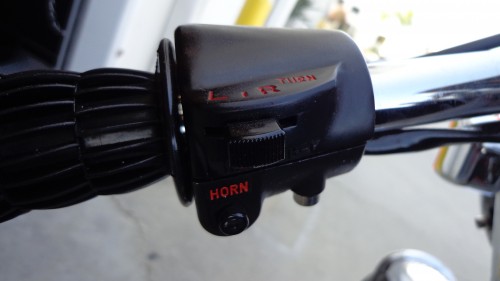
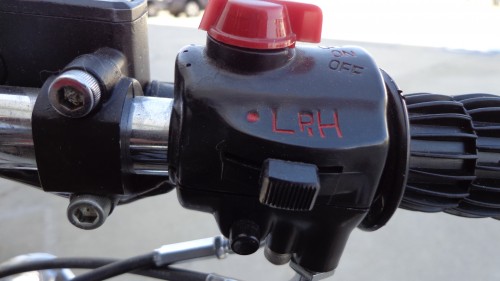
Other col parts that you will notice, unlike many others out there is that I have used genuine NOS handlebar controls, over $220 each side.

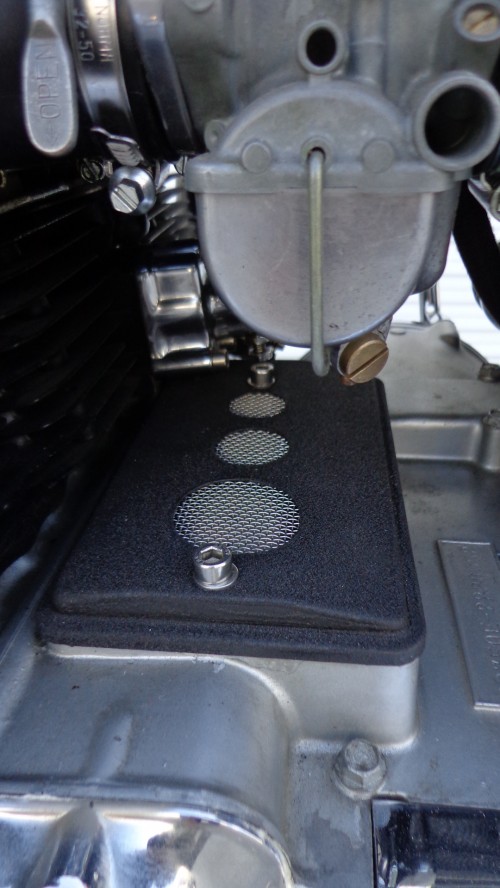
The carbs are all rebuilt with new throttle cables and custom air filters.

The New headlight has a New bucket and insides too. And a 65 watt halogen Bulb to make sure you are seen on the road at night.

This has a cool display set up with the ignition relocated at the top of the tree, I wanted to move the ignition switch away from the motor as these get hot.

Also I polished the top triple tree to look like chrome, the steering has all new bearings and brand new chrome Honda steering Nut and washer.

All the bolts are Stainless Allen heads and this has had so many hours of work done to it. A new Clutch cable and Custom Adjuster.

This is clean and under the seat will be a brand new battery, the frame is powder coated and you can see how great she looks from these photo’s.

This has a new solid State rectifier and a battery tender too.

Also the shocks are brand new TEC models and I made custom lowers to lift the rear end a little higher by 50mm.
The bike just is cool to look at and with a RC1000 Motor it really does turn heads FAST!

This has Original New Old stock Superior Waffle GT grips from 1974 and were still in Original packaging on the shelf for years and years.
I may put some more little touches to her before someone buys her but I do hope it does get a great home.

Thanks for looking at this machine, it has now gone to a New owner and sure hope they ride the hell out of it,

I doubt I will locate another Russ Collins Built Motor any more and so glad I happened across the engine over 10 years ago,

2 of my Classic machines that I have built from just old bits and pieces that were literally in the garage and all in boxes or on shelves, love what I do and hope you do too, thanks so much for looking. If you want a bike built, serviced or just parts, drop me a line carpy@carpyscaferacers.com or you can call or even text me on 714-598-8392 as I am always happy to help, been building over 17 years here in California.