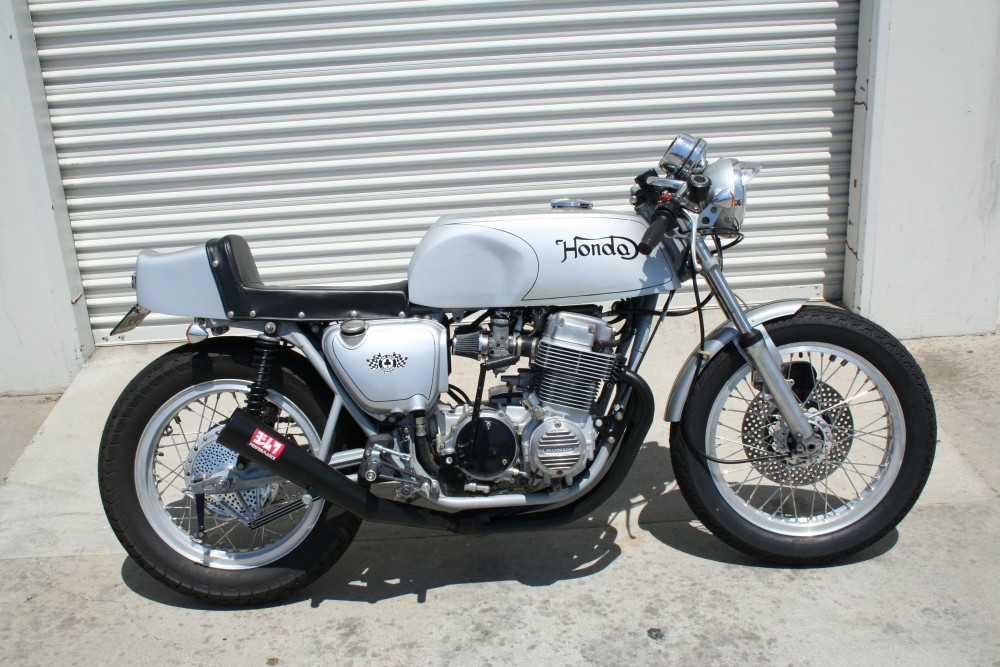
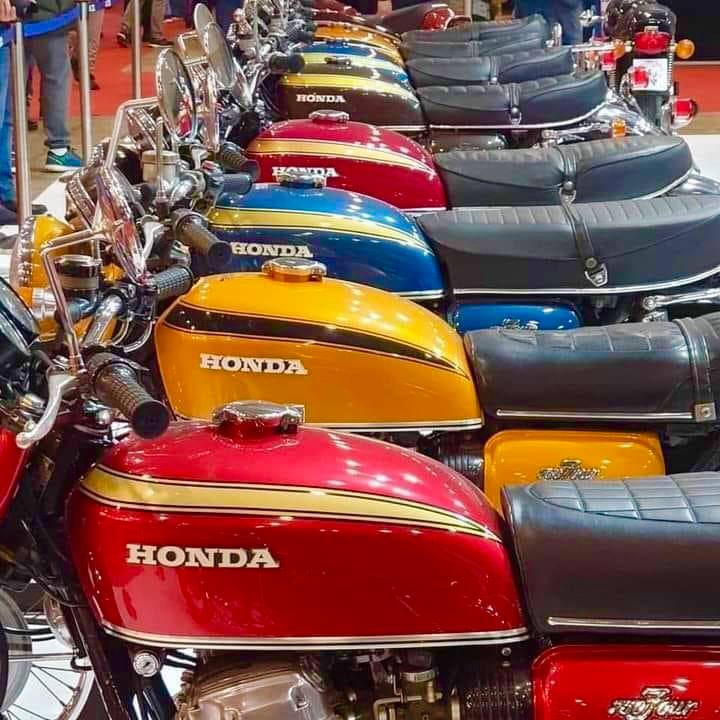
Wet weekend, so thought I’d rattle on about what’s happening in the Barn and Blog about things I like.

Well, we are getting another downpour in Southern California, something that we really do not get much of down here, the last storm was the worst in over 100 years but i think that this weekend storm is just light rain, just hope the hills hold out a little longer.  But when it rains its keeps people inside, same as me, I have 16 bikes to try and put together in my own time frame but I am still working on getting the inside of the workshop into a usable area and not just storage. But, when you have crap weather, it gets you motivated to get on with a few jobs you have been putting off.

This brings me to Sean Skinner of Virginia’s MotRelic, he was twiddling his thumbs and came up with a unique concept of his old Orange Krate Schwinn push bike and bung an XS650 motor in the frame, something I had done back in the 80’s in the UK with Moped engines, but this is on another level and thought that I would share.

In 1968 when the Orange Krate got its name, it hit the streets running, well peddling to be precise but the Hot Rod styling oozes Custom features and for less than $90 back then you could own one of these Kustom Push bikes.

“Schwinn introduced the original Sting-Ray in 1963 after the company realized kids in California had been customizing their bikes to look like motorcycles. Bikes were fitted with 20-inch wheels, elongated seats, rear ‘sissy bars,’ and ape hanger handlebars.” – Schwinn Bicycles:

Sean Skinner –  Builder of some of the most popular machines I ever had the pleasure to feature, had the idea to take things in the opposite direction: to build a motorcycle based on the 1968 Schwinn Sting-Ray Orange Krate.

This was no easy task, I have tried many engines in push bikes and most have failed or, after a few miles I grenaded the motor, the frame or the whole thing, so a lot of thought, effort, sweat and tears went into the designing of this machine to accept Yamaha’s Triumph Motor, the infamous XS650 Twin.


Sean purchased a frame jig, cut the neck from a stock XS650 frame to retain a valid VIN number, and used a ring roller to begin obtaining the curved bends of the frame. As you can imagine, almost everything on the build was custom-fabricated. Sean takes us through the entire build process below, from the creation of the Banana Girder forks to the iconic banana seat, complete with spring-loaded sissy bar shocks like the original!


There’s the bicycle-style two-gallon tank, cut and shaped from a Virago unit, and the custom exhaust that seems to vanish into the curves of the frame. The engine itself is XS650 perfection:

“Fully polished, big fin cylinder, rephased by Hughs Handbuilt, electronic ignition and tons of chromed parts…”


“A fun whimsical build that is art in motion and nothing else. A childhood memory of wacky bicycles with squared off slicks that didn’t handle well but were there for fun. When you could customize them with lights, speedometers, wheelie bars, sissy bars, and anything your child heart desired. This bike is for that.”

Such a stunning piece of work that many could try and not come close to the flowing lines that this Custom piece exudes, a creative signature from the master builder and the more you look, the more you see.

Where to begin…

Back in 2016 I had an idea to build a motorcycle designed around the looks of a 1968 Schwinn Stingray Orange Krate. Now let’s add to the mix that I have never built a complete frame before or lots of other parts of this build that follow. I acquired a clean stock frame that I cut the neck off of so I could retain the proper VIN number. I installed the lonely neck onto my recently purchased frame jig and then I started to brainstorm how I wanted it to look.


I started the frame process by bending and building the lower hoop around the mock-up engine cases so it could sit centered on the jig and give me a nice base to build from. The Stingray has a very curvy frame that flows from every angle. Achieving the correct look and bends required the use of a ring roller. This tool let me slowly roll the straight tubing into any radius I needed. To help me with finding what radius looked the best, I secured some PVC tubing to the axle blocks and curved to the shape I needed and then copied that in steel.

Once I had the frame tacked up and resembling the Stingray photos I had, I went ahead and welded the whole thing up. The two frame pieces that follow the shape of the gas tank are removable and serve as the upper engine mounts and frame strength.

Once I was done with the frame, I hit a stumbling block and the frame sat for four years in my basement. It was either the lack of money for all the engine parts or the lack of confidence in building the front end. Probably both. As time went on I never forgot about the build; it just wasn’t top priority until one day when I was surfing Marketplace and stumbled upon an XS650 that a good friend had built. He was selling a bike with the perfect engine for my build. Now when I say perfect, I mean, fully polished, big fin cylinder, rephased by Hughs Handbuilt, electronic ignition, and tons of chromed parts. And just like that the build had a fire lit under it once more.

With the stress of sourcing all the parts for an engine floating away, I could focus on the front end. Rake and trail are the most important things to consider — too much or too little and things get…interesting. I had to get the frame at the proper ride height so I found a 21-inch rim, a perfect Shinko to use for mock up, and laced it to the XS650 hub with the help of Buchanan Spokes. Having the comically large wheel mounted to the frame really allowed me to see my vision in real life. It’s adorable.

While knowing how the front end should look, getting it to reality is a different story. I scoured the internet looking for a company that has built the Banana Girder in the past. The front end is not a new design and it has been used many times. I found a fab shop that builds them for Harleys, but they would be way too large for this build. I was able to get them to sell me the upper and lower “trees,” which included the stem and center pivot parts. The rest was on me to design, fabricate and build.

While walking around a swap meet I ran into my buddy Dave. He handed me a skinny little 17-inch wheel that also had a tiny drum brake. It was the perfect front wheel for this build. Now that I had a front wheel to build up from, I got to work figuring out the geometry and curves needed to get to that point. Once I had the measurements, I built a crude jig to hold the three pivot points on each fork leg, assuring that whatever happened in between those areas, the pivot points would be symmetrical. I found a stout little mountain bike shock with adjustable preload and rebound to handle the road. Spacers were machined and bungs were threaded and drilled. The front end was coming together!

Next I had to figure out handlebars and how to attach them to a very non-traditional upper tree. I machined some studs and centered them perpendicular to the stem. Now that they are welded, I cut up a new set of ape hangers to position and weld to the upper tree.

So many things were handmade for this build. One thing that was a challenge and fun to do were the lever perches. Cut, milled and drilled from 1/2″ steel. I created a clean and tidy part that once welded to the bars made the bicycle theme come alive. Venhill made the cable kits that worked fantastic and gave a vintage look to the build. With the front end wrapped up and bars in place, it’s officially a roller!


On to the gas tank and seat. Trying to stay in the lines of the Stingray, I had to make the gas tank a shape that flowed with the frame and still held at least two gallons. While sitting in the shop I noticed an old Virago tank hanging on the wall. I could see from the side that it had a similar curvy shape in the side of the tank. I made a tunnel and base to the new tank that followed the frame. Once that was in place, I cut up the Virago tank and found the shape I needed in two pieces. More sanding and test fits than I care to admit, I had the tank parts tacked into place.

The seat had to be the iconic banana seat. Aluminum was used and I cut and shaped it to flow with the tank and flow with the frame. I shaped the foam to compliment the base and flow with the tank. Schwinn used spring-loaded shocks on the bottom of the sissy bar, which allow the seat to move and give some cushion over the bumps. I had to reproduce this in my build.

Mcmaster Carr carries all kinds of springs and bushings to make this dream a reality. After measuring, I ordered everything I needed and machined all the parts to create a full-size version of those seat shocks. I had to also make a pivot up front to allow the shocks to work.

I can’t believe it’s actually all coming together. The bike’s fabrication is nearly complete. The rear brake pedal mount design that incorporates the switch was a cool project. It uses a Magura brake lever switch that keeps the wiring small and tidy. The foot peg mounts were found at a swap meet. I think they are early Sportster or Shovelhead pieces that looked so much like pedal cranks I had to make them work.

The final project to tackle was the exhaust. At first I wanted to make an exhaust that doubled as a chain guard, but then realized I didn’t want to see the exhaust and was sure it would ruin the look of the bike. After a long while of staring and mental anguish, I decided to have the exhaust follow the frame from the subtle curve at the front to the full length curve the rear frame has. It made the exhaust somewhat get absorbed into the frame. Some people don’t even notice the exhaust until they’ve looked the bike over for a while. I guess that means I succeeded at making it blend in and not take away from the bicycle look.

The final project to tackle was the exhaust. At first I wanted to make an exhaust that doubled as a chain guard, but then realized I didn’t want to see the exhaust and was sure it would ruin the look of the bike. After a long while of staring and mental anguish, I decided to have the exhaust follow the frame from the subtle curve at the front to the full length curve the rear frame has. It made the exhaust somewhat get absorbed into the frame. Some people don’t even notice the exhaust until they’ve looked the bike over for a while. I guess that means I succeeded at making it blend in and not take away from the bicycle look.


This is the first bike that I have gone all in on with chrome. Don at DGM Chrome Plating in Philadelphia, PA handled this tough job and all of my parts look unreal. It’s amazing how good he and his guys made everything look.

The frame was finished in a micro flake orange powder coat laid on by the talented guys at Right A Way Powder in Middletown, MD. The orange sparkles in the sun and looks beautiful with all the other sparkly bits.

The tank paint was sprayed on by Danny Knight at Knights Kustoms in Winchester, VA. That off-white paint was mixed up to look like the vinyl on the seat, heavy flake and all, he nailed it! The “Yamaha” font was painted on with the help of stencils made by John Ralph at Quail Run Signs in my town. He’s a wizard with the program. I am a one-man shop that handles all of the fabrication, welding, and building, but I could not do it alone and really, I wouldn’t want to. It’s fun to have talented people in your corner to experience the creation with you.

Now with all the parts back from powder, paint, and chrome, I can get to work making my creation come to life. With the engine on its side on the lift, I gently set the frame over the engine and push the chromed bolts through the mounts. The rear wheel is next to install. This lets me hold the frame upright in the lift.

The front end slips on and the front wheel is put into place. I stand back and look at all these mirror-like pieces and I get very excited to see the finished bike on the ground and out in the sun. The gas tank is set on the frame and I can finally see the bike coming to the finish line.

All of the time spent designing and building has come down to this, the first start. It took about five kicks to get her going. Blame it on dry carbs, no battery, stage fright, or whatever. It started and sounded amazing. The gamble on welding baffles in the middle of each pipe paid off. She sounds glorious!

Once I checked everything over, I didn’t hesitate to fire it up again and go for a ride through the neighborhood. Smiles for miles on this thing. It handles well and rides very nicely. 100% happy with this build and I’m excited to show it to all of you. Since writing this I have been to the Mama Tried Show in Milwaukee and have been invited to the Handbuilt Motorcycle Show in Austin, TX. Y’all come out to see it in person!

You have to look at this bike and smile at the fact that it was built from inspired dreams of the Schwinn Stingray Orange Krate. A fun whimsical build that is art in motion and nothing else. A childhood memory of wacky bicycles with squared off slicks that didn’t handle well but were there for fun. When you could customize them with lights, speedometers, wheelie bars, sissy bars, and anything your child heart desired. This bike is for that.

Thanks for reading,
Sean Skinner

A great ride for sure, like back home in the UK, we had Raleigh Chopper push bikes, but i am thinking of my mate Alan Oller up in the Bay Area as he loves XS650’s and this would be a fun project for him next.

Hope you all have a great Easter weekend and thanks for reading.

Until next time, get them grinders out and start having a go at something constructive.


25th Anniversary Edition Ton UP Machine CB750K

Well, next year will be my 25th Anniversary of creating machines over on this side of the pond, many people have asked would I replicate the infamous K5 with Cafe on the tank to celebrate a quarter of a Century building Motorcycles, and I thought, I may go along the similar lines to that very Bike that kind of put me on the map so to speak.

But what should I do?  On reflection I think it is indeed a cool idea to do something like that very machine but, with some extra cool parts and exhaust system etc but I do have a NOS Paul Dunstall 5 Gallon Manx Tank in my Barn and will probably use that, so, I have a few old parts laying about and have been to and throw in coming up with that popular concept bike I created all them years back.

I have an empty Motor that I will use as a mock up for the time being. Then build something that will have a bit of oomph, but we shall see how things go, but the amount of messages I get about the old Cafe Bike I created all them years ago, still causes a stir and I think it will be fitting to do something in that style, maybe different color etc and wheels too.

So I will use old snotty spare parts to mock it up, as well as some New stuff to see if it will fit and as you see, I think I may go with my Infamous Sidewinder Exhaust system as it hugs the frame and, you can still use a main stand. I am putting my Vortex Baffle in for that crisp response and crackle when you open and shut the throttle.

Simply slide the baffle in all the way and the endcap finishes the system off just like the old days and I like ceramic Black end to give a good contrast to the system.

Please remember, this is all a Mock up, I will strip the frame and then either paint or Chrome it, not decided what yet but will add info as and when I do more to the bike, I am just getting a feel right now but love the way it will sit and of course will use shorter fork tubes in the steering.

See how close the Sidewinder is to the frame, but, not touching it, and- If you look, you can see that if you wanted, you can still use the Main stand, even if you were changing a rear tire or fitting a new chain, it makes it easier to slip the main stand on and not have to remove the exhaust system.

Still so Much to do and see where I am going, but I do like my Sidewinder Exhaust system as on the 75K I created a quarter a century ago I went with a different 4 into 1 system, plus this system allows for super easy access to the Oil filter Housing too.

I love the look of the tromboning headers and they flow so well, a crisp note that will get you noticed every time you twist the throttle, the bike will get a complete strip down and then I shall bead blast the paint down to bare metal, grind any welds off that are ugly and add some brackets for New tank and seat combo etc, this will take time but don’t want to rush either.

This is my own design and I like to Ceramic coat these , this time I chose the Brushed Aluminum look and I think it will set the bike off great once everything is tied together and have that Cohesiveness that will draw a crowd.

Of course stopping power is paramount on these machines and with a little extra Horsepower, these inline fours need some good surface area to be able for the brake pads to grab onto and bring you to a safe stop, so I chose to go with Beringer and have the floating Rotor and Custom Caliper set up to give me that punchy braking that many lack on their builds.

Of course, you need a good strong Master Cylinder to push all that brake fluid down to the Caliper as quick as possible and I thought I may as well go for the trifecta and get a Bringer Master Cylinder set up and very cool it looks too.

As you can see, this is a rough mock up, no painting will be going on until I have completed the whole build up and then once I am happy I shall do the tear down, rebuild a Motor and then slowly assemble the machine, but right now I am trying all sorts of concepts, I had an old set of 1977 Lester Rims that came off an old Chopper bike that was parted out many moons ago.  It is a 19″ front and a 16′ rear, the shock absorbers that I have fitted are not tall enough for what I want, these are about 13 inches from center to center, I want at least 14 inch centers to raise the rear end for a more level stance.

I have had this old frame for years and its weather beaten, but that makes it for an interesting build as I love resurrecting 50 years old Motorcycles from parts, I believe this will be a fun bike to ride, I shall incorporate rear sets and maybe a Custom swing arm with adjustable shock mounts for changing rear Geometry etc.

So, although the frame is Rusty and some corrosion, I have always started with frames like this, I am media blasting it anyway so it will be all fresh metal again when I start the build up after I am happy with the overall look when I am done fitting parts.

I have other things to do like all my orders today, so I had better get the exhaust orders done and ready for the UPS driver as exhausts always sell well and weather will be warming up all over the globe soon and that means- Riding weather.


So, with that I had better get these orders packed and labeled for exhausts and get them done as light will be fading soon, but thanks for follwing me on the 25th Anniversary build and of course, I shall keep you all posted via here.

FOUNDRY’S LATEST KAWASAKI Z650 CAFÉ RACER

Tom Simpson | Owner | Designer | Builder | Barista ! 

Tom was a blacksmith with an interest in motorcycles that stretched back to when he grass-tracked on mopeds around a field.

“The seed of my bike obsession took hold when my dad brought home a knackered Suzuki GT250 Ram Air,” he says. He’d been given it as part payment for some work but couldn’t get it going so after a lot of pestering it was given to me. My uncle and I got it to start, but a stripdown found a bent con-rod.

“That was it for that bike but I was hooked. Smoking around on a mate’s GS500 was the precursor to my first big bike, a Hornet 600. Then, when I was into my blacksmith work fulltime, I was also riding, welding hardtails, making occasional bits and gradually it progressed into full time work.”

What makes Foundry Motorcycle machinery stand out is Tom’s philosophy to incorporate new ideas with every build. “By not formalising what I do it means that it keeps everything fresh. I love coming to work and I try to build different things.”

But how does Tom define his style? “I think my smithy background comes through. It’s more organic rather than bolt-on. Most of the stuff on my bikes I make right here. I always make the exhausts flow in a particular way. I make all my own subframes. If I keep building the same over and over I could make more money but each time I try to do something, it’s different.”

So here we go with a classic style Z650 creation that Tom had to use his Blacksmithing skill set to accomplish the really bitchin set of wheels that adorns the tarmac of the British Countryside.

The Customer dropped a frame, wheels, tank and a set of forks to the Chichester based workshop that’s located about 14 miles North West of Bognor Regis and 22 miles East of Portsmouth in the UK.

Unfortunately there was no powerplant as the Client was working the the motor himself, but luckily Tom had a empty shell of an engine from a previous build and was fortunate to be able to use that as a fixture until such time as he could fit the rebuilt item- But, that does not stop Tom and his fabricating mind in creating something that he and his client had talked about and working from a few sketches that Tom had laid out whilst in Conversation with the customer to what he was looking for.

As Tom’s previous trade was of a Blacksmith, he was used to swinging a Hammer and manipulated metals to form into what he was imagining, and this was a similar task to Blacksmithing, being that he has to heat and bend, cut weld and grind the frame to create something unique and of course rideable.

The Customer has informed him that he did want some dramatic changes which meant Tom would have to fabricate a custom swingarm, an entirely new subframe, and a full stainless steel exhaust system, something that was not an easy task and if it was, well, everyone would do it right?

As you can see, a lot of time and skill was used to fabricate the Aluminum swing arm and the end result is a Factory race looking set up thats been highly polished to a chrome finish, along with a set of YSS shocks and Tarrarozi styled rear sets for that Cafe Racer look, of course Aluminum rims polished and Laced to polished stainless spokes was the best way to go for that 1960’s North Circular look.

I personally have built a few swing arms in my time and can see the amount of time and energy that went into making this particular version work and look almost factory.


Moving to the subframe, Tom decided to avoid the typical cut-‘n’-loop style that so many of recently built Racers and Brat style bikes adorn- Instead, he designed a tail hump that would integrate neatly with the rear frame rails. A set of custom brackets and bosses ensures that everything fits together very neatly and has form and function rather than the normal “Cut n Shut” style.

The tail section’s bodywork is divided into a couple of sections. The traditional  racer hump forms the top half, while the bottom serves to blank off the underside of the tail, while also acting as an electronics tray. The overall effect is very uniform and flows so well and not bulky.

Hand fabbed mini Mega’s finish of the exhaust headers and are polished too, these bark like a Police dog at a Football match and make sure people know the client is there, I also belive in loud pipes and like the way they are aesthetically laid out.


CR carbs were the order of the day and with foam filters these units fill the void that many leave when they remove the stock airbox, A Lithium-ion battery now hides under the tail bump, with a Motogadget mo.unit control box stashed under the seat, makes everything very neat and tidy, Tom wanted to keep the Stock petrol tank as it has the right lines to flow with the rest of the bodywork. The Gas Cap is a Monza style piece to keep in with that Ton Up society and the tank is fitted with a Click Slick petcock from Golan to make sure it delivers the go go juice .

Up front you will notice that Tom added another Bacon slicer to the refurbished front forks and of course all the aluminum is polished to a chrome finish, and the client requested not to have a front mudguard, but Tom had the presence of mind to leave the factory mounting holes in place incase he gets fed up of road grime in the face and he han easily add a fender. Also the Nostalgic Avon Roadrunner tires were fitted to make sure this Z650 sticks to the tarmac.

Everything is nice and tight and regularly ridden in the English countryside and these hand made exhaust bellow out to warn whos coming around the next bend.

The only jobs that happened outside of Foundry’s workshop—other than the engine build—were the paint and upholstery. S.Jago Designs laid down the stylish paint job, and Trim Deluxe added a touch of class to the seat. But the rest is all Foundry and you can tell, as the Devil is in the detail and this has it with a Capital D.


Sitting pretty with a great stance, this machine looks and sounds the part and am sure the Client is over the moon with the way this turned out, considering this was a design on a scrap of paper.

So if you ever get to Blighty, drop into Foundry and see what Tom is creating, I am sure it will raise both eyebrows when you walk into the shop?

Nice Job Tom, well done fella.


Merry Christmas from Carpys Cafe Racers

Jeez, another year gone and soon beginning a brand new one.  Well, I hope that this finds you all well and happy?  I wish you ALL a very Merry Christmas and hope that you get time to relax and fit the new parts to your ride. These last 12 months have rocketed by for me but I have a few more new parts in the making and hope to show them soon and will showcase them first.

Look forward to gearing from you and l hope that I can help you create the Motorcycle that you want in 2024.

Thank you all for all the business and I continue to push the proverbial envelope in more parts and some special one of Motorcycles that I will be selling too.

Here is a movie ya might want to watch whilst you are off for a few days.

Another movie if you have a Rainey day and want  something to help the wet weather get by faster.

Ya just have to love the sound of the Two Strokes, and a Fun French/Italian movie

What a Start to a Movie! Its OK the Hedgehog does not get hit but it gets you watching through your fingers though eh?

A Parisian takes the law into his own hands and sets out to find the motorcyclists who killed his wife and child.

Release date: December 3, 1975 (New York)
Director: Gérard Pirès
Story by: John Buell

An ordinary man is driven to violence in the name of revenge in this drama. Paul Varlin (Jean-Louis Trintignant) is a businessman who decides to take his wife and daughter on a vacation. While stopping for gas, Varlin’s wife is accosted by a gang of motorcycle thugs, who progress from ogling her legs to raping both the wife and the young girl, and then killing them both. When Varlin discovers this horrible crime, he takes it upon himself to track down and kill the bikers in the name of justice. L’Agression also features Catherine Deneuve and Claude Brasseur.


Commercial from the 1960’s on Motorcycle Fashion

I look back and laugh but to be honest, this was the new thing as you were not required by law to wear a Crash Helmet at all in the UK, but in the 60’s fashion was about everything and road safety was being pushed quite hard in Britain, due to so many road accidents with “Teenagers” on Motorcycles.

When did it become law to wear a crash helmet in the UK?
A guide to UK motorcycle helmet law and safety standards …
1 June 1973
The UK crash helmet law was introduced on 7 February 1973 and debated at the House of Commons on 5 April 1973. The law was finally put into operation on 1 June 1973. The law was opposed by a number of people, including founder of the Motorcycle Action Group (MAG), Dennis Howard.


Although as a Kid I wanted one of these but I think only available here in the states back then. LOL.

A day of filming for TV with Larry, Jay Leno etc was a Blast

Hey Everyone, well its the weekend, I have been a bit ill in health recently and have not been on the website as much as I would like to but I am back on my feet, few health issues to try and figure with the Human Technician but I am sure I will get that all dialled in.

Anyway, its a Saturday so I thought that I would add a great video on here, my Buddy Larry Romestant builds Beemers and they are works of art, we have become good friends over the years and thought today I would share the tv show that had him showing him creating his bike, like you lot I am sure you have had many ups and downs when it comes to creating your ride and Larry does indeed too, which means its the real deal.

Jay Leno,  and James Maund get a feature in this show and I was happy to oblige in a segment too, great to watch on your PC or Big screen and hope you like it?


The trials, tribulations and triumphs of being a custom bike builder come to life as Larry and Carol Romestant design and build a one-of-a-kind BMW Special K cafe racer. Featuring Jay Leno, Steve ‘Carpy’ Carpenter and James Maund with some of the most scenic riding sequences ever seen.


http://specialks.net

Homepage

Helping you with New Parts create your ride

Hard to believe that I have been wrenching here in Southern California for 23 years, I continue to make parts for Motorcycles and Hot Rods too, it is nice to be busy and I am a very Positive person with a massive work ethic that I very much doubt I will ever stop from doing.

So I am hoping to come up with a few more parts and of course, offer them on my website, there may be some other things I will be doing like video’s etc to show you how things fit etc, soon as I have got my workshop sorted out to how I want it.

Fun times ahead but still love building Custom Machines.

Well, the Storm has left Orange County, more rain than anything to be honest, but at least over the next few weeks it will get a little cooler, but after September is when I love the temperature to turn wrenches in the Barn.

It’s always fun the first time you fire a Machine up after putting a load of parts together and the final product is revving away and begins a new chapter in its life as a Custom created Motorcycle.

Soon I shall be creating a few more Machines and will be up for sale on my website, so keep checking in from time to time, of course, I will add a video of anything on here, so you can have a closer look etc.

Have a great week everybody.


Awaiting Hurricane Hilary

Well, here we are, I am sat in the office, gazing out of the window at the rain that started to to fall a few hours ago, we are used to having pretty much, 340 days a year of sunshine but to be honest almost year round riding weather in Southern California, so to see some H2O coming down is quite refreshing.  But – We are expecting Hurricane Hilary to be arriving this afternoon, something SoCal has not witnessed in 86 years and, to be honest I don’t think it will be anything like a hurricane, more like a windy day in Seattle I think.

Plenty to do in the workshop as well and need to pull my finger out a little as its starting to fill up faster than Noah’s Ark, but its all good and will get to them, I need to sort a few bikes out, I may let the Katana go cheaply as I just dont have time to work on it, been sat inside for many years and I am sure someone will want that machine for $500, as its a great platform to have fun with, but as yo see, I have many projects to get sorted and the weather will cool off in a month or so and give me to me to see what I can concentrate on here.

I will be building some of the CB750’s to sell, but will of course, show the machines on my website for you lot to have a look through and see if there is anything that may float your boat etc, but I still am making parts for bikes and always continue to manufacture new stuff to get your bike back up on the tarmac.

Just thought I would write a quick blog and show you what I am up to and hope that where you are is warm enough to get out into the Barn, shed, garage etc and start wrenching.