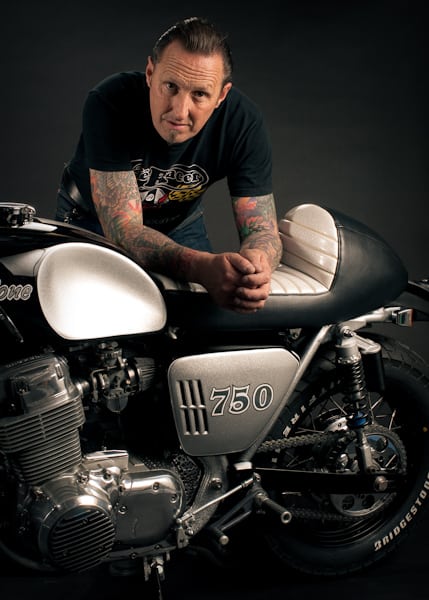
I went out for a Pint of milk, Came back with 10 CB750 Engines

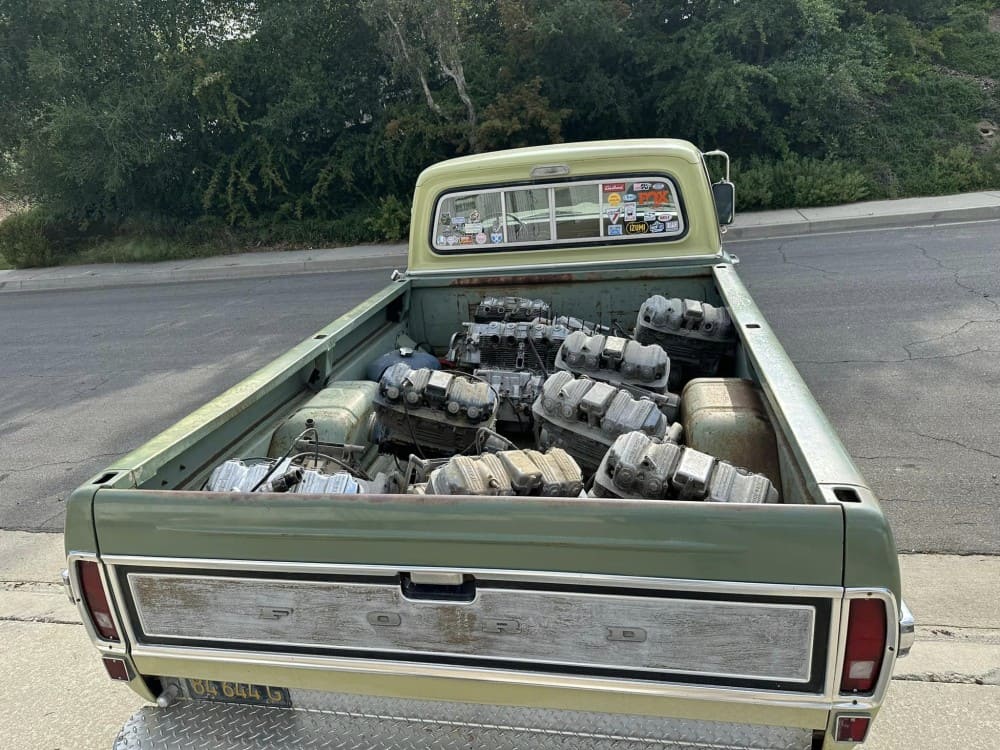
It’s a funny old world, I mean, I initially went out to get a pint of milk and on the way there I came across a stash of SOHC Motors that a buddy of mine needed to off load as he was clearing his place out for renovations etc, what better way of getting rid of them then to let me have them.  And, as I have a Long bed Pick up truck, I thought to myself I should be able to get all 10 engines in the back of the F250.

Lucky for me, it’s only 4 miles from my place, and as my old beast only does 6 Miles to the Gallon, it was well worth taking the turck to go and get these SOHC in line Four Motors, they had been sat outside in the Californian sun for many many years but I can use some of the parts even if some of the motors are locked up etc.

It was no easy task carrying 10 CB750 Motors from a back yard and loading them onto my truck, at 230 pounds each, every one became heavier and heavier, by the time I had dragged the 10th Engine out and up and onto my bed of the F250, i was feeling as weak as watered down beer. But I got them all on and then thought about it, man- That’s just over One Ton of Engines, and the F250 is a 3/4 Ton.

I know I will have use for these, even for parts alone, I have a small collection now that for now I shall place in my barn and wait until later on when I have some free time to see what is what.

These towed home no problem in my pick up and that hardest part was unloading a Ton of engines, as it was only 3 miles from my place and I was already tired from throwing tem up onto the pick up bed, but, not as far to move to the barn.  I sure felt it afterwards as thats 2 ton moved in less than 2 hours.

I have stored them away now in the Barn, but I am still working on New doors for the outside, so will just have to tip toe around for a bit until I am ready to hang the doors up.

Glad to have got them and I know I will be turning to a few when I create some more machines for the tarmac, nice to have spares at your finger tips though.

I have another Motor in a frame you can see and one more on a dolly in the shop that I need to move over, always something to do at my New location, it will take a little time to get it how I want but then it will be icing on the cake as working from Home is always the easiest and more enjoyable way of working i think.

I have a lot of work to try and catch up on since our European visit but refreshed and ready to take on another chapter in the life of Custom Motorcycle creation, I have a few ideas for more exhausts, Handle bars and other parts, so stay tuned to the site if you can.

Oil leaks whilst i was away need to be cleaned and gaskets fitted, Doors painted and hung, and then organise the bikes and where the parts will go is something that is not to be rushed but everyday there is something to mess about with and I enjoy so much.

Thanks for reading my posts, I like to share what I have been up to and its great hearing from you too and seeing what you are building at home, if I can help I always will be it via email carpy@carpyscaferacers.com or call / text at 714-598-8392 as its a pleasure having a chin wag where ever you are in the globe.


Fun times ahead at the workshop.

Well, a New year and New projects, I have a bunch of bikes that need to get running and then decide which way to go in the way of building and creating something cool from the shop but many different platforms are sat in the Barn, just awaiting some wrench time, but I do enjoy creating New rides.

I get many questions on how do I put in the Knee inserts on gas tanks, well, first off, I find a damaged tank, I don’t want to use a good solid undented gas tank, seem a shame to bash the crap out of it to be honest, so I usually have something about the shop or in storage that I can use and love to repurpose something that has been discarded, but I do use ear defenders as I have already got  Tinnitus from years of grinding metal, riding motorcycles with No ear plugs and going to many gigs and standing up front by the speakers.

I really enjoy making parts for the machines I build and of course offering it to customers too, its a noisy job but if it was easy, then everyone would do it right?

I have a few ideas for New parts this year, so keep checking back with me, also I hope to offer parts for different models and brands of Motorcycle, so I should be able to help you all, my Customer Service really is hard to beat compared to the many shops that have sprouted up recently, this is my career and my passion not just a business.

If its engine parts you need, drop me a Dime or Text on 714-598-8392 and I am more than happy to help you lot out with your project, this year should be a fun one and maybe I will meet some of you at an event?  I have built many Motorcycle over the almost 23 years I have lived here in Southern California and look forward to building many more.


The Hot Rod and Razor exhausts Now in stock, this is how they sounds too.

Carburetor Restoration Services

Well, for many years I have been rebuilding carbs on the SOHC 750 Honda, as well as the smaller 500 and 550 models, and I am still getting these sent to me to get the old crap and grime off of them and totally get then revamped to a Clean and smooth running set.

Many people have a go at sorting their rack of 4 out and get it to run, albeit out of sync etc but the people that do have a go, really know what is entailed in taking these carbs apart.

You need a lot of patience and plastic sandwich bags, to take these all apart and inspect where the blockages may be, as the journals are quite small , and even though you have cleaned the main jet and idle jet, you might of forgotten about the internal journals in the bodies.

Most of the ones I receive still stink of old gas and when you take them apart, the gooey remains of old fuel give that lovely aroma of bad petrol and that sticks to you for days, no matter what you use as hand soap to get it off of yourself.

The trick to these, if you want to call it a trick, is to strip apart, and then vapor blast these so everything is super clean, then air line it, then once that is done, ultrasonic clean them and slowly put back together, but, I like to have the parts zinc plates and the aluminum bodies powder coated, then the bowls and tops highly polished.

Above is a set of CB550 carbs that have seen better days and they run but very badly, these need to be taken apart and put back together only once they are cleaned and polished and these will look so different when they come back to you.

As you can see, its a huge change and of course for the better, the other thing is that these have all new jets and needles as well as gaskets etc, just take your time and have a look at what you get for your money, a lot of work and time spent on these.

Every thing gets taken apart, many do not and that will show up if everything else is spotless, but these are rebuilt and then bench synchronized and after that, they are run on a motor and synchronized with a mercury stick for smoother running.

Take a look at the photos I took, you can see what a difference this is, not just a can or carb cleaner and a quick wipe down, these are fully refurbished and ready to go on your inline four.

You can see the Detail here and notice New gaskets as well as hardware, the carb bodies look way better now they are coated and you have a choice of Silver stock or Black too.

Send me yours or I can sell you a set already built etc, the choice is yours to be honest, you can also have the piece of mind that these will run on your motorcycle, right out of the box and let you get on with other things, just remember to tell me what exhaust and air filter you are running to allow for jet adjustment for tuning.

You can choose a stock style, with polished bowls and top rings like the ones you see right here for the CB750K model Honda Four.

Or a wrinkle Black and polished set up thats a lovely combination for Custom builders, I like them all to be honest and I am sure that you will be stoked with these.

Send me your dirty snotty old carbs for a full tune up and a brand new lease of life, your Honda will thank you for it and no more of that choke throttle choke throttle hassle.

These will get all pulled apart and then be cleaner than a cats arse, I have rebuilt quite a few hundred of these in the 19 years and plan to continue to do this for another 20 years or so, thanks for looking and hope I can help you out.

You can call or text on 714-598-8392 for more information.


Old relics in the Cold

Well happy Saturday to you all

Here in SoCal, the only snow we see is 90 minutes up the road at high elevation in Big bear etc, but you don’t find cool stuff like this anymore and what cool rides are sat in the cold on this video , albeit they will be crushed but if the owner had any sense, he would make a bloody fortune if he sold each one.

Plenty to chose from as I can Model A’s to cool step side pick ups and panel wagons, a must see if you can make it here, but not sure if the owner will stick the shotgun out the window.

Sure hope someone buys these as there is so much potential here.

Enjoy you Saturday.


Peace and Grease.

WHEEL BEARING RETAINER SOCKET ( FRONT ) S.O.H.C.


 photo 043_zps55004bed.jpg


Here we go with one of our Newest designs, this time I wanted to make a good tool to remove the front hub wheel bearing and try and save the Original retainer if possible, and 99% of the time you will destroy the old one with a chisel and hammer.

So, we came up with this idea and it works on ALL the bikes that we build, I will also have the rear hub socket available on the parts pages too, so check them both out.

 photo 050_zps6964b851.jpg


We made these here in house and then sent them out to get chromed, and this is such a handy tool to own.

 photo 049_zps29a0b0cc.jpg


Seeing as I use mine all the time, I thought I would offer them to you the public and stop you climbing the walls trying to get your retainer undone.

 photo 048_zps61128a3d.jpg

All the tools you will need is a ratchet and that’s it, you can go and remove the retainer, but remember to remove the Oil seal first.

 photo 045_zps694cdb1b.jpg

But a great tool to get you out of trouble if you cannot get that alloy retainer to budge.

 photo 044_zps73619f47.jpg

Even if you only use this once, it will save you so much time and frustration that’s for sure.

Always keep it in your tool box for the next wheel bearing job- or even lend it to your mate and stop him crying too.

If you have a CB750 from 1969- 1978 then the front bearing retainer is the same, all you do is pop the old oil seal out, insert our socket tool and use your ratchet wrench and there you go, she will come undone, this has saved me many times in the past and I hope that you will feel as relieved as we did when we first used it?


We sell the Retainer and the Oil seal if you need it and just check our pages of parts for them as we have a search engine, as well as having a New website coming out to make your shopping even easier, now that’s a good thing right?

We also sell the rear retainer tool to get that stubborn Alloy retainer out.


WW2 Seafire Fighter plane fully restored

Well, I wanted to post this on my blog today, to restore a plane is something else, to restore a war bird is another thing and to have it flown is mind blowing. This is an original WW2 seafire that we used for the Navy in Britain and for the American troops to fly off aircraft carriers. An awesome restoration, the hours it must of taken to get this right, he even made sure all the cannons were fited and function,attention to detail is just mind blowing and the ONLY one in the globe flying.
Sit back and watch this cool and unusual war bird make history, one mans dream did turn into reality.
if I had a hat on this morning I would take it off and tip it towards you mate. Brilliant Job.


NEW SIDE STAND AVAILABLE


Many people asked me about the side stand I have just used and, it is now available here at the shop, we make these and I use them on the CB750,the 650,the 550 and cb500 HONDA and this sits the bike at a nice angle.


As I am sure that your one is bent out of shape and the bike is leaning over too far and you have to fit a block of wood underneath the stand to stop it tilting.


This is solid Black and replaces your old tired out version, you can buy the spring and bolt from us too if you so wish.

Just unbolt your old one and then fit this and you are styling once more.


I am happy that I now have these available and I am looking forward to using these on all my rides in the following months.


So, if you are tired of putting a piece of wood or board under your side stand, here is your answer.