Playing about in the garage with an old snotty frame

Well, I need to clean some of my old storage out and thought I would have a bit of a play about today, being its Sunday , and see if I can at least come up with some sort of rolling frame.


So a few bits and bobs were put together to see where this may go, not sure what style or Caff or Brat style but just having a dig around out of my old parts to see where we end up.

I had about 3 hours to spare today and wanted to try and at least collate some parts that have been getting in the way in storage and this would be a fun project to start on today in the garage.

So, a fun afternoon just playing with an old neglected frame that had been butchered up many many years ago and to save it from the junk yard, I took it off a friends hands and thought that I could at least do something with it and save another inline four from the scrap pile.

Well its all about there, not sure if I like it or not, the Alloy 5 Gallon hand Made gas tank is fun but not sure on the seat and I do not like the handlebars at all, but thats all I had kicking around the garage, either needs Clip on’s or a set of Ace Bars.

Not sure on the smaller LED headlight right now but I had these old parts laying about here in my garage, so its a mock up and I am sure this bike will go through a few guises until I am happy with the look and the style that I want to try and create.

Up in my Rafters, I had a coupe of old Dresda swing arms, this one is a NOS CB750 version, so I thought I may as well use the thenig and am happy that I have, of course I shall run a wider rim later too as I want to fill that void up.

I had some old Tarrozzi rear sets brackets so if I go the Caff route, then the ends of the brackets of the frame will get nipped off and sealed up with weld for a clean look.

The whole point of me mocking the bike up , is to see if there is any parts that I really like and may help the bikes lines flow nicely, I am not sure on this old CR750 seat, its ok but I am just not feeling it to be honest, so I may put this one back in the storage and think again.


The 5 Gallon Manx tank is cool but I am not feeling it on this frame at all right now, mainly because I am not a fan of the handlebars I fitted, but as its a Sunday and I am using parts from the garage, it will do for a while but am sure this will change its look as time goes on here.

But I have it all mocked up and I may go with my Custom gauges, just for that Classic look and will refurbish the left speedo to match the Skull and cross bones tachometer.

Just want to show that I do use old knackered parts and I can change the look and style right here in the garage, as this build goes along you will see some progress shots but I need to have a rolling frame that I am happy with, before I tear it all apart and start to the tiresome hours of welding, grinding, sanding and refurbishing, until i am happy with the way it is looking.

it looks ok but just not turning my crank, so i think I will try another petrol tank as some times that alone can change the lines and flow of a bike, so i have an old k3 gas tank I can plop on and see what that looks like compared to this Manx Alloy version.

Well, I do like the Original tanks of the K series, but not sure I like the seat at all now, thats all part of the mock up, just keep going unto you are happy with the look that you are after, this may take some time, but its all worth it in the end, you just cant rush this stuff.

Well, the Handlebars are now doing my head in and as the light is starting to go I may pull the plug for this afternoon and re-charge myself once more and see where we go on this old girl.

The main objective today was just to piece together a bunch of old parts that have been collecting dust in my storage and around the garage, so at least I have made some progress to some extent.

I am glad that I used the Dresda swing arm and hope to be banging out my own version of these again, but stay tuned to how this old K model is going as i hope to make a cool, head turning machine that will belt along the highways and byways of Southern California, stay tuned……………………………..


Carburetor Restoration Services

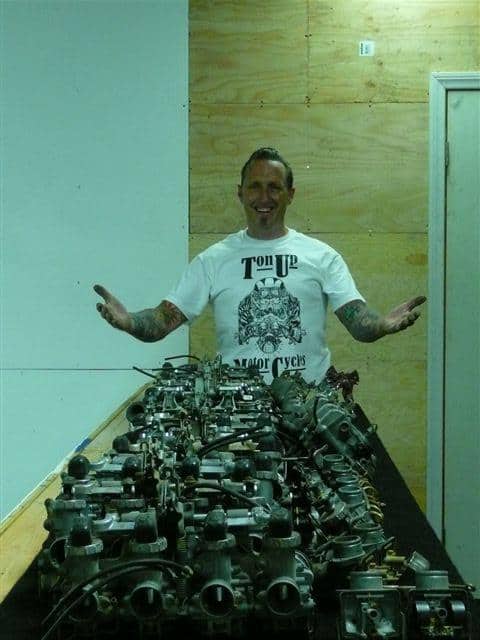
Well, for many years I have been rebuilding carbs on the SOHC 750 Honda, as well as the smaller 500 and 550 models, and I am still getting these sent to me to get the old crap and grime off of them and totally get then revamped to a Clean and smooth running set.

Many people have a go at sorting their rack of 4 out and get it to run, albeit out of sync etc but the people that do have a go, really know what is entailed in taking these carbs apart.
You need a lot of patience and plastic sandwich bags, to take these all apart and inspect where the blockages may be, as the journals are quite small , and even though you have cleaned the main jet and idle jet, you might of forgotten about the internal journals in the bodies.

Most of the ones I receive still stink of old gas and when you take them apart, the gooey remains of old fuel give that lovely aroma of bad petrol and that sticks to you for days, no matter what you use as hand soap to get it off of yourself.

The trick to these, if you want to call it a trick, is to strip apart, and then vapor blast these so everything is super clean, then air line it, then once that is done, ultrasonic clean them and slowly put back together, but, I like to have the parts zinc plates and the aluminum bodies powder coated, then the bowls and tops highly polished.

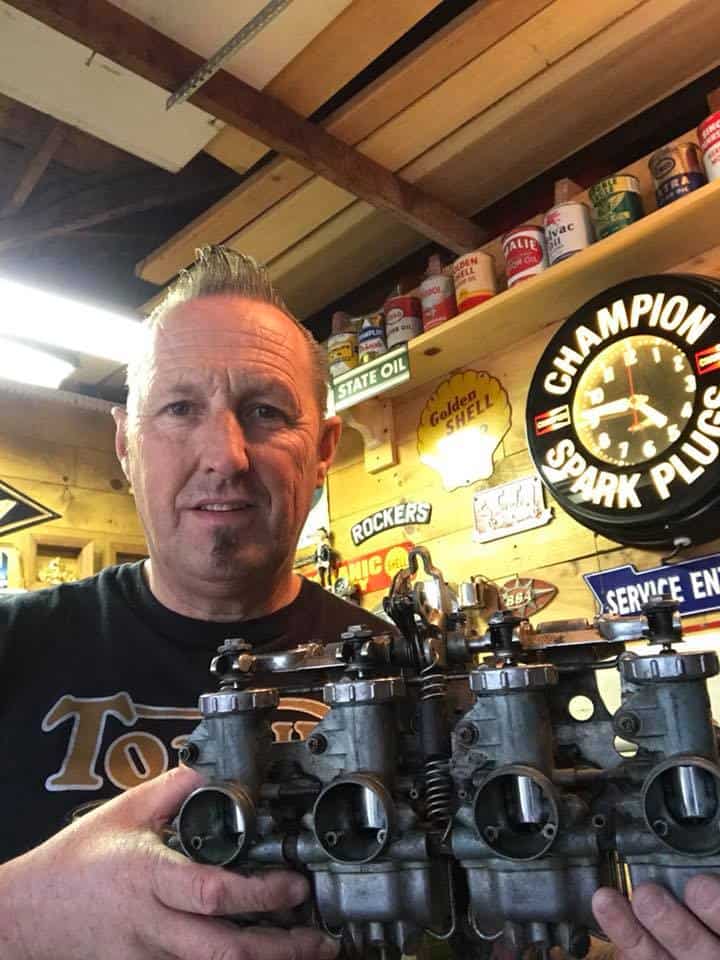
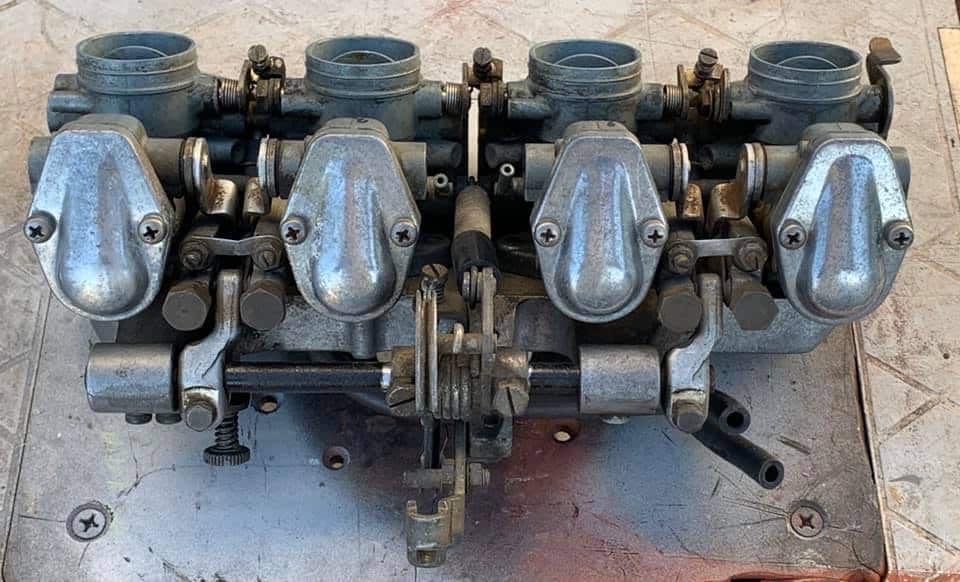
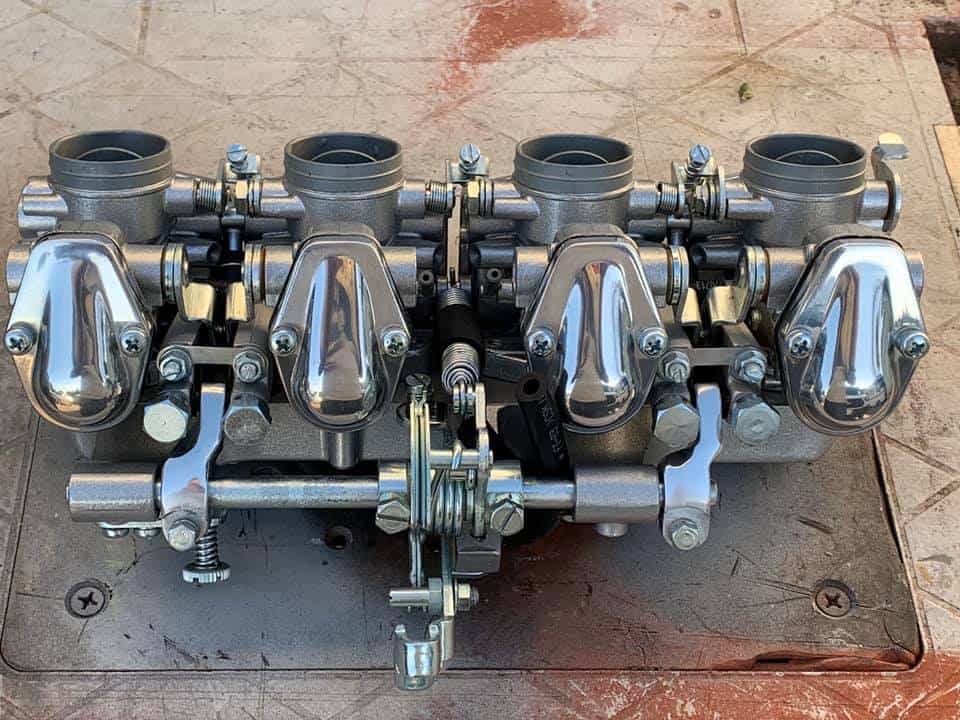
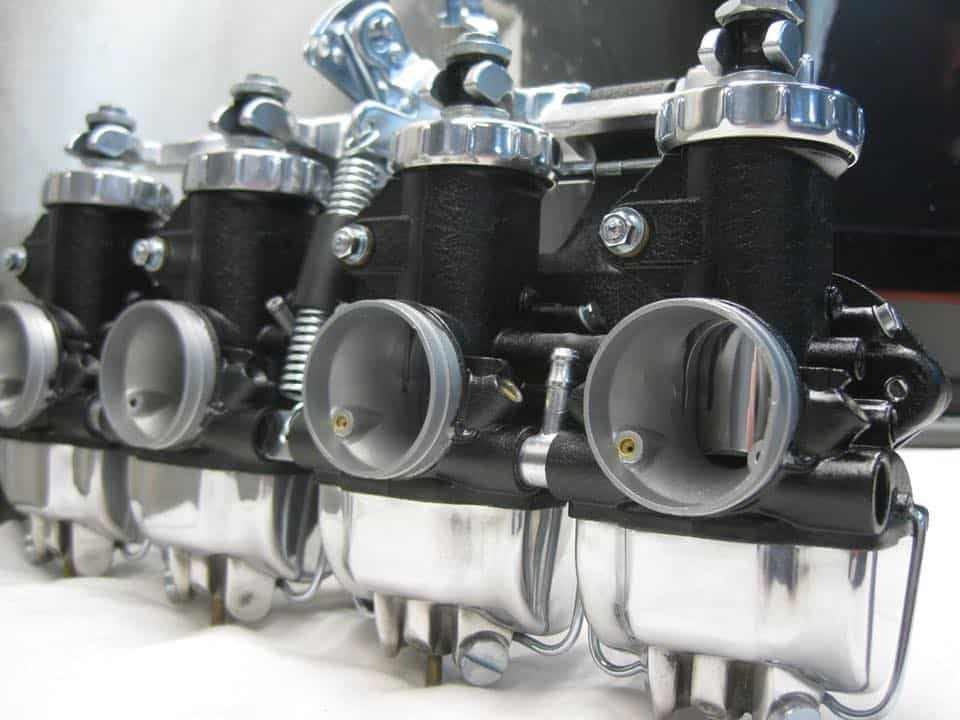
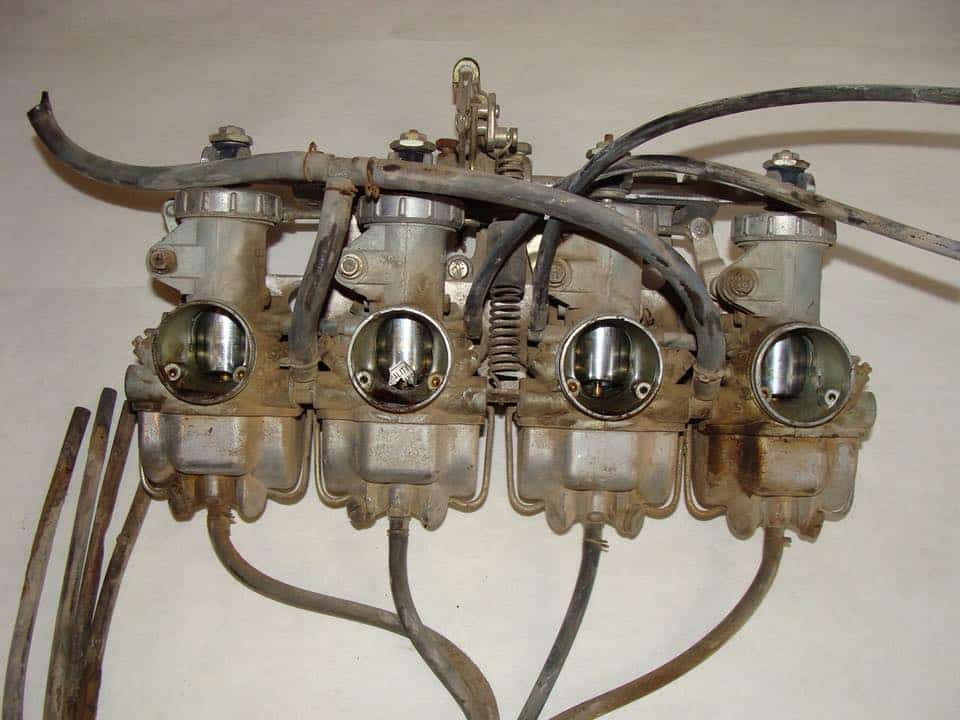
Above is a set of CB550 carbs that have seen better days and they run but very badly, these need to be taken apart and put back together only once they are cleaned and polished and these will look so different when they come back to you.

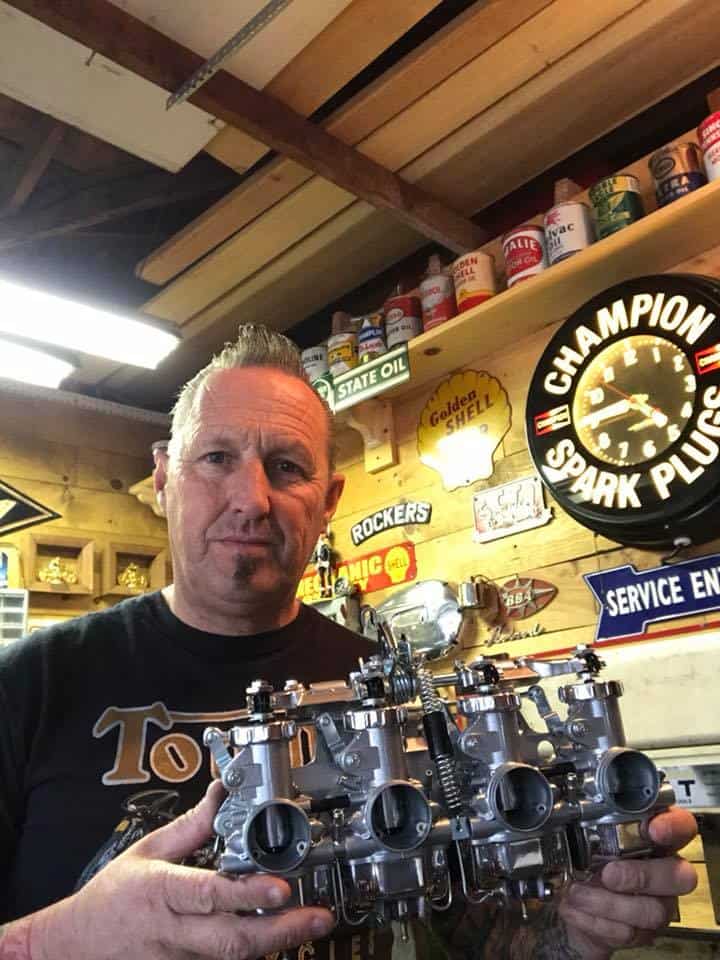
As you can see, its a huge change and of course for the better, the other thing is that these have all new jets and needles as well as gaskets etc, just take your time and have a look at what you get for your money, a lot of work and time spent on these.

Every thing gets taken apart, many do not and that will show up if everything else is spotless, but these are rebuilt and then bench synchronized and after that, they are run on a motor and synchronized with a mercury stick for smoother running.

Take a look at the photos I took, you can see what a difference this is, not just a can or carb cleaner and a quick wipe down, these are fully refurbished and ready to go on your inline four.

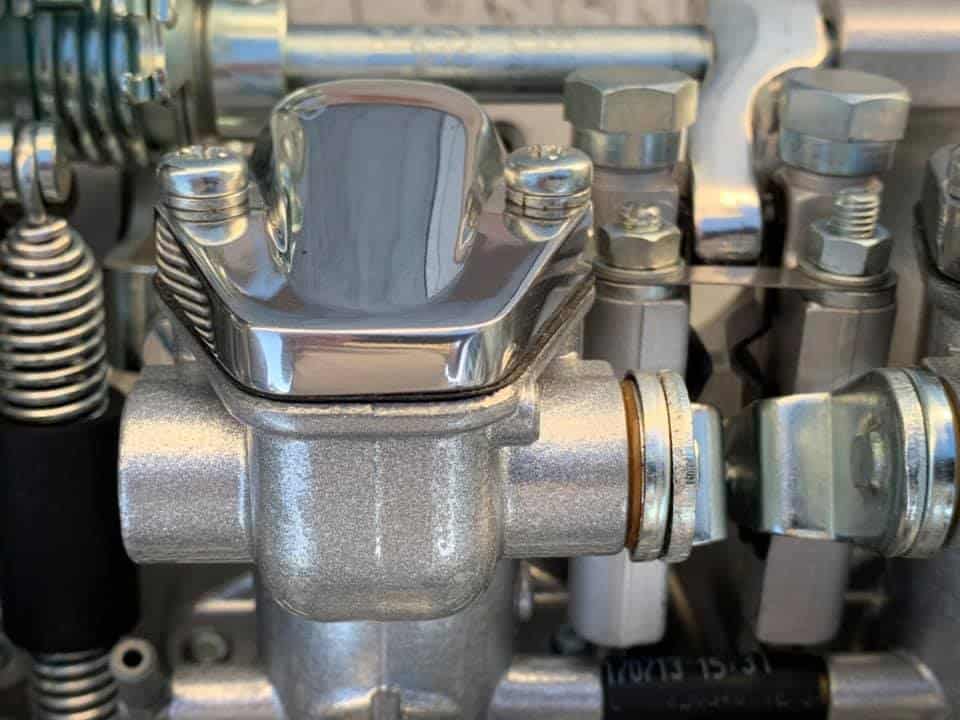
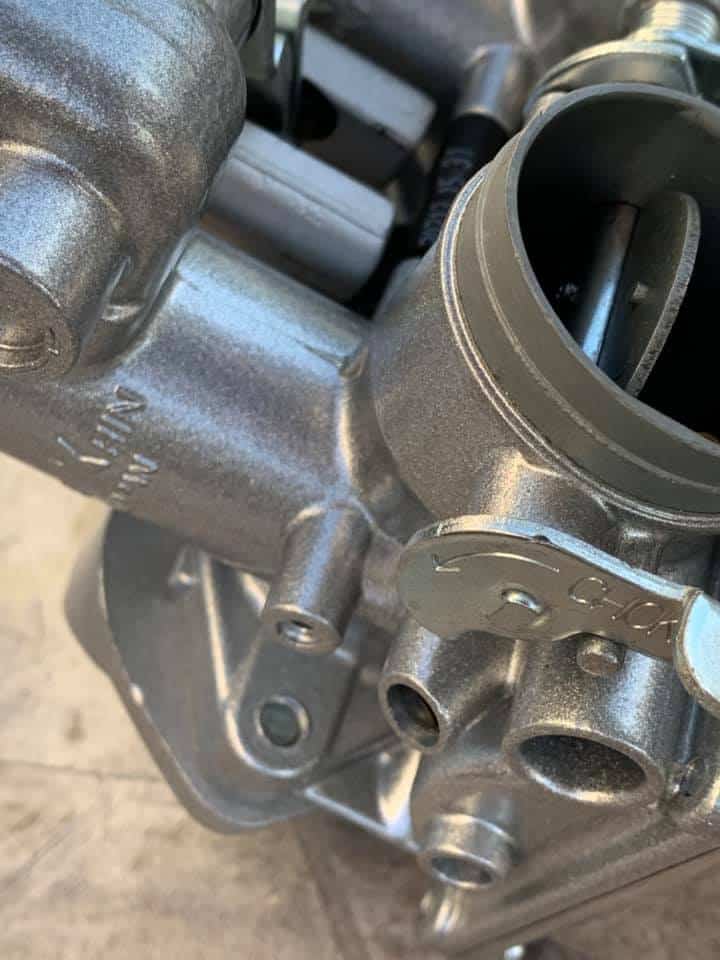
You can see the Detail here and notice New gaskets as well as hardware, the carb bodies look way better now they are coated and you have a choice of Silver stock or Black too.

Send me yours or I can sell you a set already built etc, the choice is yours to be honest, you can also have the piece of mind that these will run on your motorcycle, right out of the box and let you get on with other things, just remember to tell me what exhaust and air filter you are running to allow for jet adjustment for tuning.

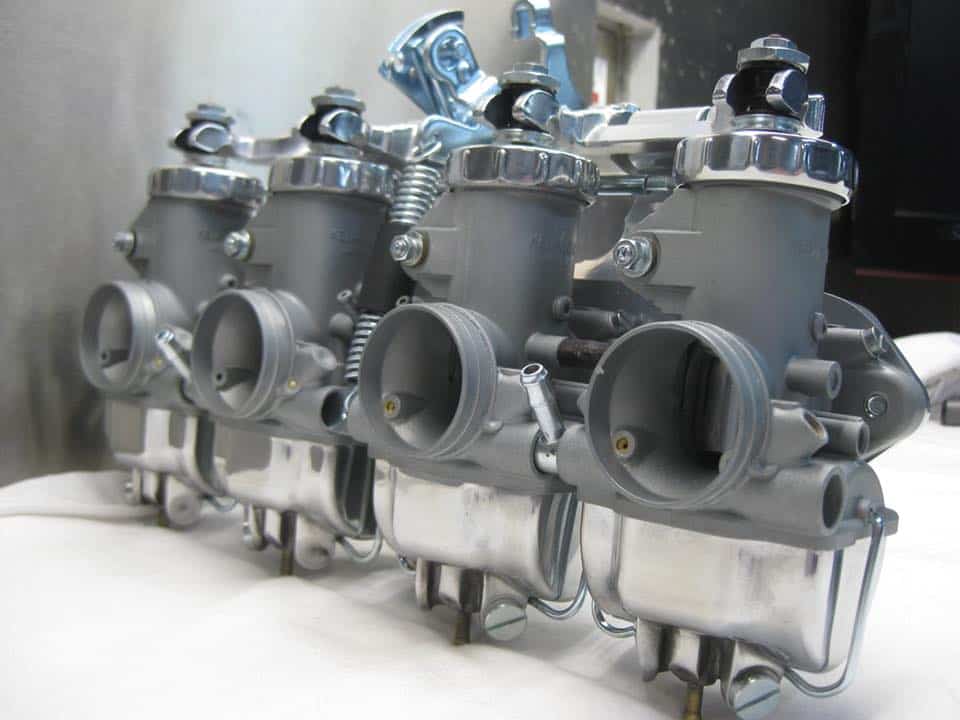
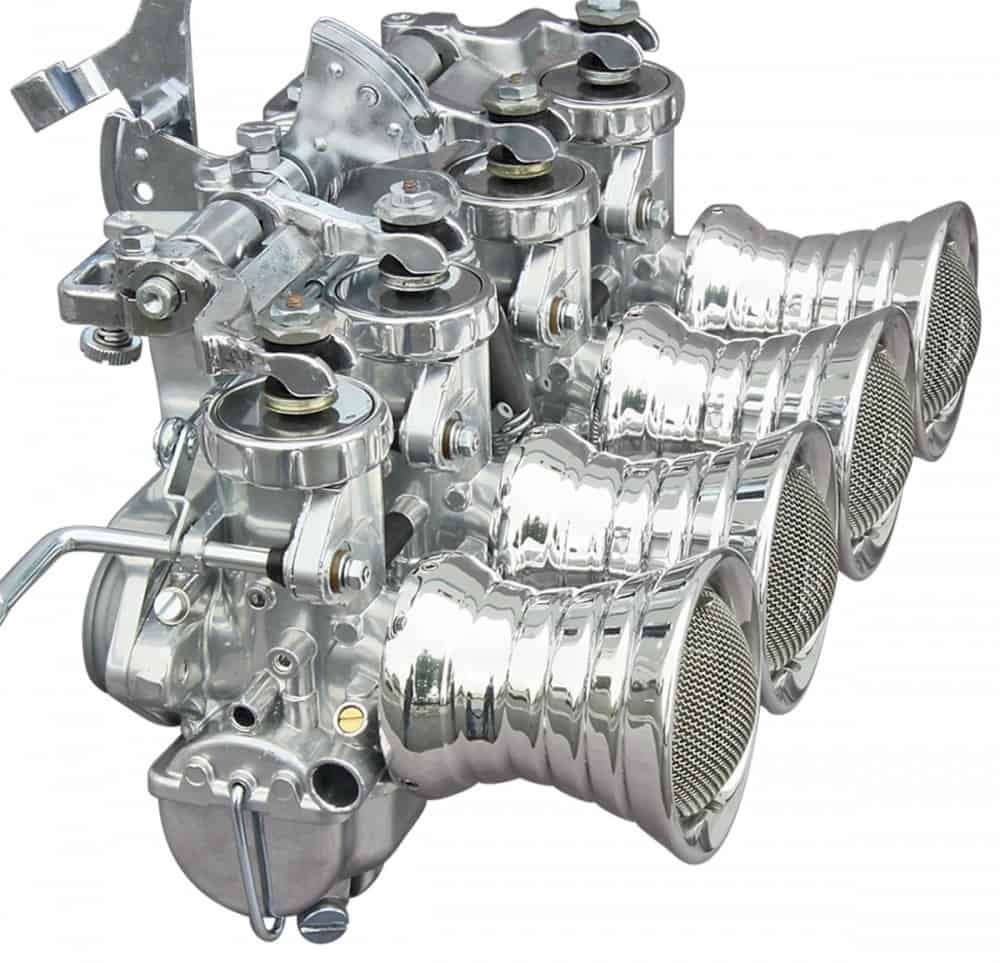
You can choose a stock style, with polished bowls and top rings like the ones you see right here for the CB750K model Honda Four.

Or a wrinkle Black and polished set up thats a lovely combination for Custom builders, I like them all to be honest and I am sure that you will be stoked with these.

Send me your dirty snotty old carbs for a full tune up and a brand new lease of life, your Honda will thank you for it and no more of that choke throttle choke throttle hassle.

These will get all pulled apart and then be cleaner than a cats arse, I have rebuilt quite a few hundred of these in the 19 years and plan to continue to do this for another 20 years or so, thanks for looking and hope I can help you out.

You can call or text on 714-598-8392 for more information.


Paignton Sea Front weekly Bike show by BMAD back home where I lived for a while and shows still going.

Well, back in my old seaside town where I resided for a few years in the south of the country, started a great Motorcycle fraternity up called BMAD, (Bikers, Make A Difference).

First founded By Kelvin and Jane Halloran in 2003, this event and meetings have continued to grow and function as a very successful meeting in Paignton Seafront, attracting many of the public to come and look at these great two wheeled machines and also the main objective is that it raises money to help sick, disabled and disadvantaged children, also other worthy causes and charities within the TQ postcode area.


Funds are raised by hosting a three day festival on Paignton Esplanade over the May Day Bank Holiday (fri-sun), this includes live music, traders and of course bikes, Trikes and scooters!
We host 18 bike nights also on the Esplanade, these take place every Wednesday evening at 6:00 pm from the beginning of June through to the end of September, we are fully supported by bikers who make a donation on the gate for themselves and a pillion if applicable. Collection buckets are available for pedestrians to donate should they wish.


All monies raised by BMAD are used for charitable causes and all volunteers are unpaid.

General Information
We hold bike nights every Wednesday evening between the start of June and the end of September. Bikers donate £1:00 per person at the gate to park on the Esplanade and enjoy our bike night event.

In addition we hold a Bike Festival over the first May Bank Holiday weekend (fri-sun) and I have been to that a few years ago when I took a trip home as our MUM was dying from Cancer, that place was so cool, people remembered me from 30 years ago and it was like I had never left the Torbay area.

This bike meeting is always popular come rain or shine, the time I went , the weather was blowing hard, the air was colder than an Eskimo’s fridge and the H2o was starting to get stronger, but- everyone just enjoyed their-selves and rightly so, you cant let weather stop you from enjoying what you have a passion for.
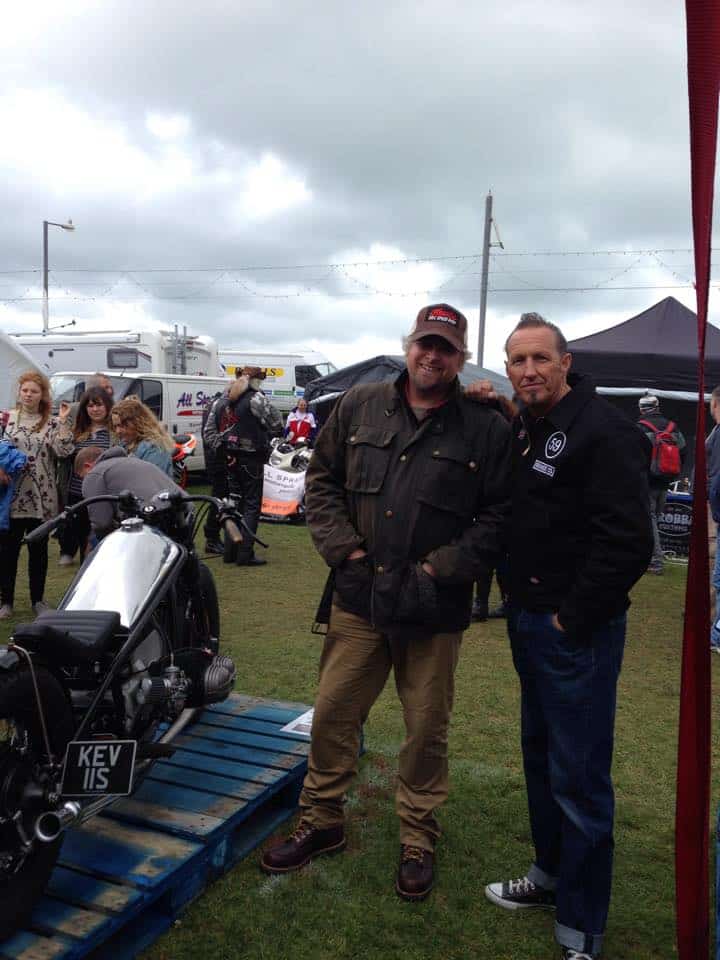
What I love about it is that there is Old and New, so like Forrest Gump saying that life is like a Box of chocolates, Paignton sea front BMAD show is the same, as you just never know what you are going to get and as we look here a Cool Kawasaki 400 and the ring and ding ding of the RD400 and in restored condition, I can almost smell the Castrol R from here in California.
Road bikes, Classics and Customs, like this Bobber, there is always something for everyone and no attitudes either, a bang on meet up that others should learn from to be honest.
Mission
Our mission is to raise funds for sick, disabled and disadvantaged children within the TQ postcode area, to support local charities and other worthy causes.
This show is maybe 5 minutes walk from my old apartment and I used to love to walk along the seafront, buy a bag of fish and chips ans check all the bikes out along Paignton green.
Like I said, there is something for everyone, even this Lambretta got plenty of attention, mind you, many will not know what this model is, unless you are into Hair dryer Motors.
Good ole Motor Morini with Megaphones, as a teenager I loved to hear the sound of these V twins belting a long with their distinct roar.
So, a section for the Scooters were available, making this meet up a super friendly event and some rare ones at that.
The good Old 500. I had one of these in Blue, my first BIG bike, I traded it for a SL125 Honda and Ran a muck around East Anglia on it for a long time, those expansion chambers still ringing in my ears today!
Perfect pre unit that I would love to own too, hats off to the fella for bringing such a tasty treat along to this event, see if you can make the next one?
The meet up on the seafront is July 17th at 6pm Paignton seafront, hope you can make it and send me some cool pics.

Love what I do here in my Garage

Been doing this for close to 20 years now here in Southern California, always fun and challenging to say the least- I have lost count of the thousands of orders I have managed to be lucky enough to generate, through you people, I am stoked that you enjoy my blogs and my parts, as well as builds and my reply to emails when you are stuck with your bike.

I continue to push the proverbial envelope in this great and very competitive market that has now emerged in the two wheeled lifestyle, and its great to receive word from well known companies that let me know that I in some way have inspired them not to give up and keep trying.

I am trying to make more parts and stay tuned to my website as as soon as they are ready i shall do a quick Blog to show you have they fit and look etc and then put on the website to make available to you right away.

Thanks for all the great emails and texts etc, I am busy with a number of things, from Vapor Honing parts, to polishing and chroming, as well as making new parts, drilling hubs and working on my Vintage Hot rod too, never a dull life here in La Mirada thats for sure. Thank you again and as we enter into the 243rd year of this Great Country- I wish you all the very best and look forward to helping you any time.  Have a super week everyone.


Evening of Fireworks on the USS NIMITZ Aircraft Carrier CVN68

What an amazing time Jennifer and I had, aboard the USS NIMITZ Aircraft Carrier in Coronado-San Diego, to celebrate July 4th and sit on the actual flight-deck as the bombardment of pyrotechnics took their explosives high up into the ether via barges on the water that were surrounding us like Custers last stand.

As you may know, I was commissioned by the Captain a few years ago to create a cafe Motorcycle to keep Morale high and to incorporate some of the US Navy and the Nimitz into the bike, of which I did and everybody loved it, Jack still has the motorcycle and proudly has it on display.

Captain Schueller Personally invited Jennifer and I to accompany him on the flight deck of the Carrier and experience a night of fireworks with some of the crew and some officers and I could not turn that opportunity down, I mean who would right?

So, we drove down the 5 freeway to Coronado and met Captain Jack and his family and then headed out to the Nimitz, of which was 5 minutes away from his Married quarters.

I have been lucky enough to have traveled out on the Nimitz not once, but Twice and went out to Sea for a few hundred miles and watched what they do to protect this great country I live in, so to be invited back for this special occasion was quite an honor and something I shall not forget ever.

Here is a little information on her if you are interested.

USS Nimitz History
After her commissioning May 3, 1975, Nimitz’ first deployment began July 7, 1976 when she departed Norfolk for the
Mediterranean. Nimitz again sailed toward the Mediterranean Sea Dec. 1, 1977. Sept. 10, 1979, she was dispatched to
the Indian Ocean as tensions heightened after Iran took 52 U.S. hostages. Four months later, Operation Evening Light
was launched from Nimitz in an attempt to rescue the hostages. The rescue was aborted in the Iranian desert when the
number of operational helicopters fell below the minimum needed to complete the rescue.
Oct. 29, 1988, Nimitz began operating in the North Arabian Sea in support of Operation Earnest Will. Nimitz then
departed Bremerton on Feb. 25, 1991 for the Arabian Gulf, relieving USS Ranger (CV 61), during Operation Desert
Storm. Nimitz again deployed Feb. 1, 1993 to the Arabian Gulf, relieving USS Kitty Hawk (CV 63) as part of Operation
Southern Watch.
Sept. 1, 1997, Nimitz set out on an around-the-world cruise. During this deployment, Nimitz was ordered into the
Arabian Gulf to support Operation Southern Watch and various United Nations initiatives.
Nimitz arrived at her new homeport in San Diego Nov. 13, 2001. In 2003, Nimitz deployed in support of Operations
Enduring Freedom and Iraqi Freedom. In May 2005, Nimitz embarked on a six-month deployment in support of
Operation Iraqi Freedom and the Global War on Terrorism. After leaving the Gulf, the strike group participated in
Malabar 2005, an exercise between the U.S. and Indian navies. In 2007 and 2008, Nimitz CSG deployed in support of
the U.S. commitment to peace and stability in the region. Nimitz departed to the Persian Gulf for a scheduled eightmonth Western Pacific deployment on July 31, 2009 in support of Operation Enduring Freedom.
Nimitz arrived at her new homeport in Everett, Washington in March 2012. March 30, 2013, Nimitz deployed in
support of Operation Enduring Freedom. Nov. 3, 2014, Nimitz took part in naval aviation history when the Navy’s fifth
generation Joint Strike Fighter, F-35 Lightning, touched down on a carrier at sea for the first time.
Nimitz arrived at her new homeport in Bremerton, Washington Jan. 13, 2015. Beginning Jan. 15, 2016, Nimitz
underwent a 20-month extended incremental availability (EPIA). Nimitz began workups Oct. 10, 2016 for a 2017
deployment completing sea trials, and Tailored Ships Training Availability and Final Evaluation Problem (TSTA-FEP).
Nimitz returned to sea Jan. 28, 2017 to undergo its first Board of Inspection and Survey (INSURV) since 2010.
In April 2017 Carrier Strike Group (CSG) 11 completed its final pre-deployment assessment, Composite Training Unit
Exercise (COMPTUEX), marking the completion of a condensed Inter-Deployment Training Cycle (IDTC). Nimitz
deployed on a regularly scheduled deployment June 1 to the U.S. 7th Fleet (C7F) and U.S. 5th Fleet (C5F) areas of
operations. Nimitz returned home from deployment on December 10, 2017. Nimitz entered dry dock six on March 1st,
2018, for a docking planned incremental availability at Puget Sound Naval Shipyard and Intermediate Maintenance Facility.

The aircraft carrier continues to be the centerpiece of the forces necessary for forward presence. Whenever there has been a crisis, the first question has been: “Where are the carriers?” Carriers suIt’s hard to explain, but the Nimitz is an immense Ship, it is basically a Floating Runway and small city on the water, and over 1000 feet long it is nothing short of stunning to stand on the deck from the stern and look towards the Bow.


• Four distilling units enable engineers to make more than 400,000 gallons of fresh water a day for use by the
propulsion plant, catapults and crew.
• Nimitz can stock at least 70 days of refrigerated and dry goods.
• Several tons of laundry is washed every day by Nimitz’s laundry, dry cleaning and tailoring services personnel.
• Nimitz’stwo barber shops trim more than 1,500 heads per week.
• Nuclear power allows the ship to store 50 percent more ammunition and almost twice as much aviation fuel as
the largest conventional steam carrier.
• Nimitz can hold 3.5 million gallons of fuel.
• Nimitz reaches more than 23 stories high from the keel to the top of the mast.
• The hangar bay extends for most of the ship’s length. It is used for major repairs and shelters aircraft.

Nimitz deployed on a regularly scheduled deployment June 1 to the U.S. 7th Fleet (C7F) and U.S. 5th Fleet (C5F) areas
of operations. The deploying units from DESRON 9 accompanying Nimitz are the Arleigh Burke-class guided-missile
destroyers USS Hopper (DDG 70), USS Howard (DDG 83), USS Shoup (DDG 86), USS Pinckney (DDG 91), USS
Kidd (DDG 100), and the Ticonderoga-class guided-missile cruiser USS Princeton (CG 59). Nimitz strike group is part
of U.S. 3rd Fleet, which leads naval forces in the Pacific and provides the realistic, relevant training necessary for an
effective global Navy. U.S. 3rd Fleet constantly coordinates with U.S. 7th Fleet to plan and execute missions based on
their complementary strengths to promote ongoing peace, security, and stability throughout the entire Pacific theater of
operations.

Embarked aviation squadrons of CVW-11 are: Lemoore, California-based “Argonauts” of Strike Fighter Squadron
(VFA) 147, “Black Knights” of VFA 154, “Blue Diamonds” of VFA 146, San Diego-based “Death Rattlers” of Marine
Fighter Attack Squadron (VMFA) 323, the Whidbey Island, Washington-based “Gray Wolves” of Electronic Attack
Squadron (VAQ) 142, Norfolk-based “Bluetails” of Airborne Early Warning Squadron (VAW) 121, and San Diegobased “Eightballers” of Helicopter Sea Combat Squadron (HSC) 8, “Wolfpack” of Helicopter Maritime Strike Squadron
(HSM) 75 and “Providers” of Fleet Logistics Support Squadron (VRC) 30.

Nimitz flew missions in support of Operation Inherent Resolve from July to October, launching 1,322 sorties and
dropping 904 pieces of ordnance from the U.S. 5th Fleet area of operations. During more than three months in the
region, the ship and its crew also supported the mission by building 1,112 pieces of ordnance and performing flight deck
operations during the day and at night.
Carrier Strike Force Operations
Nimitz participated in a three-carrier strike force exercise in the Western Pacific, Nov. 11-14. While at sea, Nimitz
conducted air defense drills, sea surveillance, replenishments at sea, defensive air combat training, close-in coordinated
maneuvers, and other training. The coordinated operations in international waters demonstrated the U.S. Navy’s unique
capability to operate multiple carrier strike groups as a coordinated strike force effort. This was the first time three
carrier strike groups operated together in the Western Pacific since exercises Valiant Shield 2006 and 2007 off the coast
of Guam. The exercise focused on the ability to rapidly bring together forces from three strike groups in response to any
regional situation.

Weekend is here already, working on a New braided brake line set up, and a Custom Headlight Assembly.

Well, Saturday soon came around, I have been pretty busy as of late at the shop here in La Mirada, it is always a busy time of year as many people need pars for their bikes and I help all that I can to make sure they can complete their Motorcycle in time for some great riding.

Now, I am bringing out many more new products that will be available for you to use on your machines and I do all the prototype work to make sure it not only fits easier, but that it performs better than what you have right now.

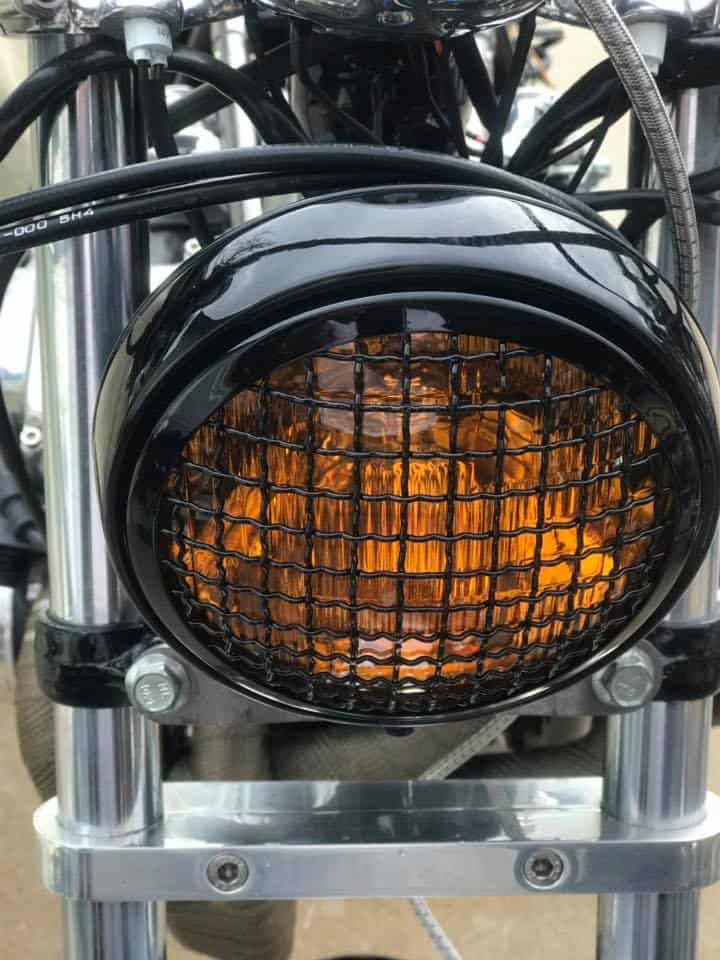
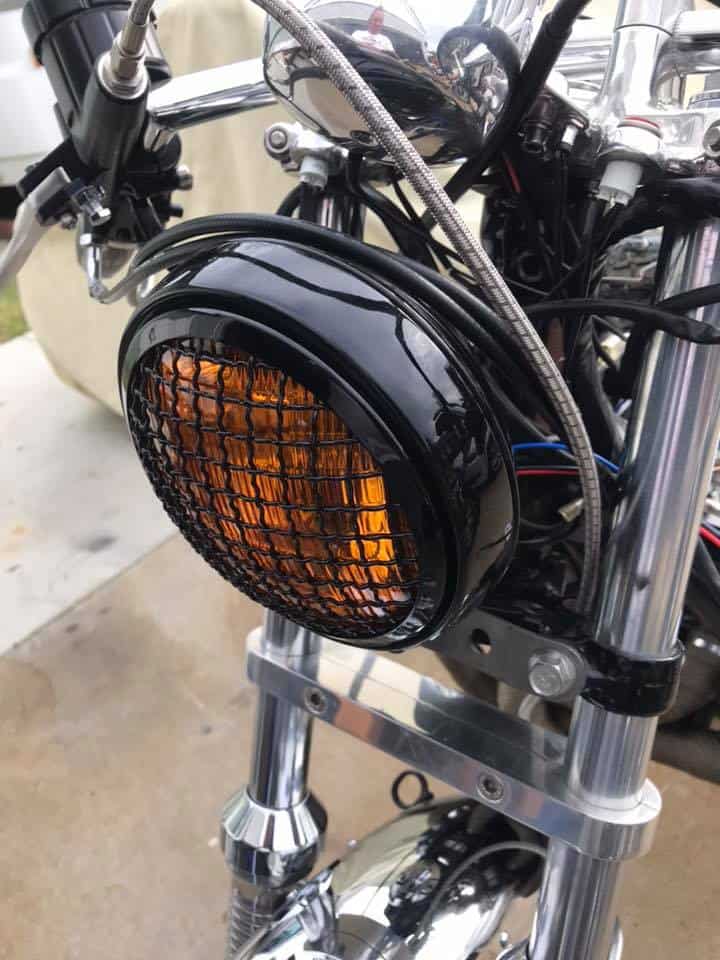
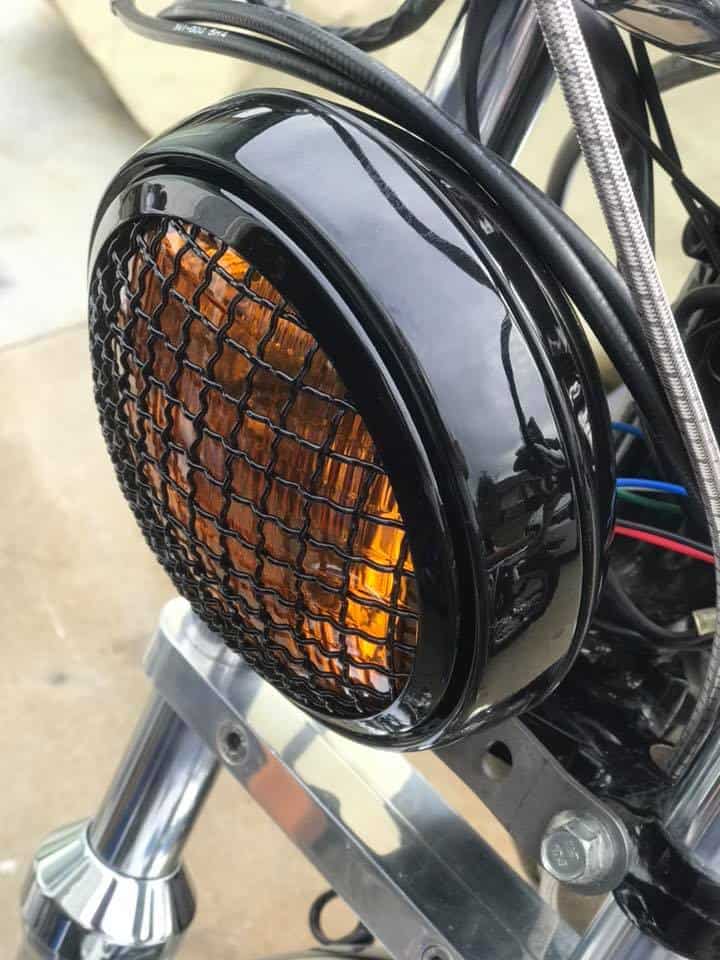
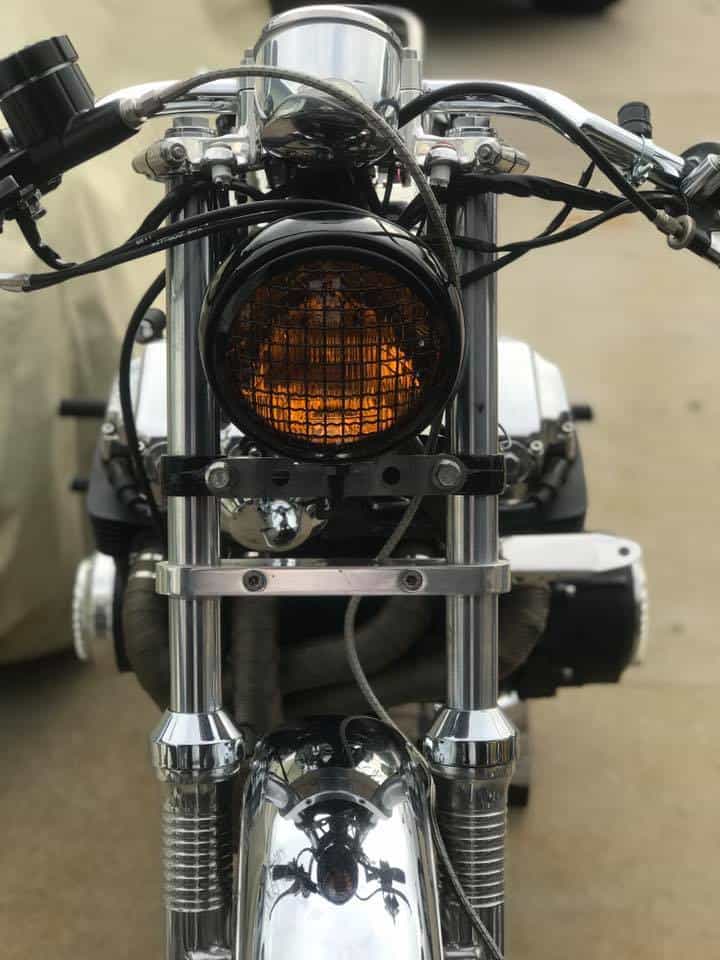
The 2 parts I want to feature today are my Custom European headlight, which is a really Custom look and comes with a Stone guard and a Yellow Lens, to get you noticed.

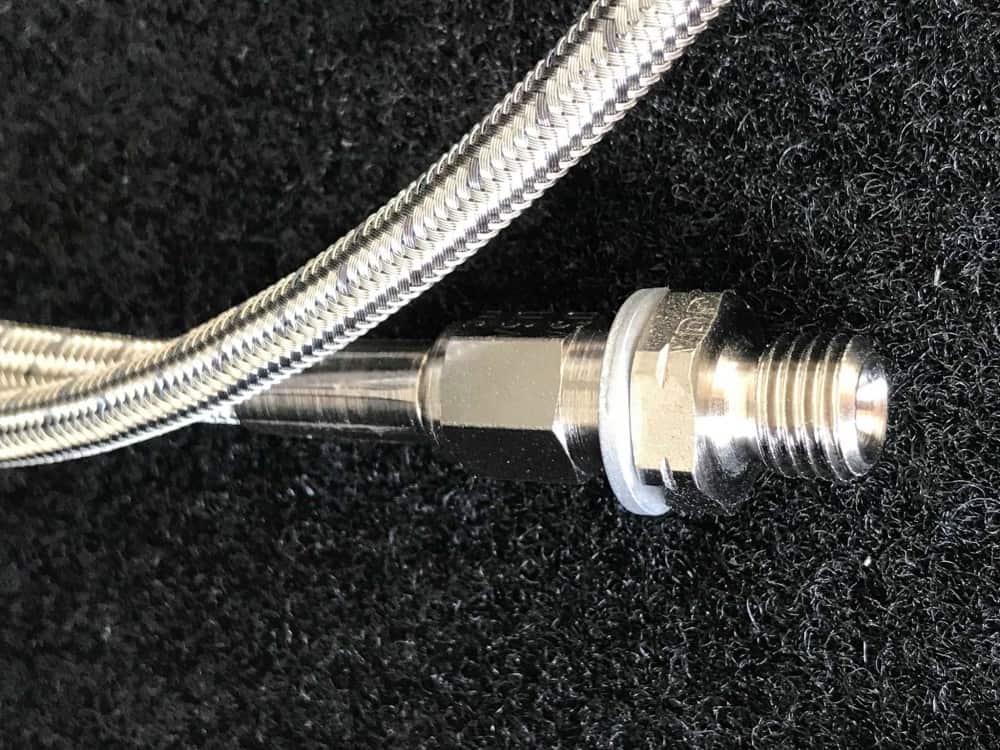
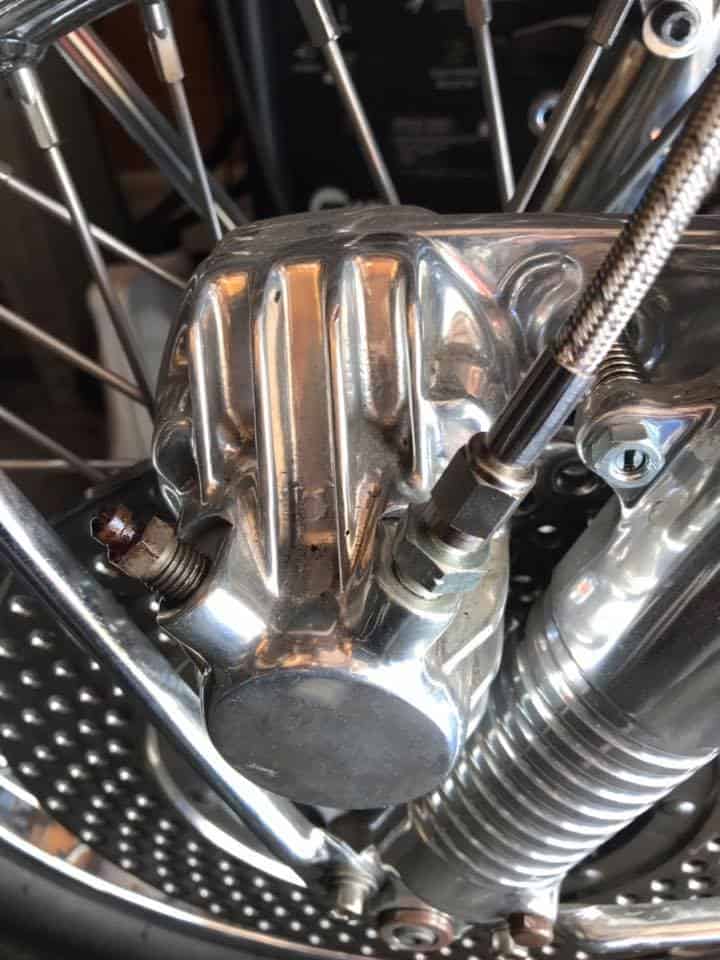
So right now, today I have been working on a Project motorcycle, a CB750 F Super Sport and the stock brake line set up just wasn’t cutting it, so I removed that and used my brand new Braided hose stainless brake line that has Stainless Steel adapters and is so easy to fit to your machine too.

So, above you can see the Braided hose, this is Top Quality all the way, even the Formula One Race cars you see use this brand of hose, so you know these are a great deal.


These Braided hoses will fit the CB750K and the CB750f but- this is for removing your front brake switch, I dont like them and remove them from the triple tree and fit a single one piece brake hose, and this will give you 40% more braking and so easy to fit too, but- if you want to have your brake switch, I offer a 2 piece brake line kit on the website, so check that out at your leisure.

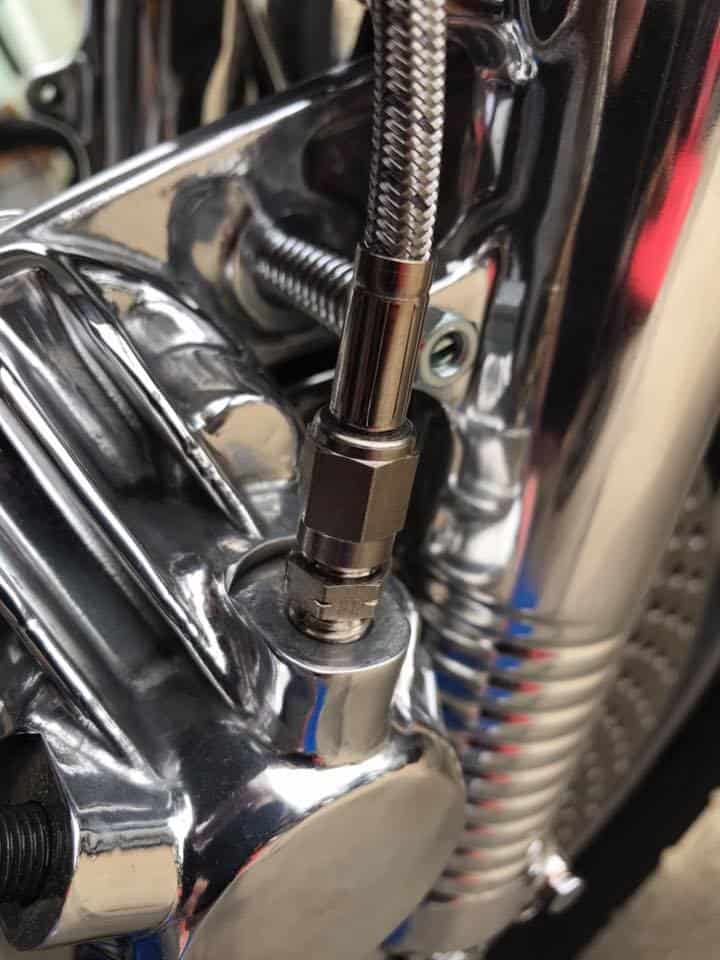
I use a straight fitting that simply screws into the caliper, then you use the crush washer I supply, then route the braided line down to the caliper, going behind the lower triple tree and then into the caliper, simply screw the adapter in place, undo the bleeder, fill the reservoir on your mater cylinder and bleed it into a bottle with a clear pipe so you can see the air bubbles exiting the bleeder.

These are such great quality and gives your brake more power but also a more Custom look as well.

You will find this so easy to bleed and the brake will feel way more positive when you grab the lever and thats a good thing.

This literally took me 5 minutes to fit and bleed and now functions so well and gives me more confidence in stopping when i am out on the tarmac next and now available to you lot.


The Brake hose is fitted and now I have fitted the Euro style headlight and made a special bracket to house it, this allows you to use the stock location of the lower triple tree bolts, i will chrome the bracket when completed and that too will be available on the website .

The Stone Guard will protect your lens from any stones or projectiles that are sometimes left on the highway or byways when you are riding to an event or a job etc.

Also, the strong Yellow lens, gives it a European style but will grab more attention from drivers but with out blinding them, look how cool this front end is now.

So, I am off to the garage to do a wee bit more but wanted to show you what i got up to today, have fun with your Motorcycle and thanks for checking my Blog and my parts out, I am here to help, call or text 714-598-8392 and I will do my best to get you sorted out.

I love my job and love to promote Custom parts too.

The Vesco Brat Bike Honda CB750 SOHC Rebuild Report

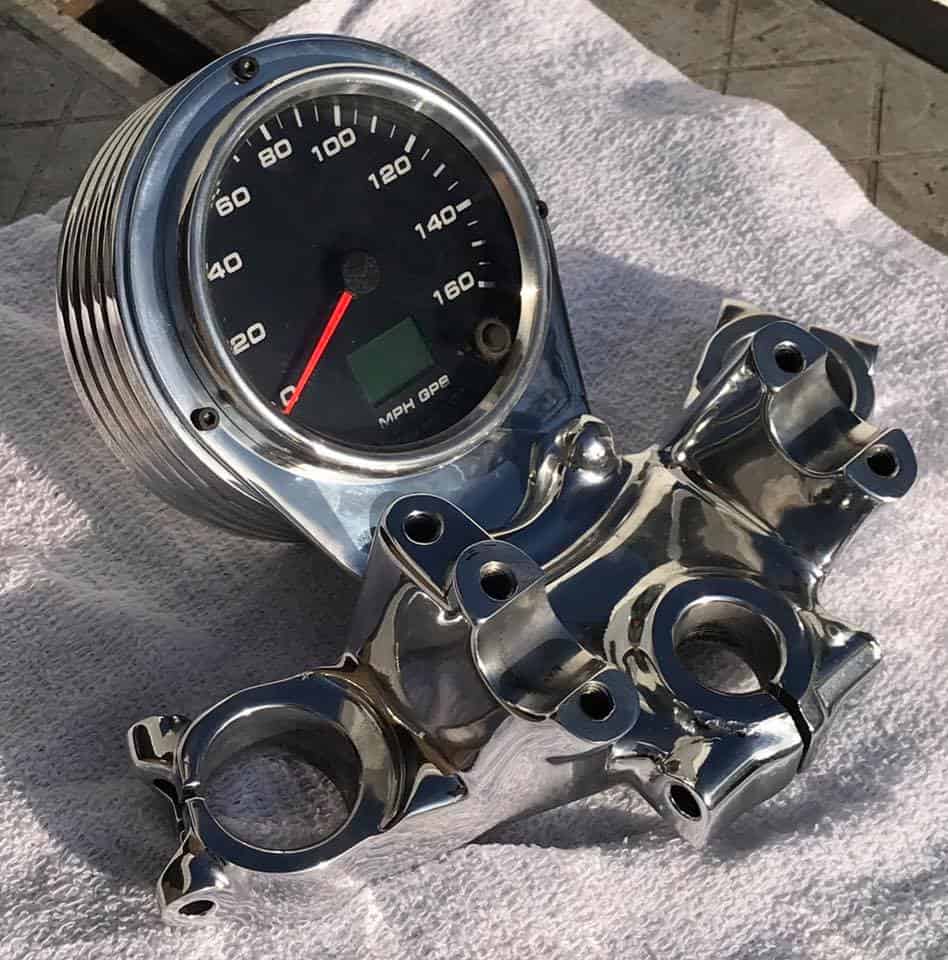
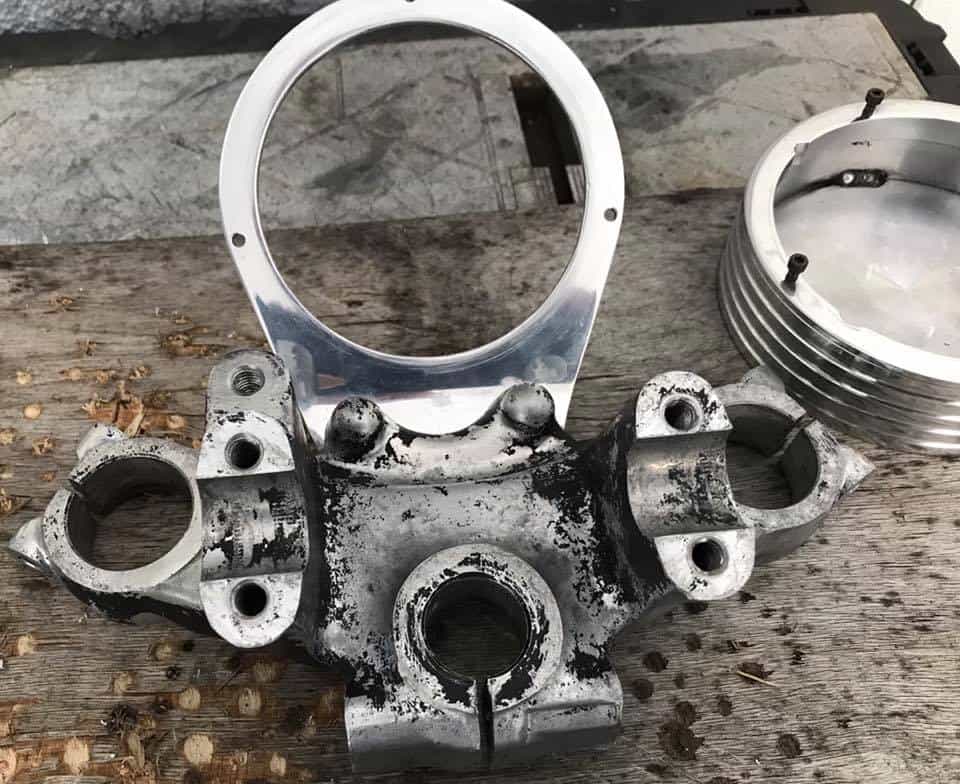
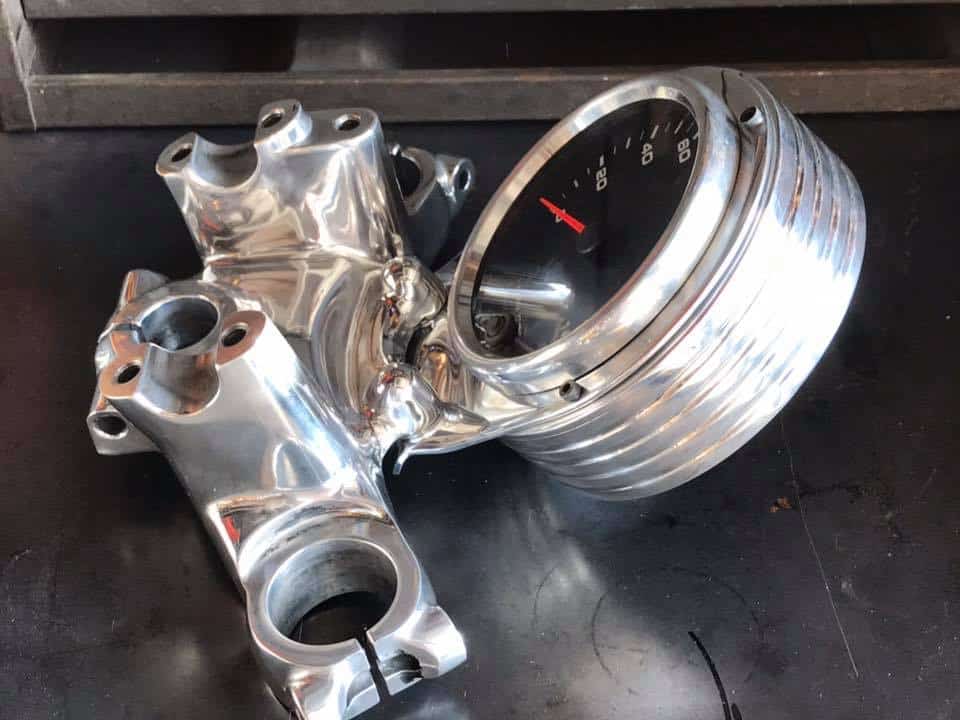
Well, the weather has been fighting me this month, worse Month since 1962 for the amount of H2O we have received and again today as we head to the end of February, we have more Rain coming down this week, so I need to try and use my time wisely and get as much done on this machine as I can.  Lets start off with the Triple Tree on this bike, as I wanted to change the Cable Tach and Speedometer and make something more Custom.

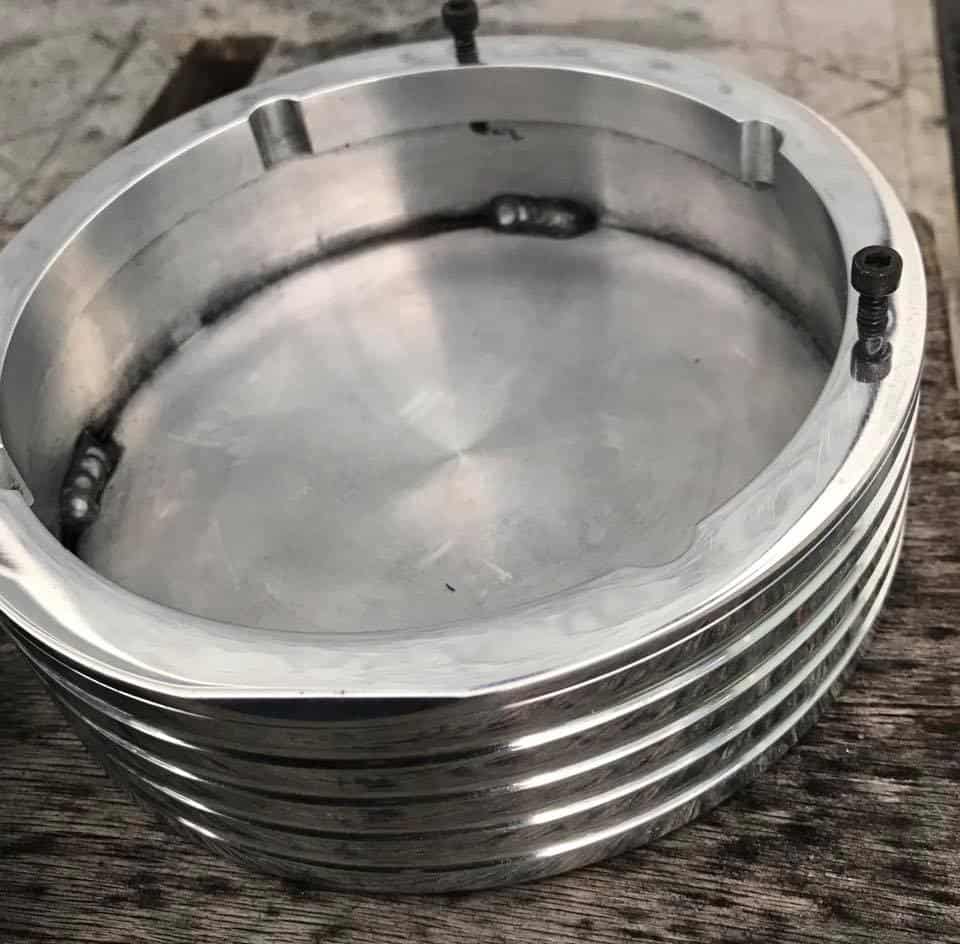
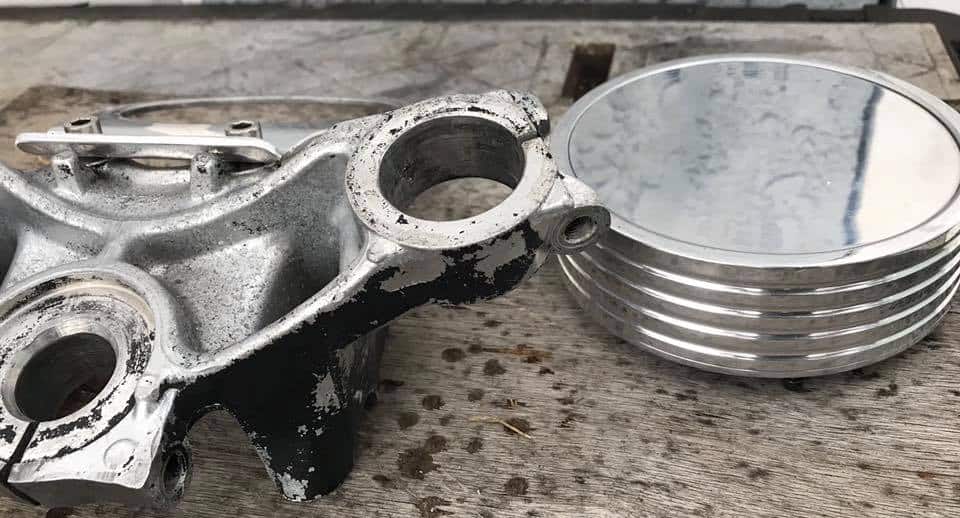
So, have a look above and you will see that I have started to make a start on the fabrication on the triple tree, first off I ground off the Original Factory outer tabs that housed the stock gauges, then I hand cut an Aluminum Holder out of a small sheet of Aluminum and made sure that it would be able to fit the stock location tabs that the Ignition switch used to fit into, and it looks great, if you look to the right, I already made a start on the Speedometer Bucket.

Not an easy task this but a block of 6061 T6 Aluminum was chucked up on the Lathe and turned down to the size I need for the Speedometer to sit snug and tight in the housing, also reliever three areas for the set up to really fit snug as a bug with no rattling about.

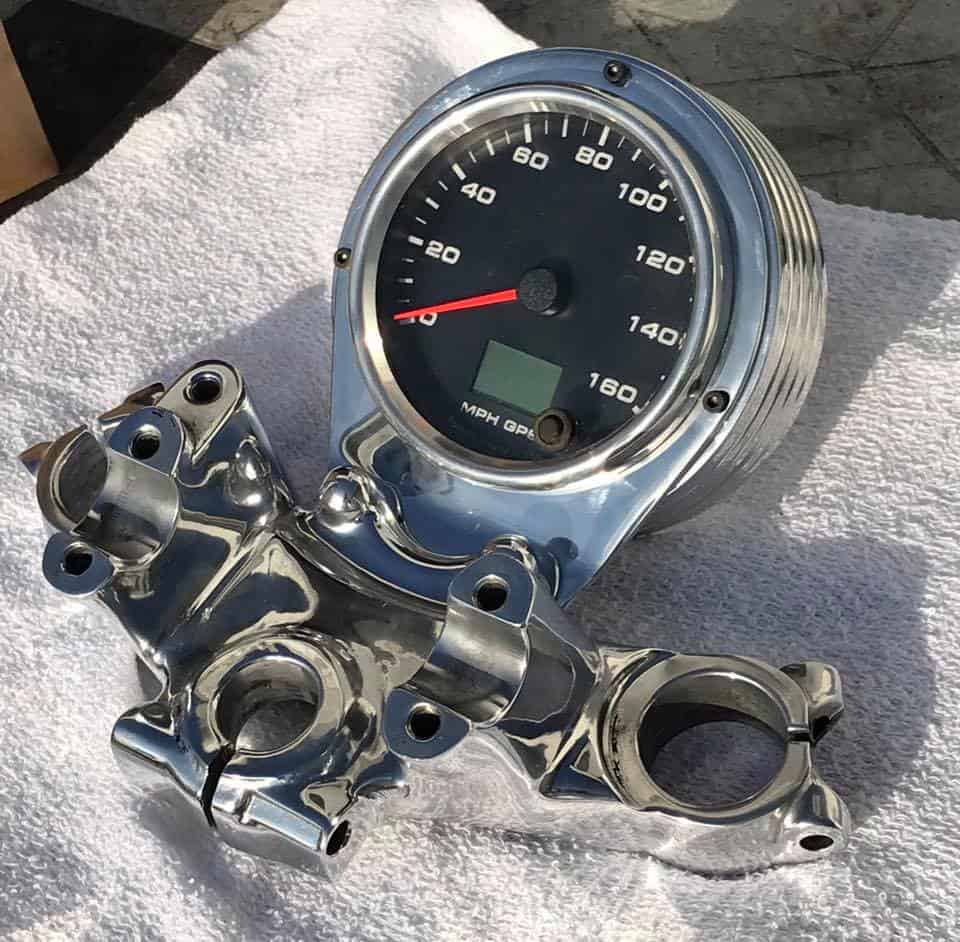
I wanted to incorporate fins into the casing as the front forks have this look as well as a few other features on the bike to make the whole concept flow and I am quite a big believer in that, I also need to grind a little more on the top triple tree and then smooth and polish to give the whole set up a look of chrome, no easy task too.


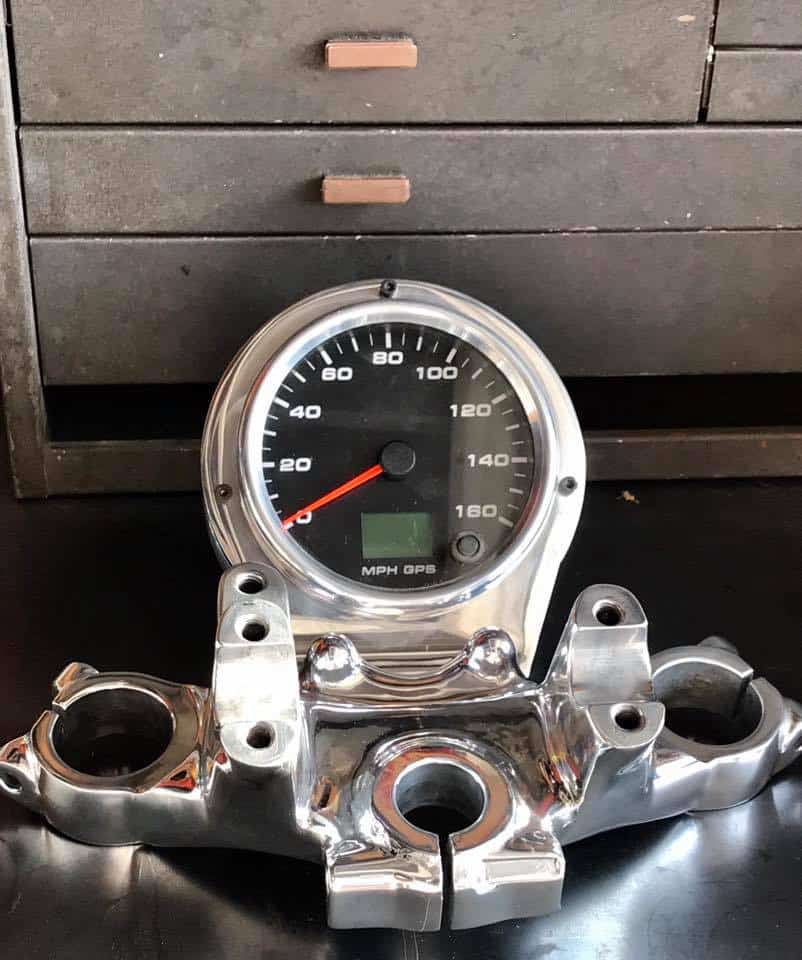
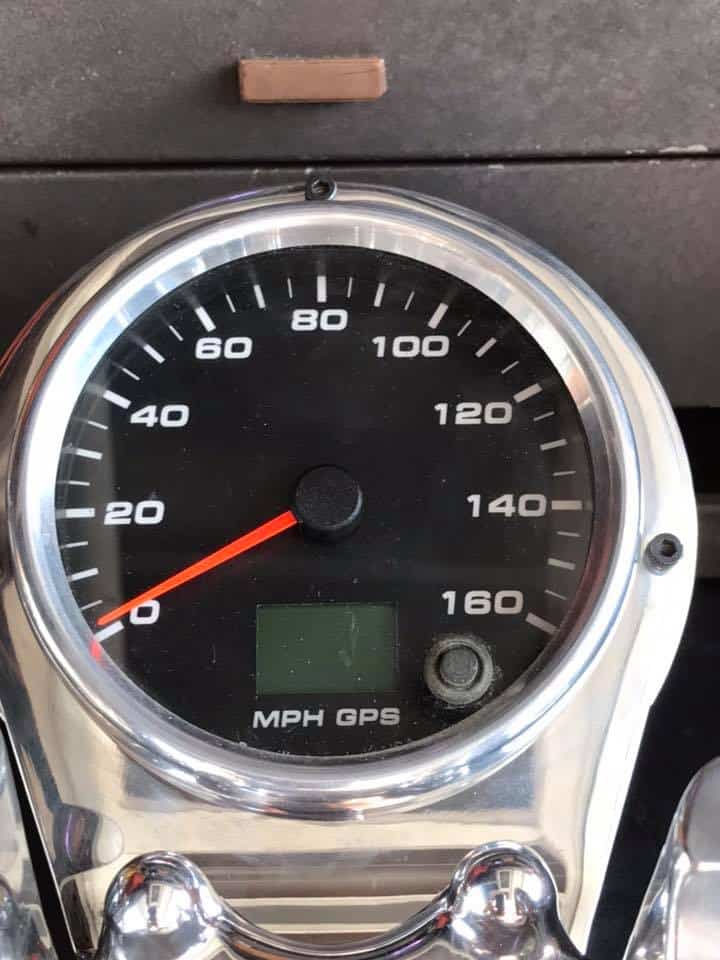
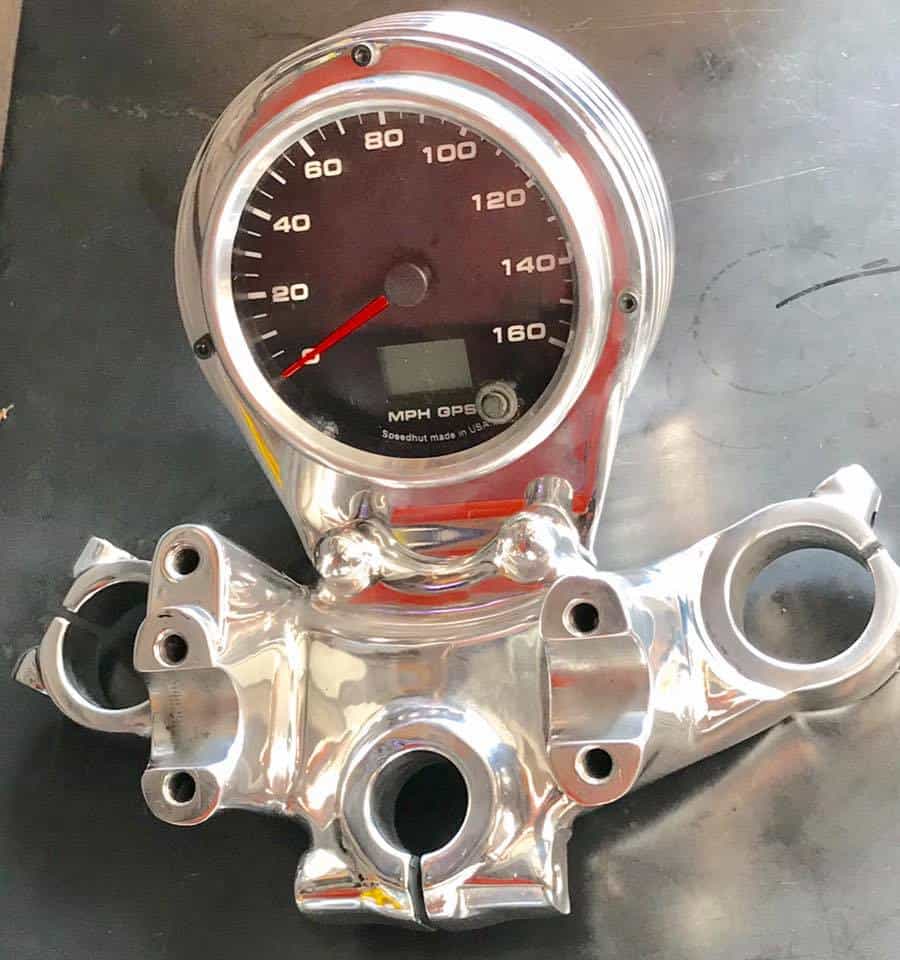
Now I am happy as its all Polished and the GPS Gauge set up looks really Custom, I machined Three 7/64 locator holes to allow the gauge to Clock right in the Location I wanted and have to say I am super stoked at how this now looks on the polished Triple Tree.

The bike I am creating is a 1974 Model Honda CB750 But I am using a later upper and lower tree to allow me to have the small tab brackets in the center and glad I went this route.

I wanted to create something that is different from the norm and I do enjoy what I call ” Newstalgia “, New parts with a feel of Old, and I believe I have created that with this.

I really like the look, the Gauge is 4 inches and the bucket is 5 ” and a strong solid appearence, I think it blends in well with the style of bike I am building.

So just a final clean up and then I need to pick the lower tree up from the Chrome shop, this should really set the whole top end off on the bike and glad I took the extra mile.

I will Clean up once more and add some polished Handlebar clamps that I make and she will be all ready for when I start to bolt all this together again, so in a week or two I can start to assemble the frame, it is still at the painters but not for long and thats going to be Silver Flake, should be a good contrast to the rest of the bike.


Thanks for reading my blog today and hope I have inspired you to get into the Shed, garage or lock up and have a go with your ride?


Love what I do, best job in the world.

I have always enjoyed being my own boss, Yes there is never any wages, yes everyday can be a Monday, yes you can burn the candle at both ends, the the rewards of creating something with your own hands, far out weighs the negative sides to being self employed.

Happy Hump-day Everyone.

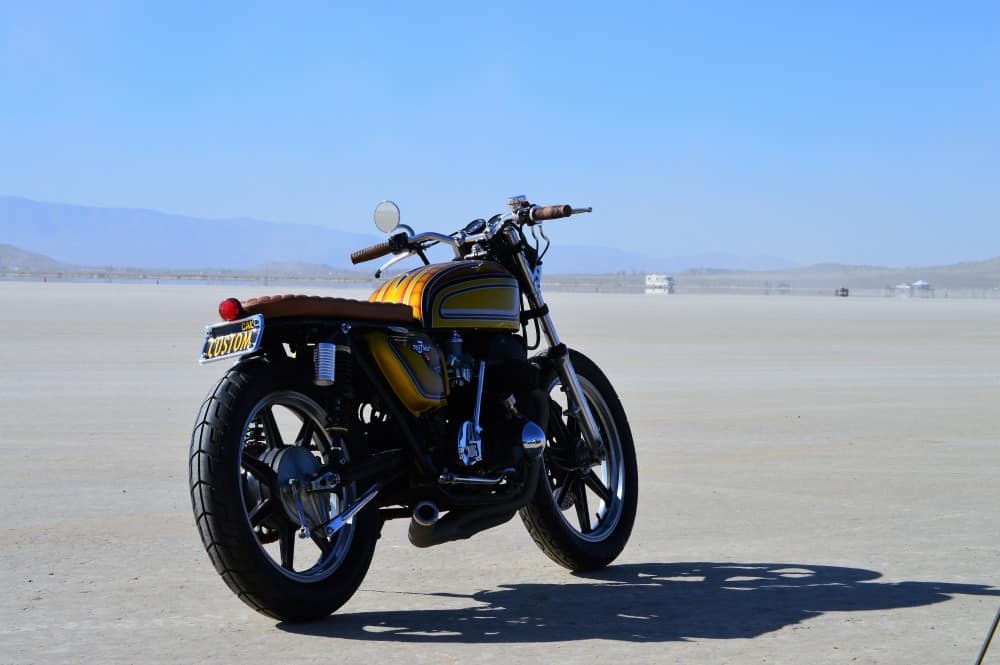
The Vesco Honda at El Mirage

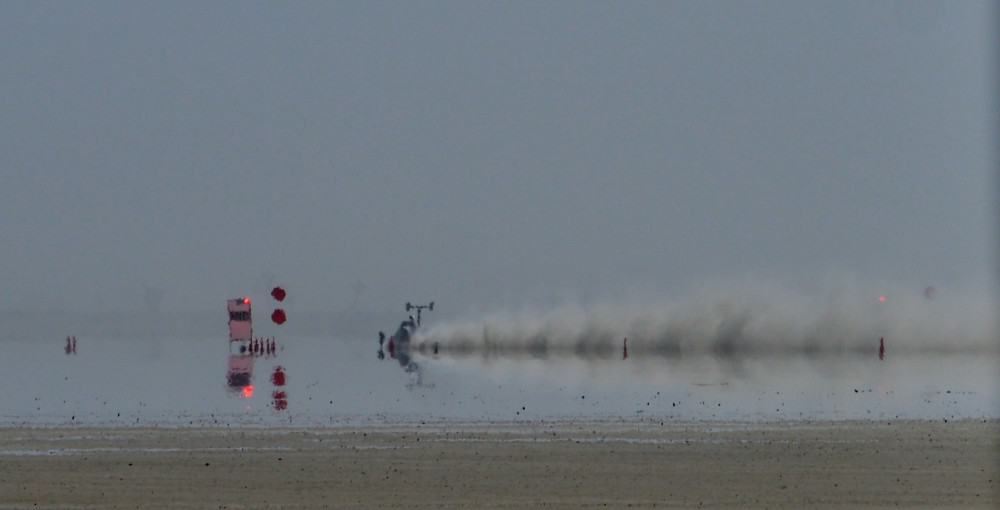
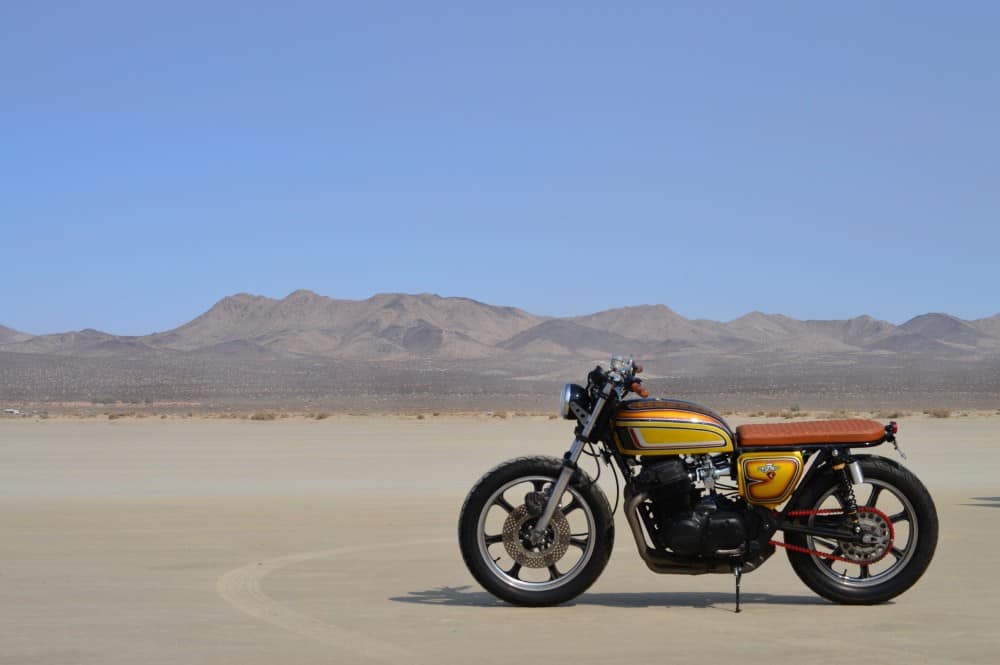
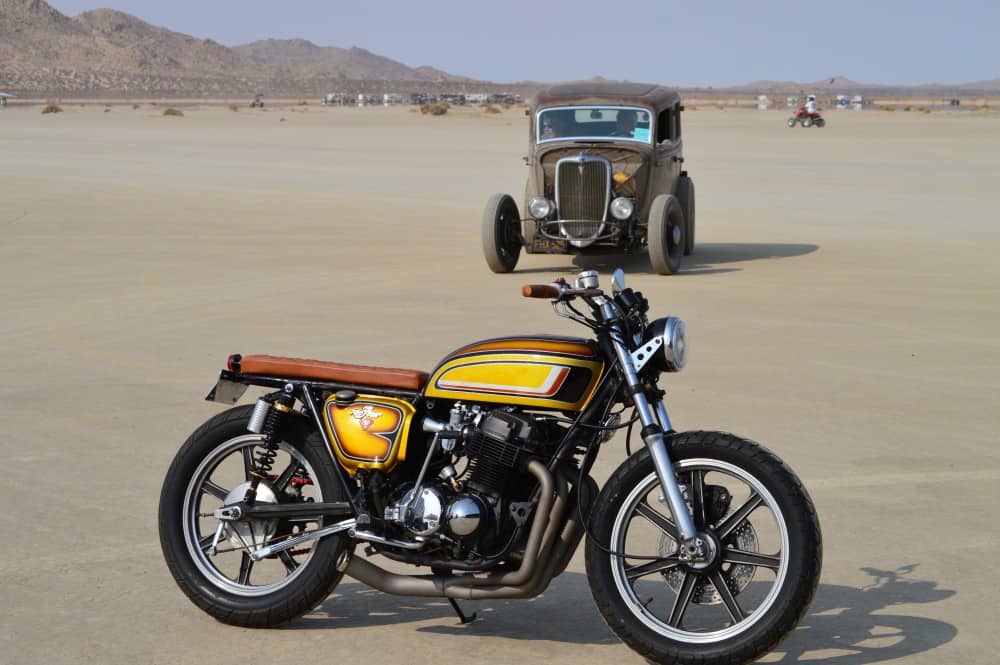
On Saturday, Jennifer and I went out to watch the races at El Mirage dry lake in Southern California, this place has been having speed trials since before ww2 and continues today through the SCTA. (Southern California Timing Association.) So we took the van and the Honda and drove up to the lake bed and set up our ezy up and radio etc and food for the day.

Such a fun day watching cars and motorcycles race the clock, some reaching speeds well over 250 miles an hour, its awesome to spectate as you are so close to the action.

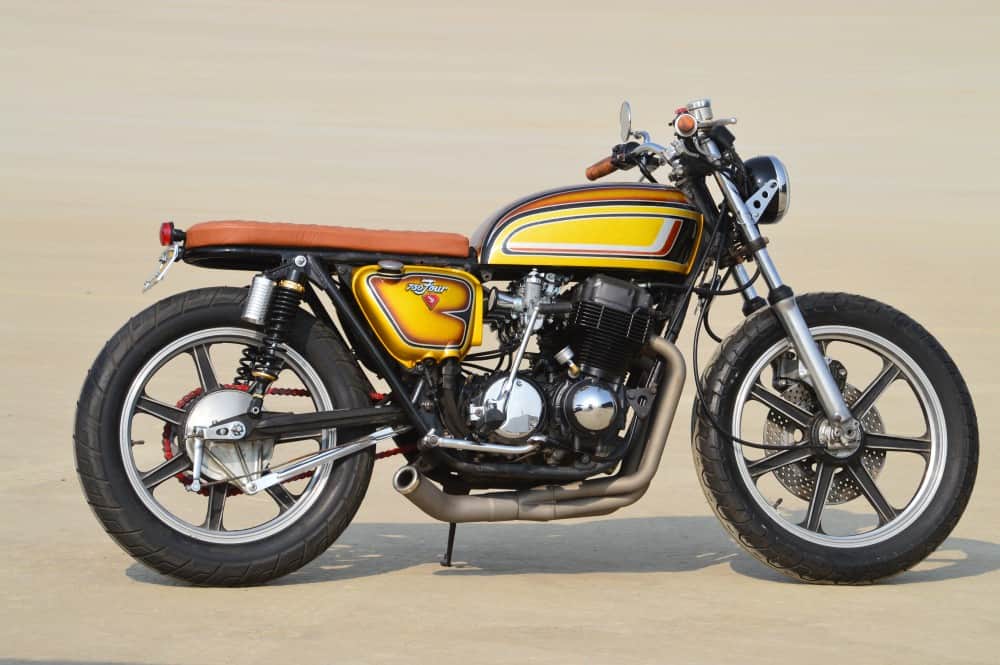
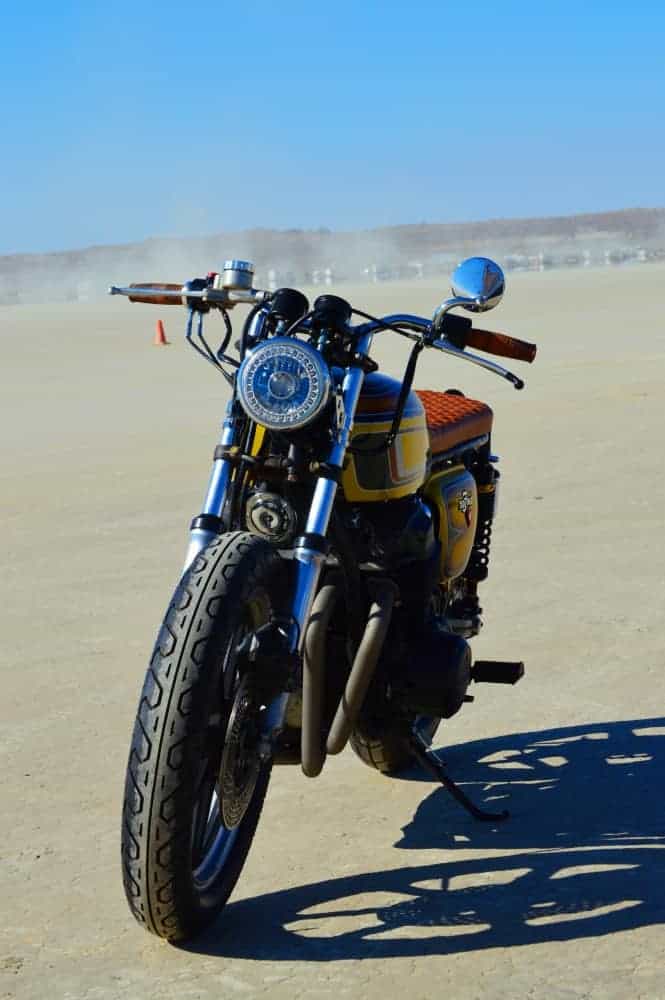
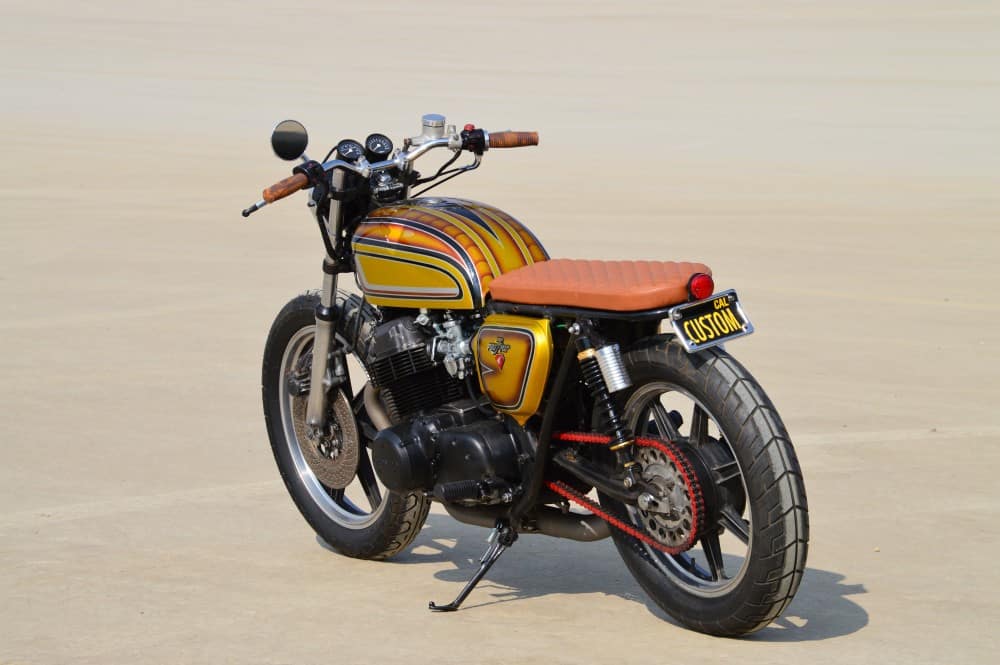
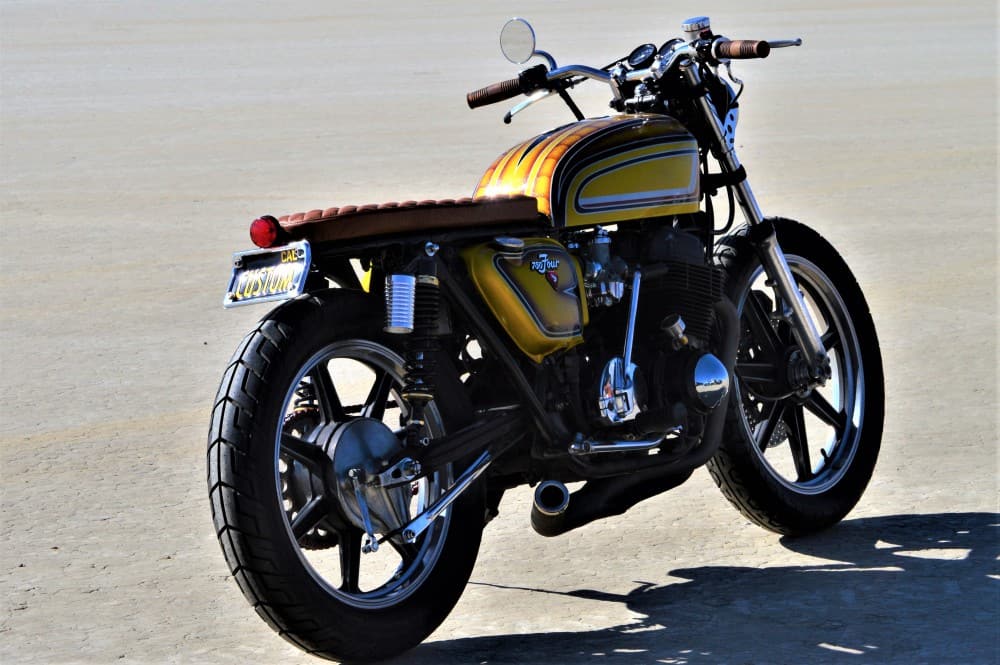
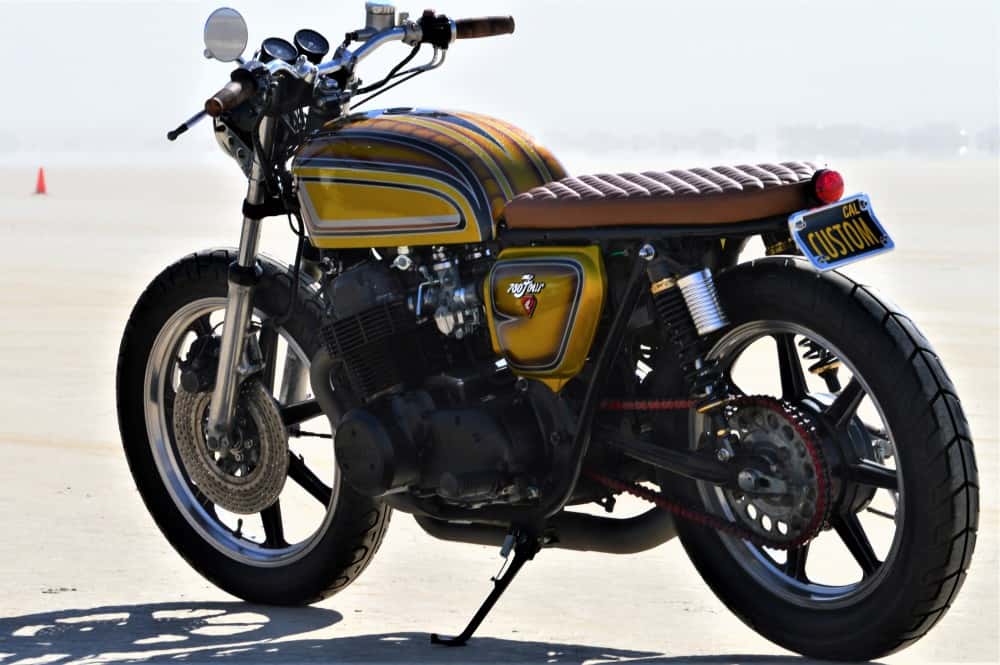
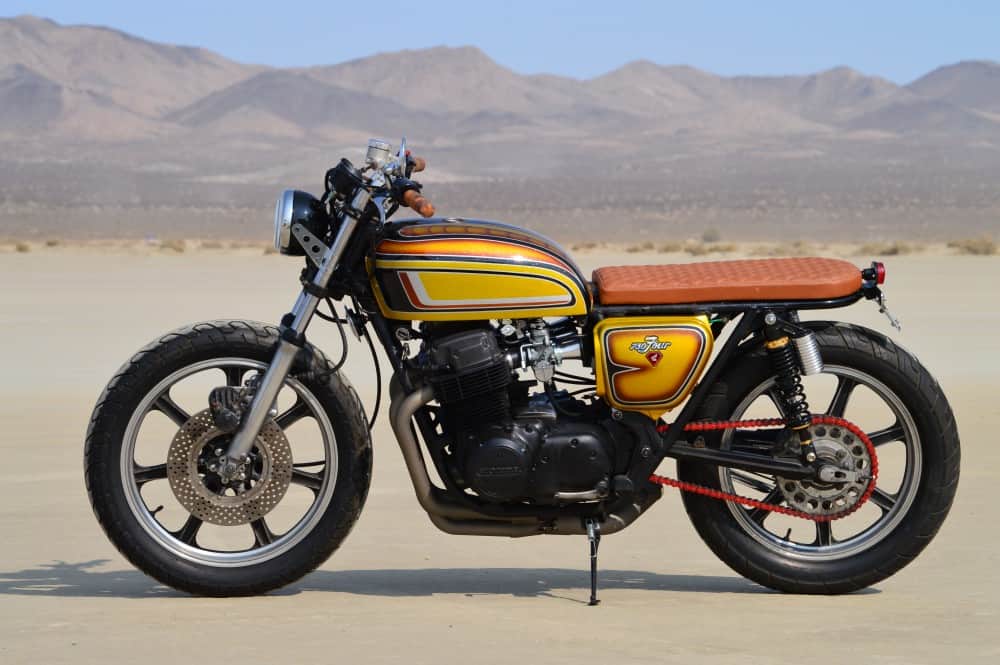
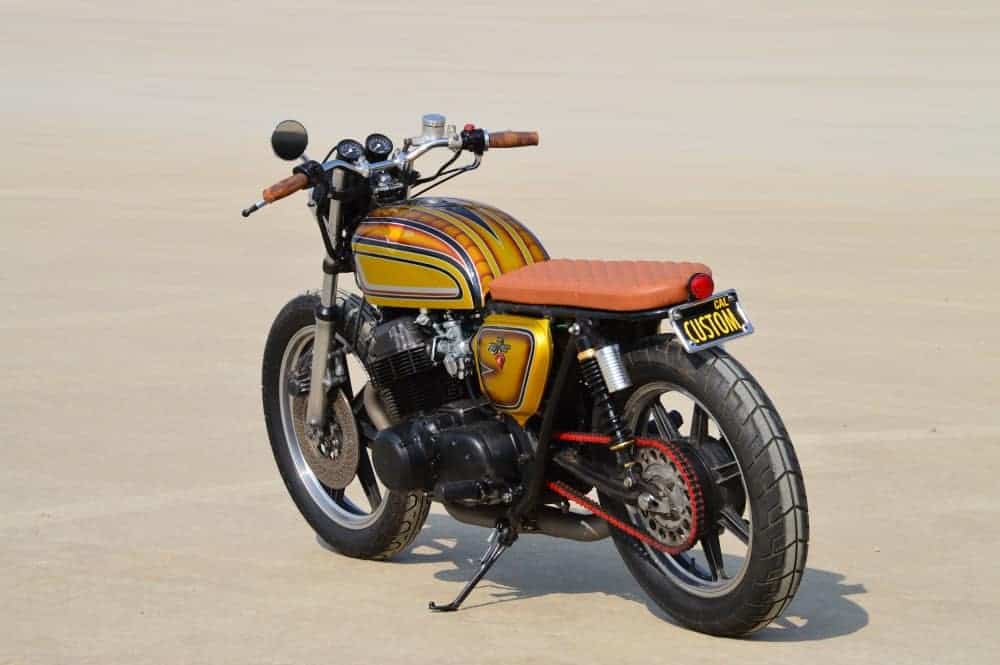
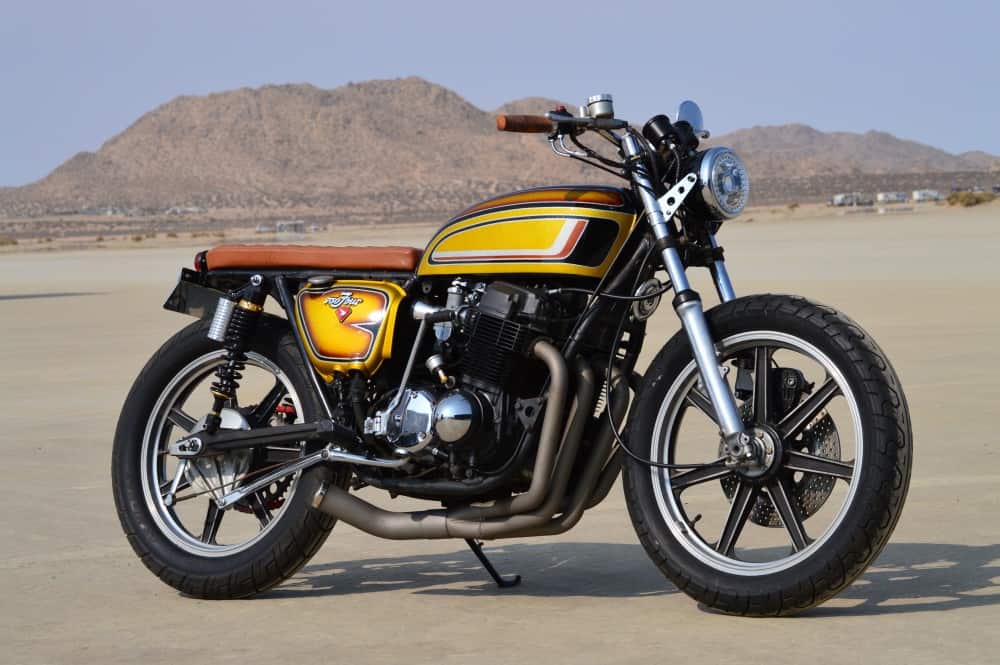
Took some snaps of the Vesco Honda and thought that I would share them today, above you can see the Shorty Turn out that I did for this particular build, the bike is all running now and am happy at the outcome of this machine that had not run since the 1980’s.

This is not a show bike but, it could easily be, as I was thinking of running for 100 miles, then stripping the bike down to the frame and painted the chassis silver and start a cool custom project, but also this is up for sale as she is right now as I do have other builds to continue with for my Customers.

The Bike runs well now and fires right up with either a Kick start or hitting the starter, it has nice low end torque all through the range of gears and is a fun machine to ride.

Sitting Pretty on this famous Dry lake where even Don Vesco himself has raced, the Honda does look at home sat here in the So-Cal Sunshine.

My Custom, Hand made and chromed handle bars – Make this bike so comfortable to ride, no back breaking leaning over the gas tank, a sit up and cruise feel that I enjoyed.

The exhaust system of mine flows so well to help exit the gases from the engine and it has a velvet tone to it as she pulls through the curve.

Old style lights but really are modern LED, that way it looks old school but people will see you with these bright lights, plenty of travel in the suspension on the rear too.

See if you can visit the dry lakes when they have sanctioned races on, its an awesome event to go to and everyone is approachable.

These Lester rims are 19 inch front and 18 rear, I took these off a CR750 Road racer some years ago and have had them in storage for quite a few years and I am so glad that I got to use them, fitted my New side stand as original one had broken off, the bike sits well.

This is a comfortable bike to ride and has loads of potential to be a really cool Custom machine, it has some rare parts on and are only getting harder to locate these days.

It has New Handlebars, Bar Switches, Harness, Battery, Pipe, Shocks, Grips, Cables, Chain- as well as many other new parts, like totally Rebuilt Carbs and New intakes and Throttle Cables etc.

A fun weekend on the lake bed and Jennifer and I had a blast, chatting to Racers and meeting up with folk we haven’t seen in a while, the commeraderie is second to none.

Jennifer taking in some of the racing as she helps move the bike onto the Lake bed.

Time to get some miles on this puppy, but wanted to at least share some photos that I took whilst out at El Mirage, this bike will be up for sale soon, if interested call or text me on- 714-598-8392

Thanks for reading today.


The Vesco Honda now gets a Coat of Paint

Today was a good day, you know what its like when eventually things start to go to plan, albeit around the houses a little but I did get the end result that I was seeking and today I want to share with you how far I got on with the Vesco Honda CB750 Today.

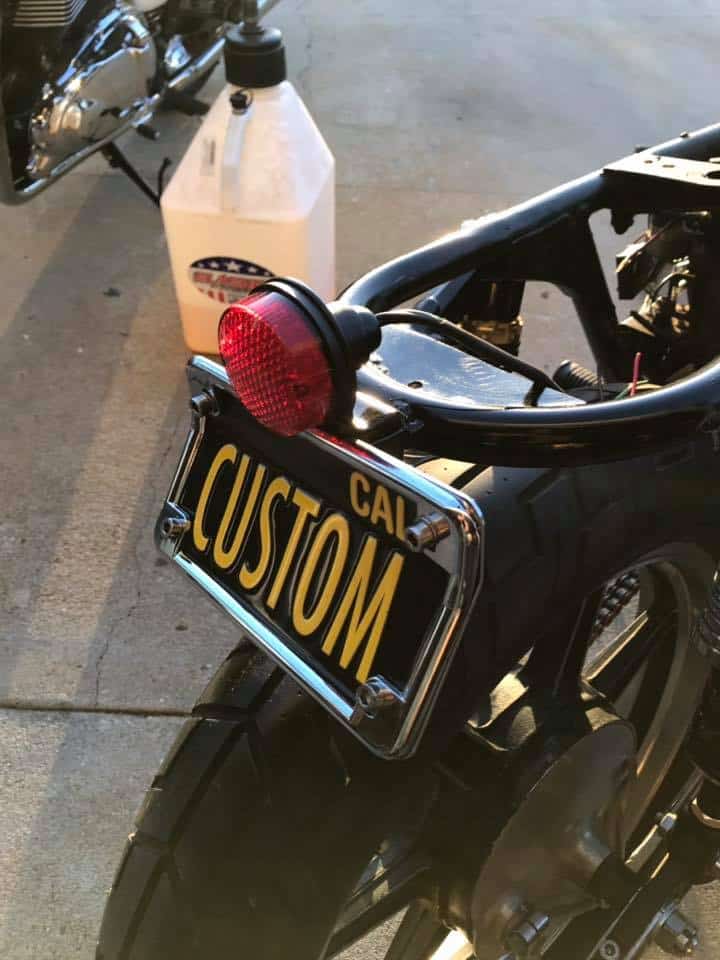
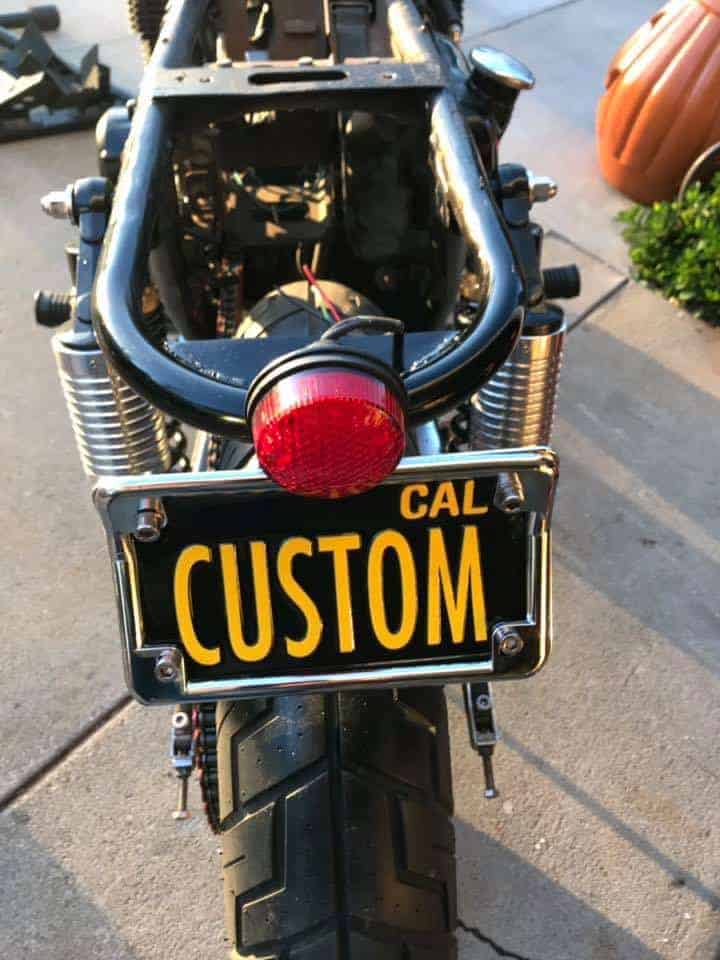
I wired up the tail light assembly, and these can be no easy task at times, especially when the wires are different colors to the Honda version and no instructions of diagrams, I usually test the assembly on a battery before hand, just to save me from blowing fuses, I keep a few handy anyway, as there is nothing more frustrating than connecting something up on your harness, hot the switch and hear the Phhffft of a fuse blowing and a small small or burnt ether as you start to raise your own temperature and let out a few choice words that would make a Sailor Blush!
So, I wired up the rear tail light assembly, all works great now and, being a LED module, this will make sure that you will be seen in any weather condition and thats a good thing, especially having a strong braking tail light.
I fitted a new battery and leads and fuse box too and am happy at the result for now, remember, this is no show bike right now, I want to get her running to be able to asses the Honda to see what I will need to tear down and rebuild into a show bike, but its fun doing this and today was a good day.
The Gas tank looks so much better now, it was a sort of Maroon Oxide when I picked the bike up and I removed the gas cap neck and welded in a Harley bung, so the top would look a little smoother and more Custom to be honest.
But I was unsure as to what color to have on this bike as I dont really have a them for it, but though that I would go with a cool bright design and use smaller metallic/ flake with the old fish scales and shadowing thats so reminiscent of that 70’s back home in the UK and over here in the states.
As you can see, this really does brighten up the bike and I am happy that this is this color for now, doesn’t mean I will stay with this if I chose to build into a Custom machine but right now I am happy with the look and the side covers flow with the gas tank, thats very important to me and the outcome is pretty much how I first envisioned creating this 750 Four and we are almost there to take it for a test ride.
The Lester rims are tall and even though I am 5″11 I am almost on tip toes when I am sat upon this motorcycle, but I have tried to make the stance of the bike as level as possible, I believe I have achieved this look and my own Brand of Handlebars really do set the bike off better, something I am quite proud of to be honest.
The 4 into 1 of mine looks so aggressive with the tail pipe Cut down low and I wanted a short turn and exit to make this Brat bike something of a head turner, but I have still more little things to do and clean up.
The gas tank still needs to be sealed up as I ran gas through it and the bloody carbs blocked up dues to sediment in the gas tank from the flake in the paint, so I have now taken the gas tank to a radiator shop and they are going to seal the inside the tank and I should be good to go then.
The colors came out well and represent days gone by over the 70’s and I am pretty stoked at the outcome, and with a New petcock and throttle cables, this will last quite some time now.
The side covers are great, and I have just received the emblems to put on the covers, the 750 four script and the Diamond emblem below, so that will set the side covers off.
Obviously the bike needs to be taken down to the frame and all gone through later but I want some fun on it now and hopefully by the weekend, this will be ready to take for a run on the road and see how she is.
So, a little more bits and bobs to do but this bike has come a long way in a relatively short amount of time and I am really happy at the result and the guise of the Honda it is in right now.
Lester rims are Original Race ones from a CR750 I removed them from, front is a 1977 and the rear is a 1978, still need to fit new bolts and a speedometer cable tomorrow.
Sure looking forward to test riding this later on this week, its been sat since the mid 1980’s, so this will be quite a fun ride.
I have just received some side cover emblems too and they look really Nostalgic.