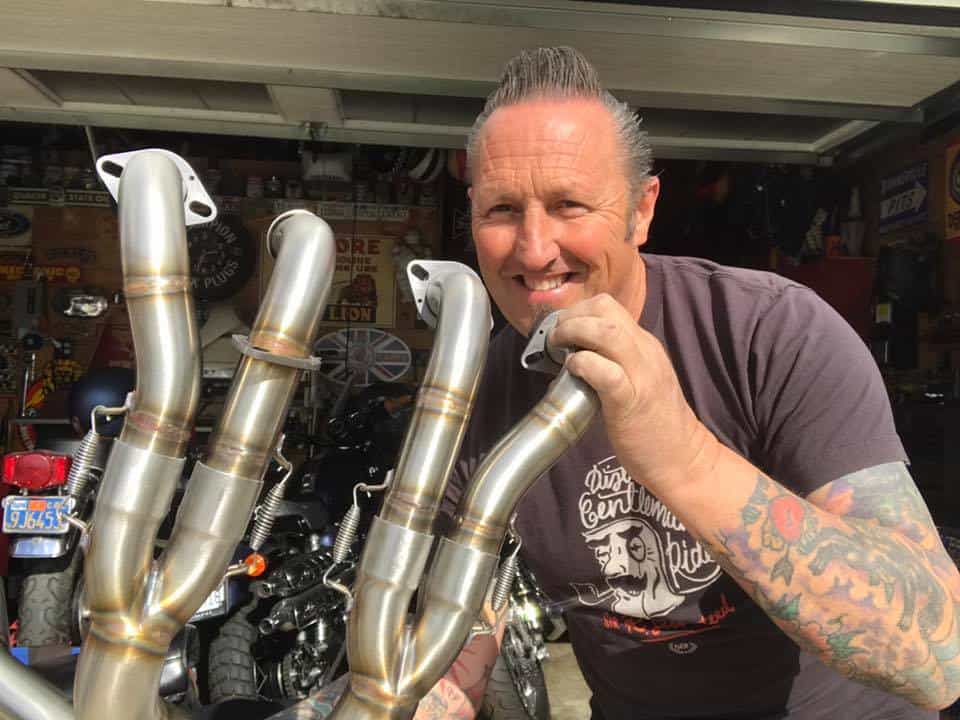
Motorcycle ‘s built in your garage are still as popular as ever

Well, time seems to fly as of late, been doing a few things and it has been hard to try and blog anything these days, the clock just seems to tick away so many times faster than before, but I thought I might at least start one today and tell you about the old Super Sport I am putting together.

I have had some Hard Bags in my storage for some time, I last fitted some to Jennifer’s Triumph some 5 years ago and they are still holding up well, and as I had this old 500 pounder to play with, I thought I would use these bags and make a Little Dispatch style bike that I had back in the UK as I was a Motorcycle Messenger. Sure i love the cafe bikes, been parts of my life for so long, but- when you need to take a bunch of stuff with you on a journey, what do you do?

So I am making up some brackets to fit to the bike so that I can tale stuff with me, ie to the chrome shop, or powder coaters etc and these bags will undo with a coupe of bolts and the bike is naked again.  love it or hate it, these are part of my life back in the UK and though that I would build a bike that I can blap around on and make it look a little different to the many I see out there these days.

I think that once the Bodywork is all one cohesive color, then these bags may not even be noticed to be honest and am excited to do something that I used to when I lived in Great Britain, you dont see many bikes like this with bags on but its common place if you were a courier and I am going to give it a go, still a long way to go as yet but it is taking shape. So follow me on this little build and we shall see where it takes me.

I grew up with these bikes and even with bags on, you would belt around London, Birmingham or where ever, to get where you needed as fast as possible, it was such a fun yet dangerous job back then and loved every minute of it.

PHOTO BY DAVE GURMAN-https://www.wemoto.com/news/article/1100/motorcycle_couriers_then_and_now


Adding Bags to the Old 750 SS Honda in the Garage

Been a while, but I thought I would fir some Bags I have had for a long time, onto the 750 Super Sport, as to be quite frank, I never fecking see them and, I had these on many bikes as I was a Disatch Rider, Ie Courier, and the more that I could carry on my bike, the more money that I would earn, as i rode all over the UK and parts of Europe and having unboltable saddle bags were a blessing indeed.

So, I have had these for a while, I did for some to Jenn’s bike and she has had them at least 5 years and uses them all the time, these will take a while to get to fit right and this is my 3rd set of brackets, still not there but its all trial and error and eventually I will get to the stage where I am happy and can tear the brackets down one last time, cut and weld and paint then refit.

Its good to be able to simply bolt these on and go, sometimes you need to carry stuff and these will be just the ticket when I have them completed, I am a long way off as they need to come in about an inch and half tighter but, Rome was not built in a day and these will not be either.

The trick is to make them look factory fit, then also once they are completed how I want them, they will painted to the same color as the rest of the body work and the uniformity will probably make these bags almost disappear once I have the livery that I am happy with.

Right now I think this bike will be a Dark Navy Blue with white Racing stripes and some logo, but thats a while away and also I need to fab a lower bracket to support the bottom of the bag and give it some rigidity as well as allowing for the shocks to still function smoothly with no binding etc.


Shame there wasn’t some off the shelf brackets available like Triumph have but I think Once I am completed and happy at the way they fit and function, I may make a few sets and off for sale on this website.

So,for now I have got this far, some will like these on the bike, and others will not.  What I like about this particular set up is, well, you can simply unbolt these and leave the bike in its naked form, but, if you need to go to lets say the Chrome shop to pick some parts up, just bolt these bags to the rear shock mounts and you are ready to go, no need for a bulky back pack etc.  I may add some LED turn signals into the back of these and a brake light to make more functional and keep me from being bumped off in rush hour.


Weekend is here already, working on a New braided brake line set up, and a Custom Headlight Assembly.

Well, Saturday soon came around, I have been pretty busy as of late at the shop here in La Mirada, it is always a busy time of year as many people need pars for their bikes and I help all that I can to make sure they can complete their Motorcycle in time for some great riding.

Now, I am bringing out many more new products that will be available for you to use on your machines and I do all the prototype work to make sure it not only fits easier, but that it performs better than what you have right now.

The 2 parts I want to feature today are my Custom European headlight, which is a really Custom look and comes with a Stone guard and a Yellow Lens, to get you noticed.

So right now, today I have been working on a Project motorcycle, a CB750 F Super Sport and the stock brake line set up just wasn’t cutting it, so I removed that and used my brand new Braided hose stainless brake line that has Stainless Steel adapters and is so easy to fit to your machine too.

So, above you can see the Braided hose, this is Top Quality all the way, even the Formula One Race cars you see use this brand of hose, so you know these are a great deal.


These Braided hoses will fit the CB750K and the CB750f but- this is for removing your front brake switch, I dont like them and remove them from the triple tree and fit a single one piece brake hose, and this will give you 40% more braking and so easy to fit too, but- if you want to have your brake switch, I offer a 2 piece brake line kit on the website, so check that out at your leisure.

I use a straight fitting that simply screws into the caliper, then you use the crush washer I supply, then route the braided line down to the caliper, going behind the lower triple tree and then into the caliper, simply screw the adapter in place, undo the bleeder, fill the reservoir on your mater cylinder and bleed it into a bottle with a clear pipe so you can see the air bubbles exiting the bleeder.

These are such great quality and gives your brake more power but also a more Custom look as well.

You will find this so easy to bleed and the brake will feel way more positive when you grab the lever and thats a good thing.

This literally took me 5 minutes to fit and bleed and now functions so well and gives me more confidence in stopping when i am out on the tarmac next and now available to you lot.


The Brake hose is fitted and now I have fitted the Euro style headlight and made a special bracket to house it, this allows you to use the stock location of the lower triple tree bolts, i will chrome the bracket when completed and that too will be available on the website .

The Stone Guard will protect your lens from any stones or projectiles that are sometimes left on the highway or byways when you are riding to an event or a job etc.

Also, the strong Yellow lens, gives it a European style but will grab more attention from drivers but with out blinding them, look how cool this front end is now.

So, I am off to the garage to do a wee bit more but wanted to show you what i got up to today, have fun with your Motorcycle and thanks for checking my Blog and my parts out, I am here to help, call or text 714-598-8392 and I will do my best to get you sorted out.

I love my job and love to promote Custom parts too.

New Stainless Steel Exhaust for the Vesco Honda Creation

Well, the Rains are here again tomorrow, so had to tear into many projects to try and get ahead of the storm, as it will restrict me to many things I need to do to create this Custom Motorcycle, the Exhaust I originally tried out was pretty Bad Arse- But I wanted something really trick, so for a few days I sketched a couple of Idea’s and came up with my Latest design.

This is my latest system and I have called it the “Y-Block” And this system breathes like a man with Three Lungs.  Seriously, this is a great bit of Kit and hand made from 049 Stainless and not only does it perform, it is light weight yet sturdy. This is so much better in Stainless and wanted to show the Globe that cool stuff does indeed come out of sheds and Garages.

A lot of time and effort went into this system and I am happy at the end result, this will look great on the Vesco Honda and am sure many will ask about all the details that the bike has on it, there is so much to do and have to do all I can in the short amount of time to get this machine back up and running- no easy task and still quite a way away from completing this build.

The system will fit ALL of the 750 Motorcycles from 1969-1978 in the SOHC Range and will fit the CB750K, CB750F and CB750A models too, the design took some time to create how I drew it but it is bang on and I cannot be more happier than how the “Y-Block” free flowing System has turned out.

All quick release springs, this is a slip on system just like the old race bikes and wanted to give a little more Hot Rod look to this set up and I feel that I have accomplished that style and look. This has a Nickel Plated Removable Baffle and sounds just like a deeper version of the Yoshimura style system.

The fit and finish is superb and great ground clearance too, wasn’t sure if this was even possible a few weeks ago but after many drawings of concepts etc this is the end result and it looks so good, I am super happy that I went this way and it sure does look Custom. Sat on the workbench and rwady for it to be fitted to the Custom machine when I get it up to assembly.

This is my design and its a 4 into 2 into 1 set up that really lets the gases flow hard and escapes at the end through a baffle at a faster pace than many out there, and I really wanted a trick looking set up that not only looks and sounds great, but performs pretty well too, and this sure does meet the bill.

Of course I will offer this as a line for the HONDA CB750, CB550 and CB500 a little later on but first i want to see how it performs on the bike and will give a full run down when I have all that completed, but this New System really is a unique set up that I will be happy to offer to all of you soon for your inline Four Motorcycles.

I will weigh it later as its so much lighter than the steel versions and when it is in its brushed Stainless guise, its a real head turner with the welds turning that nice Bronze color.

A fun looking Exhaust that I am proud to put my name on and I am sure will get quite a lot of interest for other peoples rides, so today turned out a great way to bring the week to en end.

This will be easy to fit to your very own inline four, even if you are on your own as it weighs nothing and comes apart easily for assembly etc and the springs are way easier to remove than undoing bolts .

I wanted to have something different out there and to show that I also love Hot Rods too, it’s all a cool lifestyle that I have always been into and now have a great system for the inline Four Honda’s.

When the Vesco Brat bike is completed, I shall take a lot of photos of it, as well as some sound bytes of the exhaust system, I will still use the Yoshi style baffle as I love that tone.

So with that- I shall bid you a fond farewell and get back into the Garage, as I have a million more things to do and as the storm approaches, I need to get in there fast.  Thanks for stopping by and reading my blog, let me know your thoughts, as input is so important from My Customers.


The Vesco Brat Bike Honda CB750 SOHC Rebuild Report

Well, the weather has been fighting me this month, worse Month since 1962 for the amount of H2O we have received and again today as we head to the end of February, we have more Rain coming down this week, so I need to try and use my time wisely and get as much done on this machine as I can.  Lets start off with the Triple Tree on this bike, as I wanted to change the Cable Tach and Speedometer and make something more Custom.

So, have a look above and you will see that I have started to make a start on the fabrication on the triple tree, first off I ground off the Original Factory outer tabs that housed the stock gauges, then I hand cut an Aluminum Holder out of a small sheet of Aluminum and made sure that it would be able to fit the stock location tabs that the Ignition switch used to fit into, and it looks great, if you look to the right, I already made a start on the Speedometer Bucket.

Not an easy task this but a block of 6061 T6 Aluminum was chucked up on the Lathe and turned down to the size I need for the Speedometer to sit snug and tight in the housing, also reliever three areas for the set up to really fit snug as a bug with no rattling about.

I wanted to incorporate fins into the casing as the front forks have this look as well as a few other features on the bike to make the whole concept flow and I am quite a big believer in that, I also need to grind a little more on the top triple tree and then smooth and polish to give the whole set up a look of chrome, no easy task too.


Now I am happy as its all Polished and the GPS Gauge set up looks really Custom, I machined Three 7/64 locator holes to allow the gauge to Clock right in the Location I wanted and have to say I am super stoked at how this now looks on the polished Triple Tree.

The bike I am creating is a 1974 Model Honda CB750 But I am using a later upper and lower tree to allow me to have the small tab brackets in the center and glad I went this route.

I wanted to create something that is different from the norm and I do enjoy what I call ” Newstalgia “, New parts with a feel of Old, and I believe I have created that with this.

I really like the look, the Gauge is 4 inches and the bucket is 5 ” and a strong solid appearence, I think it blends in well with the style of bike I am building.

So just a final clean up and then I need to pick the lower tree up from the Chrome shop, this should really set the whole top end off on the bike and glad I took the extra mile.

I will Clean up once more and add some polished Handlebar clamps that I make and she will be all ready for when I start to bolt all this together again, so in a week or two I can start to assemble the frame, it is still at the painters but not for long and thats going to be Silver Flake, should be a good contrast to the rest of the bike.


Thanks for reading my blog today and hope I have inspired you to get into the Shed, garage or lock up and have a go with your ride?


Have a Great weekend everyone

Well, the end of the week is here and the weather is surprisingly cold here in Southern California, but this weekend I need to work on parts for the Vesco bike that i an trying to rebuild for a show in March in La for the OG Show, so I am flat out right now but enjoy the challenge.

Hope that you may time to wrench on your machine or even get lucky enough to take it out of the weather is not too bad, but- this time of year, many people are in their Shed, garage, Workshop, tinkering with their 2 wheeled machine and if you need help on parts or even advise, this is why I am here as we are all a big family.  I will also try hard to get you on the road as soon as possible.

I need to get another Master Cylinder for the Brat bike that I am creating and the one you see here on the Revolver Caff I built will be what I need, these work so well and are brand new, affordable and can run up to 2 Rotors too as it has a good size piston in the chamber.

I will be busy all weekend working on revamping parts and polishing parts and maybe some welding too, I get more done on the weekend than I do during the week, I think because I have so many emails and phone calls and texts to reply too and I do that all week.

Have a great weekend everyone, you can order 24-7 on my website and you can email, call or even text me still and I will reply, have fun and hope to see some of your creations soon.

Vesco Bike, bit more done on parts today.

Well, the weather has been pretty unkind over here in California, the Rain has been hammering down and as much as 3 inches a day, so that has restricted what I can do in the garage as I need to pull the bikes outside to be able to work in the area.

Rain was due this afternoon, so I went out in the garage and started by pulling the old rear brake hub out and then cleaning it in Vinegar and then lightly polishing it, I then secured the Brake hub to a piece of Old ply wood and then set about drilling a hole display, as I like that old school speed air cooling look and thats what I wanted to do to this hub.

Took quite a while but am happy with the result, I still have to Polish to a chrome finish but got it done just in time as the rain was beginning to fall.

So, I went into the garage and got the old brake Rotor from the Vesco bike and as it had seen better days, I thought I would give it the Old style Swiss Cheese style and drill 185 Holes into the Rotor, thus allowing heat Dissipation and it is also good for dispersing water like rain etc and lastly it is lighter too.

These Rotors are arguably, softer than an Italian Soccer club and drilling using a carbide tip was pretty easy but, it is time consuming drilling 185 Holes, and as you look at the Rotor, it does indeed look as though I have drilled them in a curve, but on closer inspection, you will see they really are a straight line of 3 then 2 holes and fun to drill and, for me its really therapeutic.

I love doing these and over the 19 years, I have drilled over 500 Rotors and they are still on the road today, testament that these really are a great set up for the Honda Four.

There you go, the tough part is, once you have drilled the 185 Holes you then have to counter sink them, Both sides, so thats 370 times, but as I said, to me its therapeutic and do the whole job in 90 minutes and what a great outcome, once I get to this stage, I shall remove the paint and then polish it to a chrome looking finish.

Still loads to do but wanted to share what I had done today, I used to offer these Rotors and may do again but need to collect about 50 of them so I can bang them out in a week etc.

but fun doing all this and hope you are enjoying my blog on the recreation of this old Vesco Honda time machine that I am turning into a Custom Brat bike to the La Custom show in March.


I started doing this here 19 years ago today.

Wow- Time does indeed fly by, on February 15th 2000 I started doing this and 19 years today I am still enjoying what I create and sell to you lovely lot.

Hard to believe that this 140 pound guy from North London, would be living his dream and doing what I always wanted to do, Motorcycles have been my life since a kid, I always look back and think how lucky I am to be doing what I do.

I have lost count of the amount of Motorcycles I have built since 1975, but I have never lost the passion for these 2 wheeled machines and dont think I ever will.

My T100 Triumph Daytona was such a fun bike but- it needed constant servicing, but that was the fun of it, getting to know your Motorcycle and how things work. I used to be a Dispatch Rider in the City of London and also up in Birmingham, riding thousands of miles all over the country and loved it, I worked for many companies delivering things everywhere, and knew there was nothing like being your own Boss and having Motorcycles.

I do sometimes miss that job as I got to see so many places, in the UK and in Europe but, the Danger was outrageous at times but that is why the money was so good, as we took big risks in what we do, and in all weathers, some Rain, some crazy winds and plenty of Snow and Ice. A major decision that I made moving here was because the weather was so nice and no more cold Knees and hand riding Motorcycles.

50 pounds lighter and more hair LOL- Loved that old bike too, it was a 1953 Sunbeam S7, I sure loved that bike and it looked along the lines of a Harley but was British.

I was self taught in Mechanics and loved taking snotty parts and transforming them into something very cool and different and I was hooked from day 1.

I hit the ground running in 2000 here in Southern California and built a well known Motorcycle out of the CB750 Honda Four, many people used to stop me in the street and ask.

“What is that bike” And I would reply its a Cafe bike, I got ask so many times that I painted on the tank the word  Cafe  in Old English, with Gold Model paint, using a modeling paint brush, then I guess I got noticed all over the place and started getting magazine coverage.

Roll on to modern times and I am still creating affordable parts to complete builds and want to than you all for being my Customers and look forward to speaking to you soon.

There is never a day thats the same for me in this industry and i love that aspect, there are always things to make, draw, build or repair and as long as there are second hand motorcycles out there, then I am good.

Where do I see this industry going? Well of course I have now seen the electric designs and although they look cool, they have no sound, I dont think I would like a dead quet machine, I like the roar of an internal combustion engine, I also believe in loud pipes save lives as if a pedestrian steps out in the street and an electric Motorcycle is belting along-Well theres a catastrophic accident waiting to happen.

I have manufactured thousands of exhaust systems for these old bikes and am gearing up to design more affordable styles and all made here right in California not oversea’s where the majority of systems are made by people not even into Motorcycles.

So, thank you, from the Bottom of my heart for ALL your support, you are helping my continue to live my dream and I hope I can help you, even if its just problem solving over the phone,

Thanks for reading my little Blog, right now I am building a Brat style Custom motorcycle and hope to get it completed for the OG show here in LA, but the weather is against us right now but we shall plug on. I love All motorcycles and glad that you enjoy what I do.


Thanks again for 19 years, the 20th year anniversary will have to be a bike created I think to celebrate an awesome milestone in business here.

Until next time, have a super weekend ahead of you and hope to hear from you soon.

CHEERS!

Wishing Everybody a Very Merry Christmas, Happy Holidays

Well, it is that time of year already and this time Jennifer and I are taking our first Christmas Vacation, we shall be in Hawaii to enjoy all the Islands and the delights of the sights and sounds of the Pacific as we shall be on a cruise ship. The website will be manned and I can still answer emails etc by phone etc.

Parts will not be shipped until January 3rd i’m afraid as I am away from the shop, but sometimes a Vacation is needed and hope you all understand?

Many thanks from the bottom of my heart for ALL your orders, emails and phone calls, its you that keep me going and I am glad to help you get your machines on the road.

More parts coming in the New year, so stay tuned to the website and I hope to be making more videos on the Daily Blog as well as maybe looking into pod casts etc for your enjoyment and, participation etc.

Enjoy this festive time of year, go out and ride if you can, and if the weather is too bad, stay in and work on that Motorcycle you have in the Garage, shed, back yard, the New year is just around the corner. so enjoy this time and look forward to hearing from you.

I will still be on Facebook, Instagram and Twitter too.  Facebook is Carpys Cafe Racers or Steve Richard Carpenter. Twitter: 750racer Instagram: Carpys_garage

Thanks for everything Folks and have a wonderful time this week.  Aloha and mele kalikimaka


The VESCO HONDA CB750 Brat Bike

Well, many of you have followed the Blog on this machine, right now I am just enjoying the build as its running pretty darn good, so will keep it as a runaround until such time as if it either sells, or I get some time and I can strip bare and make a full custom project from this Motorcycle. But it sure was a great find, I purchased the bike though a contact and headed just a few miles down the road to the city of Orange here in Southern California to check this 1974 CB750K Honda out that had  been in storage for many Many years and had not even run since the mid 1980’s.

I have purchased so many CB750’s in the past but, its always great when you have the unknown ahead of you, most of the times they are so badly damaged or neglected, that you need to take a foot pump with you and a Mallet, as the tires are usually flat and the front brake will always stick due to some corrosion inside the caliper and the Rubber mallet will release the piston so you can push the bike into your van or trailer.

Found out that the family’s last name was Vesco, I inquired not related to Don are you? “Yup sure am” he tells me about it and this bike is actually his lads and he ran out of time, money, patience and enthusiasm on this machine and has been sat a long while. And now it was time to make some room in the garage, so it has to go, I made an offer and after a little bit of haggling a price was agreed upon and there it was, this old snotter that had a hard life but for the last 30 odd years had sat used and abused in all sorts of places, and now it was coing home to my shop to see what I could do to at least resurrect this vintage piece of tin.

It sure was hard work loading it ion the van as everything was corroded or semi seized up, but managed to get her up and into my van and then we were on the way to its new abode- my place.

Back home in 20 minutes and took the bike out and placed on a wheel chock so I could have a look at what we got, it had good potential but many people go in head strong and then kind of lose their drive in completing their dream and I purchase many machine in this guise and much worse too.

Brakes were seized and it took sometime to be able to get the bike onto the driveway on my own, the kick stand would not function as it was too long and kept getting in the way, I knew I had my work cut out but needed to know if I could get this old girl to run, as I didn’t want to strip this right away, always best to see how the motor is first before you dive in. You can see the plug caps have electrical tape over them, a warning sign that this had issues back in the day right away.


The carburetors had seen better days, not only were the bodies of this rack of four corroded, the slides had stuck inside, so another issue to sort out, but it did have compression when I kicked it over and thats a great thing to know.

Old Mac exhaust wouldn’t of ran well as the underneath of the header was squashed flat, must of hit a speed bump years ago and no way would it run that well with a restricted collector.


I wanted to just have fun with this bike, as I said, not sure how I was going to go until I got her running, but to get to that stage there was a few things that I thought would be cool so I could at least ride it once I figured all the issues out on this honda, and as you have probably experienced, there were many issues, but, whilst I had her in my shop, i wanted to change the seat set up and make a fun Brat style machine just because, well I can.

OK, so I made a steel seat base and tried another gas tank too, as I needed to clean the inside of the other one as I always do when I get tanks that has sat for many years, I had to change out the wire harness and the handle bars and controls and glad that I did as the old ones were so badly corroded, they would of caused a fire for sure. And then with a New set of intake manifolds and rebuilt carburetors this machine w\was almost ready for a fire up.

Below is a little iphone video I did on Face book, not sure how the motor would go but I had compression and now spark, so, with gas, this should in theory fire up.

So, as you can see, I had the bike on my work table and I used an old lawn mower tank as an iv to feel the motor, I was pretty sure she would at least back fire but as I re-jetted it and cleaned bowls out, I was certain that with new coils, battery and plugs and of course New oil and filter, that this puppy would run, and was pretty stoked with the end result.

Carbs redone and all clean with new intakes and my stainless steel clamps too, fitted some spun aluminum Velocity stacks with gauze for that old style look and re-jetted once more.

To make sure all is well, I need to be physically able to take this bike for a little ride, as no idea how the clutch is, the gears etc and the general running of this bike, I fitted another headlight and then whilst I was there at my storage, I removed some Old Lester wheels I had, I had taken them off a Vintage CR750 AHRMA race bike and simply stored them, tires were a little hard but thought what the hell, lets bung them on as the wheels on this bike anyway were toast.

I also had to make some sort of tail light assembly up as riding up the road, I still want people to see that I am braking etc, so put this set up together and it works really well being LED.

As you can see, I fitted the Lester rims, 19 inch front and 18 back, I also upholstered the seat in a soft brown leather with Diamond stitching and its sure comfortable I was surprised, the gas tank needs some work but I shall address that no worries, I also cut my 4 into 1 down that I ceramic coated titanium color, as I wanted an aggressive look to it and think that this does come across quite well.

As the sun goes down I managed to fire this up and it felt good to hear the bike run and run quite strong, I fitted a 530 O-Ring red chain that I had and it looks pretty tough, as you can see, I made one of my side stands and now the bike sits up nicely, so many dont or need bits of wood under them.

I also fitted an oil pressure gauge kit to make sure that I had good pressure, and it did, it fired up to about 70 pounds, so am more than happy about that, exhaust looks really cool.

OK, now it is time to address that gas tank and it needs some love, i think I shall go all out 1970’s Candy Custom style on this one as it needs some color for sure, but I noticed it had pin holes, so- went back to the original tank that came with the bike and decided to cut off the neck and weld in a Harley Bung instead.

So, the best thing I do is use a sawzall and cut the neck as far down as I can first as this needs to be flush on the tank for the bung to weld in nice and smooth.

As you can see, it takes some time and of course, I made sure that there was no residual gases exiting from the tank, be careful and make sure you wash your tank out before emmiting any sparks near this thing. LOL

So, with the neck sanded smooth to the tank, I used a Harley gas tank bung, I sell this kit on my website, and wanted to use it for this build to be a little different as the original locks always break on the Honda and knew that this would like quite trick once finished.

This is perfect for the Honda Gas tank and there is enough room to be able to TIG weld the bung in place with no distortion to the surrounding areas of the filler neck.

Now all Tig welded and cooled down, this is ready to attach the screw in gas cap, I did this a long time ago on the Cobalt Special Honda I built, so was eager to see how this looked.

Well, that looks so much better than the stock configuration and once painted will really set off the gas tank from the others out there and a neat Custom touch to this machine.

With New rear shocks and a comfortable seat, this is taking shape as a cool little Muscle style Brat bike that will turn heads where ever it sits and the paint will make you need Sunglasses.

Here we are at El Mirage at a SCTA sanctioned meet, last races of the year – so wanted to attend and take a few photos of this Vesco Honda and I am so glad that I did.

There is still a lot more to do to this but right now it just needs to get a few miles under its belt, I always say the first 100 miles will tell you how the bike will perform, so a ways to go as I only have 14 miles on it so far but of course shall do many more on it.

Don’t want to take this apart yet anyway, i mean its fun right now, no show bike but easily could be if I took her down to the frame and started from scratch, but right now I want to have fun with it and what better place than El Mirage Dry lake.

She sits real well and is a blast to ride, she got plenty of looks as you cannot miss the paint job, no matter how fast you drive.

So I am happy with the way she is and looks to be honest and I love riding the bike around to be honest as it sits so well and not too low as many are these days.

Jennifer my Girlfriend loves it too, she has a triumph of her own and loves all Motorcycles, love seeing Girls with bikes too and we go out riding a lot together to be honest.

Final look at El Mirage before we head home, it is only 100 miles from our house so always fun to come out here and view world speed time trials record attempts

Gas Cap sets off the tank nicely and the paint job is so reminiscent of them Customs days of the 1970’s back home and around the world, I think its a nice balance in color.

Fish Gills and shadowing are becoming a lost art but this really came out well, using house Of Kolor Candy paints and Pearl bases with light flake added.

The bike sits well, I like the smaller headlight, they have L.E.D’s inside it for turn signals, so keeps everything neat and out of the way, the Lester Rims gives it that Old School period right away.


Added 2.5 inch mechanical Gauges to tidy top end out, of course my Hand Made and chromed Euro Bars really make this comfortable for your shoulders and Cole Foster grips soak up any Vibration that you may have.

I think the Man above digs it too, No thunderbolts when I stopped outside his place, Phew!

I really enjoy riding the bike around my Town, the roads are smooth and its a joy to blap about on and even though I want to do way more to it, I need to sit back and have fun riding it for a little while as it was and still is a super fun project.

Slowly clocking the miles up but amazing that this runs and hasnt since the mid 1980’s, and its a joy to jump on and take for a spin around town.

I used a Biltwell Mirror for legal reasons and it works pretty well to be honest, Id love to paint the frame later but not right now, The motor runs strong, the gear transition is really smooth.

Eventually the Motor will be painted and tricked out but as I am having so much fun on this, I will wait until later, unless someone buys it of course.

Thank you for following me and purchasing My parts for your projects, it means a lot, this is my Passion and life, so I really do appreciate all your business.

So, until next time I work on this, I will leave you with a list of things I changed, just in case you are curious as to what I did on this machine through the build up.

This was the Very First ride after it had not run since the mid 1980’s, so stoked to be able to experience great moments like this, unless you are a bike builder, you really wont understand the Euphoria that you feel when you click into first gear and ride off down the road.

Peace and Grease to you all.


Carpy


  1. Lester Rims 19″ front 18″ Rear.
  2. Drilled Front Rotor
  3. Euro Bars I made 7/8
  4. Cole Foster grips
  5. New Handlebar Controls
  6. New Throttle Cables
  7. New Clutch Cable
  8. New Speedo Cable
  9. New Tach Cable
  10. New Wire Harness
  11. New Coils and Caps
  12. New Iridium Spark Plugs
  13. New Battery
  14. New Red 530 Chain.
  15. New Custom Side Stand.
  16. Custom Gas Cap Kit.
  17. New Side Covers.
  18. New 2.5 Mini Gauges.
  19. New 4 into 1 exhaust Shortened and Ceramic Coated Titanium
  20. Rear Frame Hoop
  21. Rear LED tail Light assembly
  22. New Finned Piggyback Shocks.
  23. Rebuilt Carbs.
  24. New intake Manifolds
  25. Stainless Hose Clamps
  26. Braided overflow pipes.
  27. Custom 5 3/4 headlight with internal LED signals.
  28. New Horn.
  29. New Flat seat in Leather with Diamond Design.
  30. New Brake and clutch levers.
  31. New Biltwell Mirror
  32. New Chrome Fork Ears.
  33. New Oil Pressure Gauge kit.
  34. Chromed Rear Stabilizer bar.
  35. New Foot pegs and Rubber.
  36. New Custom Weld in Gas Cap Bung and Screw in Cap.
  37. Custom Candy Flake Paint.