Honda CB750K Gas Tank refurbish for 1976 SOHC HONDA K6

Well, I seem to be trying to do too many things in one go some days and must learn to relax and get to a slower pace and then get it all done. LOL!  Easy to say but they do say that integrity is the winning ingredient in the race for complacency , and to be honest, in my older age, I now seem to stop for a second and look back on things and try to dissect my days at the workshop and become more productive but in less hours, if that makes any sense, work smarter not harder my grumpy old man used to say.

So, I have been restoring an old 1976 CB750 Honda up in the barn, not to a show standard, just to be a nice clean daily rider, but sometimes things comes to a halt when I need to repaint the bodywork, but this time the formula works great and now have a superb Painter thn not only does a fantastic job, actually listens to what I want, then takes time to test colors and repaint if need be, until the job is how I want it to be.

Usually my artistic flair gets the better of me and I go into a winding road of turns, trying to get a super cool design that will wow many onlookers, but as this is for a bike that I really want to be head turning but in its stock factory livery, something that is super hard to do these days, but I am almost there with the bodywork for this Honda Four.

Now, I had a fella in Santa Ana that I have used many times in the past, and gave him my gas tank and covers, plus a few hundred bucks to help him with things and that was 6 months ago, he has buggered off and never responds to my plea, so Mister Police Officer will be collaring him soon with any luck.

I had to go on Ebay and pay an extortionate price for a fairly straight set of side covers and petrol tank off a K5/K6, it was labelled K5 but the Petcock was on the left side, making this a k6 model. Honda decided it was much safer to move the petcock to the left hand side of the motorcycle because that way if you run onto reserve whilst riding on the freeway etc, you do not have to take your hand off the throttle to turn the petcock onto the reserve position, thus being safer on the road and not slowing the bike down at all in that transition.

So, I asked my Painter if he could replicate the colors of Candy Antares Red, he said of course, then I enquired would it be necessary to purchase some reproduction decals, so he could add them then clear coat over the whole tank.  Of which he replied to me. “No, , as i can mask it and make the colors up in paint.  I was a little skeptical when he informed me that it wasn’t really a problem to attain the same effect with paint rather than a decal and he also said that the new decals will fade in time but the paint will hold true. So, I said I would trust him with that and said that as soon as the gas tank turns up from Ebay, I shall bring it over to him and see what he thinks about it.

My Painter has been spraying Motorcycles for many years and has high class clients, his time is not cheap but, he does amazing work and sometimes you just need to bite the proverbial bullet and go for it.

So, as you can see by the photo below, this was the fuel tank that I purchased off of Ebay, it does have a K5 note on it but it’s a K6 as you can tell by the petcock bung is on the left hand side, but i needed a tank that still had the old decals on the side so my Painter could measure them and reproduce them in paint, a tough task for many but not my guy.

It wasn’t perfect but it was a good candidate to the many I had seen on the net for sale, so this is what we started with,as you can see it is candy antares Red but it needs stripping completely so we can address any dings or scratches and then begin the preparation of this set up for my Big 4 Honda SOHC.

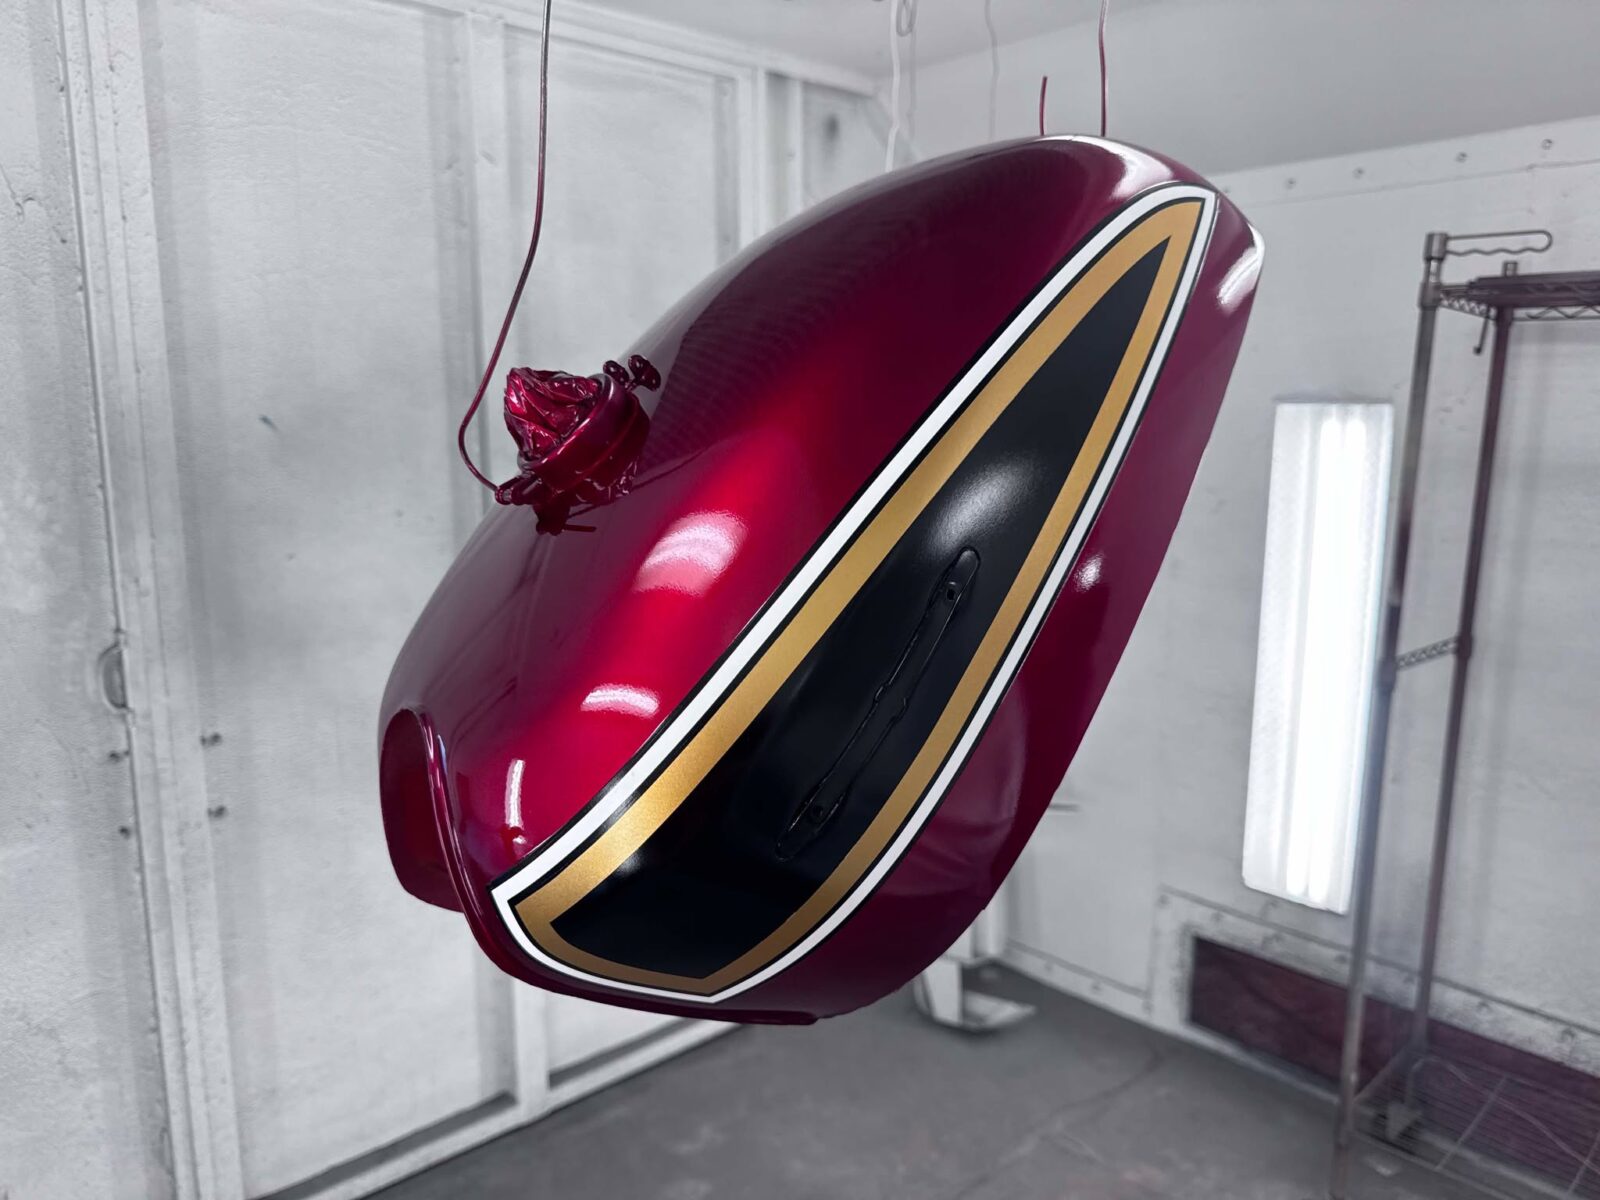
As you can see in the photo here, we have blocked the tank and made sure all is smooth and even, then Black base coat is added and it looks really good right now, the next job is to match the Gold for the design on the original decal, so this takes a little time to get right but with a lot of color test sprays we go it.

Aztec Gold is painted on the tank and this will really look nice when the clear is added later on in the process, but I am super happy with the progress and how clean everything is.

Here are the side covers, they were not in the best shape cosmetically but now bloc sanded and base coat added, these are almost ready to spray Gold, but they did need to be sanded quite a bit, and now looking good.

I am super glad the way that these came out and its all blended nicely, and when the Red is laid over these, they will give a fantastic Antares Red glow, something that I am looking forward too, this paint is top quality and will not fade in out Californian sunlight compared to many other brands I have tried over the 25 years.

I know that you will be thinking to yourself, this is too purple, but, this is not done yet and you will be super stoked at the look of this gas tank when its completed.

Just look at that, this is all paint and not decals, a lovely looking fuel tank for my K6 Honda CB750K model, this will be the Jewel on the crown when it’s all done and fitted.

The side covers came out really well and shall be fitting New Emblems to them later on in th week, but this is all worth the wait for me and super happy I went this route on the bodywork.

This still needs a buff but it looks fantastic in these new colors once more and once badges and lower tank trim are fitted it will look factory, I have always loved the K5 and K6 Antares Red.

So, there she is, stunning is all I can say, I have New Chrome Gas Cap and lock for it too, so this will be already to fit to my machine soon, and quite excited to get this on the bike, its the best parts when it all comes together as a cohesive piece.

All three sitting in the California Sun and I am taking it to my workshop where I shall put in the cupboard as I need to polish the valve cover this week, but then I can put this all on after.

This was a lot of work but completed in a timely manner, something that loads of painters I have used have always struggled with time management, but as he paints all the time for many Motorcycle and Custom cars, this was a fun job for him.


How much for a professional paint job like this?  Well, save your pennies as its $3500 but you can get a cheaper job and it wont last like this and I am more than happy with it, no runs, no curtains, no orange peel and, no decals to peel off.


Weld in Gas Cap Bung Project

Howdy all

Well my task this week on the old Vesco Honda was to try and get rid of the ugly gas cap and spring lock that the stock Honda’s have, for a start, this one was corroded beyond any help and I had to literally force the bloody thing open if I need to get gas into the tank and then, I could not snap it shut.

So I though I will go ahead and cut the old gas cap and neck off and use one of my own Weld in Bungs that I sell on my website, when in Rome right?

So, with gas tank in had, I placed it on an old old table and then proceeded to get the grinder with a cutting wheel on it, now, make sure that the gas is well and truly vacated that vessel, else you may be like one of Spacex Rockets and heading out of the ionosphere if you put any spark to it.

Lucky for me I had washed it out and aired it for some time, I still used an old BBQ Lighter on the end of a pole and lit it, just in case any fumes were lingering, usually you may get a pop, but nothing this time, so I knew I was good to start cutting away.

I removed the gas cap by simply using a metal dowel and tapping the holding pin out, the same as the clasp too, and now I am ready to bung on my Goggles and start the grinder up with a metal cutting disc inserted.  many a spark I must admit but all good, just took my time and went in both sides and she came off pretty fast.

So – all that was left to do was to use a Flap wheel and grind the neck flat and any old paint must be removed to allow me to weld a bung in later.

With that all cut off, I test fitted the bung and it was perfect, so stoked to get it to fit snug and now with a little more metal cleaning around the top of the tank, it was time to weld it up.

Then, using a Sincrowave 200 Tig Welder and Bronze rod, spot weld the bung into place, moving opposite to disperse heat evenly and not cause any  warping etc.

Once spot welded it is then welded slowly and bit by bit until the whole edge of the bung has been covered and is uniform, that is now done and looks so good to how the stock one was.

The next after it has cooled is to start to get rid of the old paint, I was not going to use paint stripper, that stuff works well but is so messy, I thought this time I would use a DA Palm Sander with 80 Grit paper and take the paint off the old way. There was Green Primer, Blue, Maroon and Black paint in layers on here and that sure would of made a mess with Aircraft stripper thats for certain, so sometimes the more traditional way is the best and to be honest I enjoyed the challenge.

Took less than 2 hours all told and now I am ready for paint, just got to decide how I want to go with color and design but I wanted to share this gas tank project with you lot on my website so you can see how it is done. it gives you a little sense of achievement when you get to this stage and I am now ready to sit down and see if I can come up with some paint color schemes to change the look of this 40 year old Gas tank.

I sell the kit on my website complete with Screw in gas cap too, so if you like me, are finding CB tanks hard to locate these days, try and make do with one thats damaged and simply change the neck and give the tank a brand new life too.

Of course this will have a little bit of Bondo on the tank to smooth it all out but, today’s mud is awesome and you wouldn’t know, even if you put a magnet on it, as the stuff I uses has metal particles in it.

So there she sits, I will put the New Gas Cap back in, I use a Vented Screw in style and this still looks Classic in a way and achieved what I wanted, this will look pretty cool when it has paint on it and will add photos later when I refit the gas tank back on the bike.

Still a while away from paint but thought that Ii would share what I have done as a blog and maybe it will get you motivated to have a go on your project?

I still have so much more to do to this old ride but it will be a fun journey and will keep everyone posted as to its build as I do more things to this 750-4 Motorcycle.

The Weld in Bung really did work out well and changed the look of the tank completly and I am looking forward to applying Custom paint to see how this turns out.

Thanks for watching.


“How Can I Stop My Handlebars Hitting The Gas Tank

SOMETHING HITTING?

Well, there is quite an easy solution to this, simply weld a blob of weld on the bottom of the steering stops under your frame, maybe an 1/8th inch, check it and turn the bars to see how close you like it.

This is real easy to do, make sure you unplug the ground from your battery though as you can weld your points shut.

Alternatively, you can drill a hole and thread it in the lower triple tree, as that has steering stop lugs, then you can attach an M3 or M4 bolt and that can be adjustable for steering.