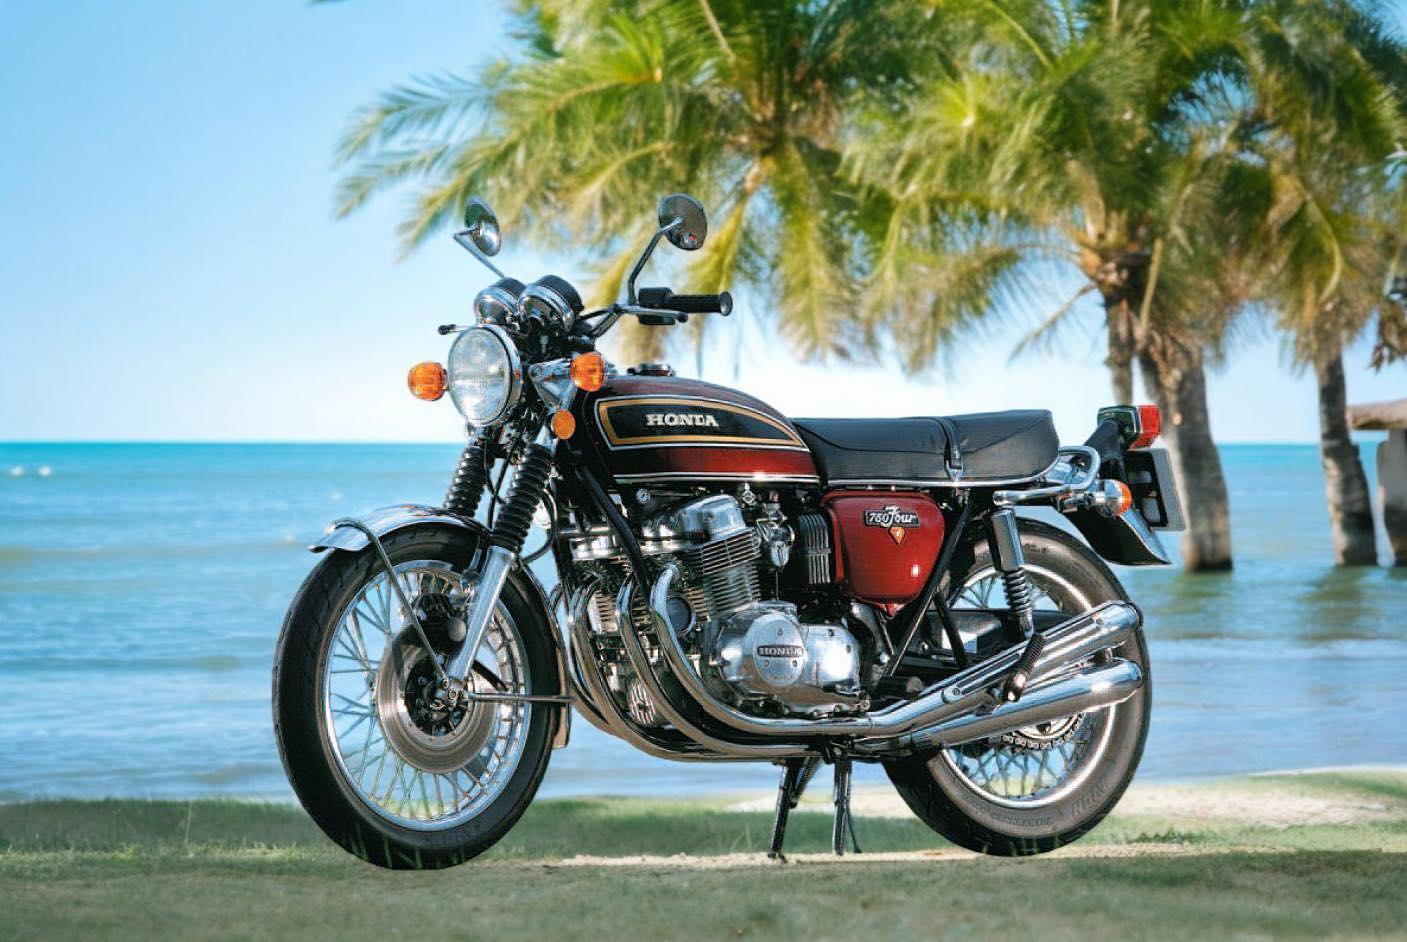
Honda CB750K 1976 SOHC I have managed to revive.

Well, I thought I should at least out down on some what of a lost, the parts that I have either refurbished or replaced with New Old stock on this 1976 K6 Machine as its so easy to get lost in the many parts you need to sort out, to be able to ride a non running machine that had sat in a yard for many many years.


  1. Brand New 4 into 4 Exhaust system from Japan
  2. Brand New Exhaust clamps
  3. New Genuine Honda Horn
  4. New Genuine Honda Clutch cable
  5. New Genuine Honda Fuel tank rubber
  6. New Complete seat assembly
  7. New Genuine Handlebar Grips
  8. New Levers
  9. New Mirrors
  10. New Chrome Rear Shock Absorbers
  11. Powder Coated Rear Swing Arm
  12.  Chromed Stabilizer bar
  13. New Chain and Sprockets
  14.  Rear Hub rebuilt and polished
  15.  New Rear Rim and spokes
  16.  New rear Tire and tube
  17.  Polished brake hub with new brake shoes
  18.  New brake actuator arm
  19.  New brake rod and spring
  20.  Rechromed rear fender
  21.  NOS rear tail light assembly
  22.  New inner fender
  23.  New Battery
  24.  New Genuine Honda Coils
  25.  New Plug caps and plugs
  26.  New oil and filter
  27. Rebuilt and tuned carburettors
  28. New intake rubber boots
  29. New starter cover
  30.  New Clutch Cover
  31.  New OEM kick starter
  32.  New Oem Brake pedal
  33.  Rebuilt front caliper
  34. New exhaust spigots
  35. New fork tubes upper
  36.  Rebuilt lower forks and polished
  37. Stripped and Powder Coated Main stand with New Spring

I have a few more little things to do on the bike and then I can fire it up again, but I am glad that I persisted and continued to clean this big 4 machine up and its looking pretty cool as it stands right now.

She does sit at the right height now, as I have fitted the correct size tire in the rear, I need to clean up the gear shift cover and will do that this week, as well as the sprocket cover, this bike has many New parts on now, I would like to repaint the tank and side covers but no time at present and I have many other motorcycles to build, this is the original Candy Antares Red livery.

The exhaust system fitted really well, I am a dealer for this system and they come direct from Japan with the baffles included but not the heat shields, but I was super stocked at the fit of these and the chrome looks amazing.

I used New spigots and New flange clamps to set the pipes off, would seem sacrilegious to go any other way as the original ones were rusted and looking worse for wear, this is a nice fresh factory look i believe and super glad that I went this route. Not cheap by any standards, but chewap will not last so buy right and you will see the benefits further on in time compared with inferior copies of this system.

I have always loved the look of inline four machines and the Honda was such a popular choice back in the UK when I was a Teenager, I have had so many Honda’s in my life and continue to work or build them in my barn.

I did buy an aftermarket rear fender as the original was quite bad in the way of rusty deposits, but the aftermarket version that I paid $200 was utter rubbish and got my money back, so invest the $400 and  stripped and chromed the original fender and bought a New tail light assembly, sure looks nice now.

I have also fitted a New seat, the other one was ok but I wanted a fresh look and thought I may as well get another new unit to complete the bike and give it the right ride height, these bikes were a tall ride and have to be honest was surprised the Japanese Public could ride these as I am 5″11 and am tippy toed when sat upon this bike.

Sure, there are many more little things I can do to this machine but my plan was not to restore the bike to its New appearance in 1976, but to give it a fresh look from a sad and tired past of sitting in a garden to the elements for many years, but this will be for sale, I think $5000 is a fair price and, if I do more work, of course the price goes up, the exhaust system alone was $1600.

New Grips and Levers and cables etc help this old Lady become young again and of course I fitted stock mirrors for that 1970’s vibe and takes me back to my last years at school when I first saw a Red CB750K coming down the road.

The bike sits well and I removed the main stand and powder coated it and fitted brand New Genuine Honda hardware, I wanted to use the main stand as many have been removed over the years, plus it makes it so much easier to remove the rear wheel or chain etc.

The New tire and tube feels great, with New original DID rim and polished Hub with new internals and New brake shoes, Rod and actuator, this is a super set up and the New rear shock absorbers are the correct models for that ride height of 1976.

New footpegs and New Old Stock Brake pedal and New old Stock Kickstarter help clean this five hundred pound 2 wheeled Classic Thorobred up and give it a new lease of life, hoping that you are liking what I have accomplished on this 50 year old Motorcycle.

I took this out of the Original bag, cost me over $150 but its the Original and stoked that I located one not too far from me so there are some neat touches to this Motorcycle that you may enjoy looking at.

Now, the Carburettors are completely rebuilt, synchronized and are attached to genuine Honda NOS intake boots, I have old 1976 Velocity stacks on the bike but do have the original Airbox for the old girl. And also I fitted a New Clutch Cable and Covers too, Just have to fit a bolt in bottom points cover today.

The rear wheel is all rebuilt with New spokes and new bearings too, New chain and sprockets is a must and she really is a Classy looking bike, not yet found the title but am looking for it, I think the original owner has title and I have recently corresponded with him, so he may find it, if not I will sell with a Bill of sale as its been off the system for many years.

It does need a New front tire and I may fit another later on as I go along, but right now she looks really good and wanted to show the machine on my website as many people have been asking about the old girl.

Thanks for looking and I will continue playing with this CB750K until she sells, but of course, the More I work on it, the more the price will increase, but I do enjoy reviving these inline four beauties and hope you have enjoyed the pics and write up on this Japanese Iconic bike.


Refurbishing the 1976 CB750K Honda Four

Here we are with another episode of tweaking that old 1976 CB750K Model Honda, she has been sat for so many years, I was initially just going to get her running and sell her, but I have grown attached to this machine and its my best year personally, so thought I would remove worn out parts and fit brand new ones. Still a ways to go and I shall blog as I go along but – Eventually this will start to look like it did when it came out from the factory. Except the paint as that’s a really expensive process these days but I may even have a go at that later who knows, so stay tuned….

I didnt like the patina on the footpegs, even though this particular machine only has 17,000 Original miles on her, she has sat many decades in a Back yard and the eliments have taken a toll on any of the parts and brightwork, you can actually see that the foot peg rubber has no wear at all, which is more validation of the low milage, but I wanted to fit some OEM parts and here is a set of New pegs that I will fit to the bike.

The same thing goes for the rear brake, it had heavy rust pits that even I could not be able to polish out, so I thought I would buy an OEM genuine Honda one and that will help clean up that area that does get neglected over the years on these machines.  Not cheap but rechroming would of been even more expensive, so this was the lesser of two evils.


The Original Kick starter also has pitting, so I managed to track down an original New Old Stock one and later on I shall probably get the original one stripped and chromed again but not right now.

The Honda should start to look like it originally did when it rolled out the door all them years ago and I am enjoying the time and effort to get this to where it really needs to be.

I removed the old clutch lever and thought I may as well address that issue with a New version and that will clean up the handlebar area somewhat as many people leave that part of the bike and I always notice that.

Now that looks a million times better and with NOS grips too I am more than happy to get on with another part of the bike now, I am in no rush at all with this k6 and when completed will offer it up for sale.

The poor headstock always gets left out, the steering stem nut and washer was begging to be replaced as well as the steering pinch bolt, I could not leave the bike with these parts like that.

I try to use as much Genuine Honda stuff as I can lay my hands on and this is the case right here, it is fantastic quality and you know not only will it fit, it will last many years too.

So, another job done and if I find anything I feel that needs sorting out I shall of course do it as I am on a roll now, although this is by means no restoration, just a revamp of tired parts.

The starter motor covers always rust as they are easily open to the elements, so I ordered a new one as this has seen better days, what do you think?

A big improvement and I could go on forever on the bike, just a few of the fundamentals needed to be addressed but I still need to rebuild a rear wheel as the original one is just too rusty to strip and re-use as its too dangerous to mess with stuff like that.  Next up is to fit the footpegs, a New old stock brake pedal and kickstarter to at least clean that side of the bike up and look more original now.

Looking very much like the bike it was originally at the factory and am pleased I went this route on this one, although still many more things I have to replace to get it to the standard I will be happy with, but each week that goes by I give this a nod of approval.

So, I will be working on removing the center stand and painting it as its looking a little weather beaten, its a big heavy part but I want to get that looking good, I may Powder coat it for long lasting life in all honesty, so stay tuned……


Honda CB750K 1976 getting a little more work completed.

I decided that whilst I have some spare time and a few parts etc I shall get into the K6 a little more and clean her up, as she has sat for so many years in a Back Garden, its only fair I revamp her a little and put her to a more Original style as to be honest, the 1976 CB750K Model was probably the best looking bike of them all and ran well.

So, I thought that I would try and clean up the lower front forks, as the factory clear coat has long gone and and as the sprinklers, hot and cold climates happen, the lower forks and anything aluminum takes a beating.

I jacked the bike up and removed the front wheel, I also made sure I used a pair of jack stands too, just to hold the chassis incase we get an earthquake here in Southern California, as 530 pounds is not so easy to pick up if its laying on the floor.

As you can see, the lower stanchions have seen better days, the pitting is caused after the clear coat gets eaten away by heat and moisture then aluminum will break down slowly in cold temperatures causing oxidization, of which you can see on the left fork lower, but I have refurbished so many of these over the years, I was not worried at all about cleaning these up to a more original look, but it does take a bit of dedication and hard work to achieve that goal, like anything else in life really.

After sanding the forks by hand, I start my process of buffing, using Block  compounds you can buy from shops, to my “Special” Secret Sauce that I have used for decades and slowly improved to get it to the standard that I like, yes its messy but that’s the reward afterwards when you see a shiny piece of art.

Its not a 5 minute process that’s for sure and the more effort you put in, the bigger the reward at the end, this is just its early stage and I increase pressure and change cutting compounds as I go along, remembering that this gets bloody Hot as you increase the pressure on the wheel.

As you can see, that is a good comparison with just a little bit of work, more to do but I am happy how this is going and people ask me how I get the finish on my Polishing, so thought I would share this with you lot today.

Yes, I wore gloves as these get super hot and being aluminum, they hold the heat for a long time, I am really happy how the forks are starting to turn out and am glad that I made the decision to pull the front forks and rebuild them.

So, a bit pf scotch pad, sanding block, then polishing will get you to this stage, I can go more but don’t want it too showy chrome looking and will rebuild these now, the upper tubes are total toast, as you can see below.

The forks at the top are always covered by the headlight ears but Honda did not take into consideration that the metal will sweat in hot and cold condition and of course rain etc can get down the forks and sit there, these forks are typical of the many that I have pulled out of the bikes over the years, so a common problem.

I believe Honda went cheaper on the chroming, using less on the forks as you don’t see it and putting money into the Motor, as I have seen hundreds like this and that’s always been the look when you drop the forks at the top. But I have a Replacement set of aftermarket ones ready to go.

I have always liked Polishing,I was taught at a old 17th century Barn when I worked for Rolls Royce as a kid and it always stuck with me and its so rewarding to turn something ugly into quite the jewel.

I use my circlip pliers to fit the snap ring into the lowers, a real life saver these are as you do not want to risk scratching the chrome by using regular pliers etc.

I try to use Genuine Honda parts where ever I can as the parts are top quality and of course guaranteed to fit perfectly, as many aftermarket parts do not.

I refitted the springs and will fill with oil when the wheel is on but still up in the air, that keeps the pressure off the springs and easier to fill the forks that way and not have the springs flying out towards your eyes if you put the bike on the ground.

So there you go, forks back on and they look so much better than before. I will be fitting New speedometer cable and New Tach and speedo gauges to clean it all up at the front, but she is taking shape and will continue to revamp her as I go along.  I will be fitting Brand New 4 into 4 exhausts to the New Honda spigots that you see in the cylinder head, also New footpegs and New kick starter and brake pedal, so keep watching carpyscaferacers.com and see how we go.