Blog
The Matador – A 1978 CB750K that needed some TLC
Nov
Well, after 25 years here in Southern California and creating over 50 machines in many guises, each old resurrection I try and get into and finish a non-running left alone Honda, becomes harder and harder to know what to do with her these days, but if I found super clean models, then I could just retore them to their stock configuration – But that’s not the case most of the time, as I usually have basket cases, boxes of old parts that I have picked up over the years and then some people that want their old 500 pounder out of the garage as the wife cannot get to the dryer anymore without tearing a pantyhose etc. So, every time I drag a rolling frame home, or a rusty pallet of old parts, i try and decide what i shall create and also name as the bike always has to have some sort of title, of which i can then remember if somebody enquires about a machine that I built years ago.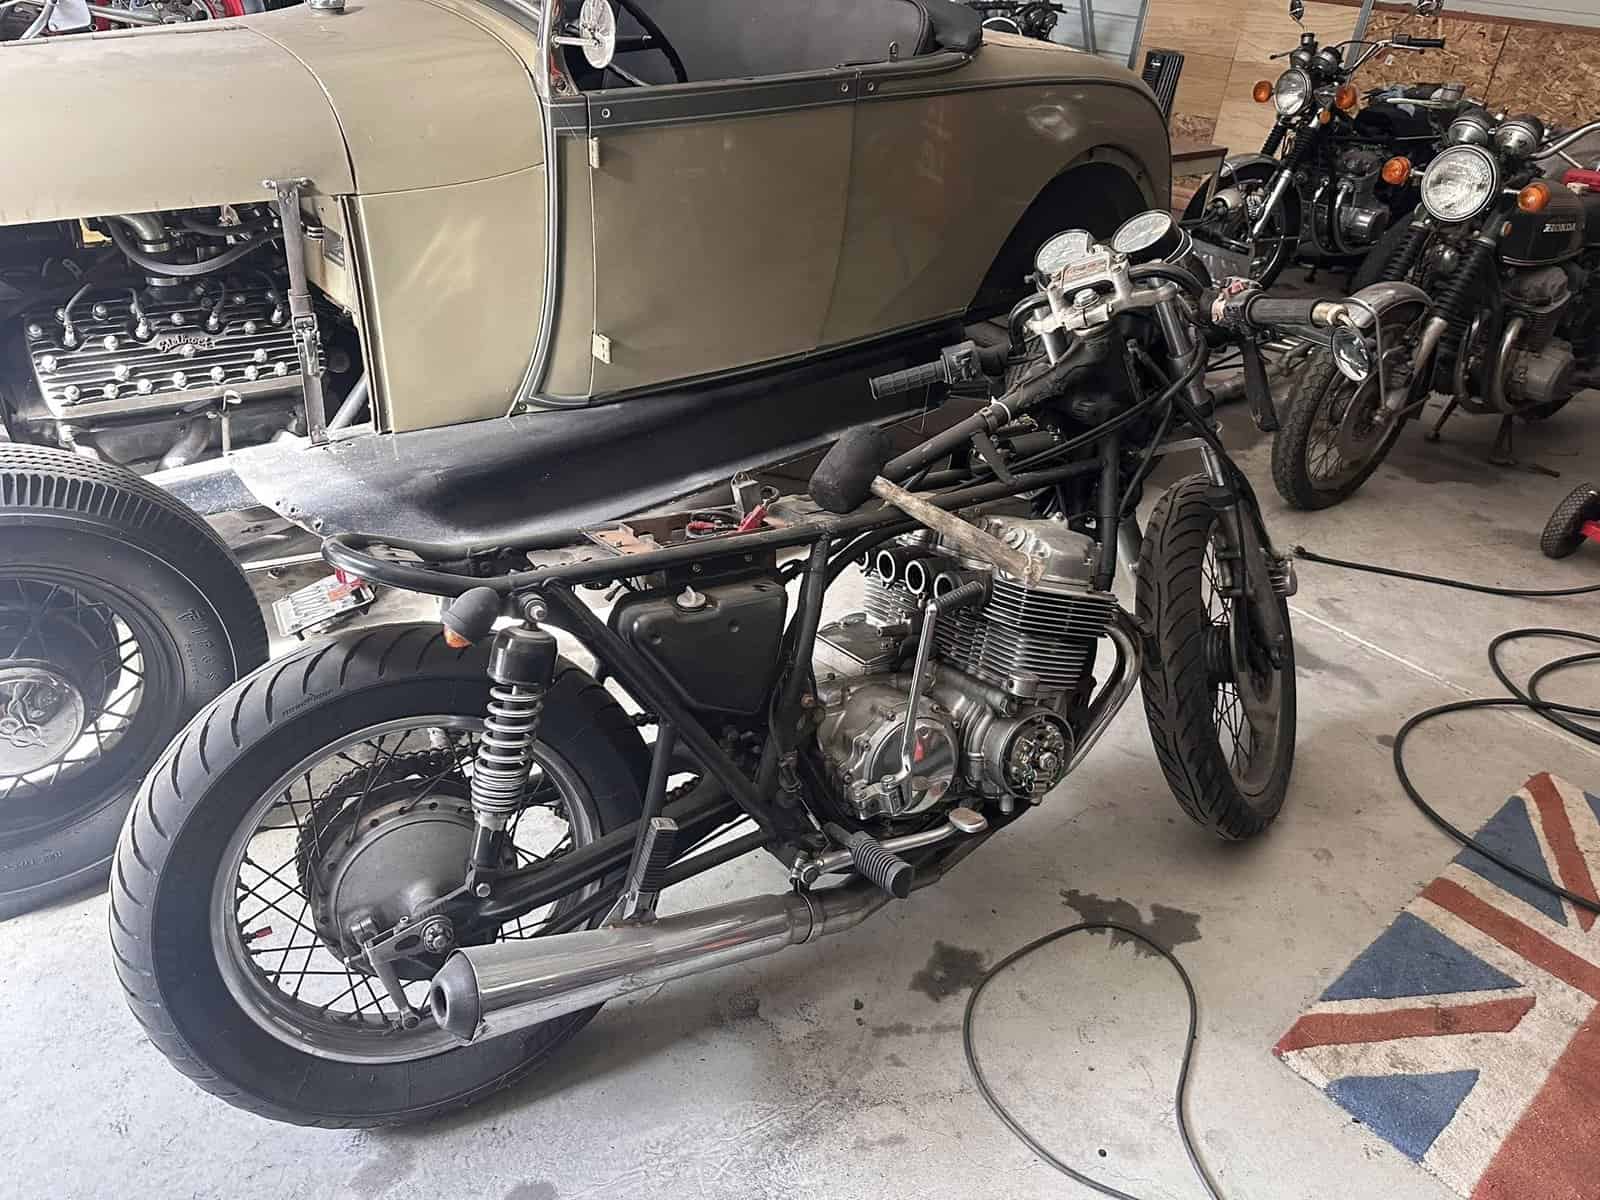
So, this old girl is no different and I wanted to try and resurrect this machine without going all out and powder coating the frame etc, maybe a cool affordable bar hopper that is fun to ride and park anywhere/ Well that’s what I am thinking about this machine that you see here on my blog. She was left outside to the elements and is in need of a good old clean up and I shall pull the old wiring out as it needs some love and attention. And, as you can see, there is a lot of bike there, I just need to figure out the condition of the motor and of course, what direction that i am going to take in building this machine.
I have named this bike the Matador, as it will take on any Bull in the ring and swerve out of any bad situation, I want this to look like a strong daily fun rider that literally anybody can ride and be a fun, affordable Motorcycle that onlt brings a smile to the many faces that see the bike getting around the towns and city’s of where they reside.
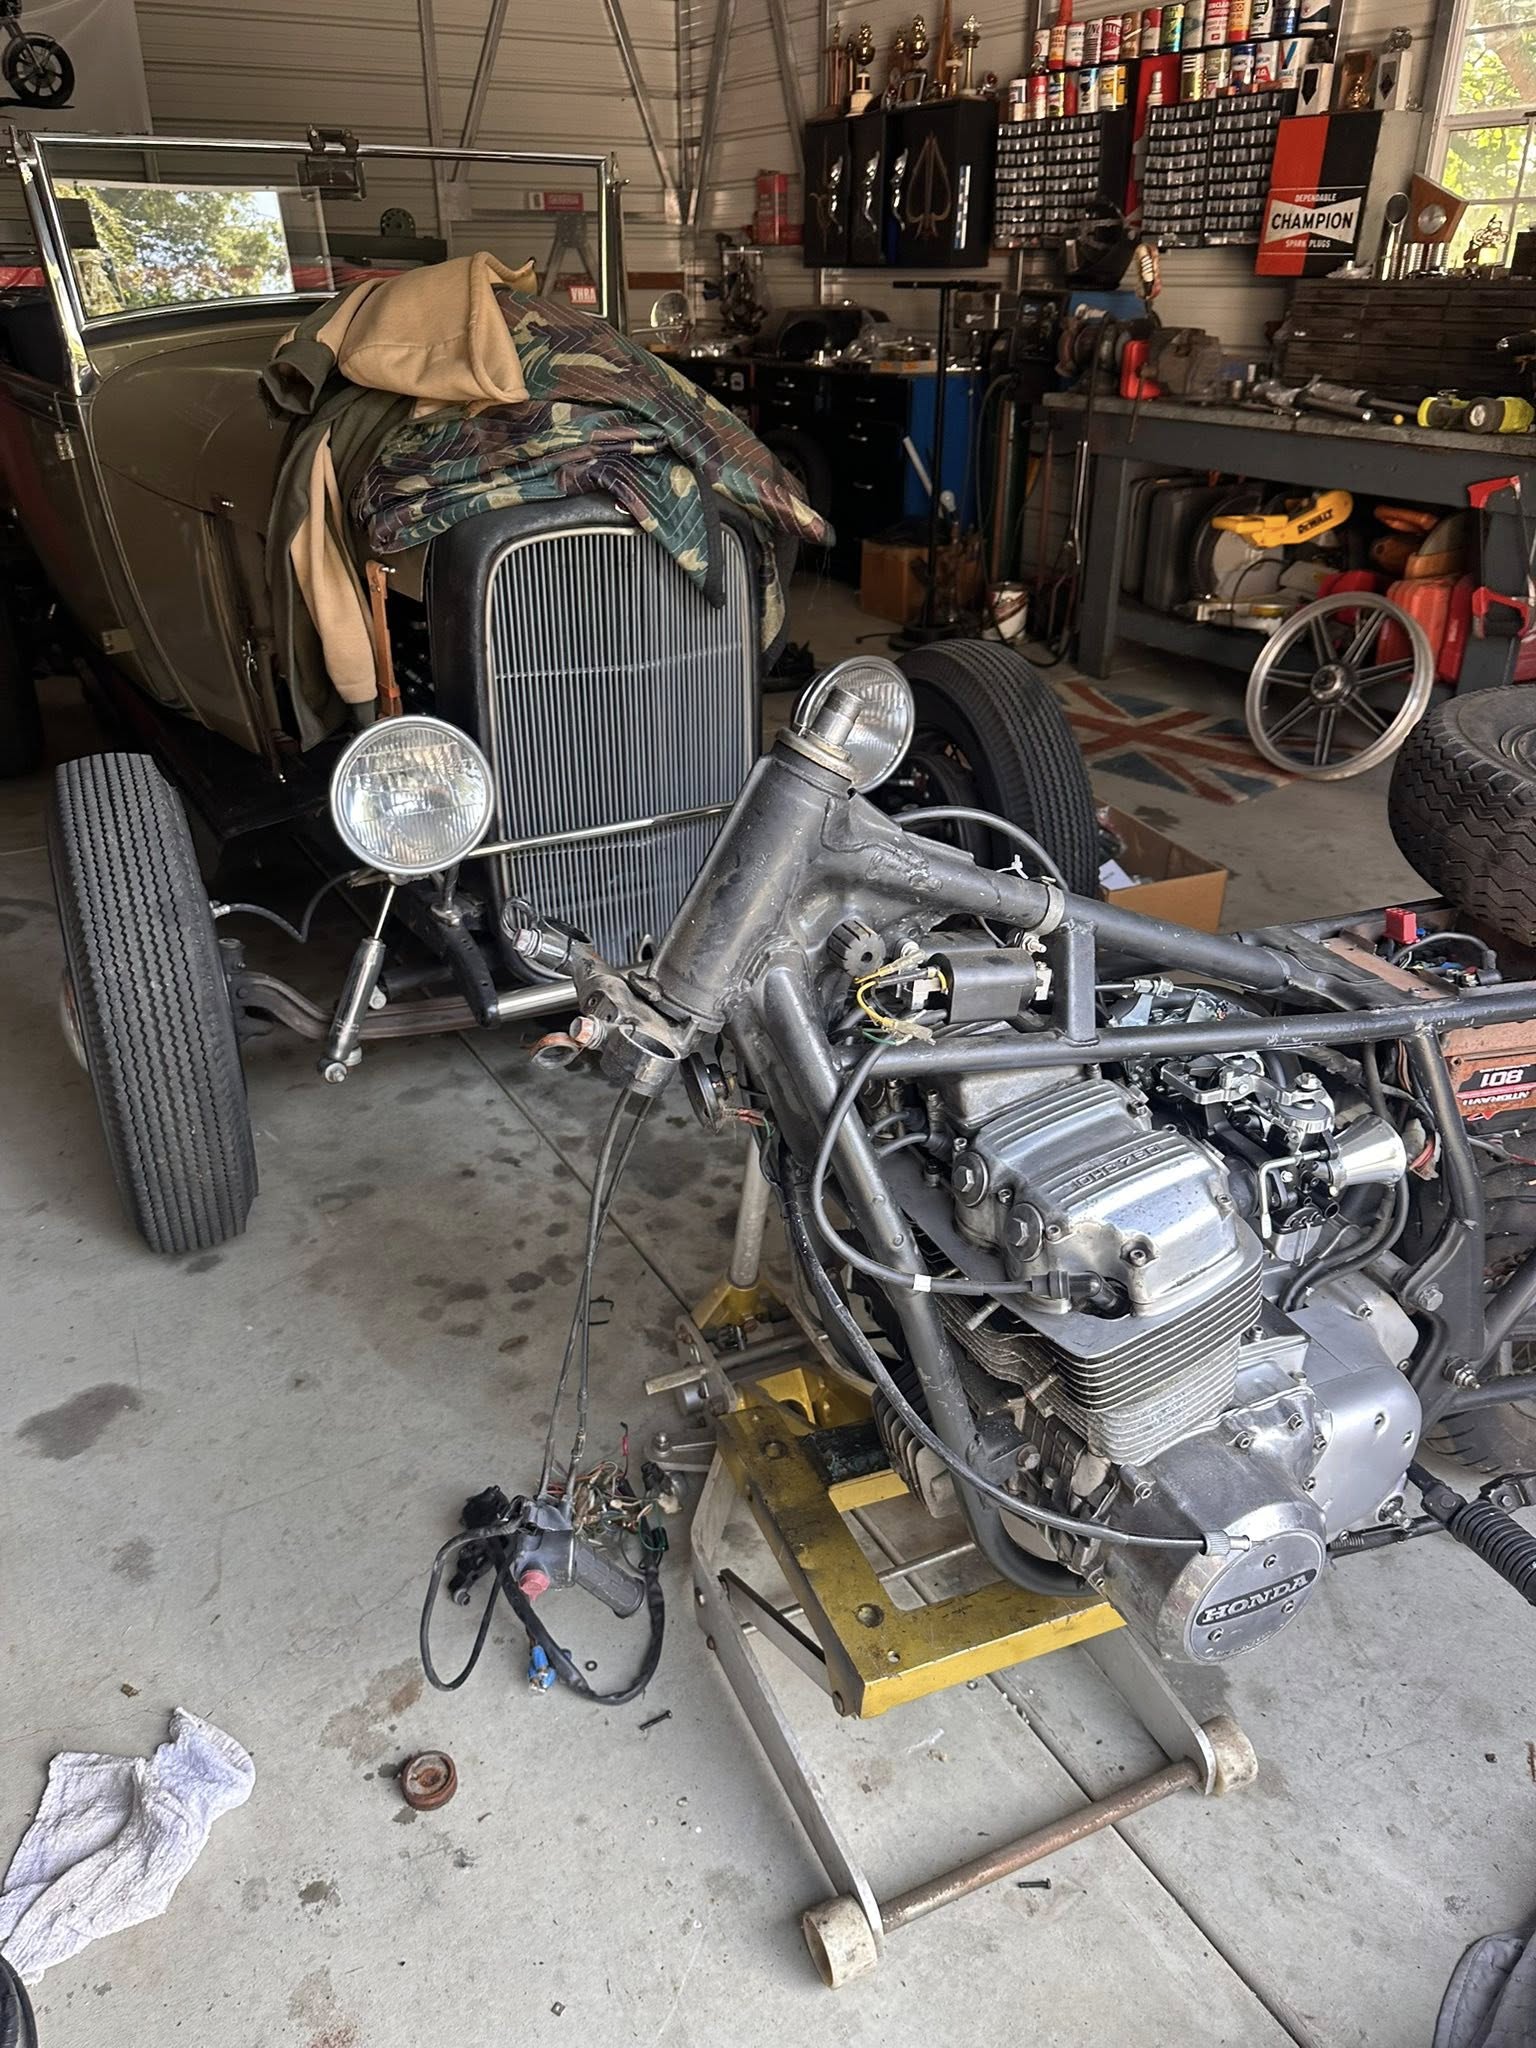
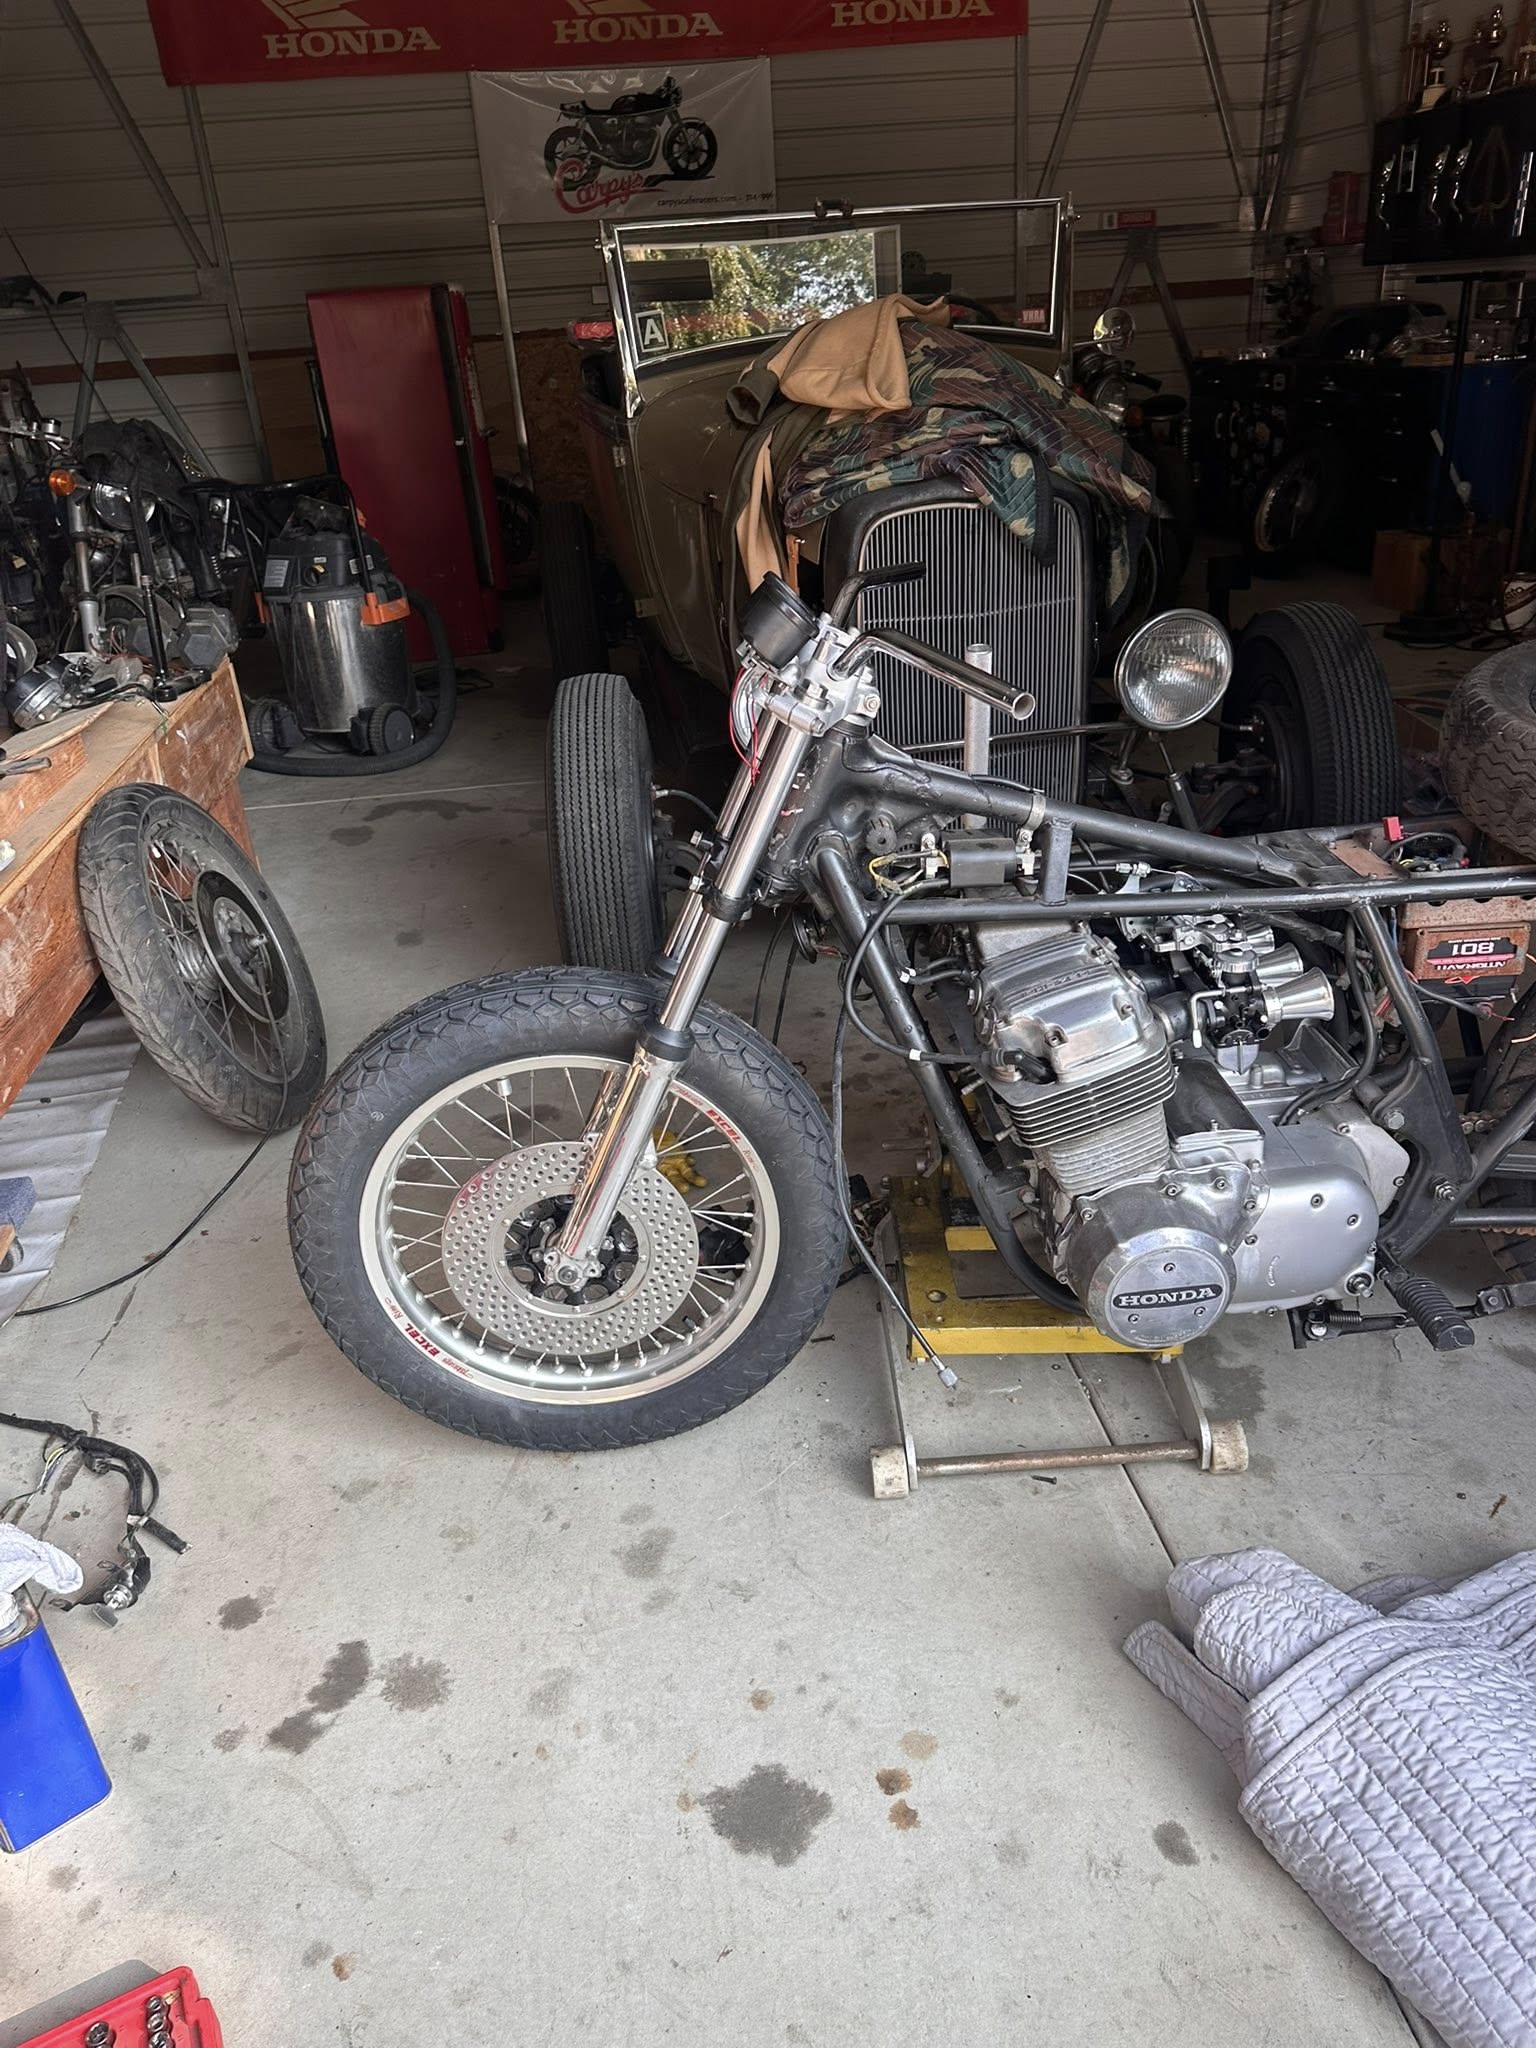
I think what I am going to do is jack the bike up so I can tear the front end out and refurbish the forks etc, as they have seen better days and I have some new shorter fork tubes that I can insert and fit some roller bearings to really make the bike steer like a hot knife through butter, as the old bearings are binding and notchy, so whilst i remove it all, I may as well give her a good set of New bearings and grease.
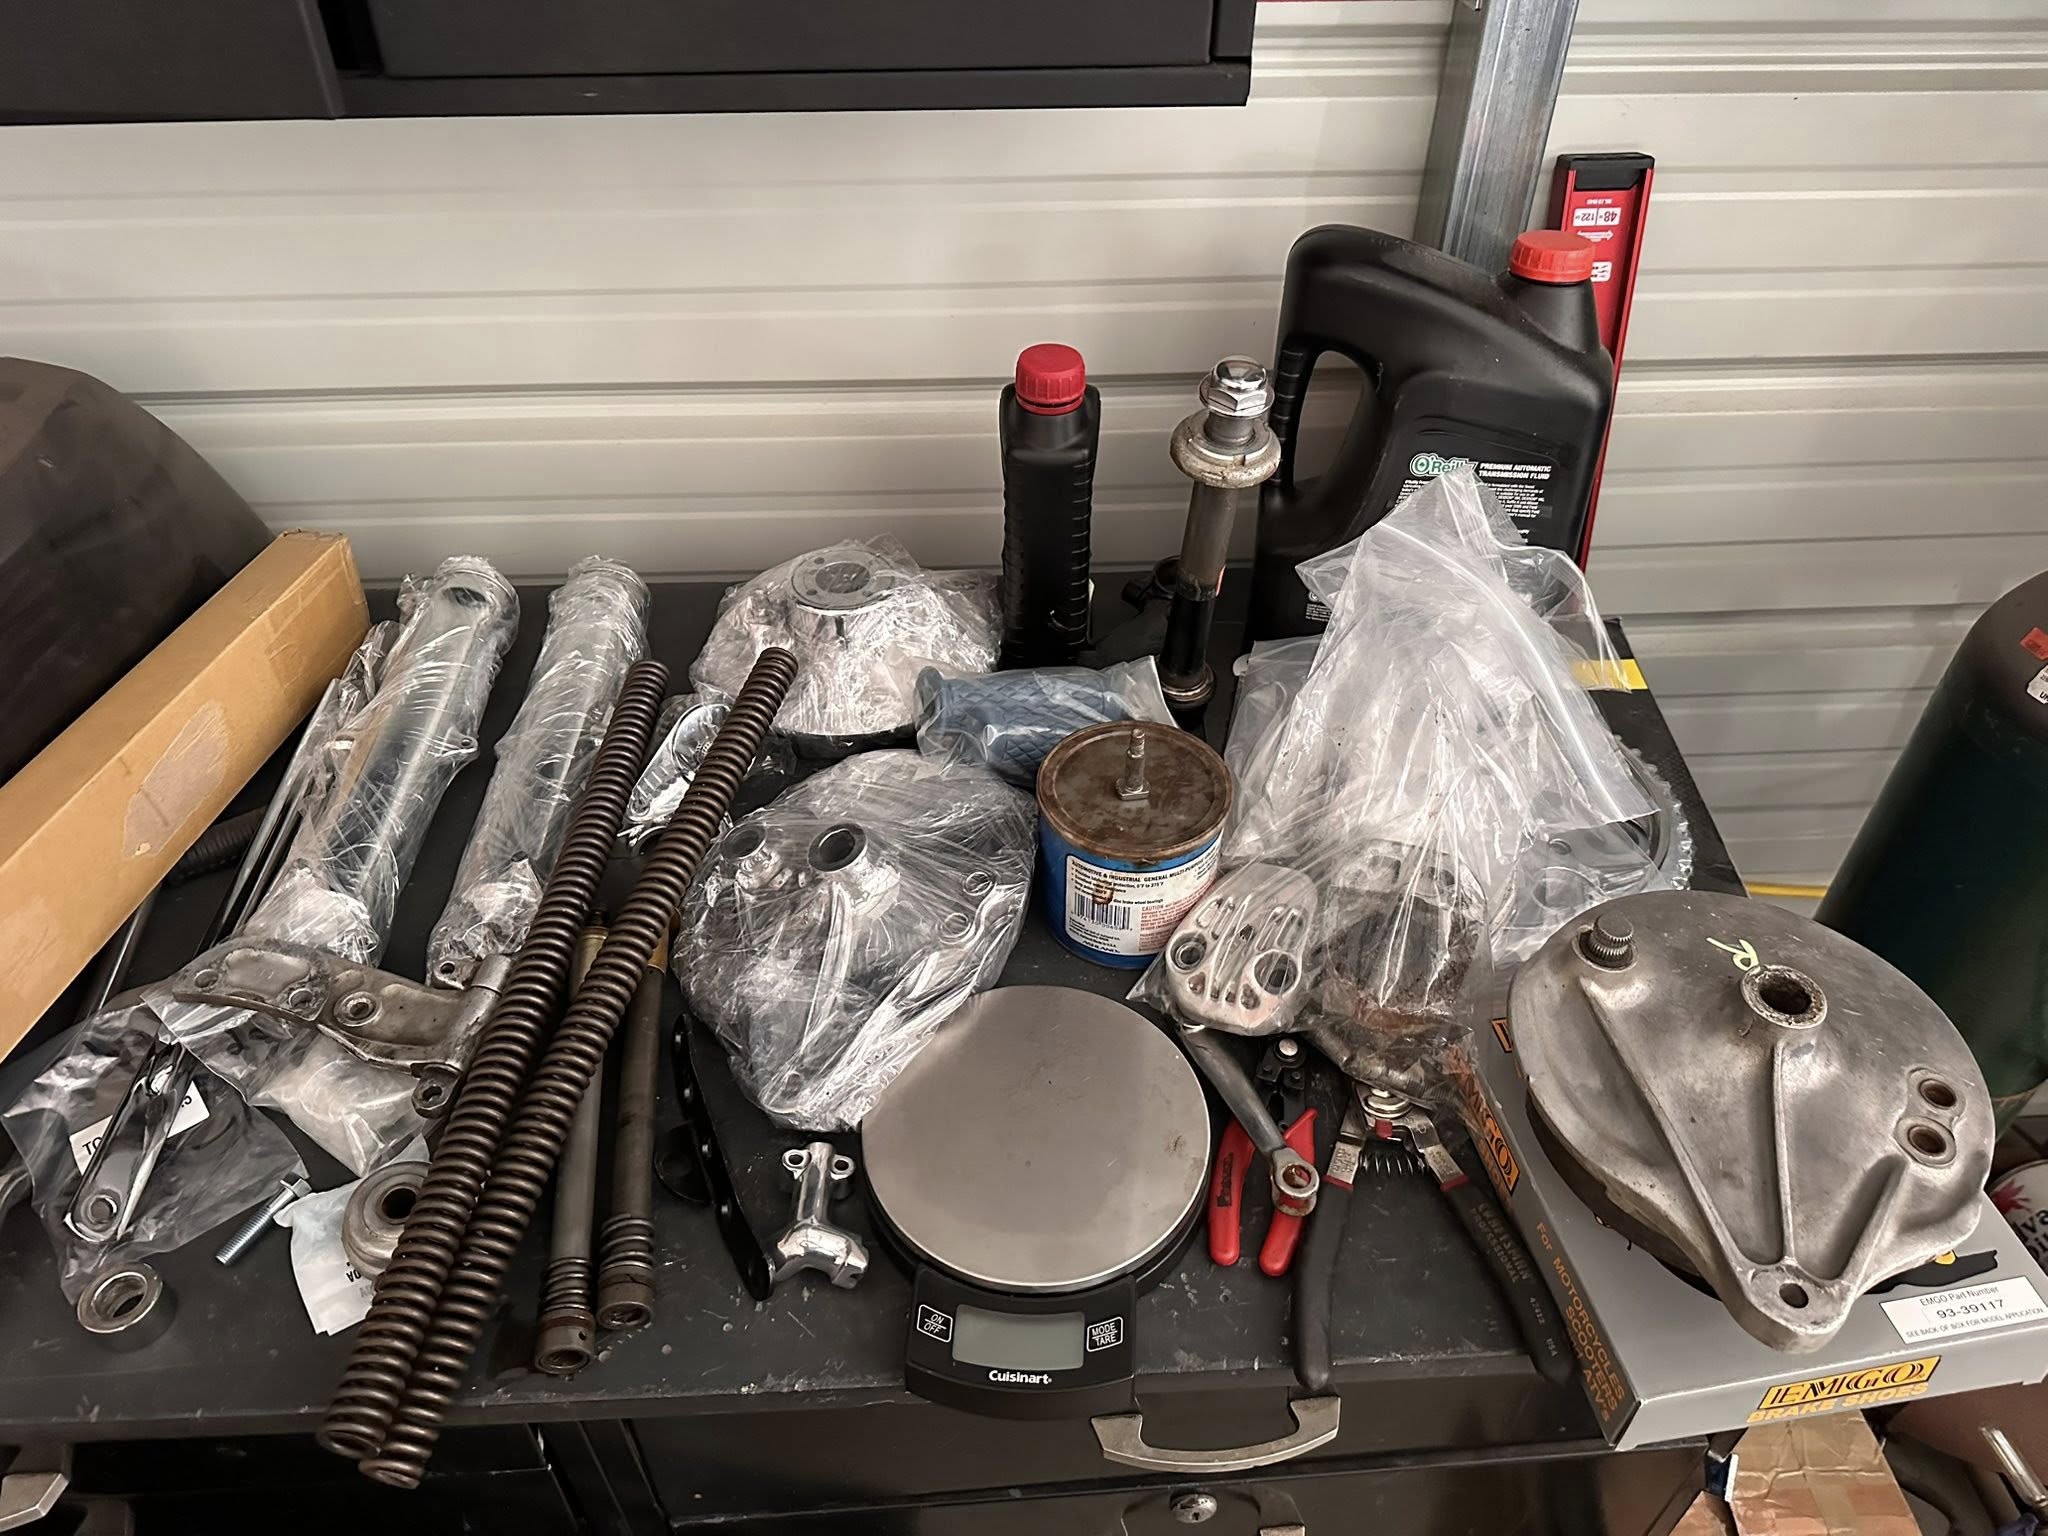
I have a bunch of parts I needed to polish, so got on with that and made a pile of parts on my bench in my barn, so i can simply just get on with a front end rebuild and not be hunting for parts whilst the frame is precariously balanced on a hydraulic jack. I even have an electric scale so i can weigh out my fork oil, well, I use ATF to be honest, always have, just like the race guys did back in the day.
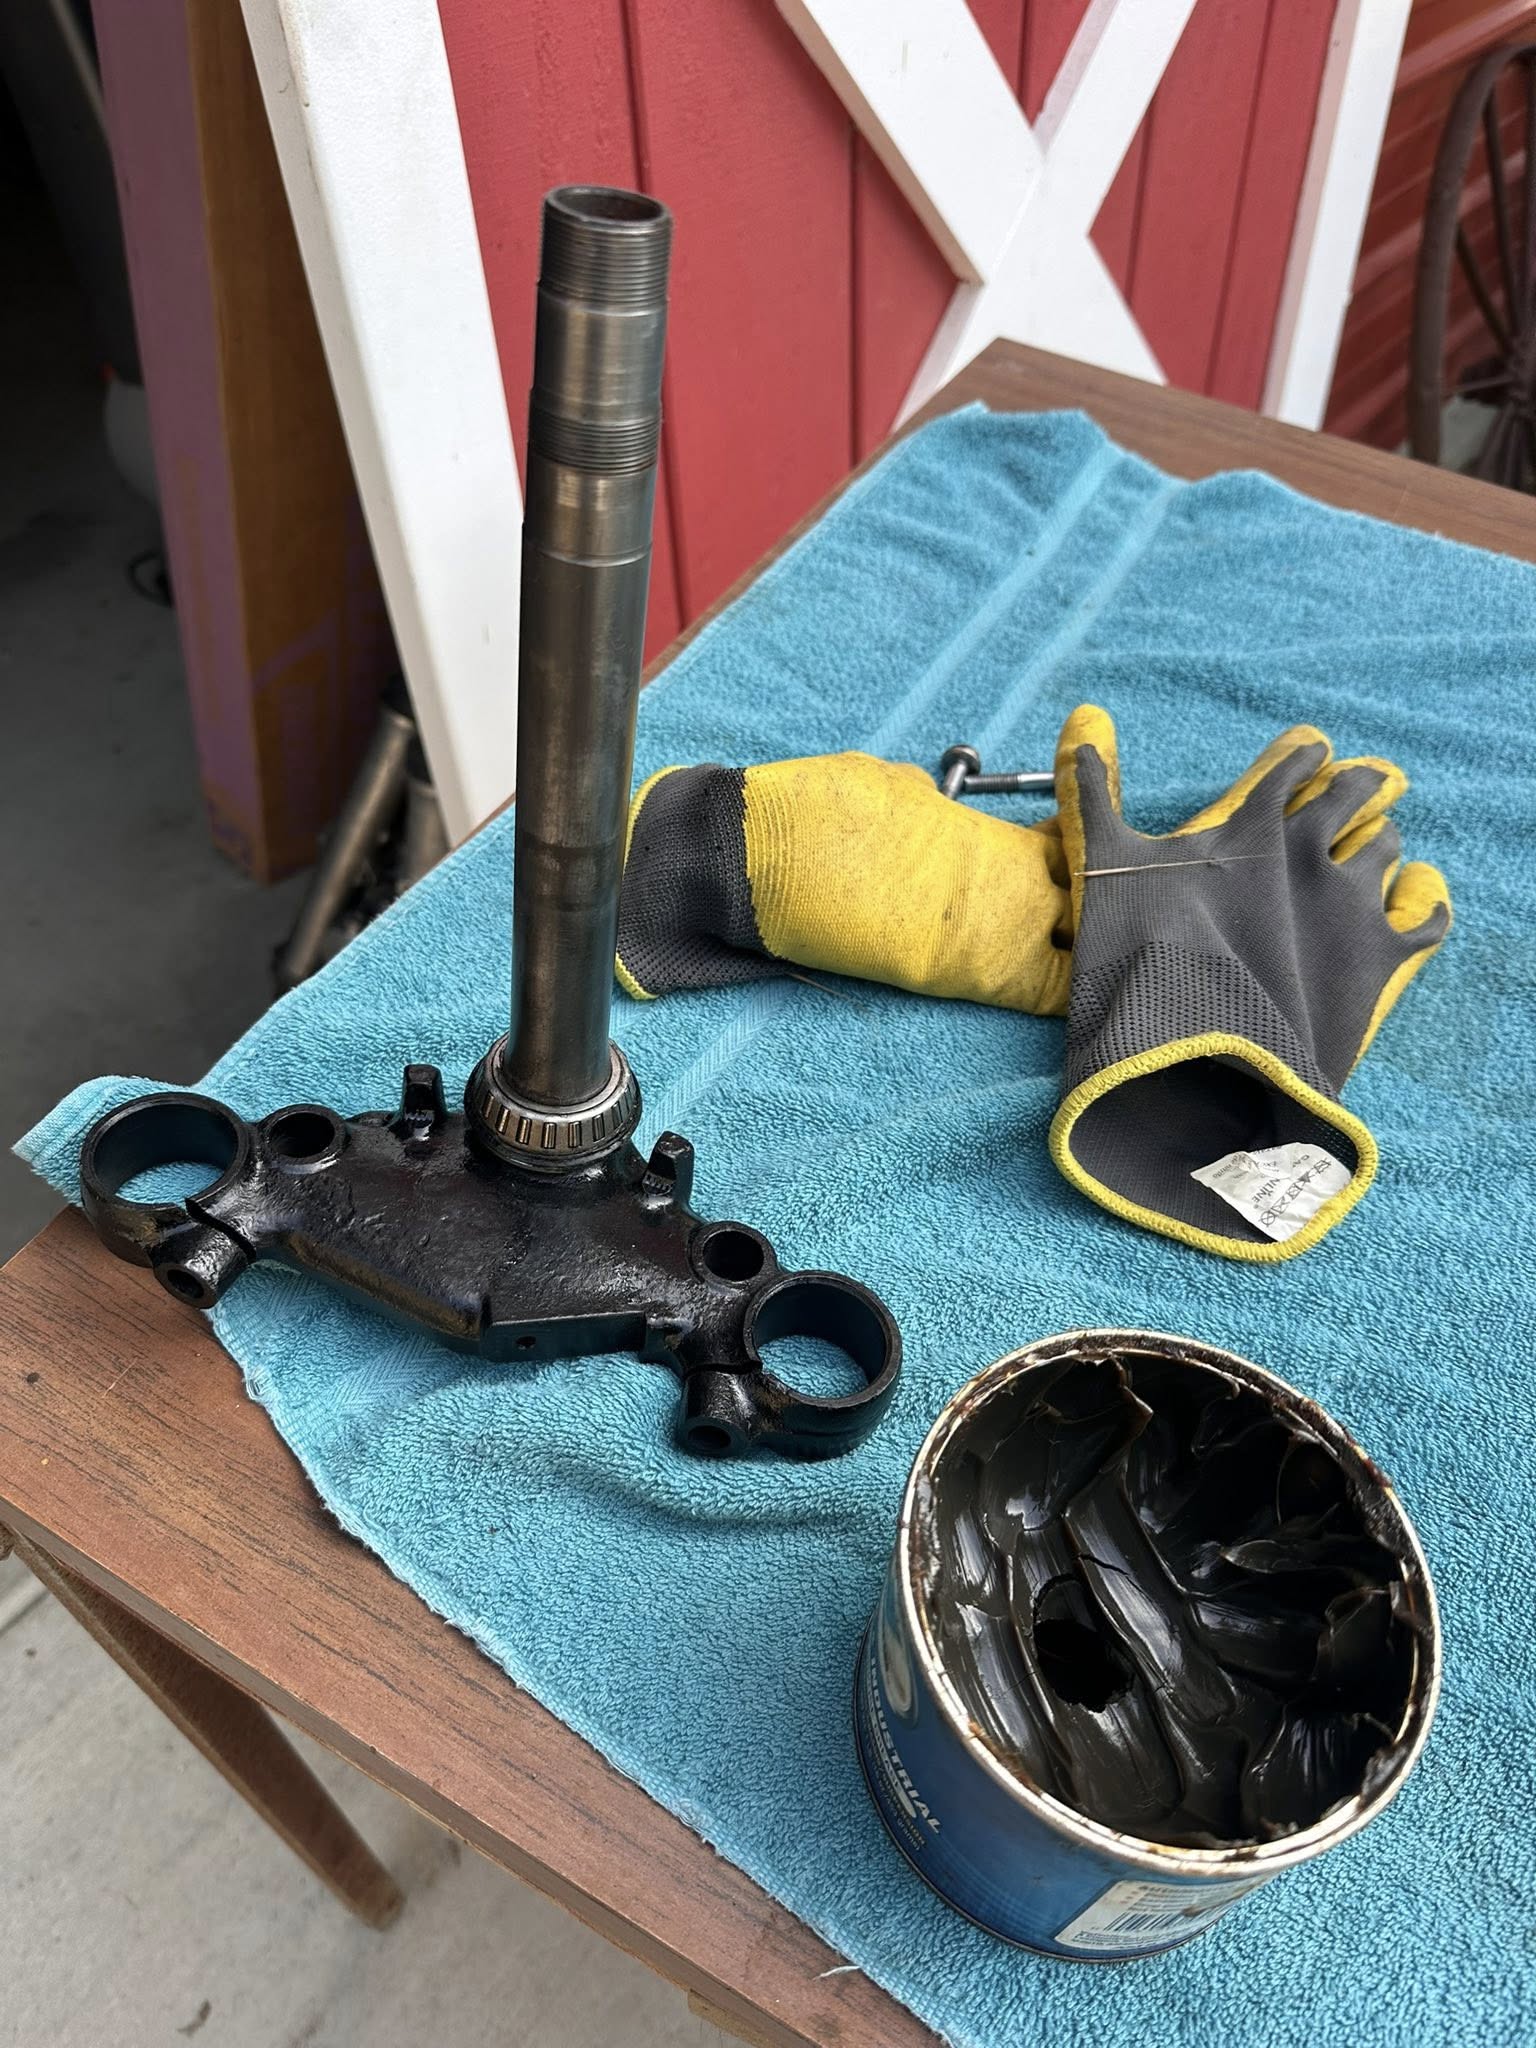
bearings in place and now a good dab of grease into the race in the frame and around the roller bearing, this is a 1978 CB750K front end of which I cleaned up and am now ready to assemble back into the bike and get that part of work out of the way and a tick of the list of many things that i have to try and address.
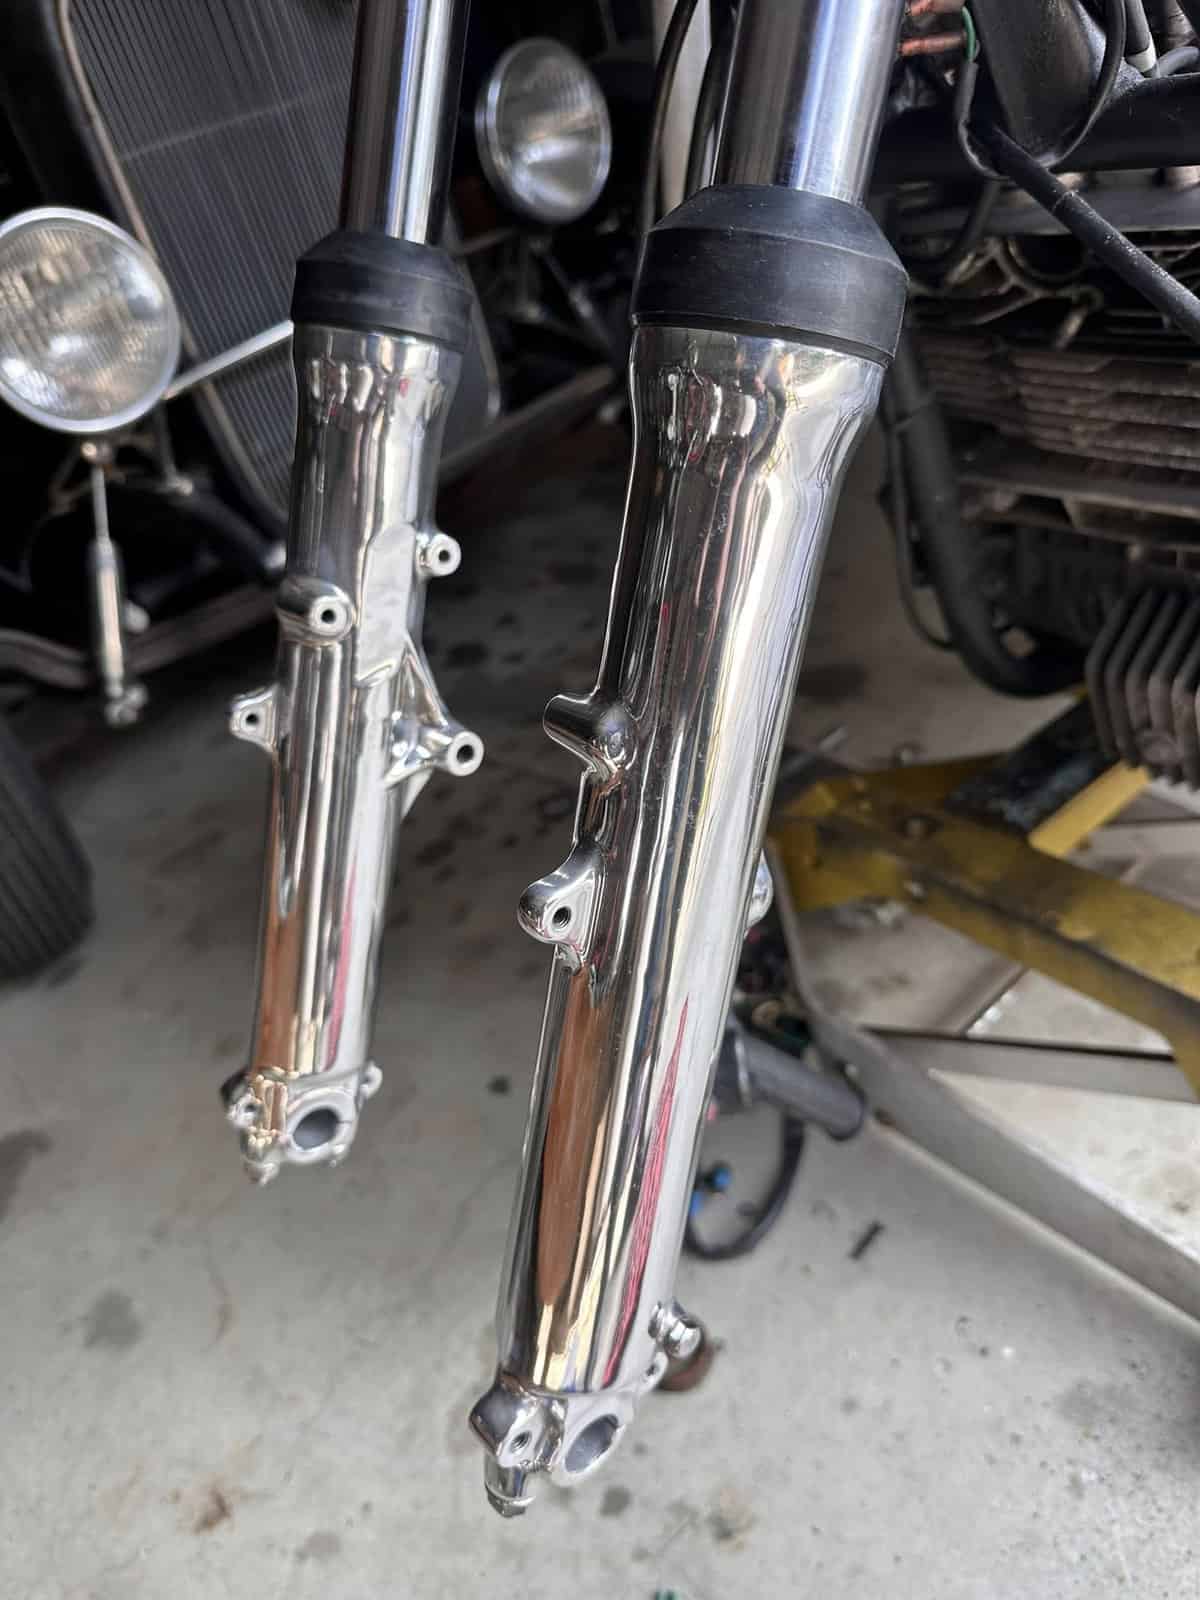
That is so much better and many years of grime an road dirt have now been removed as I polished these right here, then fitted new fork tubes which are 3 inch under in length to slam the bike a little more in the front, added new seals and dust caps too, I am loving this now and it steers so smoothly as it should.
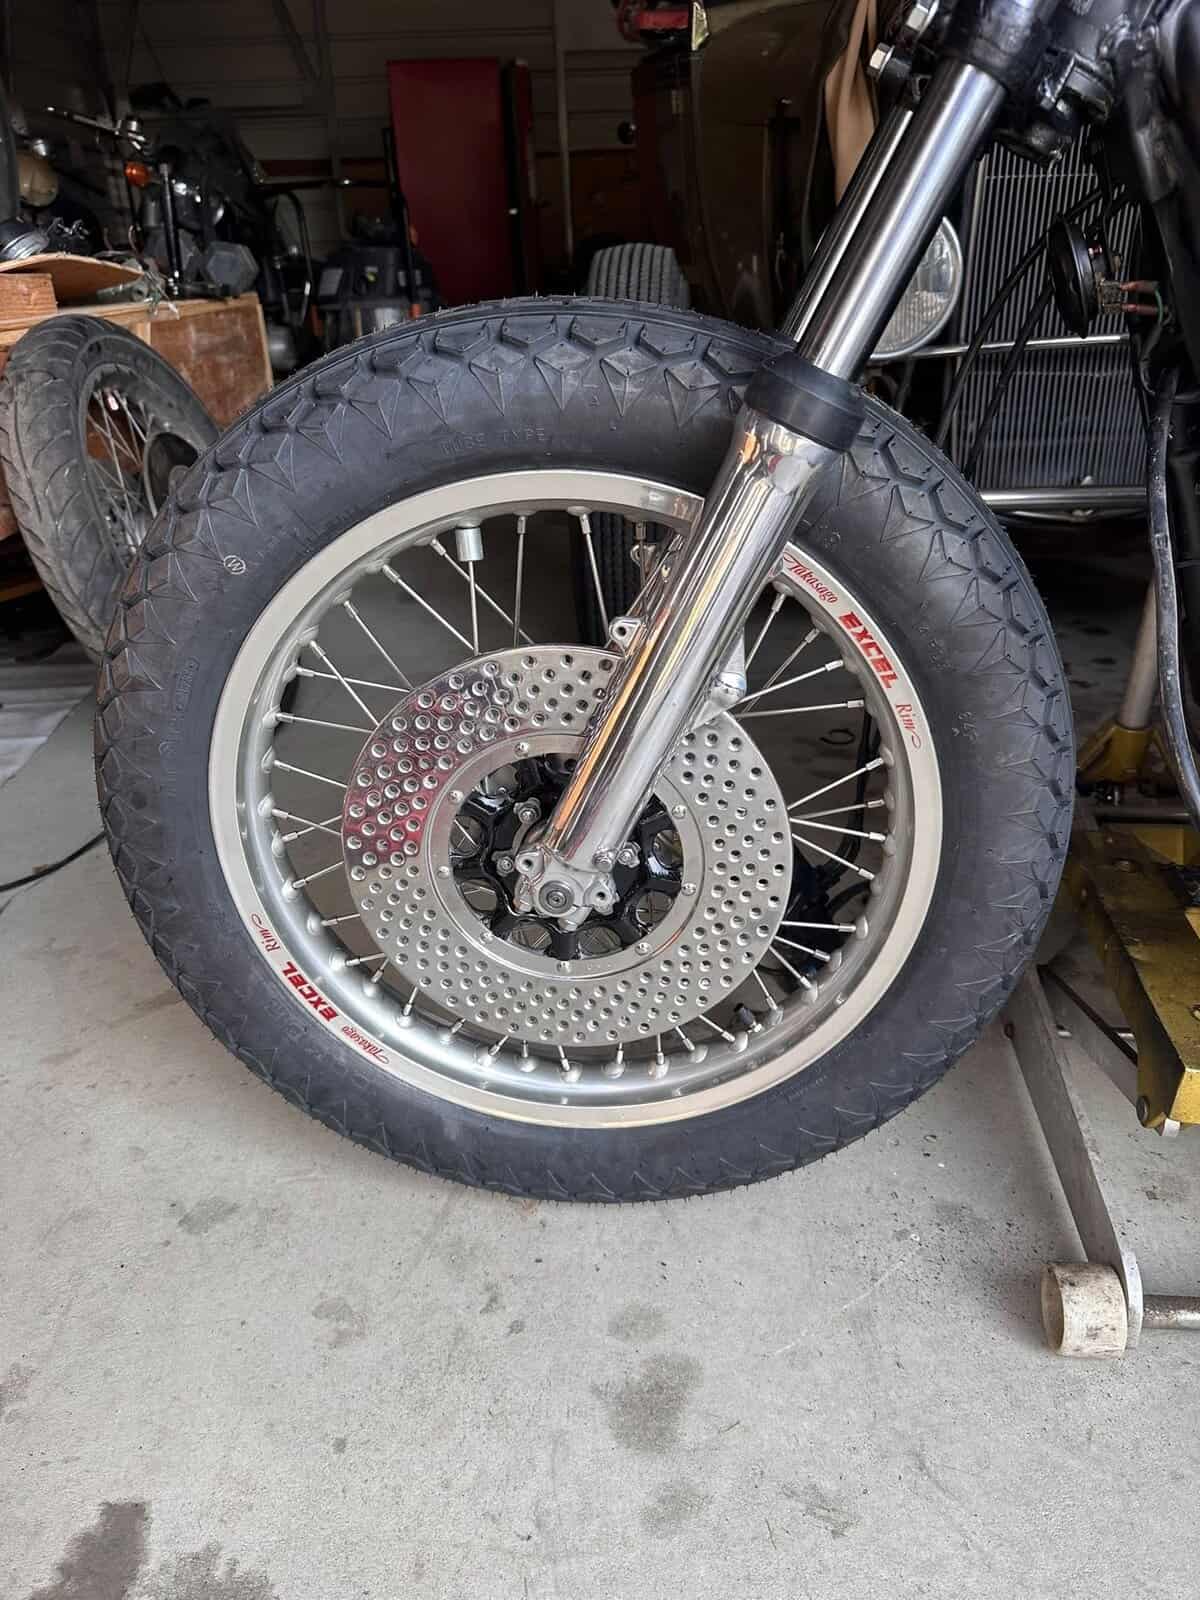
This time I wanted to have this a little beefier at the front, not only did I get rid of the old front wheel, I rebuilt another but used an aluminum Excel rim and re-spoked the hub, then drilled the brake rotor and painted the center black like factory, its a nice contrast and that Fat Diamond treaded tire is so Nostalgic and am glad that i went in this direction.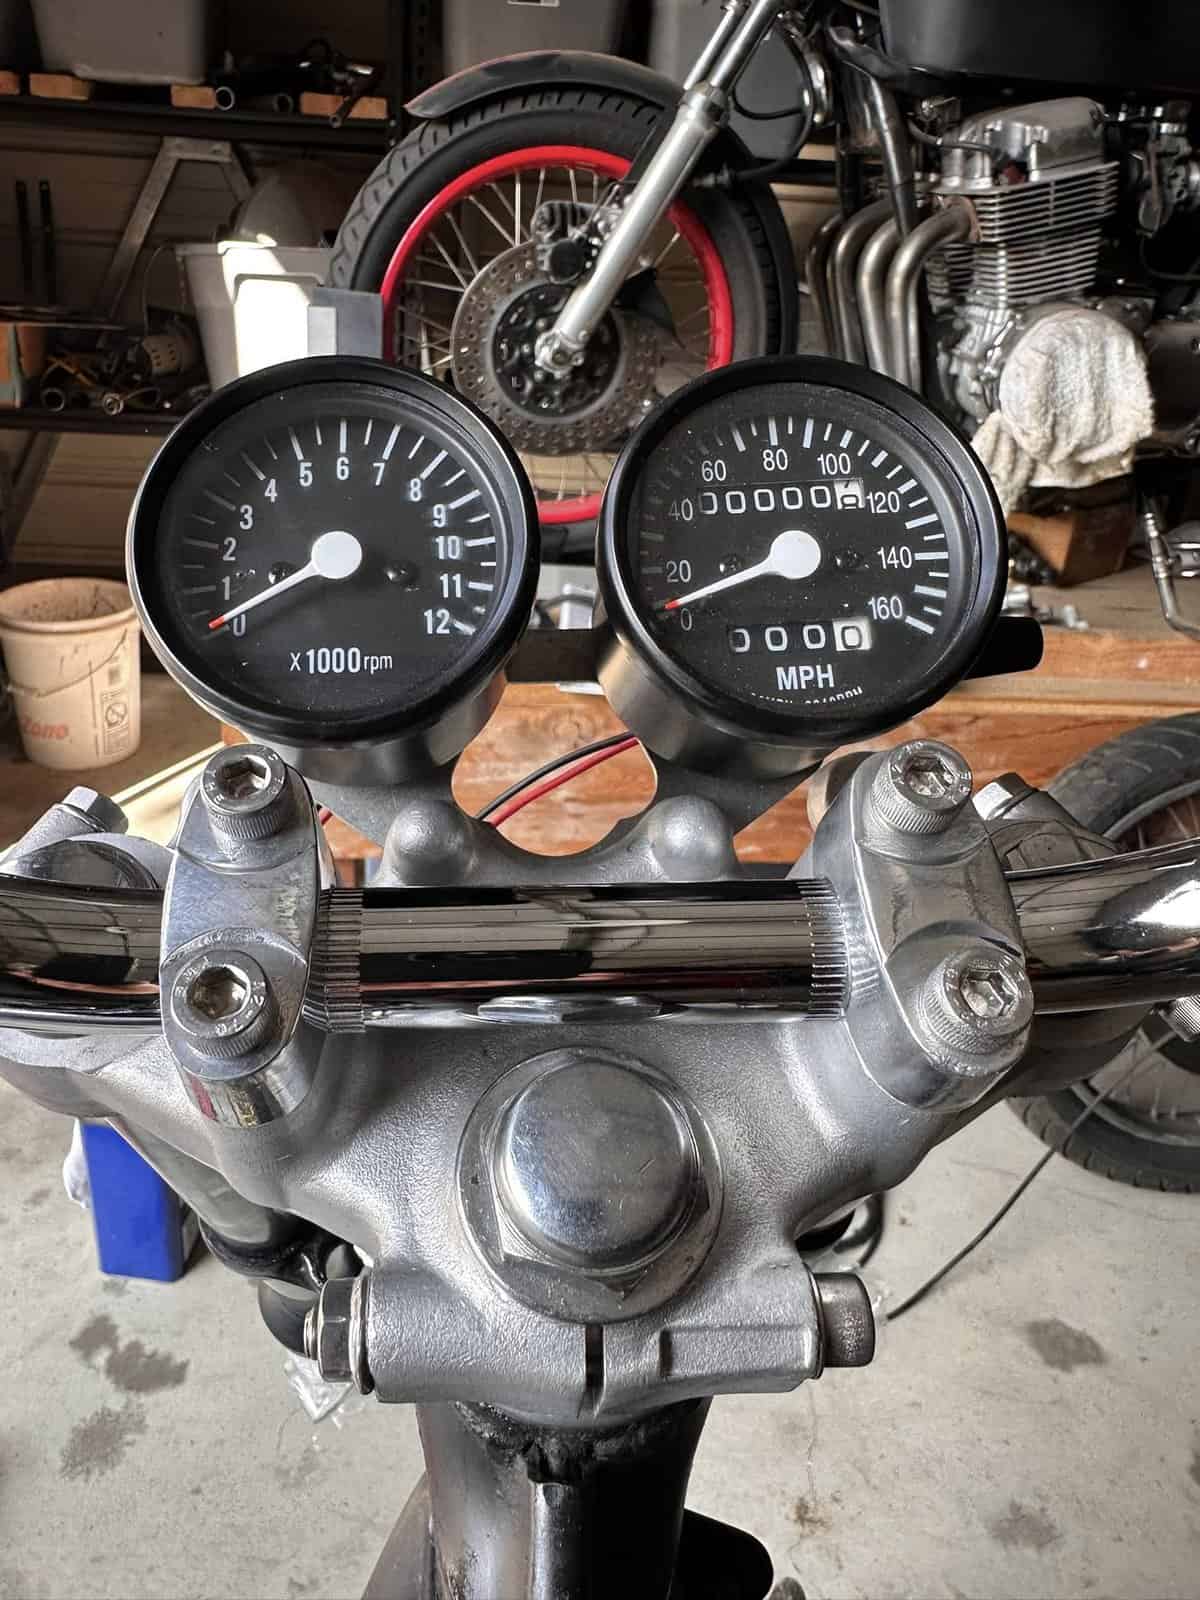
I vapor honed the upper triple tree for a cleaner look, fitted a set of my own Chromed handlebars and hand polished the handlebar holders, after that I fitted a new set of Black 2.5 Mini gauges to clean the top of the bike up as I am not a fan of the huge gauges on a custom machine if they are plain stock, and believe this is a tidy set up for what i am creating, but each to their own when they build there’s, I just like it with these smaller gauges in this particular build.
Now we are taking some shape with this old CB750 machine and I am happy the way it looks up at the front of the bike, it may not be your cup of tea, but thats what makes us all a little different.
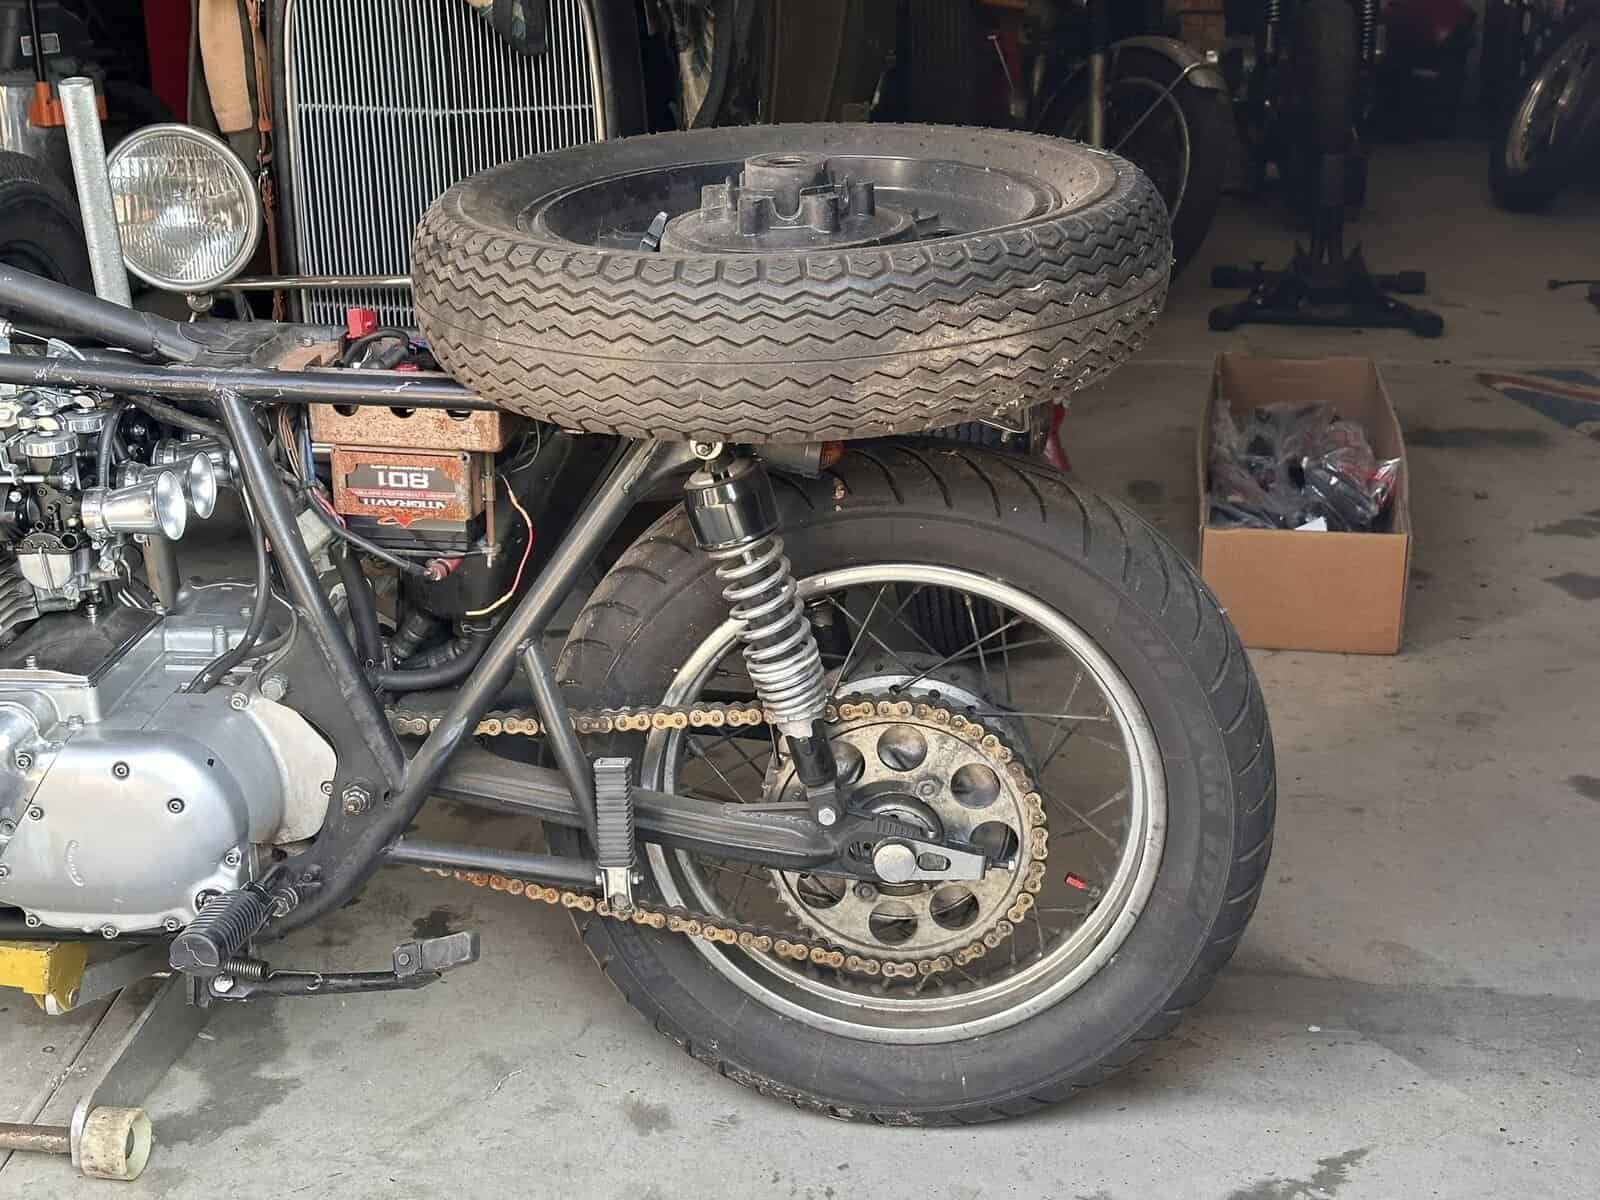
The rear wheel was bugging me, as it has seen a better life and now that I have a New aluminum rim up at the front end, I may as well build one for the rear so it all matches to some extent, so it was time to remove the old 17 inch stock rear model and build a fresh 18′ alloy version.
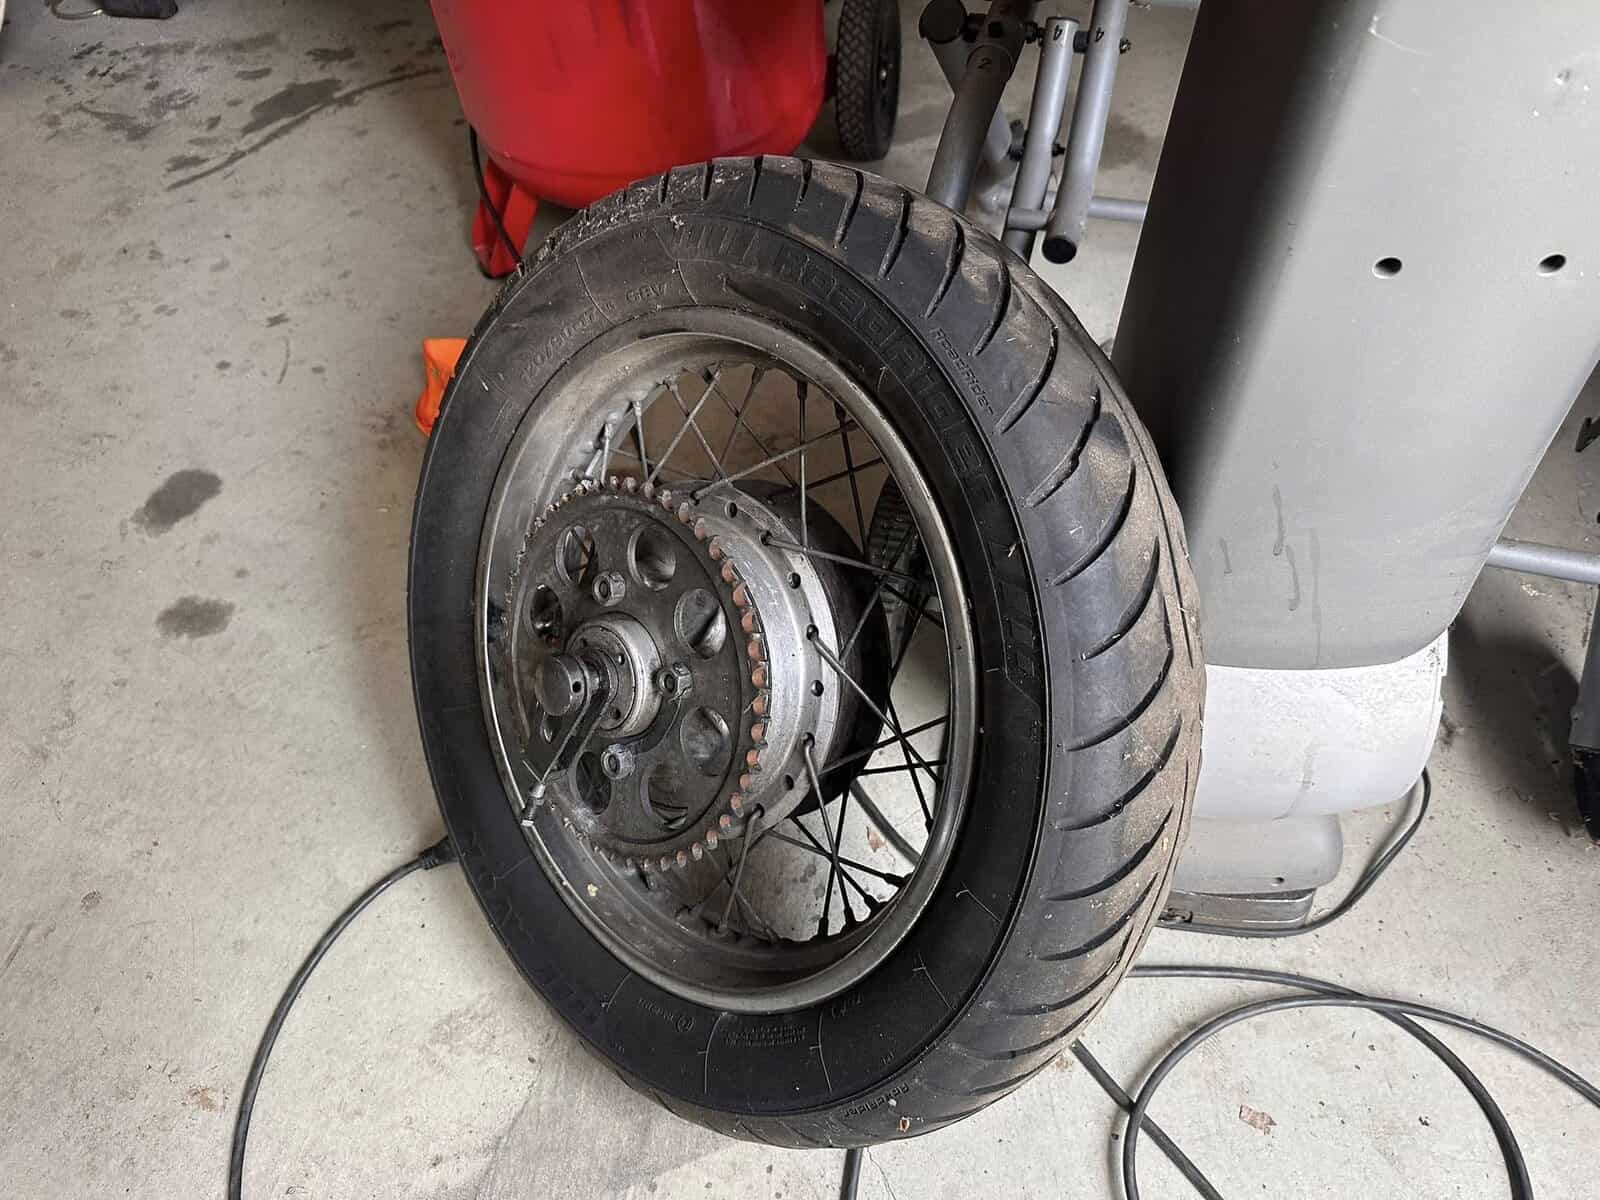
I forgot how heavy these rear wheel are, especially with 40 pounds of old air still in the tire, but I got it out of the swing arm and got rid of the chain as it was rusty, now this will have a brand new set of rims to give her a new look.
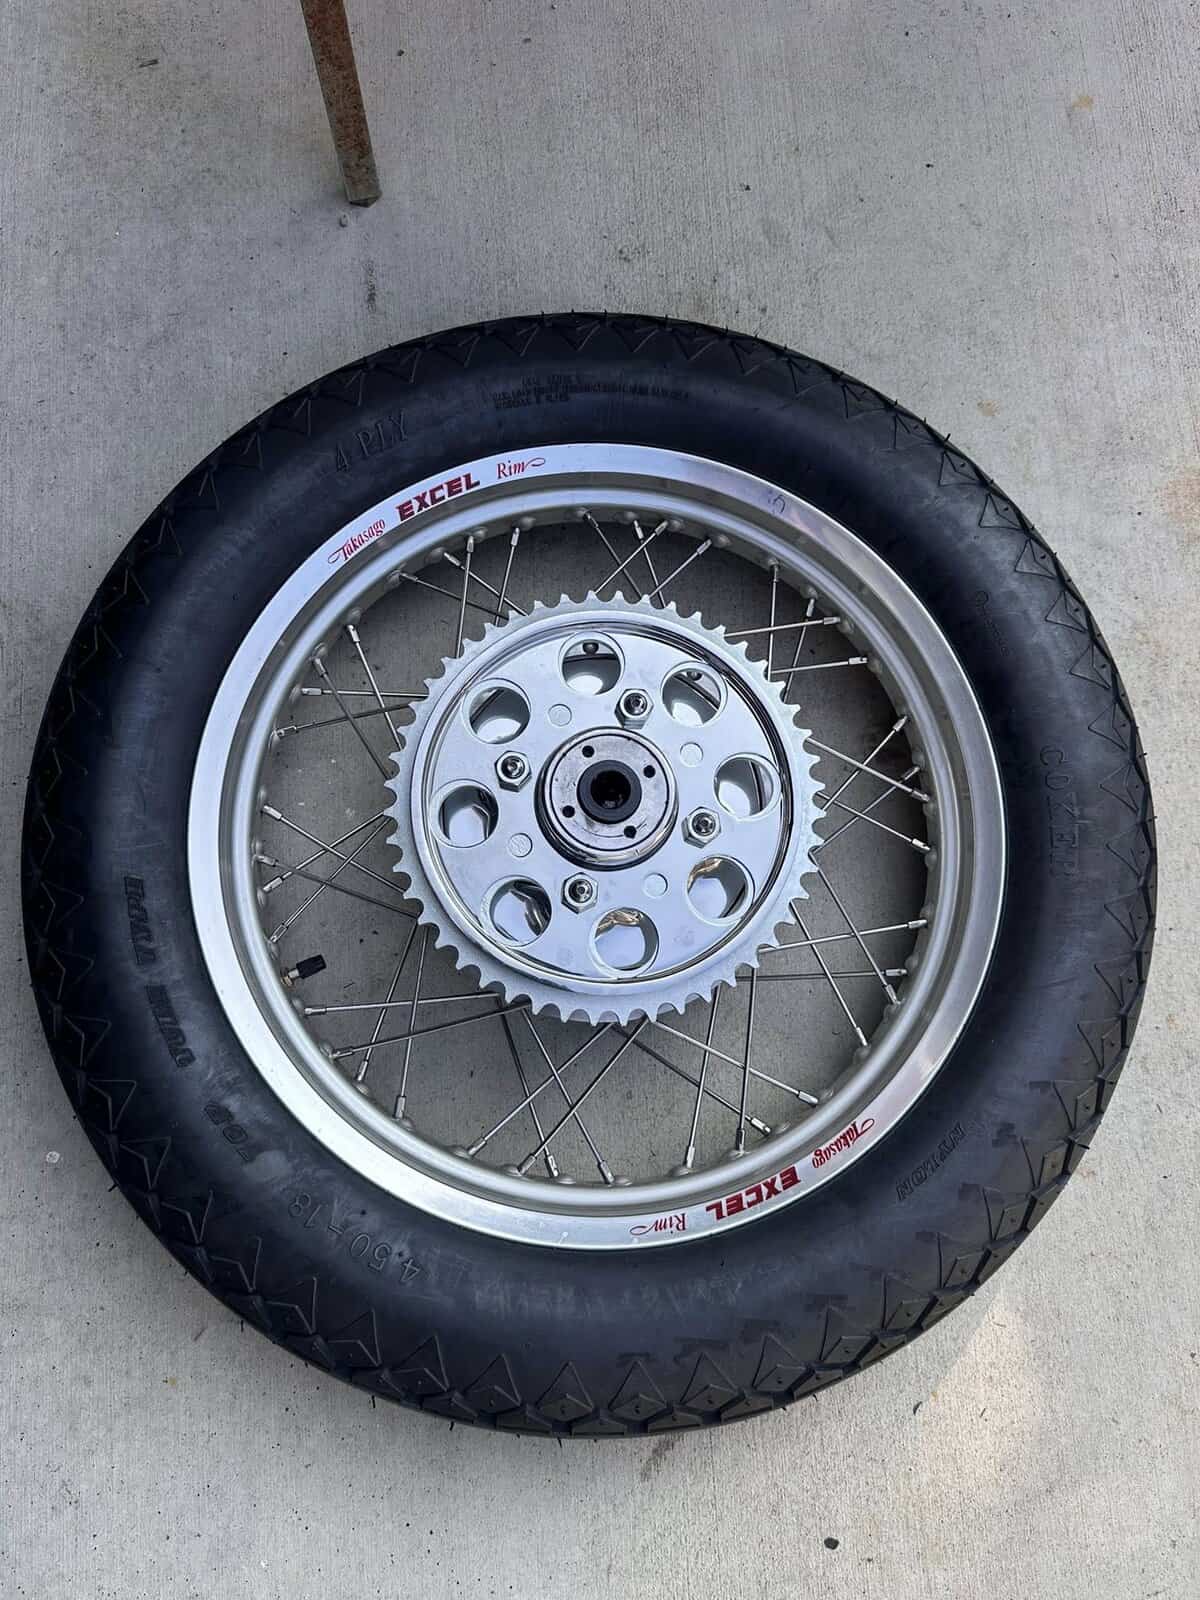
New spokes, polished hubs, new sprocket and I chromed the safety guard to make this stand out, as I am going to fit a New colored chain as I had a spare one in my cupboard here in the barn, so may as well use it right? New sprockets and chain is always a must for me as I have no idea how the bike was ridden before I acquired it and if these bikes lose a chain, it invariably causes engine case damage if they do snap as it will spool around front sprocket and then your case has a big hole in it, and I have seen many JB welded over the years as they didnt have a tig welder at hand.
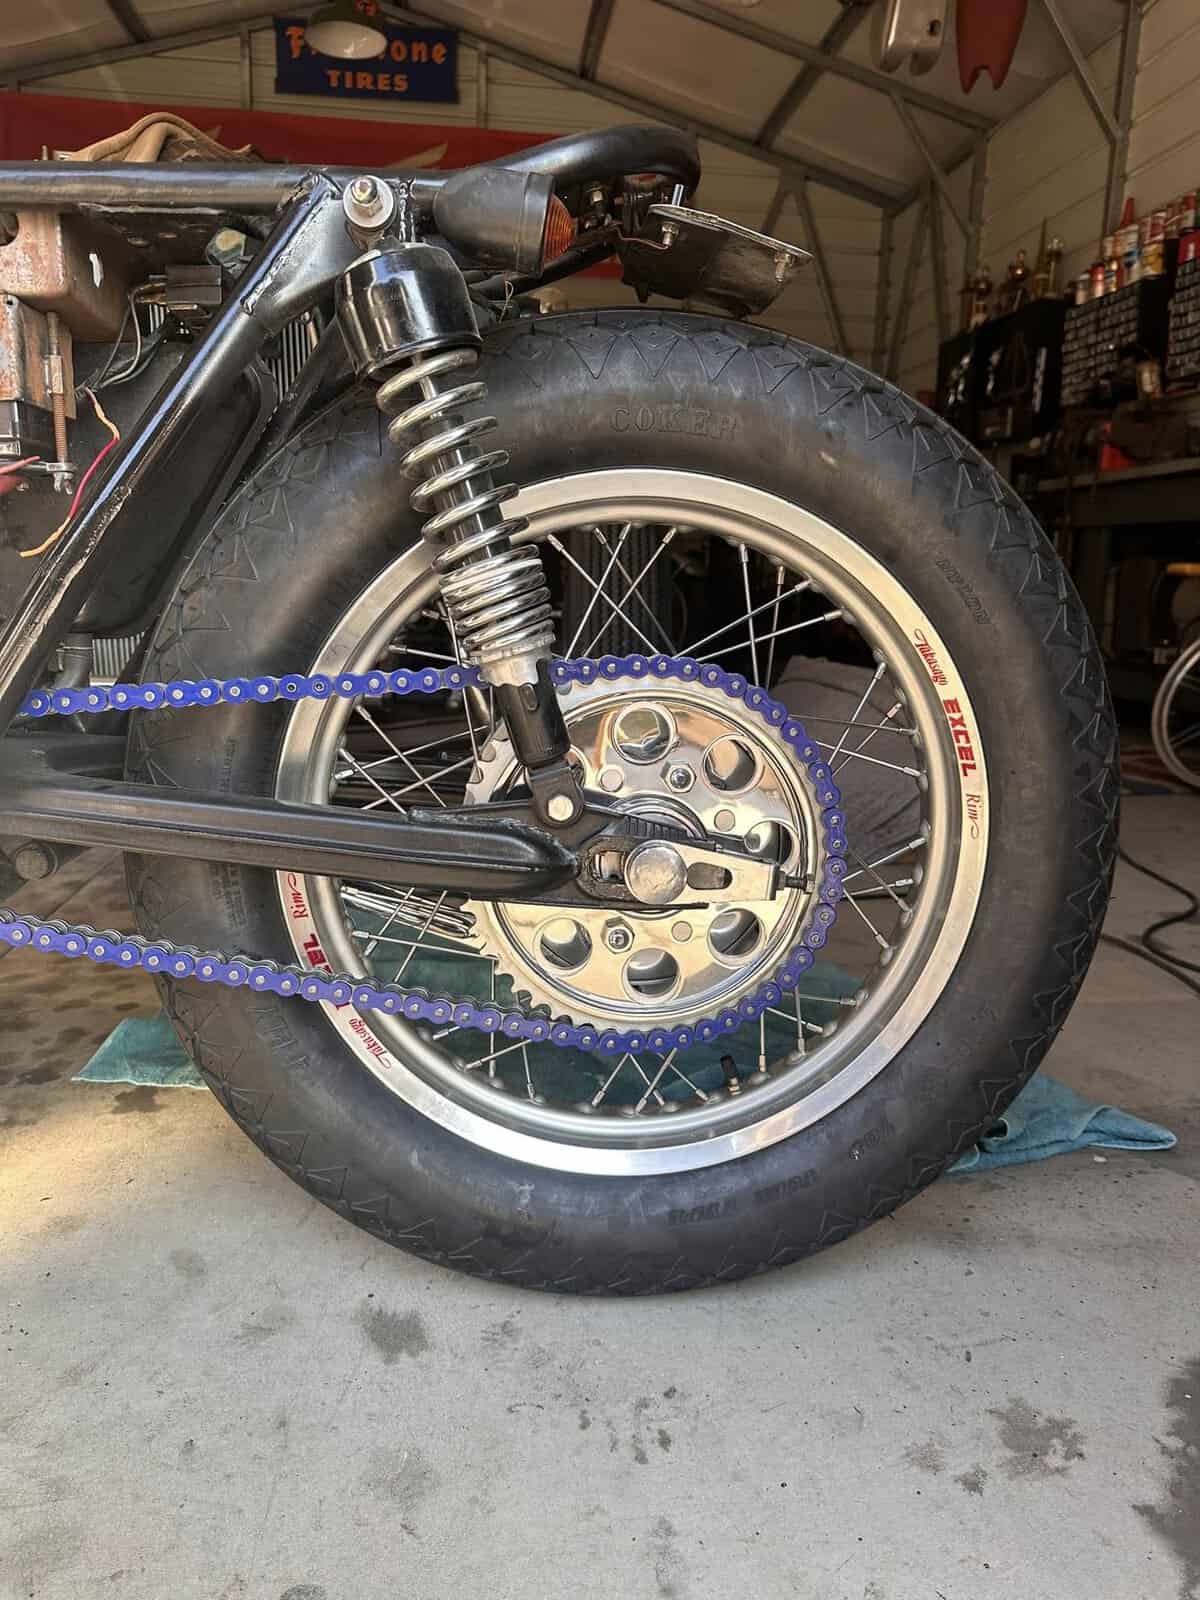
That’s a lot better now, not sure if I am going to keep the rear shock’s yet, they work pretty good though, but this bike is coming along well, although a long way to go before i can have a ride around here on it, but I am enjoying this creation of the old 1978 CB750K Honda.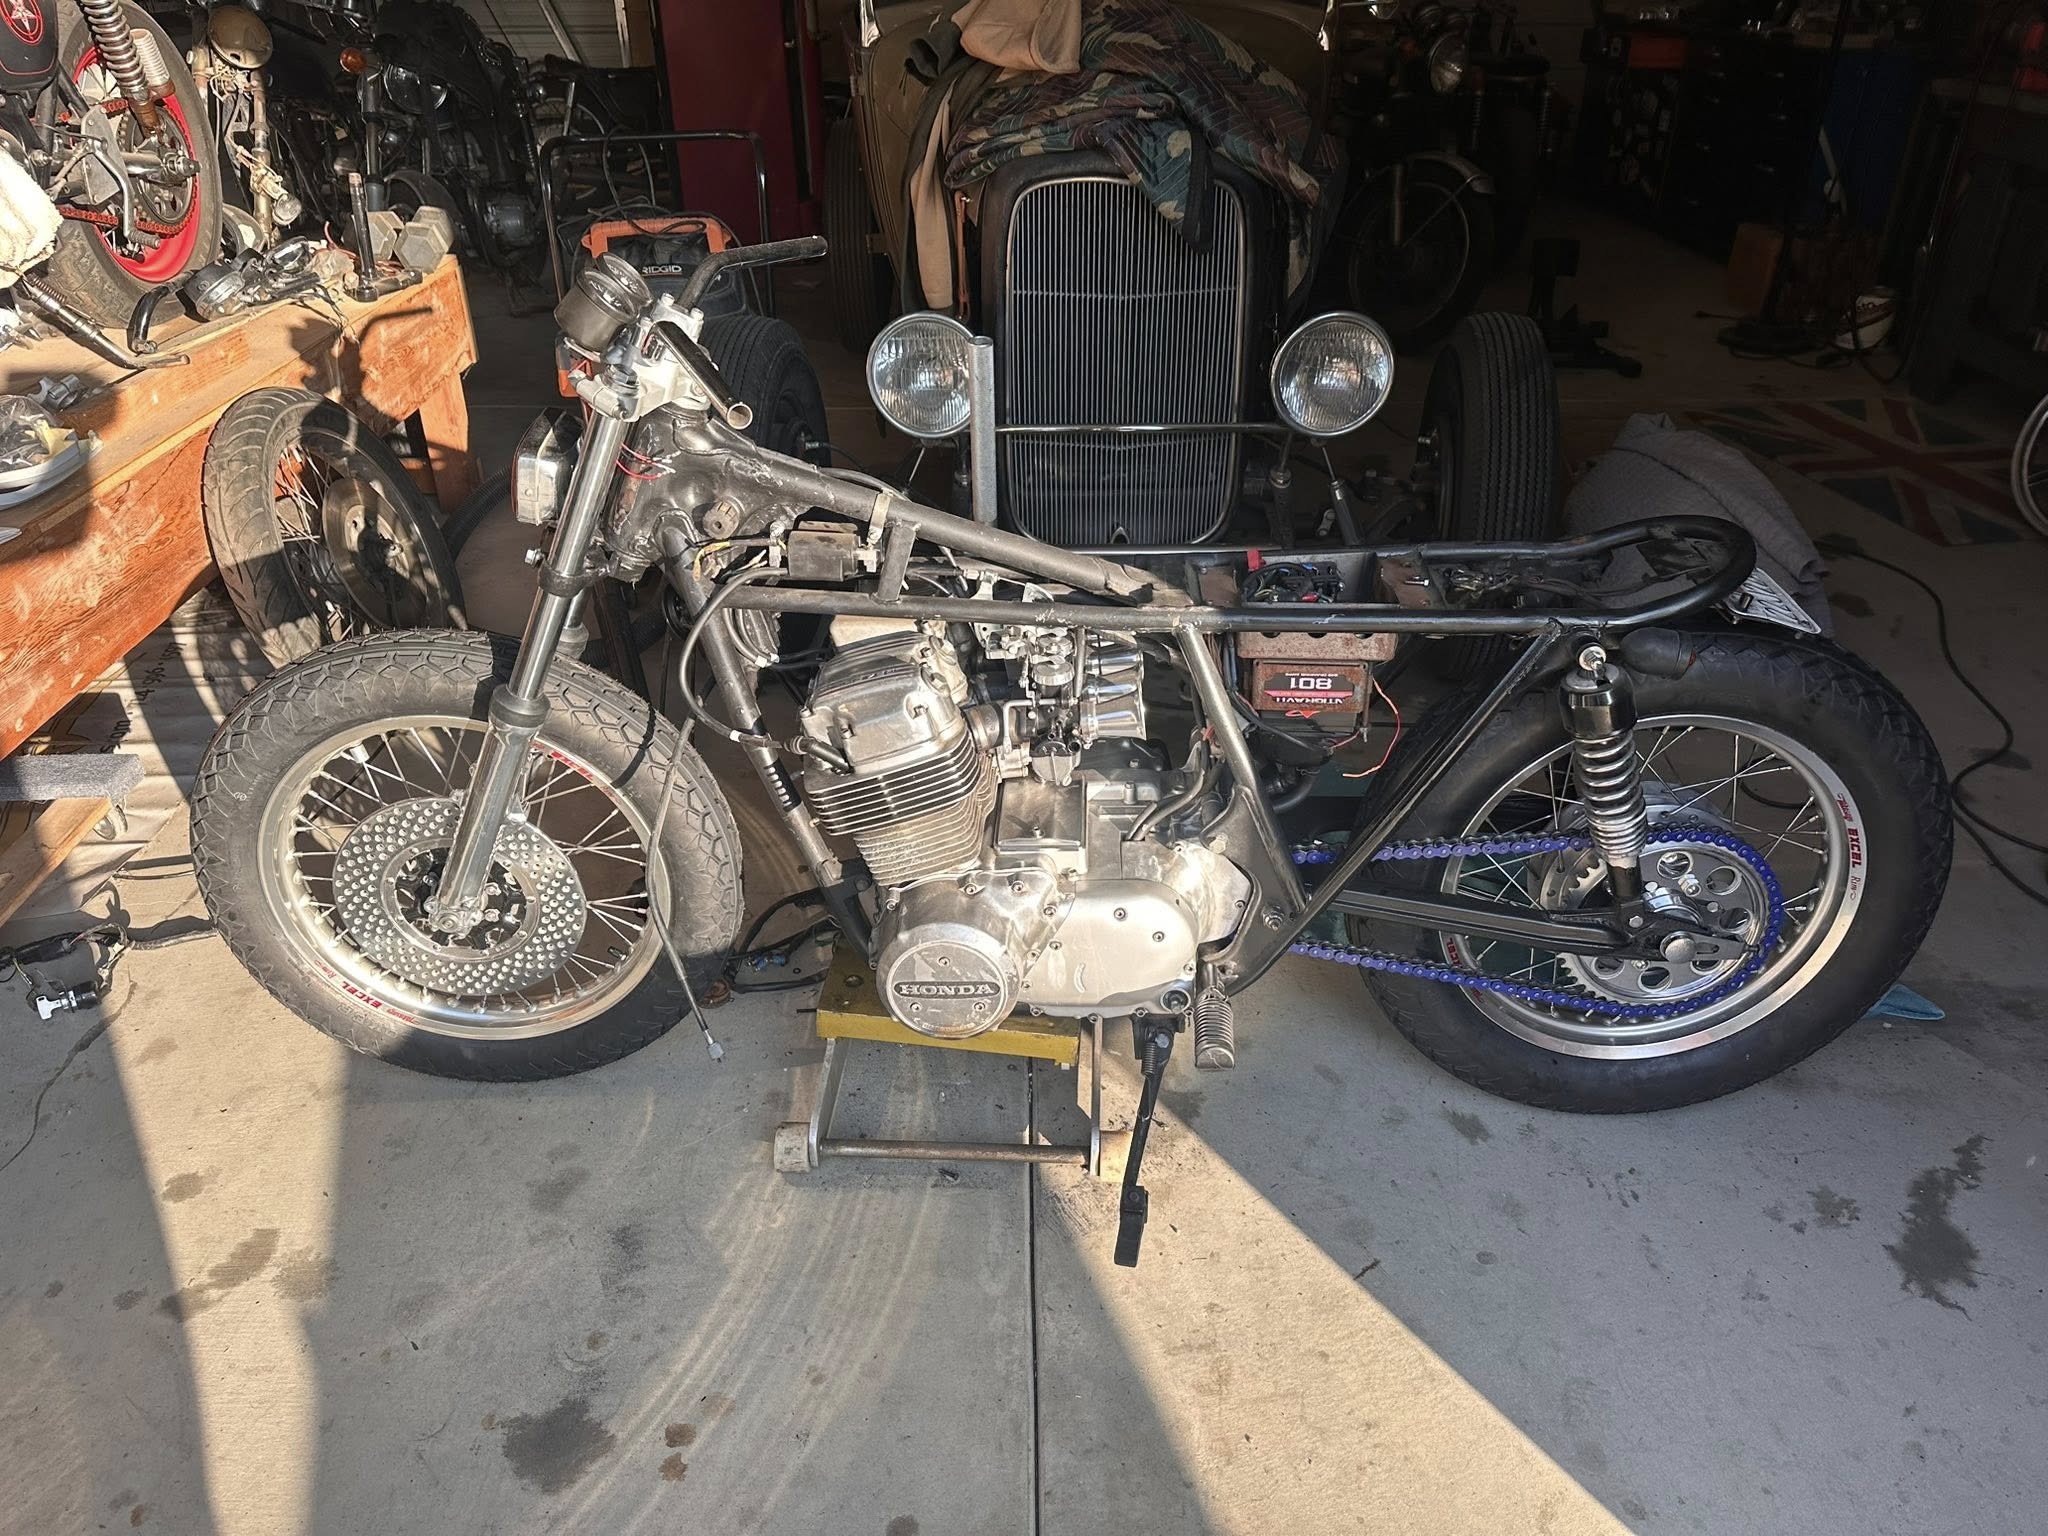
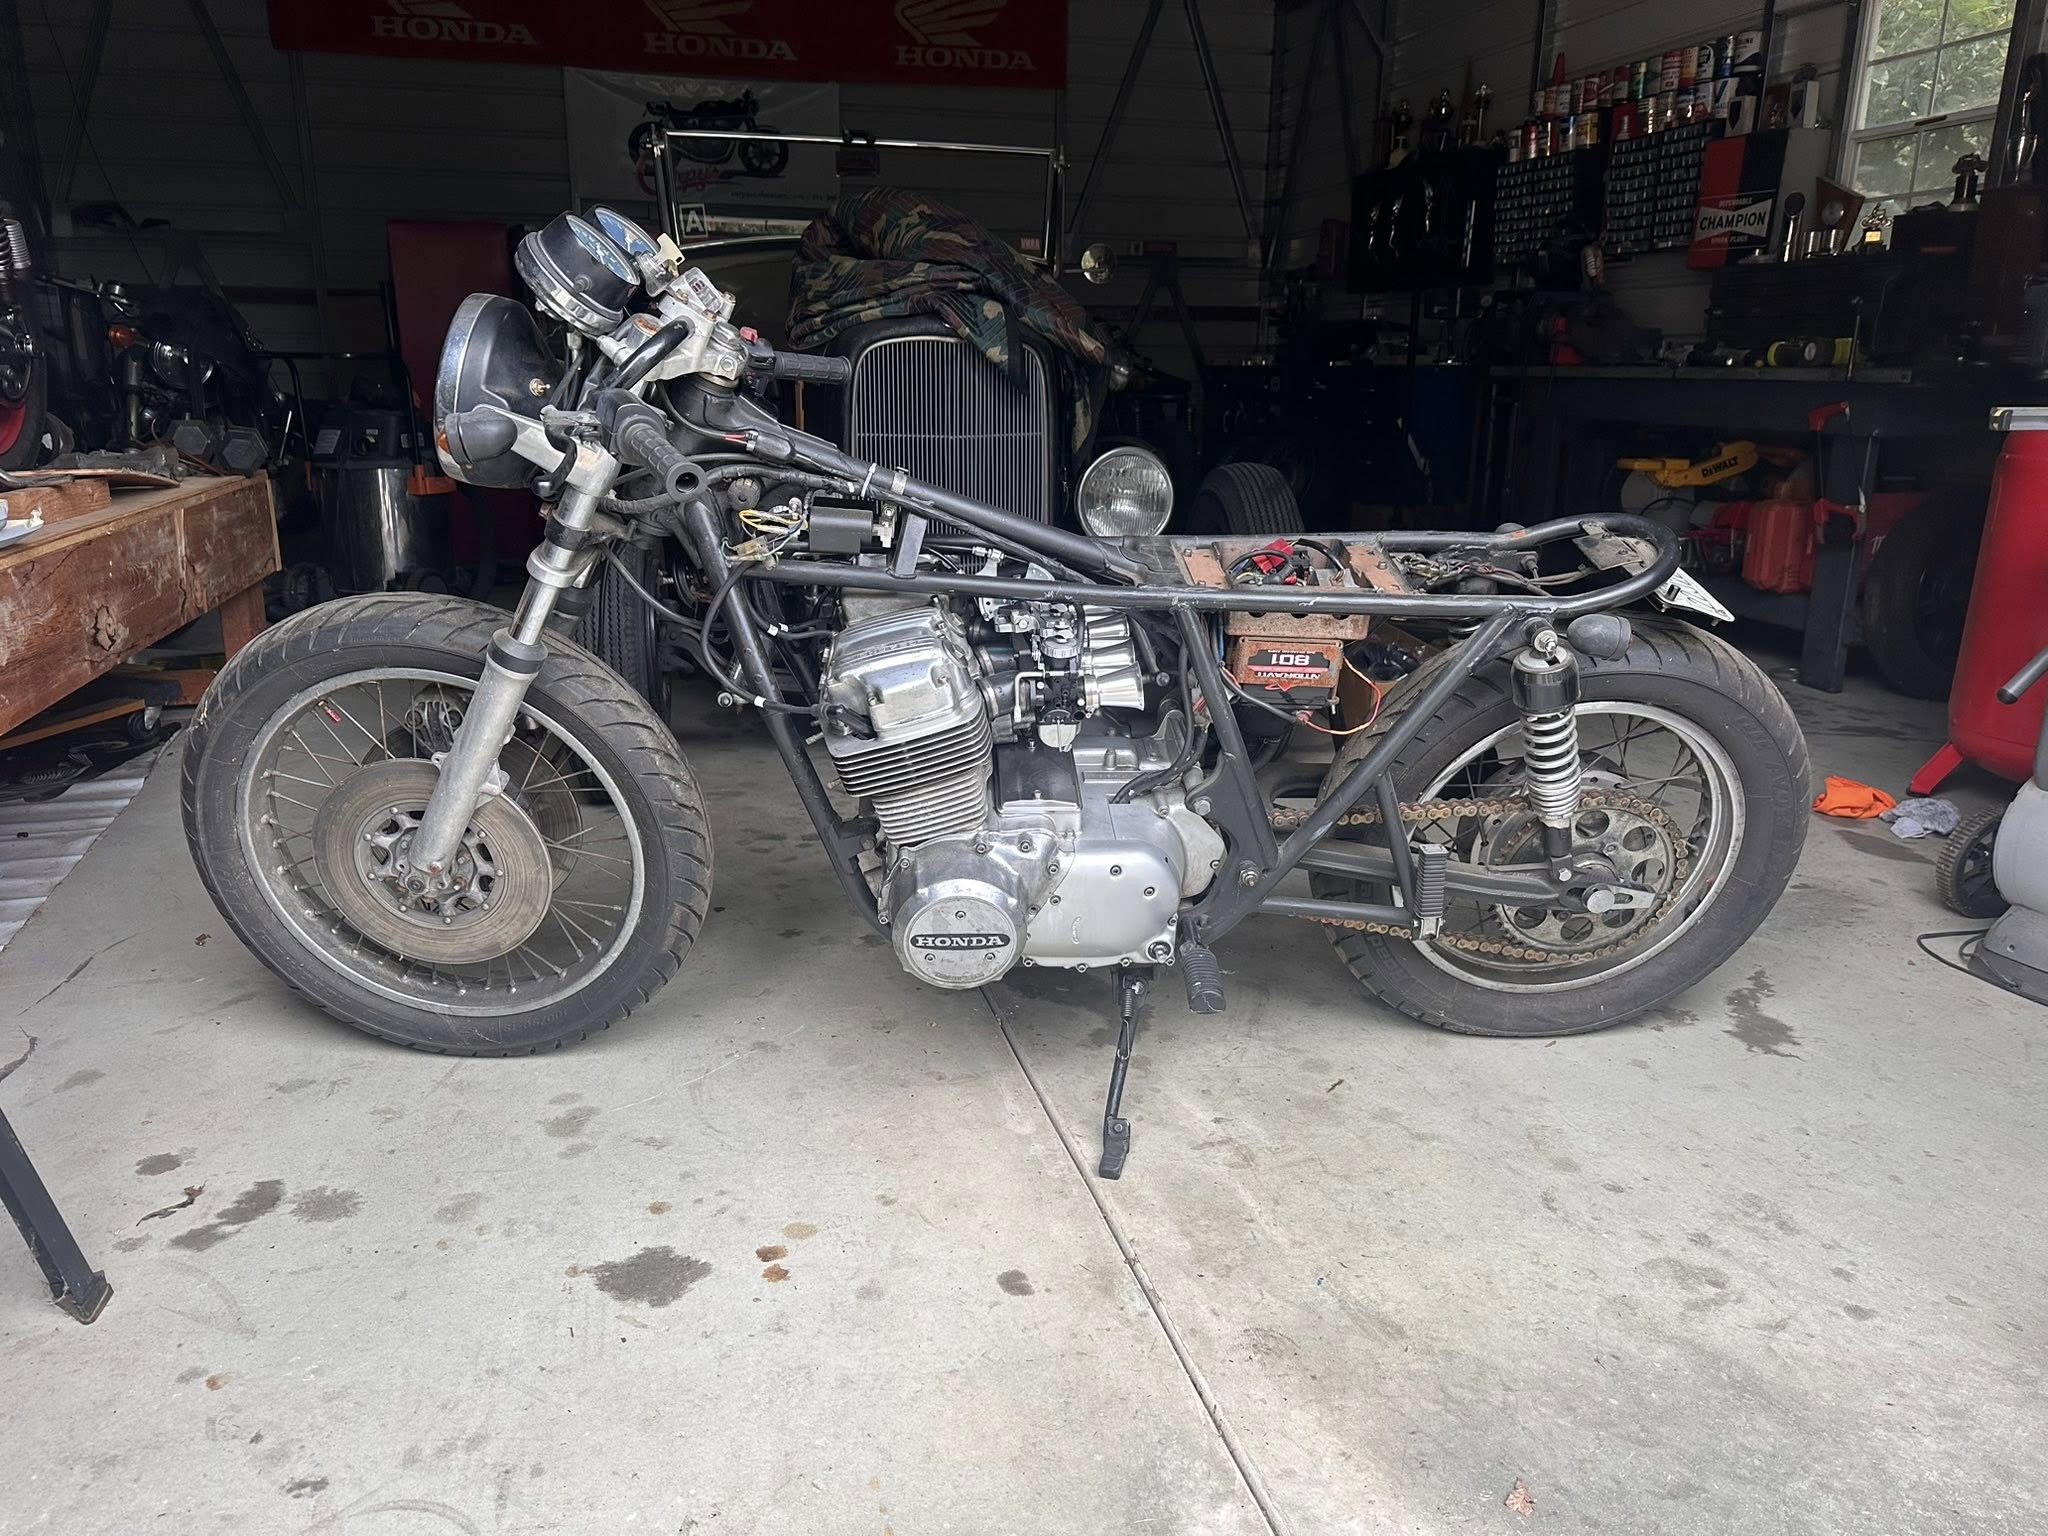
This is great with the lower front forks, but now it’s time to add the front handlebar controls, new throttle cables and a new set of grips, I have all of them parts here and may as well use what I have and get on with the bike as much as I can, as you lot will already know that the parts for these are starting to demand more money all the time, so if you can use up any spares that you have acquired over the years, you will be thanking yourself later.
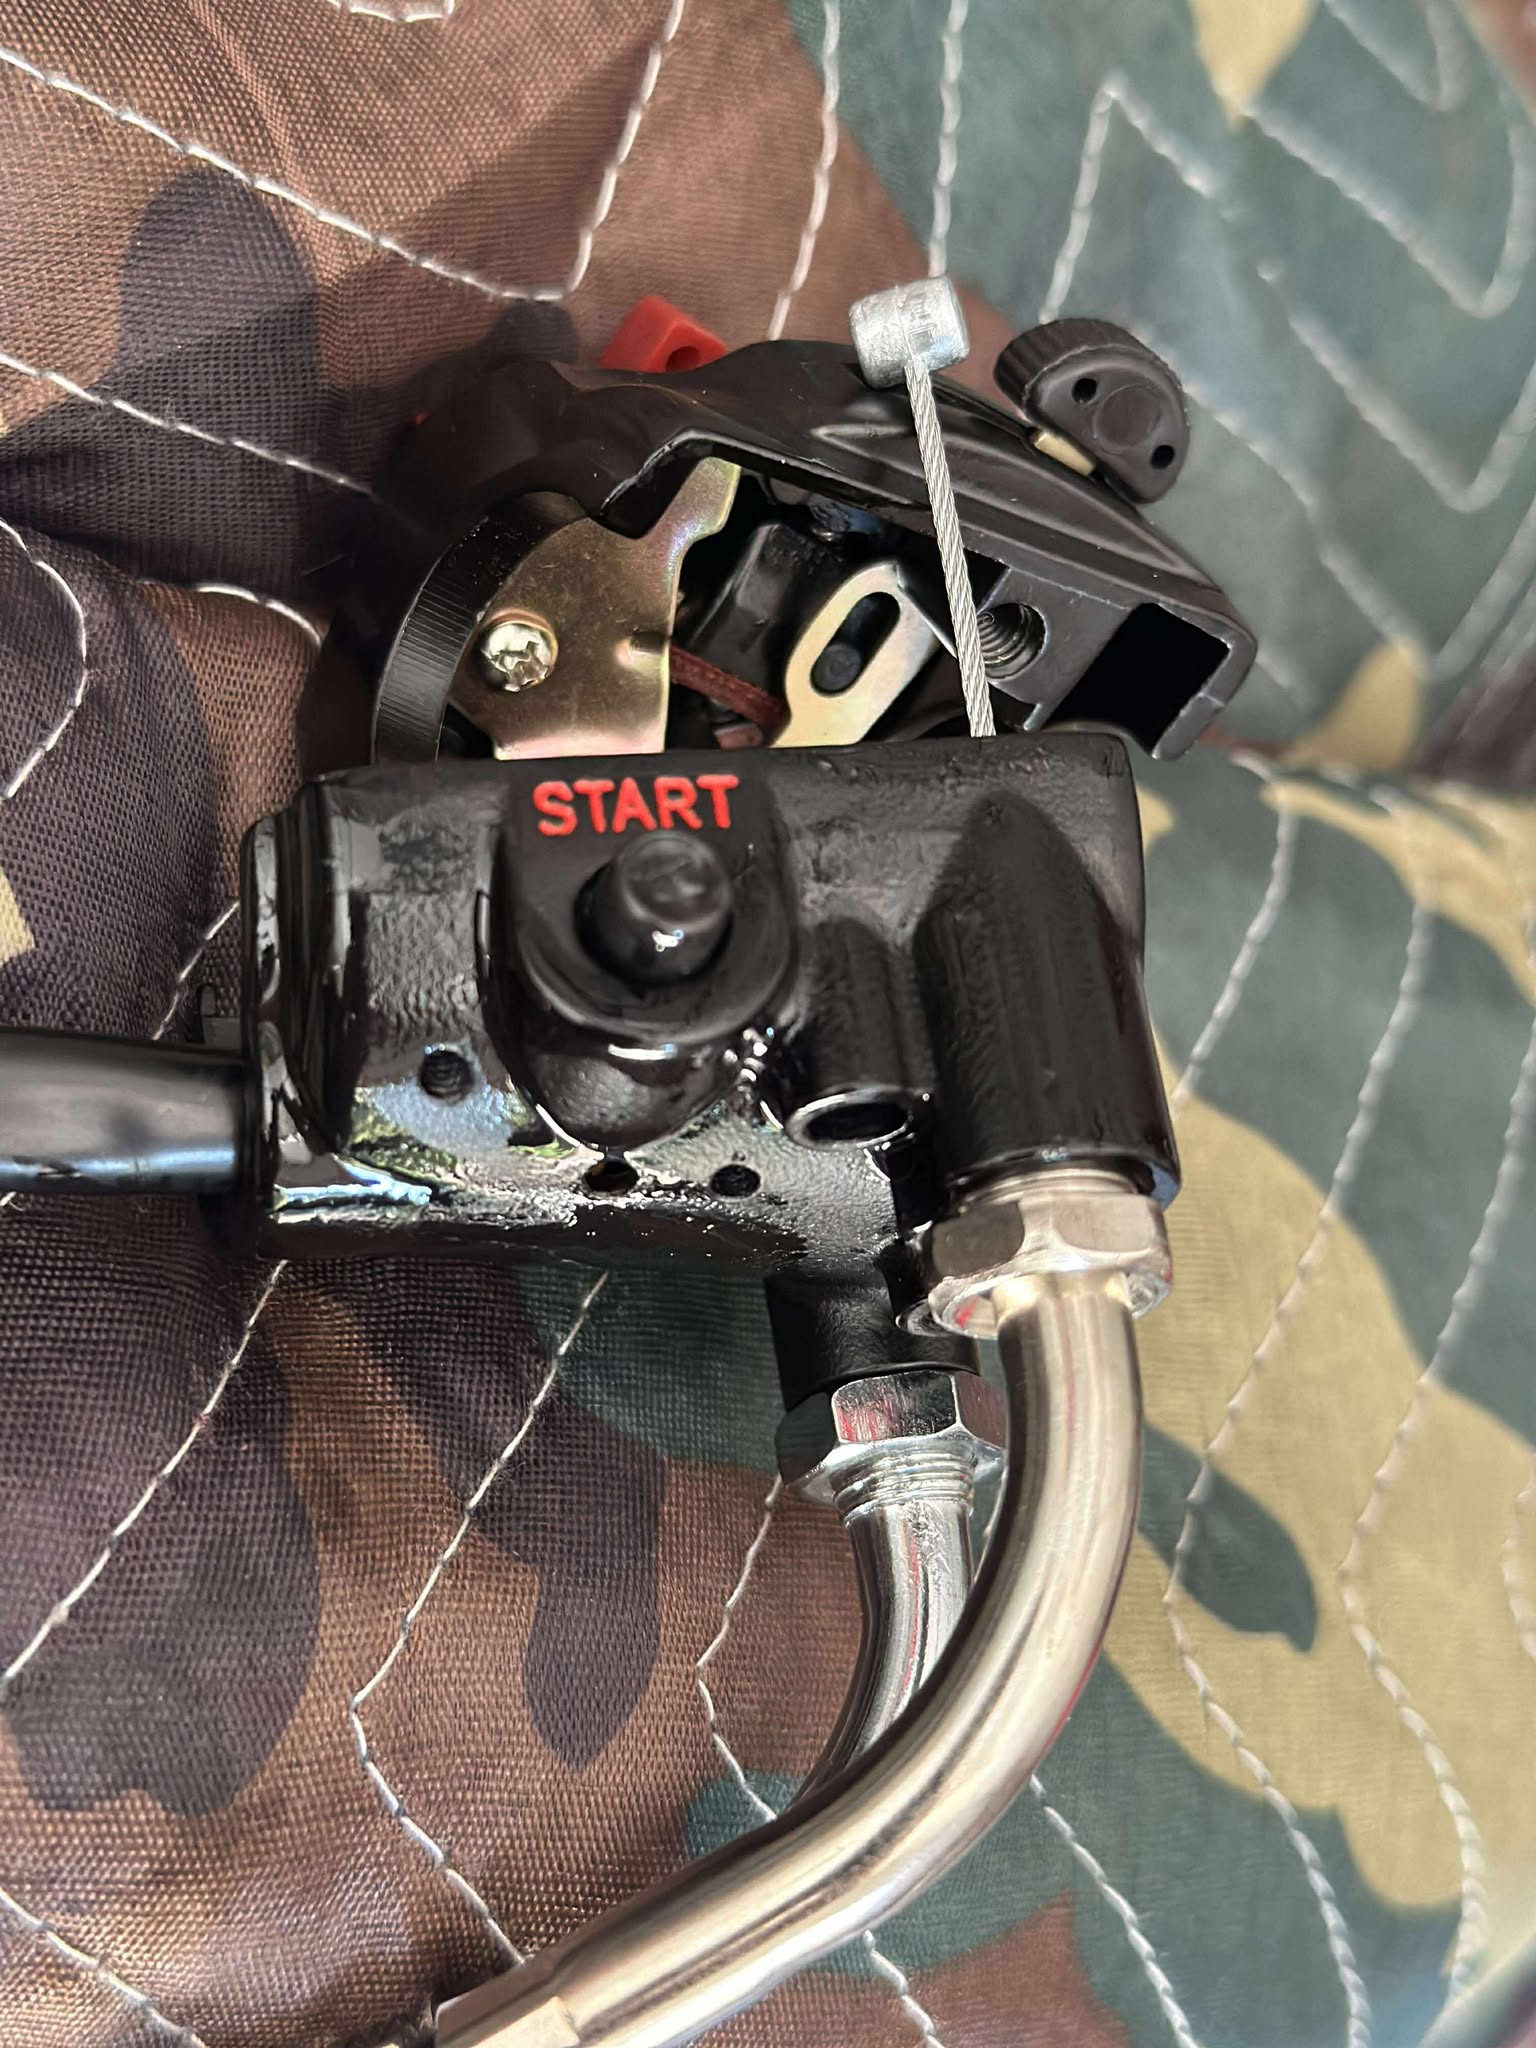
I have some New handlebar switches and I always make sure I have WD40 at hand or Kroil, to lubricate the throttle cables and threads before assembly, that way it all screws together easily by hand with no binding, these push n pull cables can bind quite easily if not maintained and lubed up. I used brand new cables as I had a set in the drawer that I totally forgot about, Genuine Honda ones will cost you close to $60 each these days.
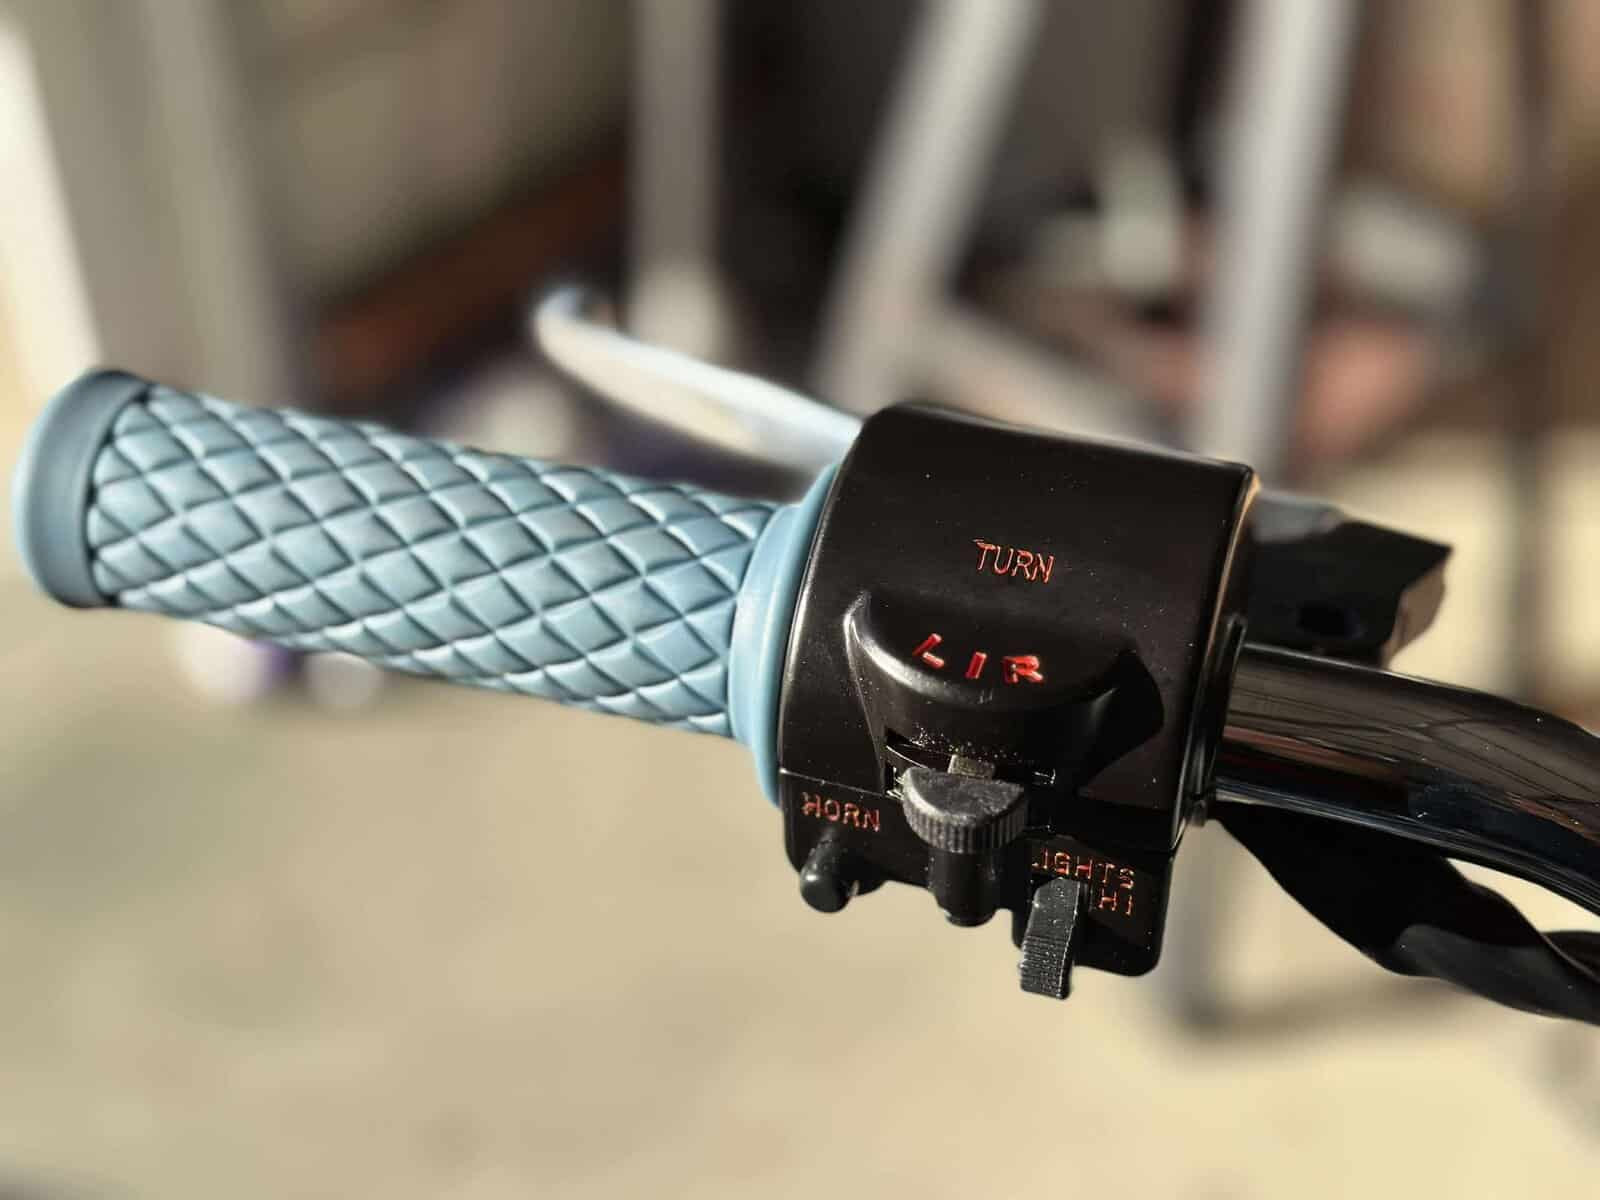
I fitted new levers and new grips too, love a nice-looking handlebar set up, Classic meets Custom, I had to shave a little off the switch housing so I could run the wiring outside the bar as I prefer that look to be honest on this bike, now have to fit clutch cable and tension but that’s an easy job to do but she is taking shape.
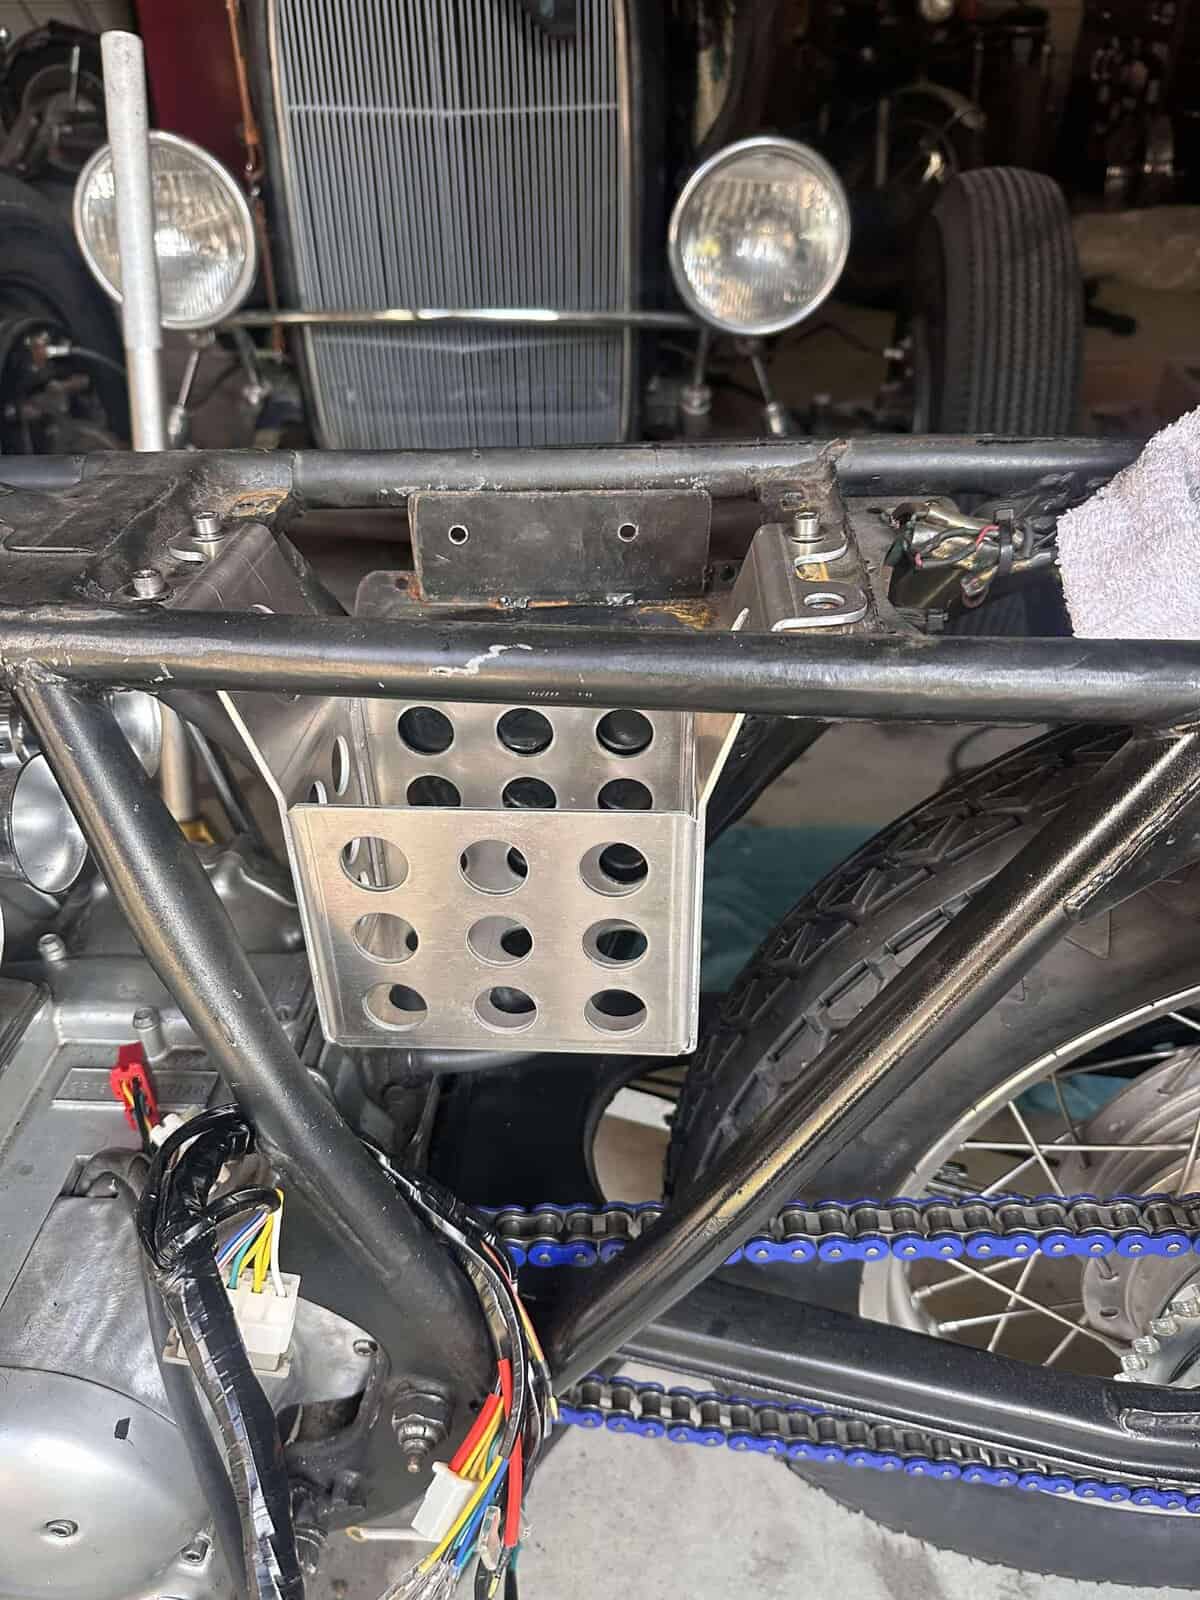
Made up one of my aircraft aluminum battery boxes to fill the void in the frame, the old one that was in there was rusty and needed a new life and look, so this fitted the bill nicely. Whilst i was there I got a new wiring harness out of my parts, so this will be reliable electrics, nothing worse than 40 year old tired wiring and these colors match lol.
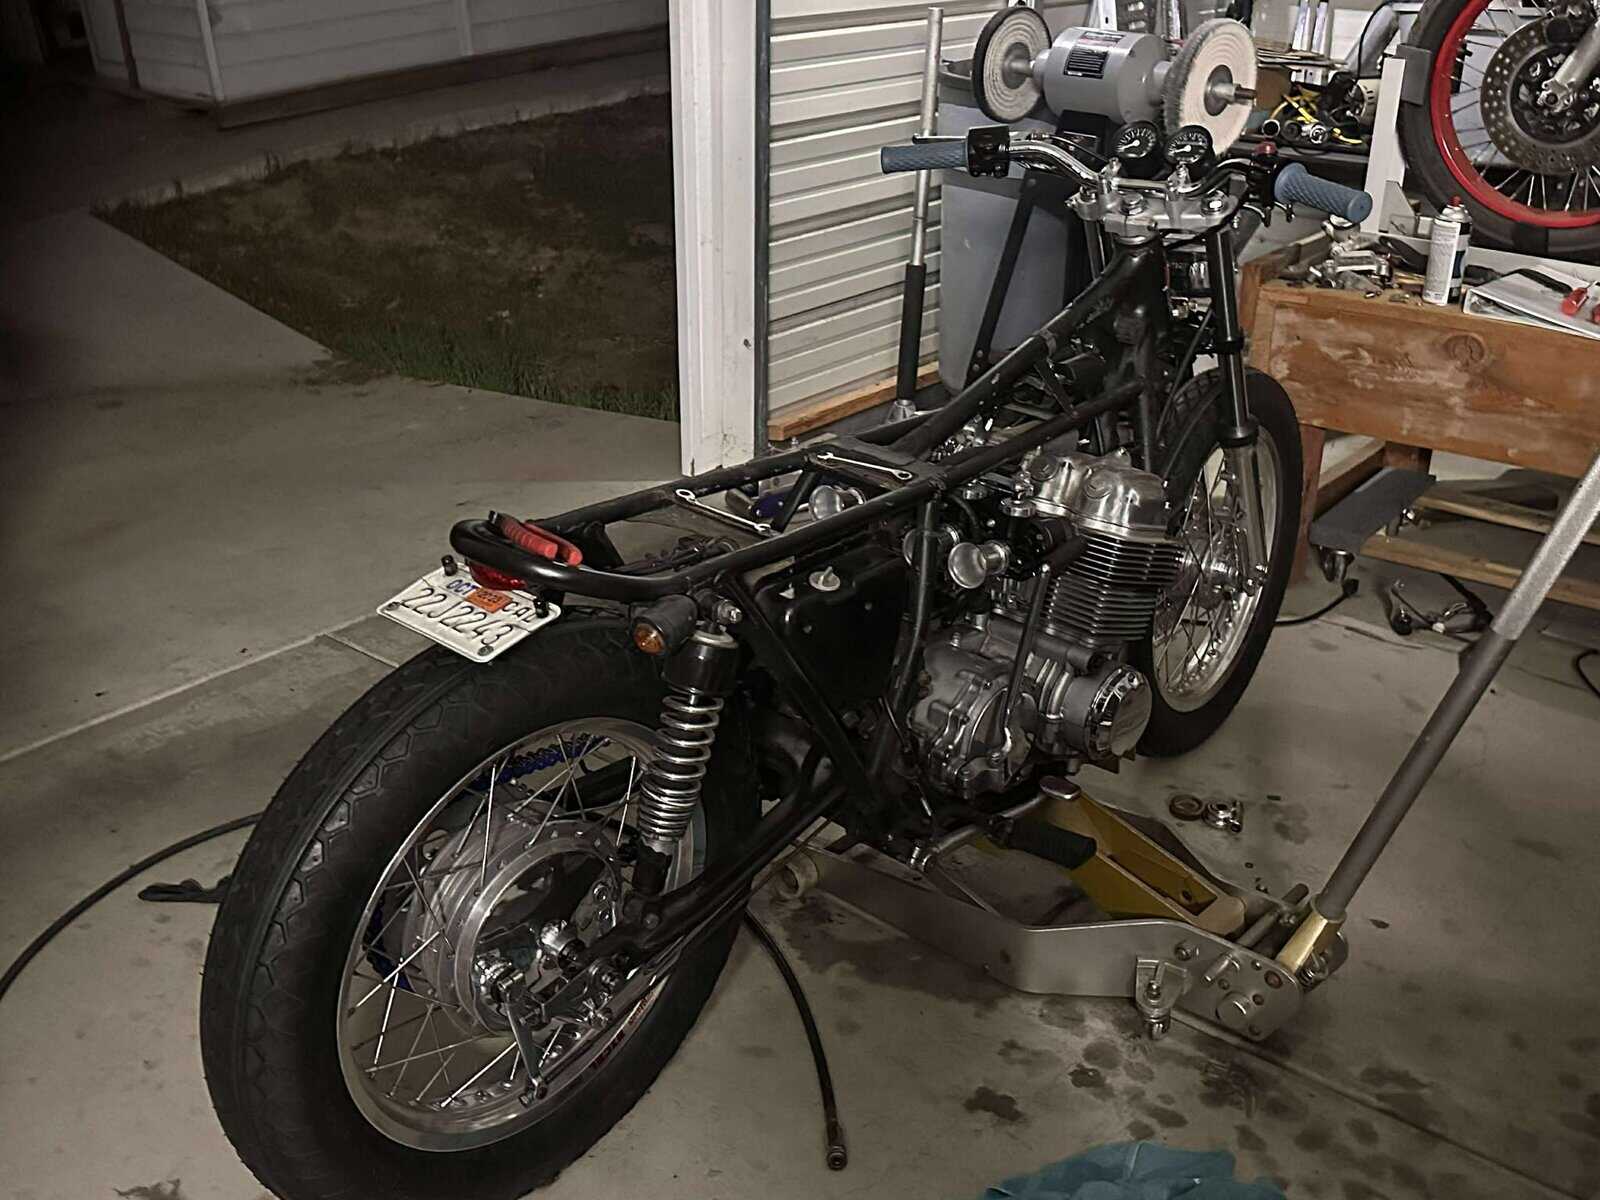
So, right there is how it is at this very moment in time, I am going to stop for a bit as I have other motorcycle projects to work on, I have ordered a solid state rectifier for it and will fit that this week and finish all the wiring up, its coming along well and happy with it so far, will lose rear light and signals for something new but thats for another day.
Thanks for reading the blog on the matador. OLE!