15 days until the Jolly Round Fella Scrambles down the Chimney

Well, just over 2 weeks until the big day, I am sure many of you have only just thought about presents and the like and a mad rush trying to find stuff in the shops or on line?

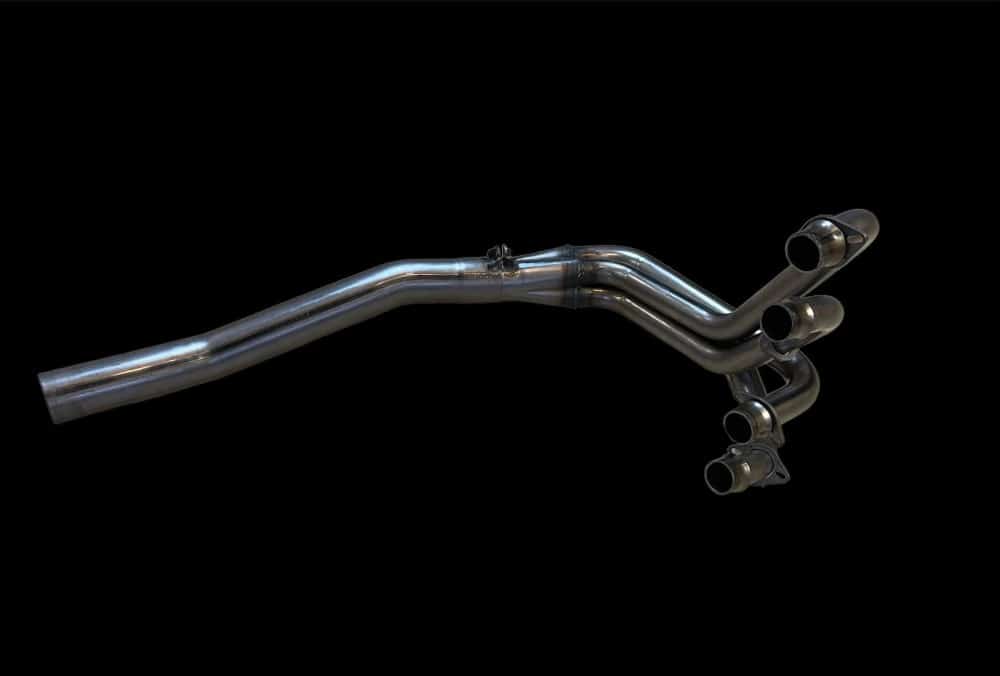
I love this time of year and right now I have been shipping out many Exhaust systems to people all over the globe and even have a festive $100 off exhausts to try and give some Christmas cheer to you 2 wheeled racers out there. I am going to try and make some new parts in the 2023 season and am quite excited about that, I enjoy producing something that not only fits easily, but has a great look and works very well, also keeping the product affordable.


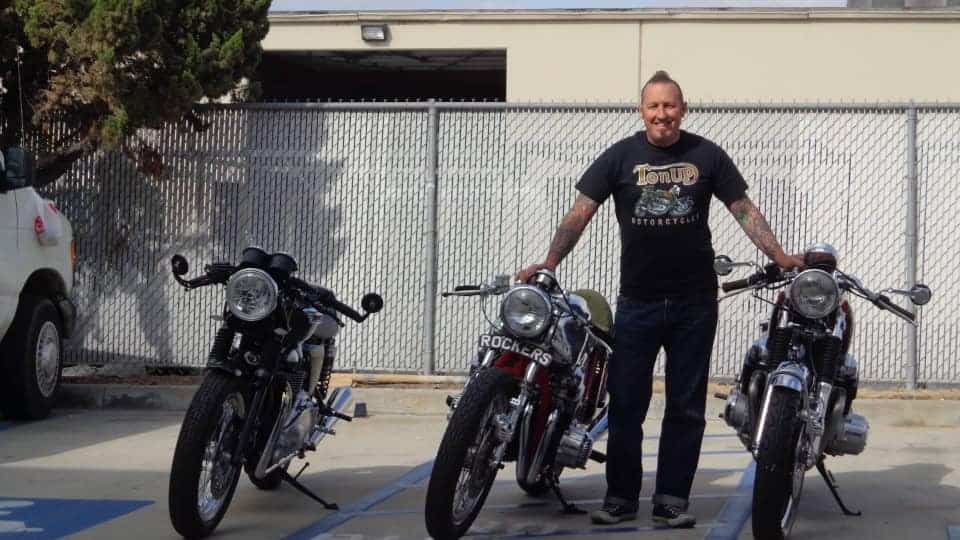
If I can help from Tee shirts to handle bars, or Seats to hoops, drop me a line  carpy@carapyscaferacers.com or drop me a Dime or Text at 714-598-8392 as I am always happy to chat and have done for almost 23 years here in Southern California.

Thank you for supporting me, I am still a one man band and love it that way.

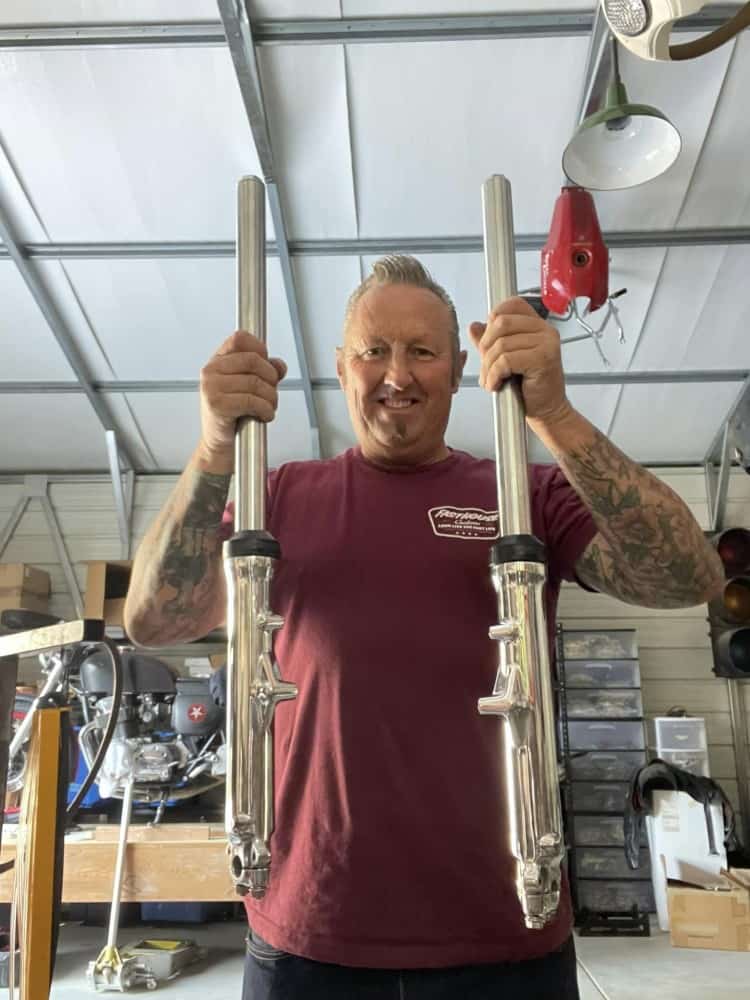
Rebuilding Old Set of CB750K forks 1974 HONDA

For many years I have rebuilt my own forks, and the transformation is so abundant, I wanted to share what I do in the Barn with you lot and maybe you can have a go at resurrecting your own set?

These tired front forks came off a 1974 CB750 K and Customer wanted Rebuilt and Polished suspension, so this is what I did to these old girls you see here.

The Lowers needed to be stripped apart and then sanded and cleaned then I will polish them to a Chrome finish for that Custom look, lucky Honda cast these quite thick so plenty of meat to polish by hand.

The upper tubes are toast, this is a common issue with the forks as originally Honda fitted fork covers and the  condensation in different heat simply left water droplets sit here and slowly rust the chrome away and into the tubing, you would not notice at all until you took the fork ears off the bike.

I have taken these apart and bought replacement Chrome tubes, then I sanded and buffed the lowers to a mirror finish, I covered in cling wrap to keep clean whilst I assemble these so as to not scratch the surface.

I slid the dampner into the fork tube and then inserted the upper tube into the lower stanchion, this is secure by a Bolt with a Copper washer right under the fork leg, secured with allen wrench and began the rest of the rebuild of these forks.

I have fitted so many of these Fork seals over the years and people always ask me, which way up do you fit these, I tell everybody that when you fit Honda seals, the ID Numbers should be facing you when you look at the seal seated in the fork lower.

Also, many people ask me how I fit my seals into forks, I have seen people use scary tools or hit with a screw driver, usually ending up tearing or making a hole in the seal, so what I have always used is a piece of PVC that I bought 20 years ago from Home Depot, this is the perfect size to insert oil seals .

I simply slide the PVC tubing down the fork leg until it sits on the seal, it fits perfectly and will not bind up as this makes sure that it is level when you tap the seal into the fork leg.

Personally, I use a Rubber Mallet and tap the tubing until I feel the seal bottom out on the inner shelf the fork has and then I know she is all the way home as you will feel the resistance right away and you can see the recess in the fork where the snap ring goes.

Some Honda’s have these snap rings, or as we call them in England ( Circlip ). But some early models had a spring clamp, but this is a snap ring that sits in the bottom of the cup of lower fork and secures the seal into the stanchion.

I use a set of Circlip Pliers but long nose pliers will do as you need to squeeze these together to slip into fork lower then release to lock seal in place.

I then slide the New Dust cap that I sell many off from the website, over the tube and down to the lower, it simply pushes on and sits tightly over the end of the fork and dresses it well.


There you go, nice and snug over the lower fork and easy to fit to be honest, and this job can be done pretty much by anyone with minimal tools.

I used New Stainless Lock Washers and Stainless Flange nuts for the bottom cups to finish them off nicely and its ready for Fork oil which is 5 ounces, I use Automatic Transmission fluid, always have and I throw in a couple of stainless washers on top of the spring to set the preload that I like.

And there you go, ready for the customer to fit back onto his Motorcycle and have fun on the tarmac, just thought I would do a little blog on what I do from time to time as many ask me for tips etc, thanks for watching.

The transformation is so cool to see, I often stop and look at what I have accomplished and you will do the same thing for sure.

So have a go at your ones, you may surprise yourself and save some money at the end of the day too.

Any info you may need about anything bike related, email me on carpy@carpyscaferacers.com or text me on 714-598-8392 I am here to help.


Working on Projects in the Barn

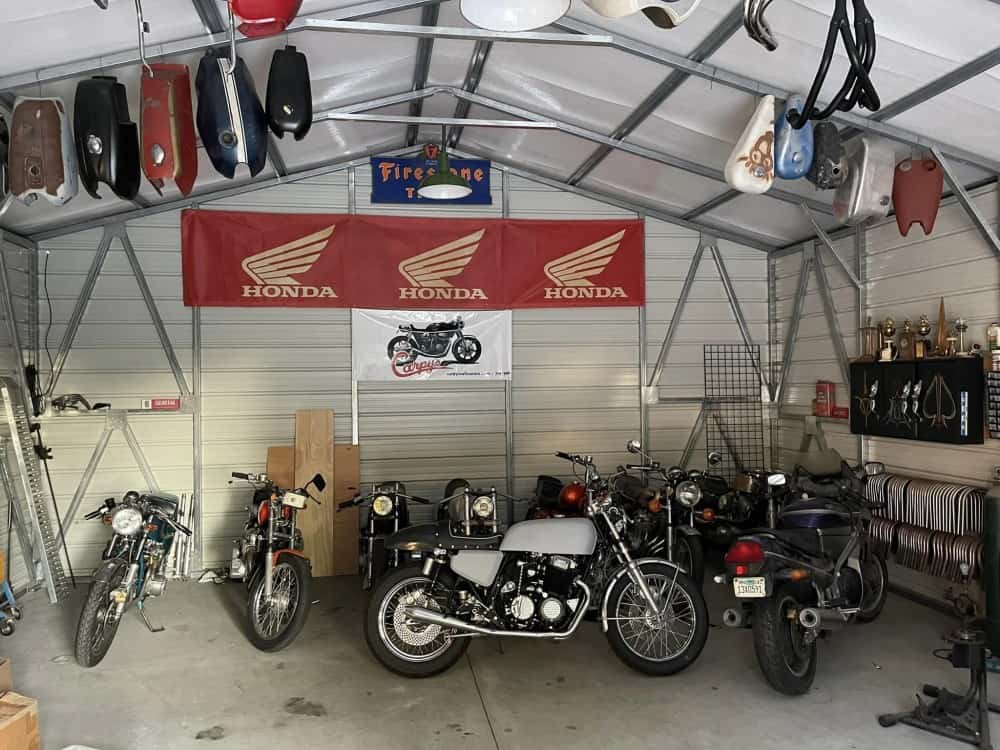
Time does not stand still and I now have all sorts of work to do but glad that I still get many emails, Phone Calls and of course texts, asking about builds, parts, service or idea’s etc, I love what I do and even though I really have had not had the time to build cabinets and work benches , I have enough to get by and get a few projects sorted out.

A lot to do and still get some what organized in the Barn, I will move my Model A Roadster out and start to get myself in work mode as quite a few things I have to do in here and its sure nice after 22 years doing this, I am still popular with the Public all across the globe.

You may remember The Red Devil I created about 2006, it got in a wreck when we were out riding about 13 years ago, and now it is time to fully rebuild this Old Caff Machine that has done many miles over the years and to resurrect this to a Tarmac eating two wheeled Monster will be a challenge but I am up for it.

This will be a frame off build and will be taking the old girl completely apart and will remove the paint from the frame and powder coat a Gloss Black, but keep the rims RED as its a great offset for this bike and nobody was really doing it when I did this back in the day.  I’m keep the tank but need to repair it as it has some damage from the crash, there must of been 100 Yards of Oil on the road when she slid on her left side when a Pick Up truck slammed into it on a off ramp from the freeway right in front of me.  Poor lad had a bad leg for a long time but now, years later, he is looking forward to a revamped Red Devil Motorcycle.

But I am looking forward to turning a few wrenches and creating some unique rides, the RED Devil will take some time But I have the Super Sport to finish next and then once I am happy with that, I shall offer it up for sale.

The Milwaukie Special will get a Full RED and White Paint job and will be quite the head turner, with great 4 into 2 exhausts and a fully rebuilt motor, this will scoot along quite happily, anywhere around the USA, as its had tons of work done, from the painted frame to the hand drilled rotors, this is quite a work of art that I really enjoyed creating.

All sorts of motorcycles in the shop now and of course the Mint 550 Supersport is always a lovely sight for sore eyes, as well as the 883 Sportster I am building too that will eventually buzz around here on the twisting roads that we are lucky to have we we live.

A Lot of 750 Bikes too in the stable with more to come, I hope to be creating a few cool rides and then offer them up for sale, I love building Motorcycles and am quite happy when I get to use my creative juices and try and build something interesting.

It will be a busy year here at the workshop and looking forward to building these and making some interesting inline four Custom bikes for people to really have fun with.

This old Girl is an old Drag bike that was built in the mid 1970’s, but may be transplanting it into the RED Devil if the Mill is OK as have no idea if she will run, but this is no ordinary engine, this is a RC COBRA Engine, with extended Cam towers and an RC Engineering Exhaust, along with an ARD Magneto and a set of smooth Bore Mikunis.  So before I get too crazy in stripping this old bike, I will need to get her going, this is a long term build but I hope I can get her to run again.


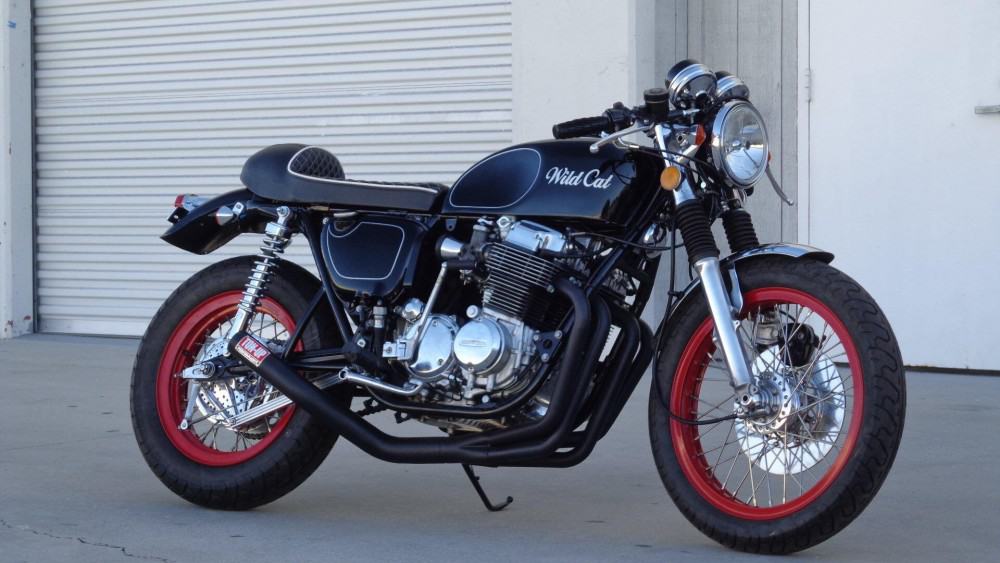
The WILDCAT CB750 HONDA FOUR

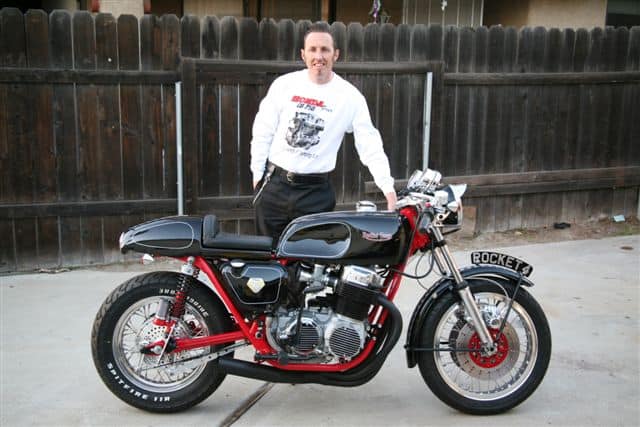
You would seem it strange to have forgotten about a Motorcycle I had built for a Customer, but as I have created so many machines over the years, I guess I do get a bit of a Brain Block sometimes, it was not until I was flicking through some photos that I noticed this CB750K Model Honda Four  Motorcycle that I did my surgery on and turned it into what he wanted, a real Wildcat.

It was a Shiny Chopper-ish style machine that my Client had owned for a long time, but wanted a change and Loved the Cafe Style Bikes that were hitting the tarmac around where he lived, so my job was to transform this cruiser into something more Racer Looking.

The Rims were stock but I wanted to add a Fatter rear end with some nice Rubber on the Rims and also give it some color to stand out right away, you cannot miss the Gumball Red, it is so striking.

I used Polished stainless spokes and Polished both hubs, as well as hand drilled the rear brake hub to give it that Road Race styling, it gets rid of the heat from braking, Dust from the shoes and cools the brakes when running along the tarmac etc.

New adjusters, Brake Rod and actuator arm, make this machine brake like a New bike and it sure looks clean now, a lot of attention to detail that I am known for.

New Rear sprocket and chain finished off the rear end but I think I want the rear end to sit a little higher, so them shocks will have to go for longer versions.

Longer Chrome rear shocks made all the difference in the ride height and the response when cornering, I am glad that I went this way, I also machined some 6061 and milled a Finned Stabilizer Bar to give that more Custom look, rather than the Flat Bar Honda uses.

I made a nice Bump Stop leather Racing seat unit for this bike, that still allows the seat lock and hinges to be used, that way you can get to your tool box and documents easily, the Motor got a once over and then I removed the stator cover, sprocket cover, Trams cover off and polished to a chrome finish.

The Customer worked at the Zoo with the Tigers etc, hence the title of the bike Wild Cat and that’s what he dug, so we applied that in a Gray color to the Petrol Tank.

I took the Gas tank off and hammered the sides to make my Classic Knee inserts, reminiscent of the old racers back in the day, making it easier to tuck your knees in and get more tighter on the bike and be a bit more aerodynamic as it were. Smoothed out and painted a Gloss Black, also applied my Checker Decal Kit then pinstriped the edges and ran a line around the knee inserts to finish them off, ready for Clear coat now.

New Gas cap and Lock to finish the tank off nicely, I do prefer the stock gas tanks, so this mod I do really makes this look like a factory item.

The Customer didn’t want rear sets, I would of preferred them but its personal choice and I have long legs – so need to have rear sets on my builds, but this looks pretty darn cool now its all back together and can run under its own power once more.

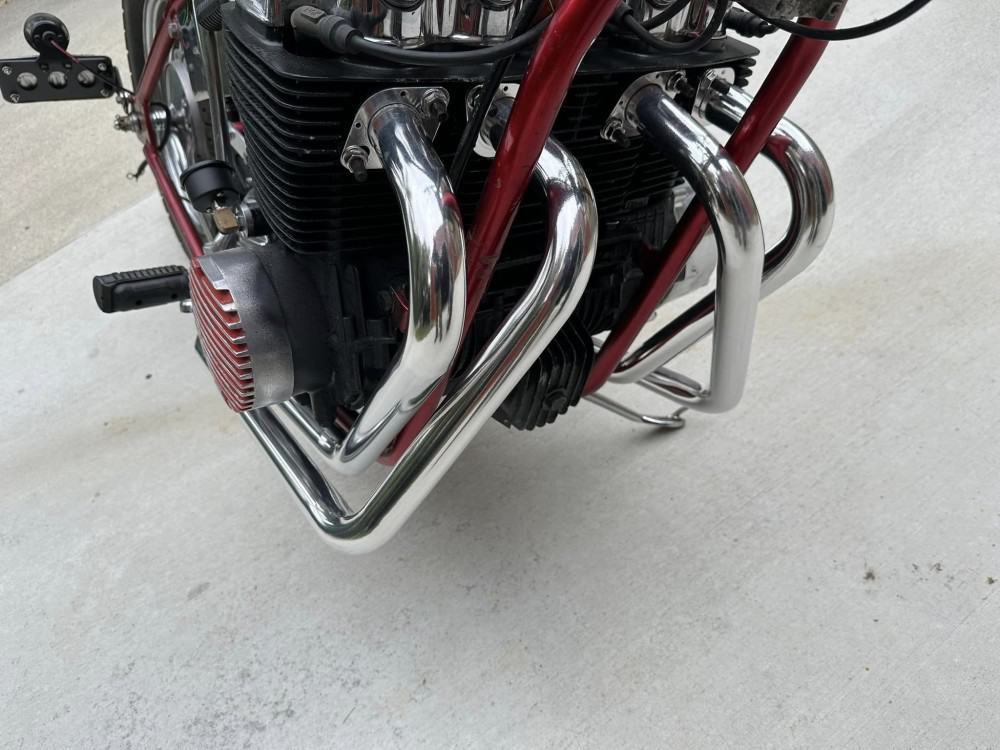
She is sporting my 4 into 1 Yoshimura style Performance Exhaust system and the inline Four Motor now breathes so much easier and sounds awesome with a Velvet Tone out of the tailpipe.

I cut the old fender down as it had some dings in it, rebuilt the front brake and added New Hose lines to it as I wanted this to stop on a Dime, well- maybe a Dollar Bill.

Sitting in all her Glory- The Wildcat runs hard and strong and boy is it fun in the twisties, as you can see I added my Signature Clubman handlebars, for that low stance.

I always enjoy creating these Motorcycles and the owners are always super stoked when they take them out for a spin for the first time, there is a lot of detail here and I offer the parts on my website if you want to build your own version.

A fun Machines that will give you many miles of smiles this bike sat right and really handled well when you gave it some beans in the corners, super proud of this one.

This has rebuilt front forks, New side covers, custom Turn Signals, New bars, new controls, new throttle cables and levers with new cables, plus New GT grips, rebuilt Carbs and Custom Bellmouth Velocity stacks.

Look at how well the bike sits has a New TriBar headlight, new fork gators and New ignition too, The seat I upholstered and used High density foam so you have a comfortable ride.

Thanks for reading this and hope that you like what I have dome to this old inline Four CB750 Honda, these are brilliant bikes and phenomenal engines.

I hope to post more creations that I have completed and share with you lot on here, love hearing all the positive feedback, thanks very much indeed and let me know if I can help you with your build.

Building an Inline Four Project out of bits and parts laying about.

Well, I still have not made my mind up how I am going in the design part of this ride, I thought I would use my phone and record a few sessions as I continue creating a machine that I personally like and want to use and I am sure that it will go through a few guises before I get on the right track, although that’s half the fun of it.

So here are a few videos I have cobbled together and hopefully you will like what I am trying to achieve, remember, Rome was not built in 7 days.

Fitted one of my Exhausts to a 750 that hasn’t run in 8 years or so

People ask me about my exhausts all the time, I have had many repeat customers over the 22 years here and just happened to come across this 750F that a Customer bought to me on a trailer and has sat for 8 years, it was a mess and other people could not get it to run , so as the exhaust and motor were in much needed attention, I gave it a shot and she cleaned up pretty good, thought I would share it.

It wasn’t a show bike, just a run around machine that was in bad shape, I spent a weekend and got the motor looking nice, used one of my Yoshimura style 4 into 1 Performance exhaust systems and wrapped the headers with DEI Black 2″ wrap and boy was this a fun ride now, she was a little cold from the get go, not surprised as it hadn’t run in 8 years but, with rebuilt carbs, new gas, chain, exhaust , speedo and even brake lines, this old inline four breathed new life and to be honest, I wouldn’t of minded keeping this as a parts getter, as it was a blast to ride.

I also added a hoop for the Customer, his Original seat was rotted beyond recognition, so made him a seat assembly and upholstered with Diamond Stitching, I used memory foam and it was really comfortable.

I used my rear Custom License plate Holder that has a Model A Ford tail light attached and was an LED version, so nice and bright to get you noticed when you are applying the brakes.

This old Supersport has no turn signals, they were lost many moons ago and ugly as hell anyway, I sell a lot of these Brushed Aluminum 12v Signals and these were just the ticket for this build, you will also notice I made a new Braided  Stainless Steel rear brake line as the original one had rotted out and the Caliper had seized up. The tires were totally rotted out, so fitted my Favorite Bridgestone brand, these look great and handle so well, sits the bike up nicely too.

I also Added a New RED 530 DID chain, this was a good Combination, have always liked Black and red and with New sprockets and the old ugly 630 chain and sprockets removed, this was a smooth ride, no binding noise you get from old chains etc.

The Original headlight was broken beyond repair, so used my own Custom Chrome 7 inch set up that has LED turn signals inside the lens, cleaning the front end up as you may remember, 1977-1978 F models had huge Turn signals that jutted out like elephant ears, you may also notice that I fitted New Aluminum Levers on handlebars, New grips and new cables.

I added a set of 2.5 Mini Gauges, these are calibrated for the 750 and clean the whole top end of the triple tree up, his Originals were missing, so these were a great choice and I think suite the bike well, not cluttered like many you see on the road.

This 78F has the Double Disc front end, which is something Honda should of created on the earlier models, but I had to make new lines for it, went ahead and made some braided steel ones up, took a long time to bleed but it stops on a dime now. The old Master Cylinder was totally rotted away, so I fitted a larger Kawasaki version to allow for the double disc as it needs more fluid and that worked out really well.

I made some New side covers as the original ones that were fitted were so brittle and cracked, these are Urethane and will last for another 40 years, I replaced the Original shocks as there was no rebound left and these are just the ticket and look like original 70’s ones but made with todays materials. The Motor was Black being a 78 F, but in need of some love, so cleaned the motor with degreaser and painted high temp wrinkle that I have made and it came out nice, added Pod filters to the rebuilt carbs and the Front fender was dented on the front and rear, so I cut the Old stays off and shortened the mudguard to give it that Sporty look.

All in all, this non runner Classic has been resurrected  to a fun Bar Hopper machine and pulls quite hard too, still needs paint and a bit of chrome but this sure was a fun bike to ride, I really enjoyed it. The Original Carbs were the keyhole version, they are fine when working but they were toast, so, I always fit earlier intakes, Cables and carbs to the 77-78 SOHC Motors as you can remove the float bowls with the carbs still on the bike, also the choke is a lever on the side, not the ugly cable that goes up in between the gauges, runs smooth now too.

Here is a Video of a little try out in my area to see how the carbs are dialed as this was the first real time on a major road, I loved this bike as it had linear power, have a look and see what you think.

Making a Motorcycle Work Bench from Scraps of Timber

Some of you may know that we have had a Barn built now for my New workshop, and as you know, materials for building have literally gone through the roof- So I thought that whilst we are refurbishing the California Ranch house, I will try and repurpose some of the timber that we ripped out of the ceiling in the kitchen.

The timber is old but solid and of course, ceiling truss material is 9 inches deep, so, instead of sending the old timber that’s in a pile outside, to the tip- What better way than to give that wood a new lease of life and of course, help me out along the way too.  So, I decided to use some of the scraps of timber laying about and see if I have enough to make myself a Motorcycle table/Workbench, as I like using timber and even the Harbor freight tables are $599 and last a couple of years.

Once I pulled some of the old Plater Board off the timber, then spent a bit of time removing the old nails that were in all the timber etc., I then cut the bad pieces off and see what I had, I figured that I would have just enough to assemble an 8 feet work bench for building or servicing Motorcycles and wanted it to be heavy enough to with stand a bit of hammering ad of course welding too.  And I am sure there are many of of you out there like me, that like to repurpose stuff, save your cash for other more important things in life, and feel a little proud of the fact that you made something out of just trash.

You decide what you want to make and then just get on with it, I had no real plan, just a few measurements, I measure the longest bike I have and said well lets say from tire to tire its 7 feet, so an 8 feet table will be just about right for securing a two wheeled machine of up to 800 pounds on this construction.  But, even though its waste material, I want it to be level as there is nothing worse than a wonky table right?

This timber is so thick I am super stoked that I could make use of the materials that were Original part of the Ceiling of the house, so I started to cut and then screw these pieces together and knew that this was going to be a cool set up for what I need here at the Barn.

To say the work bench is sturdy is very much an understatement, I wanted to make sure that this will last for many years, build it right from the get go and you will have something that will last probably your lifetime if done well. I cross braces the bench using the rest of the Rood truss material and this is now super rigid and I will have no issues mounting a motorcycle atop this set upo.

I used 3.5 inch screws to get into the timber with some bite, this thing isn’t going anywhere and am happy with the way it is looking, the work bench will be invaluable for me and so stoked to be able to use up some scrap material that was going to the dump anyway.

I also used some thick MDF I had laying about from old storage racks and that sits across the subframe, giving a sturdy platform and will allow me to use some old wood sheeting that was an off cut. I am lucky to have a chop saw and a table saw, as well as battery screw guns, but this was quick a quick build and I must admit, very therapeutic for me as I enjoying making stuff. Better make sure you have a Vacuum cleaner too as more dust than the Sahara desert that’s for sure.

I did have 5 tables at one point when I had the big shop, but they do take up a lot of space and had them in storage for ages, there is something about making your own workbench though and I will use it all the time, and if I don’t need to, then I can push it over to my racking area and still have room for my Hot Rod to be parked inside so I can do some wrenching on that as well. Of course, I have a long way to go on fitting out my workshop and the fun is taking your time and putting stuff up then maybe changing it if it doesn’t work how you want it, the good thing of now having your own workshop is there is no Landlord breathing down your neck.

As you can see, with an off cut of 1/2 inch Ply on top of the table, it really finishes it off, I have also fitted a Bump Stop on the end of the table for the wheel chock to sit up against tightly.

I shall clean this up as its been sat in the shed, then I shall secure this to the bench using some Coach bolts and a nut and washer underneath as I need this to be really secure, as when I run a Motorcycle up onto the table and into the chock, I need the wheel chock to hold the front end of the bike tightly, so these ones have holes in the legs and that means I can secure it to the platform.

Ready for Bolting down and you can see I have a strong bump Stop right on the end of the table, I will also use some Long Eye Bolts to fit to the sides of the Table, that means I can tie down the handlebars for even more Security when I am out of the workshop.

I am sure I will clean her up after everything is bolted down etc and not sure what I may add but as you can see, this is a super strong Motorcycle table and I simply use my Ramp to run the bike up and into the chock, then simply take ramp off and hang that up. No cost really at all, this heavy set up will last as long as Noah’s Ark I think.

Super stoked to pull a Bike ramp out and Jenn gave me a hand and we loaded this project machine up on the work bench, it was great, sturdy and easy to put up there, the wheel chock holds it in place but I still need to add some hardware to be able to tie the front end down on case we have an earthquake etc.

As you can see, there is plenty of room behind the bike and a CB750 it 7 feet from tire to tire, and I am pleased I created an 8 foot work table so I can weld or grind and get some parts prototyped up at my own leisure.

This bike may take on a few guises until I am happy as to how I want it, thats the fun of doing your own stuff, but now I have a solid table, I feel much better when I have to belt away at a gas tank, as the metal tables you see, tend to flex about too much.

The other thing with this set up is I have the height where I want it, if I need to sit and do wiring, I can use a mechanics stool, I will finish the tie downs this week and maybe later I might paint it but right now I am happy how it is and hope you lot dig it too?

I have plenty to do on this project and a few Customers want me to create their builds, so I have every confidence in my work bench, way stronger than that Chinese crap that you see advertised out there.

I have much to do in the barn and more things to make, hang up or secure to the beams or the walls etc, but- when you get surplus second hand timber, well, you have to use it right away right?

Maybe it will inspire you to get in the Shed, Barn, garage and bung some scraps of wood together, its fun building stuff and even more when it doesn’t cost you anything.

Thanks for taking an interest in what I do, I love my job and enjoy building Motorcycles, servicing and of course, making new parts for these old Bone Shakers.

I will keep you posted as to how this Motorcycle and of course, any others that I work on in the Barn, I get many emails asking for pics of what I am up to, so now I can stop, take a pic and post it, that’s what’s fun about being your own boss. I have my Courier bike to finish too, so plenty of Irons in the Fire, so stay tuned……………….


Steve McQueen’s 1969 “Sandcast” CB750 Honda SOHC up for Grabs

This is a rare “Sandcast” 1969 Honda CB750 “Sandcast” that’s historically significant for two reasons, firstly it was the world’s first “superbike” and secondly it was bought new by Steve McQueen through his production company Solar Productions.

For those who may not know about this 500 pounds of Iconic Motorcycling Mastery, here is a small run down of the inline four Japanese History.

Having captured five consecutive championship titles in the historic 1966 World Grand Prix Road Racing Series, Honda decided to withdraw from the World GP circuit beginning the very next season. Upon that announcement, the company turned toward its primary target; the development of high-performance consumer machines. Thus it would achieve through the application of technology obtained in road racing.

Honda was in those days exporting more than half of its Japanese-made motorcycles. The company, however, did not offer large-displacement sports bikes, even though they were in great demand in developed countries such as the U.S. Moreover, sales of Honda motorcycles in America had begun to drop in 1966. Accordingly, American Honda had been asking for the development of new products.

The Dream CB450 was released in 1965 as a high-performance bike. Featuring a two-cylinder DOHC engine, it had been created at the request of American Honda, which wanted a higher-class version of its predecessor, the 305 cc CB77. Yoshiro Harada, who was in charge of the development project, reflected on the product’s history.

“In 1960,” he recalled, “the U.S. market for large motorcycles was approximately 60,000 units annually. Of these, most were imports from British makers. The Japanese market was comparatively much smaller, with monthly sales of several hundred units. But through our understanding of the situation we decided to develop a 450-cc bike, specifically a mass-production model, that could be sold in the U.S. as well as Japan.”

The CB450 sold relatively well, but it did not win acceptance as a major product. The majority of American riders, it seemed, did not judge motorcycles simply by how fast they could go. They also wanted responsive torque performance so that they could get the power they needed without downshifting. For many local riders, motorcycles represented a means of recreation and relaxation rather than rocket-sled performance.

Harada visited the U.S. around the summer of 1967 to observe the CB450’s impact in local markets. He even went so far as to detail the machine’s superior performance to the staff at American Honda, telling them it was even better than the 650 cc models by Norton and Triumph. However, they did not see the point in riding a 450 cc bike. Instead, they simply held to the belief that “bigger was better.”

The 650 cc displacement size was the largest to be found in Japan, yet these bikes accounted for only a few percentage points in the overall market. Harada therefore decided to develop a bigger model, as an obvious nod to the U.S. market. However, the request given by American Honda, ‘”the bigger the better,” seemed quite vague to him. Based on that advice alone, it would be difficult for Harada to determine the right displacement.

It was then that Harada learned from a reliable source that Britain’s Triumph was developing a high-performance model with a 3-cylinder 750 cc engine. This bit of news determined the engine specification. By October 1967, the outline for Honda’s new larger cc model had been defined: it would be driven by a 750 cc engine having a maximum output of 67 horsepower (one more than Harley-Davidson’s 1300 cc unit, whose maximum output was 66 horsepower).

A team of about twenty members was assembled on behalf of the development project in February 1968. The design of the CB750 FOUR had officially begun. However, Honda was already the industry’s leading producer of motorcycles, thanks to the popularity of its classic Super Cub. By introducing the CB750 FOUR, the company planned to become the world’s top manufacturer in terms of quality as well as volume. This model’s competition, however, would be formidable, since the pack included comparable models from Triumph, BMW, and Harley. Therefore, the new Honda would have to offer a superior level of performance and reliability in order to lead the field.

A 4-cylinder, four-muffler engine structure was to be the basis for design so that riders in every market could immediately associate the bike with the stunning performance of Grand Prix machines. Moreover, the handlebar position would be elevated – popular among American riders – to emphasize the bike’s dynamic, “wild” image. As Honda’s first mass-production model with a large powerplant, the CB750 employed various technologies designed to ensure high production volume and easier maintenance for the owner.

Integrating Design with Human Engineering

The objective of Honda’s basic development plan was to make long-range, high-speed touring safer and more comfortable, while achieving superior output. Therefore, the emerging science of human engineering – called “ergonomics” – was to be incorporated structurally, right down to the finest detail.

To facilitate the collaborative process among design engineers and production personnel, common engineering targets were established for product development. These included the following:

[1] Ensure stability during high-speed cruising (between 140 and 160 km/h) on highways, yet retain an ample margin of output for effective maneuvering in traffic.
[2] Provide a braking system that is reliable and resistant to high loads by anticipating frequent rapid decelerations from high speeds.
[3] Minimize vibration and noise in order to reduce rider fatigue during long-range cruising. Provide an ideal riding position for comfort and the proper operation of controls based on human-engineering principles, and design the mechanisms so that the rider can easily learn how to operate them.
[4] Ensure that various ancillary devices, such as lights and instruments, are large and reliable. They must be designed to help the rider make sound judgments and ensure sufficient visibility for surrounding vehicles.
[5] Extend the service life for each device and ensure that it provides for easy maintenance and servicing.
[6] Create original designs that also are easy to mass produce by utilizing newer, better materials and production technologies. This applies particularly to cutting-edge surface-treatment technologies.

The satisfaction of these requirements meant that the team would have to utilize the vast reserves of engineering information Honda had accrued in the manufacture of Grand Prix machines. Moreover, computer systems would be introduced in order to streamline the various steps involved in development. However, computerization ultimately did more than that. It increased the efficiency of numerous development tasks, including plan modification in the prototype phase, design changes, hardware modifications, and testing. It even reduced the time needed to plan a line for mass production of the CB750 FOUR.

The First Motorcycle to Offer Disc Brakes

Fortunately, Harada had come across some after-market disc brakes in a motorcycle accessory outlet during his trip to the U.S., and they had proved effective in the CB450. As a result, he immediately visited Lockhart, the developer and manufacturer. After consulting with the supplier’s staff regarding the ideal design, Harada left the company with a set of their products. He secretly believed the new model they were going to develop might offer an opportunity to adopt disc brakes.

The day of the 1966 Tokyo Motor Show, scheduled for October, was fast approaching. However, Harada was still unable to make up his mind. Therefore, he brought two different brake specifications to Soichiro Honda and asked for some advice.

“We’ve designed two separate specifications having different braking systems,” he told Mr. Honda. “One uses conventional drum brakes and the other had disc brakes. Of the two, the disc-brake specification had only recently been developed, so it will need more tests. If disc brakes are adopted, we aren’t sure we can meet next spring’s completion target.”

Mr. Honda’s reply, though, was simple and direct: “Well, of course we’ll have to go with disc brakes.”

The CB750 FOUR was a hit at the Tokyo Motor Show, flashing its big disc brakes to throngs of admirers. Rave reviews began pouring in.

However, immediately following the show, many hours were spent analyzing the remaining problems. Before the model’s commercial launch issues that needed to be solved included increased wear of pads and noise in the brake pads, problems that were generally associated with disc mechanisms. They had to be solved in order to “achieve higher power while maintaining safety,” which was a key requirement in the development of the CB750 FOUR.

Mr. Honda, in his reply to a question from an engineer, explained Honda’s objectives in developing the CB750 in the January 1969 issue of the company newsletter (No. 124):

“When I went to Switzerland last June,” he said, “a policemen on a white police motorcycle came into the park where we were. He then got off his bike. I was watching it, thinking what a small motorcycle he was riding. I was amazed to find it was a Triumph 750 cc. So, actually the motorcycle was fairly big, but it looked small since the policeman was so big. [Laughs] I knew then that our bikes wouldn’t sell in foreign markets if we kept building them according to our Japanese perceptions. That’s why I suddenly became enthusiastic about this, and it’s why I started telling them to develop a bigger model as soon as possible.”

The CB750 FOUR was released in the U.S. in January 1969. That year, Honda held its first U.S. dealer meeting in Las Vegas, Nevada, a gathering of motorcycle dealers from across North America. The meeting’s objective was to motivate sales, which had been sluggish since 1966. As a strategic move prior to the coming spring season, the meeting was also attended by company representatives from Japan, including Soichiro Honda himself. The event’s true highlight was the introduction of the CB750 FOUR and other new models such as the Z50 and SL350.

“A retail price of $1,495 was announced by American Honda’s President Kihachiro Kawashima at the Vegas meeting,” Harada remembered. “Since large bikes were selling for between $2,800 and $4,000 in the U.S. at that time, all 2,000 dealers burst into thunderous applause when they heard its price. I’ve even heard that the machine fetched a premium as soon as it was on the market, selling for $1,800 to $2,000.”

Honda was soon deluged with orders for the CB750 FOUR, and the initial production forecast of 1,500 units a year became a monthly figure. Even that, however, was not enough, so the number jumped to 3,000 units.

Employing an Idle Facility to Produce a Large Motorcycle

Saitama Factory (currently Wako Plant) and Hamamatsu Factory were in 1969 selected to produce the CB750 FOUR’s engine and body, respectively. American Honda sent two engineers to Saitama Factory to join the staff for a series of tests, in which 300 items were checked from the user’s perspective. Honda Motor had high expectations for the exportation of the CB750 FOUR which was believed to be a strategically important bike for increasing the sales of other Honda models on the U.S. market.

This was Honda’s first attempt to market a big bike, and therefore it would be hard to forecast sales accurately. For that reason each plant decided to make effective use of idle production facilities, normally used for power products. This would serve to minimize the company’s overall investment. Modifications and overhauling, however, would be needed before their equipment could be used to build the CB750.

Honda’s previous models used a spilt-type, press-fit crankshaft having a needle bearing. However, the four-cylinder powerplant in the CB750 FOUR employed an integrated crankshaft and metal bearing. At Saitama Factory, the staff wracked their brains trying to identify the right machining equipment and line configuration to produce a part they had no experience making. They even visited automobile manufacturers in order to acquire some knowledge they could use to plan the line.

Efficiency on the line was poor initially, and as a result the production volume was at most five units per day. However, the machine became an instant smash hit, bringing tears of joy to everyone involved with the CB750’s creation. The initial production forecast of 25 units per day was pushed up to over 100 units. Back orders piled up as a result of this explosive, yet completely unexpected sales activity. Soon, the production of sand-molded crankcases, for which the factory did not have a dedicated machine, could no longer meet the rate required for mass production. In response, the entire crankcase production facility was upgraded to adopt the metal die-cast type. The line was gradually enhanced as production volume increased. However, every time the volume was adjusted, additional employees would be mobilized to run a temporary line. Everything had to be accelerated in order to produce such a number of bikes at Honda’s level of quality. Ultimately, though, the production of engines and bodies was transferred to Suzuka Factory – in July and October 1971, respectively – as part of the company’s endeavor to satisfy customer demand.

Suzuka Factory was then building the CB500, using a production line within its automobile plant. However, there were problems with this facility, including a restrictively narrow corridor along the line that hindered the smooth flow of parts. Therefore, with the assumption of CB750 Four production, the factory took a long-term view and changed the L-shape line for body assembly to a straight-line configuration. The move offered a better work environment and vast improvements in employee safety.

The organizational structure and operator training were improved, too. To that end, a dedicated organization was formed for the production of the CB750 FOUR by gathering selected personnel from the Honda 1300 and TN lines. The resulting vacancies on those lines were then filled by personnel from the factory’s auto plant. Those assigned to the motorcycle production line were then given orientation concerning the major differences from automobile production, particularly with regard to the prevention of damage to the product’s exterior. Accordingly, the line started up on schedule, with all cost and quality objectives satisfied.

Creating the Nanahan Boom

Honda had succeeded again, bringing other Japanese manufacturers into the arena with sports bikes featuring large, 750-cc engines. Therefore, it is no exaggeration to state that the Honda CB750 FOUR was a pioneer model in that regard. In fact, it gave birth to a new category known in Japan as “Nanahan*1.” Yet the Honda model, with its decidedly high-performance intentions, also fared very well on the racing circuit.

The in-house racing team at Honda R&D brought their CB750 Fours to compete in the Suzuka 10-Hour Endurance Race scheduled to be held in August 1969, soon after the model’s commercial launch. Honda dominated the race with a one-two finish by Blue Helmet MSC. The team of Morio Sumiya and Tetsuya Hishiki took first place, while the pairing of Yoichi Oguma and Minoru Sato came in a close second.

Veteran rider Dick Mann, meanwhile, streaked to victory on his CB750 FOUR at the AMA Daytona 200-Mile Race in March 1970. It was a ride that sent customers throughout the States running to their Honda dealers. In reflecting their conviction that “bigger is better,” American riders soon wanted a bigger bike with an engine offering even larger displacement.

The American hunger for large bikes was enhanced with the 1972 launch of Kawasaki’s hot new 900 cc ZI. Forced to develop a more appealing sport bike with a larger engine, Honda launched its 999 cc Gold Wing GL1000 in the American market. The units were initially exported from Japan, but as demand grew production switched to Honda of America Manufacturing (HAM). In May 1980, the first U.S.-made GL1100 machine rolled off the line. It was very well received in the U.S., becoming a major force in the growth of local production activities.

Note:
*1 Nanahan: Meaning 750 in Japanese, the term was used by the development staff to maintain the confidentiality of their new model. Nanahan later became a popular term, and was widely used in magazine circles.

Steve McQueens ” Sandcast” CB750 Sandcast is now up for grabs.
This 1969 Honda CB750 is an early-production model that was acquired by Steve McQueen’s Los Angeles–based Solar Productions movie production company in July 1969. The bike is powered by a 736cc inline-four featuring a “sandcast” case and is finished in red with chrome fenders. Features include a five-speed transmission, a chrome four-into-four exhaust system, quad Keihin carburetors, an electric starter, a front disc brake, street lighting, a two-up seat, and both center and side stands. The bike was acquired by the seller in 2016, reportedly from its second owner of 45 years, and subsequently underwent a two-year mechanical and cosmetic refurbishment that was completed in February 2022. This CB750 K0 Sandcast is now offered with original sales documentation, a letter from Honda Motor Company, a copy of an invoice from American Honda, refurbishment records, a Honda tool kit, a yellow-on-black California license plate, and a clean California title in the seller’s name.

The fuel tank was refinished in Candy Ruby Red with gold and black stripes, and the oil tank, side cover, upper fork covers, and headlight bucket were painted to match. The duplex-cradle frame was media-blasted and repainted black. Features include chrome fenders, street lighting and reflectors, a two-up seat with chrome trim and a rear lip, folding passenger foot pegs, and both center and side stands.

Re-chromed rims measuring 19″ up front and 18″ at the rear are laced to clear-coated hubs with zinc-plated spokes and were mounted with IRC Grand High Speed GS-11 tires during the refurbishment. Suspension consists of a rebuilt telescopic fork with black rubber gaiters and clear-coated sliders as well as a swingarm mounted with dual chrome-shrouded shocks. Braking is from a disc with a rebuilt caliper up front and a drum at the rear.

A re-chromed handlebar equipped with dual mirrors is clamped ahead of instrumentation consisting of a 150-mph Nippon Denso speedometer and a matching tachometer with an 8,500-rpm redline, both of which were refurbished at Motorcycle Gauge Restoration Services in the Netherlands. The five-digit odometer shows 22k miles. Total mileage is unknown.

The 736cc SOHC inline-four features an early-production “sandcast” case with a rough texture formed by a gravity-casting method rather than die-casting that was used for most of the model run. The engine breathes through a quartet of 28mm Keihin carburetors and a chrome four-into-four exhaust system. An overhaul of the engine at Charlie’s Place of Glendale, California, in 2019 included replacement of the timing chain, tensioner, roller, and guides as well as the pistons, stator, starter, and points covers.


Engine number 1001370 falls within the range of the approximately 7k Sandcast engines produced.

Power is sent to the rear wheel through a five-speed transmission and a replacement drive chain.

A copy of a July 1969 invoice from American Honda to the dealership owned by McQueen friend, stunt double, and riding companion Bud Ekins lists delivery of a red CB750 that was noted to be “For Mr. Steve McQueen.” The serial number shown (1001064) matches the number stamped on the bike’s frame, a photo of which can be viewed in the gallery. 

The bike is accompanied by a notice of transfer mailed to the Department of Motor Vehicles in Sacramento, California, from American Honda stating that transfer of ownership to Solar Productions Inc. was made on July 23, 1969. The card lists a vehicle identification number that matches the number stamped on the bike’s frame and a vehicle license number that matches the yellow-on-black California license plate .

An awesome machine with some great History too.

BaT Essentials Seller: Niteroi Location: Santa Barbara, California 93101 Listing Details Chassis: CB7501001064 Engine: CB750E1001370 Early-Production Sandcast Model Refurbishment Completed in 2022 22k Miles Shown, TMU 736cc SOHC Inline-Four Five-Speed Transmission Candy Ruby Red w/Gold & Black Stripes Electric Starter 4-Into-4 Exhaust System 2-Up Seat w/Rear Lip Front Disc Brake Private Party or Dealer: Private Party Lot #71469

The Dispatch Cafe Machine 1975 CB750 F Super Sport S.O.H.C.

Been a while since I have tinkered in the Barn, I am starting to do a bit of creating on a machine I have had as a stock bike and sat in storage for many moons, and I thought to myself, why not create something that I personally rode back in the day and in the style of what was the latest Motorcycle hitting the TON back in London.

I have loved bikes as a kid and my bedroom was literally covered from walls to ceiling in motorcycle posters, of course I loved the Cafe Racer scene and had many Dunstall style bikes on my wall, but wanted to have something similar when I was old enough to ride.  I actually put Clubman bars on my first ever little moped as a crazy 16 year old, I had a Bikini Fairing on the front and a little expansion on that ride, I loved it.

I was a Dispatch rider in London and Birmingham, delivering stuff all over the UK but many trips around the City of London to iconic places like Buckingham Palace , The House of Lords, Newspaper and Magazine Companies, to dodgy Porn Video tape sellers in SOHO, but I loved it.  In London especially, you needed to be able to carry as much as you could for the better wage, but you also needed to be a streamlines as possible to speed through the busy roads of London.

The Creation I am putting together reflect my life, so not a quick build, this is something I will take my time on and weather you like it or not, it will be something that is really a part of me and my life on two wheels. It will take some sorting out to fit the Original Avon fairing that was indeed on a Dispatch bike in London, I have had it years its beaten up and half missing but that’s perfect as we never had any money for lavish New parts, we bought stuff out of a paper called the “Exchange & Mart” then fitted it and never really had time or cash to fully paint it, so this will be great for the ride and I hope I can fit this to the machine to work just like it did when I was a lot younger. LOL!


I used to spend many an hour looking through that rag as it was only 15p and I am sure people back home in Blighty reading this will also remember doing the same, no internet then ha ha.

I am happy that I can do this and reflect on the years that have seemed to have flown by, no idea where the 140 pound Skinny Fella went to but I can always reminisce with this build, the bike was super heavy but strong as an Ox, I hope to get the bike completed sometime this year and will show it as a feature on the website.

I may go with a different seat of mine, I have already tried 5 different seats and still not happy, but thats half the fun of designing something and when I get it right, I shall feel a whole lot happier.

You used to see so many of this style when I was riding around Oxford or regent Street, on a busy Tuesday morning, having a fairing and side Panniers gave me so much more loading space, some days I would even fit a back rack and a top box, but that did get a little over laden at times.

I think I have a screen for it but can get one from a company here or in the UK, so no worries on that, but a long way to go as I have to allow for the steering to move smoothly and not catch anything mid turn.

Of course I shall have a headlight in the fairing, an old style one too and the obligatory Fog lights as well, fun times ahead and thought that i would share.