No products in the cart.
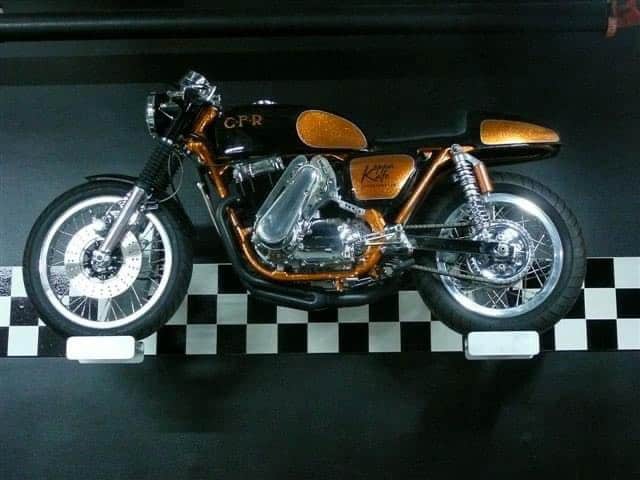
The Old Koppa Kafe was a fun Custom to create in my Garage.
20
Jun
No idea where the time has gone to be honest, but I always loved creating this machine, just because it has so many great Original parts on it that really did make people turn heads.

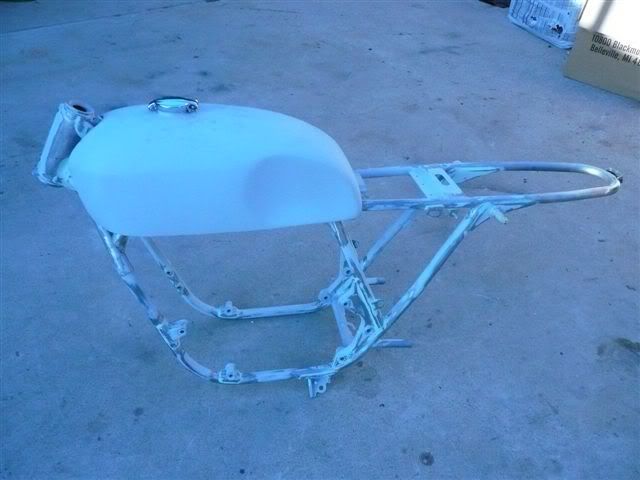
So I started off with a bunch of parts and already had the idea of how I wanted this, as the KOPPA KART was a famous Barris Kustom Truck that I had loved as a teenager and wanted to have some Copper Influence on this Motorcycle, but I had to do a ton of preparation to the Honda Duplex cradle frame to make sure all looks good when painted.
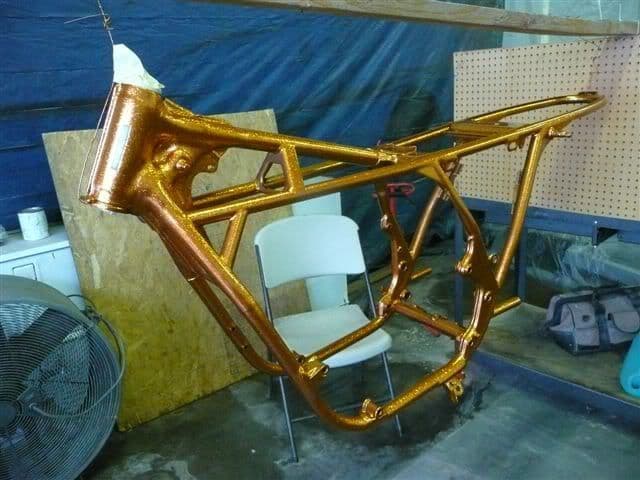
There was a lot of hand sanding and grinding of old Factory welds to try and make this Chassis as smooth as I possibly could, but also, I cut the neck and added a couple more degree’s to the rake, not too noticeable but I didn’t want it too aggressive, and I think this came out perfect for what I was looking for.
Also made up a Hoop and welded that to the frame, nobody was doing this back then and wanted it to finish of the seat that I was going to fit to it, and welded a bracket at the rear so I could attach the seat cowl and make it sturdy. But the most work that really needed some attentions was how was I going to extend the stock gas tank 5 inches, as I wanted a much longer fuel tank and thought that I may as well use some of my old spare gas tanks to cut up and make the change.

This is no easy task but, I was fortunate to have a bunch of K series Petrol tanks laying about in my garage rafters and thought the best way was to keep the front end and extend the tank backwards using sections from a couple of old gas tanks.
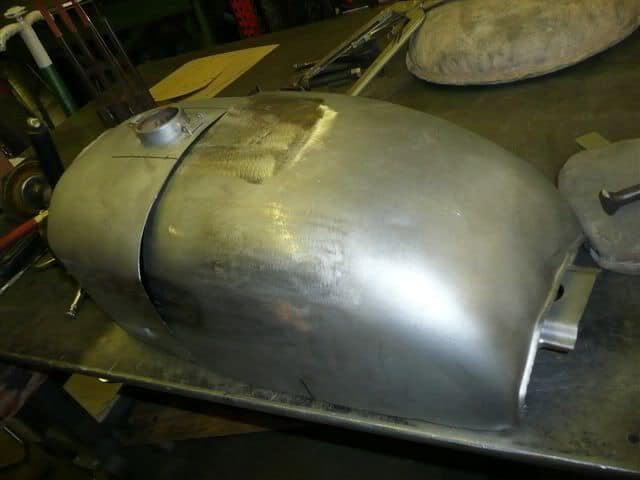
You can see the section cut and of course had the gas tank media blasted to get all the paint off so at least there was clean metal to work with, this will also have hammered knee inserts to give it that touch of Nostalgia of TT racing days and I was glad that I did go this route in the end.
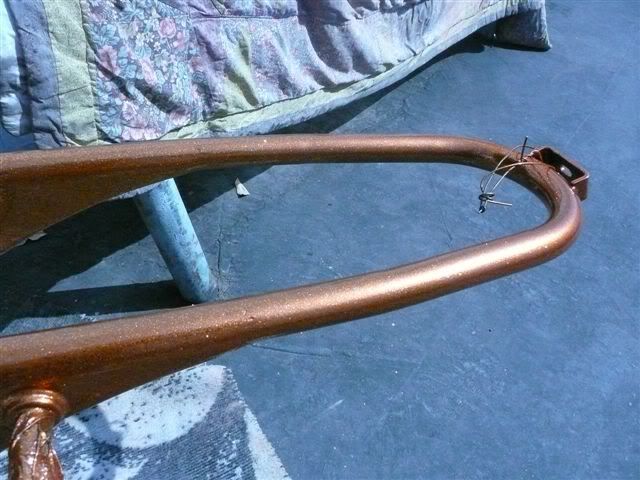
You may not notice the stretch but its way past the original mounting bracket on the frame, you may also notice that I cut the rear exhaust and passenger peg supports down, this was to clean the lines up and allow for the lower part to become a bracket that my Italian rear Sets could attach too, I also braces gusseted the frame under where the gas tank sits just to give the frame a little more rigidity.
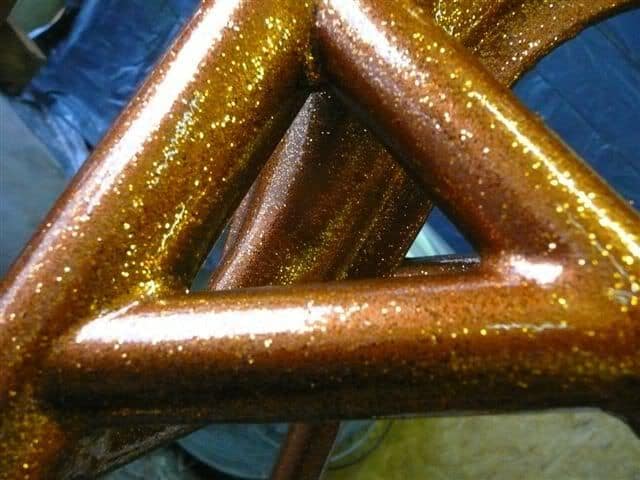
Here is the cross bracing that I did and used the pieces I cut off the bike, so it all got re used into this creation and I had not seen anyone do this before too so another added attraction I guess?
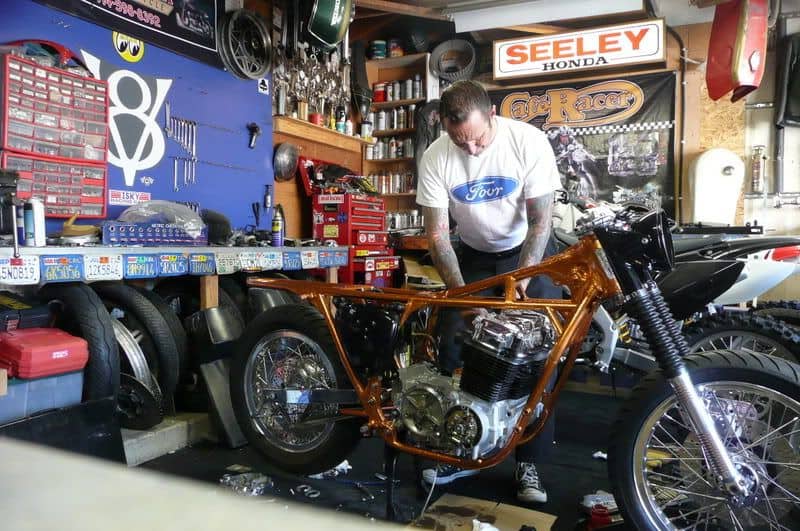
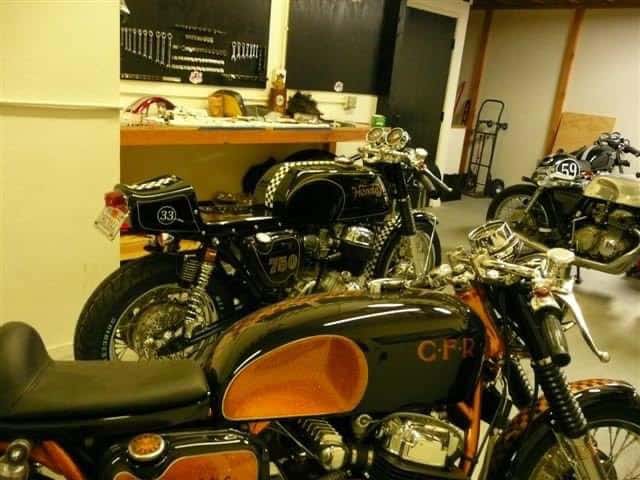
Putting this machine together in the garage was pure fun, I really did love the way the old girl was being revamped and as you can see, I did a lot of detail as at the end of the day, I was building bikes for a living now and this would be a great business card bike. many cool Parts and I used a pair of 18 inch Aluminum rims that were for a CB750 Automatic, of course I used to rear rims and then polished them to a chrome finish to give it a little more Bling.
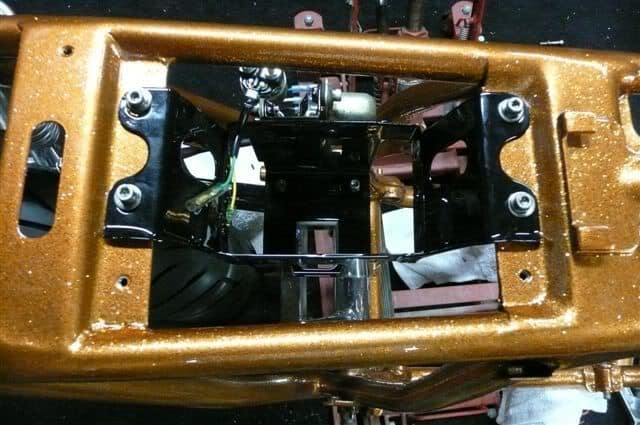
So many hours were put into this and it became quite a challenge at times, but kept pushing on, I had to retap most of the thread holes as metalflake gets everywhere when you paint it and not use a booth, but I kept being persistent and it paid off, I used stainless Allen head Bolts through out the bike too, not cheap at almost a dollar per piece but makes the bike for sure.
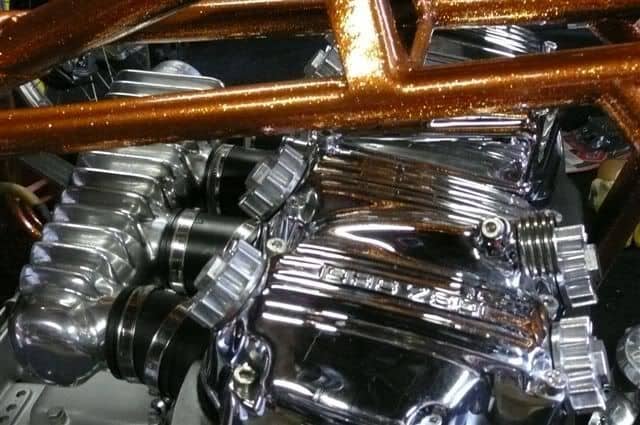
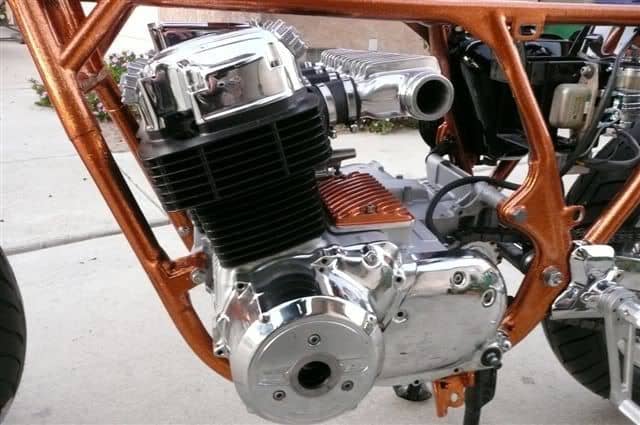
Hand polished all the Aluminum and it took me forever to find an intake Plenum, I had one but it just would not fit, found out it was a Suzuki one, so thought to my self, ” Where the hell am I going to locate one of these Plenums for a SOHC?” Then I got an email from a guy in Sweden who had a Suzuki and was Supercharging his but, his Plenum didnt fit and he thought his may be for a Honda. So we traded and sure enough, when I tried to fit the Swedish one, it fitted like a glove. What were the chances of finding another eh?
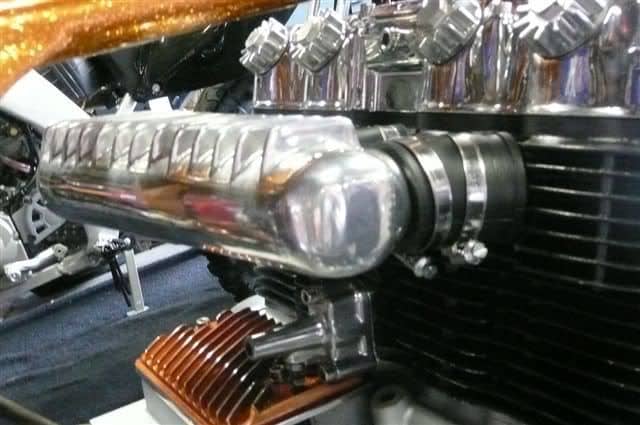
What a piece of art it is too, so happy to be able to fit this to the machine and another tick off the list of things that needed to be accomplished to get the bike to the standard that I was after.
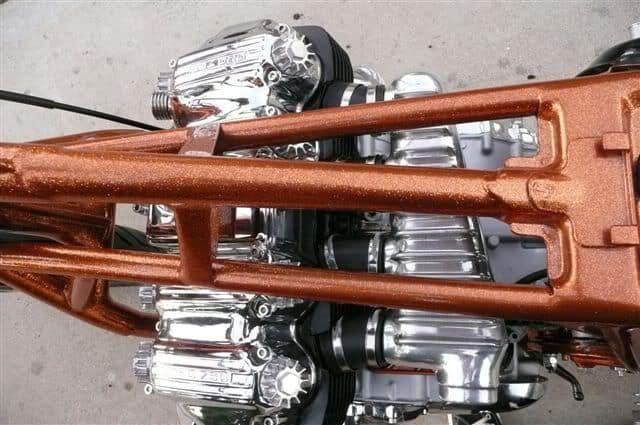
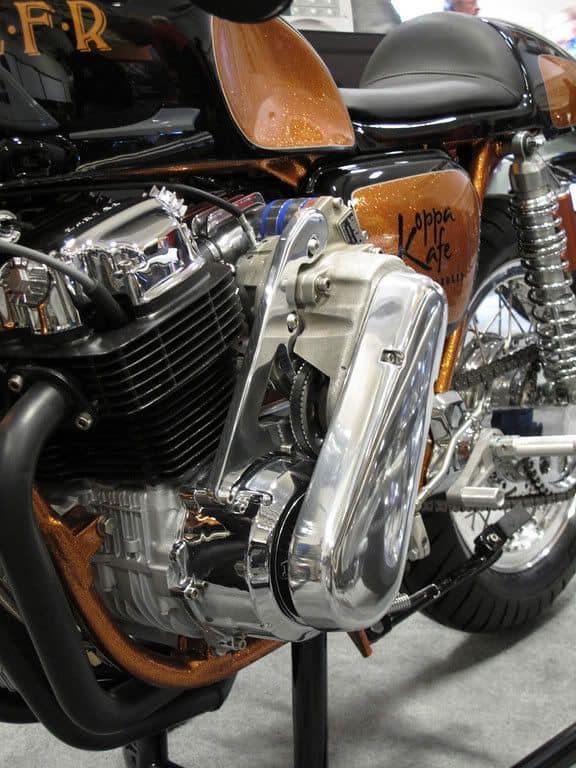
Just look how cool this Copper Metalflake looks, we used 3 pounds of the stuff to get the required depth that i was thinking of and a ton of clear coat was used to smooth it all out, but that Polished Aluminum offsets the Copper really well , what do you think?
I really was happy at the way the bike sat and looked and bit by bit I would get things accomplished, then I would push it onto the driveway to see how it looked in natural light.

I had Machined the front Lower forks and rebuilt them with New uppers, springs and this was a neat and unusual look as I had never seen anyone machine lower forks on a 750 before.

When I had these on the bike at Shows, people would ask about the forks and send me theirs to rebuild and give it that Custom look, it sure added some Custom touches as I painted the grooves Copper to go with the rest of the bike.
Finding someone to drill the correct hole on the stator cover, turned out to be a pain in the arse, I had one so called shop in another state have a go and messed it all up, so I did it my self and under cut the hole then used a drum sander to keep adjusting until the oil seal fitted tightly, and there you go, job done.
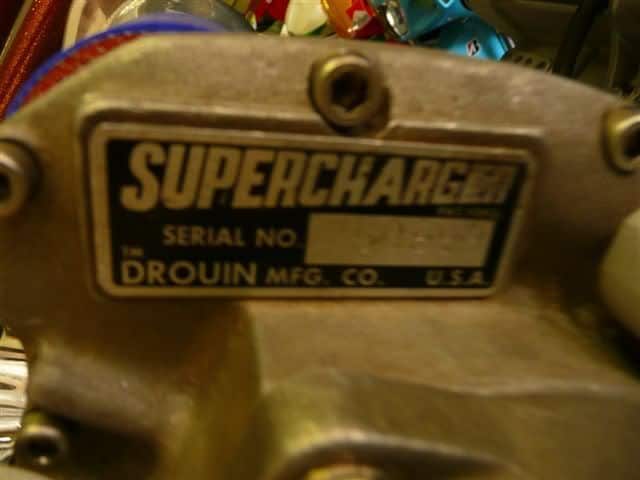
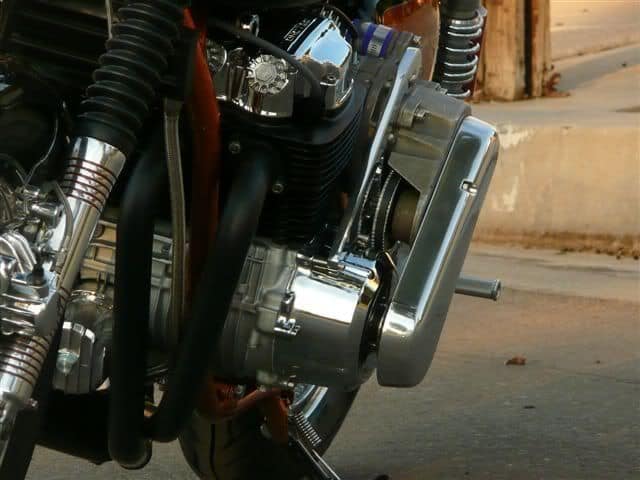
I had an Old Drouin Supercharger that was once going to go in an old chopper/drag bike and after I got all the parts I knew what bike I was going to build. Now, the Motor I had was a fully Blue Printed motor, costing 7000 Dollars many years ago and this was perfect for the bike and thats how this came about.
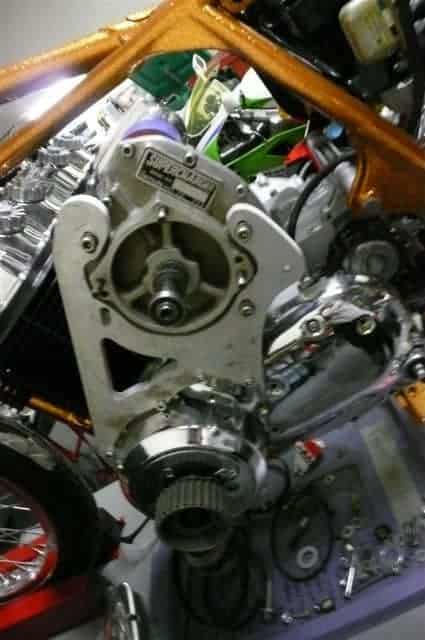
I had a local company water Jet a bracket out of 7075 Aluminum and gave them a paper template, this worked out and treat and bolted right up to the SOHC motor with exact clearances, I simply Polished the bracket once everything was test fitted and you can see the Crank Pulley at the bottom fitted perfectly too.
All fitted and this Mechanical Washing machine looked Bloody awesome all hanging out of the engine on the Left hand side, it is Belt driven too so pretty quiet to be honest with a neat Polished Aluminum Belt cover for added coolness.
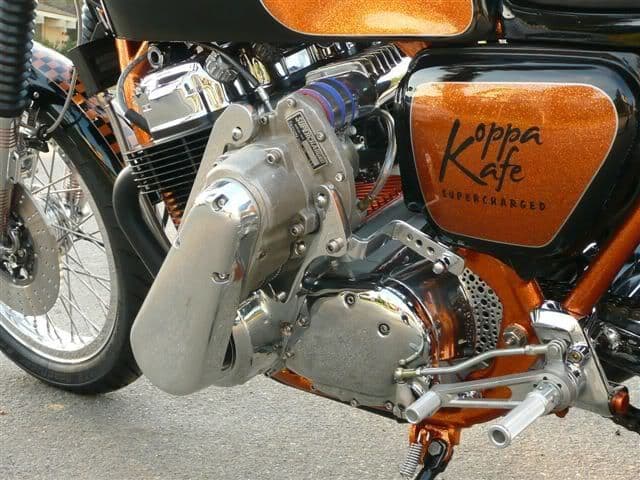
Yeah, it was an intricate bit of Kit to begin with but loved looking at this Motorcycle I looked at it as a piece of art and used as many pieces from a 1969-1978 Honda as possible.

I hand Hammered the knee Inserts using a Tear Drop Hammer from Eastwood Supply and this came out so nice with the Copper paint and boy did it shine when the Sun hit it too.
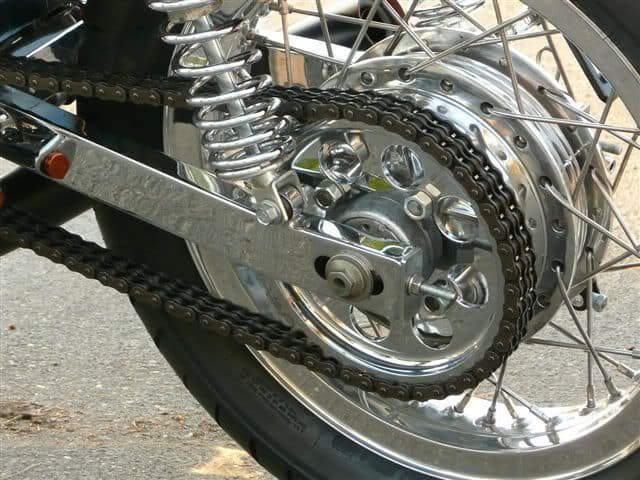
There is a lot of work here and those who have tried to Polish their Hubs will know what I am talking about, I also added a Double Chain and Sprocket set up as there was a lot of Torque here in that engine, I couldn’t locate one for the longest, but Azusa Chain helped me as this was for an Old Lathe and converted it to the bike and worked really well, ran a slightly wider sprocket carrier for the offset to be right.

I also fitted an Old Lockart Oil Cooler to the bike as it will run 15% cooler with that fitted and as the Oil Filter Housing has some broken fins, I cut them off and polished the body and it looked pretty good to be honest. I ran Braided Aircraft lines to the cooler too some Dash 12’s.
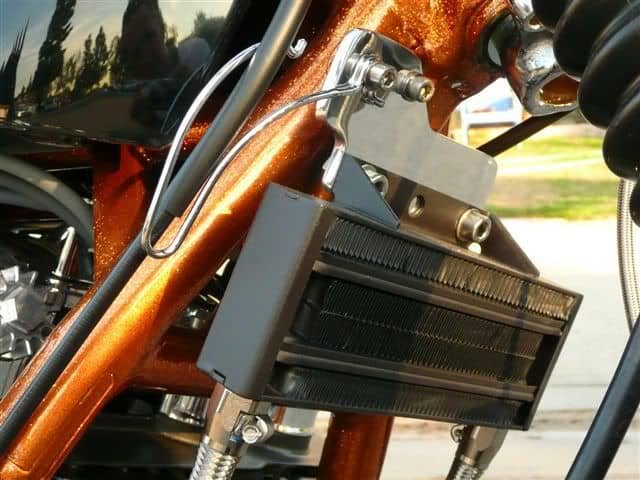
That’s an Original Lockhart Cooling Radiator too, I made a thick Aluminum Bracket to mount it to the Horn bracket and then polished it to look like chrome, it worked really well too.
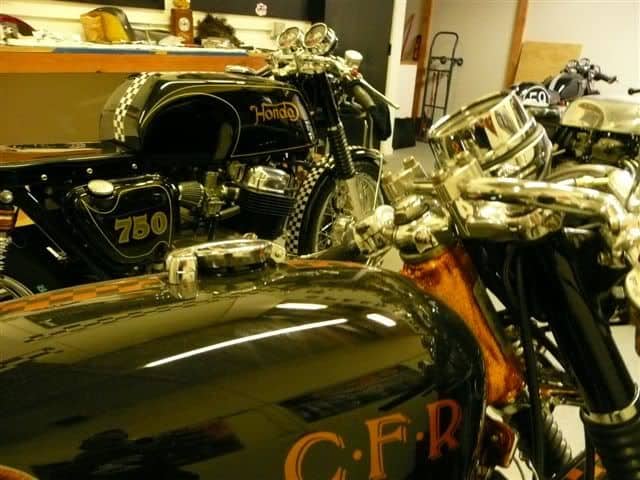
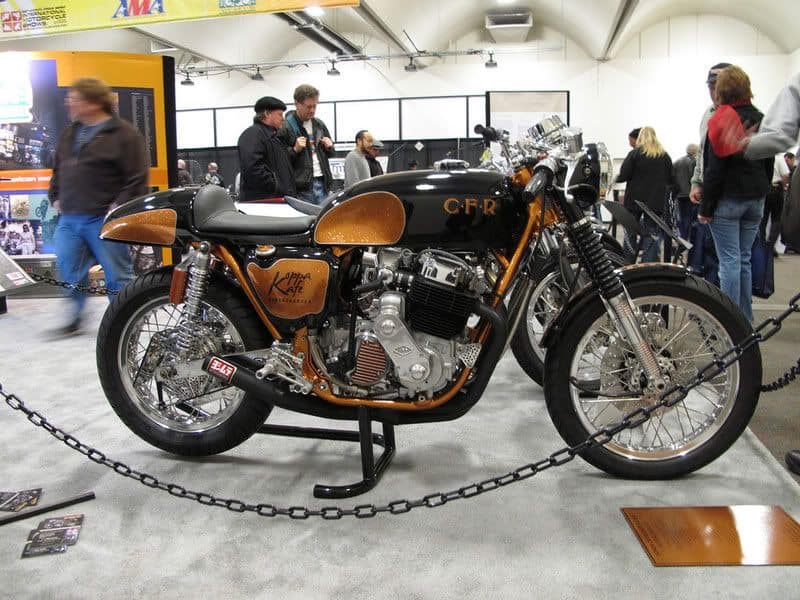
That tank turned out so well, I used Por15 to seal it before painting and then pressure tested it at a Radiator shop, C.F.R was for Cafe Racer but in the style of the old H.R.D Motorcycles of years gone by.
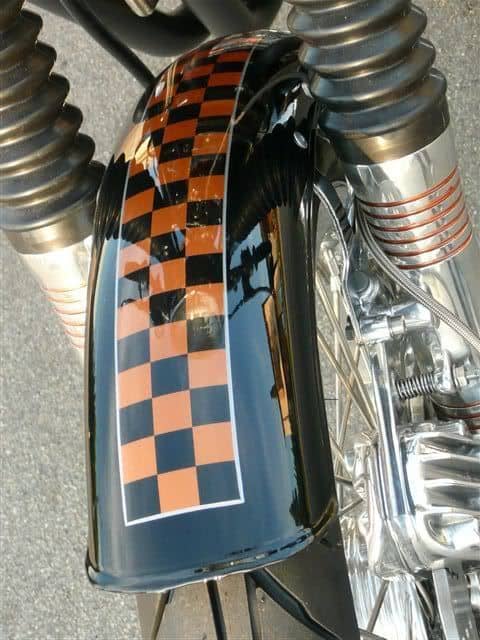
This was My first attempt at making a Fiberglass front fender, since then I have sold over 500 of these to Customers all over the world, its 22 inches and has a bead all the way around it.
Cant get enough at looking at that, even today, it was a tough Motorcycle with loads of interesting parts and so Glad that I jumped in and had a go at creating this machine, there wasn’t many Café bikes at all about, so many people used to comment on what sort of bike it was and I think i was lucky enough to inspire a few people to have a go their selves and create their own unique ride.

My First attempt at a Custom Gauge, using an original one, I wanted to put BOOM at 140 MPH, got many comments on that and it was a great discussion point at shows etc.

I fitted an Original Series One Yoshimura exhaust of which was the pattern for all the systems I make today, I used a CB750 Connecting Rod for the license Plate holder, I later swapped the plate to the other side as the exhaust gases would tarnish the chrome lol. They are New Old Stock FOX shocks too and they really did give the ride height that I wanted on 18 Inch rims.
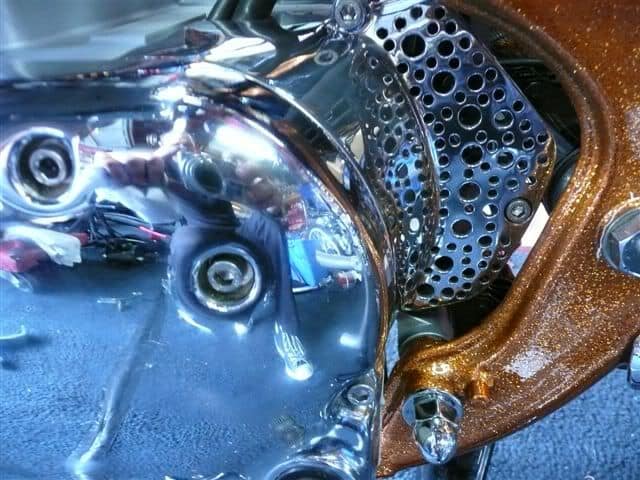
Allen bolts all through out the build and I did my drilling style on the sprocket cover just the break up some of the glow of the polishing, I have made many of these covers and sold to customers too over the years.
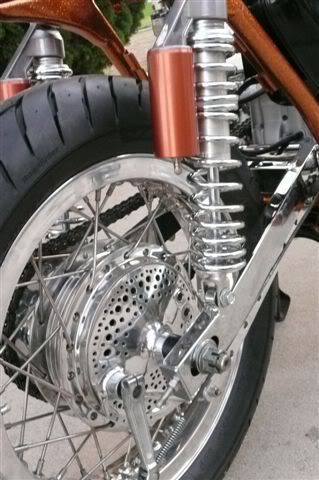
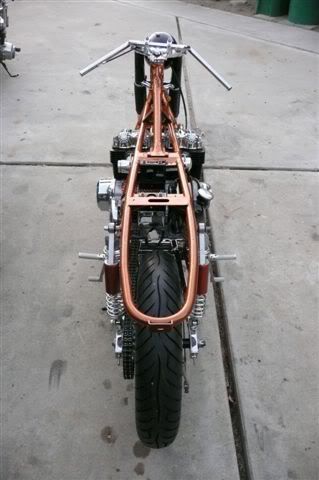
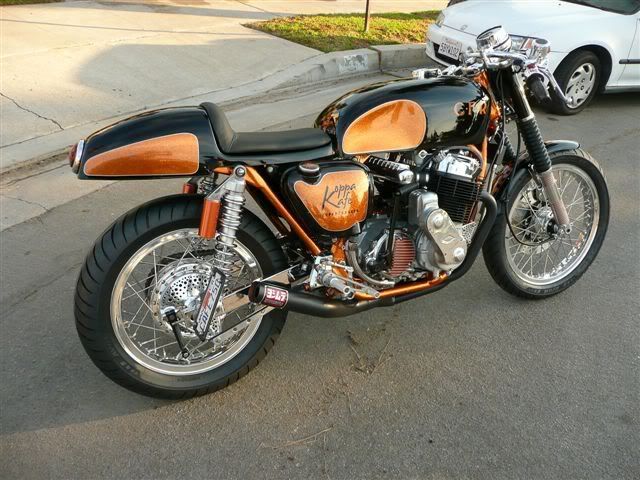
Rear Hub gets the same treatment and that’s an Original Dresda Boxed Swing arm that I chromed and boy does it look sharp on the bike, it really does accent that rear end.
I used Cow Hyde to upholster the Custom seat and used Gel foam for a comfortable ride and its a nice riding position with that 5 inch stretched gas tank.

Everything I feel on this Motorcycle Flows well, its such a warm color too, I hope that you liked just some of it as I know that you understand how much effort goes into creating a machine such as this.
Time has moved on and this bike now resides somewhere in Australia and hope the owner is having fun with that Custom built CB750 HONDA.
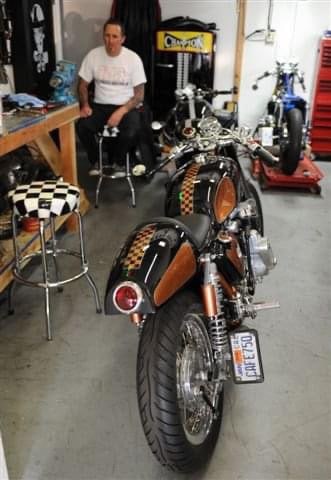
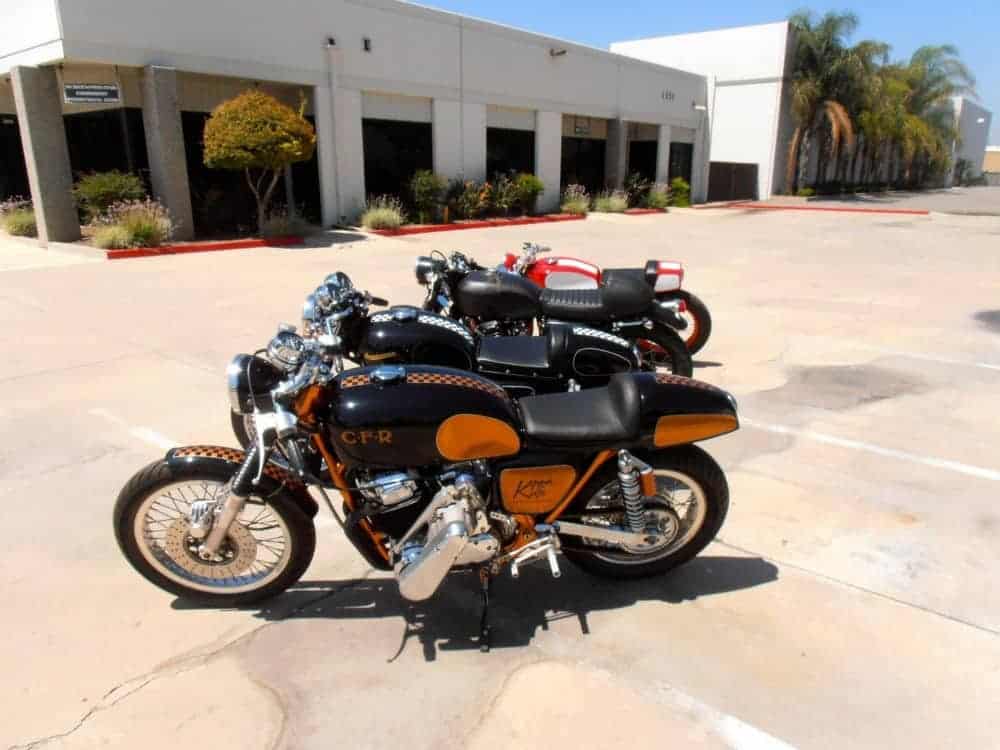
I took this bike to many shows all over the USA and had many great conversations with like minded people.

I think this was Seattle show but ALL the shows were super fun and made so many friends and acquittances etc. it’s a healthy industry now and I am still making many parts for these super fun inline four motorcycles.
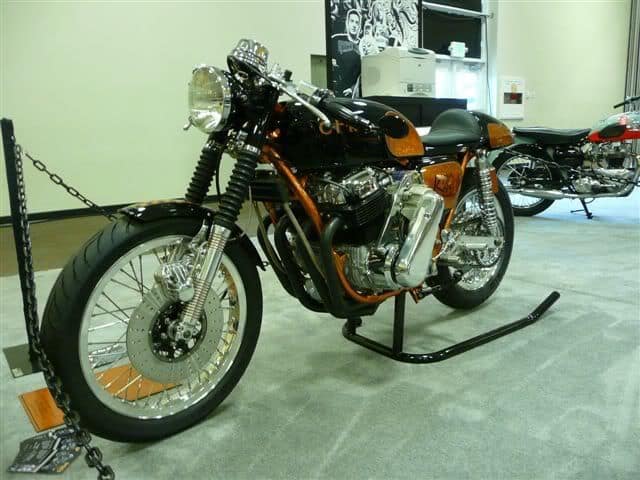
I used a headlight from an Old DeSoto Automobile as I think it fitted in between the fork ears really well, I hand drilled the front Rotor using my drill press, I even made the bike stand.
One of the last photos before the bike made her way to the other side of the world but am proud to say I created that Monolith of a Café Racer.
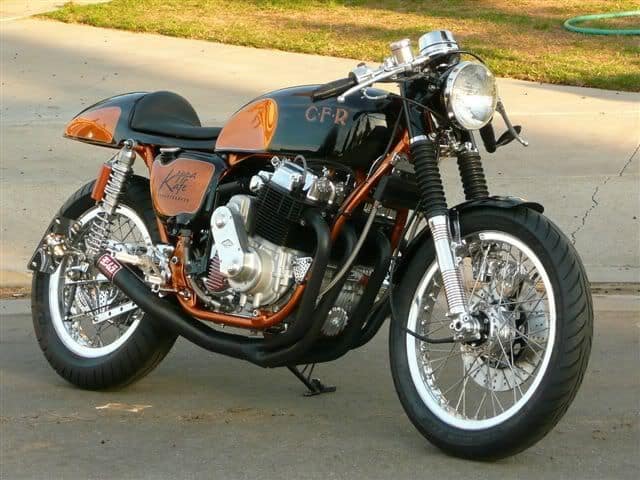
As you can see, on the Right side of the bike, I fitted an old 1974 ARD Magneto, that too is Belt driven and gave the bike its Status Quo, she sure does sit well on the Tarmac too.
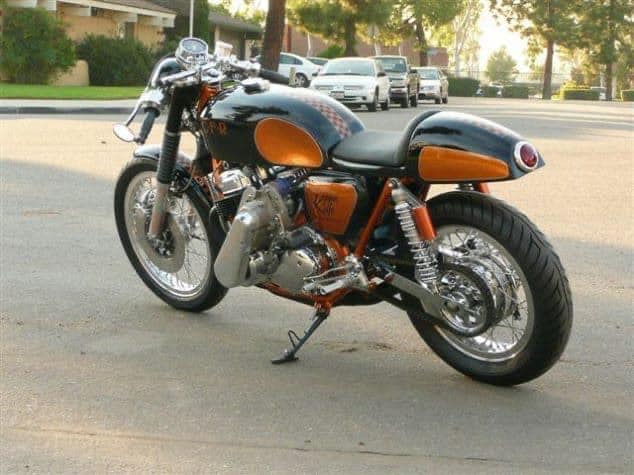
I used a Pontiac Taillight for the rear on My Custom Rocket Four seat assembly and I still sell them to this day and send all over the Globe.
Thank you for reading my Blog today, I just wanted to show you a bike that I really did have fun creating and love seeing what you lot are putting together. Below is a before and after shot.
Have fun with what ever you are creating and if I can help, you can call, email or even text me, I am always here to advise Thanks again and keep on building and Riding.
.