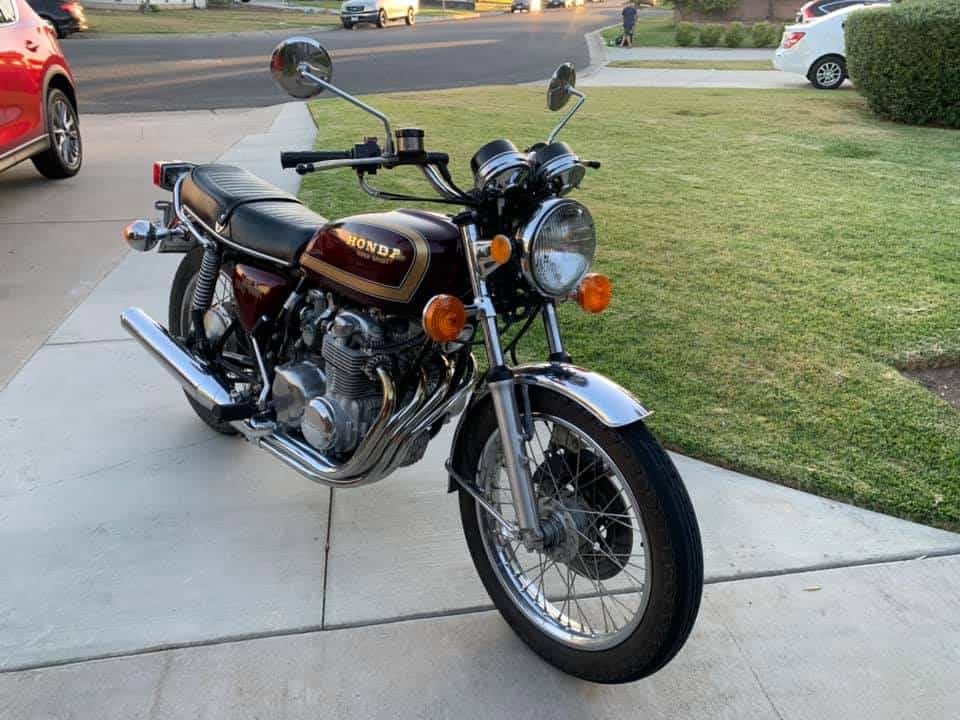
CB550 I am putting together from parts laying about.

Well, here we are and will shortly be beginning a New journey, moving to a bigger place with an acre of land and shall be having a Barn built for my workshop, so I thought I would try and use some of the old parts I have in my storage, to at least get a rolling chassis, so will be easier to move around when the time comes for me to move all my stuff.

This 550 frame was a friend of mines, but he got into a bad accident a few months back and will no longer be riding again, so, rather him getting rid of the frame, he gave it to me with some bits and bobs, and Ii thought now was a good time to at least assemble a few bits that I do have and see where we end up down the road a bit.

I had de-tabbed it and welded a hoop a few years back and then he had the chassis Powder coated and thats how it stayed, so I now have this at home and am now starting to see what I have to get this in some sorting of movable project, and I have a long way to go, as well as dealing with the smoke ash and bad air quality, due to the fires, I shall not be rushing this.

I am going to be putting it together in my spare time and see where we end up, but have an idea roughly of a Brat style bike that might be fun to ride on El Mirage dry lake etc later  on when the SCTA meets start up again.

When you start off with just bare bones, and no Game Plan, who knows where you will go, but, as we may be on the move very soon, I need to clear some of my storage out of parts laying about and at least make this 77-78 Frame Rollable, so I can move it about a little later on.

I managed to locate an old swing arm and fitted that to the chassis, and then I pulled out some TEC shocks that I had in a box and thought that this would be the best project for these as they are Brand new and will set the bike off nicely.

I had some Polished lowers in a Draw and some Hard Chromed upper stanchions all wrapped up in a box in my storage facility, so a good time to put together a good set of front forks, complete with New O-Rings and Upper Nuts etc, finished the look off with some chromed Dust Covers and there you go, a neat front end. I actually use A.T.F. for the oil and then set the pre-Load by adding 4 Stainless Washers in the top above the spring, just like they did at the Race tracks, as I hate the plastic tube spacers, dont trust them at all.

This bike needs everything, so it may take some time to get all together but, for now I am piecing the bike in the garage and its taking shape right now, a 18 Inch rear rim laced to a front polished hub and stainless stee spokes was the order of the day and of course, it would not look as Custom, without a set of Diamond Pattern Tires.

You may also Notice that I have fitted a Pro Moto set of Black 7/8 Handle Bars, with a center brace, just to give it a more Tracker look and to be honest, they feel really good on these tree’s.

Now she has a rear wheel and, even though she sits higher, I really am digging the ride height and stance of this machine, admittedly, she may drop down a tad when the Motor gets plopped in but, I like this concept so far and am having fun piecing this old girl together to begin a new life after many years of laying dormant.

Not sure on the Headlight or the Gas tank right now but, as I have a few parts laying about, I am just using them up for now and can check them later if I find something else.

This does have a nice look and feel to it, it roils so nice with new bearings and the bars give it a Classic pose and something I have high hopes for later on, long way to go and noticed the right foot peg is incorrect, so will need to find a 77 version so the brackets fit the frame right.

You may get bored at looking at these photos but right now I am trying to get a feel of how I want this bike to look and am sure I will be trying a bunch of gas tanks until I get the right one to work.

I polished up the old Rotor and will grab a set of old caliper and brackets from my storage and see what I can mount up on here,then strip and polish to a chrome look.

I tried another gas tank off a 500, still not sure and will keep trying, I will make a seat pan but make sure plenty of padding and i think tuck n Roll but not sure what color just yet, will wait until I know what fuel tank I shall use on this build.

Working on a super cool front bobbed fender, getting there and will be stoked to get that all dialed in, looks pretty dope already but just a few tweaks more.

That where we stand right now, and talking of stands, there is no main stand for this, so I have to come up with a longer kick stand for this bike, as she wont be able to stand upright with out one.


Sunday and many an hour getting this CB550F Dialled in.

A Super Hot Weekend, why do I attempt such crazy work when the weather is like this? I guess we all do right?

A long day but managed to get the old carbs out as the idle was not functioning, but a complete redo was needed and boy what a pain in the arse the 550 carbs are top get out of the frame.

I dont know what Honda was thinking and if you are like me, you dont have time to look for a service manual and then read through all the jargon as to the correct way to remove the carbs.

Honda never want to share photos to make it easier, so no quick way there, I looked at the bike and just went ahead and took it on as a Customers machine and went from there.

Sure, I have worked on over 100 of these bikes but they all had the air box missing and now I know why, as they are a fecking Royal pain in the rear thats why, but I did manage to figure it out and as it was 100 degree’s in the Garage, I had to be as quick as I could muster, but that plan went right out of the crappers window and I struggled for quite some time to be honest.

But now I can look back and laugh, well maybe now LOL, it required a lot of patience and I had run out after 20 minutes and the swear jar is filled to the brim now, but much better for it.

The Carbs are on tight and I had to undo the air filter box and move it back about half an inch as thats all it would go and no matter how fecking hard I tried, I could not get the whole air filter box out, probably because the breather hose was catching but I did not want to remove it if I didn’t have to. I then managed to remove the rubber hoses from the air box and that gave me a little wiggle room to get the carbs off but not much.

I managed to pull the carbs out from the Left, but many people told me they will only go in and out from the right, so no idea how I managed that but, they came out and undamaged too.

The carbs needed a complete overhaul and I checked the rest of the bike over, the throttle cables are OK but I could do with new ones, I didn’t have a pair on hand, so lubed up the originals and they function great. but, putting the carbs back in is not as easy as 760’s, especially if you are using the stock air box.  I basically did the same thing but this time I headed from others and went in from the right.  And after much swearing, sweating and a lot of grunting, I got the carbs to get to their position, and- to help the carbs fit back into the intake manifolds, I put a smearing of axle bearing grease around each opening.

Plop, they went in, I did up the hose clamps on the manifolds and then I covered the air box rubbers in WD40 and then slipped them back into their positions, rotating until sat flush in the box.

After reconnecting the clutch cable and throttle cables and more hoses than a bloody fire truck, I emptied gas tank of the old fuel and bunged that in my van, as that will run on anything.

Bought some higher octane gas and poured her in and the bike fired up right on the first go and idles lovely now, pumped tires up and took her for a little blast up to about 60 mph around the houses and it runs great now.

So, any of you attempting to put carbs on or off and still use the stock factory air box, take heed, use WD40 and grease as it really helps and get those rubber hoses off the air box first to give you a little wiggle room.

A nice all together machine, Genuine 11K miles and now she fires right up and rides quite well to be honest, I do think I will replace the tires as these are original ones and I will feel happier with new rubber on this machine as this is now my Girlfriends bike and I want to make sure all is good for her to take out anytime she wishes.

What amazes me is how damn quiet the bike is with that big old chrome Cannon perched at the rear of the bike, but, its staying on there as the bike is too original to mess with to be honest and would like to keep a stocker around anyway.

I will do a few more things to the bike as we go along, I would like to powder coat the main stand and kick stand at some point, so may buy another set and do it when I feel like I have some coating to do, that way Jennifer can still use the bike and no real down time needed.

I am happy that the bike now fires up right away and purrs away to its hearts content, this will be a keeper and I am sure will only get miles on it around the countryside where it will reside in an old style barn.

Hope that you like the Blog today? As I am sure that many of you can relate to the trials and tribulations that we have to go through sometimes, just to keep these machines running?

Have fun with your machine and I am here to help or advise if I can, this is a big family when it comes to 2 wheeled machines and thank you for taking your own time to read my exploits and hope that it made you smile at least once?


New Stainless Steel Exhaust for the Vesco Honda Creation

Well, the Rains are here again tomorrow, so had to tear into many projects to try and get ahead of the storm, as it will restrict me to many things I need to do to create this Custom Motorcycle, the Exhaust I originally tried out was pretty Bad Arse- But I wanted something really trick, so for a few days I sketched a couple of Idea’s and came up with my Latest design.

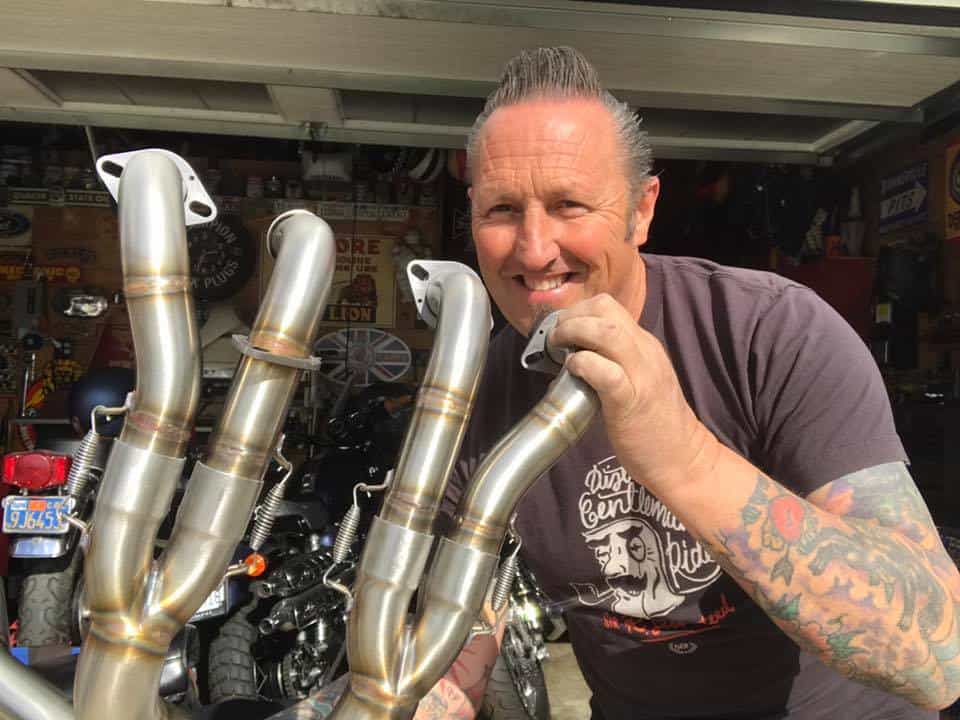
This is my latest system and I have called it the “Y-Block” And this system breathes like a man with Three Lungs.  Seriously, this is a great bit of Kit and hand made from 049 Stainless and not only does it perform, it is light weight yet sturdy. This is so much better in Stainless and wanted to show the Globe that cool stuff does indeed come out of sheds and Garages.

A lot of time and effort went into this system and I am happy at the end result, this will look great on the Vesco Honda and am sure many will ask about all the details that the bike has on it, there is so much to do and have to do all I can in the short amount of time to get this machine back up and running- no easy task and still quite a way away from completing this build.

The system will fit ALL of the 750 Motorcycles from 1969-1978 in the SOHC Range and will fit the CB750K, CB750F and CB750A models too, the design took some time to create how I drew it but it is bang on and I cannot be more happier than how the “Y-Block” free flowing System has turned out.

All quick release springs, this is a slip on system just like the old race bikes and wanted to give a little more Hot Rod look to this set up and I feel that I have accomplished that style and look. This has a Nickel Plated Removable Baffle and sounds just like a deeper version of the Yoshimura style system.

The fit and finish is superb and great ground clearance too, wasn’t sure if this was even possible a few weeks ago but after many drawings of concepts etc this is the end result and it looks so good, I am super happy that I went this way and it sure does look Custom. Sat on the workbench and rwady for it to be fitted to the Custom machine when I get it up to assembly.

This is my design and its a 4 into 2 into 1 set up that really lets the gases flow hard and escapes at the end through a baffle at a faster pace than many out there, and I really wanted a trick looking set up that not only looks and sounds great, but performs pretty well too, and this sure does meet the bill.

Of course I will offer this as a line for the HONDA CB750, CB550 and CB500 a little later on but first i want to see how it performs on the bike and will give a full run down when I have all that completed, but this New System really is a unique set up that I will be happy to offer to all of you soon for your inline Four Motorcycles.

I will weigh it later as its so much lighter than the steel versions and when it is in its brushed Stainless guise, its a real head turner with the welds turning that nice Bronze color.

A fun looking Exhaust that I am proud to put my name on and I am sure will get quite a lot of interest for other peoples rides, so today turned out a great way to bring the week to en end.

This will be easy to fit to your very own inline four, even if you are on your own as it weighs nothing and comes apart easily for assembly etc and the springs are way easier to remove than undoing bolts .

I wanted to have something different out there and to show that I also love Hot Rods too, it’s all a cool lifestyle that I have always been into and now have a great system for the inline Four Honda’s.

When the Vesco Brat bike is completed, I shall take a lot of photos of it, as well as some sound bytes of the exhaust system, I will still use the Yoshi style baffle as I love that tone.

So with that- I shall bid you a fond farewell and get back into the Garage, as I have a million more things to do and as the storm approaches, I need to get in there fast.  Thanks for stopping by and reading my blog, let me know your thoughts, as input is so important from My Customers.


My Hot Rod 4 into 1 Exhaust system for the CB500 and CB550 Honda.


Well, Colder weather but had to continue and get a few things completed as a lot of Rain was on its way here and I worked as fast as i could to get a set of HOT ROD Exhaust system ready to Ceramic Coat as a Customer in Australia is eager to have them on his bike,. I just sent a set to the UK and he is really happy with they way they look and fit, as well as the way they sound.

This exhaust came out well and the Customer wants this one Silver in Ceramic Coating, so this is how it looks when it is coated and fitted to the CB550 Honda Motorcycle.

It bolts up so easy and stand out in the crowd, an aggressive style that shows your Engine off well too, it barks like a scolded dog and lets your engine breathe all through the curve.

Another with a Raw header and a ceramic Turn out and these are very popular for many bike builders, order one today from me and choose weather raw steel, Ceramic Silver, Black, Titanium or Bronze.


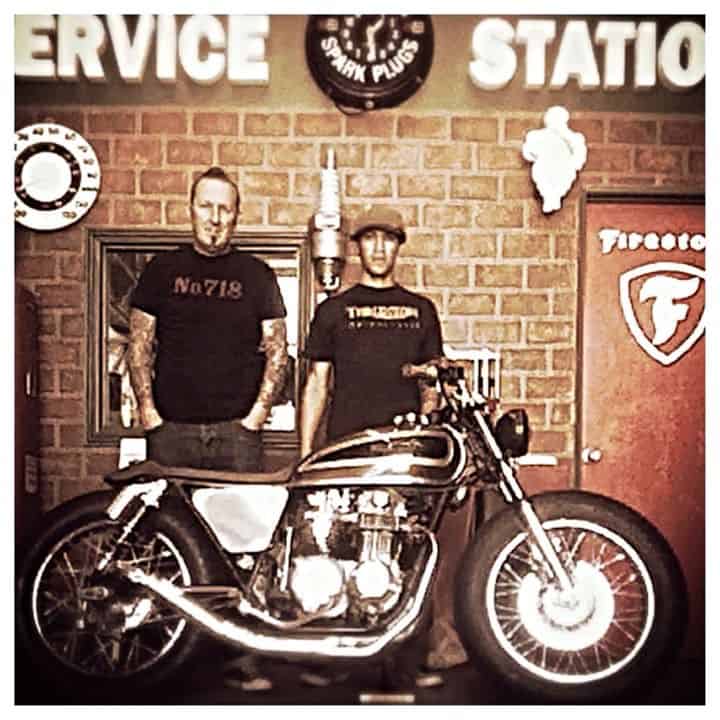
CB550 HONDA BROWN BOMBER BRAT BIKE

Sometimes I forget to take photos when I am working on something, then a little later on down the line, I end up kicking myself as somebody usually comes into my place or calls or even emails me and asks if I have built a Honda CB500 or CB550 Brat Bike.

4

I did take a few photos of this ride but not enough and to be honest it was a Bike I picked up locally not three miles from the house, a guy had had it for many years as he used to use it to go to college as a cheap means of transport.

2

10 years after he completed College, life in general took over and had no time for the little inline Four Honda and it sat at the way side of the house under a tarp and then a few years later it was put in the corner of the garage.

1

I bought it and even though the bike was a sad state of affairs, it would be a fun little project that I could have a little bit of artistic sculpturing on and see where it ends up.

5

I used one of my Special Stainless Steel 4 into 1 systems and boy did this thing Bark like a scolded dog, this really did turn heads and in a good way, such a perfect breathing motor.

25

The seat was made from 20 Gauge steel and then we welded about 5 inches of old rear fender to the seat base and I thought it would look cool if it were all upholstered.

13

Removed the forks, took apart and then machines some cool fins in the lower legs, then magnafluxed to make sure all was safe and it sure was, New upper tubes fitted and rebuilt.

12

The bike sat so well, and when you jumped on this bike, it would go as hard as you wanted it to go with out any question, it really breathed so well you would be so surprised when you opened the throttle, the little CB550 felt like a 750.

14

The wheels were all new and used stainless steel spokes and polished the hubs, then shod both of them with Coker Diamond treaded tires that fills the bike out very well indeed.

15

Should of kept this little Ripper as it would suprse any motorcycle at the traffic lights yet it was great on gas, the Carbs were set up on a Mercury stick and loved the gas I used.

18

Hand made 7/8 Brat/Tracker Bars of mine that I chromed, help steer this Bar Hopper in the right direction. used Metalflake grips and 2 inch Bar Risers.

19


One piece of steel and a rear fender shortened and welded to it, then covered in Foam and upholstered over, came out so well and stoked that I wet this route on the bike.

20

Old carbs rebuilt, Dipped and re-jetted and then synchronized to make sure it ran even and smooth under load and boy did it handle well, fitted new cables too.

21

Rebuilt the forks but machined these fins and then polished to a super high Luster you would think they were chromed and these last a long time until you need to polish once more.

24

New Fork top Rubber fitted and New Rims were laced to the Polished Hubs, not a show bike but New parts in the right places.

22

New Brake shoes and Polished hub with New shocks, sorts the rear end out and it handled so well too.

23

Old speed Boat headlight I used with a Toggle switch ontop to illuminate it, I think it suited this machine very well indeed.

25

A great bike that was super fun to create and ride, the guy that bought it was a New marine and rode it to Pendleton with no worries all the time, great testament to a cool machine.

26

Kota taking the Brat for a little run and loved it, Dakota Made the seat and he loved this mean machine.

27

Hope I see this bike again one day as its one of them that you wished you had kept, thanks for reading about this little Honda, it was a Giant Killing machine.