The Vesco Honda at El Mirage

On Saturday, Jennifer and I went out to watch the races at El Mirage dry lake in Southern California, this place has been having speed trials since before ww2 and continues today through the SCTA. (Southern California Timing Association.) So we took the van and the Honda and drove up to the lake bed and set up our ezy up and radio etc and food for the day.

Such a fun day watching cars and motorcycles race the clock, some reaching speeds well over 250 miles an hour, its awesome to spectate as you are so close to the action.

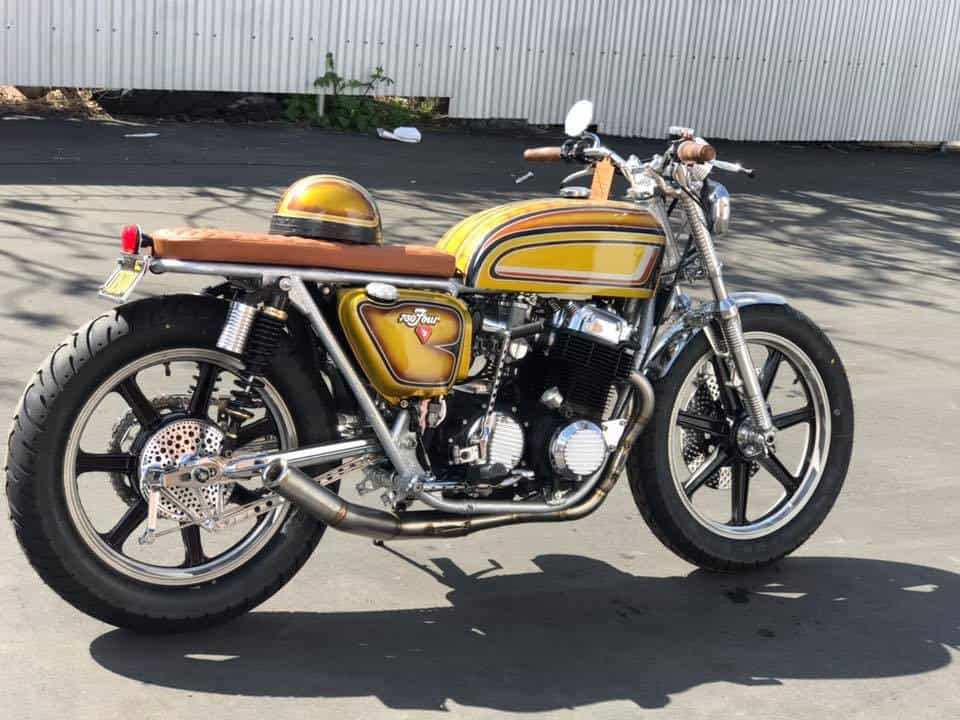
Took some snaps of the Vesco Honda and thought that I would share them today, above you can see the Shorty Turn out that I did for this particular build, the bike is all running now and am happy at the outcome of this machine that had not run since the 1980’s.

This is not a show bike but, it could easily be, as I was thinking of running for 100 miles, then stripping the bike down to the frame and painted the chassis silver and start a cool custom project, but also this is up for sale as she is right now as I do have other builds to continue with for my Customers.

The Bike runs well now and fires right up with either a Kick start or hitting the starter, it has nice low end torque all through the range of gears and is a fun machine to ride.

Sitting Pretty on this famous Dry lake where even Don Vesco himself has raced, the Honda does look at home sat here in the So-Cal Sunshine.

My Custom, Hand made and chromed handle bars – Make this bike so comfortable to ride, no back breaking leaning over the gas tank, a sit up and cruise feel that I enjoyed.

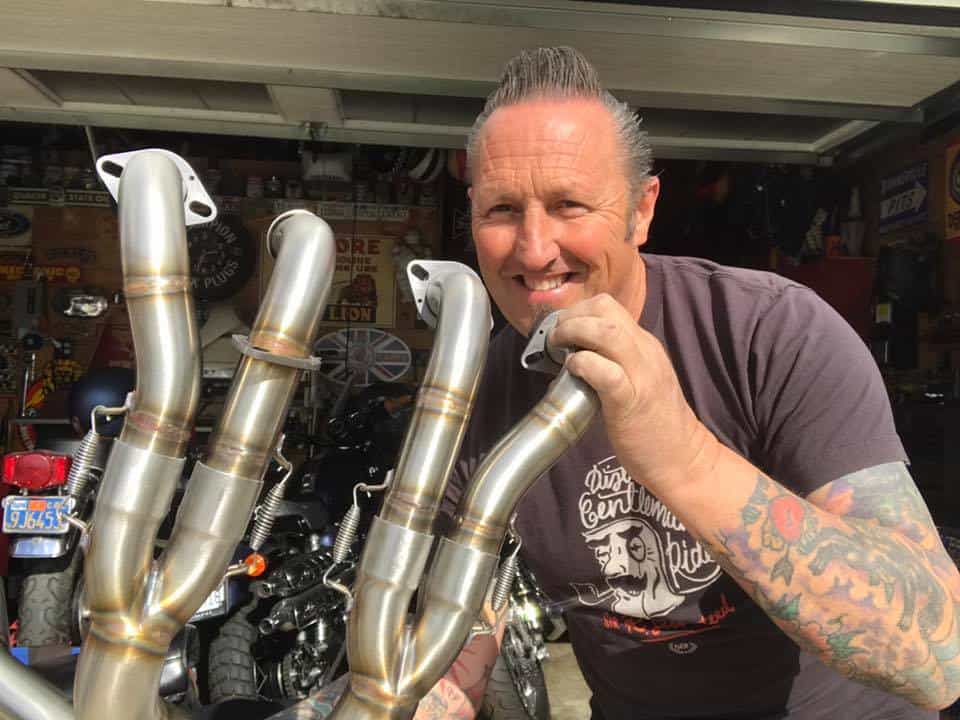
The exhaust system of mine flows so well to help exit the gases from the engine and it has a velvet tone to it as she pulls through the curve.

Old style lights but really are modern LED, that way it looks old school but people will see you with these bright lights, plenty of travel in the suspension on the rear too.

See if you can visit the dry lakes when they have sanctioned races on, its an awesome event to go to and everyone is approachable.

These Lester rims are 19 inch front and 18 rear, I took these off a CR750 Road racer some years ago and have had them in storage for quite a few years and I am so glad that I got to use them, fitted my New side stand as original one had broken off, the bike sits well.

This is a comfortable bike to ride and has loads of potential to be a really cool Custom machine, it has some rare parts on and are only getting harder to locate these days.

It has New Handlebars, Bar Switches, Harness, Battery, Pipe, Shocks, Grips, Cables, Chain- as well as many other new parts, like totally Rebuilt Carbs and New intakes and Throttle Cables etc.

A fun weekend on the lake bed and Jennifer and I had a blast, chatting to Racers and meeting up with folk we haven’t seen in a while, the commeraderie is second to none.

Jennifer taking in some of the racing as she helps move the bike onto the Lake bed.

Time to get some miles on this puppy, but wanted to at least share some photos that I took whilst out at El Mirage, this bike will be up for sale soon, if interested call or text me on- 714-598-8392

Thanks for reading today.


Vesco Honda CB750, finally running and enjoying some miles.

Well, its been a fun journey just to get the bike into the guise that I wanted, its no show bike, but could be with more TLC, not sure where I am going with the bike yet but I gotta tell you, every time I fire a bike up that has not been started since 1983 and click it into gear, there is always that hesitant OMG what if, feeling, but I went through as much as I could and was sure this would be fine.

The mechanical Clunk you always get as you click first gear, I let the clutch out bravely but making sure my finger is covering the brake lever just in case something is not right, I pull out onto the tarmac for the bikes first ever ride in so many years.  Well, 35 years to be exact!

She pulled off very smoothly, transitioning through the gears effortlessly, I was watching the Tach, the speedometer and of course the Oil pressure gauge I had fitted, just to make sure all was functioning OK, and she surely was.

2nd, 3rd, 4th and finally 5th and the power was smooth, no shuddering at all, the Exhaust had its velvet tone barking away as I increased the revs, up to 4000 and sped up to about 60 mph on a straight away, the bike felt great, my New Handlebars were perfect for this stance and the seat actually was comfortable for being flat.

Brakes were fine, just a little adjust to the rear but I think the brake shoes are more than likely shiny, but a few hard stops will sort that out, but I rode around the houses here in La Mirada at a nice constant speed, watching the Rev Counter to see if there was any bounce or fluttering, but all was good.

I do need to replace the fork seals and will do that if I strip the bike and build into a show bike, but- for now, I want to put some miles under her belt and make sure everything is ok for the next 100 miles, so only another 96 to go, but fun ones no doubt.

It was a mighty fine feeling, having this bike run and to run really well, all the hard work paid off and I was smiling all the way around the roads I took as I felt good today, I guise a sense of achievement.

Still, she needs cleaning up but, I can do that later on and of course, the more I do to this Motorcycle, the more I shall want for it, but this Vesco Muscle Bike is a great looking machine and turns heads even now.

Not sure if I need to add a front fender yet, will see, a Bobbed one may look cool and stop crap hitting you in the face at high speed, but this is a great Bar hopper, so may no need one.

Plenty I can do to clean the bikes lines and appearance up but the main thing was to see how she ran and of course handled, and I really do enjoy riding this machine.

Hope you too have enjoyed the build on this old machine, I was not sure how I was going to go with the look, but I think on this particular ride, I made the right choice.

Price? Well I guess if I was forced to let it go, $5000 would be the price right now as she is.


The Vesco Honda now gets a Coat of Paint

Today was a good day, you know what its like when eventually things start to go to plan, albeit around the houses a little but I did get the end result that I was seeking and today I want to share with you how far I got on with the Vesco Honda CB750 Today.

I wired up the tail light assembly, and these can be no easy task at times, especially when the wires are different colors to the Honda version and no instructions of diagrams, I usually test the assembly on a battery before hand, just to save me from blowing fuses, I keep a few handy anyway, as there is nothing more frustrating than connecting something up on your harness, hot the switch and hear the Phhffft of a fuse blowing and a small small or burnt ether as you start to raise your own temperature and let out a few choice words that would make a Sailor Blush!
So, I wired up the rear tail light assembly, all works great now and, being a LED module, this will make sure that you will be seen in any weather condition and thats a good thing, especially having a strong braking tail light.
I fitted a new battery and leads and fuse box too and am happy at the result for now, remember, this is no show bike right now, I want to get her running to be able to asses the Honda to see what I will need to tear down and rebuild into a show bike, but its fun doing this and today was a good day.
The Gas tank looks so much better now, it was a sort of Maroon Oxide when I picked the bike up and I removed the gas cap neck and welded in a Harley bung, so the top would look a little smoother and more Custom to be honest.
But I was unsure as to what color to have on this bike as I dont really have a them for it, but though that I would go with a cool bright design and use smaller metallic/ flake with the old fish scales and shadowing thats so reminiscent of that 70’s back home in the UK and over here in the states.
As you can see, this really does brighten up the bike and I am happy that this is this color for now, doesn’t mean I will stay with this if I chose to build into a Custom machine but right now I am happy with the look and the side covers flow with the gas tank, thats very important to me and the outcome is pretty much how I first envisioned creating this 750 Four and we are almost there to take it for a test ride.
The Lester rims are tall and even though I am 5″11 I am almost on tip toes when I am sat upon this motorcycle, but I have tried to make the stance of the bike as level as possible, I believe I have achieved this look and my own Brand of Handlebars really do set the bike off better, something I am quite proud of to be honest.
The 4 into 1 of mine looks so aggressive with the tail pipe Cut down low and I wanted a short turn and exit to make this Brat bike something of a head turner, but I have still more little things to do and clean up.
The gas tank still needs to be sealed up as I ran gas through it and the bloody carbs blocked up dues to sediment in the gas tank from the flake in the paint, so I have now taken the gas tank to a radiator shop and they are going to seal the inside the tank and I should be good to go then.
The colors came out well and represent days gone by over the 70’s and I am pretty stoked at the outcome, and with a New petcock and throttle cables, this will last quite some time now.
The side covers are great, and I have just received the emblems to put on the covers, the 750 four script and the Diamond emblem below, so that will set the side covers off.
Obviously the bike needs to be taken down to the frame and all gone through later but I want some fun on it now and hopefully by the weekend, this will be ready to take for a run on the road and see how she is.
So, a little more bits and bobs to do but this bike has come a long way in a relatively short amount of time and I am really happy at the result and the guise of the Honda it is in right now.
Lester rims are Original Race ones from a CR750 I removed them from, front is a 1977 and the rear is a 1978, still need to fit new bolts and a speedometer cable tomorrow.
Sure looking forward to test riding this later on this week, its been sat since the mid 1980’s, so this will be quite a fun ride.
I have just received some side cover emblems too and they look really Nostalgic.

Little bit more work on the Old Vesco Honda

Well, here we are, been away on the East Coast but now need to play catch up as I have this Vesco bike to get up and running, and then I have to plan a build for a Customer all the way in Iceland, so that’s kinda cool.

But, as I was away I had time to collect my thoughts on this machine, it needs tons of work but will be fun and I have gone with the concept of getting the bike to run and see how reliable the engine is, maybe take it for a blap across El Mirage Dry Lakes in a few weeks and then, if I am happy with the old snot Monster, then I can strip her apart and build a nice Custom machine out of it for someone to have fun with.

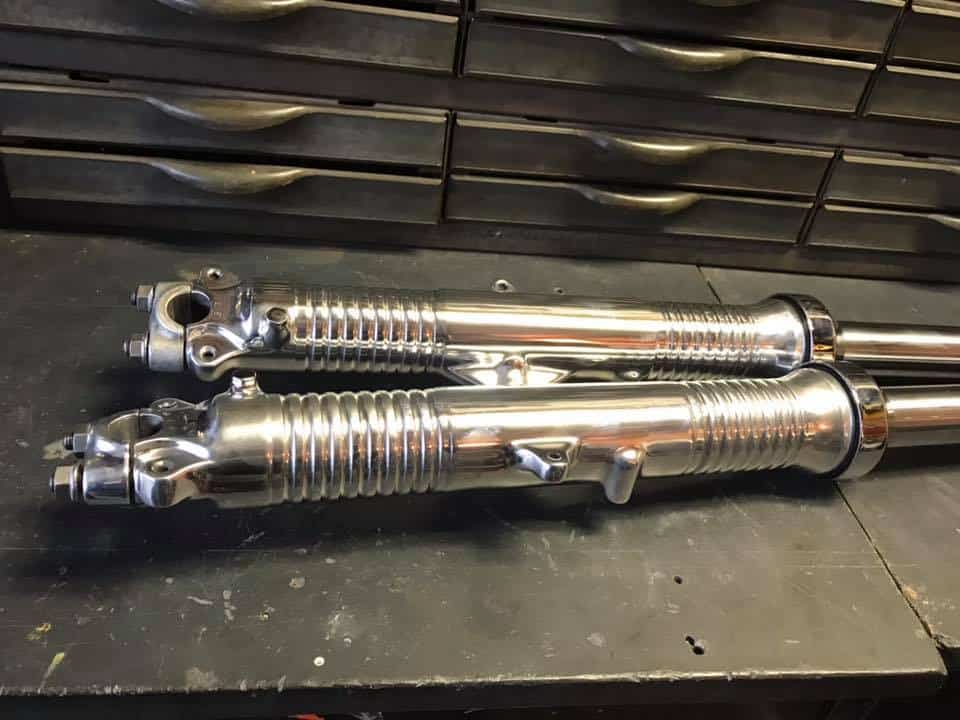
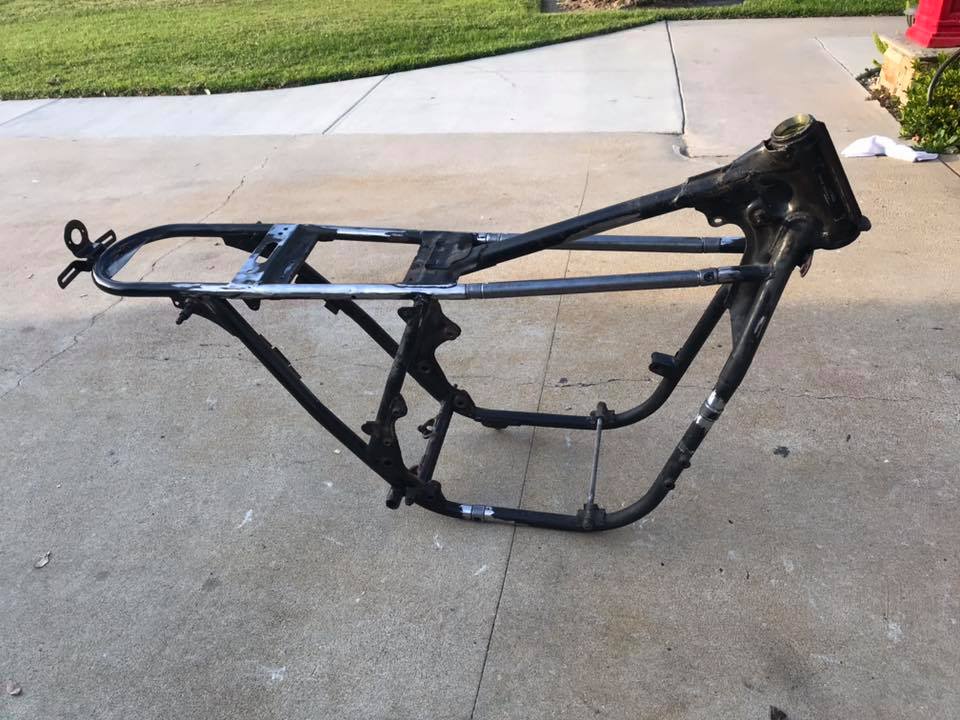
The Motor runs as we all know now and I am happy about that, but now its time to clean out the gas tank and get some paint on it, so I have used an old knackered gas tank as a mock up as I still need to make a seat base for this ride, and as it is going to be a Brat style machine, I need to get about and cut some of the frame to allow me to fit my special Steel Hoop Inserts and then I can set about making a flat seat base for it once the hoop is all cut and welded in.

I make sure I drill a hole through the tops of the hoop and the frame, then- when I insert the slugs and tap the hoop to Butt up against frame, I will be able to spot weld the holes first and then weld the Butted join for more strength.

So, just some Gloss Black paint for now so it doesn’t rust, later on when I am happy about how the bike rides, handles and sounds, the whole machine will be taken apart and I shall bead blast the frame, smooth the welds and then modify the frame a little more before I go for a Custom paint job, but this is the length of the frame I am looking for and can go onto make a seat base.

As you can see, it looks pretty good, I used Automotive paint to spray the tail end, but I have so much more to do, its taking shape a little bit each day and that’s what I like.

I used an old piece of 1/8th inch steel plate and this is more than ample enough to support my fat arse and will be good to upholster too, yes of course I will clean the surface rust off when I am ready for Upholstery. I was lucky to have some old steel plate in the garage, so no cost involved at all, thats always good right?

OK, the steel is now cleaned up as it was only surface rust and a quick going over with my Air sander sorted that out, when you see the base it looks pretty long but, it is just the length I am looking for as you can easily sit your arse on the bike, and you have enough room to strap some parts or luggage on the rear if you so need, I mean, Motorcycles are still supposed to be practical right?

Now the seat base is done, I just need to weld some studs underneath, as I am going to have them go through the cross brace behind the battery box and can then plop the seat on and add some flange nuts underneath to tighten, I will also add a bolt at the back of the seat to keep everything secure, as well as a small half moon plate on the inside of the hoop, just in case I want to add a tail light or license plate there later. You wont see it as its hidden, so if I chose not to use it, no harm done.

Up front I chose to go for some cool Custom 7/8 Grips, this time I liked the look of the Marble effect that Cole Foster makes, they really are comfortable, so a good choice, you will notice New handlebar control switches as well as New clutch lever and cable fitted to this machine.

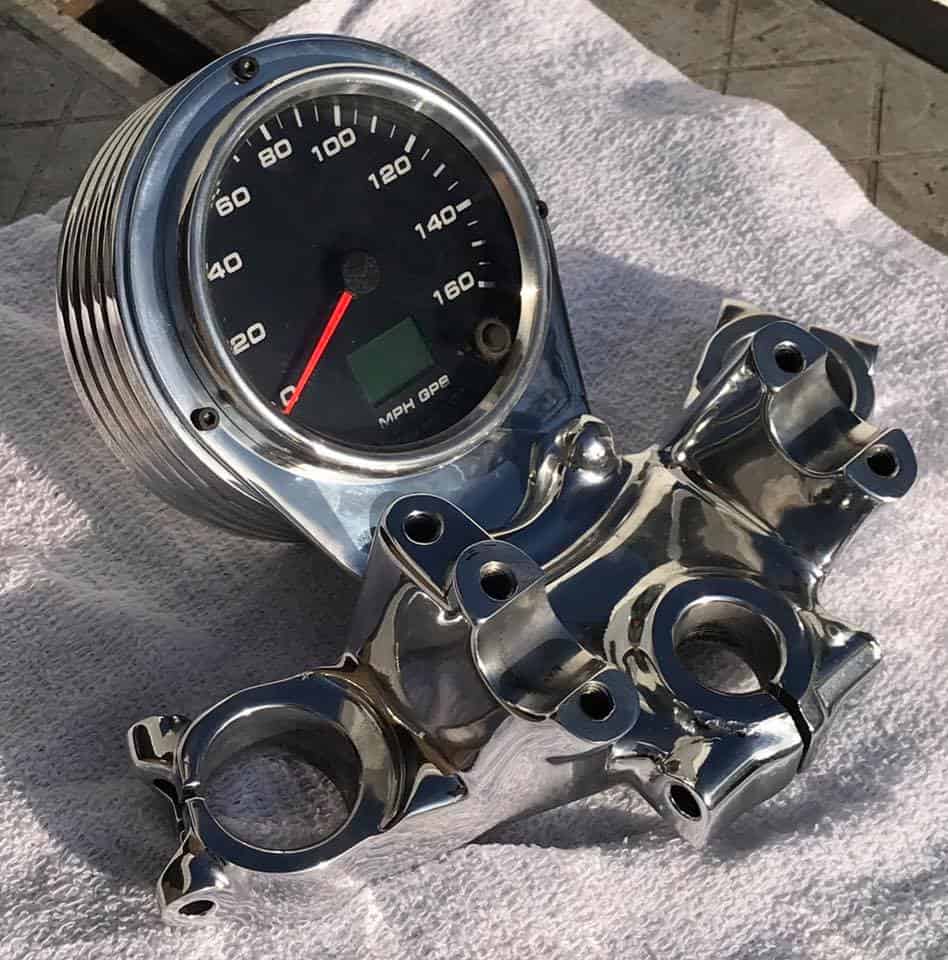
This bike didn’t have any gauges at all, so I chose to go for the good old 2.5 mini Gauges, to keep everything neat and tucked away up front, eventually I will polish the triple tree and fit new front forks.

The old carbs needed going through and re-jetting as I am running my Exhaust system, I also fitted new throttle Cables and Bell Mouth velocity stacks for that yester-year look, I made sure that I also fitted brand new Air intake manifolds and used stainless hose clamps with rolled edges. The over flow lines are braided hose and at $4 a foot, they aint cheap but work great, the rubber ones you usually see dry out in the California Sun, so want something to last, ad these Aircraft hoses are just the ticket

Well, thats as far as I have got done today, will take more pics tomorrow, enjoy your weekend everyone and thank you for following me on the Vesco Honda..


Working on an old snotter that came from the Vesco Family

I pick bikes up from time to time that some owners just cannot get going, other shops have had a go and no joy, and I picked this old bike up a long time ago from the Vesco Family, Grandson of Don Vesco, I left it in storage for a while and wasn’t too bothered as this has not run since the early 1980’s.

Don Vesco was an American businessperson, motorcycle racer, and multiple motorcycle land-speed record and wheel-driven land speed record holder. He set 18 motorcycle and 6 automobile speed records during his life.

This bike is a real mess, no idea if it will run but am determined to get this inline four running again, need to know how the motor is before I begin to rebuild it into a cool ride once more.

It has had a hard life and has been from pillar to post and no luck getting this old 500 pound SOHC machine to run again, but I know I can get it sorted, just takes time and patience.

There seems to be leaks all over the Motor, the kick stand has seen better days and there is oil and dirt all over the bike, would love to know what life it has led.

Has a weird set of clip ons that wont stay clamped on it and the wiring harness is old and brittle as well as the usual repair using different colored wire etc, this is going to be a pain.

The tach cable looks like it ended its life a few years ago and the end cap drive unit is still stuck in the valve cover, thats a good thing else the oil would come out of there when it ran.

Some funky wiring going on with horrible plastic sleeve covering, thats all gotta come off right now, so strange what some people will do to their bikes in the shed.

Top triples had seen better days and someone had ground the handlebar clamps off so they can use some later clip ons, but they are about a millimeter to wide and wont clamp down hard, I shall go back to a standard triple tree and fit some scrambler bars I think, just to get this bike as a runner for a while and see how she fares, then- I can decide a little later to strip and build into a Custom Machine.

Everything seems to be covered in oil or grime and crappy clamps etc, its had a hard life, but my main objective is to first remove the shitty wiring and connectors etc and then fit a new harness, battery, coils etc and see if I can get this old girl to fire up again.

The coils had decided to crap them selves and the wire harness was as solid as a rock, the California Sun had dried it all out and this has to all be removed right now.

As you can see, there are different gauge wires that have been added to this harness, the Fuse box is knackered and temporary connectors all over the place, just really bad work.

The carbs will need tearing apart but for now I shall pull the bottom end out and fit New main jets and Idle jets and see where we go with a new battery and plugs etc.

So now its time to do what I like doing and will see if I can figure out all the bad things that have happened to this inline four over the years, hopefully I can resurrect this 70’s iconic machine.

And we begin, it does take a lot of patients but its worth it in the end, I have to see whats up with the Motor first as that at least gives me an idea at the cost involved to turn this into a great looking Custom Motorcycle and it sure warrants that, seeing it was in the Vesco family.

12 interesting facts about land speed racer Don Vesco

Don Vesco doesn’t fit neatly into a specific category of motorcycling, but the one thread that runs through his career is the quest for speed. He became famous for his land speed records in the 1970s and continued racing through the 1990s.

Here are a dozen facts you may not know about Vesco, who was inducted into the AMA Motorcycle Hall of Fame in 1999.

1. Vesco was born in 1939 in Loma Linda, Calif. During his lifetime, he was a dirt tracker, factory road racer, drag racer, motorcycle dealer, race-team owner and land speed record-holder.

2. He was mechanically inclined from a young age, tearing apart model airplane engines and making them faster by the time he was in third grade.

3. As a teenager, Vesco parlayed his mechanical skills into cold hard cash. He would buy old Cushman scooters for $20, fix them up and sell them for $25.

4. In his teens, Vesco fixed up a Triumph twin and entered his first official race, a local drag racing event. Then he took that same Triumph and started racing scrambles, TTs, and eventually road races on an old military airport outside of town.

5. One of Vesco’s riding buddies, and his archrival on the track, was future AMA Motorcycle Hall of Famer Cal Rayborn.

6. Vesco won a lot of local road races in the late 1950s and early 1960s. He caught the attention of Honda, which was just coming into the U.S. market. Honda hired him to race its rare and very expensive RC161, a 250cc, four-cylinder racer, to promote the brand.

7. Vesco’s relationship with Honda lasted until 1963, when he took an offer from Yamaha, which was also just getting started in America, to race at the United States Grand Prix (a non-points-paying international race) at Daytona International Speedway. He rode a works Yamaha RD56 250cc GP bike and won the 500cc class. Also loved his Norton Motorcycles too.

8. By the late 1960s Vesco had already been a factory rider for Honda, Yamaha and BSA. He was even a factory rider for the little-known Japanese maker Bridgestone in the 250 GP class for a short time.

9. In September of 1970, Vesco set the motorcycle land speed record of 251.66 mph at the Bonneville Salt Flats in a streamliner powered by twin Yamaha engines.

10. In 1975, Vesco broke the 300 mph barrier in the Silver Bird Yamaha (powered by twin Yamaha TZ750 motors). Then in 1978 he broke his own record, turning 318.598 mph in a twin Kawasaki turbo rig. That record stood for 12 years.

11. Vesco lost an eye after being hit by a rock while watching a sprint-car race in 1996.


12. He died on Dec. 16, 2002, after a long battle with cancer.

New Ceramic Coating Colors for the exhausts now available

Wow- hard to believe that I have been selling these systems for over 18 years now and still going strong, so this time I thought that I would offer a new Ceramic Coating Color, as many people ask me about these things.

So what I now offer is the New Titanium Coating and it looks really cool, its a Gray but a metallic gray and really covers well.

Here’s how they work—Ceramic Coatings and Exhaust Wraps help contain the gaseous heat within your exhaust pipes. This causes the gasses to heat up and expand. Since the exhaust gas is trapped within the system, it expands the only direction it can—out of the tailpipe. As a result, exhaust flow is boosted, allowing a rush of fresh air to enter the engine’s cylinders, increasing horsepower. Both ceramic coated headers and  Exhaust Wraps improve horsepower, so let’s go over their pros and cons and see which one is best for you.

Ceramic Coated Exhaust Parts

This is a spray-on finish that’s infused with heat-insulating ceramics. It is not a DIY solution, these exhaust parts are coated at the factory, or sent to a facility with the proper equipment.

Pros

The New Titanium which is what you see here.

This is a great look and changes the look of your machine instantly than just the Black you see. But I also offer these colors too.

Black- Silver- Burnt Bronze, with more options coming soon.

Wanted to show the New Titanium as this is a old school look and I really like the way these came out to be honest.

Just go on the exhaust page and on the drop down box, simply choose the color that you would prefer for your system, its as easy as that.

If I can help you with any of these options you can simply email me at carpy@carpyscaferacers.com or drop a Dime in the slot at 714-598-8392 and if you need answers fast, then Text them to 714-598-8392 and I will get right back to you.

A YAMAHA TRX850 REVAMPED IN MOSCOW


IF YOU’RE LOOKING for a donor for your next build, look back to the 1990s. That decade is chock-full of untapped potential—hidden gems that might not have been big sellers, but now offer great performance at bargain prices.

We’re quite intrigued by the Yamaha TRX850 in particular. First launched in Japan in 1995, then in Europe a year later, it was something of a parts bin special. It was powered by the same 849 cc parallel twin as the TDM850, but with a 270 degree firing interval.

MCN said it was “a match for Ducati’s 900SS in its day, but it never sold well.” And it wasn’t bad looking either, with a trellis frame that mimicked the Ducati it was trying to nick sales from.

But is it customizable? One relatively young custom shop in Moscow thinks so. Chemisov Custom Works were handed a 95 TRX850 and an open brief, and responded with this angular café-fighter.


CCW is a two-person team, made up of Ivan Chemisov and his wife, Lyudmila. They’ve been operating for less than two years, but Ivan has plenty of prior moto-experience. He’s worked as a mechanic for sixteen years, including a stint wrenching for a race team.

A desire to do more creative work prompted him to launch CCW, and before long a friend booked in the TRX850 for a makeover. Even better, he gave Ivan and Lyudmila complete creative freedom on the project.


The couple drew inspiration from the most unlikely source. They’d tied the knot in Georgia a month before the build began, with the Ushba Mountain in the Caucasus range as a backdrop.

So the tank and tail of the TRX850 would symbolize the mountain’s distinct twin peaks, and the polished and black finishes on the bike would hint at the ice, snow and rocks that cover the mountain.


But before Ivan could whip up a new design, he had to bring it back to spec. The TRX850 hardly started, ran badly when it did, and made poor compression. So he tore into the motor, did some head work, and replaced a whole list of parts, including the valves. Then he installed new air filters, and rejetted the carbs with a Dynojet kit.

All of the Yamaha’s original body parts, including the fairing, went in the bin—revealing more of that pretty trellis frame. “Visitors at the workshop constantly asked the same question,” Lyudmila tells us. “From what Ducati is the project being built?”

But with the bike stripped down, Ivan noticed that the frame design was not symmetrical—which gnawed at his perfectionism. So instead of just editing the subframe as planned, CCW ended up tweaking the central part of the frame too.

The TRX’s new bodywork is a monocoque affair, which Ivan shaped from aluminum using the only tools available: a wooden mallet and his hands. The fuel pump’s hidden under the tank, to keep the design as compact as possible.

Ivan’s always had a close connection to racing, and that’s influenced the smaller details. The seat is bare bones—a single layer of race foam, to keep weight down. (In fact, the entire tank and tail section weighs just four kilos). And the tank breather tube integrates with the radiator and crankcase breather tubes.

There’s more metalwork lower down, in the form of a set of aluminum wheel covers. Finished in gloss black, they add some presence to the bike without appearing bulky. Getting them to fit meant modifying the front brake setup, and Ivan built in angled valve stems, so that you can still pump the tires.

With respectable 135 mph performance and handling out the crate—and a limited budget—there wasn’t a need for excessive chassis upgrades. CCW simply added braided brake hoses, and upgraded the reservoirs.

They reworked the top triple tree though. The ignition was moved, and LED built idiot lights into the triple. The stock dials gave way to a single tacho; in keeping with the race theme, there’s no speedo.

The stock clip-ons were replaced with a new set from LSL, mounted lower for a more aggressive stance. LED turn signals were installed in the ends, with a pair of square LED headlights doing duty up front (one each for high and low beams).

There’s another nod to Ushba up front—a mountain-shaped plate that doubles up as a headlight mount and triple clamp reinforcement.

Out back is a side-mounted license plate holder, which also carries a taillight and turn signal combo LED. The whole bike’s been rewired too, with most of the components—including the battery—now stashed under the tank.

CCW kept the bodywork polished, and finished almost everything else in black. Little parts like levers were polished, and all the fasteners were swapped for stainless steel items.

A pair of stubby stainless steel mufflers with built-in dB killers finish things off, mounted to the stock headers via custom connector tubes.

The overall vibe is muscular and mechanical, even if it doesn’t look particularly comfortable or practical. But this is completely intentional, born out of Ivan’s love for performance machines that are built to go fast rather than far.

“In our ideology of customization, style and functionality stand in first place,” says Lyudmila, “and comfort and practicality go to the background.”

Between budget restrictions and the condition of the donor bike, it took CCW a year to finish the TRX850 off. Now that they’ve broken onto the scene, we’re hoping their next project kicks off soon.

With any luck, it’ll be another forgotten 1990s jewel.

Chemisov Custom Works on Instagram | Images by Lyudmila Chemisova

FOR SALE- 2014 TRIUMPH THRUXTON 900 EFI Only 6500 Miles

Here we are with a great Motorcycle for somebody, this is a great machine and with only 6500 Miles on the Odometer, this will be a great bike to take out  and enjoy the freedom of Two wheels.

I have changed a few things on this machine, to start off with, there is a set of Italian ZARD up sweep exhaust for that Road Racing circuit look, these are a super nice tone and stainless steel with Space Age heat wrap covering the header pipes.

I have made a Custom Union Jack seat and that has New foam too and very comfortable for them long journeys if you so wish to do.


Then I have added a New Chrome Grab Rail, just in case you are taking a Passenger or you can use it to hook Bungee straps to and carry things on the bike with no problems.

I Just fitted a Brand New Non maintenance Yuesa Battery to make sure everything is tip top and functions well.

Take a good look, this bike is clean, even under the fender its clean, a nice Motorcycle that I am sure the rider will get many miles of smiles with.

This bike is located in La Mirada and I have the title in hand too.

Drop me a line or a Dime if interested, great for any rider, from Novice to pro, this is a fun machine.

This is such fun to ride, I love the Triumphs for their reliability and looks alone, it’s a cracking piece of kit and am sure that you will have fun with it.

Thanks for looking and have a great weekend. You can call or even text on 714-598-8392. Or email me on carpy@carpyscaferacers.com

Price $5,500 and have Title in Hand.


Anaheim Rod & Custom Shop Quality and Customer Service all the way!

Well, every now and again I like to Blog about experiences and companies that I personally have been involved with, be it helping out or having them help me out and today I wanted to concentrate on a great family run business located in the City of Anaheim just by the 5 freeway and it is called Anaheim Rod And Custom.

Now, before I start my ramblings, yes, there are a plethora of Custom shops located all over California, I mean, thats where it really all started here in the late 1940’s when the Late great Wally parks started the NHRA and from there on, Customs and Hot Rods have been created in this great State and Anaheim Rod And Custom is one shop that stands out in the crowd as one of the best Customer Service businesses that you will ever encounter.

Just a quick look at how Matt created the Front door of the shop.

Of course there were the Likes of Barris, Winfield and Daryl Starbird etc knocking out some head spinning work that was way beyond its time, but here at Anaheim Rod And Custom, that flavor has not soured at all, in fact there is always something cool and unique that is being worked on in the shop and the attention to detail is phenomenal.

So, lets get to the Beginning of this company:


Matthew Means started this business almost 20 years ago and has always had a hankering of being his own boss and starting an Automotive Restoration company, Matt was in business with a partner at the time and then met the adorable Pin up Girl that I know as Becky Sue. There is not too many business that is family orientated and work with each other every day and, if they do, then they understand that its not an easy venture with many bends in the road, but the straight away stretches out number the curves and when Becky Sue met Matthew at the Continental room- Which is an old school speak easy that has been around since 1925 in Fullerton. Well, it was meant to be.

A little video of the 1965 Merc Project that came out of Anaheim Rod And Custom for you to see.

I met Becky Sue at Fudruckers at a car show, I was doing a TV show at the time and we interviewed Becky Sue as she was a Car Nut and loved everything about Customs, Hot Rods and Pin Up stuff, so we got on like a house on fire. Well, to wind on a few years, I hadn’t seen Becky Sue for a while until I saw her in a Cool Parts car and was driving by my shop, she stopped as she recognized me then informs me that she met Mathew and they got married and have a Automotive Restorations Business called Anaheim Rod And Custom.

Now, bear with me on this, about 6 years ago, Mathew had organised a Huge Tiki styled Custom Car show at Don the Beachcombers on PCH, Becky Sue said to come along and meet her fella, well I not only met Matthew there, I met my wonderful Hawaiian Girlfriend there Jennifer Sun, who I am still madly in love with today and if it wasn’t for that show, I may of never had met Jennifer.

So I will always be indebted to these Two for helping me find the Girl of my dreams and like Becky Sue, we do a lot together and she helps me run my Business with book work, tax’s etc and general show organizing etc. Its Great having a partner in the business with you so understand these two who run Anaheim Rod And Custom.

So, almost 2 decades of building cars and painting under their belt, also Matthew wanted to pass on this business to his son when he obviously gets a little older, their first son was aptly named Atom Ford Means, so with a name like that, you better be in the Automotive business eh? They also have a wonderful bundle of Joy named Presley Mae and many times you might just catch them at the shop, learning the ropes as early as possible, nice to see too.

Now, I can go on and on about what they have built etc but what you all need to know is that this is one of the best Quality shops you will find that gives such personal attention to your machine, after sales service is also impeccable with a great atmosphere when you entire their abode, you are first met with a smile, a rare thing, a handshake and a tour of the shop, which you will find is very clean and organised. You can see me here walking in the Black tee shirt at their Open Day show.

Pretty much everything is done in house, even the paint, Matt has very good skills with paint, so much so that he has been requisitioned to apply the cool Custom coats of candy to many British Custom Motorcycles and as well as that, Matt is a dab hand at the Winfield style Fade away paints, including Pearlescents and Bold Candy Colors, to eye blinding and dazzling Metal-flake finishes.


What I like about Anaheim Rod and Custom is that Matthew is not deterred in any way with Long term projects, I believe that his attitude is ” Take the Bull by the Horns” and get the job done right.

I was stuck for space with my 1928 Model A Roadster, I needed a company I trusted that could do the work that I asked for. Many just said yeah, yeah yeah and to be honest, its just a job to them.

But Mathews approach is so unique to many I have seen, not only did I first of all hang out at his shop to see exactly what his work entails, I actually felt like part of the family there.

Their services offered are so vast, from Welding, Cutting, shaping Metal, Bead Rolling, Chassis work, Air Bagging, Custom Paint Spraying, to Major Electrical and the list goes on, from cars to Motorcycles to Boats, he does it all. here is my steel floor that Matt hand made and boy is is great and sturdy, comp[aired to the stock Wooden Model A floor base.

On July 23rd Anaheim Rod And Custom had their grand opening, My Roadster was there and we were invited to check the show out, turned out to be a real treat, cool Cars and Motorcycles, cool people and really had a fun time talking to new and Old Customers of Anaheim Rod And custom and look forward to more events like this.

Matthew took me aside at the shop, took his own free time to get me a full and detailed Estimate, that Becky Sue had typed out into a full bound Folder and gave me a few options if I wanted to save a little money ion one area and spend on another. This was all smooth and not rushed at all.

I hung out for a day when My Roadster was there to give a hand if needed, I was not needed at all but loved Matthews approach to what he did, yeah its an old Hot Rod but he dint abuse the vehicle and in fact went way above what he quoted me to do just because he wanted to do it right. How is that?

I spent in excess of $13,000 there but many had quoted more and I would of had less work, all the build was also documented and everyday at the end of the work day without Fail- I would receive Progress Reports and photos to show how much headway they had made.  Now I dont know anybody that does that these days.

As I said too, Mathew and Becky Sue work  also work with British Customs and have painted bikes owned by such celebrities as Tony Hawk, David Beckham and Orlando Bloom. 

Many Motorcycles have been painted by Matt and you may not of even known, but he sure is great with that Spray gun.

Starting with a white pearl base coat and adding a layer of bright Candy Red, and finishing with a Black Candy top coat. The resulting presentation is stupefying, appearing nearly pitch-black in low light with metallic deep reds and purples shining thru the highlights in full sunlight, showcasing the curves and angles of DEUS handiwork.

Another bike painted and this time for British Customs, for Tony Hawks Foundation, this was auctioned off for charity, what a great job.

There is always something cool going on at the shop, plus there is great music and an ambiance that is like no other shop I have ever encountered.

The Paintwork is not cheap but- the attention and work that is put just into the Prep work is why his finishes are so great and the longitude is always going to be there, compared to many others.

Also- Anaheim Rod and Custom partners with bike builder Micheal Woolaway, of Wooly’s workshop at Deus Ex Machina and have painted numerous motorcycles for Deus.

I get Matt to paint for me as there is nobody better for the time and effort that he and his team put into each paint job, no matter how big or small the scale, the finish and quality is something that Matt finds must be paramount in any work that comes out of Anaheim Rod And Customs premises.

Tonya Kay is a great actor that takes on ANY role and encapsulates the character with her own twist, she is charismatic, sexy, sultry and quirky in her pin up lifestyle and has a passion for Classic Cars , and the photo you see that Speed Girls Captured is Tonya’s very own 1965 Buick Rivera that she aptly titled as the Grape Space Coaster and the Custom work was completed by Matthew means of Anaheim Rod And Custom in Southern California. I will let Matt tell you all about it in the Video below……

Beck Sue Means, runs the business side of the Company, sending out quotations for potential jobs and Custom Applications, Customer service, ie follow up calls to check how they and their vehicle are doing etc. As well as the rest of the internal tasks that you have to perform daily in a Busy Custom shop office etc. She is the VP there but also will roll her sleeves up and jump in the with the rest of the crew in the workshop if needed, her Pops was a mechanic and only makes sense for Becky Sue to follow in the foot steps of her Dad.

If there is anything you need from a Estimate for work needed at Anaheim Rod And Custom, then Becky Sue or any of them can be contacted at:539 S Central Park Ave E, Anaheim, CA 92802

Their Contact number is: (714) 203-6589 make sure you tell them Carpy sent ya!


This is a unique Company with so much passion for the Automotive art, Matt is multi talented and can weld, paint, wire, draw, sculpt etc, he has every base covered in your requirements.

From a Motorcycle Gas Tank that needs to be painted, to a full tear down and rebuild of what ever you have in your Shed, Garage or  a project that is still sat on your driveway needing help, these are the people to call, you will not be disappointing.


YOUR BEST CHOICE FOR HIGH QUALITY RESTORATION, CUSTOMIZATION, PAINTING AND FABRICATION IN SOUTHERN CALIFORNIA


INDIAN SCOUT CAFE RACER MOTORCYCLE


Today I thought I would add one of the finalists in the Wrench build off, this fella below PJ Grakausas is one of the finalists and the Indian Cafe Racer he created is a real nice piece of work and needed to be shared, some of the images are credited to Return of the Cafe Racers, Hot Bike, Silidrome and Pintrest.

Up until now most of the manufacturer build offs we’ve seen have been between professional workshops or dealerships. With ‘The Wrench – Scout Bobber Build Off’ Indian motorcycles have taken more of a grassroots approach. Recognising the importance of the ‘backyard builder’ Indian invited custom enthusiasts to submit concepts of how they’d like to customise a Scout Bobber. From the 100+ submissions received a panel of judges including Roland Sands and Jason Paul Michaels selected 12 semi-finalists. Then through a public vote, 3 winners were given a 2018 Indian Scout Bobber and a $10,000 USD budget. Ohio based safety inspector PJ Grakauskas was one of the 3 chosen builders and this is his fully faired ‘Scout Cafe Racer’.

12 weeks after they were handed the bikes all 3 ‘Wrench’ contestant builds were unveiled at the 2018 Sturgis Motorcycle Rally. Seeing a cafe racer styled bike at an event that’s traditionally cruiser and chopper focused instantly piqued my interest so I reached out to PJ to learn a bit more about his project.

Hi PJ, Why don’t we start with a bit about your history with building custom bikes.

I don’t build bikes full time, it’s just an expensive hobby for me. I grew up surrounded by motorcycles my whole life, but mainly racing off-road. When I started building custom bikes it was to spend more time with my dad. I took parts and bikes from our barn and used them to make unique motorcycles I wanted to ride.

What was the process leading up to being selected as one of the top 3 builders?

It started with entering the contest. We had to submit design concepts, essays, and previous build experience. I drew up my ideas and had my friend Cory of Moto Mesa Designs tweak it and turn it into a gorgeous digital rendering. From there it went to public vote. After I was awarded as one of the top three I went to Bair’s Powersports (our local Indian dealership) and picked the bike up.

Do you have any prior history or experience with modifying Indian motorcycles?

I don’t have much history with them prior to this build. But I do know THEIR history. I’m honoured to be able to build a bike with such a rich heritage.

Did you expect the bike to get a good response at Sturgis?

I really didn’t. Sturgis isn’t known for cafe racers or sports bikes. The crowd is very v-twin oriented. So I was happy to get a great response and all the pats on the back. Having my peers at Michael Lichter’s Passion Built Show give me praise was also a nice surprise.

Anyone who has ridden an Indian Scout will appreciate just how much work was required to create PJ’s Scout Cafe Racer. What’s most impressive though is that the bulk of this build took place in a small workspace out the back of his home. The most obvious modifications are, of course, those to the bodywork. The full fairing is a custom-made fibreglass unit that PJ designed and was finished by Kacey Elkins of Krossover Customs. PJ tasked Raw Iron Choppers with cutting and welding knee dents into the stock fuel tank while he built his own tail section and had the seat covered by Ginger at New Church Moto.

Getting the Scout sitting right was an integral part of PJs cafe racer transformation. To do this he installed a set of ’07 GSXR forks using Cognito Moto 50mm offset triple trees. To level out the frame, he also fit a pair of 12-inch Ohlins shocks. Spoked wheels were high on the list of must-have items so he fit a pair of 18 inch Sun rims. The front is laced to the GSXR hub while the rear is fixed to an aftermarket hub by Indian. Woodcraft clip-ons wearing Avon grips set up an aggressive riding position and the stock footpegs have been relocated for comfort. Pj completed his handling modifications with Pirelli Sport Demon rubber and a full brake upgrade using gold anodised parts from Beringer.

No cafe racer build is complete without at least a little additional horsepower, and PJ’s Scout Cafe Racer is no exception. The bike now runs a DynoJet Power Commander tuned to get the most out of a Zipper’s intake, custom 2-into-1 exhaust and Supertrapp alloy muffler. Those with a keen eye will also notice a change from belt to chain, another modification done to achieve a classic bike aesthetic. The choice of chain colour was to tie in with the stunning black and gold paint scheme laid by Krossover Customs.

A great mid sized machine with plenty of guts in the right hand and something I would love to ride myself, nice to see lines that flow and motors that Go, this is an affordable bike that will last many moons for sure and I hope that I get to see it at some point around the circuit of shows etc.

Make sure that you give this fella a thumbs up when you see this machine as he really hit the proverbial nail right on the noggin with this bike and its a great piece to look at.

There are so many great bikes being built and you think that you have seen pretty much all that can be done but, this is proof of the pudding right here that it is not.

I am sure this is comfortable on long rides and, even more fun when you get into the twisties, love to sling my leg over and see what the power transfer is like.

Still, the only flaw that I can see is, after all that work, nobody puts any time into making a side stand that touches the ground, I have made many of these as having to carry a chunk of steel or aluminum with you all the time is not fun.

The Gas tank is another story, it really looks so Nostalgic and just loved the lines that the Gloss Black gives it, a well put together motorcycle thats for certain.

You cannot go wrong with Ohlins suspension,this will soak up the deviations in the tarmac like a New Coupe De Ville.

I like the way the rear sets are mounted and the whole bike flows with that full fairing set up, the swing arm is sturdy enough to take on any road that you take this bad boy onto.

Beringer make sure that you get plenty of stopping power, their products are up there with the best, I should know, as I am a dealer for their products and this looks really cool.

Hope that some of you out there, get to see this Indian Cafe Racer, its a good put together machine that needs to be seen and heard for sure, below are the renderings that got PJ started.

Out of the 100 or so submissions, 12 semi-finalists were showcased online for a fan vote to determine the final three finalists. These three builders got a full paid trip to Minneapolis for an unveiling party of their customized Scout Bobbers at Sturgis.