New ceramic Bronze Exhaust systems now available

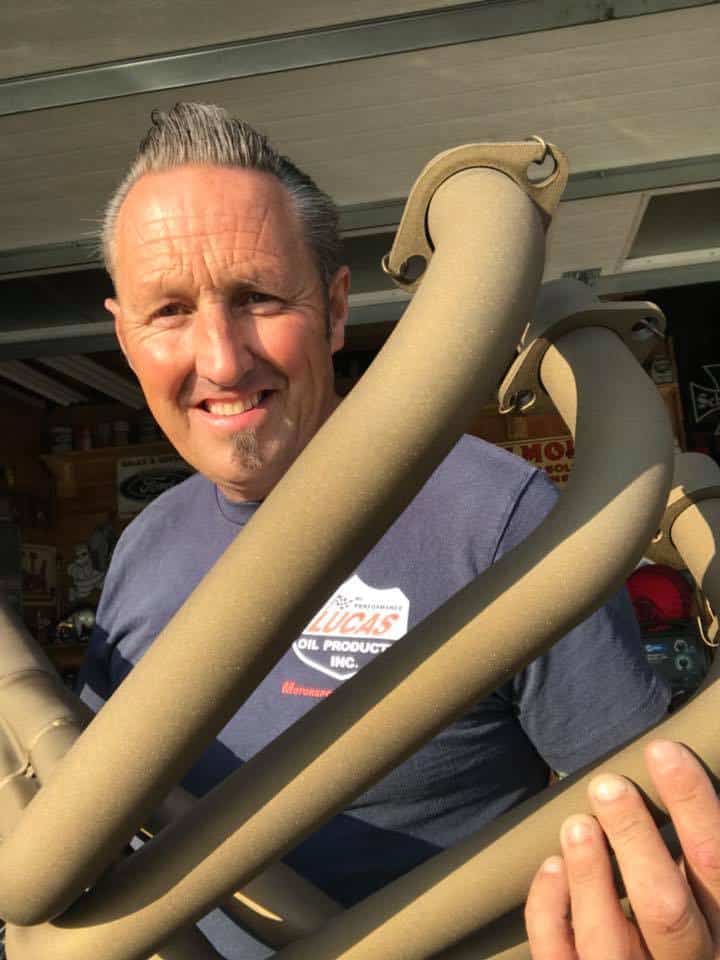
Well, I have now added this great Custom Burnt Bronze metallic ceramic Coating color to the 4 into 1 Exhaust systems we make, this is a superb Custom application that really enhances the look of your two wheeled machine and wanted to show you how great this looks.

Its almost a Metallic look and I love the way it looks and this is a New look for Exhaust systems and wanted to offer this color on the systems we manufacture here in California.

We ship Globally and this is a 2 piece set up so easier to fit and cheaper to ship as well.

I am glad to offer this Color to you and you simply go to the exhaust page and chose the Ceramic Color you would like, be it Burnt Bronze, Black or Silver, as well as Raw Steel or a show version of Stainless Steel.

These also come with a Chromed removable Baffle and what is good about my systems is that if you wanted to, you could cut the tail pipe down to the length you lie and the baffle will still fit.

So if you are looking for a Custom Exhaust for your inline four from 1969-1978 SOHC Honda or even the DOHC version, we make them here and offer them to you in different finishes.

Our systems flow and Perform, over 1500 systems sold around the globe and over 18 years in business, love doing this and we get great feedback and many repeat customers too.

Thanks for looking, I love this Color and look forward to seeing it on other Customers machines, let me know if I can help.


Moto Guzzi Service today

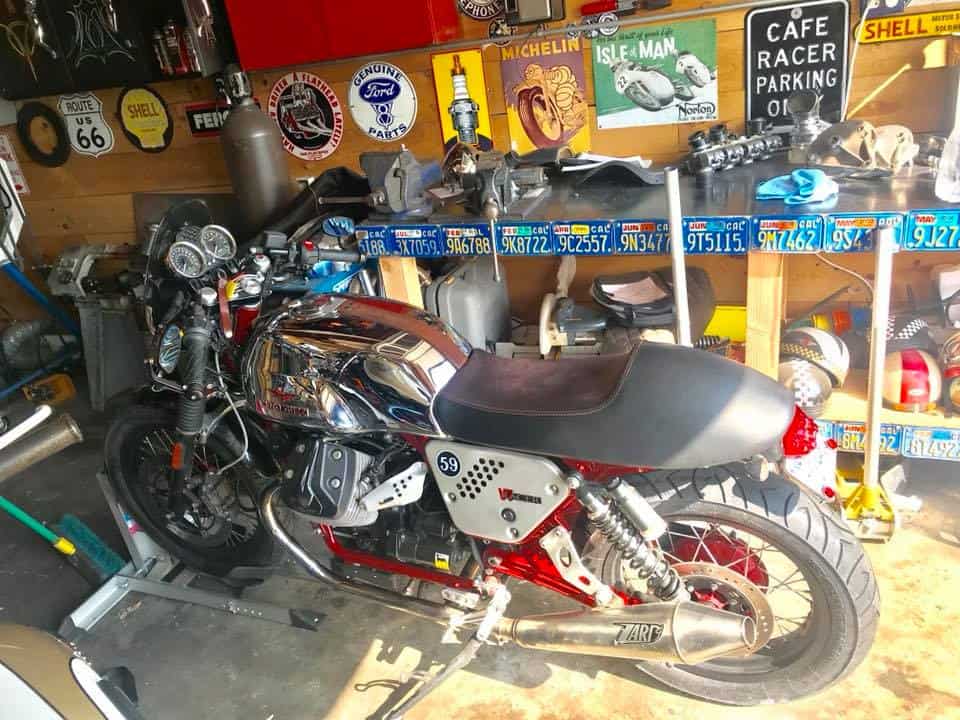
I get all sorts of machines in from time to time that need a service or other little jobs, I like these as it changes the day and keeps you updated on other machines. it is always nice to sample opther Motorcycles and these Moto guzzis are gracious machines that have a ton of History, unless you have ridden one of these, V twin opposed motors have their own transfer when you down shift and will feel strange at first as you feel the torque of the motor go from right to left as you accelerate and decelerate.

Today was the turn of the Italian steed, this 2013 Moto Guzzi V7 needed new tires and the fluids changed and I got right into it, seeing as it was a fantastic day here in La Miirada.

Fun thing is, the service manual is all in Italian, so after a little research from everything to Moto Guzzi website, you tube and forums, I had enough information to get this done in a timely fashion too.

Similar to an automobile set up, nothing easy on this, to drain the gearbox, you have to make a paper funnel shoot, else the oil will just pour out under the bike and over the frame, so I made a funnel and all was well. Albeit a little fiddly, but after a while, gravity helped me out.

Then there is no sight glass, you check the level from the side bolt and as soon as oil starts to seep out, then thats the level. Same goes for the drive shaft too, very antiquated but does the job and  this is now all buttoned up and ready for a test run. These are fun machines, and have Linear power, a great center of gravity and smooth transition in gear shifting.


Model A Roadster in Australia, ” The Road to Gulong.

If you think of Hot Rods, no doubt you will be thinking of California beach cruises, Detroit Autorama, Hershey swap meets in Pennsylvania etc, but- Australia has the Hot Rod bug as bad as the USA and the UK and I know this because I lived there for 4 years, working for a Hot Rod Radiator manufacturing shop in North Melbourne.

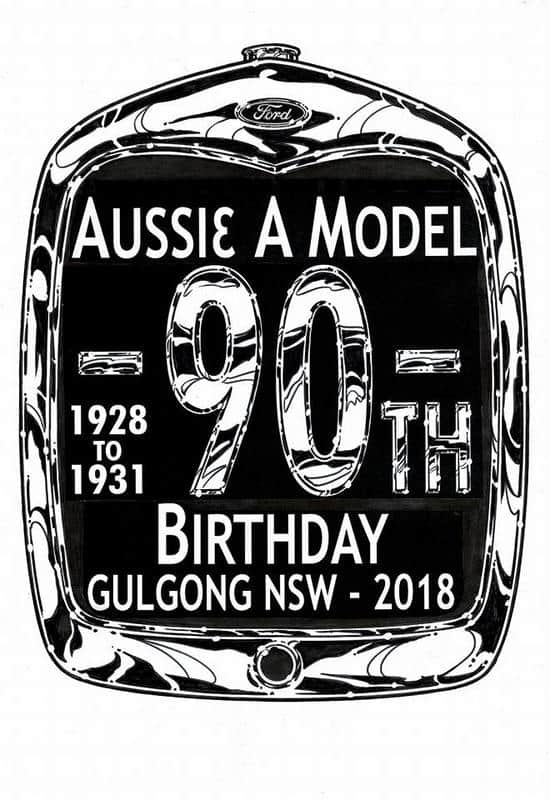
They are huge Petrol heads and I loved it, so, when I saw that the Model A in Australia was celebrating its 90th anniversary, I thought I would share this set of small videos.

Andy runs Classic & Custom Garage in Melbourne, Australia. Andy’s good friend Duncan has a build underway at C&CG of his Ford Model A Roadster.

Watch the videos as Andy gets this old stocker A-Bone to a running standard that will have full fenders and slightly lowered, but- still using its Original 4 Banger Motor, this episode, Andy removes some rust on the lower panel and makes a fresh replacement.

Below, you will see Andy has replaced some of the Bodywork and hand made some of the floor as well as seat riser, the Roadster body is about to be removed as Andy will be removing the old gearbox and replacing it with a Modern T5 set up.

Below, more work involved this time, changing the Carb to a grey Motor Stromberg was a cool idea, making a riser and flipping the linkage is a great idea, lots of work here, machining the flywheel to allow the T5 to fit and run a Holden Clutch, nice job and attention to detail Andy.

I am hoping there will be another episode after this one below, but I shall add the Gulgong show from another person to show the 90th Anniversary of the Model A. But great job Andy on this Roadster.

Below is a video of a geezer making the trip to the Model A 90th Birthday bash, Australia is a vast county, only 100 miles smaller than the States, and people travel great distances with no worries in the world, everywhere is measured in Hours not miles, great effort going all that way in rain and snow too. Tons of Model A’s as far as you can see.

I had such a blast living in Australia for 4 years, living in NSW and Victoria, everyone was great and all shared the passion that I am into, people are so genuine and enjoyed all the Hot Rod shows I attended and, I attended tons of them.


HONDA CB750 SOHC CARBURETOR DESK LAMP

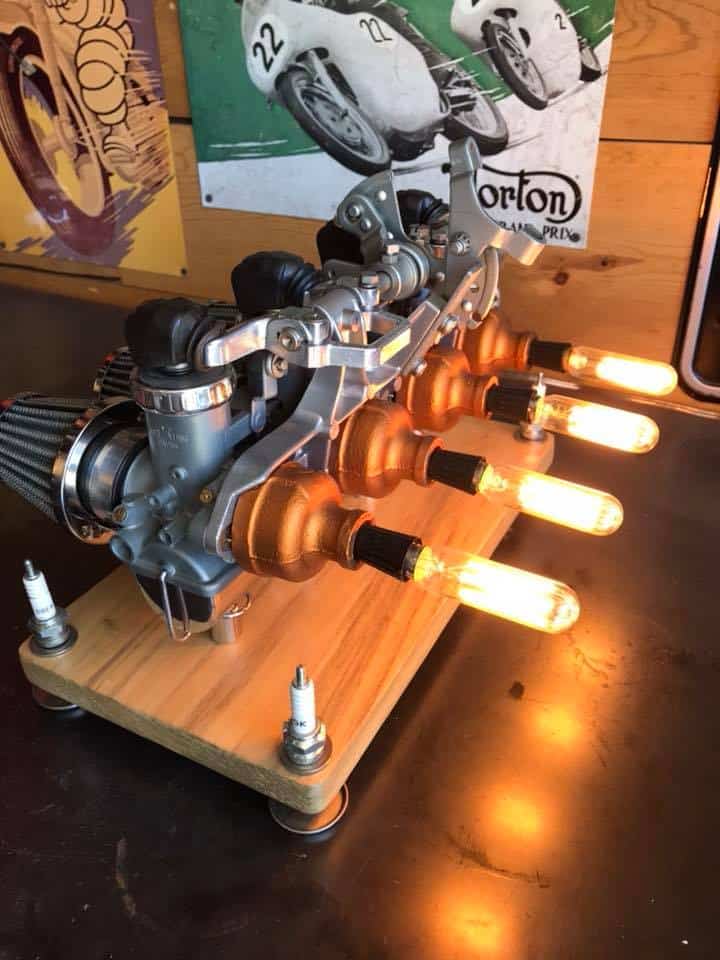
Here is an old worn out set of carbs that I took off a 1973 CB750 K Model Honda CB750 SOHC Model, the float posts inside were broken and the seats of the slides were worn out.

But- instead of throwing these old Carbs out, I like to Recycle stuff and knew these would look great as a Desk Lamp if I stripped them and wired them up to 110v plug.

I Vapor blasted the body, Polished the Carb Bowls and tops, I then  wired them up individually and made a stand for them using a piece of Poplar timber that I sanded, stained and clear-coated.

To add to the Nostalgia of this rack of four, I used genuine Honda parts like the Carb adjuster tops etc.

I added New 39mm Pod filters to finish these carburetors off and placed on the stand, I then made some stands for the base by using NGK plugs that the Honda uses.

This is a great look and have made a few sets over the years of which people still own and use, they are unique and hand-built, a lot of time goes into these Lamps I make.

If you are a Honda fan or a Mechanical Lamp fan, how can you not like this set up?

I shall be making some more out of broken Carburetors and will show on the website for sale. These are definitely a head turner and makes a great conversational piece where ever you place them.


I have been making Mechanical Lamps for a Number of years and enjoy what I do, these make really cool Gifts, so if you want anything making, just drop me a line carpy@carpyscaferacers.com and I will see if I can create something for you.

HONDA 1978 SUPER SPORT Lives to fight another day, Resurrection from Dereliction.

Well, this was quite a test for me, when this bike turned up, nothing worked, you could hardly push the damn thing to get it to move, this was sat for almost 8 years in Asuza Canyon by the River, it was left to bake in the Sun, then the rain and wind got to it and the bike was covered in mud and oil.

Been a long time since I have a totally messed up Honda as bad as this one and it was quite a challenge to get this girl to be back on her on two wheels again.

But I took the job and needed to get this old inline Four back up and running once more, but I sure had my work cut out thats for sure.


Never give up is the Motto here and, although this is no show bike, it was gratifying to be able to get to ride it a few miles today and make sure all is well, the top end rattles a lot but its adjusted, just bad maintenance in the years before, but- saying that- the Motor pulls hard and No smoke, thats why I love these inline Four motors, they are so strong.

I still want to put a few more miles on it as I have 10 miles so far, all the gears work fine and the clutch, signals function now as well as a horn and lights, so a quick check of oil level, chain tension and go round all the bolts and re-tighten, then I shall be happy to cal the customer to come and pick the bike up. I Ceramic Coated the exhaust and then used titanium heat Wrap to give it a more Rugged look, , but dont panic when you first fit heat wrap, as when you first get the exhaust hot, the wrap will smoke until its cured, like bacon in an oven LOL!

The headers do not smoke any more after 10 miles, but wanted to show you what the smoke looks like, that way you dont worry about yours and rush to gab a fire extinguisher.

Just goes to show that if you are persistent, then good things can happen, this was no easy task I tell you, the rear brake was totally seized, the master cylinders that are good are really hard toi find, I fitted new piston and seals to it and was glad to get it to function once more.

The fronts were frozen and they took a long time to get to work right, albeit a New master cylinder was needed for that, but now works well, it now has a Halogen headlamp with LED turn signals inside, lower handlebars and a comfortable Brat style seat that the Customer requested.

Sits well as it is lower at the rear just a tad, the seat I made from scratch and is comfortable with high density memory foam and of course you can carry two people as well.

I think the old man above gave me a little help as for some reason the neighbors could hear me shouting his name at the top of my voice. LOL!

So one more saved from the junk pile and hopefully if the guy keeps his routine maintenance, this will see many miles of smiles.

Thanks for reading the Blogs and following what I am up to, its great hearing from you all.

If I can help you can always email me on carpy@carpyscaferacers.com or if you want to you can text me on 714-598-8392 Have a great day you lot and have fun with what you do.

1978 Honda CB750F Super Sport Snotter- Revamped

Well, here we go with a Customers bike that has been sat outside by a river for about 8 years, the Customers asked if I could help him out and well, you know me, I said OK.

The say that a Picture paints a thousand words, well, this aint no oil painting and there is not enough words in the the English Language that came to mind when they dropped the bike off at my place.

There it was, 500 pounds of old cold, rusty and Muddy Honda, looking to have a new lease of life, some how I think I have scrapped the bottom of the Barrel, then another rolls in, but I am a man of my word and help out I shall indeed.

This was a complete mess, I mean it had been rained on from every corner of the bike, then wind blew the tarp off and rotted everything that was rubber or plastic, then to rub salt in the proverbial wound, it got wet again and covered in mud.

The bike has had a tough hard life, there was Oil everywhere, of which probably saved a lot of the bike from rusting to be honest, but everywhere I looked, this Motorcycle needed help, it was a sad state to see and I knew that I could some how get this running again, the only issue was the poor chap was on a limited budget, and I know how that feels, been there many times.

But there is a point where I must stop and say No, but the Leo in me tells me to have a go and help this bloke out, so, with a shaky handshake and sweat coming off my brow from pushing the thing up the driveway, I sat there and took in the whole sorry life that this inline four must of endured to get into the condition it is now in.

1a

Even the handlebar grips were so thrashed from the elements that half of the grip glues itself to my hand, not even lacquer thinner would remove that tar like substance from my fingers and was marked for life I think, but this is just the start of something that I really should of said, no thanks mate I cannot help you. Story of my life with things I guess but I have always pushed the envelope and this needed a Caterpillar truck to move it. The rear chain was rustier than the Titanic’s Crapper door, I shall be changing this Big 630 chain and sprocket system to a 530 set up.

5


The tires were torn up, and would hold air for about 2 hours then go as flat as a pancake, my Compressor got plenty of overtime keeping these things up for sure, but the amount of dirt, grime and Spiders nests was just unbelievable. I really have my work cut out here and as everything is knackered, I have to clean stuff before I start replacing parts etc.

2

I was never a fan of the Comstar rims to be honest but this bike has some sentimental value to him and I will do the best that I can, to bring this old bird back up to speed once more.

4

Not only was the seat all torn up, the foam had hardened and was starting to fall apart as soon as I moved anything, and as the Customer wants a Hoop welded to frame and a flat seat set up, this thing can get 86’d into the bin.

7

As you may know, the 77 and 78 Models had these Keyhole carbs, and when they have been left for such a long time, these buggers are so hard to get back to running nicely again, they have an accelerator pump that plays up all the time, the choke is on a cable and up on top of the triple tree and the sun dried the knob, of which it breaks as soon as you touch it, lastly, this bloody things are a royal pain to work on.  Just to change the jest, you have to remove the rack from the bike, as the float bowls do not have clips on like the earlier SOHC models.  So what I do is if these carbs are goosed, I inform the customer they would be way better off if I fitted earlier carbs, as you can change the jest with the carbs still on the bike and, it has a choke lever on the left sode of the carb body and way easy to use.

8

The sprocket cover tells a tale right there, covered in oil and road grime, as well as spiders webs, this is going to be scary when I remove the 2 Phillips screws in a minute, so stand back!!!!!!!!!!!!

22

Holy Moly, just look at this, the bloody sprocket doesn’t even have a securing Bolt and washer on it, there is nothing to keep this sprocket from literally, falling of the drive shaft, now the 77 and 78 sprocket set ups are different, the earlier versions have a little clip with two holes for bolts that sit in the recess in the drive shaft. Where am I going to find a CB750F Bolt and washer ????

23


I looked in my parts drawers in the garage and bugger me, will you look at that, still in the sealed packet and, I had even written in sharpie CB750F Sprocket, what were the chances?

25

Think its a fair assumption that this chain is Royaly Fecked, so I shall be glad to cut this 630 version off, but there is so much Oil and grime all over this bike, things are going to be messy for a while.

12


There seems to be oil all over this bike, and I mean everywhere, I need to see whats occurring here as thats an insane amount of Oil deposit and the guy said the bike used to run before he parked it, I checked the tach hole in the Valve cover but thats OK, the Valve cover seems OK as well as the  Cylinder head, which I think could be one of the oil lines, but what a mess this is going to make, just to take that apart.

26

That looks like the issue, Oh yeah- I will just put electrical tape around the leaking oil line, that will fix it-Not! So I now have to make a new oil line, but at least I have found out where the majority of excess oil must of been leaking from to get all over the bike like that.

29

All fixed and I cleaned the other hose up and oil tank and I feel a lot better about putting this back on the Super Sport once more and hopefully no more issues in that department.

19

Well, its at this point you think to yourself. “Why am I doing this”?  But its a challenge, the customer is on a low budget and this motorcycle is of sentimental value, so a no brainer but there are so many things wrong and not working on this bike, this will take me some time to get dialed in.

20

Time to remove the carbs and boots and clean the frame up, I shall then fit New intake manifolds from a 1975 CB750K model, rebuild some early Carbs and fit new cables too.

36

I cleaned and painted up the motor with High Temp Wrinkle from PPG I get made up in cans, and that helped big time. I then fitted the earlier intake manifolds and, using a flat edge, made sure that the intakes were all even and flat, this makes fitting carbs back on the bike so much easier than trying to force a rack on when the intakes are off slightly.

37

I have always used New Stainless Steel, Rolled edged Hose clamps, as these will not dig in and cut your hoses with traditional clamps and of course, being stainless, they will not rust or corrode.

41

Well, I pulled an old set of inline four 1975 CB750K Round tops out of my pile and these need to be gone through but when they are completed, and then synchronized, these run like a top.

104

All clean and ready to go straight on the bike and, these will fire right up no worries at all, these are cleaner than a cats arse and will make a huge change in this motorcycles life.

46

These are now all in place and have fitted New Genuine Honda Boot covers over the linkages to keep crap out, many do not do this, but I want these to stand out as they look and function so well, plus you can change main jets is minutes with the carbs still on the motor.

30

I try and use as much of the original parts as I can, but these coils were losing voltage and not repairable, unfortunately these are not cheap to replace, I had no choice but to use Brand New ones but, so glad that I did, these new ones I will be fitting will last many years.

31

All bolted in, this bike will have a new life for sure, but it just goes to show by leaving a bike for 6 years with no cover and let mother nature belt the hell out of it, is not a very good idea at all.

39

The old cables were all torn up anyway, but, on the earlier carbs you must use the earlier cables, but thats a good thing as you know everything is new and will function real nice.

40

New cables going in, now we are starting to make some very good progress, make sure that you use WD40 and lube these cables as they will keep these operating smoothly.

49

The aluminum hangers were oily and needed a bit of a revamp, so I removed these and began to clean them up, think I shall polish these to make a difference on the bike.

50

Now that is way better and I feel a lot better putting something clean back on, this motorcycle will sure look different and for the better.

52

New cables through out, the clutch cable was actually seized up, so a new one was purchased, I always use New adjusters too .

57

The points cover looked like it had been in a bad way for a long time , but- it wasnt too banged up to be honest, so, using my special Formula High grade restoration Polish, I jumped into action as I love polishing old stuff, it took me about 90 minutes but it was well worth it and looks as good as new now.

58

Now that is a lot better and used New stainless Allen head bolts to give this Points cover a New lease of life, it sure looks great on the motor now.

59

The Clutch cover was in the same shape as the Points cover, so, back to the polisher, some more secret sauce and a polishing mop and then I will refit to the engine.

60

Now this looks a whole lot better once polished to a super high luster I used Allen head bolts which are all New, as is the clutch cable too, so a smooth clutch at long last.

44

Look how bad the muffler is, its had bad gas welding, then an old screw held this together, sort of, I will keep the stock header and will make a new up-swept tail pipe for this bike.

47

Getting to it with a piece of 2.5 tubing, as I want this to look cool and sound pretty strong too, this will be a fun part of the process on the Super Sport Bike.

63

There is the tail pipe, complete with a Removable baffle, this is way better than what was on there, the old muffler even had a mouse nest in it, so glad to change this set up.

64

Next up, the Customer wants a flat frame with a hoop, so what I am going to do is cut the rear frame horns off about the middle of where the old cross brace is.

66

I have cut the frame rails off to where the customer wanted, this will then have my frame inserts put in and I will cut one of my special frame hoops to fit to the bike and give it a new look.

67


Now- I use a de-burrer to remove any inner tubing, I want to make sure that the inside is hollow and smooth so the inserts will slide in tightly, that way there will be no issues.

68

The inserts are in and they are really snug, I go in about an inch and half both sides, it is double walled on this part of the frame, so the hogging out does take a while and may annoy your neighbors if you have to use an air compressor and a die grinder to open this up.

69

As you can see, I have laid the hoop on top of the frame, this way I can figure out how much I want the hoop to be placed at, I then mark the hoop by the end of the chassis, as this is where it will butt up against so you can then weld it.

70


Once you make the cut, you simply cut the other side, take any burrs off the inside and then you are ready to attach this to your bikes frame and this will change the look of you machine right away.

72

As you can see, I fit the hoop into the inserts and then I simply just tap the end of the hoop with a Rubber mallet, until the ends are almost touching the frame, as I want just a tiny gap to allow for good penetration of the Mig welder to secure this to the frame.

So the little Video above shows you how I first attach the hoop to the frame, I then mig weld the ends all around and you can drill into the frame and insert and spot weld there too if you want a more secure weld too.

78

I have Mig welded this in place and am happy with the end result, next up is I have to make a seat base for this, you do see some on the market already made but many times you want to make the length of your frame to your dimension, so- I always make mine for each frame and its pretty easy.

83

Use what you have around you to make a template, I had a packing box handy, so traced the outline of the frame and cut it out, a little trim and I am ready to now make a seat base.

84

I may have gone a little over the top on thickness as this is 18 gauge but I had a sheet in the garage and may as well use it, its strong as Hercules but obviously the down fall is its harder to cut and shape, but this will work fine and be a great sturdy base for the seat I am going to make.

85

There you go, its done, now to check on the frame, grind any adjustments that need doing and drill some holes for the bolts to be able to fix to the frame, as I shall upholster over the bolts so the studs are the only thing sticking out underneath.

86

There you go, I am happy with that now, simply need to use high density memory foam and choose the material and stitching and that will be upholstered and look so different.

96

Still a long way to go on this Super Sport but- It is finally taking shape and looking way better than it did when it was dragged into my place looking very sorry for itself.

88

The Gauges were shot, one of the needle drives was not working and I wanted to clean this area up quite a bit, so came to the conclusion that this can look a lot better with all this clutter removed and different bars fitted too, as well as removing the upper triple tree and polishing it to a chrome like luster.

89

The stock fork ears have to go and the turn signal housing as they were rusted out and looked pretty ugly, customer wanted a Brat style bike and these tend to be removed, I shall also add one of my custom headlights that have internal LED turn signals inside the light, so there is nothing protruding.

91

Removed the handle bars and gauges, as well as the ignition switch as the plastic connector and dried and crumbled up, due to being sat out in the California Sun for 8 years.

92

Now, that is a lot better, as you can see, I removed the old paint from the triple tree and polished it, I also removed the stock fork ears and fitted some Custom alloy versions in Black.

93

New ignition switch also added as the stock one was worn out and now all new once more and of course, functioning too.

94

Had to make up a new pig tail for the lights as the old harness had dried out, but this will work great and, reduce the amount of wiring thats inside the headlight.

99

As ypu can see, what a transformation, my LED turn signal headlight set up is the way to go, Halogen bulb and the LED signals actually do light up Amber, a neat custom touch.

100

Starting to get some where, still have to foam and upholster seat, as well as pulling front wheel out and fitting new tire and sorting the brakes out and these are all seized up.

105

I removed the rear wheel, I need to clean all this up and thought that i would take a photo and, below I have done a quick video on my phone, to show you how I undo stubborn nuts or bolts when they have been on many years and have seized up and you cant for the life of you get them undone with just your wrench.

I try and show videos where I can, as many of you ask me on the phone everyday, so thats why I do things like this and hope that it helps some of you out that may be out in the sticks and nowhere to ask.

Hell yeah, this is slowly getting better everytime I work on the bike, the Customer came and visited and loves the way the machine is now looking, but I tell ya, it has even tested my patience on more than one occasion, just take a step back and do something else, but- as you can see, I have now upholstered the seat, and did it in the Nostalgic Diamond stitch and added silver trim to break the seat up.

I kicked the front a little to try and hide the arch in the stock gas tank, usually I weld up that area, but this customer is on a budget so this was a good way of over coming this issue, I used High Density memory foam and I tell ya, it is super comfortable.

The seat will be Bolted down so it sits nice and tight onto the frame, I still have to smooth the chassis and paint Gloss Black, but also as you will notice, I have fitted an LED strip at the back, this will function as a Running and Stop light in Bright RED.

The Turn Signals are Chrome and LED too, so this will be sure to get a drivers attention and inform them as to what they are doing ahead of them.

The New 2.5 Gauges that I sell on my website were just the thing needed to tidy the top of this machine up, I vapor blasted the master cylinder but its beyond repair, so shall be fitting a New version tomorrow.

The old 630 was totally rusted and, falling apart, so opted to change this set up for a 530 chain and sprockets, this was so messy, I was glad to change all this and have it look at least a little cleaner, thats why I prefer to usually strip the bike to the frame and do it right, but sometimes that is just not in the Customers budget, so do the best I can for them.

Looks so much better and I am glad I went this route, plus the Customer was over the moon with the look, so a double whammy there. Now onto the Exhaust system.


As you can see above, the exhaust is so so but underneath its a mess, the rear muffler was so badly welded, they needed to fit a screw into it to keep them together, so i thought that it was time to set up the good old Heat wrap, I like that Hot Rod look and so does the Customer.

There you go, all wrapped and ready to go back on the Motorcycle, remember to replace your Copper crush Gaskets too when you re-fit an exhaust system.

Looks so much neater now and I like the way that the Honda is slowly taking shape, I mean, a few weeks ago this was in a terrible state from all angles, so right now I am quite stoked.

Right, now onto the rear brake Caliper, as it is seized up beyond belief, what I normally do is remove the caliper and stick a towel in a bucket and simply put an airline into the caliper and leave the bleeder in, that usually pushes the piston out pretty fast, hence having a bucket as there is 150 PSI from the airline going into that small cavity.  But this time the Piston refused to exit, so that tells me there is a small rust ring around the piston.So what I do in this situation is go back to old school ways of getting things resolved.

So, now I have the piston out, using an old set of handlebars and a master cylinder to bleed it out, I can now get onto rebuilding the caliper, the O-Ring seal usually gets nasty and this one had too, but the Piston was rusted in and lucky for me I had a New Piston and rebuild kit at the ready. Below, Old and New, always replaces seals, especially in Brakes.

I use a pick to pull the Seal out, and then I was glad I had a New piston as the original one I removed from the Caliper Body was seized in and pitted up quite badly.

So, before I fit the Piston, I need to clean up the old caliper, as it has a lot of Oxidization in the body, as the carcass is a cast aluminum, so what I do is use a Rubber wheel to clean the body up, I sell these kits on the website, whats coo is that it does not hurt the caliper at all , although it will remove the oxidization pretty easily.

This is what I do t clean the body up, been doing this over 18 years here and always makes the brakes work really well and smoothly, I sell the kit on my website.

So, thats now clean, all blown out with an airline, a little brake fluid in the Caliper body to make sure all is smooth, Seal is in and Piston slides right inside nicely.

So, all rebuilt and ready to fit back onto the Super Sport, Bleed through and hopefully we shall have a brake now as before- this was seized solid from years of inactivity and parked outside for 8 years.

The rear brake is now a success and functions very well on the pedal, a lot of work but worth it in the end, as this brake caliper was seized up solid, am happy now.

I also didn’t like the strip light set up that I fitted to the frame, so removed that and fitted an LED stop – tail light and fitted the License plate to it and looks so much better I think.

I removed the Red LED turn signals as they were not functioning bright enough, so replaced them with some Classic Alloy 12 volt Bulb versions and tested, worked really well.

The front fender was a mess, but I wanted to still use as the front end needs bracing, so I though what I would do was cut it down and remove 11 inches off each end to make wheel look bigger.


I then elongated the mounting holes in the brace, that way the fender will hug the tire, not touch it , but give that appearance that it was.

The Customer will paint it Black when he gets the Gas tank and side covers painted, but this sits nice and tight and stiffens the front forks up and stops crap flying in your face.

Next up is to clean the rear frame up and paint it Black, tidy the wiring, fill the gas tank, add new fuel line and see how this bike runs.

OK, I have managed to do all that and can now take this for a shake down run around the Block, the petcock bloody leaks, so have ordered a new one and will change that when it arrives.

Did a good run around the block and wanted to make sure that all is well, I knew that the headers would smoke for a few rides until they have cured, so no worries there, but the top end of this old Super Sport is rattly as hell and all adjusted, these can stay like that for a long time and thats how it is going to stay for a while.

OK, so now the Customer changed his mind about a few things, so I have changed the rear tail light and made a License plate mount to sit off the bottom of the shock and used a Ford Model A LED rear Tail light.

The Bike now runs, all the gears work, Turn Signals function as does the rear Brake light and Running light, I have put a lot of time into getting this thing running again.

Virtually a different Motorcycle now, it runs well, albeit the top end rattles like some old nails in a can but they will go on like that for a long time and the customer can do that later, it pulls hard to be honest and the exhaust of mine is just Killer sounding.

I am not going to paint it, I sealed the gas tank but he can paint it as the Customer is on a budget, so when he takes it next week, he can get a painter to do their thing to her.

So there you go, pretty much done, this bike had not run in 8 years, all the brakes were seized and needed so much cleaning before I could even work on it, it is amazing it runs to be honest.

The Customer can add mirrors if he so wishes, thats just cosmetics, but at least I got this to run and drive, many would of given up and, I wouldnt of blamed them, but I continued and won through.

I am going to play with My Hot Rod thats in the back ground and look forward to this leaving my garage during the week, thanks for watching this build, hope you liked what I have done?

The California Motorcycle show at Santa Anita

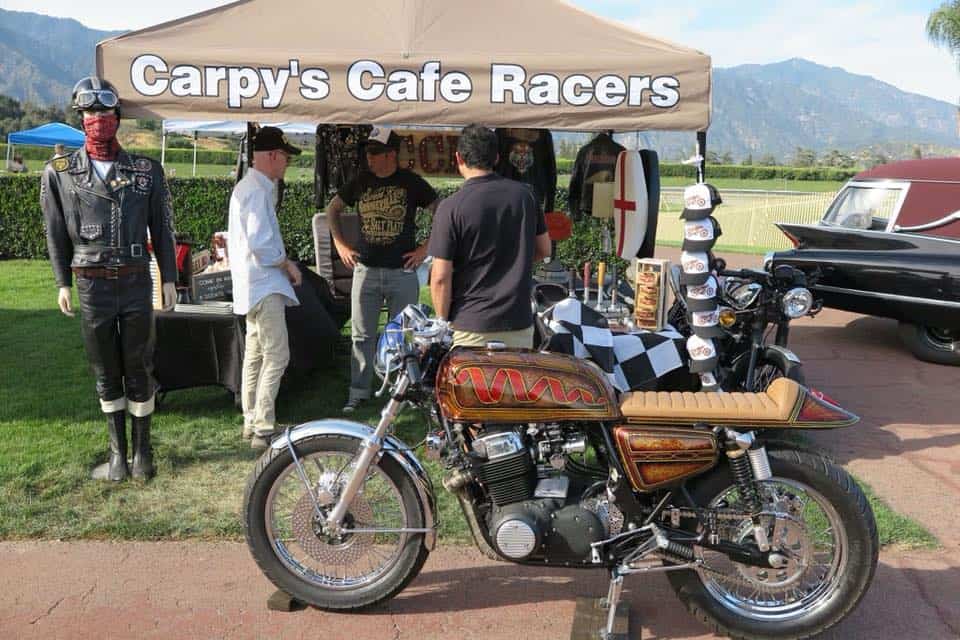
Well, Cinco De Mayo is upon us, where many people are still sleeping, we were up finishing packing the Van up with 2 Motorcycles and our Vendor Booth, we then headed out to Santa Anita Race track, where we set about unloading the van, Jennifer sorted the vendor booth out whilst I puffed and panted , walking the Motorcycles into the park, as you well know, Horses are not happy with Thundering loud megaphones and Million Dollar horses at that, so we had to walk everything into the Race Track area.

I Registered my Harlequin Honda and maneuvered that beast into the infield, where upon I parked it and spent the next hour, sweating my gonads off, trying to clean the dust off that had accumulated from our garage since the last show we were at. Not an easy task as the needle on the Thermometer was at 97 degree’s, I was melting.

But, once all set up, I went and sat in our Vendor Booth with Jennifer and tried to stay out of the heat, and the Eazy Up helped big time on this Kentucky Derby day event and was happy that we had some sort of cover over us.

Many people arrived all dressed up to the Nines in their Horsey attire, a big deal here and everybody seemed to enjoy the Motorcycles that was on Display at the event.

I spoke to many Customers of mine as they made sure to come and at least say hello, we sold our Moto Caps and Vintage Grips, whilst Jenn was selling her Moto Scented Wax melts, that seem really popular.

Plenty of cool Motorcycles on Display at the event and it was nice to see so many different styles of machines turn up on this Hot Day in May. Loved the Tracker.

Jay La Rossa had his Triumph Tracker there, and it looked pretty tough I tell ya.I hung out with him for a while, always great to chew the fat with like minded bike builders.I loved the Step side with the Two Trumpys in the back, these were top class built Custom Motorcycle, with the paint flowing from the trucks roof to one of the bikes was a neat touch.

Just have a look at some of the detail on these bikes, I loved them both and hope to see more of these on the road, I never see them ridden though these days.

BSA was well represented and would of taken any of these Classic steeds, from the Tracker at the front and the DB at the back, all bloody awesome to see.

The traditional 750 Commando is such a timeless taste of Real Ton up machines from back in the day. Always great to stop for a second and take it all in at these events.

I loved these Trench diggers, rode a few as a teenager and they scared the hell out of me, in a good way, love the twin shocker Dirt bikes, my era to be honest.

The good old CB750 SOHC unit has been put into everything you can imaging, this is a buddies of mine and a lot of work gone into creating the 750 Scrambler.

I dont think many people will appreciate the time and effort to get this old 530 Pound machine to look like it can handle the whoops and Burms of California’s MX tracks.


The good old 400 4 Super Sport Honda, its been Cafed and Raced for so many years, that people really forget how fast and fun they are to ride.  A great Powerhouse !

I would sure love to sling my leg over this AHRMA machine, reminds me of the old JPS Bikes of the day when British tracks had these and (Forgive the pun) were the Dominator.

A great Racing bike that is built so well and I am certain would holds it own and more on the race track, love the stainless exhaust headers and short reverse cone megaphones.

New meets old, a colorful array of machines and background to be honest, other than the heat, this was a really great looking part of the Race Track as its part of the infield.

I would really love to own this Honda Flat tracker, I bet its fun getting in the corners on the track and would have a blast on it and its nice to see its still being used.

Like I said, there was plenty to see for everyone, many different era’s of Motorcycles were on Display on the infield and around the race track, making it an eye candy store of the 2 wheeled variety and I was admiring them all.

This Honda Scrambler was cleaner than any cats arse, it was a super machine, nothing I didnt like about it, just gaze your peepers on this Classic machine from the Land of the Rising Sun.

Baking was not the word, it was so bloody hot I was hoping a bunch of Horses would belt by to cause a little air flow and cool us down, Summer came early here for sure.

Love seeing the old Honda’s as these were more available back home in the UK in the 1970’s when we were kids and for about 25 Quid you could pick one of these up, pull the mudguards off and headlight and go and blast along the Forrest fire roads, such fun back then and great to see them still around today.

The worldwide distributor of Hodakas was PABATCO, for Pacific Basin Trading Company. Its headquarters were in the rural town of Athena Oregon.  PABATCO designed and engineered a majority of the motorcycles, and Hodaka in Japan was responsible for the engine and manufacture and assembly. Pabatco was owned by Shell Oil Company from 1965 to 1978. The name Hodaka comes from a mountain near the factory and means “To grow taller”.

I have owned 6 of these over the years, anybody could learn to ride on the 175, and it was a superb platform for many styles of bike, loved seeing this example and being used too.

Different combination, the sohc cb750 and a Panel wagon, both very cool. Not sure who owned either buy glad it was there to be seen.

This won best of show, it was nice but still missing parts but each to their own and a nice motorcycle none the less.

Shinya bought along his CB750 with much Custom Body work that was all hand formed, Loved the front end and I believe a grimeca front brake too.

Another great Custom build that took many hours of massaging of alloy to get it the way it is, the more you look, the more detail you will notice from front forks to exhaust.

So much work going into this, removing One cylinder isn’t easy and this is one awesome Custom and love the whole concept.

Seems that Honda were really out in force on Saturday and I loved it all, one of the girls was riding this, great job.


Killer build, I dont usually like Green but this bike popped and a really nice BSA to be shown at Santa Anita, just looks so right.

A plethora of bikes and styles, and was glad to be a part of it on the weekend, it seemed to attract many people and raise a few eyebrows too, all great Motorcycles.

OMG thats all I can say with this Stable of Beeza’s, just awesome Historic value, real Ton Up machines.

Dustin Kott builds some bad ass machines, it was nice of him to purchase one of our Moto caps we sell and Jennifer designed.

Biltwell were there and Bill had his Harley Desert racer on show, fresh from doing thousands of miles in some pretty rough parts of the desert and, it survived.

My mates from Moto Chop were there, we are all like a big family when it comes to Motorcycles and custom created things, cool people.

British Customs were there too, showing what they do and manufacture, it had many cool vendors and we were all glad we had Eazy Ups as the weather was so hot all day long.

Thanks for coming by and saying hello, we had a fun time and hope to see you again at another show, I strive to help you in your quest for parts, service or advice, this is my Passion and my life, thanks for supporting me, it means a lot.


We shall be on Display at Santa Anita Race Track on Saturday May 5th

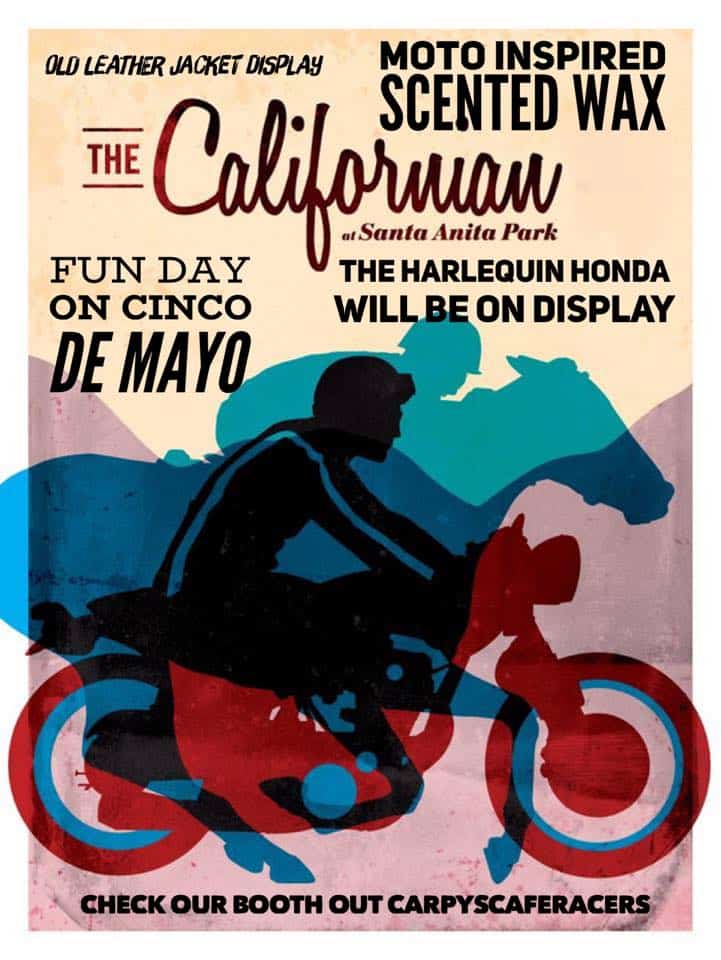
Well Cinco De Mayo is almost upon us and on Saturday, Jennifer and I shall be showing the Harlequin Honda Custom Cafe bike along with many other cool 2 wheeled machines at the Santa Anita Racetrack.

JOIN US KENTUCKY DERBY DAY

THE CALIFORNIAN VINTAGE MOTORCYCLE SHOW

FOUR HOOVES AND TWO WHEELS, THE EVENT WITH A DOUBLE DOSE OF HORSEPOWER IS ARRIVING AT THE GREAT RACE PLACE, MAY 5TH!


Join Santa Anita Park Kentucky Derby Day for the Californian Vintage Motorcycle Show. Located in the beautiful Santa Anita Infield (East End), the Californian will feature motorcycles, food trucks, vendors, and more!

We shall also have a small Vendors Booth where we will have my Triumph Thruxton on Display, alongside some Rockers Jackets and memorabilia, and Jennifer will be selling her Moto inspired scented Wax Collection .

Enter Gate 6 off of Colorado Place for FREE parking. 

Come by and say hello, always great to meet people and share this great event, its sure to be a fun day and the weather will be awesome too.

The Santa Anita Park welcomes The Californian, a one day celebration of sound, speed and taste that combines the prestige of a concourse motorcycle and classic car show with the excitement of horse racing, music, art and food. The event is built around an exhibit of new and old motorcycles and classic cars with family friendly activities ranging from a petting zoo, a food truck rally, a pop-up retail experience, a live art installation, and live music. The background, of course, is the spectacular scenery and mountainside view of Santa Anita Park and its unprecedented horse racing history. Sponsors will create unique spaces to showcase their products & judges will sort through the entries to name the best of each class while a variety of musical artists take the stage throughout the day.

Our CB750 Custom Metal-flake Cafe Motorcycle will be on Display and should sparkle in the Sunny weather, check it out if you can, then come by and say hello.

Saturday at 1 PM – 6 PM
2 days from now61–93° Mostly Sunny


Santa Anita Park

285 W Huntington Dr, Arcadia, California 91007