Blog, Cafe's I built
1978 Honda CB750F Super Sport Snotter- Revamped
May
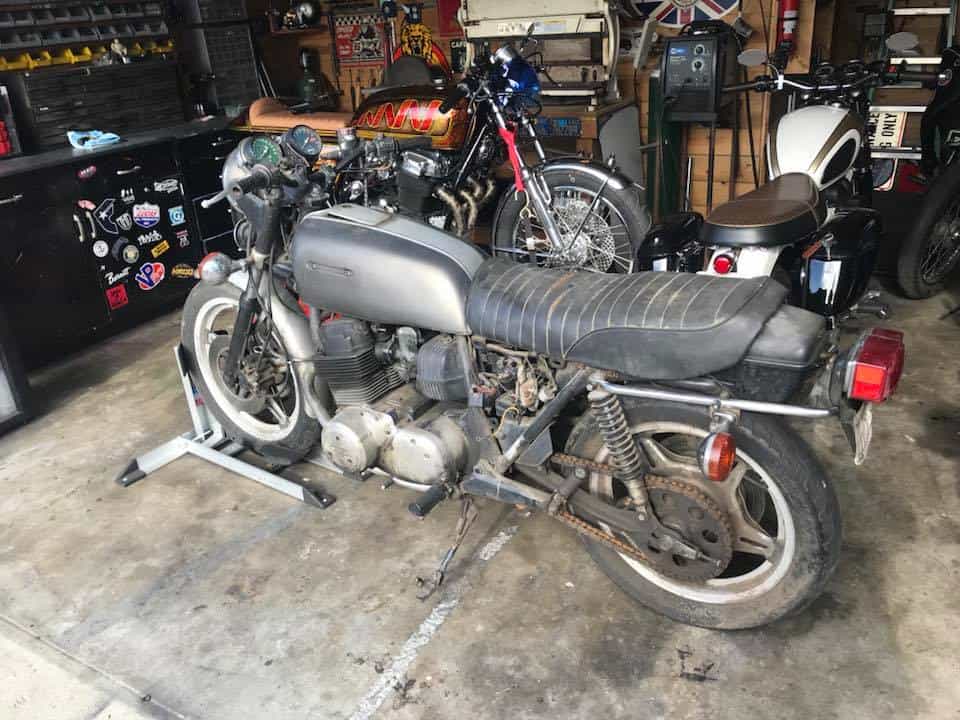
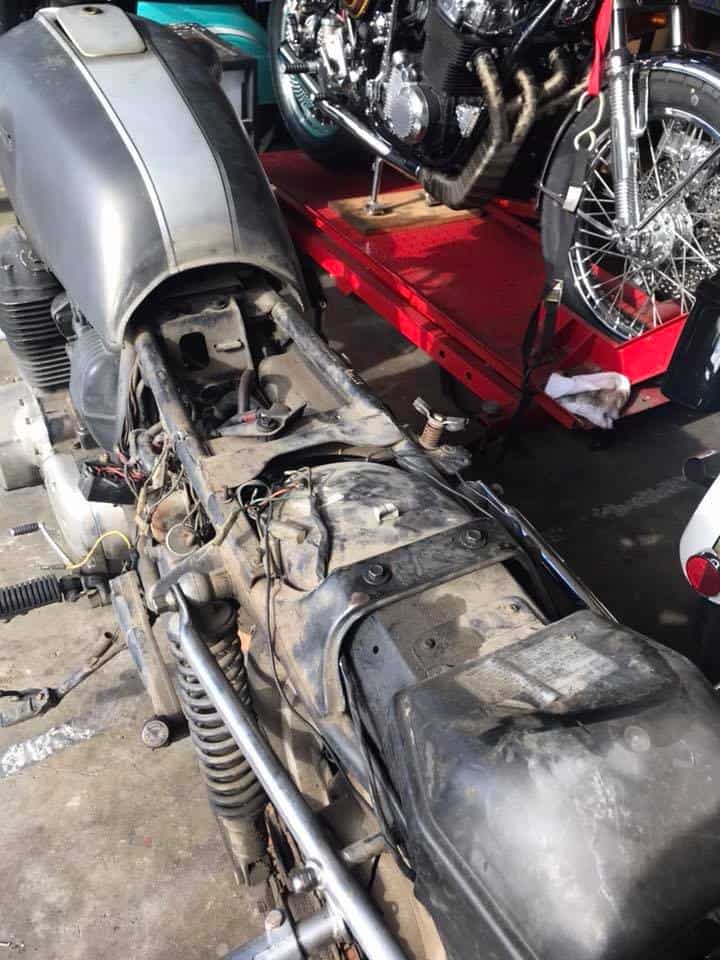
Well, here we go with a Customers bike that has been sat outside by a river for about 8 years, the Customers asked if I could help him out and well, you know me, I said OK.
The say that a Picture paints a thousand words, well, this aint no oil painting and there is not enough words in the the English Language that came to mind when they dropped the bike off at my place.
There it was, 500 pounds of old cold, rusty and Muddy Honda, looking to have a new lease of life, some how I think I have scrapped the bottom of the Barrel, then another rolls in, but I am a man of my word and help out I shall indeed.
This was a complete mess, I mean it had been rained on from every corner of the bike, then wind blew the tarp off and rotted everything that was rubber or plastic, then to rub salt in the proverbial wound, it got wet again and covered in mud.
The bike has had a tough hard life, there was Oil everywhere, of which probably saved a lot of the bike from rusting to be honest, but everywhere I looked, this Motorcycle needed help, it was a sad state to see and I knew that I could some how get this running again, the only issue was the poor chap was on a limited budget, and I know how that feels, been there many times.
But there is a point where I must stop and say No, but the Leo in me tells me to have a go and help this bloke out, so, with a shaky handshake and sweat coming off my brow from pushing the thing up the driveway, I sat there and took in the whole sorry life that this inline four must of endured to get into the condition it is now in.
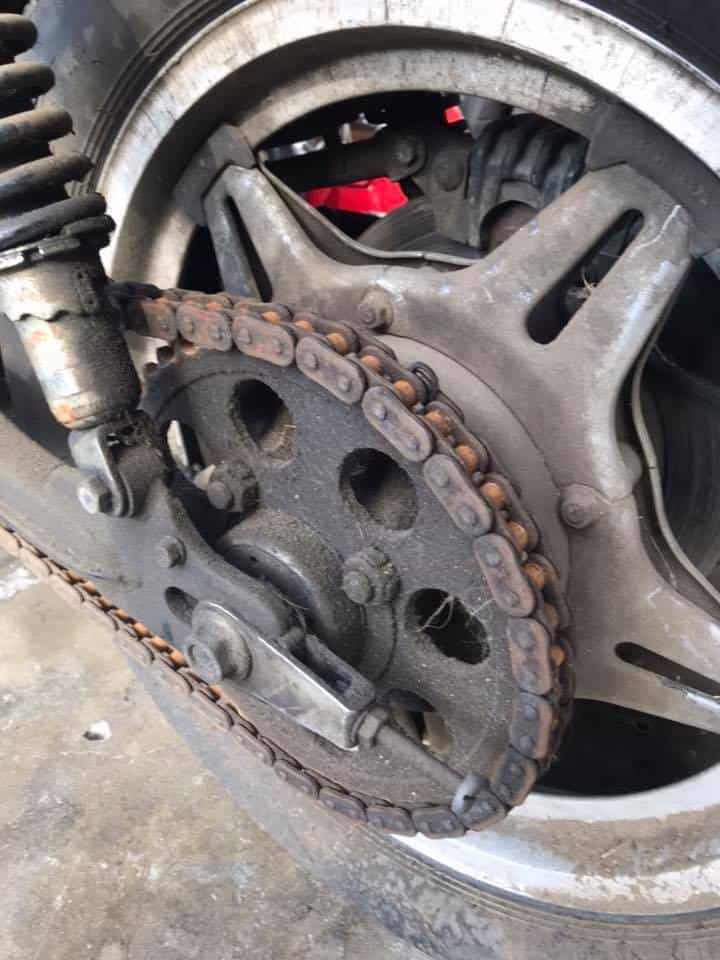
Even the handlebar grips were so thrashed from the elements that half of the grip glues itself to my hand, not even lacquer thinner would remove that tar like substance from my fingers and was marked for life I think, but this is just the start of something that I really should of said, no thanks mate I cannot help you. Story of my life with things I guess but I have always pushed the envelope and this needed a Caterpillar truck to move it. The rear chain was rustier than the Titanic’s Crapper door, I shall be changing this Big 630 chain and sprocket system to a 530 set up.

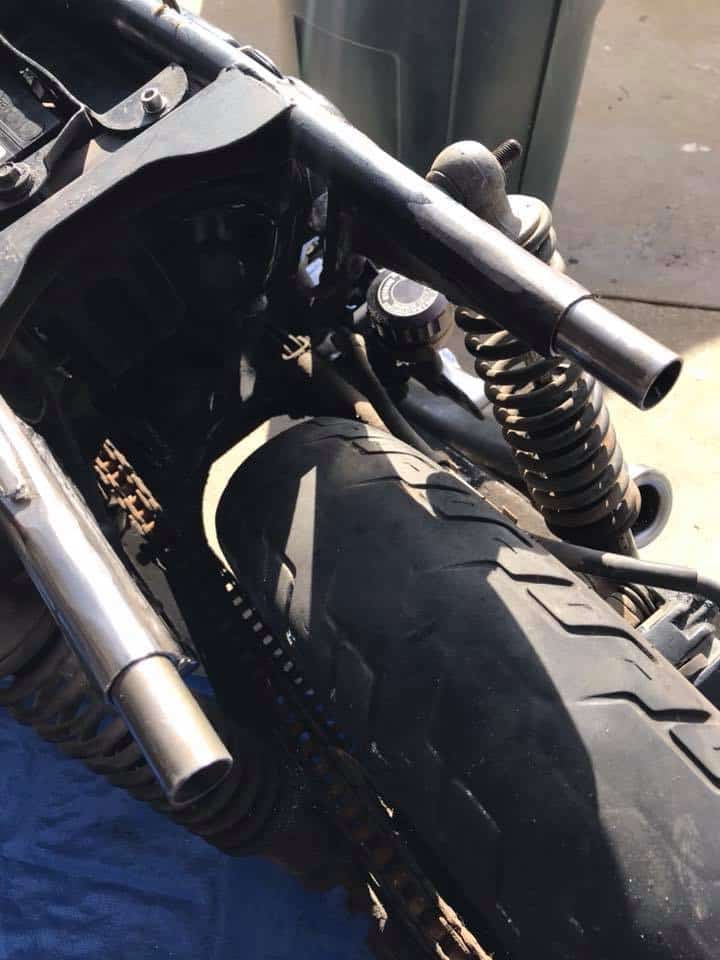
The tires were torn up, and would hold air for about 2 hours then go as flat as a pancake, my Compressor got plenty of overtime keeping these things up for sure, but the amount of dirt, grime and Spiders nests was just unbelievable. I really have my work cut out here and as everything is knackered, I have to clean stuff before I start replacing parts etc.
I was never a fan of the Comstar rims to be honest but this bike has some sentimental value to him and I will do the best that I can, to bring this old bird back up to speed once more.

Not only was the seat all torn up, the foam had hardened and was starting to fall apart as soon as I moved anything, and as the Customer wants a Hoop welded to frame and a flat seat set up, this thing can get 86’d into the bin.
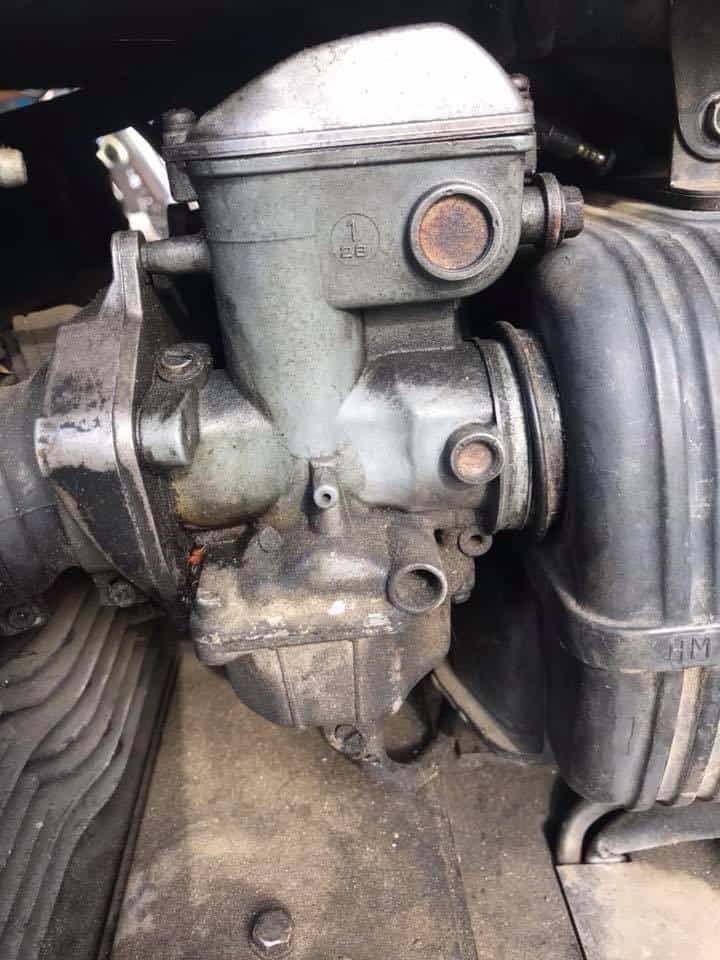
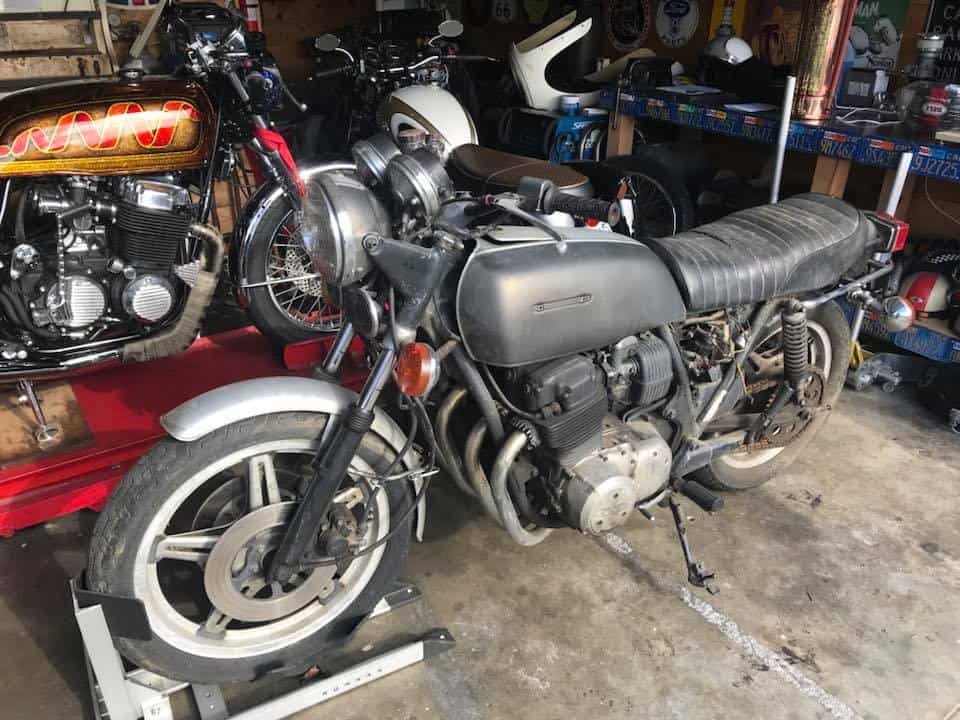
As you may know, the 77 and 78 Models had these Keyhole carbs, and when they have been left for such a long time, these buggers are so hard to get back to running nicely again, they have an accelerator pump that plays up all the time, the choke is on a cable and up on top of the triple tree and the sun dried the knob, of which it breaks as soon as you touch it, lastly, this bloody things are a royal pain to work on. Just to change the jest, you have to remove the rack from the bike, as the float bowls do not have clips on like the earlier SOHC models. So what I do is if these carbs are goosed, I inform the customer they would be way better off if I fitted earlier carbs, as you can change the jest with the carbs still on the bike and, it has a choke lever on the left sode of the carb body and way easy to use.

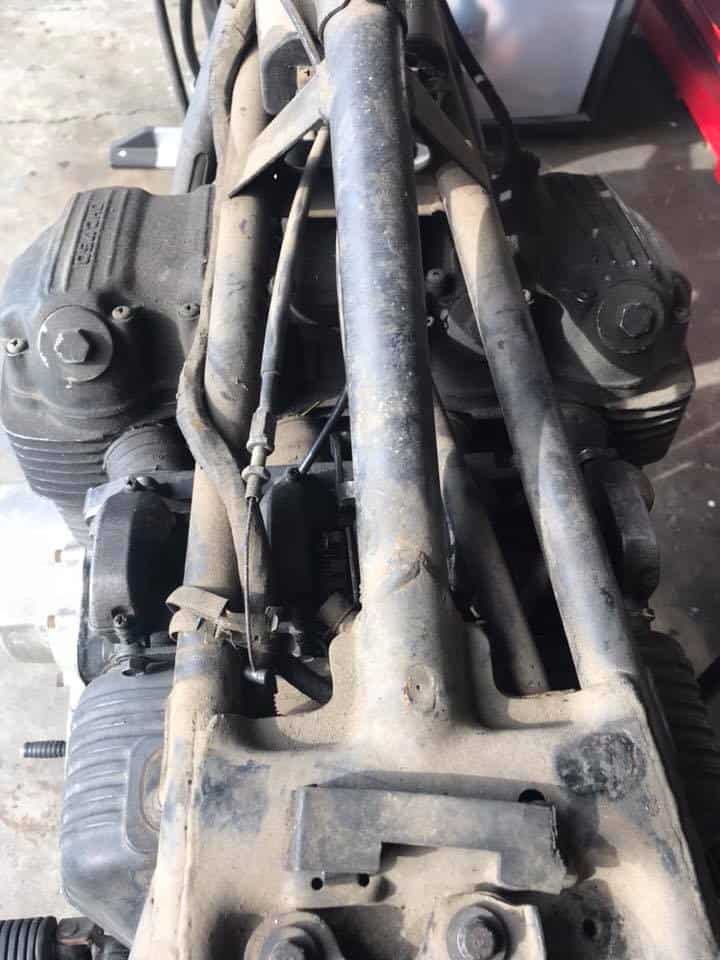
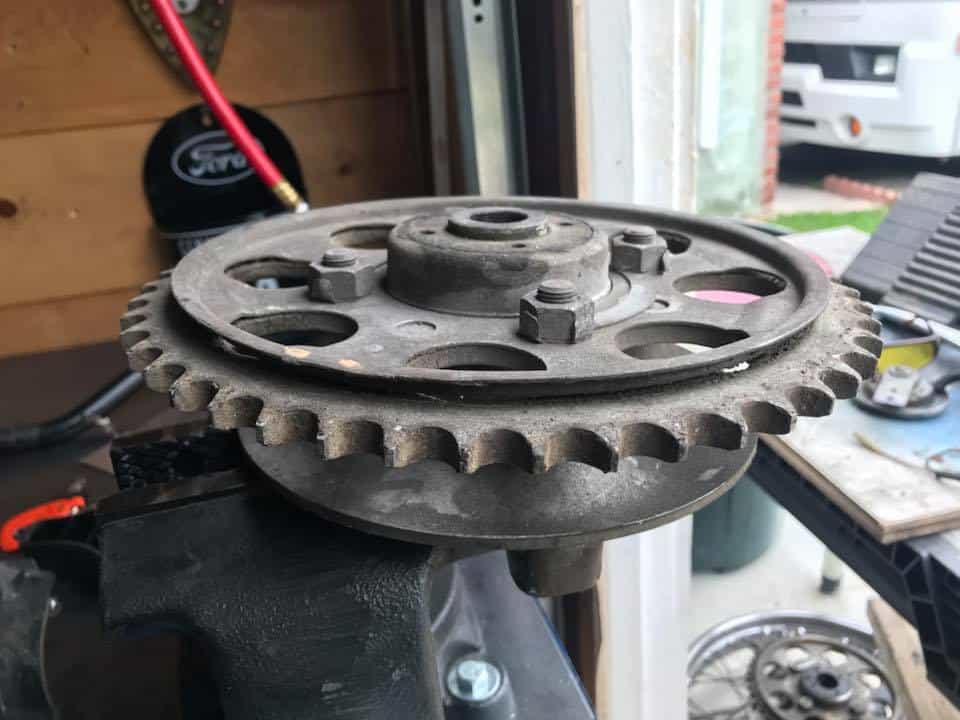
The sprocket cover tells a tale right there, covered in oil and road grime, as well as spiders webs, this is going to be scary when I remove the 2 Phillips screws in a minute, so stand back!!!!!!!!!!!!
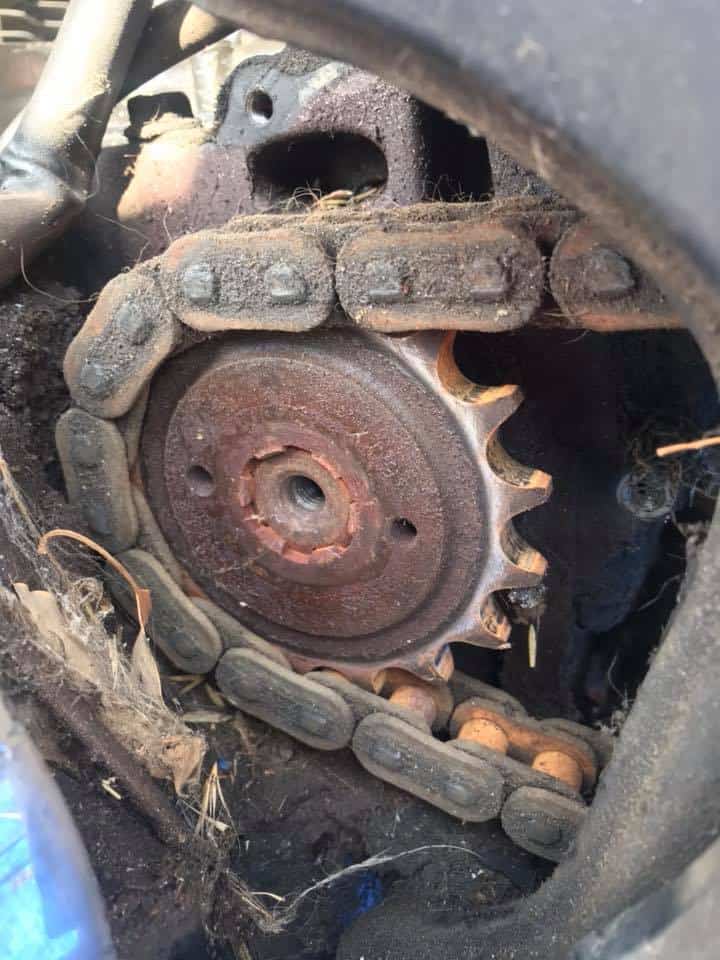
Holy Moly, just look at this, the bloody sprocket doesn’t even have a securing Bolt and washer on it, there is nothing to keep this sprocket from literally, falling of the drive shaft, now the 77 and 78 sprocket set ups are different, the earlier versions have a little clip with two holes for bolts that sit in the recess in the drive shaft. Where am I going to find a CB750F Bolt and washer ????
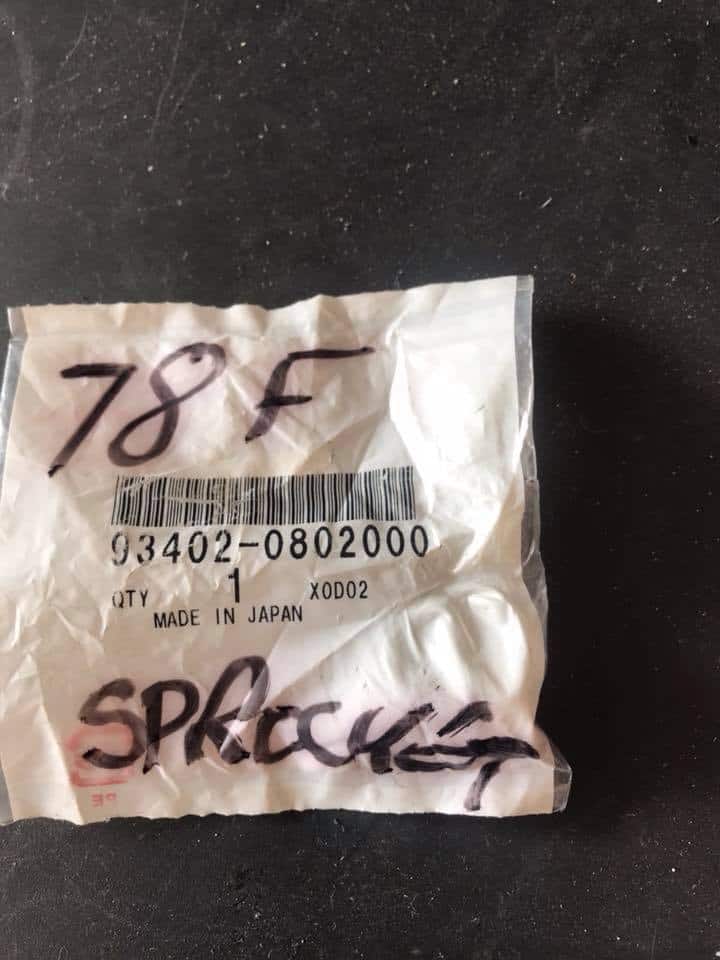
I looked in my parts drawers in the garage and bugger me, will you look at that, still in the sealed packet and, I had even written in sharpie CB750F Sprocket, what were the chances?
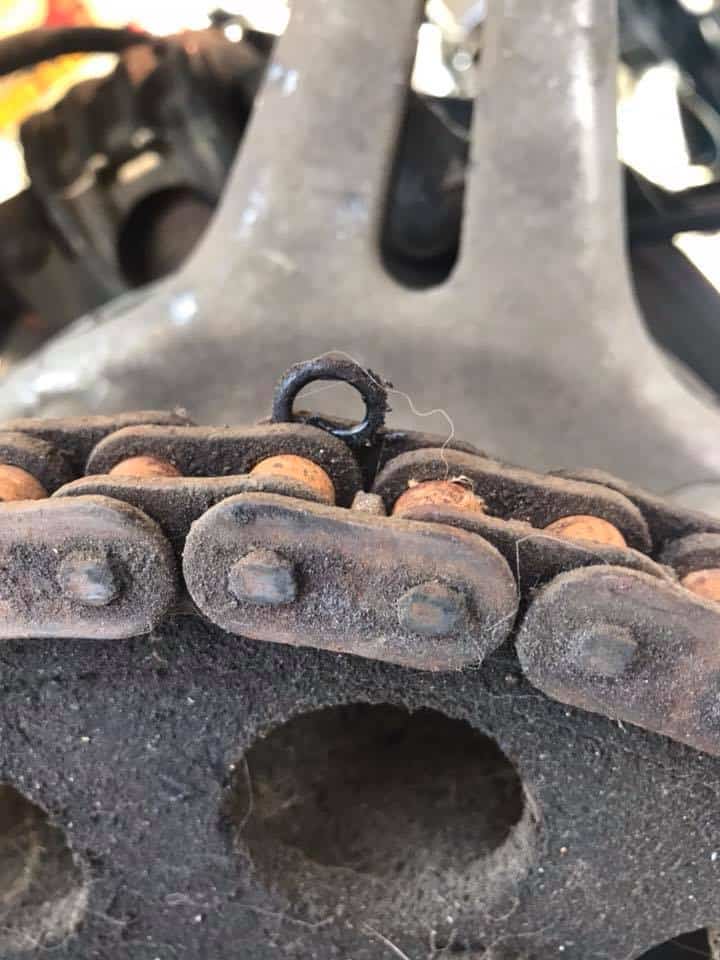
Think its a fair assumption that this chain is Royaly Fecked, so I shall be glad to cut this 630 version off, but there is so much Oil and grime all over this bike, things are going to be messy for a while.
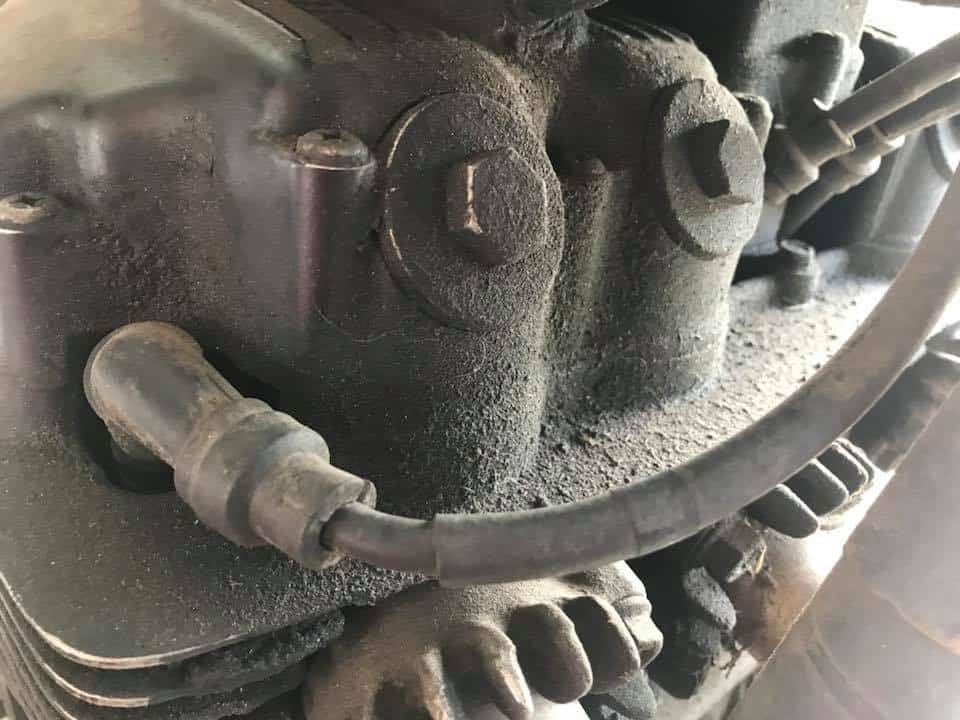
There seems to be oil all over this bike, and I mean everywhere, I need to see whats occurring here as thats an insane amount of Oil deposit and the guy said the bike used to run before he parked it, I checked the tach hole in the Valve cover but thats OK, the Valve cover seems OK as well as the Cylinder head, which I think could be one of the oil lines, but what a mess this is going to make, just to take that apart.
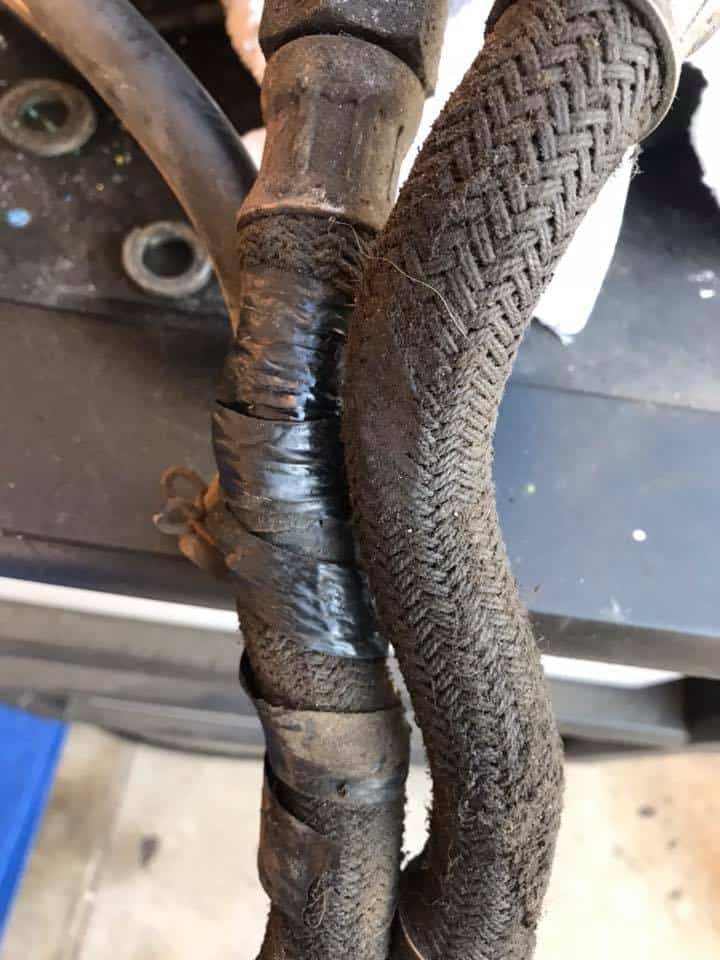
That looks like the issue, Oh yeah- I will just put electrical tape around the leaking oil line, that will fix it-Not! So I now have to make a new oil line, but at least I have found out where the majority of excess oil must of been leaking from to get all over the bike like that.
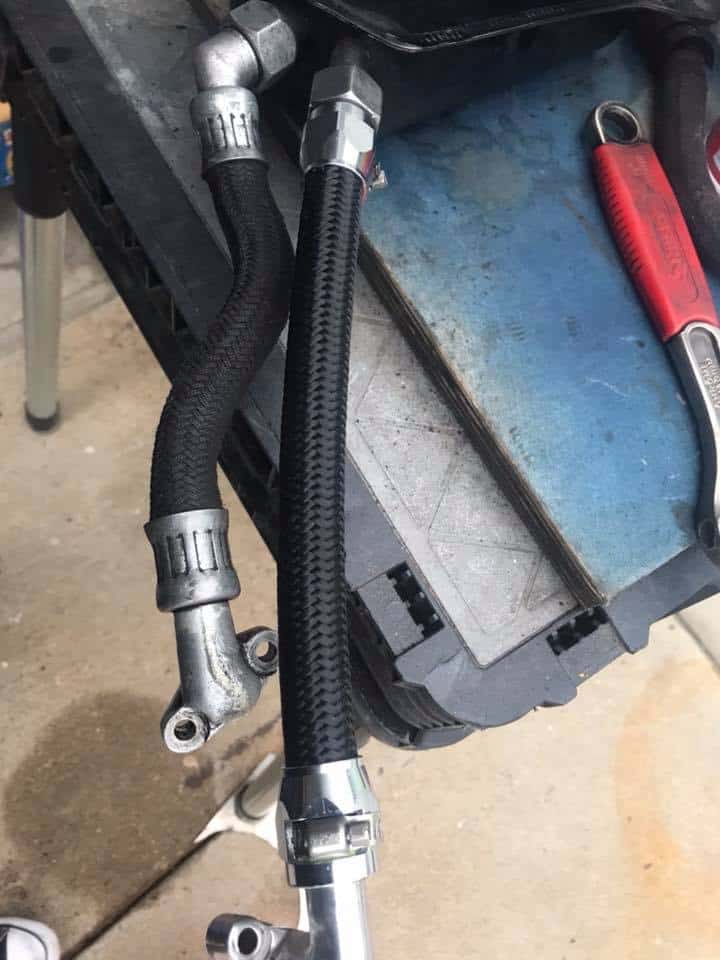
All fixed and I cleaned the other hose up and oil tank and I feel a lot better about putting this back on the Super Sport once more and hopefully no more issues in that department.
Well, its at this point you think to yourself. “Why am I doing this”? But its a challenge, the customer is on a low budget and this motorcycle is of sentimental value, so a no brainer but there are so many things wrong and not working on this bike, this will take me some time to get dialed in.
Time to remove the carbs and boots and clean the frame up, I shall then fit New intake manifolds from a 1975 CB750K model, rebuild some early Carbs and fit new cables too.
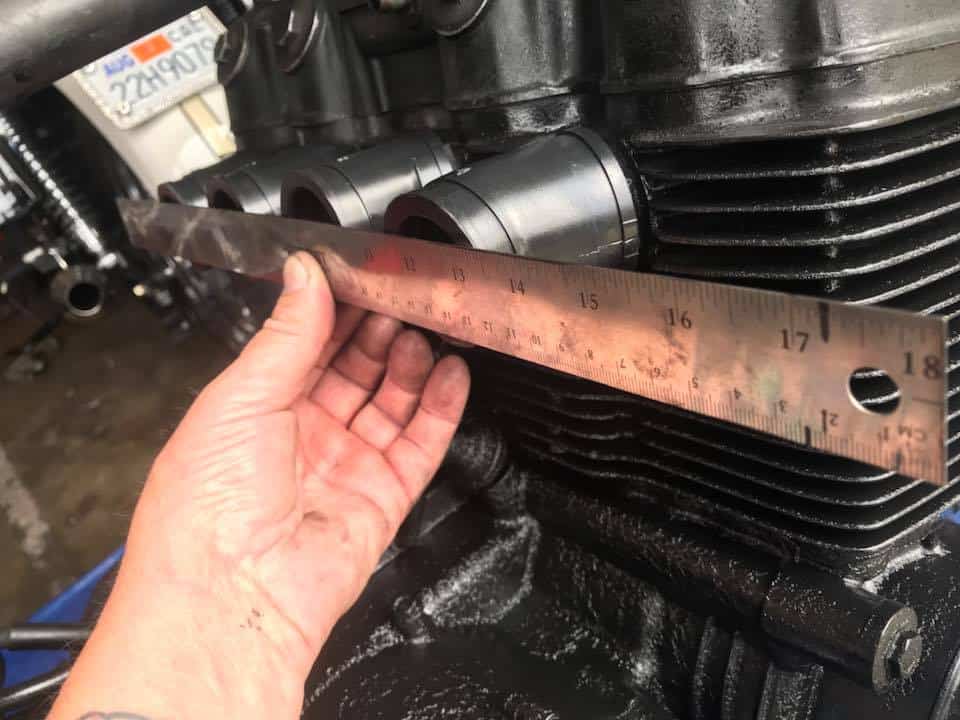
I cleaned and painted up the motor with High Temp Wrinkle from PPG I get made up in cans, and that helped big time. I then fitted the earlier intake manifolds and, using a flat edge, made sure that the intakes were all even and flat, this makes fitting carbs back on the bike so much easier than trying to force a rack on when the intakes are off slightly.
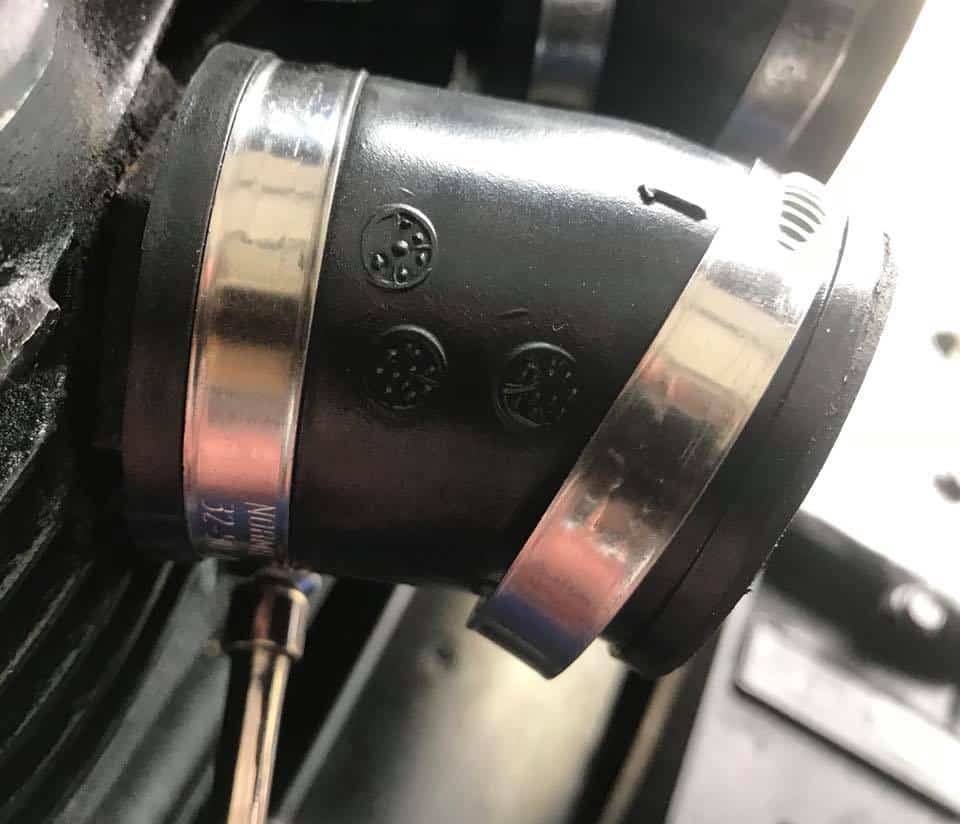
I have always used New Stainless Steel, Rolled edged Hose clamps, as these will not dig in and cut your hoses with traditional clamps and of course, being stainless, they will not rust or corrode.

Well, I pulled an old set of inline four 1975 CB750K Round tops out of my pile and these need to be gone through but when they are completed, and then synchronized, these run like a top.
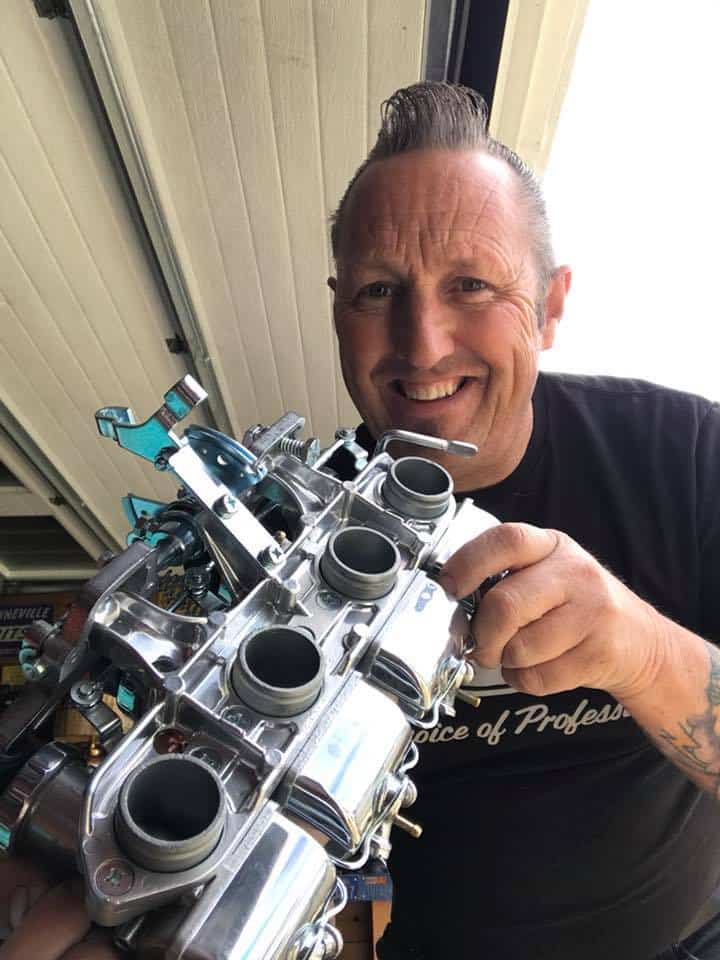
All clean and ready to go straight on the bike and, these will fire right up no worries at all, these are cleaner than a cats arse and will make a huge change in this motorcycles life.
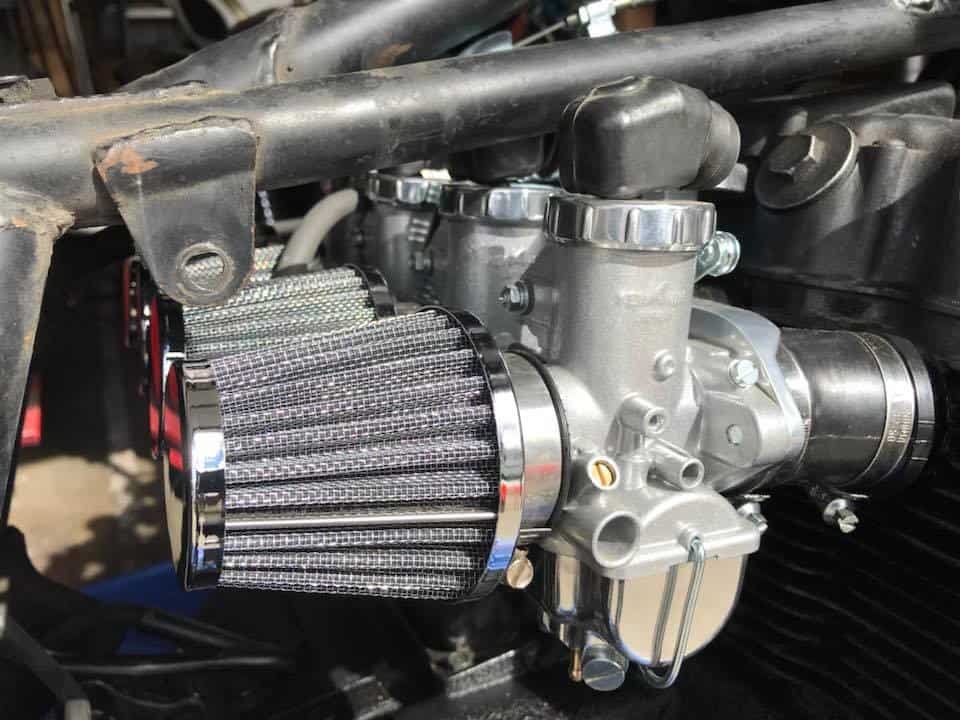
These are now all in place and have fitted New Genuine Honda Boot covers over the linkages to keep crap out, many do not do this, but I want these to stand out as they look and function so well, plus you can change main jets is minutes with the carbs still on the motor.
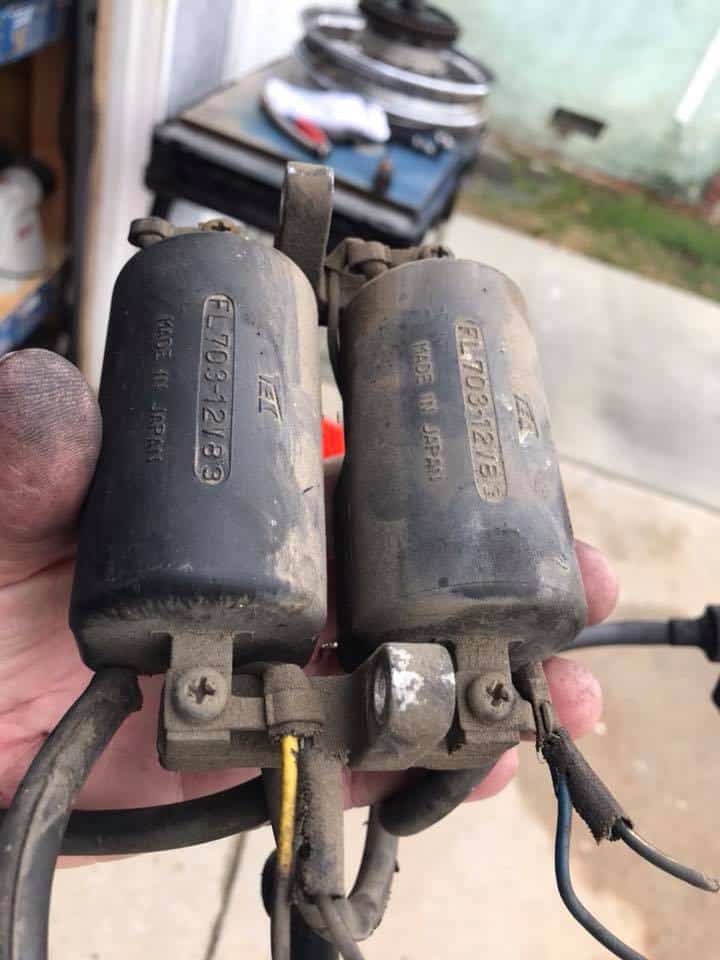
I try and use as much of the original parts as I can, but these coils were losing voltage and not repairable, unfortunately these are not cheap to replace, I had no choice but to use Brand New ones but, so glad that I did, these new ones I will be fitting will last many years.
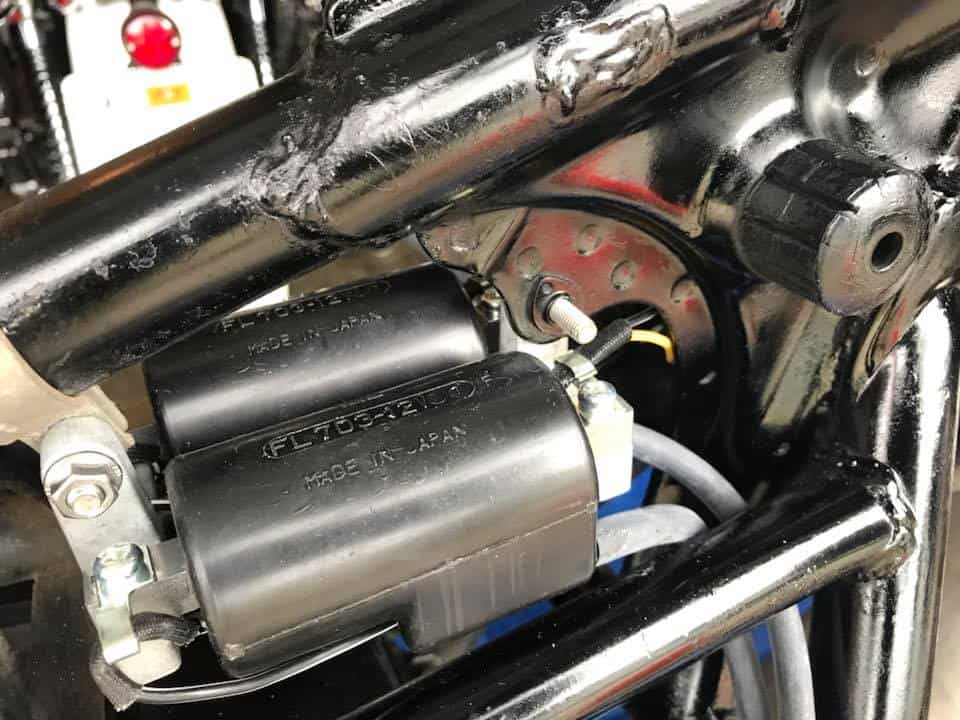
All bolted in, this bike will have a new life for sure, but it just goes to show by leaving a bike for 6 years with no cover and let mother nature belt the hell out of it, is not a very good idea at all.
The old cables were all torn up anyway, but, on the earlier carbs you must use the earlier cables, but thats a good thing as you know everything is new and will function real nice.

New cables going in, now we are starting to make some very good progress, make sure that you use WD40 and lube these cables as they will keep these operating smoothly.
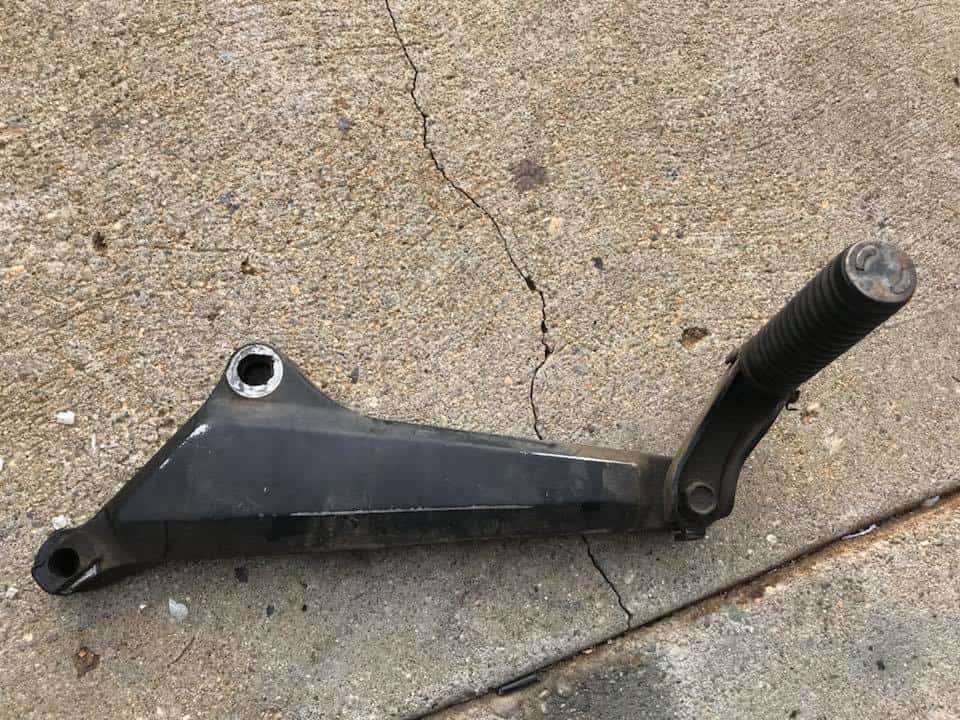
The aluminum hangers were oily and needed a bit of a revamp, so I removed these and began to clean them up, think I shall polish these to make a difference on the bike.
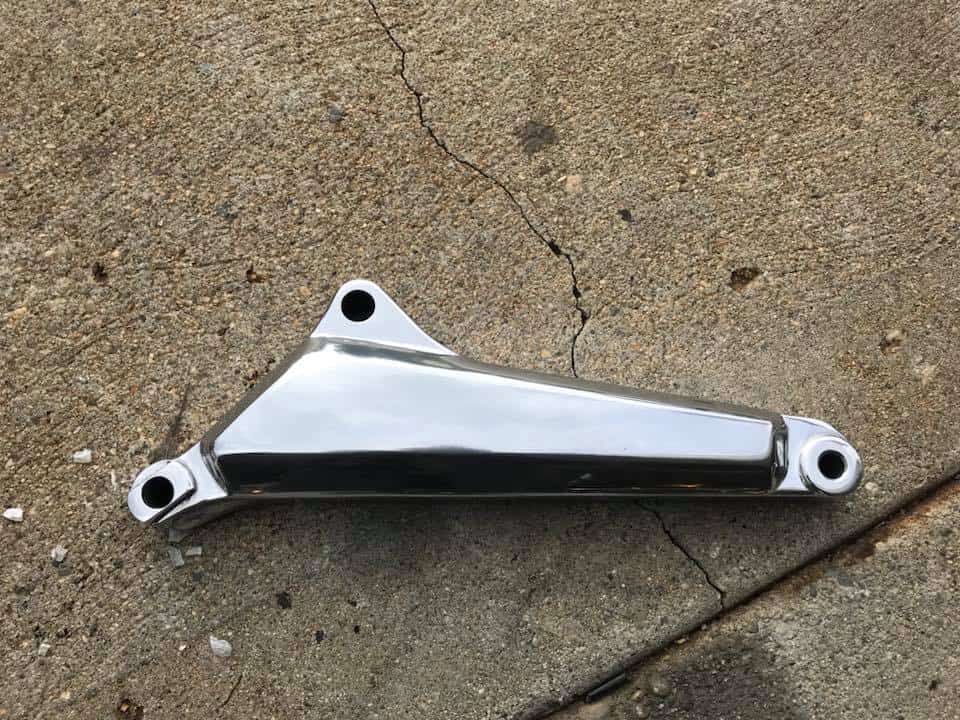
Now that is way better and I feel a lot better putting something clean back on, this motorcycle will sure look different and for the better.
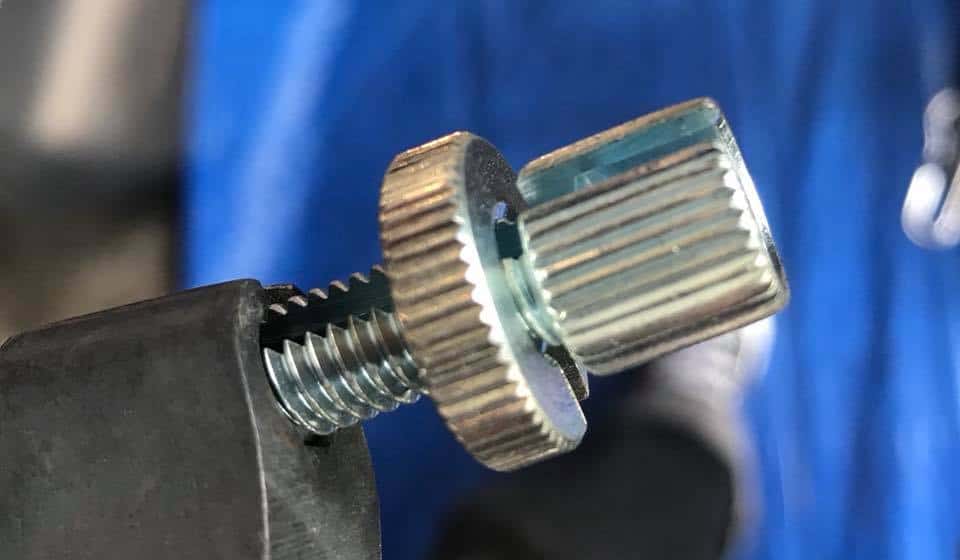
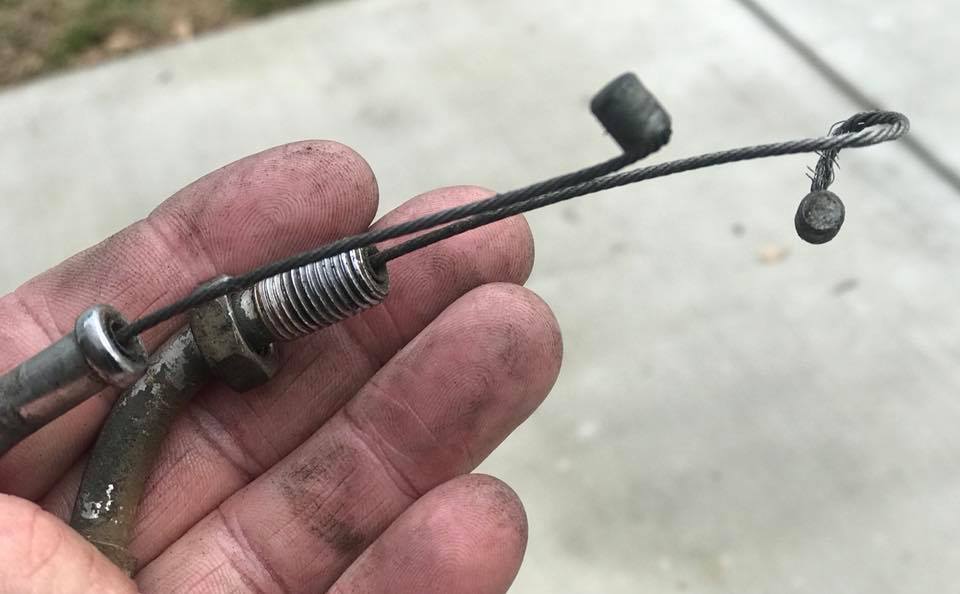
New cables through out, the clutch cable was actually seized up, so a new one was purchased, I always use New adjusters too .
The points cover looked like it had been in a bad way for a long time , but- it wasnt too banged up to be honest, so, using my special Formula High grade restoration Polish, I jumped into action as I love polishing old stuff, it took me about 90 minutes but it was well worth it and looks as good as new now.

Now that is a lot better and used New stainless Allen head bolts to give this Points cover a New lease of life, it sure looks great on the motor now.

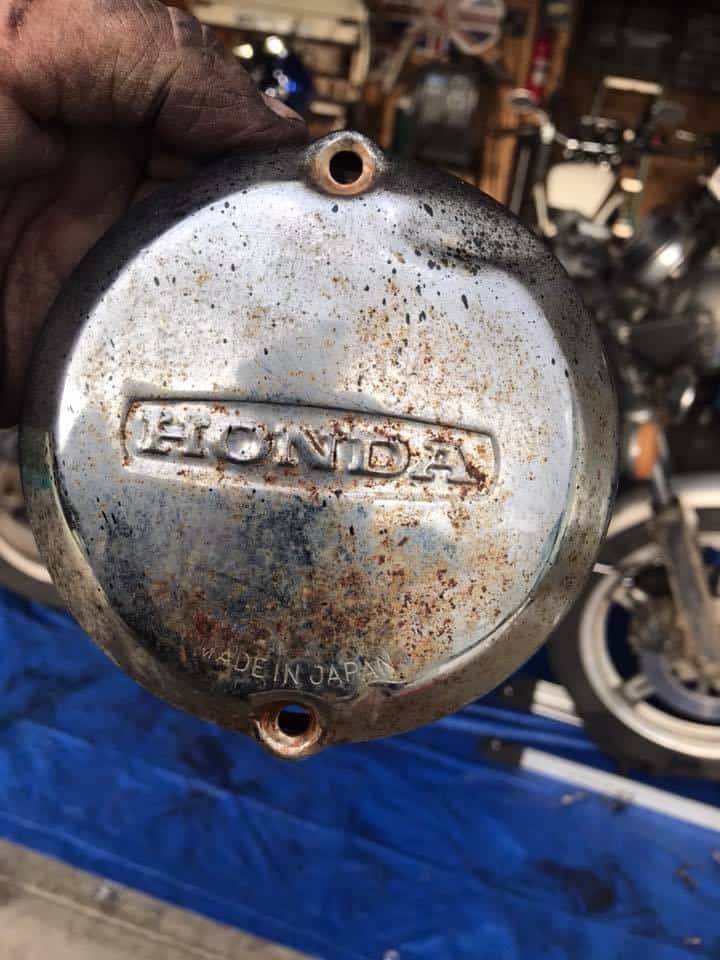
The Clutch cover was in the same shape as the Points cover, so, back to the polisher, some more secret sauce and a polishing mop and then I will refit to the engine.
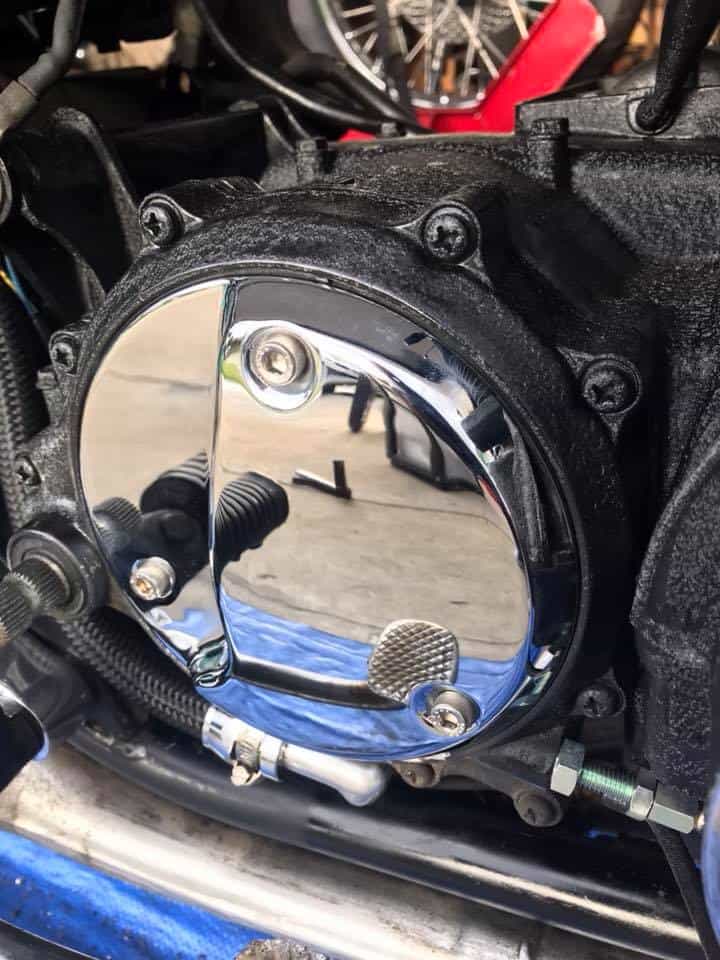
Now this looks a whole lot better once polished to a super high luster I used Allen head bolts which are all New, as is the clutch cable too, so a smooth clutch at long last.
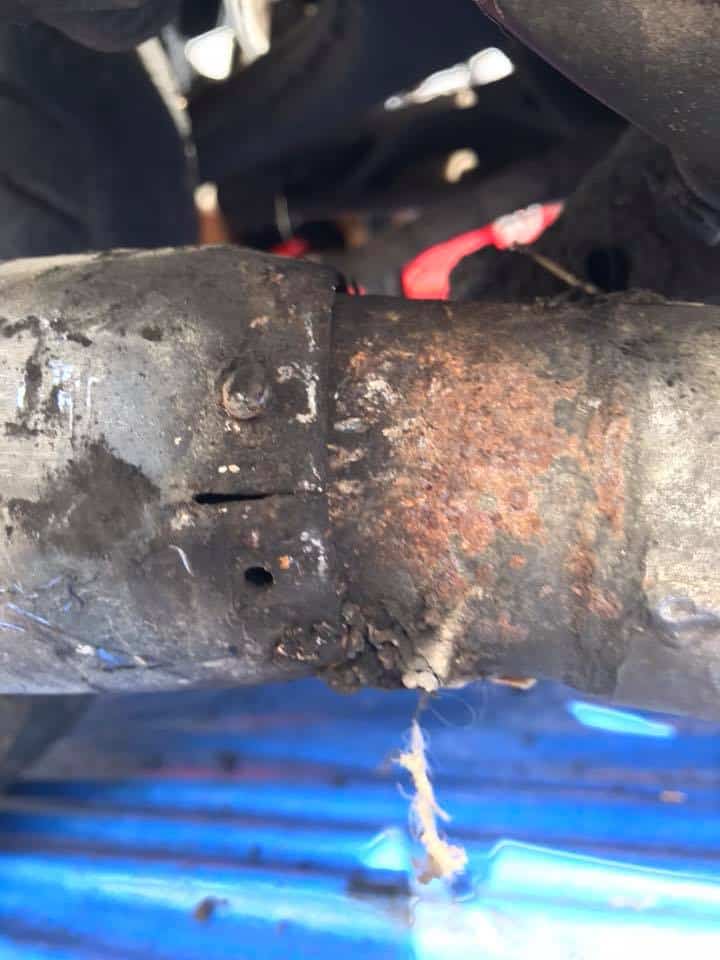
Look how bad the muffler is, its had bad gas welding, then an old screw held this together, sort of, I will keep the stock header and will make a new up-swept tail pipe for this bike.
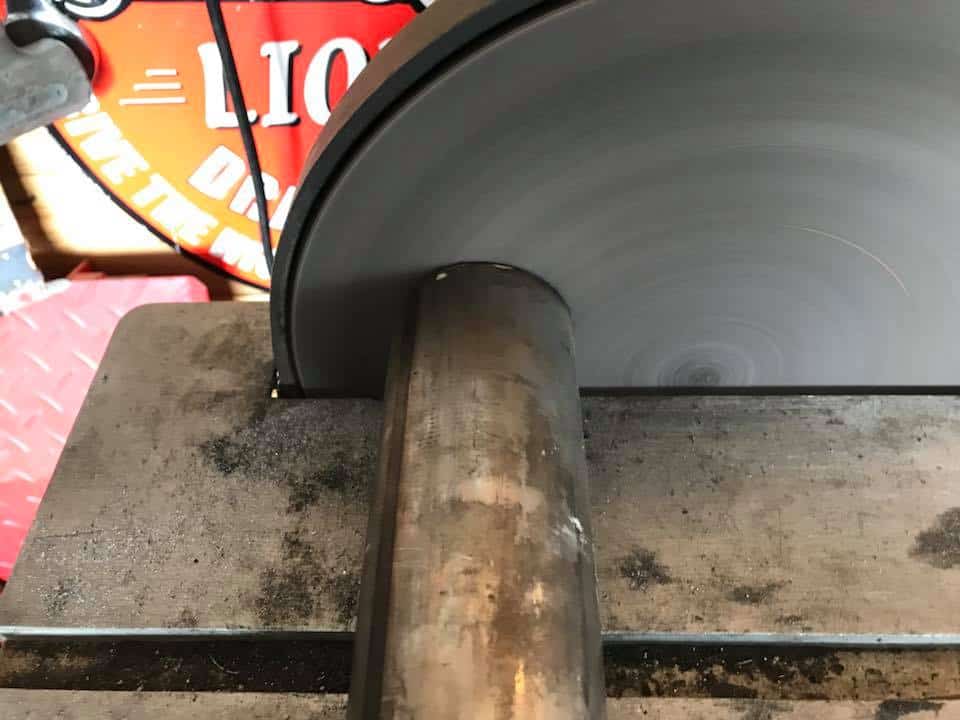
Getting to it with a piece of 2.5 tubing, as I want this to look cool and sound pretty strong too, this will be a fun part of the process on the Super Sport Bike.

There is the tail pipe, complete with a Removable baffle, this is way better than what was on there, the old muffler even had a mouse nest in it, so glad to change this set up.
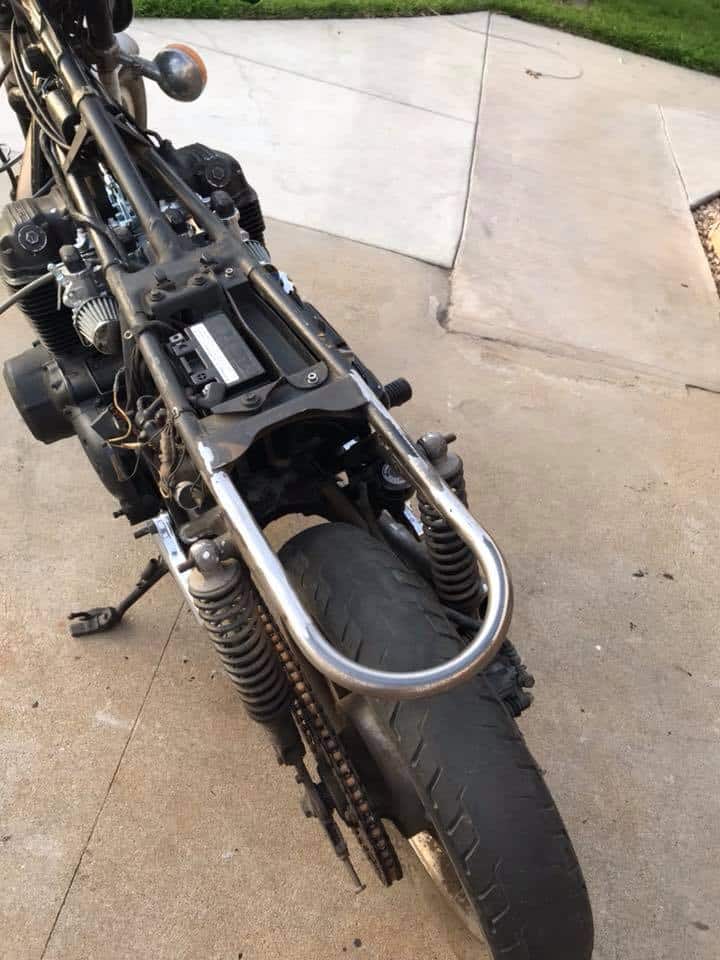
Next up, the Customer wants a flat frame with a hoop, so what I am going to do is cut the rear frame horns off about the middle of where the old cross brace is.

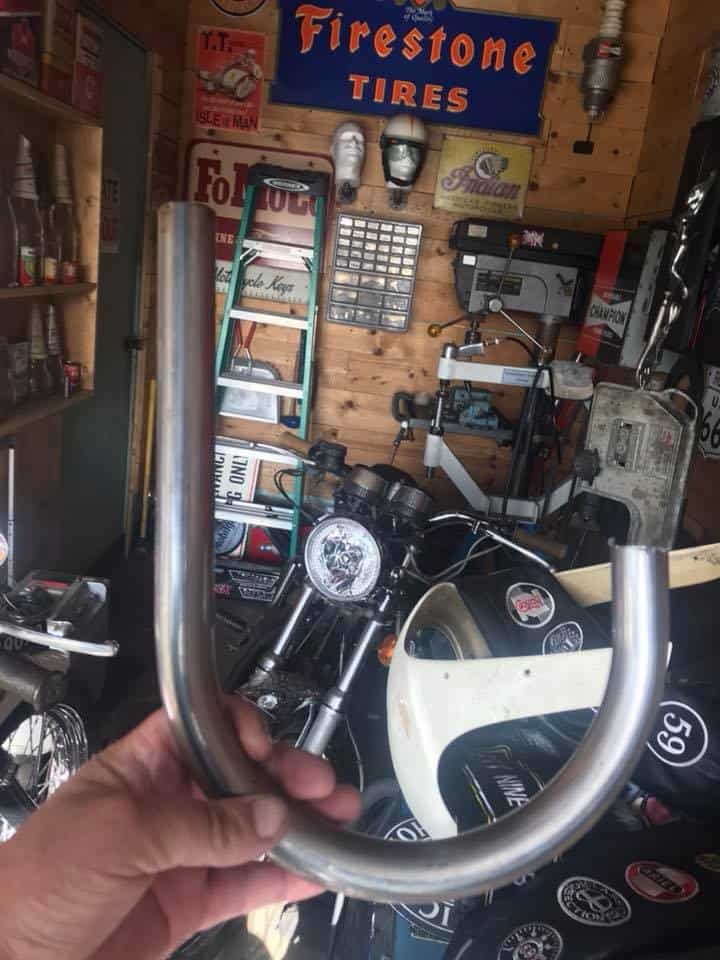
I have cut the frame rails off to where the customer wanted, this will then have my frame inserts put in and I will cut one of my special frame hoops to fit to the bike and give it a new look.
Now- I use a de-burrer to remove any inner tubing, I want to make sure that the inside is hollow and smooth so the inserts will slide in tightly, that way there will be no issues.
The inserts are in and they are really snug, I go in about an inch and half both sides, it is double walled on this part of the frame, so the hogging out does take a while and may annoy your neighbors if you have to use an air compressor and a die grinder to open this up.
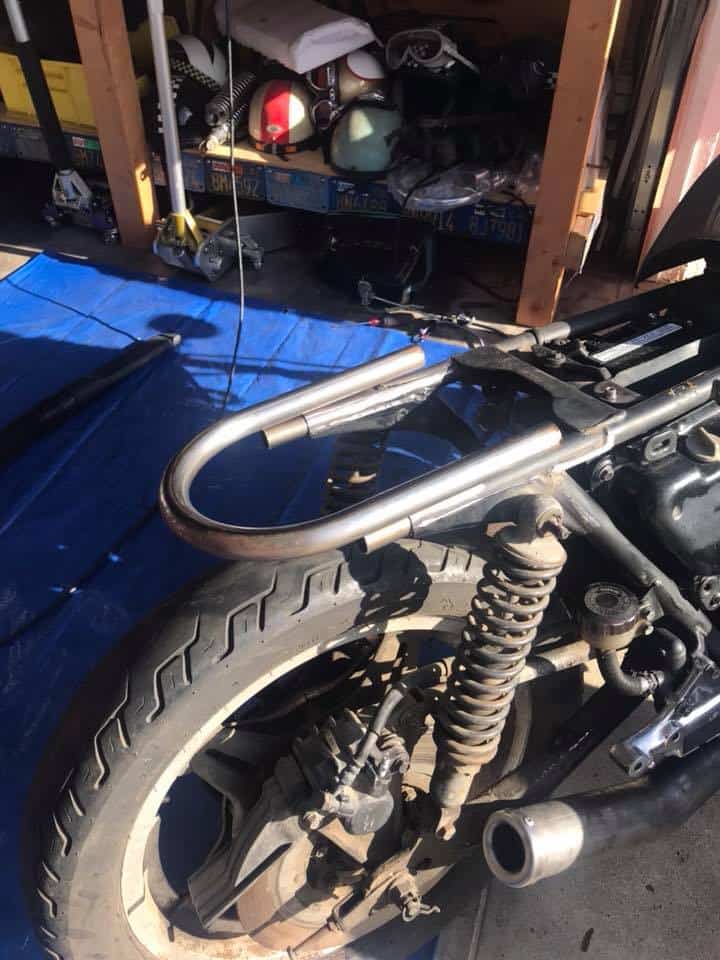
As you can see, I have laid the hoop on top of the frame, this way I can figure out how much I want the hoop to be placed at, I then mark the hoop by the end of the chassis, as this is where it will butt up against so you can then weld it.
Once you make the cut, you simply cut the other side, take any burrs off the inside and then you are ready to attach this to your bikes frame and this will change the look of you machine right away.
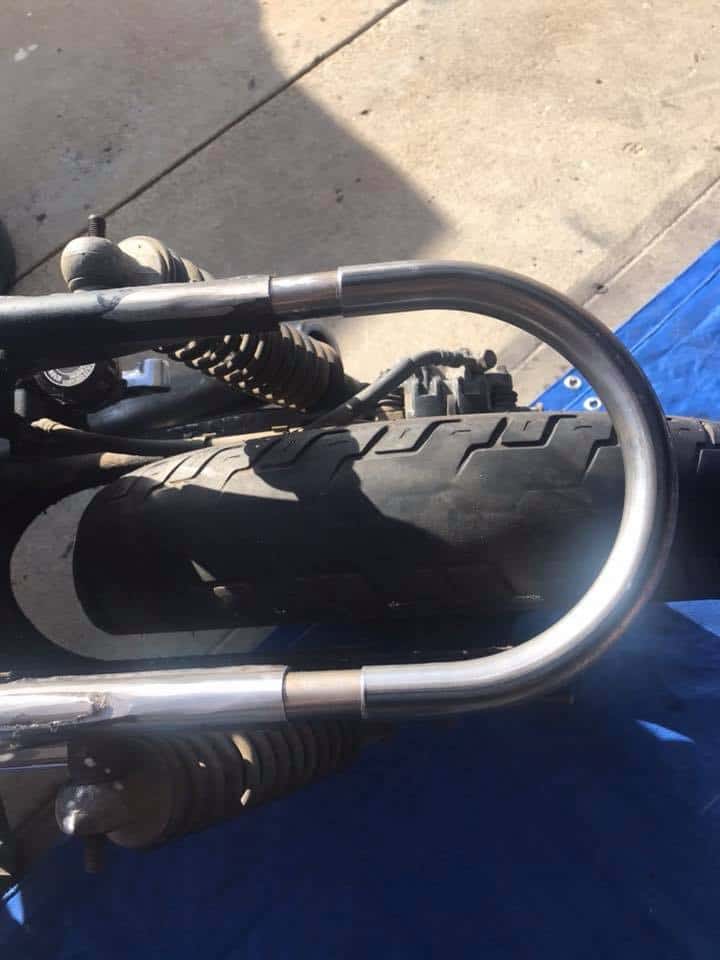
As you can see, I fit the hoop into the inserts and then I simply just tap the end of the hoop with a Rubber mallet, until the ends are almost touching the frame, as I want just a tiny gap to allow for good penetration of the Mig welder to secure this to the frame.
So the little Video above shows you how I first attach the hoop to the frame, I then mig weld the ends all around and you can drill into the frame and insert and spot weld there too if you want a more secure weld too.
I have Mig welded this in place and am happy with the end result, next up is I have to make a seat base for this, you do see some on the market already made but many times you want to make the length of your frame to your dimension, so- I always make mine for each frame and its pretty easy.
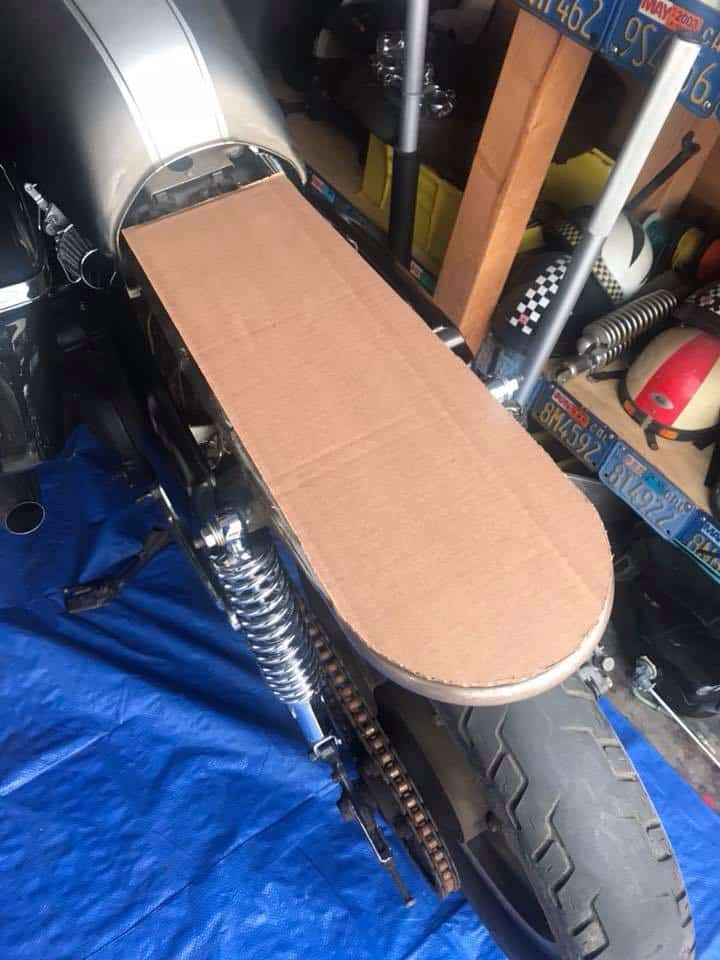
Use what you have around you to make a template, I had a packing box handy, so traced the outline of the frame and cut it out, a little trim and I am ready to now make a seat base.
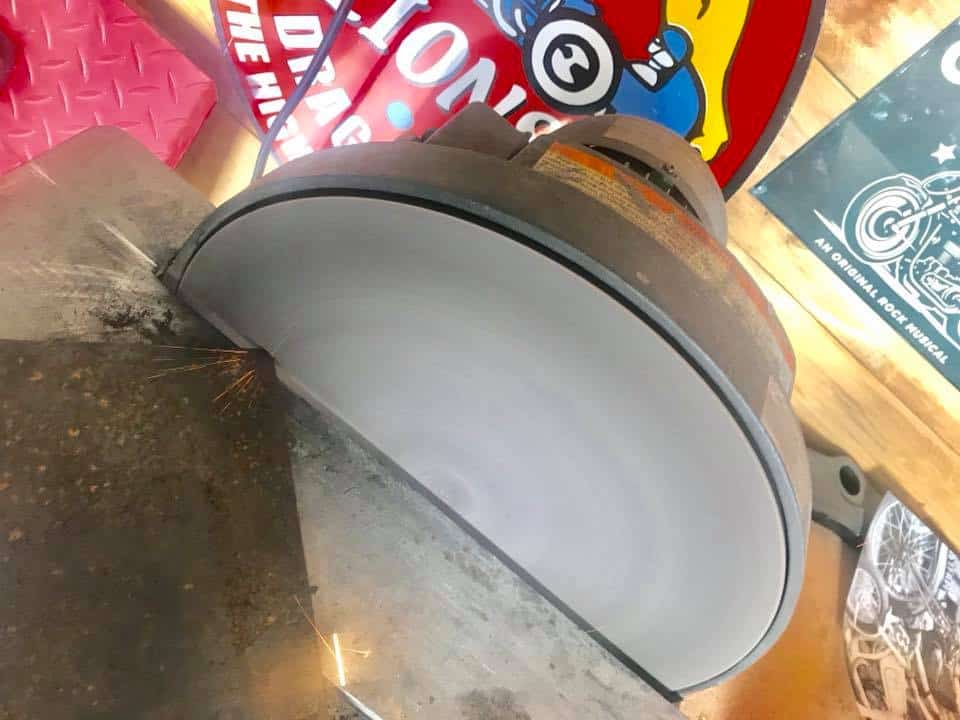
I may have gone a little over the top on thickness as this is 18 gauge but I had a sheet in the garage and may as well use it, its strong as Hercules but obviously the down fall is its harder to cut and shape, but this will work fine and be a great sturdy base for the seat I am going to make.
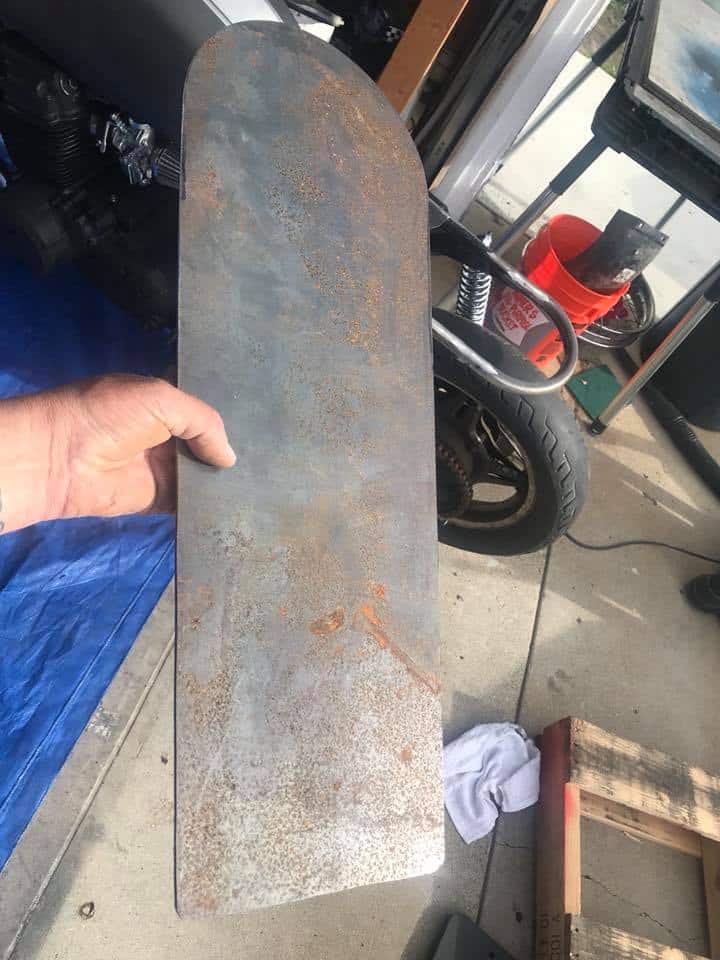
There you go, its done, now to check on the frame, grind any adjustments that need doing and drill some holes for the bolts to be able to fix to the frame, as I shall upholster over the bolts so the studs are the only thing sticking out underneath.
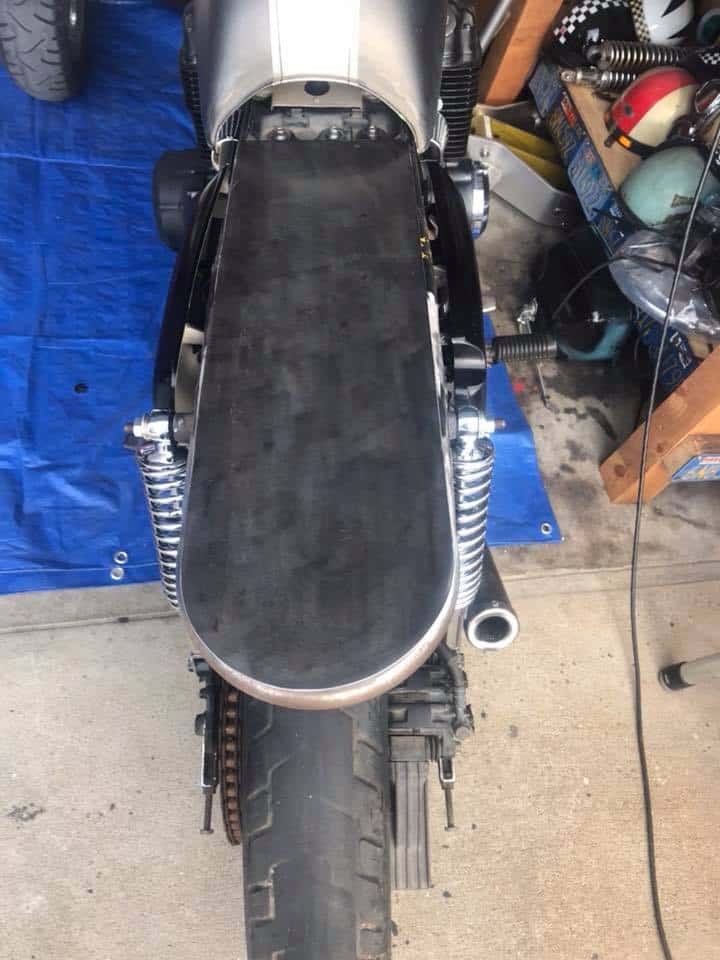
There you go, I am happy with that now, simply need to use high density memory foam and choose the material and stitching and that will be upholstered and look so different.
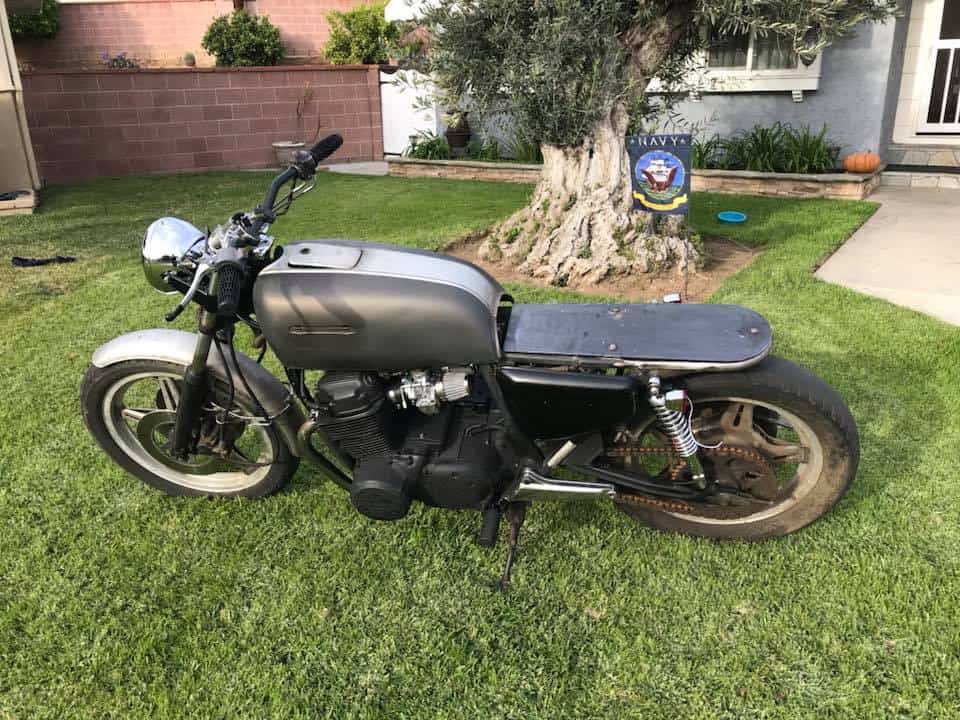
Still a long way to go on this Super Sport but- It is finally taking shape and looking way better than it did when it was dragged into my place looking very sorry for itself.
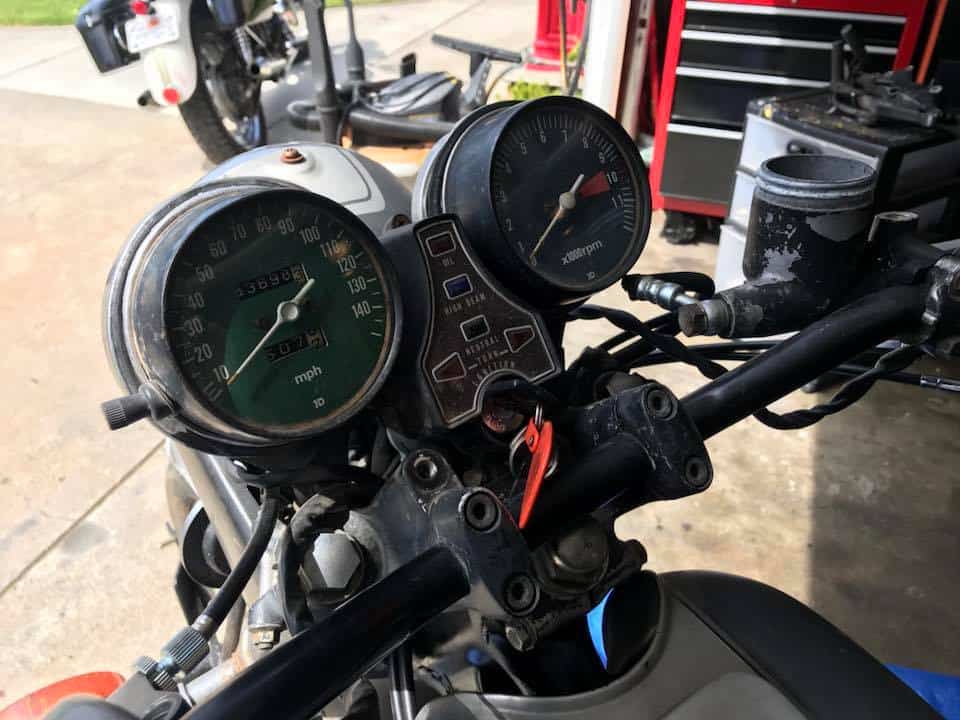
The Gauges were shot, one of the needle drives was not working and I wanted to clean this area up quite a bit, so came to the conclusion that this can look a lot better with all this clutter removed and different bars fitted too, as well as removing the upper triple tree and polishing it to a chrome like luster.
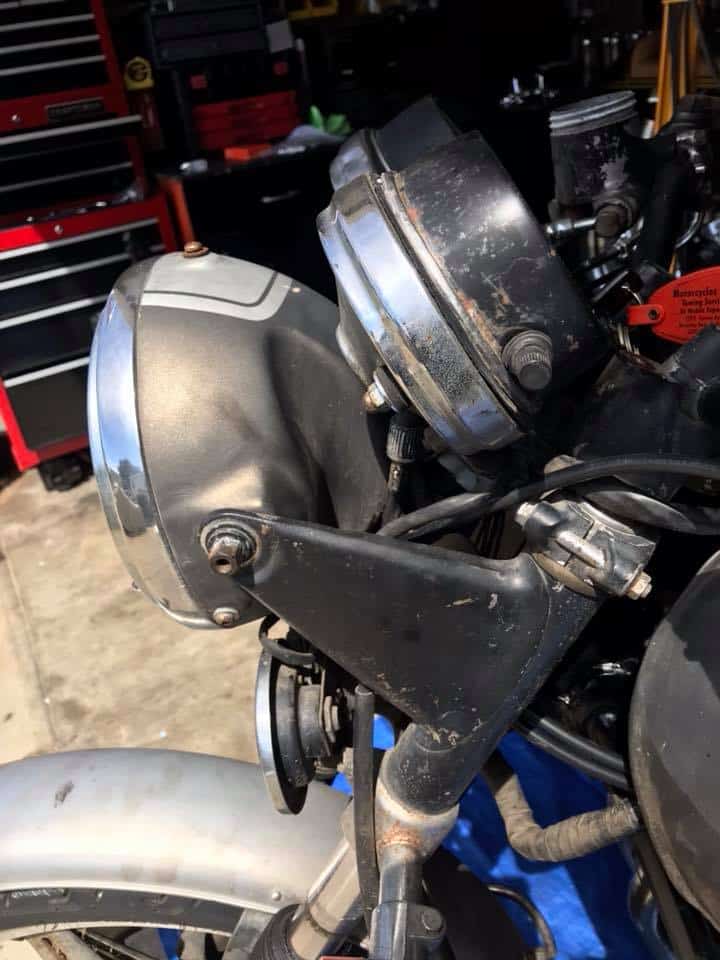
The stock fork ears have to go and the turn signal housing as they were rusted out and looked pretty ugly, customer wanted a Brat style bike and these tend to be removed, I shall also add one of my custom headlights that have internal LED turn signals inside the light, so there is nothing protruding.
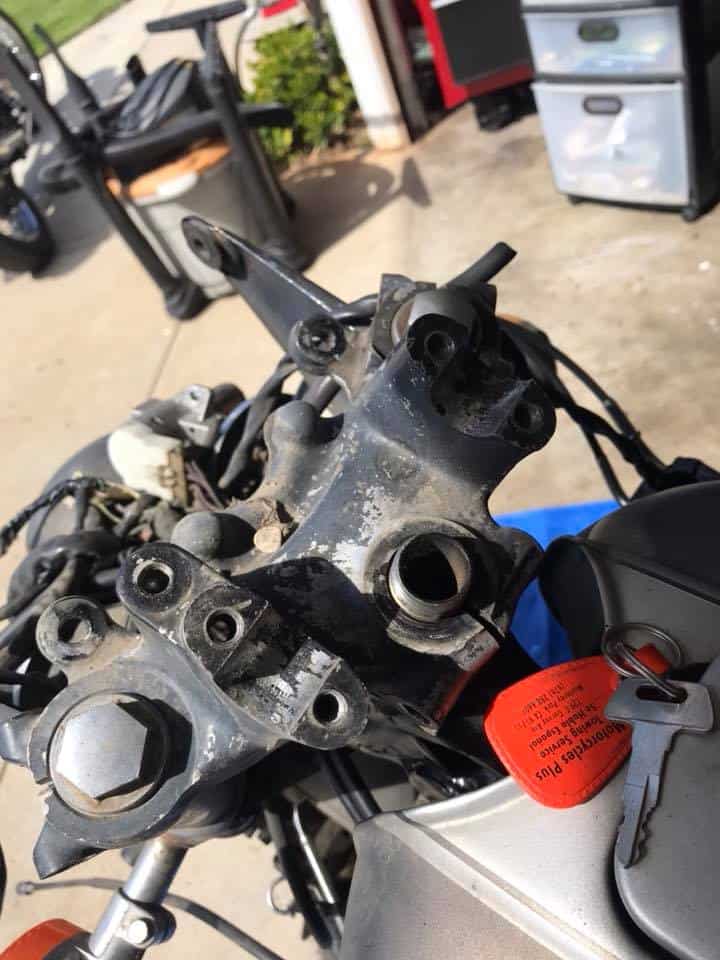
Removed the handle bars and gauges, as well as the ignition switch as the plastic connector and dried and crumbled up, due to being sat out in the California Sun for 8 years.
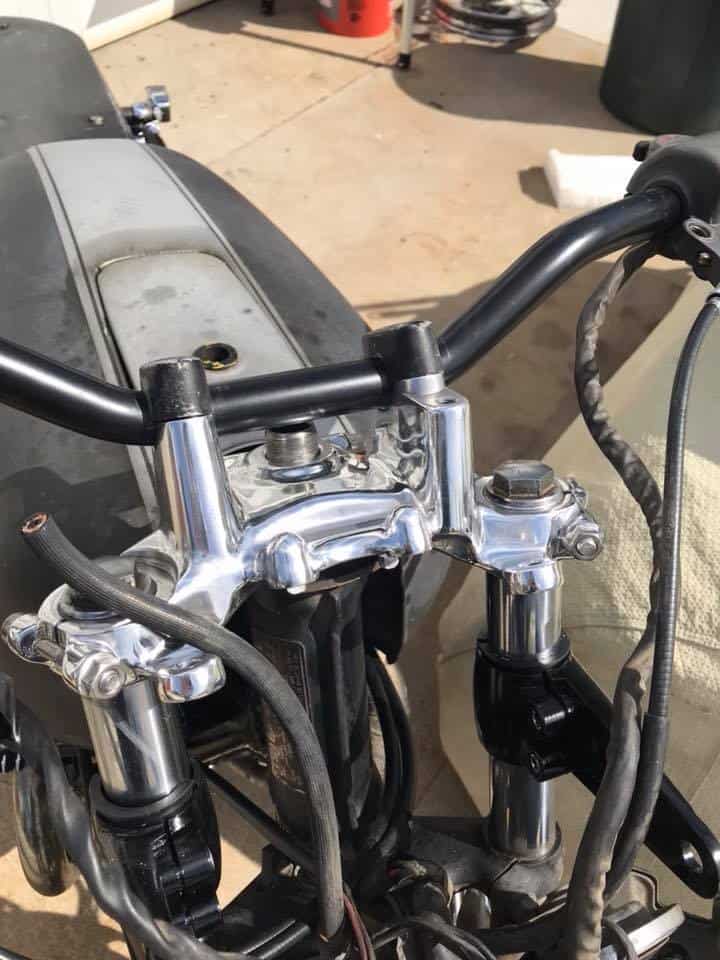
Now, that is a lot better, as you can see, I removed the old paint from the triple tree and polished it, I also removed the stock fork ears and fitted some Custom alloy versions in Black.
New ignition switch also added as the stock one was worn out and now all new once more and of course, functioning too.

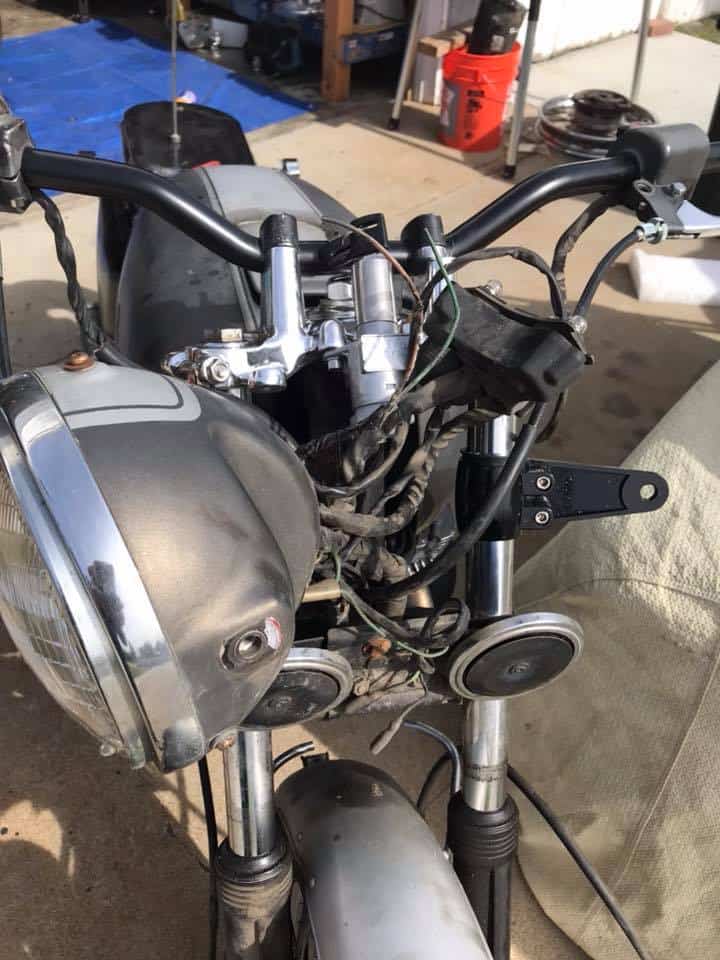
Had to make up a new pig tail for the lights as the old harness had dried out, but this will work great and, reduce the amount of wiring thats inside the headlight.

As ypu can see, what a transformation, my LED turn signal headlight set up is the way to go, Halogen bulb and the LED signals actually do light up Amber, a neat custom touch.
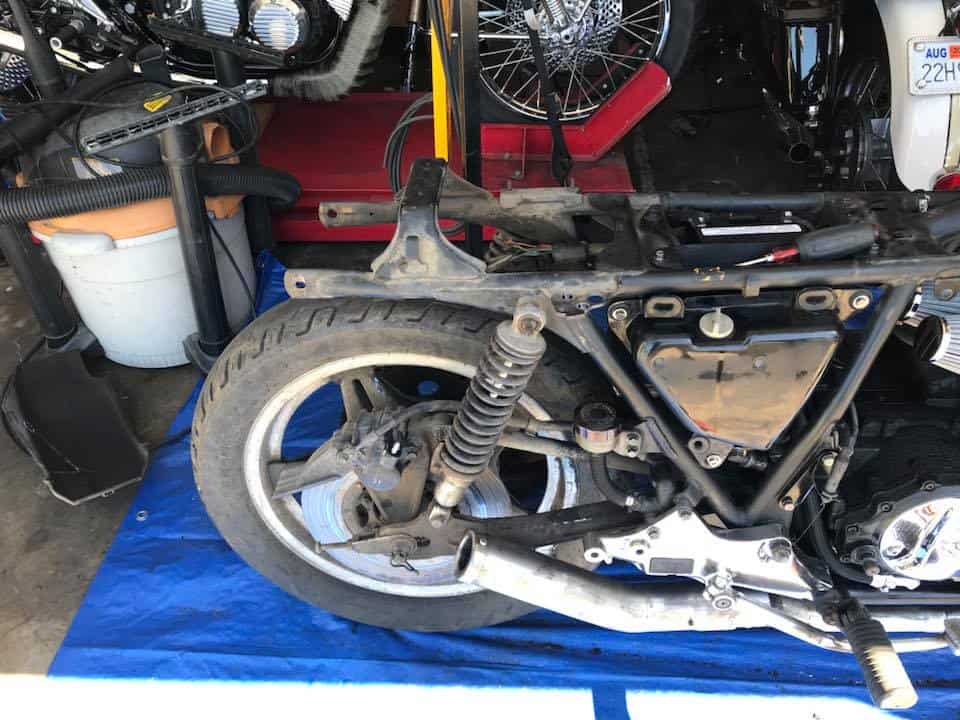
Starting to get some where, still have to foam and upholster seat, as well as pulling front wheel out and fitting new tire and sorting the brakes out and these are all seized up.
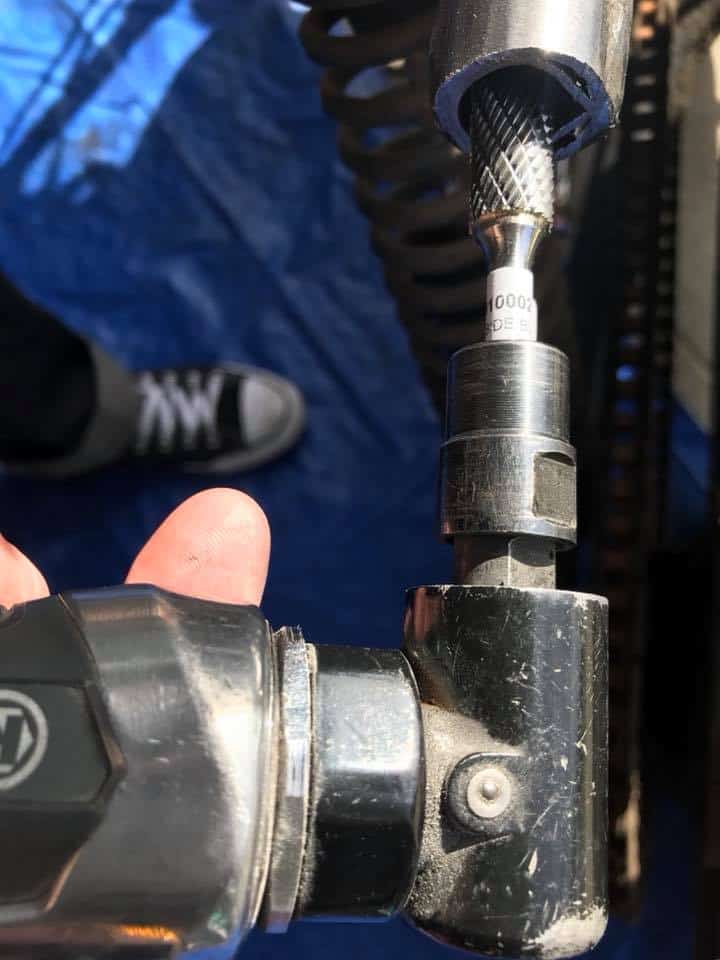
I removed the rear wheel, I need to clean all this up and thought that i would take a photo and, below I have done a quick video on my phone, to show you how I undo stubborn nuts or bolts when they have been on many years and have seized up and you cant for the life of you get them undone with just your wrench.
I try and show videos where I can, as many of you ask me on the phone everyday, so thats why I do things like this and hope that it helps some of you out that may be out in the sticks and nowhere to ask.
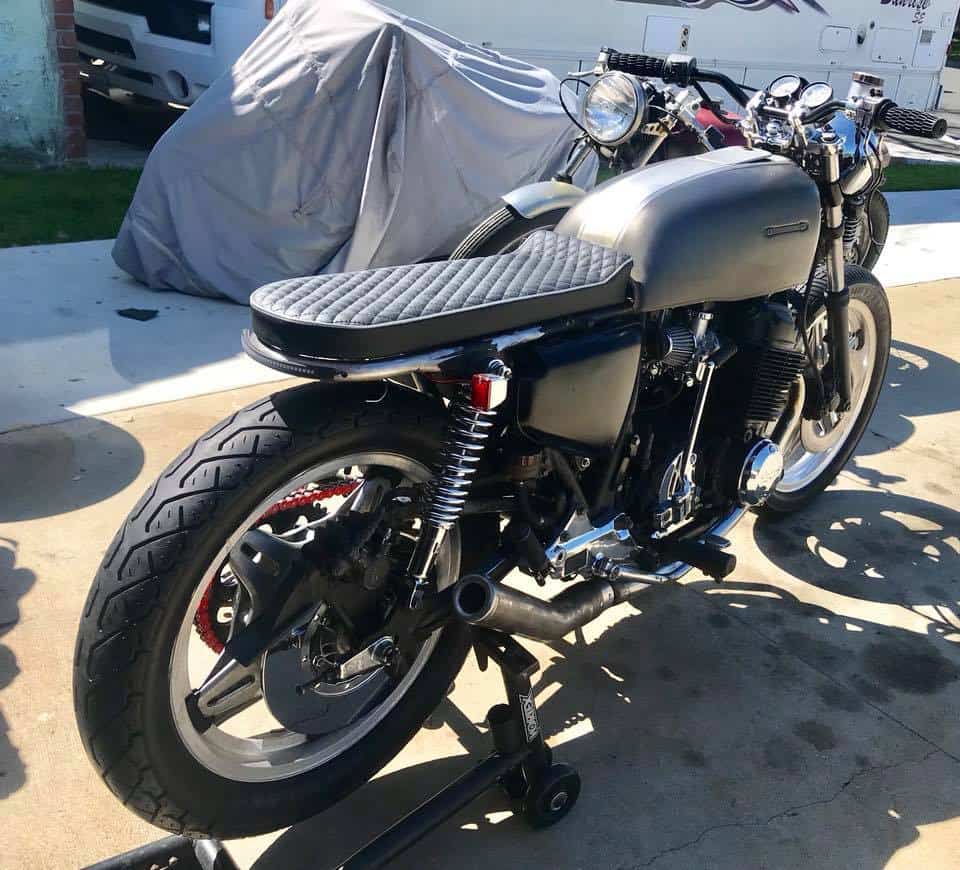
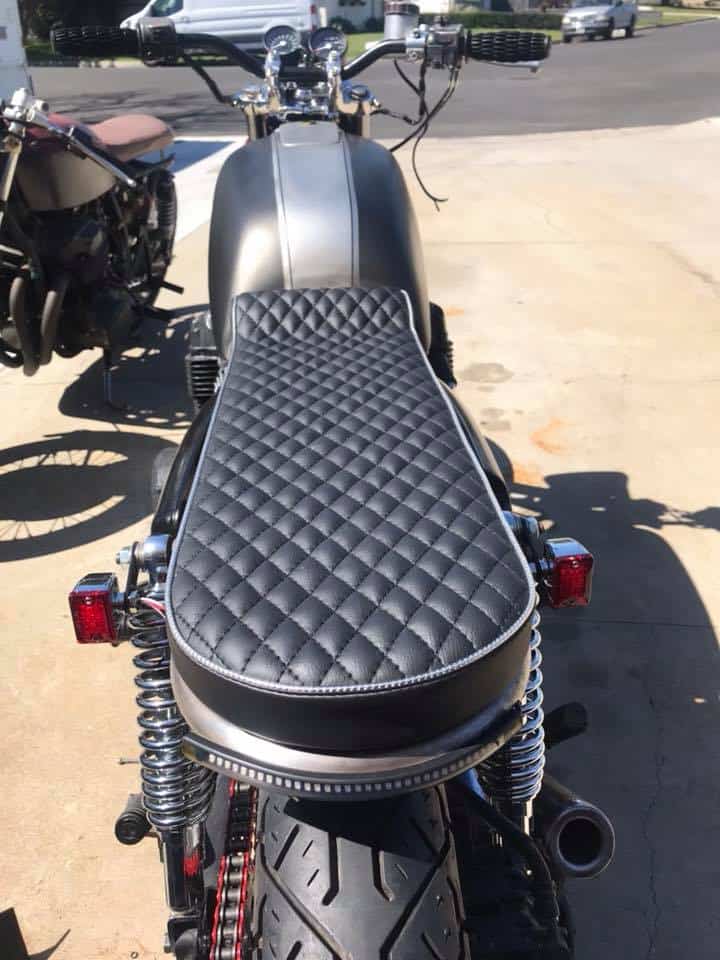
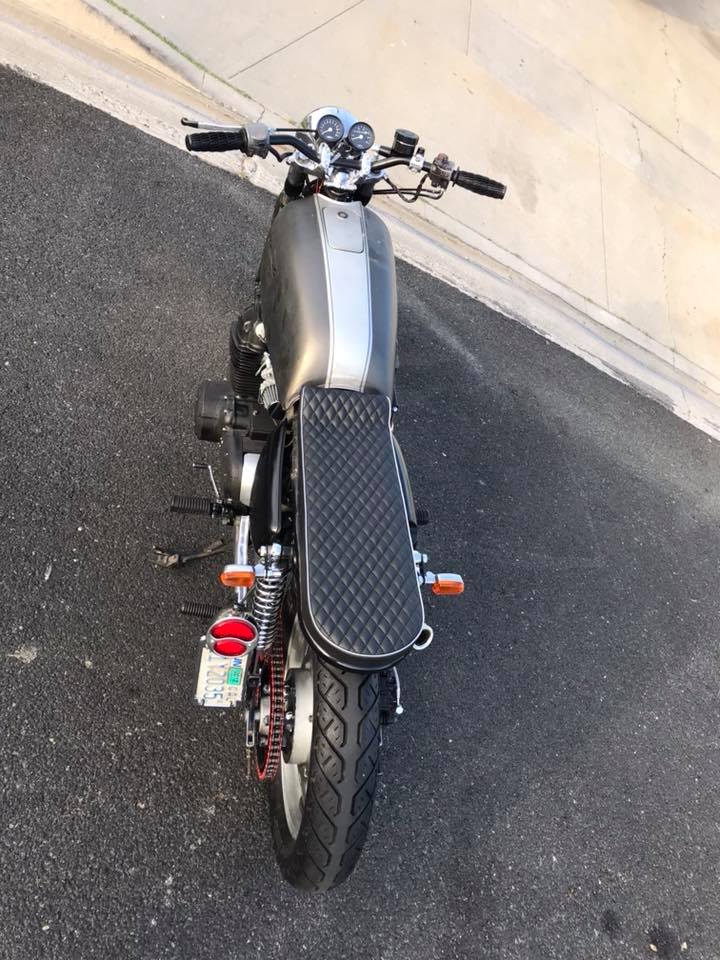
Hell yeah, this is slowly getting better everytime I work on the bike, the Customer came and visited and loves the way the machine is now looking, but I tell ya, it has even tested my patience on more than one occasion, just take a step back and do something else, but- as you can see, I have now upholstered the seat, and did it in the Nostalgic Diamond stitch and added silver trim to break the seat up.
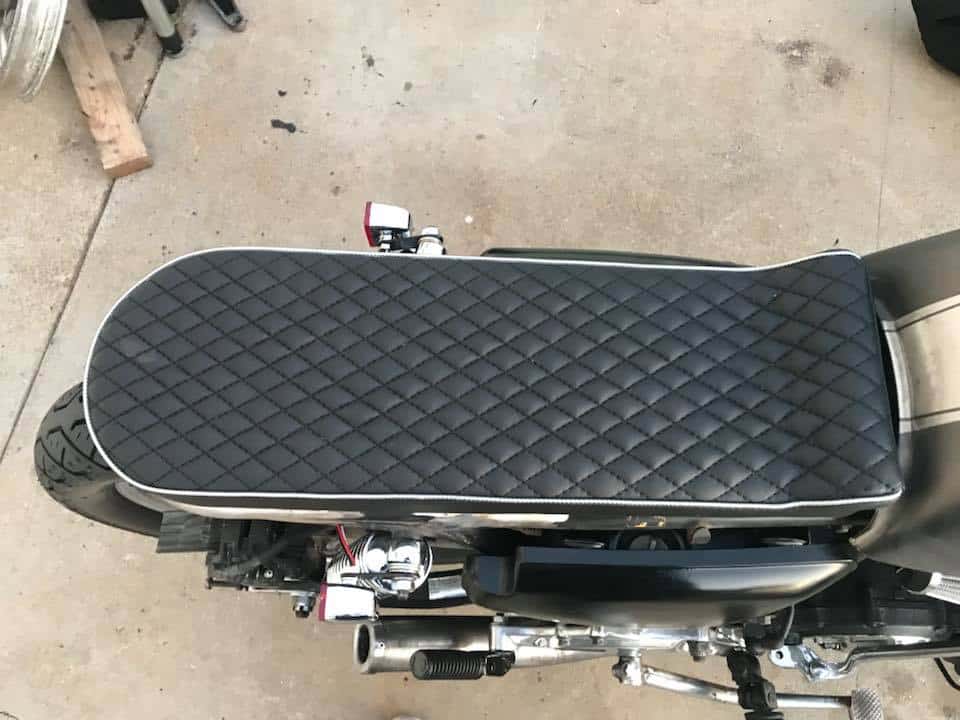
I kicked the front a little to try and hide the arch in the stock gas tank, usually I weld up that area, but this customer is on a budget so this was a good way of over coming this issue, I used High Density memory foam and I tell ya, it is super comfortable.
The seat will be Bolted down so it sits nice and tight onto the frame, I still have to smooth the chassis and paint Gloss Black, but also as you will notice, I have fitted an LED strip at the back, this will function as a Running and Stop light in Bright RED.
The Turn Signals are Chrome and LED too, so this will be sure to get a drivers attention and inform them as to what they are doing ahead of them.
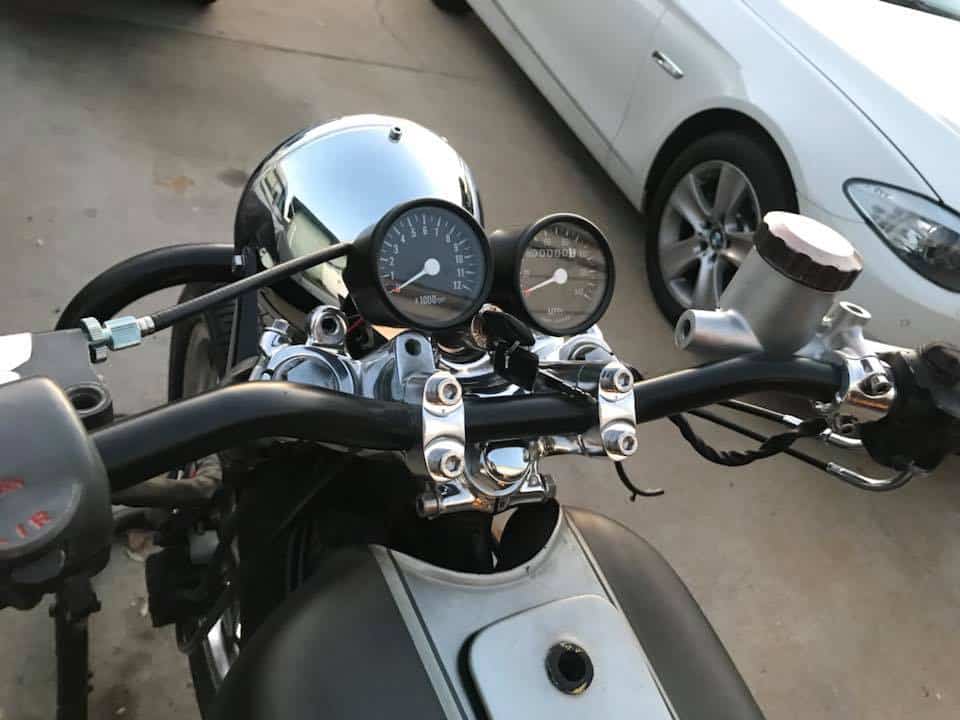
The New 2.5 Gauges that I sell on my website were just the thing needed to tidy the top of this machine up, I vapor blasted the master cylinder but its beyond repair, so shall be fitting a New version tomorrow.

The old 630 was totally rusted and, falling apart, so opted to change this set up for a 530 chain and sprockets, this was so messy, I was glad to change all this and have it look at least a little cleaner, thats why I prefer to usually strip the bike to the frame and do it right, but sometimes that is just not in the Customers budget, so do the best I can for them.
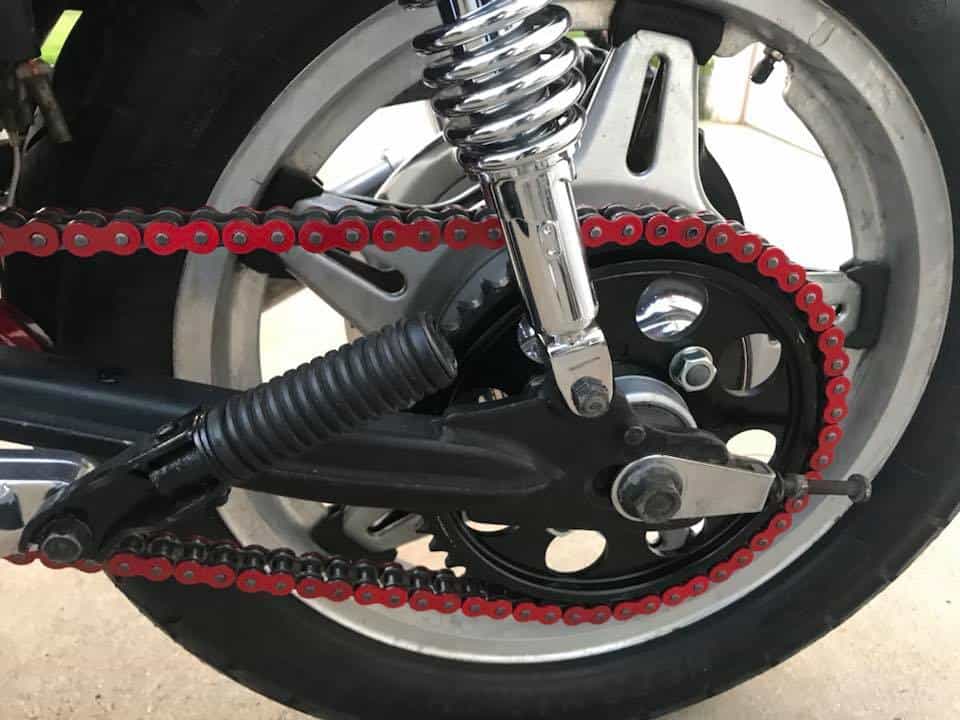
Looks so much better and I am glad I went this route, plus the Customer was over the moon with the look, so a double whammy there. Now onto the Exhaust system.
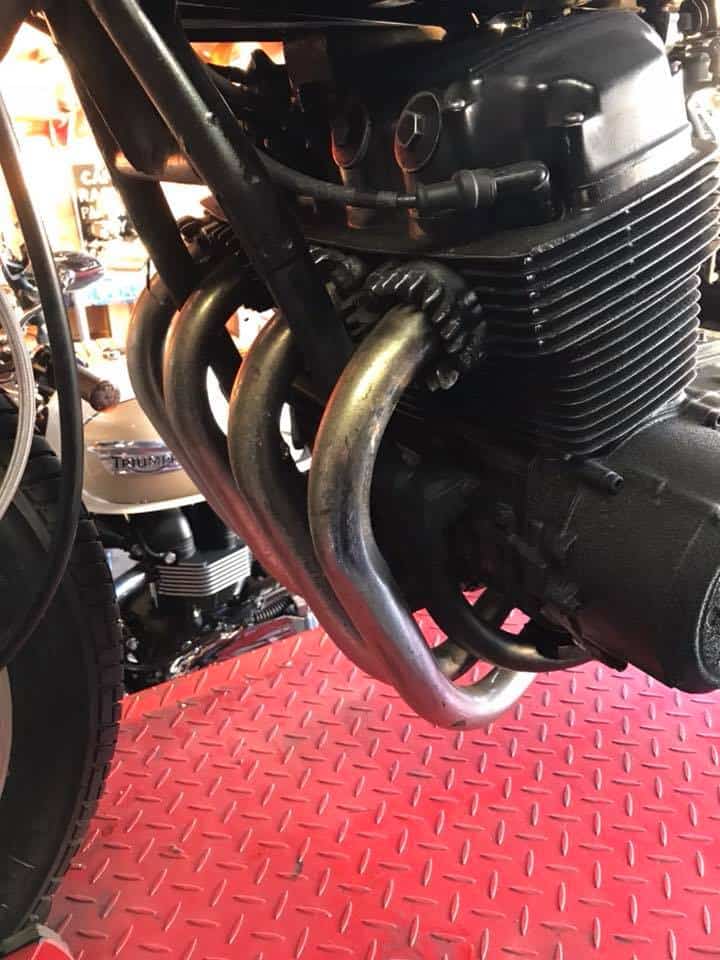
As you can see above, the exhaust is so so but underneath its a mess, the rear muffler was so badly welded, they needed to fit a screw into it to keep them together, so i thought that it was time to set up the good old Heat wrap, I like that Hot Rod look and so does the Customer.
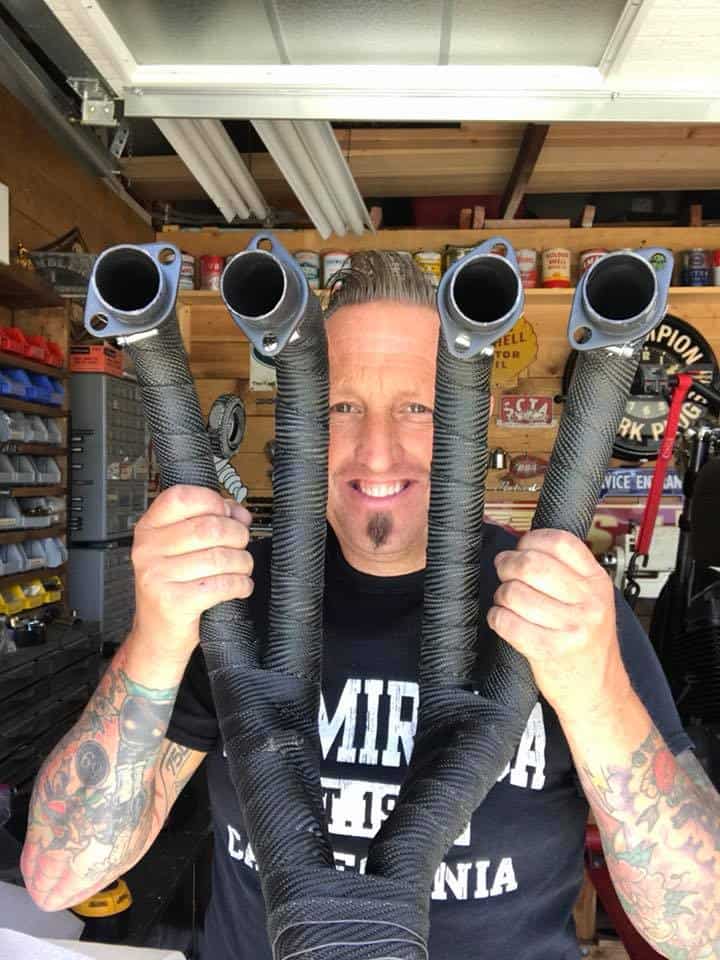
There you go, all wrapped and ready to go back on the Motorcycle, remember to replace your Copper crush Gaskets too when you re-fit an exhaust system.
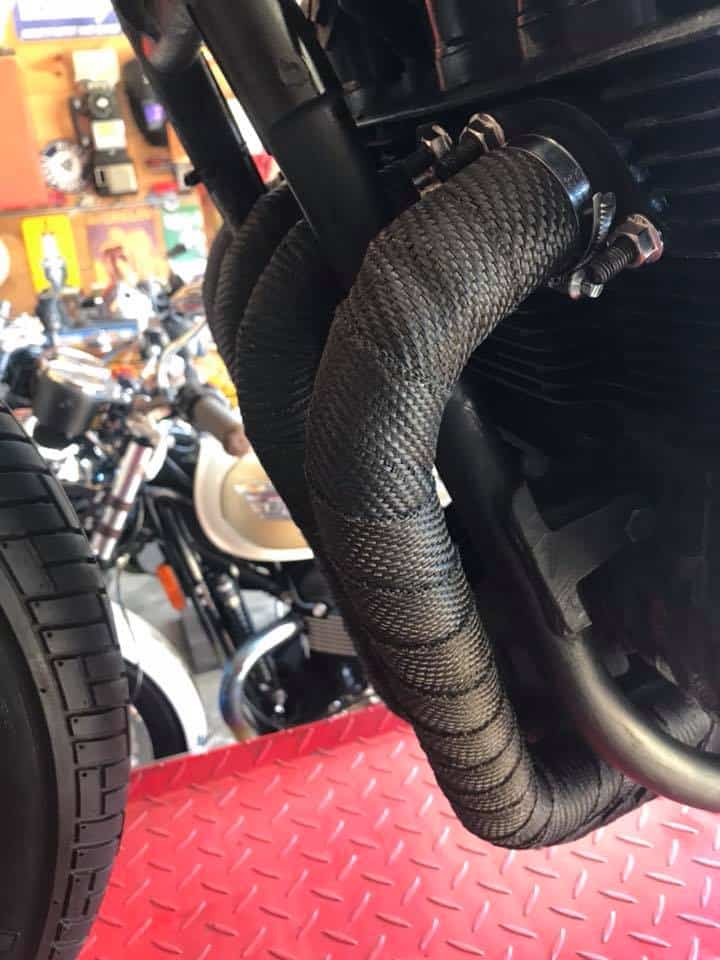
Looks so much neater now and I like the way that the Honda is slowly taking shape, I mean, a few weeks ago this was in a terrible state from all angles, so right now I am quite stoked.
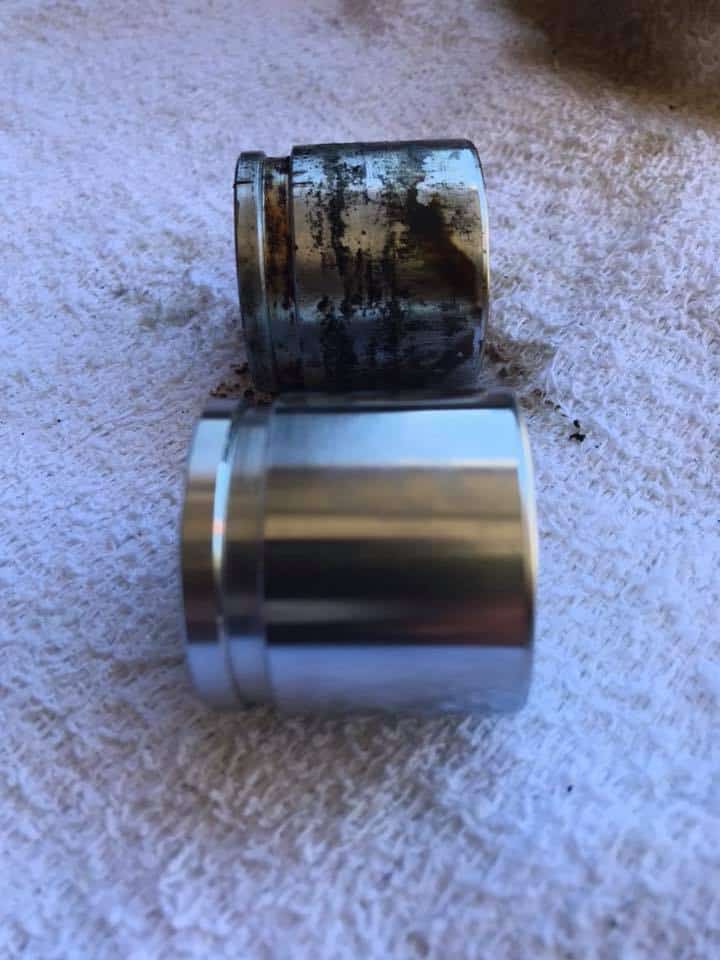
Right, now onto the rear brake Caliper, as it is seized up beyond belief, what I normally do is remove the caliper and stick a towel in a bucket and simply put an airline into the caliper and leave the bleeder in, that usually pushes the piston out pretty fast, hence having a bucket as there is 150 PSI from the airline going into that small cavity. But this time the Piston refused to exit, so that tells me there is a small rust ring around the piston.So what I do in this situation is go back to old school ways of getting things resolved.
So, now I have the piston out, using an old set of handlebars and a master cylinder to bleed it out, I can now get onto rebuilding the caliper, the O-Ring seal usually gets nasty and this one had too, but the Piston was rusted in and lucky for me I had a New Piston and rebuild kit at the ready. Below, Old and New, always replaces seals, especially in Brakes.
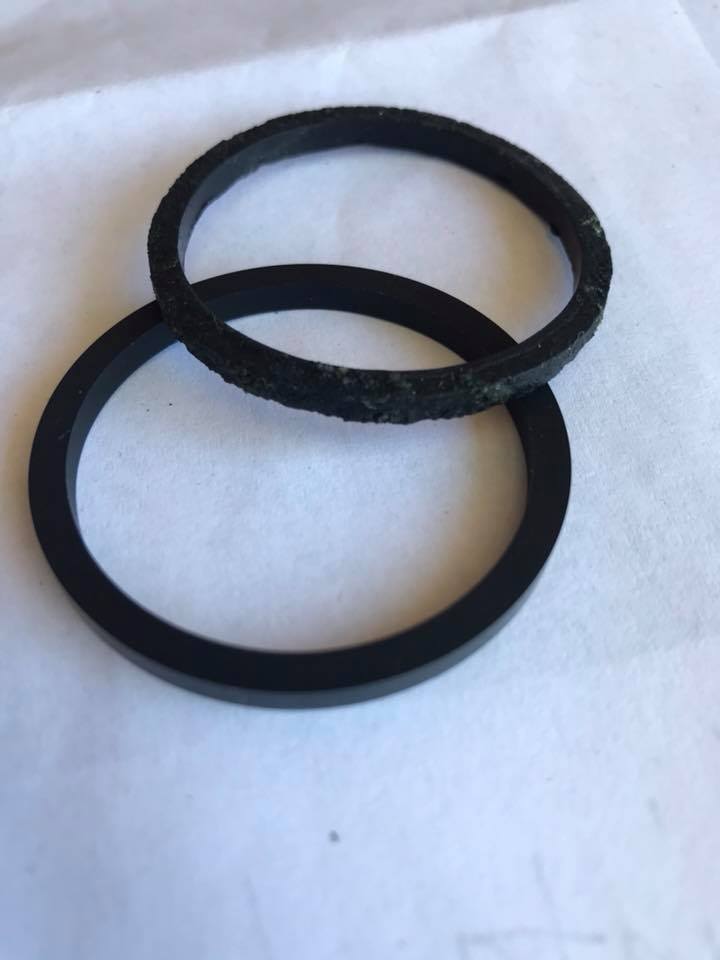
I use a pick to pull the Seal out, and then I was glad I had a New piston as the original one I removed from the Caliper Body was seized in and pitted up quite badly.

So, before I fit the Piston, I need to clean up the old caliper, as it has a lot of Oxidization in the body, as the carcass is a cast aluminum, so what I do is use a Rubber wheel to clean the body up, I sell these kits on the website, whats coo is that it does not hurt the caliper at all , although it will remove the oxidization pretty easily.
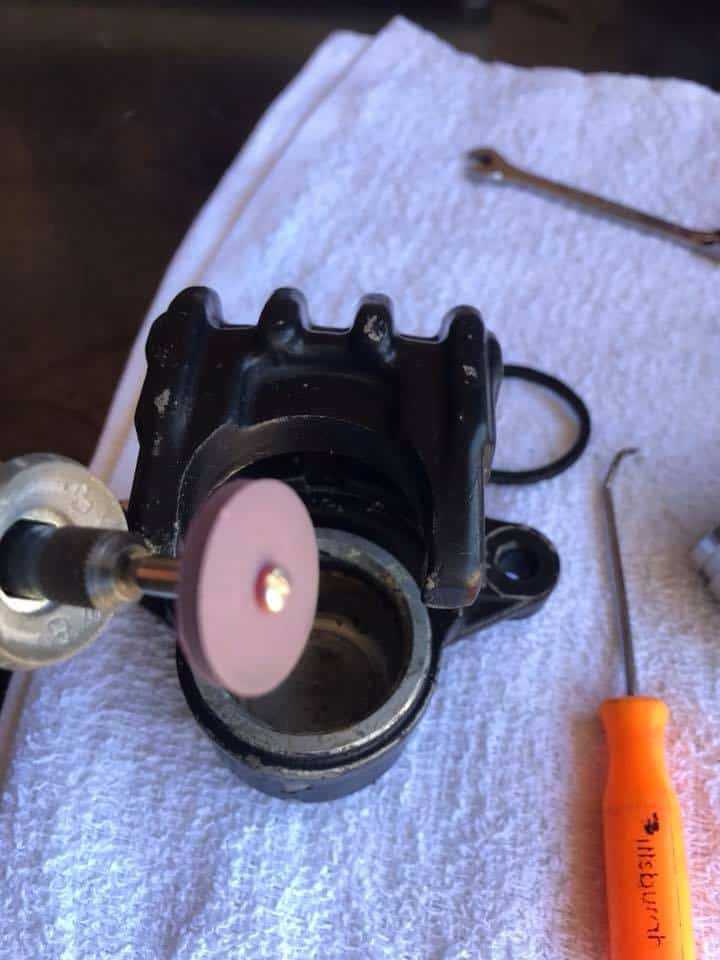
This is what I do t clean the body up, been doing this over 18 years here and always makes the brakes work really well and smoothly, I sell the kit on my website.
So, thats now clean, all blown out with an airline, a little brake fluid in the Caliper body to make sure all is smooth, Seal is in and Piston slides right inside nicely.
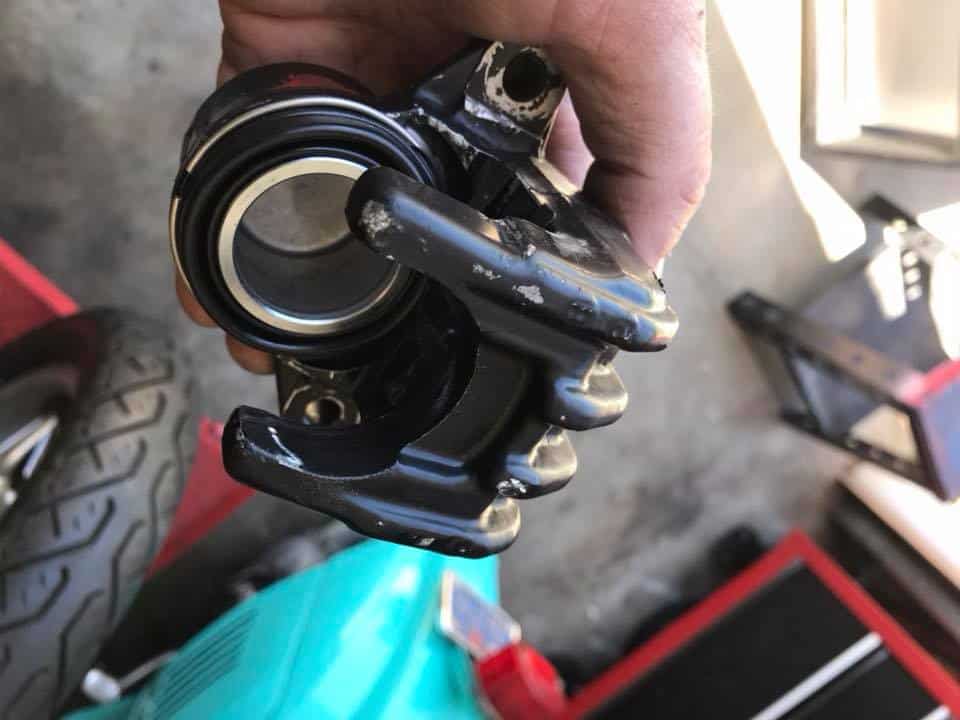
So, all rebuilt and ready to fit back onto the Super Sport, Bleed through and hopefully we shall have a brake now as before- this was seized solid from years of inactivity and parked outside for 8 years.
The rear brake is now a success and functions very well on the pedal, a lot of work but worth it in the end, as this brake caliper was seized up solid, am happy now.
I also didn’t like the strip light set up that I fitted to the frame, so removed that and fitted an LED stop – tail light and fitted the License plate to it and looks so much better I think.

I removed the Red LED turn signals as they were not functioning bright enough, so replaced them with some Classic Alloy 12 volt Bulb versions and tested, worked really well.
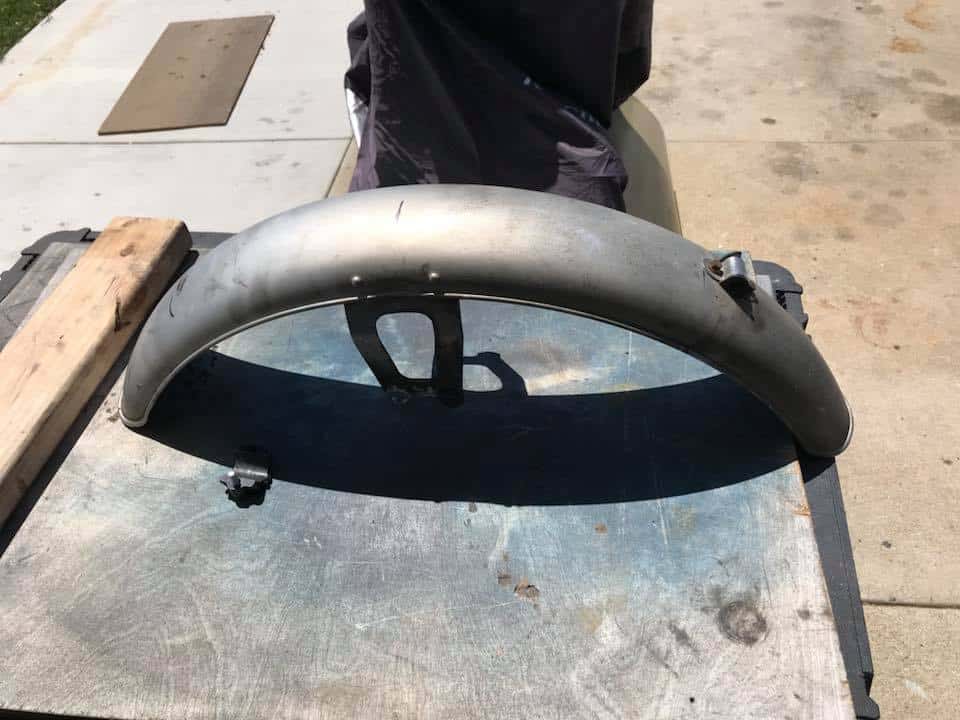
The front fender was a mess, but I wanted to still use as the front end needs bracing, so I though what I would do was cut it down and remove 11 inches off each end to make wheel look bigger.
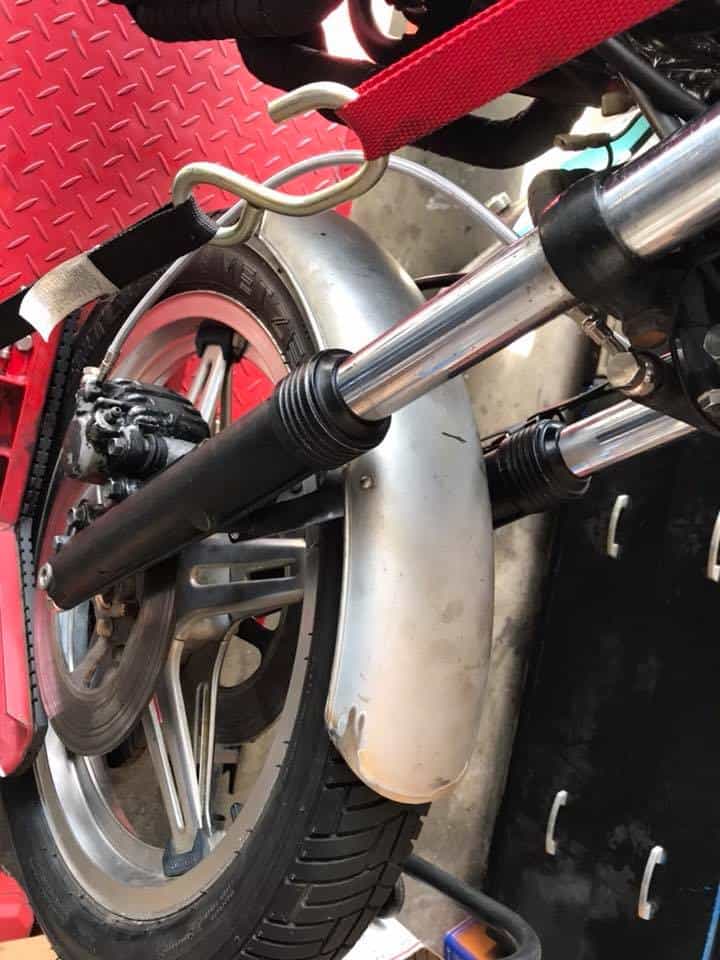
I then elongated the mounting holes in the brace, that way the fender will hug the tire, not touch it , but give that appearance that it was.

The Customer will paint it Black when he gets the Gas tank and side covers painted, but this sits nice and tight and stiffens the front forks up and stops crap flying in your face.
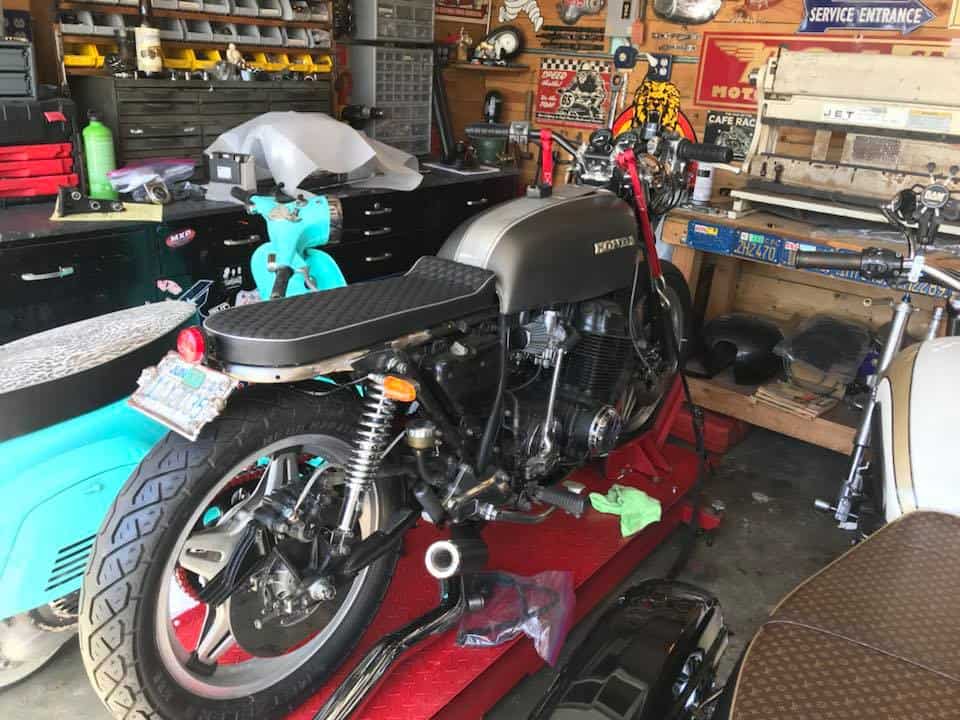
Next up is to clean the rear frame up and paint it Black, tidy the wiring, fill the gas tank, add new fuel line and see how this bike runs.
OK, I have managed to do all that and can now take this for a shake down run around the Block, the petcock bloody leaks, so have ordered a new one and will change that when it arrives.
Did a good run around the block and wanted to make sure that all is well, I knew that the headers would smoke for a few rides until they have cured, so no worries there, but the top end of this old Super Sport is rattly as hell and all adjusted, these can stay like that for a long time and thats how it is going to stay for a while.
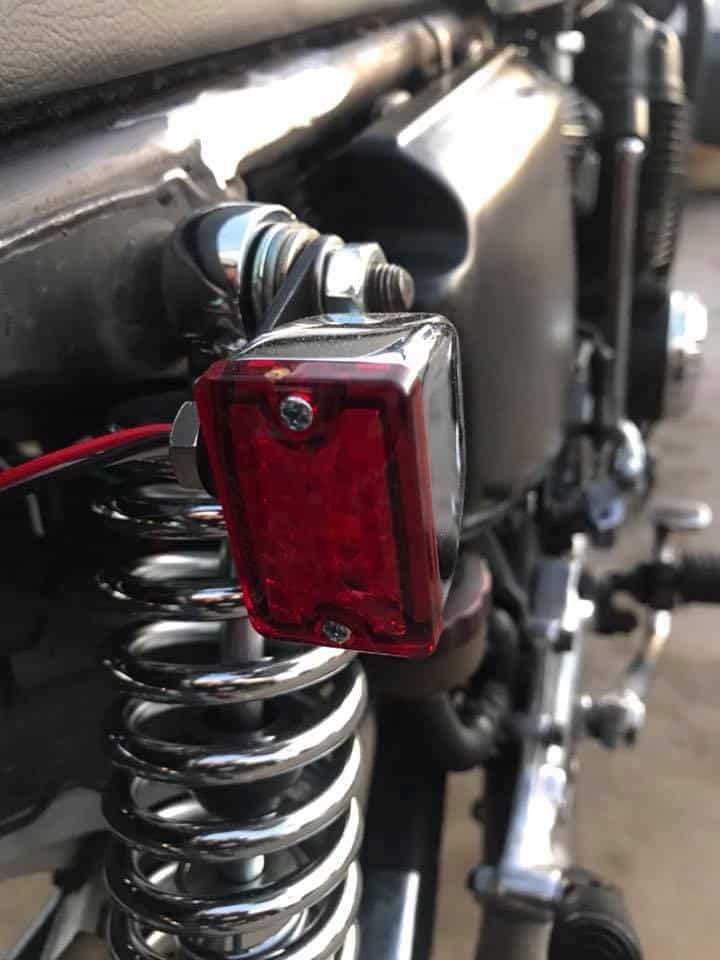
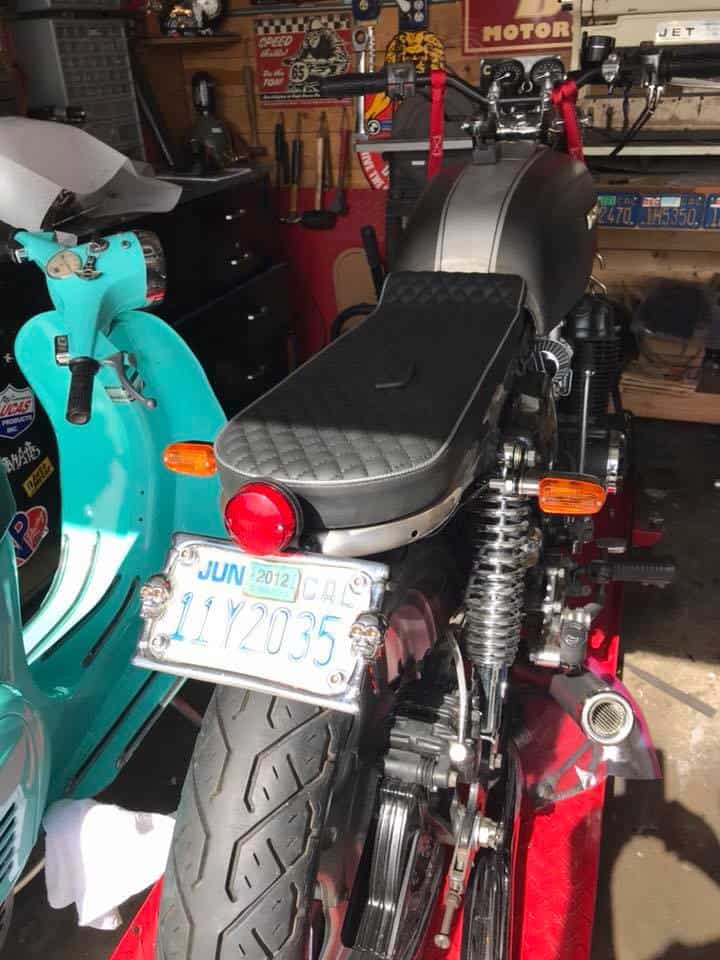
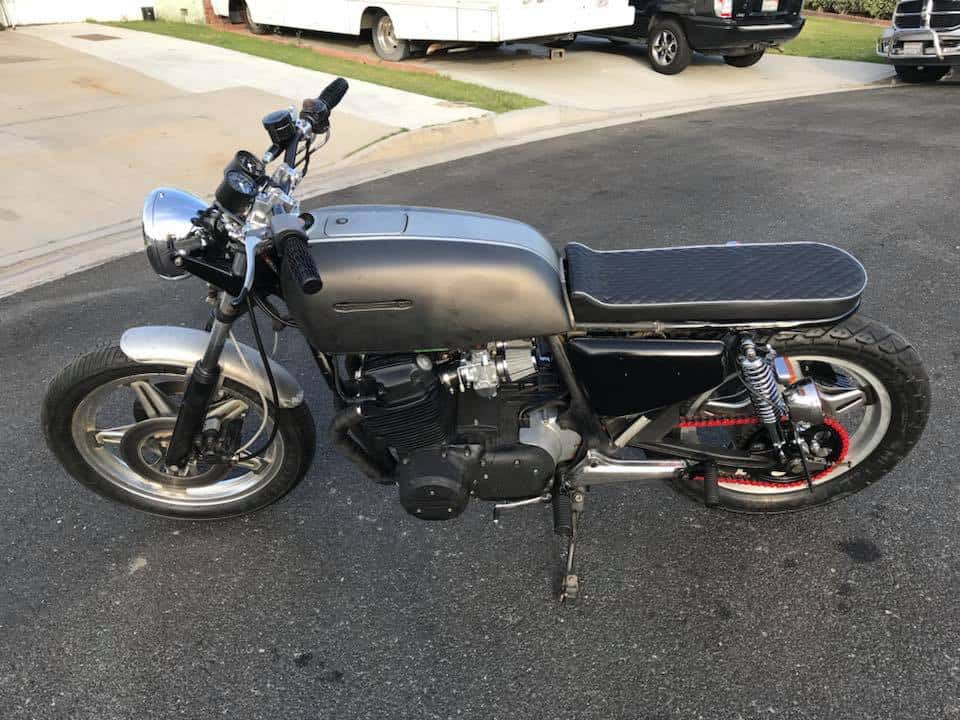
OK, so now the Customer changed his mind about a few things, so I have changed the rear tail light and made a License plate mount to sit off the bottom of the shock and used a Ford Model A LED rear Tail light.
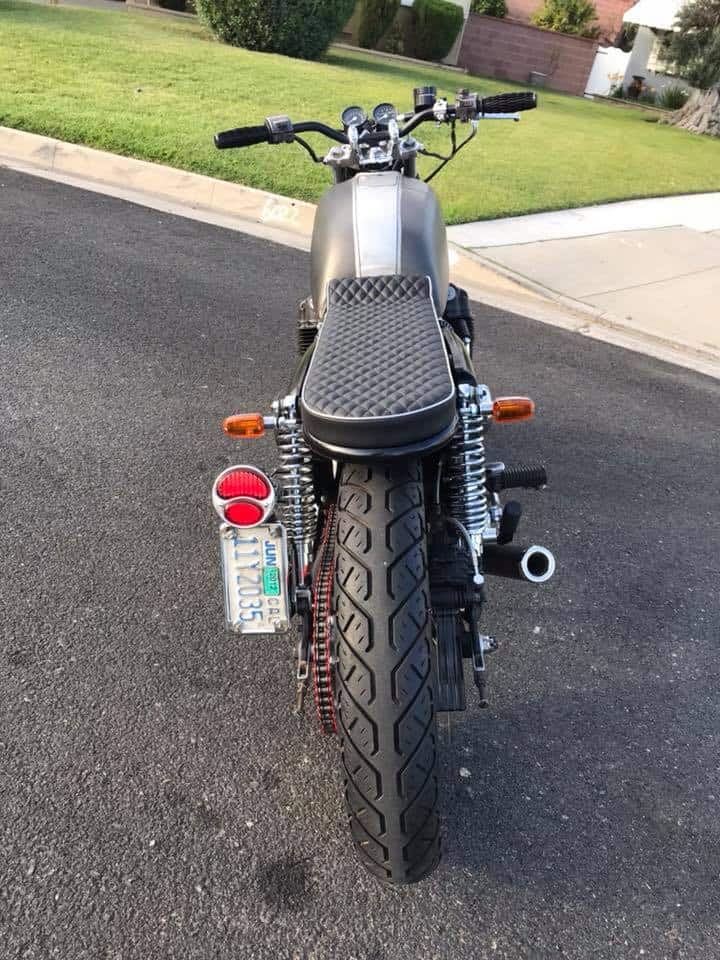
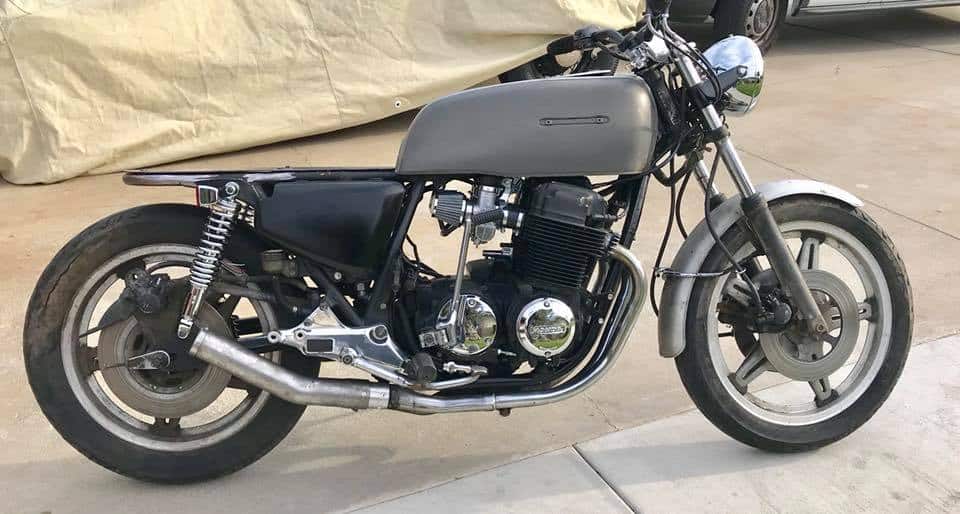
The Bike now runs, all the gears work, Turn Signals function as does the rear Brake light and Running light, I have put a lot of time into getting this thing running again.
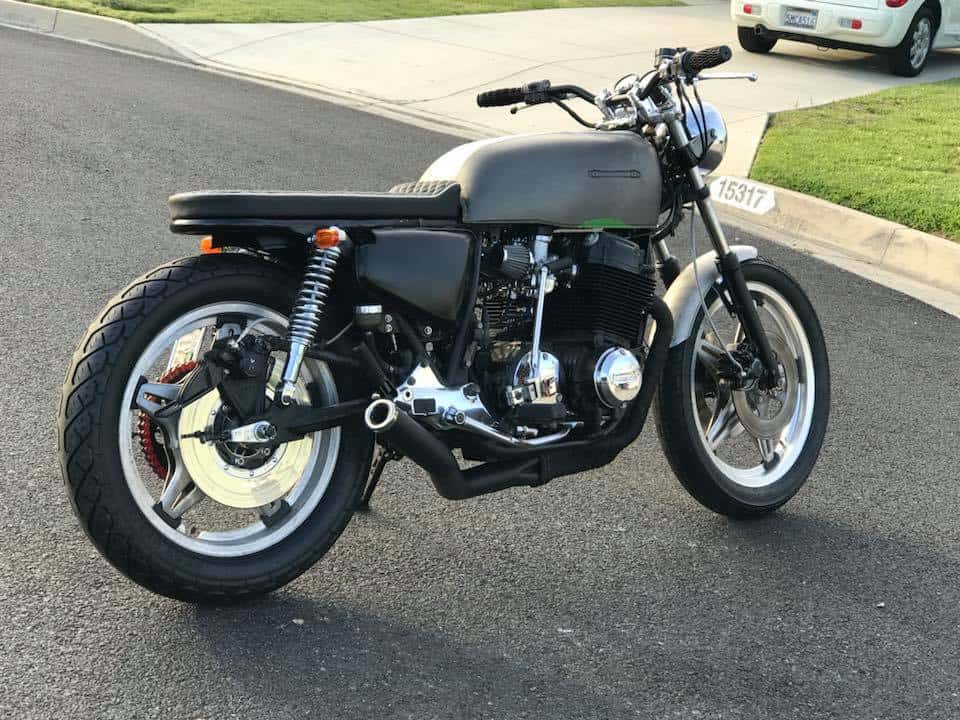
Virtually a different Motorcycle now, it runs well, albeit the top end rattles like some old nails in a can but they will go on like that for a long time and the customer can do that later, it pulls hard to be honest and the exhaust of mine is just Killer sounding.
I am not going to paint it, I sealed the gas tank but he can paint it as the Customer is on a budget, so when he takes it next week, he can get a painter to do their thing to her.

So there you go, pretty much done, this bike had not run in 8 years, all the brakes were seized and needed so much cleaning before I could even work on it, it is amazing it runs to be honest.
The Customer can add mirrors if he so wishes, thats just cosmetics, but at least I got this to run and drive, many would of given up and, I wouldnt of blamed them, but I continued and won through.

I am going to play with My Hot Rod thats in the back ground and look forward to this leaving my garage during the week, thanks for watching this build, hope you liked what I have done?