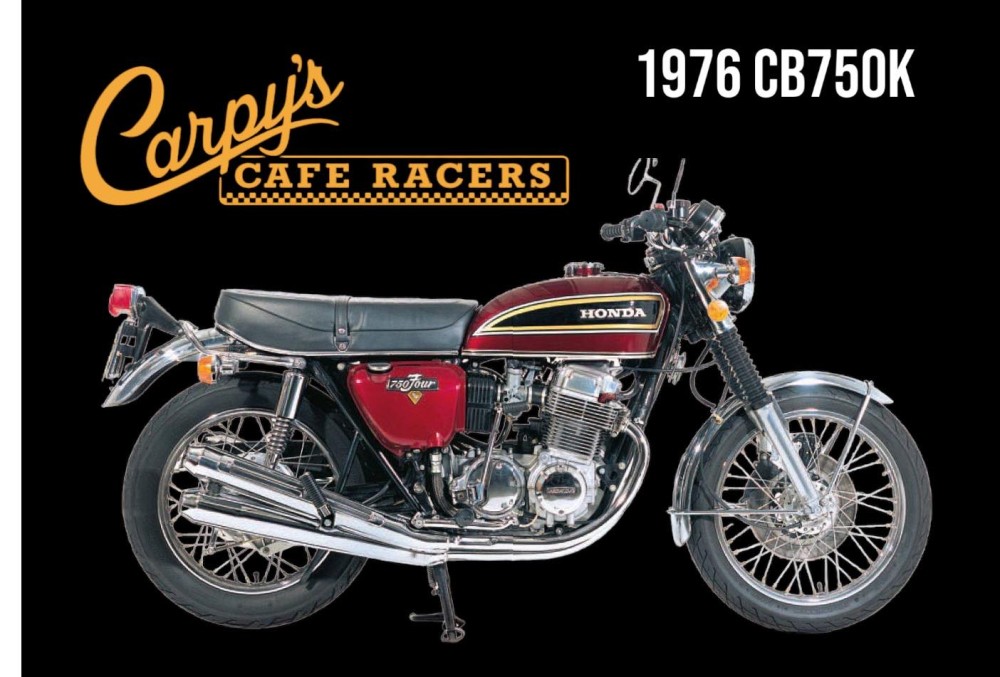
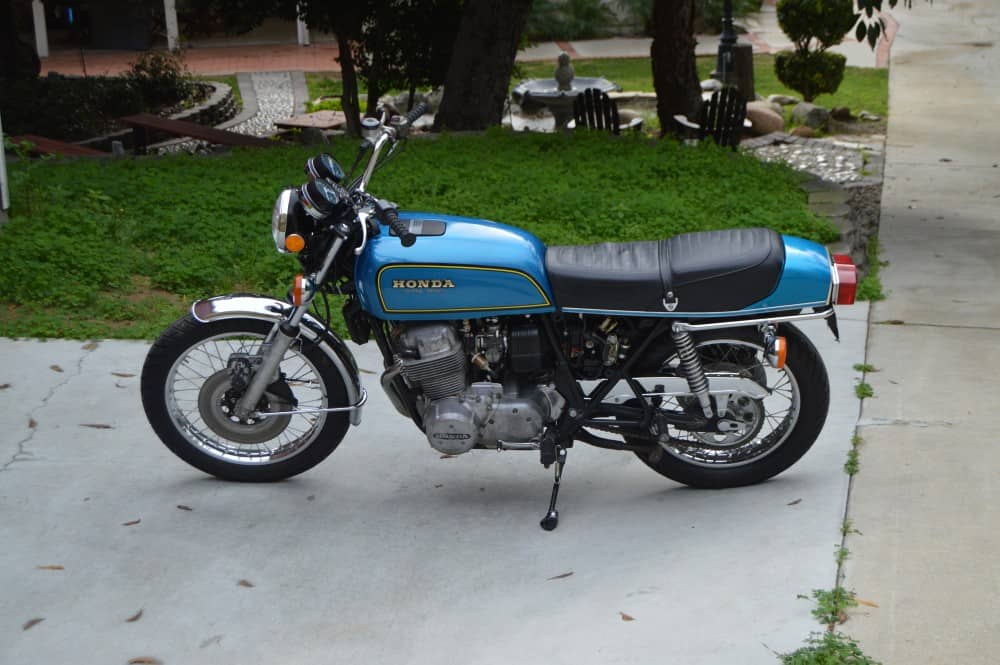
Honda CB750K 1976 SOHC I have managed to revive.

Well, I thought I should at least out down on some what of a lost, the parts that I have either refurbished or replaced with New Old stock on this 1976 K6 Machine as its so easy to get lost in the many parts you need to sort out, to be able to ride a non running machine that had sat in a yard for many many years.


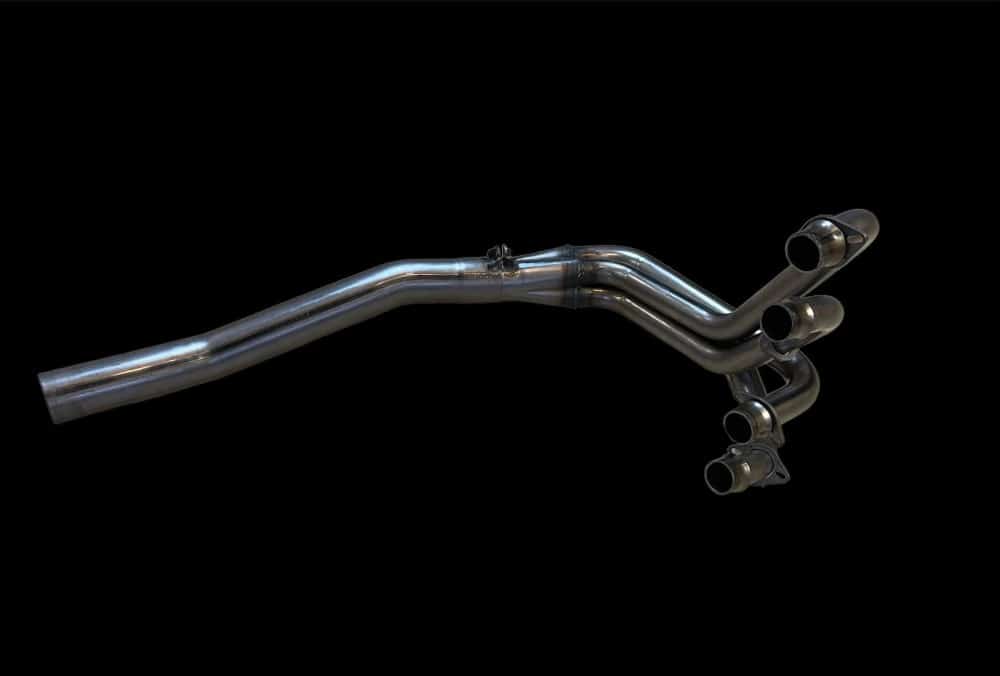
  1. Brand New 4 into 4 Exhaust system from Japan
  2. Brand New Exhaust clamps
  3. New Genuine Honda Horn
  4. New Genuine Honda Clutch cable
  5. New Genuine Honda Fuel tank rubber
  6. New Complete seat assembly
  7. New Genuine Handlebar Grips
  8. New Levers
  9. New Mirrors
  10. New Chrome Rear Shock Absorbers
  11. Powder Coated Rear Swing Arm
  12.  Chromed Stabilizer bar
  13. New Chain and Sprockets
  14.  Rear Hub rebuilt and polished
  15.  New Rear Rim and spokes
  16.  New rear Tire and tube
  17.  Polished brake hub with new brake shoes
  18.  New brake actuator arm
  19.  New brake rod and spring
  20.  Rechromed rear fender
  21.  NOS rear tail light assembly
  22.  New inner fender
  23.  New Battery
  24.  New Genuine Honda Coils
  25.  New Plug caps and plugs
  26.  New oil and filter
  27. Rebuilt and tuned carburettors
  28. New intake rubber boots
  29. New starter cover
  30.  New Clutch Cover
  31.  New OEM kick starter
  32.  New Oem Brake pedal
  33.  Rebuilt front caliper
  34. New exhaust spigots
  35. New fork tubes upper
  36.  Rebuilt lower forks and polished
  37. Stripped and Powder Coated Main stand with New Spring

I have a few more little things to do on the bike and then I can fire it up again, but I am glad that I persisted and continued to clean this big 4 machine up and its looking pretty cool as it stands right now.

She does sit at the right height now, as I have fitted the correct size tire in the rear, I need to clean up the gear shift cover and will do that this week, as well as the sprocket cover, this bike has many New parts on now, I would like to repaint the tank and side covers but no time at present and I have many other motorcycles to build, this is the original Candy Antares Red livery.

The exhaust system fitted really well, I am a dealer for this system and they come direct from Japan with the baffles included but not the heat shields, but I was super stocked at the fit of these and the chrome looks amazing.

I used New spigots and New flange clamps to set the pipes off, would seem sacrilegious to go any other way as the original ones were rusted and looking worse for wear, this is a nice fresh factory look i believe and super glad that I went this route. Not cheap by any standards, but chewap will not last so buy right and you will see the benefits further on in time compared with inferior copies of this system.

I have always loved the look of inline four machines and the Honda was such a popular choice back in the UK when I was a Teenager, I have had so many Honda’s in my life and continue to work or build them in my barn.

I did buy an aftermarket rear fender as the original was quite bad in the way of rusty deposits, but the aftermarket version that I paid $200 was utter rubbish and got my money back, so invest the $400 and  stripped and chromed the original fender and bought a New tail light assembly, sure looks nice now.

I have also fitted a New seat, the other one was ok but I wanted a fresh look and thought I may as well get another new unit to complete the bike and give it the right ride height, these bikes were a tall ride and have to be honest was surprised the Japanese Public could ride these as I am 5″11 and am tippy toed when sat upon this bike.

Sure, there are many more little things I can do to this machine but my plan was not to restore the bike to its New appearance in 1976, but to give it a fresh look from a sad and tired past of sitting in a garden to the elements for many years, but this will be for sale, I think $5000 is a fair price and, if I do more work, of course the price goes up, the exhaust system alone was $1600.

New Grips and Levers and cables etc help this old Lady become young again and of course I fitted stock mirrors for that 1970’s vibe and takes me back to my last years at school when I first saw a Red CB750K coming down the road.

The bike sits well and I removed the main stand and powder coated it and fitted brand New Genuine Honda hardware, I wanted to use the main stand as many have been removed over the years, plus it makes it so much easier to remove the rear wheel or chain etc.

The New tire and tube feels great, with New original DID rim and polished Hub with new internals and New brake shoes, Rod and actuator, this is a super set up and the New rear shock absorbers are the correct models for that ride height of 1976.

New footpegs and New Old Stock Brake pedal and New old Stock Kickstarter help clean this five hundred pound 2 wheeled Classic Thorobred up and give it a new lease of life, hoping that you are liking what I have accomplished on this 50 year old Motorcycle.

I took this out of the Original bag, cost me over $150 but its the Original and stoked that I located one not too far from me so there are some neat touches to this Motorcycle that you may enjoy looking at.

Now, the Carburettors are completely rebuilt, synchronized and are attached to genuine Honda NOS intake boots, I have old 1976 Velocity stacks on the bike but do have the original Airbox for the old girl. And also I fitted a New Clutch Cable and Covers too, Just have to fit a bolt in bottom points cover today.

The rear wheel is all rebuilt with New spokes and new bearings too, New chain and sprockets is a must and she really is a Classy looking bike, not yet found the title but am looking for it, I think the original owner has title and I have recently corresponded with him, so he may find it, if not I will sell with a Bill of sale as its been off the system for many years.

It does need a New front tire and I may fit another later on as I go along, but right now she looks really good and wanted to show the machine on my website as many people have been asking about the old girl.

Thanks for looking and I will continue playing with this CB750K until she sells, but of course, the More I work on it, the more the price will increase, but I do enjoy reviving these inline four beauties and hope you have enjoyed the pics and write up on this Japanese Iconic bike.


Honda CB750K 1976 gets a little more cleaned up.

Well, I have decided to continue playing around with this old Original inline four CB750K series Motorcycle, and I think what I shall do now is strip a few parts off and refurbish them to a nice condition.

I think that this 48 year old girl needs to have some good cosmetics, so my plan is to clean a few bits up like: Remove the forks and polish the lowers etc, maybe new gators and hardware, after that I may fit the New 4 into 4 Chrome Japanese Made 341 style exhausts, that way you get to see how the fit and sound. I have a temporary 4 into 1 set up on the bike right now but think having a Brand New set of 341 style exhausts will set the bike off and show how good the pipes fit and of course look with a sound byte or two added for your pleasure.

Also I will refurbish the rear swing arm too seeing as I fitted New rear shock absorbers and a bunch of miscellaneous parts to many to mention as I go along, but- These parts are not cheap and this will be reflective on the new price too, I am not bothered if it sells as I can use it as a great parts getter and have fun on a low milage CB750.

So stay tuned and I will of course document this as I go along, I may have some more bikes coming up for sale so keep checking back with me on the website, this will be a fun adventure, not a show bike as I don’t want to strip to the frame right now but maybe later but I do have a few K0 bikes I will try and get back on the road.  So thanks for looking and hope the K6 will look somewhat factory when I have completed it.

Once that is done I shall get a few miles on it and ride it down to the beach etc and just enjoy the good old CB750K series inline Big Four Japanese Classic machine.


Exhaust for SOHC Honda’s 1969-1978 The SIDEWINDER

I have been getting a lot of compliments on the 4 into 1 Exhaust I manufacture called The Sidewinder, this really is a great performing system that not only fits well, it sounds crisp and is a true Performance pipe.

These power houses are available in Raw steel, for that Industrial Look, or you can wrap them with Heat wrap for your Custom look, but also I get these Cerakoted in Ceramic and have a Choice of Colors of Black, Silver, Titanium and Burnt Bronze.  These are designed to fit the HONDA CB750K CB750F inline Four Models of the SOHC size, that’s from 1969 up to 1978.

Also , the advantage of this system is that you can still run with your center stand attached as these pipes wrap to the right hand side of your engine and clear the oil pain, the second thing is you have a totally clear access area to your Oil filter housing, which makes for easy oil changes and filter swaps etc.  A really well made system that is affordable and pretty easy to fit, even on your own.  I have done this many times and so glad I went this route, the whole system itself is about 13 pounds so easily lighter than the stock version.

These are all made right here in California and ready to fit to your bike and get you back on the tarmac, these are held into the Cylinder head by floating Flanges, so no more messing around with either half shims or them finned pinch clamps, simply bolt on with 8X35mm Bolts or if your head has studs, then these just slide right on into the ports and simply tighten sequentially.  I use a Stainless Bolt to attach the tail pipe to the header, as springs tend to jump off over bumps, mostly made for the track, so a tried and tested method is a high quality stainless bolt that I supply with the system.

Yes these do come with a Baffle and I do not add any packing to it, I like the 95 Decibel output but if you feel it is a tad loud for your area, then any local Motorcycle shop sells the fiberglass packing or use some steel wool and wrap around the baffle and refit until required sound is found.  No other sound like this, other than a 30 year old Yoshi.

The Photos I have shown are Raw steel, but Ceramic coating is available but takes 10 from order as I take it out to the company to do their coating but worth the wait, I do not store any in house coated, only because we get the odd Earthquake and don’t want to scratch anything if they moved when we get a shaker here.

I personally Pack these systems and send them out to you, I help Over sea’s Customers on the duty form, so you don’t get any silly fee’s, remember, I have been doing this almost 23 years, so know my way around the shipping forms. I packed these in a 16x16x21 double walled box and make sure that it doesn’t move when in transit.

Let me know if I can help you with one of these systems for your Machine, be it Stock, Custom, Café Racer. Brat. Tracker or a Dailey parts Runner, this exhaust will give you more pep and looks pretty cool too.  It breathes so well you will be stoked at the velvet tone that it emits at the rear end.  Looks Great and value for money, way better than the Chinese stuff that’s out there.

I am super stoked at these systems and have many repeat Customers from all over the states and the globe, I love to hear from customers that really do enjoy the burble that these 4 into 1 exhausts make and the throttle response is second to none. All would suggest you up jet 2 sizes on the main, but that’s it, these run so good.

If you need any more information, please drop me a line at carpy@carpyscaferacers.com or call or even text me on 714-598-8392, thanks for checking in and hope that you enjoyed this page on the Sidewinder Exhaust.

Raw Steel System : $380

Cerakote Coated :    $480

CB750 Honda Super Sport getting some work done to get her going again


\Here at the shop I always have things to do, but I always help customers out and when he bought the 1976 CB750F here I could see it needed just a little tlc, many people think they will just need a charged battery and some new fuel and away they go?  In some cases you do get lucky but this old girl does need a little bit more work before I can get her to run again.

This will be a nice machine as super low miles but as she has sat for a long while, the Carbs really do need some work, so first off they are removed and will get stripped, cleaned, vapor honed, polished and put all back together, after that they will be jetted and synchronized so they run great once more.  Not a cheap job but if customer looks after and rides regularly, no reason why these wont last another 40 years.

Intakes were solid as a proverbial rock, I do not want to refit the carbs and find out these have hair line cracks allowing air to leak into the manifolds, so I shall remove these and fit new ones that are nice and pliable and of course I sell on my website.

At least now I have a fighting chance at fitting the carburetors without having to push harder than a steam train to get the things to slide into the manifolds’ etc. Also a good tip on yours is, just add a little axle grease to the inside of the intakes to make the carbs easier to Plop, back into the rubber, makes a world of difference.

Still quite a bit to do as the front brake was binding so hard when we unloaded it from the trailer, this is always due to the steel piston inside the front caliper, as over the years when they sit in all weather and temperatures, the body of the caliper is alloy and the piston steel, aluminum will sweat and leave a rust deposit on the steel piston over time.  When they happens, altough only a small mark, the piston will not reseat when you let go of the brake lever as the O ring is catching that rust spot.  I always tap the caliper body with a rubber mallet to free the piston and that will stop the binding for a sec.

So, as I now move onto working on the front caliper, I will need a few tools, I will need an 8mm wrench for the brake line and the bleed nipple, as well as a 14mm socket to be able to undo the two steel bolts that hold the caliper to the hanger.  Also Dot 3 brake fluid and a bleeder bottle.

I will be fitting a New caliper body, I do not have a New feed line, so will have to be careful undoing the 8mm nut as it looks like its already chewed up from many years of abuse , but I will put a wrench with some tape on it and tap the wrench with a rubber mallet to shock the nut loose and not round the damn thing off.

This is the original caliper and I have no idea where originally this machine had been sitting or what sort of life it has had, even though its low miles, the weather does take its toll on them when sat for years doing nothing.

The Bolts were really tight on this front caliper, so I soaked them with WD40 and then used a socket with extension and go them to undo, but they were really on there tightly.

I replaced the front Caliper completely with the Kit that I sell on here and it worked a treat, really easy to put together and fitted like a glove.

I will advise the customer that on the next service, we should fit new brake lines, but for now we want to make sure that this Super Sport runs well and of course, stops safely.

Fitted the caliper and made sure the bolts were greased so nothing ceazes up like the original bolts and now just need to bleed the brake system to get all the air out.

All the air is bled out, bleeder nipple has the rubber cap placed on top and she is all good on the front end once more and he can rest assured the front brake will work as it should, and now I have to spend a few days stripping the carbs and getting them cleaned like new once more, stay tuned…………….

Flash Back Friday

Just a quick old Video when I had a Bigger shop that did Cafe Racers and Hot Rods, but am so much happier doing MY own stuff and not relying of other people, so have a great weekend.


MY exhaust, kicks ass at Barber Race Track.

Hey Gang

It is always good to hear from Customers and their stories of how they enjoy our parts here at Carpy;s Cafe Racers, none less than this fella, William Lundy.

He purchased one of our performance 4 into 1 exhaust systems and simply jetted and off he went, he raced his little 550 with some of the big boys.
So- I thought I would share with you, some of the email that he sent to me today, I am so stoked that he likes what we sell here at the shop and I knew he would be happy.
Enjoy:
Peace and Grease
 
CARPY


Hello Carpy,

So to start the exhaust really does rule. It all started when I got this quite large package at my door step and unboxed the glory that is the Carpy Exhaust. I immediately went about coating it with black ceramic spray from my local auto parts store. not the best option I know but I was under a tight budget. After the coating dried I began to fit the new exhaust. I was immediately impressed with good the welds were and the one piece design. once I got the old pipes off(4into2 no baffling) I slid the new part into place with ease. everything fit extremely well and I had the exhaust on and ready to go in a matter of about 15 minutes. So i started my bike up and immediately noticed all four pipes were leaking. Stupid me forgot to throw in new exhaust gaskets. So off came the pipes and around another 20 minutes later i had a monster exhaust setup. 
 
Then came the tuning.
my bike…the be completely honest is a real snotter. It looks like a turd and is beat up as anything. But…beneath the rugged exterior lies the monster. I am running a completely stock engine minus the cam chain tensioner and complete lack of electric or kick start. Also running stock carbs. With my carbs I had to play a little with the jetting. I found that for the bike and fuel that I use (sunoco 110-the purple stuff) i was running a little higher jetting than most and with a stock airbox. Not because I chose to keep it but because of budget. It is thrift shop racing team after all. The bike runs just a bit rich with normal pump gas but with the racing fuel it is spot on. 
 
once I had the jetting right for my setup it came to the choice of to keep the baffling or to not. i had already noticed an increase in my bottom end due to now having some back pressure on the motor and was really torn on what to do with the baffling. so what i did was simple. went to the local back road and broke it loose. I could scream at top end with the baffle out but i lacked the power to launch out of the corner. most likely due to my stock airbox. but with the baffle in I had the bottom end I was looking for and a pretty tip top upper end. I wasn’t so worried about top speed in reality though due to most of the track around here not having enough room to really get the bike all the way through the gears. 
 
So once I had it all sorted I fit my belly pan around the exhaust, safety wired the bits and was off to the first race of my career and best track on the east Barber Motorsports Park with the WERA sportsman series. 
 
Being as this was my first race i was forced to attend race school which was extremely informative and helpful. After some simple instruction we were set to hit the track for a practice run. I donned my suit and lined up ready to go. As I screamed through the first couple of corners it was apparent that the old bird still had some fight. I was ahead of a 1999 gsxr-750 and pulling into the corner. After exiting the museum corner and heading onto the back straight disaster struck and I had smoke and small flames coming from my ignition switch. a wire had come down and hit my motor exposing the metal inside and shorting out my system,popping the fuse and sent me back to the pits on the crash truck. 
 
Thankfully my great pit crew consisting of David Hurst and Charles Gault both riding RD yamaha’s got me fixed up while I was in class and had me ready for the next practice. The rest of the day went great and I was dropping seconds like crazy on my lap times. 
 
The next day was race day. I was set to compete in the clubman class due to it being a non vintage race day and that being the only class I would fit in without getting destroyed by modern bikes. As I pulled up for practice I see my competition. A bunch of 250 ninjas and cbr’s that I knew were brand new and highly tuned. my only chance was to hang back and see what lines these guys were running. 
 
After practice I was pretty certain that my only chance to get these guys was my ability to blast out of a corner and pull them on a straight. so when it came time to race I had two goals, Don’t be last, and try to run up front through the first couple corners.  I was gridded dead last due to points and was ready to go. the flag went up and I shot off the line like a bat outta hell leaving a thin black line and my tire about three inches off the ground nearly all the way into turn one. Ahead of everyone. As i was breaking into turn five i didnt’t see anyone near me and I went about my business, looking through the fence upon exit to see that the pack was just now making it into five. the rest is history. I twisted it up and never let up leading the races to a win by 8 seconds. 
 
The bike had seen better days and there wasn’t an engine part of foot peg that wasn’t ground to a powder or throwing sparks. But the exhaust is what really shined. the crowd from the paddock said you could hear me coming through the trees at turn 17 a thundering roar followed by a modest hum of the competitors as The bike meandered sideways onto the straight away. 
 
After each of my practice runs and races I was sure to get a few guys either modern bike riders or vintage fellows scooting over to my pit on their pit bikes to see just what was so darn awesome about the ride. I heard nothing but great remarks about the sound and performance. I was told the exhaust sounded like “the hounds of hell screaming in your ear waiting for you to mess up” from a guy I was “hounding through a few corners before a pass. Everyone got a napkin with the site…. carpyscaferacers.com -carpy exhaust, written on it. 
 
I hope you enjoyed the tale of the race and i will attach some photos and give you updates as the season progresses. now it’s time to find new pegs and a charger cover for a replacement! 
 
-Will Lundy