Building an Inline Four Project out of bits and parts laying about.

Well, I still have not made my mind up how I am going in the design part of this ride, I thought I would use my phone and record a few sessions as I continue creating a machine that I personally like and want to use and I am sure that it will go through a few guises before I get on the right track, although that’s half the fun of it.

So here are a few videos I have cobbled together and hopefully you will like what I am trying to achieve, remember, Rome was not built in 7 days.

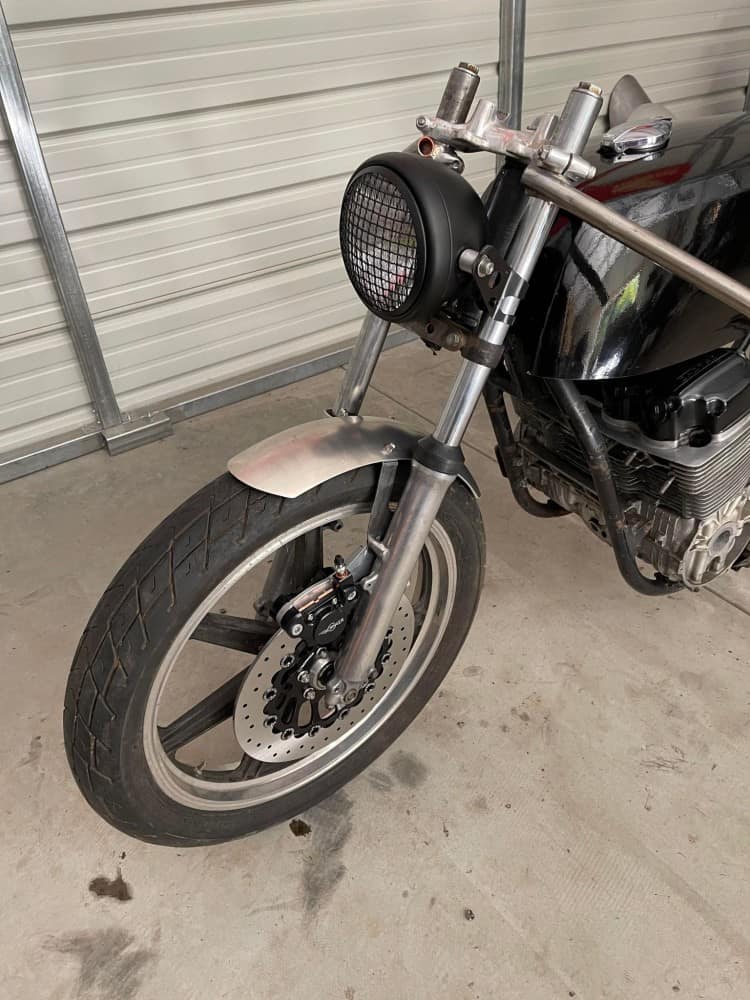
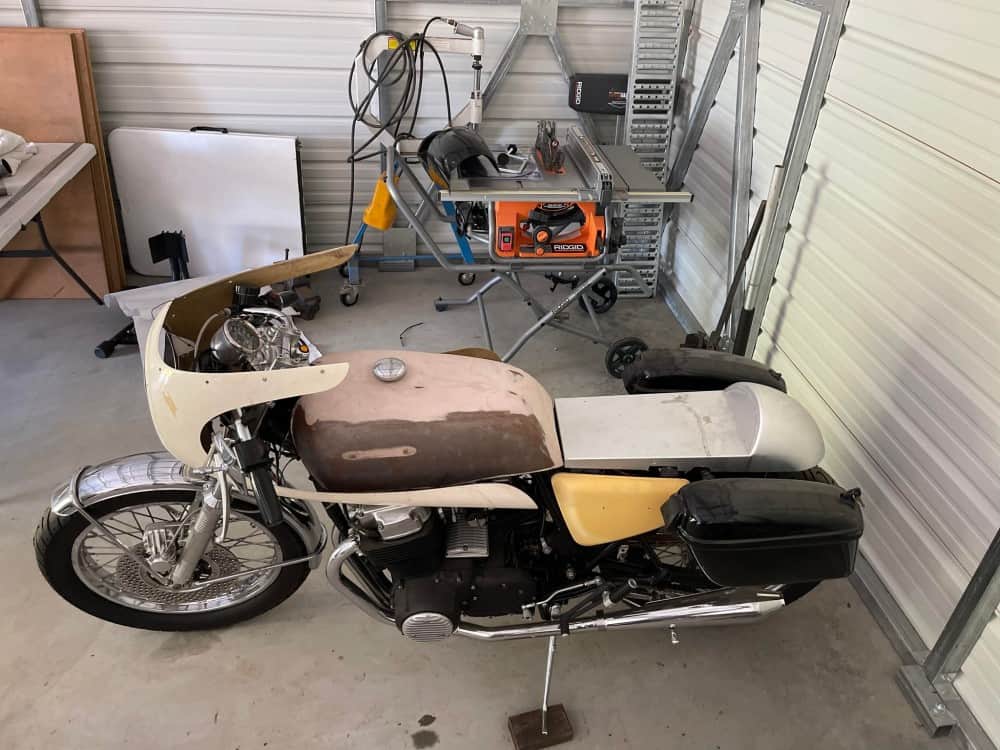
The Dispatch Cafe Machine 1975 CB750 F Super Sport S.O.H.C.

Been a while since I have tinkered in the Barn, I am starting to do a bit of creating on a machine I have had as a stock bike and sat in storage for many moons, and I thought to myself, why not create something that I personally rode back in the day and in the style of what was the latest Motorcycle hitting the TON back in London.

I have loved bikes as a kid and my bedroom was literally covered from walls to ceiling in motorcycle posters, of course I loved the Cafe Racer scene and had many Dunstall style bikes on my wall, but wanted to have something similar when I was old enough to ride.  I actually put Clubman bars on my first ever little moped as a crazy 16 year old, I had a Bikini Fairing on the front and a little expansion on that ride, I loved it.

I was a Dispatch rider in London and Birmingham, delivering stuff all over the UK but many trips around the City of London to iconic places like Buckingham Palace , The House of Lords, Newspaper and Magazine Companies, to dodgy Porn Video tape sellers in SOHO, but I loved it.  In London especially, you needed to be able to carry as much as you could for the better wage, but you also needed to be a streamlines as possible to speed through the busy roads of London.

The Creation I am putting together reflect my life, so not a quick build, this is something I will take my time on and weather you like it or not, it will be something that is really a part of me and my life on two wheels. It will take some sorting out to fit the Original Avon fairing that was indeed on a Dispatch bike in London, I have had it years its beaten up and half missing but that’s perfect as we never had any money for lavish New parts, we bought stuff out of a paper called the “Exchange & Mart” then fitted it and never really had time or cash to fully paint it, so this will be great for the ride and I hope I can fit this to the machine to work just like it did when I was a lot younger. LOL!


I used to spend many an hour looking through that rag as it was only 15p and I am sure people back home in Blighty reading this will also remember doing the same, no internet then ha ha.

I am happy that I can do this and reflect on the years that have seemed to have flown by, no idea where the 140 pound Skinny Fella went to but I can always reminisce with this build, the bike was super heavy but strong as an Ox, I hope to get the bike completed sometime this year and will show it as a feature on the website.

I may go with a different seat of mine, I have already tried 5 different seats and still not happy, but thats half the fun of designing something and when I get it right, I shall feel a whole lot happier.

You used to see so many of this style when I was riding around Oxford or regent Street, on a busy Tuesday morning, having a fairing and side Panniers gave me so much more loading space, some days I would even fit a back rack and a top box, but that did get a little over laden at times.

I think I have a screen for it but can get one from a company here or in the UK, so no worries on that, but a long way to go as I have to allow for the steering to move smoothly and not catch anything mid turn.

Of course I shall have a headlight in the fairing, an old style one too and the obligatory Fog lights as well, fun times ahead and thought that i would share.


The KC Special CB750 Honda inline Four

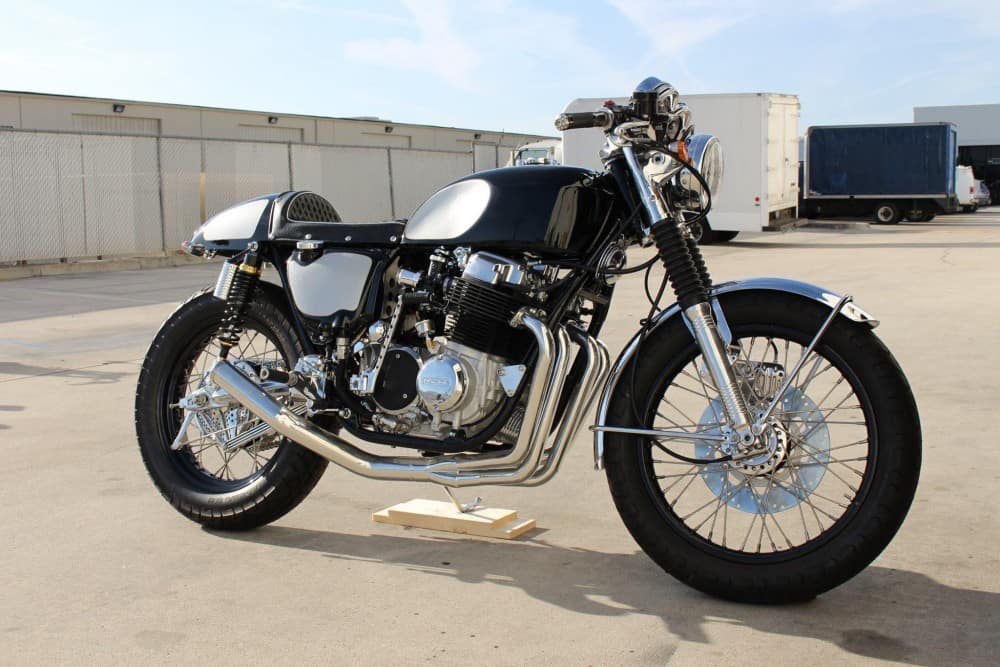
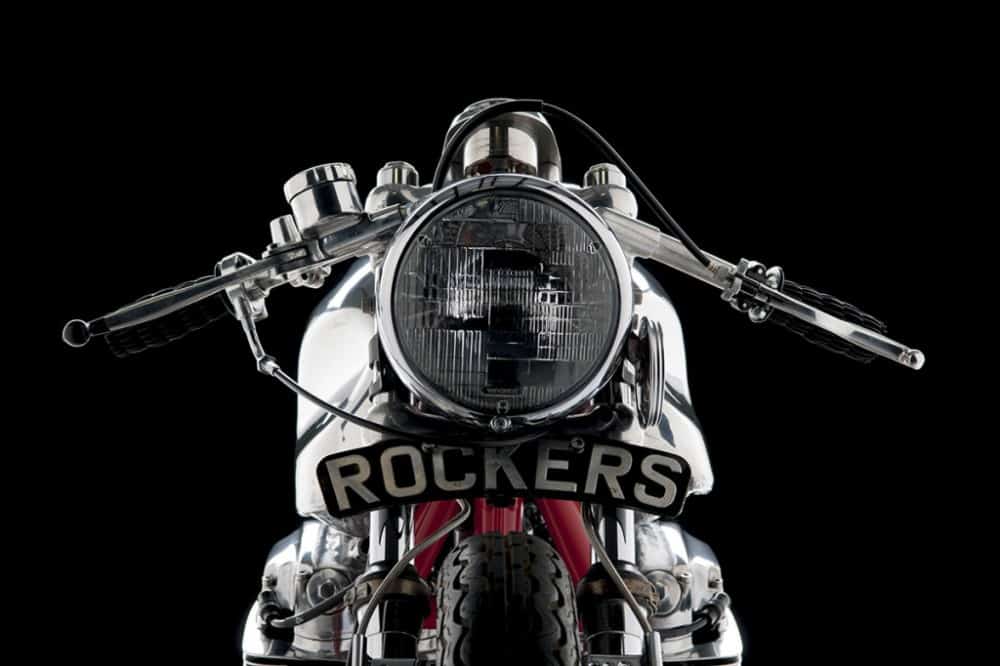
I have always loved creating My style of machine for Customers and this one is no exception, the KC Special turned out to be a great looking ride and the Owner Keith Conrad ( Hence K.C.) lives in Milwaukee and asked if I could revamp his old 1975 CB750 into a Silver and Black Cafe bike, I said sure thing and the deal was done, a build sheet was agreed upon and Keith sent the bike out to me.

I took the bike apart, right down to the frame, as I do all my builds, then I set about cleaning the frame up some what and smoothing some of the old factory welds, as Honda welds are quite rough back then as i guess they were hand welded and not automated as they are today.

As you can see, I took my time as I wanted the frame to really look nice in a Gloss Black on this build, I wanted it better than factory, so I took a long time to make sure that this Chassis came out nice, as i mostly powder coat my frames, unless I am using Candy Paint or Metalflake etc. Above you can see how Glossy the main frame rails are.

I took the stock gas tank and using my Egg Hammer, I pounded the sides to create Knee inserts, so you can tuck your legs in tighter to the bike and get a little more stream lined, just as they did back in the day for racing etc, this is no easy task and you will see how much it takes to do when you have a go your self, but worth the look in the end thats for certain.

The Paint scheme is High Gloss Black with Metalflake Silver panels and racing stripes and I really needed to make sure that this flowed well, and am happy with the result.

Plenty of Detail too, I hand machined out of 6061, a Custom Finned Oil Tank Dip Stick cap, this really did look trick, compared to the stock version.

Its like the saying says, the devil is in the detail and there is plenty to look at on this CB750 Cafe Bike and am stoked how the bike turned out in the end, worth all the hard graft.

The seat is one of my own that I manufacture, called “The Rocket 4” its a sleek sturdy and well rounded seat base that I produce and has the same curve as the gas tank, that way the body work then flows and give the machine the Status Quo.

Keeping in the theme of Old School styling, the seat upholstery was hand machined and small 1 inch Diamonds in white stitching with Silver piping and vintage snaps was completed to really make this stand out from the crowd.

I used an LED Custom Tail light that I offer on my website and this is bright as Einstein, and I think is a nice addition to the back of the Rocket Four seat unit, also the silver flake racing stripes really stand out nicely.

I machined some covers for the rear piggy back shocks as well as making some risers for the lower, to increase the ride height by 2 inches, out of 7071 Military spec Aluminum.

I also Chromed the rear swing-arm and hand made then Chromed a Custom Chain Guard to show the Gold 530 X-Ring chain off, I also polished the Hubs of the rims and painted the centers black to give a nice offset.

The Motor was rebuilt, as well as the carbs and synchronized etc, my Custom Oil lines were added in Black for a nice offset too, I fitted an oil Pressure gauge to keep the rider informed as to what is going on below.

As you can see, there is plenty going on here, I took a lot of time on the front sprocket cover and I even polished the rear set brackets for a more Custom look too.

Rebuilt and polished Carbs with hand machines velocity stacks from Steel Dragon really help the look of this bike and give it that Nostalgia look and it runs really hard too, there is something about hitting 6 grand on a 750, then you know you are starting to pull like a steam train.

People ask me about my gauges that I create on these inline four machines, and this one is no exception, unless I am restoring a bike, I don’t really care for the Honda’s Gauge faces as they are Green or Blue, not my favorite color of choice to be honest, wished they would of gone Black with White numerals like the Classic British machines, but oh well, so what I do is take the gauges apart and then I fit my Custom faces thats an overlay I print out, then repaint the needle and add chrome cups to embellish the bodys and give it a little more Custom look.

I have always liked to do this and it really does personalize your gauges, this time I went with the Cafe Racer Font and crossed Flags of which I think suit this Motorcycle to a Tee.

You may also notice that I have fitted a 2 inch handle Bar riser, to give a more comfortable riding position and easier strain on the wrists too, then fitted my Relocation bracket on top of the handle bar clamps to clean the top end of the bike up, with a BIG oil pressure Display light to match the Needle ends.

This is one tasty ride, the 4 into one system of mine is Ceramic Coated Silver, its a great look, almost a brushed polished Aluminum look to it, and she barks like a scolded dog when you get on the loud button, you will also noticed I machines a Finned Stabilizer Bar at the rear of the bike and did my usual drilling on the brake hub to let brake dust and heat escape under hard braking.

A lot of time and energy went into creating this machine and the owner really digs it, it is just how he wanted it and am glad that i was able to oblige with his demands.

The Customer wanted Gloss Black Rims with stainless spokes and he really did like the way these turned out on the bike and the attention to detail that I am known for on these inline fours.

I always fit an Oil pressure Gauge, as I do not trust the Honda Pressure switch thats behind the Barrels, so these run great and give true pressure as soon as you fir the bike up, as it is connected to the oil galley plug.

As you can see, New Levers, new Control switches, new Handle Bars, polished triple tree, New cables, New master cylinder and stainless nuts and bolts through out this motorcycle.

A great but solid Motorcycle, with aggression when you want it, reliability for everyday riding, and an awesome stance to give it that moving look standing still, sure does sit well in my stable.

I really did enjoy putting this bike together and felt good to know that I had done all and more than the Customer had asked me about, its one fine steed and I enjoyed slinging my leg over it.

I wanted to share it with you guys and Gals and hope you like what I have created too?

Maybe if you are in Milwaukee area, you might come across the KC Special? if you do, take a snap and send it to me, love to see it again.


Happy New Year Everyone

Here we are 2022 at last, man – What a crappy 2020 and glad to see the back of it and start a fresh and hope that we all have some good health and enjoy life as much as we can.

I somehow caught the Flu over Christmas and it Royaly buggered me up, Only about 80% right now but at least I am up on my feet, and I wanted to make sure that I did a bit of work at the house and get a few things ready for when My Barn arrives for assembly on Wednesday.

I have a few Projects I would like to finish this season and I hope my health gets a lot stronger as I took quite a whooping last year with Covid and the Flu, so lets all keep our pinkies crossed that we are all fine and can go and wrench on our machines to our hearts content.

There are many things that I hope to make and offer on my website for all the avid Motorcycle builders out there, I receive so many emails and texts about what you lot are up to, it drives me to help get your machine completed, and sure hope that you can complete yours this year to get on the tarmac for the new season when it eventually arrives where ever you are located.

Just wanted to wish you all a Very Happy New year and thank you for all of your orders, emails, phone calls and texts, I love chatting to you all and look forward to continuing great communication with you in this New year we have all started.

Look Forward to seeing what you are all creating and maybe see you on the road one of these days?


Here is something to have a laugh at at days gone by back home 1965.

Paint scheme I did almost 15 years ago

Well, it is almost the 4th July, the weekend is almost here, I was looking through my Computer and happened to come across this body work that I did back at home in my garage in the City Of Orange, some 15 years ago.  I didnt use it in the end and sold it on Ebay, never did see it again, I did a similar paint scheme to the HTML bike 8 years later but forgot I had even done something similar.

I had an old K4 Gas tank that was pretty beaten up and not wanting it to go to waste, I hammered the sides to give them Knee inserts a certain pop when you look at it, these take a while and I hand hammer them, but the end result is always cool to see.  They came out great and then I decided That I would have a play around with some paint, as I received some sample Candy Paint from a friend of mine.

I used a Candy Aztec Gold Base and added the flake with it and sprayed the whole tank and seat I had as a spare, then wet sanded it and masked it ready for the Candy Apple Red candy paint and laid that on super think, wet sanded and then a liter of Clear Coat to make sure it seals the color in good.

This was all experimental and was super glad at the way she turned out and, all in a garage at home, make sure you put a tarp on the floor and water everywhere as Metalflake gets everywhere.

I wanted to share this with you as to be honest, I had totally forgotten about this bodywork and now on reflection, how could I have forgotten about such a great color scheme for a motorcycle?

The Seat base is my own Dunstall assembly that I still sell many of on the website and it held the paint really well with no issues at all and was a breeze to prepare and spray.

I have always loved Metalflake and the likes of Roth, Barris, Watson, Starbird and Von Franco all loved to incorporate on their rides back in the day and when the Sun hits the color it really does Pop!

Wished I kept that now but I am sure we have all done that and I needed the money for electricity bill or something back then so it helped me out of a jam at the time.

Its a nice combination and very MV Augusta of the day, sure hope that you lot like it too?

So, I thought  that today would be a good day to show some old photographs of this tank and seat set up for a CB750 Honda and maybe it will inspire you to get out in the shed, garage or Porchway for that matter and have a go on your bodywork?

There are tons of color options that you can use and the end result will always wow you with Candy paint.

I think I have made over 100 pounded gas tanks over the years and never tire of it, albeit its a lot of hard work, but the end result is worth all that sweat.

I test fitted this on the bike I had just started, the Tenacuois Ton Alloy bike, so shows you how long ago that was.

A sharp set of Bodywork thats for certain, and glad that I took a risk on it, and all them years ago too, just makes me smile when I see this photograph.

I am building a few bikes this year and have some different Custom designs that I hope to incorporate into the bodywork, so stay tuned on my website for that.

Thank you for taking your time to read my Blog today, hope it at least made you smile, this is a very cool paint scheme that I am truly proud of putting out there in Cafe Racer Land.

Have a Super 4th of July weekend everybody.


One of my Old Dunstall 750 Honda machines

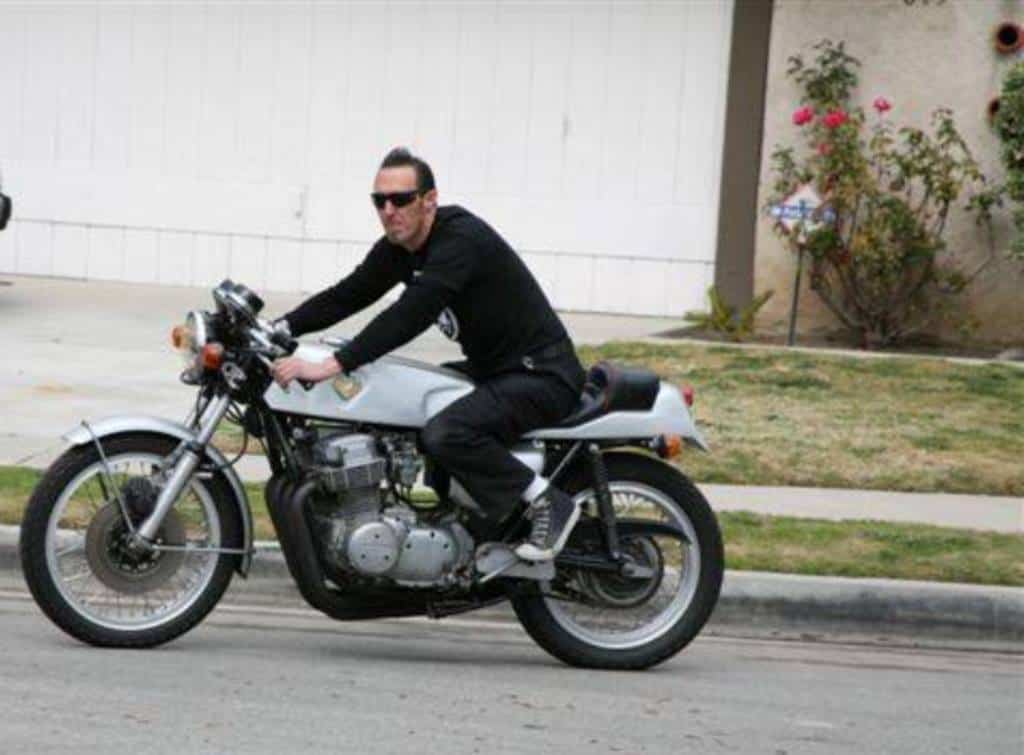
Wow! Where does the time go these days?  I literally forgot about building this bike and found some tiny photos someone took of me, so thought I would try and show them on here, so you can see this Classic machine once again.

Fun times when I lived in the City Of Orange, where I crated so many Motorcycles in my garage and worked everyday from Dusk til Dawn, creating cool crates out of Original old CB750 bikes that had been stored away for years or simply left outside to let the elements tear them up.

As you can see, I managed to rebuild an old Cafe Bike, it had Paul Dunstall 5 gallon Tank and a TT syle Manx Seat assembly, and was such a blast to ride around when I got it to fire up.

I had a set of Borrani rims on it too with Paul Dunstall rear sets, a rare find these days thats for sure, but this was a great little set up that I wanted to blap around town on for a while.

I have owned quite a few Dunstall Machines over these past 20 years or so and never tire of stretching their necks out on the back roads, just pure Nostalgia.

It had Dunstall Clip on’s and an Old Yoshimura 4 into 1 system too, I found it in boxes at a Garage sale in Los Angeles and dragged it all home with me with a big smile on my face.

The old girl ran pretty good once I had sorted out the carb issue, 3 blocked idles jets and a dirty needle base, then she wanted to fly, but- the Tires were rock hard, so decided it was time to revamp this old bike as I had a Customer wanted something on these lines but with more color.

The rear tire got wore out pretty quick and lucky for me, I get on with my neighbors as they got used to my daily shenanigans with Motorcycles etc.

Laying down more smoke than a Beginners BBQ lesson, I wanted to make sure that I had a little fun with this machine before I did some changes to it for a new customer.

I really didnt have any photos of this machine as I was so busy building multiple bikes, but wish I had taken a bunch back then to show others all these years later.

As you can see, I fitted one of my New 5 Gallon Dunstall style TT Tanks and one of my Custom seats too, this Motorcycle with its Candy Tangerine was a head turner in the Sun.

Hope that the Owner still has it and is racing about having a Blast as much as I did with this Classic cafe bike, it was fun to put together and maybe I will see it again one day?

Corona Diaries- The year of the Mask

Well, here we are, the weekend is almost upon us, things are still bad when it comes to Covid-19, this is a crazy time for us all, but- We have to live life and try and work the best that we can with what we have these days, and I hear from many Customers of their way to get through some of the lockdown and boredom, by working on their own projects in their Garage, barn, Shed or back yard.

I must admit, working with a mask on is hard, but lucky for me, I dont have people coming to my workshop to ask about parts, most will call, text or email about the issues they have with their ride.

I sure hope we find an antidote for this as I do miss riding with people and having a chinwag in person about pretty much anything two wheel related these days, but I shall continue to write a few blogs as I go along in life and share what I get up to in the garage.

I receive many orders in the day time and night, I think people sometimes believe that I work 24-7, and if I could, then I would, but I need my rest too, but, I do try my best at getting your parts to you as fast as I can but- due to this Virus, many places that I use are either closed or part time, so that holds me up in ceramic coating or steel supply etc.

So, if you can bare with me until this gets a little more manageable, I will en-devour to get your parts out of the door in a somewhat timely manner.

Be safe out there and hopefully we can get this Virus beat and all go riding like we love to, so- stay safe, stay positive and stay in the garage Wrenching.

Thank you so much for supporting me in this tough times we are experiencing in life.

Peace and Grease

Carpy


The Vesco Brat Bike Honda CB750 SOHC Rebuild Report

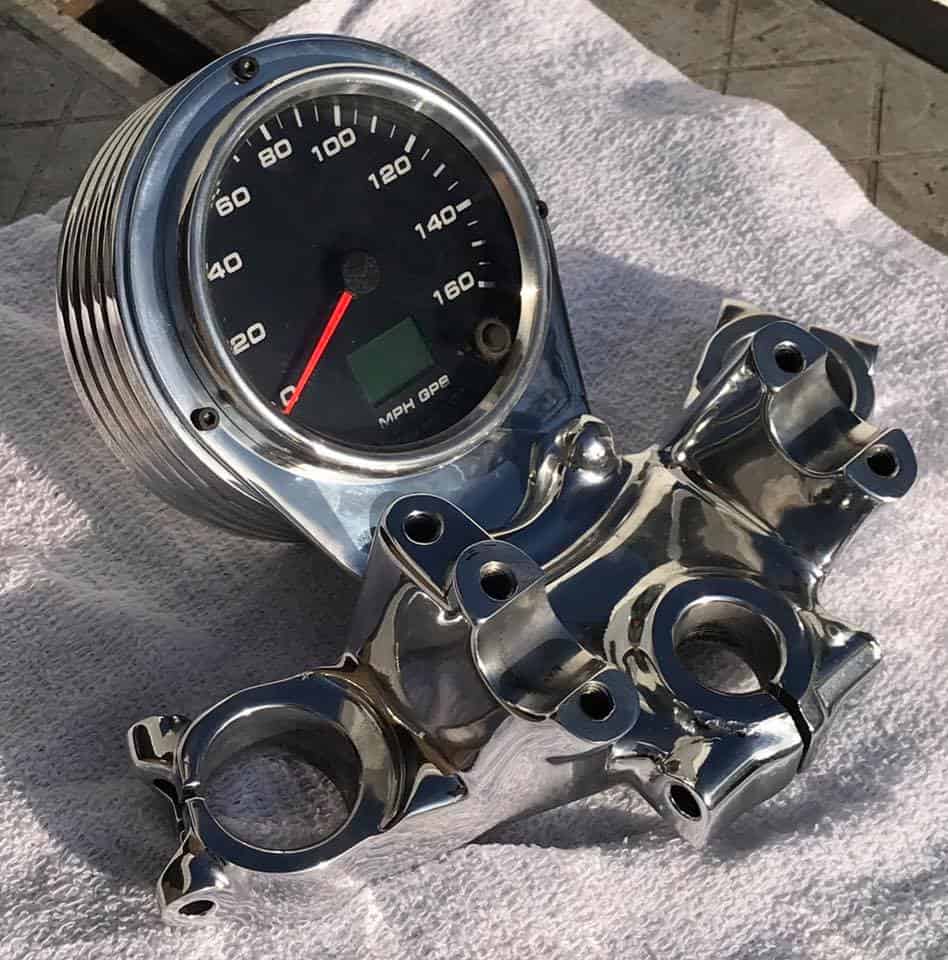
Well, the weather has been fighting me this month, worse Month since 1962 for the amount of H2O we have received and again today as we head to the end of February, we have more Rain coming down this week, so I need to try and use my time wisely and get as much done on this machine as I can.  Lets start off with the Triple Tree on this bike, as I wanted to change the Cable Tach and Speedometer and make something more Custom.

So, have a look above and you will see that I have started to make a start on the fabrication on the triple tree, first off I ground off the Original Factory outer tabs that housed the stock gauges, then I hand cut an Aluminum Holder out of a small sheet of Aluminum and made sure that it would be able to fit the stock location tabs that the Ignition switch used to fit into, and it looks great, if you look to the right, I already made a start on the Speedometer Bucket.

Not an easy task this but a block of 6061 T6 Aluminum was chucked up on the Lathe and turned down to the size I need for the Speedometer to sit snug and tight in the housing, also reliever three areas for the set up to really fit snug as a bug with no rattling about.

I wanted to incorporate fins into the casing as the front forks have this look as well as a few other features on the bike to make the whole concept flow and I am quite a big believer in that, I also need to grind a little more on the top triple tree and then smooth and polish to give the whole set up a look of chrome, no easy task too.


Now I am happy as its all Polished and the GPS Gauge set up looks really Custom, I machined Three 7/64 locator holes to allow the gauge to Clock right in the Location I wanted and have to say I am super stoked at how this now looks on the polished Triple Tree.

The bike I am creating is a 1974 Model Honda CB750 But I am using a later upper and lower tree to allow me to have the small tab brackets in the center and glad I went this route.

I wanted to create something that is different from the norm and I do enjoy what I call ” Newstalgia “, New parts with a feel of Old, and I believe I have created that with this.

I really like the look, the Gauge is 4 inches and the bucket is 5 ” and a strong solid appearence, I think it blends in well with the style of bike I am building.

So just a final clean up and then I need to pick the lower tree up from the Chrome shop, this should really set the whole top end off on the bike and glad I took the extra mile.

I will Clean up once more and add some polished Handlebar clamps that I make and she will be all ready for when I start to bolt all this together again, so in a week or two I can start to assemble the frame, it is still at the painters but not for long and thats going to be Silver Flake, should be a good contrast to the rest of the bike.


Thanks for reading my blog today and hope I have inspired you to get into the Shed, garage or lock up and have a go with your ride?


Re-Creating My Vesco HONDA CB750 Brat bike for the OG show in March

I am not and never have been a fan of dead lines, but right now I do have one in hand, March 23rd, thats when the OG show Custom Show is on and somehow I have to strip the Brat bike I built and hopefully finish it in time for the show.  No easy task when you consider that I have other jobs to do and of course, I have to tear the bike down to the bare frame and then make a start all over again.

So, the bike is ready to begin the strip, the bike will have a few tricks to the frame as I shall first remove the upper rails and then add my Custom Removable adapter kit to the top, this makes removing the engine so simple or just the cylinder head if you want to work on the bike with the motor still in between the chassis rails.

As you can see, I have used painters tape to mark where I want to make a cut in the frame to remove the rails, I use a sawzall for this job and will be using my steel inserts to replace what I am taking out of this 500 pound Honda CB750K machine.

As you can see I am making the first cut, when the kit is back in place, the integrity of the chassis will not be compromised, it will be rigid as hell, done many like this and of course YOSHIMURA did this to many race bikes and sold a Kit back in the day.


Once this is out, I shall clean the frame up using an air grinder with a Fiber wheel, this will clean the area up and then I can start to make the replacement frame.

As you can see, the inline Four Motor is ready to come out, and at 230 pounds, I want to lift this as quick as I can and not have to go too high, I have always used a storage moving Dolly to rest the motor on or put it on a milk crate as they are the same size, but Milk crates are getting hard to find these days, so a Dolly it is.

So, I straddle the bike and then with one quick lift, the motor pops up and I rest it on the frame, then walk to the right and plop it on the dolly and its out as easy as that.

So, the inline four mill is now out of the bike and I can push the engine into the garage where I shall work on that later, we have storms and rain forecast tomorrow for 4-5 days, so need to get this done and the frame to be stripped bare by the end of the day.

Right, now I can see what I have to work with as I plan and making the top kit first and thought I would share this as many people have purchased my kit and are happy how it works out for them and, saves them so much time when they need to remove the cylinder head or complete Motor.

Below is a little Video I took with my phone, you may have to hit the x on the lower right to hear what I am saying but explains what I am about to do to the bike.

Hopefully you could hear me mumbling about what I was doing and hit the enlarge button too if you want, look blow and you will see I have fitted the top rail kit and will weld it in tomorrow.

Below- I have now taped the area off here I need to make my next too cuts, as on this Custom build a I really want to be able to fit the engine easier without scratching the Metalflake paint that will be on the frame, this will be a very cool set up and the chassis will be strong as ever.

You can see the tape edges and that indicates where I will cut the side rail, this is something I have wanted to attempt for the longest of time and now is the time to do it.

Well, it is done now and there you go, I shall weld in the bungs tomorrow but have to make sure all fits will and make any adjustments before I completely strip the frame.

If you look closely you will see what I have done, once its welded and then the frame painted it sire will look pretty trick and make refitting the Motor so much more easier.

Make sure that you leave enough room for a strong bead of weld to secure the bungs and keep the frame rigid, but also make sure that you allow for any shrinkage.

Also, make sure that you Vee Groove a nice valley for a stronger weld, I also drill a hold halfway though in a couple of places, just for extra spot weld strength.

Here is the frame now that the adapters have been test fitted and I am happy about the way they look, not many would even notice until they see the inserts.

So Tomorrow and the next will be welding day, this old Honda frame has holes all over the place, so a good time to address them issues and make sure all is good.

I fitted some Tapered Races in the neck for smoother steering and looking forward to stripping all the old paint off this old girl and get into some fresh color that will turn heads.

Thanks for following what I am doing, I have a long way to go and hope that I can make such a short deadline, but appreciate all the emails of encouragement from you, it is going to be a great looking Custom when completed thats for certain, and already has quite a following.


Weld in Gas Cap Bung Project

Howdy all

Well my task this week on the old Vesco Honda was to try and get rid of the ugly gas cap and spring lock that the stock Honda’s have, for a start, this one was corroded beyond any help and I had to literally force the bloody thing open if I need to get gas into the tank and then, I could not snap it shut.

So I though I will go ahead and cut the old gas cap and neck off and use one of my own Weld in Bungs that I sell on my website, when in Rome right?

So, with gas tank in had, I placed it on an old old table and then proceeded to get the grinder with a cutting wheel on it, now, make sure that the gas is well and truly vacated that vessel, else you may be like one of Spacex Rockets and heading out of the ionosphere if you put any spark to it.

Lucky for me I had washed it out and aired it for some time, I still used an old BBQ Lighter on the end of a pole and lit it, just in case any fumes were lingering, usually you may get a pop, but nothing this time, so I knew I was good to start cutting away.

I removed the gas cap by simply using a metal dowel and tapping the holding pin out, the same as the clasp too, and now I am ready to bung on my Goggles and start the grinder up with a metal cutting disc inserted.  many a spark I must admit but all good, just took my time and went in both sides and she came off pretty fast.

So – all that was left to do was to use a Flap wheel and grind the neck flat and any old paint must be removed to allow me to weld a bung in later.

With that all cut off, I test fitted the bung and it was perfect, so stoked to get it to fit snug and now with a little more metal cleaning around the top of the tank, it was time to weld it up.

Then, using a Sincrowave 200 Tig Welder and Bronze rod, spot weld the bung into place, moving opposite to disperse heat evenly and not cause any  warping etc.

Once spot welded it is then welded slowly and bit by bit until the whole edge of the bung has been covered and is uniform, that is now done and looks so good to how the stock one was.

The next after it has cooled is to start to get rid of the old paint, I was not going to use paint stripper, that stuff works well but is so messy, I thought this time I would use a DA Palm Sander with 80 Grit paper and take the paint off the old way. There was Green Primer, Blue, Maroon and Black paint in layers on here and that sure would of made a mess with Aircraft stripper thats for certain, so sometimes the more traditional way is the best and to be honest I enjoyed the challenge.

Took less than 2 hours all told and now I am ready for paint, just got to decide how I want to go with color and design but I wanted to share this gas tank project with you lot on my website so you can see how it is done. it gives you a little sense of achievement when you get to this stage and I am now ready to sit down and see if I can come up with some paint color schemes to change the look of this 40 year old Gas tank.

I sell the kit on my website complete with Screw in gas cap too, so if you like me, are finding CB tanks hard to locate these days, try and make do with one thats damaged and simply change the neck and give the tank a brand new life too.

Of course this will have a little bit of Bondo on the tank to smooth it all out but, today’s mud is awesome and you wouldn’t know, even if you put a magnet on it, as the stuff I uses has metal particles in it.

So there she sits, I will put the New Gas Cap back in, I use a Vented Screw in style and this still looks Classic in a way and achieved what I wanted, this will look pretty cool when it has paint on it and will add photos later when I refit the gas tank back on the bike.

Still a while away from paint but thought that Ii would share what I have done as a blog and maybe it will get you motivated to have a go on your project?

I still have so much more to do to this old ride but it will be a fun journey and will keep everyone posted as to its build as I do more things to this 750-4 Motorcycle.

The Weld in Bung really did work out well and changed the look of the tank completly and I am looking forward to applying Custom paint to see how this turns out.

Thanks for watching.