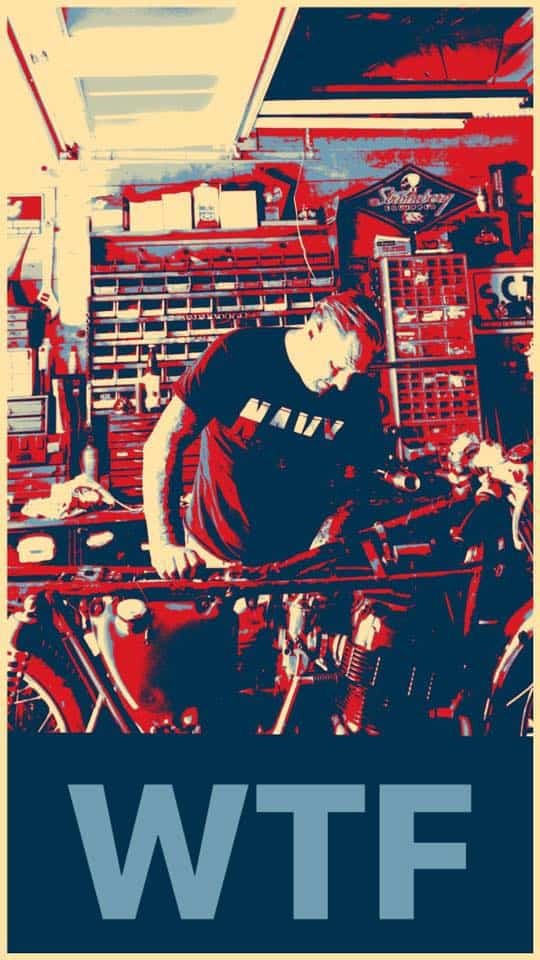
New beginnings for 2022, Looking forward to it.

The New Year is here, still a crazy world out there and I am not taking any risks to get ill again, I got all my shots, I then caught Covid and then at Christmas got a cold almost as bad as the New Omicron, what a shit start to the year for sure, but- I have got the cold just about beat, still coughing like a badly tuned motor, but I am on the road once more.

For over 20 years I have rented a building for what I do, we all throw away good money on rent and the Landlord is the only person that makes anything out of that, but- this year is all different, about 7 months ago we put in plans for a barn to be built on the 1 acre we have here in La Habra heights. We had to jump through the many hoops and have many inspections, but at last we are now making some great progress.

Once the Concrete slab was laid and left to cure for a whole month, we started to get the Barn ready to go together on Wednesday, the sun was out and the rain storm we had for a week before had gone, this is a really excited time for Carpys Garage and wanted to share some of the build with you.

A great Company that makes steel Barns for many years was the choice that we went for, robust and affordable, a steel skeleton is constructed and bolted with high grade bolts to the Concrete floor, this is a sturdy set up and am glad that we went this route.

I have no idea how I am going to decorate as yet, that all takes time and of course money, but the main thing is to get the workshop put together and then see what I can do to make it my own and have fun creating what I do from the comfort of home. And not a drive to work either.


This will indeed be the perfect place for inspiration and dont have to worry about parking, or the street sweeper etc or the Land lord coming by to increase their rent, this is a bitchin set up and super stoked to be doing this.

It is the perfect size for me and although will take a little time to dial in, it will be such a relief to jump out of bed and stroll up the yard to the Barn and begin to make parts or create builds to offer the Customers all over the globe.

I wanted a Red Old style Color Barn as the area we are in has many Ranches etc. And we thought this color will fit right in, hope to find an old Cart Wheel later to add to the side and of course old industrial Lights to mount outside, along with a Cow or Bull skull with Horns.

Lots t do but making great headway and will be a fun project as we go along, some might not understand the importance of your own workshop, but those who do, will really get how stoked I am to be in this situation.


Eventually I shall decide on a cool Barn door, as I don’t want just a regular roll up, they are noisy too, so I am looking into a few styles with Jennifer to see what would look good on the front.

It is also a nice wide opening, so I can get my bikes and Hot Rod in there with no issues, the run off is super good if we do get any more of the wet stuff.

Just wanted to share the news with all you lot, I know that a lot of you will be stoked for me and I look forward to making brand new parts here from the countryside of ideas.

Its Bulldog approved now and she will enjoy hanging out again in the garage as she was in many of my shops and loved hanging around in the workshop all day.

So, thanks for reading my little Blog and I will show more of when I have got other stuff finished in the Barn, but good things are happening and many thanks for sticking by me.


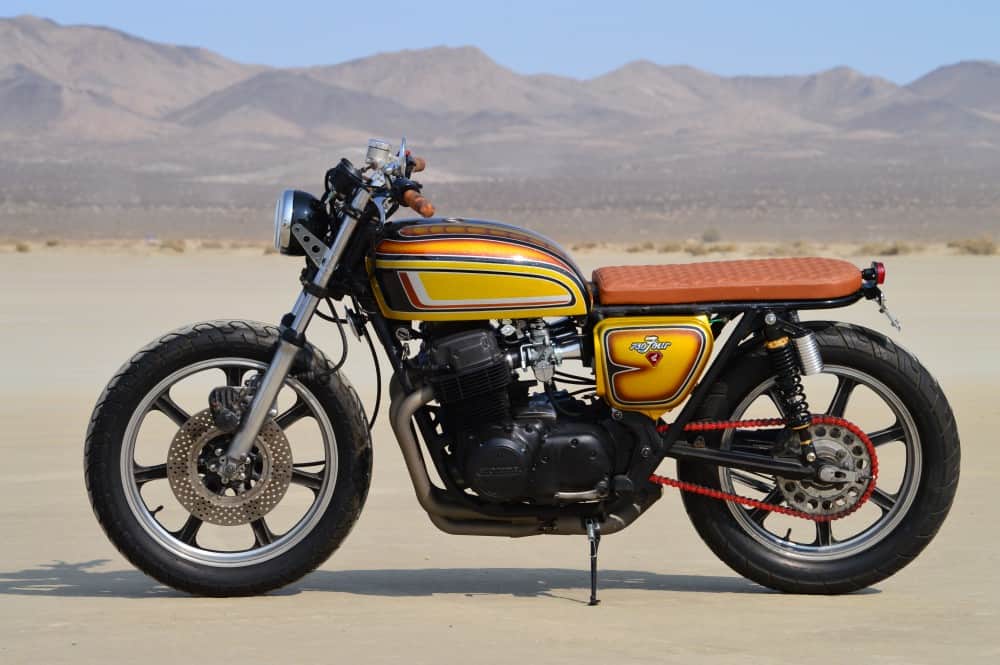
Thought I would show the New Little CB350RS HONDA that’s out and about, very Nostalgic looking, what do you think?

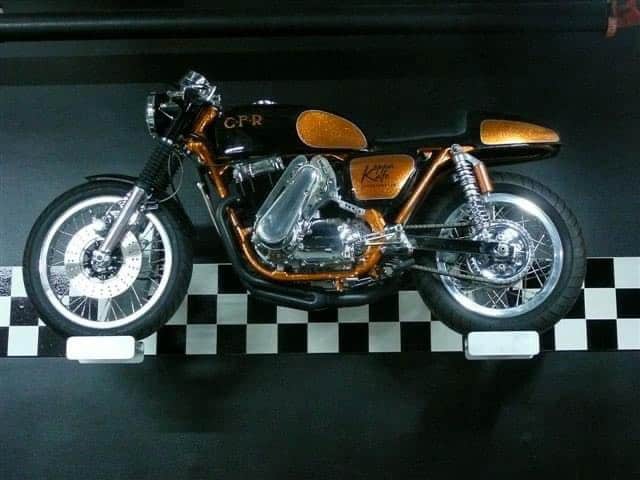
The Old Koppa Kafe was a fun Custom to create in my Garage.

No idea where the time has gone to be honest, but I always loved creating this machine, just because it has so many great Original parts on it that really did make people turn heads.

So I started off with a bunch of parts and already had the idea of how I wanted this, as the KOPPA KART was a famous Barris Kustom Truck that I had loved as a teenager and wanted to have some Copper Influence on this Motorcycle, but I had to do a ton of preparation to the Honda Duplex cradle frame to make sure all looks good when painted.


There was a lot of hand sanding and grinding of old Factory welds to try and make this Chassis as smooth as I possibly could, but also, I cut the neck and added a couple more degree’s to the rake, not too noticeable but I didn’t want it too aggressive, and I think this came out perfect for what I was looking for.

Also made up a Hoop and welded that to the frame, nobody was doing this back then and wanted it to finish of the seat that I was going to fit to it, and welded a bracket at the rear so I could attach the seat cowl and make it sturdy. But the most work that really needed some attentions was how was I going to extend the stock gas tank 5 inches, as I wanted a much longer fuel tank and thought that I may as well use some of my old spare gas tanks to cut up and make the change.

This is no easy task but, I was fortunate to have a bunch of K series Petrol tanks laying about in my garage rafters and thought the best way was to keep the front end and extend the tank backwards using sections from a couple of old gas tanks.

You can see the section cut and of course had the gas tank media blasted to get all the paint off so at least there was clean metal to work with, this will also have hammered knee inserts to give it that touch of Nostalgia of TT racing days and I was glad that I did go this route in the end.

You may not notice the stretch but its way past the original mounting bracket on the frame, you may also notice that I cut the rear exhaust and passenger peg supports down, this was to clean the lines up and allow for the lower part to become a bracket that my Italian rear Sets could attach too, I also braces gusseted the frame under where the gas tank sits just to give the frame a little more rigidity.

Here is the cross bracing that I did and used the pieces I cut off the bike, so it all got re used into this creation and I had not seen anyone do this before too so another added attraction I guess?


Putting this machine together in the garage was pure fun, I really did love the way the old girl was being revamped and as you can see, I did a lot of detail as at the end of the day, I was building bikes for a living now and this would be a great business card bike. many cool Parts and I used a pair of 18 inch Aluminum rims that were for a CB750 Automatic, of course I used to rear rims and then polished them to a chrome finish to give it a little more Bling.

So many hours were put into this and it became quite a challenge at times, but kept pushing on, I had to retap most of the thread holes as metalflake gets everywhere when you paint it and not use a booth, but I kept being persistent and it paid off, I used stainless Allen head Bolts through out the bike too, not cheap at almost a dollar per piece but makes the bike for sure.

Hand polished all the Aluminum and it took me forever to find an intake Plenum, I had one but it just would not fit, found out it was a Suzuki one, so thought to my self, ” Where the hell am I going to locate one of these Plenums for a SOHC?”  Then I got an email from a guy in Sweden who had a Suzuki and was Supercharging his but, his Plenum didnt fit and he thought his may be for a Honda.  So we traded and sure enough, when I tried to fit the Swedish one, it fitted like a glove. What were the chances of finding another eh?

What a piece of art it is too, so happy to be able to fit this to the machine and another tick off the list of things that needed to be accomplished to get the bike to the standard that I was after.

Just look how cool this Copper Metalflake looks, we used 3 pounds of the stuff to get the required depth that i was thinking of and a ton of clear coat was used to smooth it all out, but that Polished Aluminum offsets the Copper really well , what do you think?

I really was happy at the way the bike sat and looked and bit by bit I would get things accomplished, then I would push it onto the driveway to see how it looked in natural light.

I had Machined the front Lower forks and rebuilt them with New uppers, springs and this was a neat and unusual look as I had never seen anyone machine lower forks on a 750 before.

When I had these on the bike at Shows, people would ask about the forks and send me theirs to rebuild and give it that Custom look, it sure added some Custom touches as I painted the grooves Copper to go with the rest of the bike.

Finding someone to drill the correct hole on the stator cover, turned out to be a pain in the arse, I had one so called shop in another state have a go and messed it all up, so I did it my self and under cut the hole then used a drum sander to keep adjusting until the oil seal fitted tightly, and there you go, job done.

I had an Old Drouin Supercharger that was once going to go in an old chopper/drag bike and after I got all the parts I knew what bike I was going to build.  Now, the Motor I had was a fully Blue Printed motor, costing 7000 Dollars many years ago and this was perfect for the bike and thats how this came about.

I had a local company water Jet a bracket out of 7075 Aluminum and gave them a paper template, this worked out and treat and bolted right up to the SOHC motor with exact clearances, I simply Polished the bracket once everything was test fitted and you can see the Crank Pulley at the bottom fitted perfectly too.

All fitted and this Mechanical Washing machine looked Bloody awesome all hanging out of the engine on the Left hand side, it is Belt driven too so pretty quiet to be honest with a neat Polished Aluminum Belt cover for added coolness.

Yeah, it was an intricate bit of Kit to begin with but loved looking at this Motorcycle I looked at it as a piece of art and used as many pieces from a 1969-1978 Honda as possible.

I hand Hammered the knee Inserts using a Tear Drop Hammer from Eastwood Supply and this came out so nice with the Copper paint and boy did it shine when the Sun hit it too.

There is a lot of work here and those who have tried to Polish their Hubs will know what I am talking about, I also added a Double Chain and Sprocket set up as there was a lot of Torque here in that engine, I couldn’t locate one for the longest, but Azusa Chain helped me as this was for an Old Lathe and converted it to the bike and worked really well, ran a slightly wider sprocket carrier for the offset to be right.

I also fitted an Old Lockart Oil Cooler to the bike as it will run 15% cooler with that fitted and as the Oil Filter Housing has some broken fins, I cut them off and polished the body and it looked pretty good to be honest. I ran Braided Aircraft lines to the cooler too some Dash 12’s.

That’s an Original Lockhart Cooling Radiator too, I made a thick Aluminum Bracket to mount it to the Horn bracket and then polished it to look like chrome, it worked really well too.

That tank turned out so well, I used Por15 to seal it before painting and then pressure tested it at a Radiator shop, C.F.R was for Cafe Racer but in the style of the old H.R.D Motorcycles of years gone by.

This was My first attempt at making a Fiberglass front fender, since then I have sold over 500 of these to Customers all over the world, its 22 inches and has a bead all the way around it.

Cant get enough at looking at that, even today, it was a tough Motorcycle with loads of interesting parts and so Glad that I jumped in and had a go at creating this machine, there wasn’t many Café bikes at all about, so many people used to comment on what sort of bike it was and I think i was lucky enough to inspire a few people to have a go their selves and create their own unique ride.


My First attempt at a Custom Gauge, using an original one, I wanted to put BOOM at 140 MPH, got many comments on that and it was a great discussion point at shows etc.

I fitted an Original Series One Yoshimura exhaust of which was the pattern for all the systems I make today, I used a CB750 Connecting Rod for the license Plate holder, I later swapped the plate to the other side as the exhaust gases would tarnish the chrome lol. They are New Old Stock FOX shocks too and they really did give the ride height that I wanted on 18 Inch rims.


Allen bolts all through out the build and I did my drilling style on the sprocket cover just the break up some of the glow of the polishing, I have made many of these covers and sold to customers too over the years.

Rear Hub gets the same treatment and that’s an Original Dresda Boxed Swing arm that I chromed and boy does it look sharp on the bike, it really does accent that rear end.

I used Cow Hyde to upholster the Custom seat and used Gel foam for a comfortable ride and its a nice riding position with that 5 inch stretched gas tank.

Everything I feel on this Motorcycle Flows well, its such a warm color too, I hope that you liked just some of it as I know that you understand how much effort goes into creating a machine such as this.

Time has moved on and this bike now resides somewhere in Australia and hope the owner is having fun with that Custom built CB750 HONDA.

I took this bike to many shows all over the USA and had many great conversations with like minded people.

I think this was Seattle show but ALL the shows were super fun and made so many friends and acquittances etc. it’s a healthy industry now and I am still making many parts for these super fun inline four motorcycles.

I used a headlight from an Old DeSoto Automobile as I think it fitted in between the fork ears really well, I hand drilled the front Rotor using my drill press, I even made the bike stand.

One of the last photos before the bike made her way to the other side of the world but am proud to say I created that Monolith of a Café Racer.

As you can see, on the Right side of the bike, I fitted an old 1974 ARD Magneto, that too is Belt driven and gave the bike its Status Quo, she sure does sit well on the Tarmac too.

I used a Pontiac Taillight for the rear on My Custom Rocket Four seat assembly and I still sell them to this day and send all over the Globe.

Thank you for reading my Blog today, I just wanted to show you a bike that I really did have fun creating and love seeing what you lot are putting together. Below is a before and after shot.

Have fun with what ever you are creating and if I can help, you can call, email or even text me, I am always here to advise Thanks again and keep on building and Riding.

.

I started doing this here 19 years ago today.

Wow- Time does indeed fly by, on February 15th 2000 I started doing this and 19 years today I am still enjoying what I create and sell to you lovely lot.

Hard to believe that this 140 pound guy from North London, would be living his dream and doing what I always wanted to do, Motorcycles have been my life since a kid, I always look back and think how lucky I am to be doing what I do.

I have lost count of the amount of Motorcycles I have built since 1975, but I have never lost the passion for these 2 wheeled machines and dont think I ever will.

My T100 Triumph Daytona was such a fun bike but- it needed constant servicing, but that was the fun of it, getting to know your Motorcycle and how things work. I used to be a Dispatch Rider in the City of London and also up in Birmingham, riding thousands of miles all over the country and loved it, I worked for many companies delivering things everywhere, and knew there was nothing like being your own Boss and having Motorcycles.

I do sometimes miss that job as I got to see so many places, in the UK and in Europe but, the Danger was outrageous at times but that is why the money was so good, as we took big risks in what we do, and in all weathers, some Rain, some crazy winds and plenty of Snow and Ice. A major decision that I made moving here was because the weather was so nice and no more cold Knees and hand riding Motorcycles.

50 pounds lighter and more hair LOL- Loved that old bike too, it was a 1953 Sunbeam S7, I sure loved that bike and it looked along the lines of a Harley but was British.

I was self taught in Mechanics and loved taking snotty parts and transforming them into something very cool and different and I was hooked from day 1.

I hit the ground running in 2000 here in Southern California and built a well known Motorcycle out of the CB750 Honda Four, many people used to stop me in the street and ask.

“What is that bike” And I would reply its a Cafe bike, I got ask so many times that I painted on the tank the word  Cafe  in Old English, with Gold Model paint, using a modeling paint brush, then I guess I got noticed all over the place and started getting magazine coverage.

Roll on to modern times and I am still creating affordable parts to complete builds and want to than you all for being my Customers and look forward to speaking to you soon.

There is never a day thats the same for me in this industry and i love that aspect, there are always things to make, draw, build or repair and as long as there are second hand motorcycles out there, then I am good.

Where do I see this industry going? Well of course I have now seen the electric designs and although they look cool, they have no sound, I dont think I would like a dead quet machine, I like the roar of an internal combustion engine, I also believe in loud pipes save lives as if a pedestrian steps out in the street and an electric Motorcycle is belting along-Well theres a catastrophic accident waiting to happen.

I have manufactured thousands of exhaust systems for these old bikes and am gearing up to design more affordable styles and all made here right in California not oversea’s where the majority of systems are made by people not even into Motorcycles.

So, thank you, from the Bottom of my heart for ALL your support, you are helping my continue to live my dream and I hope I can help you, even if its just problem solving over the phone,

Thanks for reading my little Blog, right now I am building a Brat style Custom motorcycle and hope to get it completed for the OG show here in LA, but the weather is against us right now but we shall plug on. I love All motorcycles and glad that you enjoy what I do.


Thanks again for 19 years, the 20th year anniversary will have to be a bike created I think to celebrate an awesome milestone in business here.

Until next time, have a super weekend ahead of you and hope to hear from you soon.

CHEERS!

Vesco Honda CB750, finally running and enjoying some miles.

Well, its been a fun journey just to get the bike into the guise that I wanted, its no show bike, but could be with more TLC, not sure where I am going with the bike yet but I gotta tell you, every time I fire a bike up that has not been started since 1983 and click it into gear, there is always that hesitant OMG what if, feeling, but I went through as much as I could and was sure this would be fine.

The mechanical Clunk you always get as you click first gear, I let the clutch out bravely but making sure my finger is covering the brake lever just in case something is not right, I pull out onto the tarmac for the bikes first ever ride in so many years.  Well, 35 years to be exact!

She pulled off very smoothly, transitioning through the gears effortlessly, I was watching the Tach, the speedometer and of course the Oil pressure gauge I had fitted, just to make sure all was functioning OK, and she surely was.

2nd, 3rd, 4th and finally 5th and the power was smooth, no shuddering at all, the Exhaust had its velvet tone barking away as I increased the revs, up to 4000 and sped up to about 60 mph on a straight away, the bike felt great, my New Handlebars were perfect for this stance and the seat actually was comfortable for being flat.

Brakes were fine, just a little adjust to the rear but I think the brake shoes are more than likely shiny, but a few hard stops will sort that out, but I rode around the houses here in La Mirada at a nice constant speed, watching the Rev Counter to see if there was any bounce or fluttering, but all was good.

I do need to replace the fork seals and will do that if I strip the bike and build into a show bike, but- for now, I want to put some miles under her belt and make sure everything is ok for the next 100 miles, so only another 96 to go, but fun ones no doubt.

It was a mighty fine feeling, having this bike run and to run really well, all the hard work paid off and I was smiling all the way around the roads I took as I felt good today, I guise a sense of achievement.

Still, she needs cleaning up but, I can do that later on and of course, the more I do to this Motorcycle, the more I shall want for it, but this Vesco Muscle Bike is a great looking machine and turns heads even now.

Not sure if I need to add a front fender yet, will see, a Bobbed one may look cool and stop crap hitting you in the face at high speed, but this is a great Bar hopper, so may no need one.

Plenty I can do to clean the bikes lines and appearance up but the main thing was to see how she ran and of course handled, and I really do enjoy riding this machine.

Hope you too have enjoyed the build on this old machine, I was not sure how I was going to go with the look, but I think on this particular ride, I made the right choice.

Price? Well I guess if I was forced to let it go, $5000 would be the price right now as she is.


Working on an old snotter that came from the Vesco Family

I pick bikes up from time to time that some owners just cannot get going, other shops have had a go and no joy, and I picked this old bike up a long time ago from the Vesco Family, Grandson of Don Vesco, I left it in storage for a while and wasn’t too bothered as this has not run since the early 1980’s.

Don Vesco was an American businessperson, motorcycle racer, and multiple motorcycle land-speed record and wheel-driven land speed record holder. He set 18 motorcycle and 6 automobile speed records during his life.

This bike is a real mess, no idea if it will run but am determined to get this inline four running again, need to know how the motor is before I begin to rebuild it into a cool ride once more.

It has had a hard life and has been from pillar to post and no luck getting this old 500 pound SOHC machine to run again, but I know I can get it sorted, just takes time and patience.

There seems to be leaks all over the Motor, the kick stand has seen better days and there is oil and dirt all over the bike, would love to know what life it has led.

Has a weird set of clip ons that wont stay clamped on it and the wiring harness is old and brittle as well as the usual repair using different colored wire etc, this is going to be a pain.

The tach cable looks like it ended its life a few years ago and the end cap drive unit is still stuck in the valve cover, thats a good thing else the oil would come out of there when it ran.

Some funky wiring going on with horrible plastic sleeve covering, thats all gotta come off right now, so strange what some people will do to their bikes in the shed.

Top triples had seen better days and someone had ground the handlebar clamps off so they can use some later clip ons, but they are about a millimeter to wide and wont clamp down hard, I shall go back to a standard triple tree and fit some scrambler bars I think, just to get this bike as a runner for a while and see how she fares, then- I can decide a little later to strip and build into a Custom Machine.

Everything seems to be covered in oil or grime and crappy clamps etc, its had a hard life, but my main objective is to first remove the shitty wiring and connectors etc and then fit a new harness, battery, coils etc and see if I can get this old girl to fire up again.

The coils had decided to crap them selves and the wire harness was as solid as a rock, the California Sun had dried it all out and this has to all be removed right now.

As you can see, there are different gauge wires that have been added to this harness, the Fuse box is knackered and temporary connectors all over the place, just really bad work.

The carbs will need tearing apart but for now I shall pull the bottom end out and fit New main jets and Idle jets and see where we go with a new battery and plugs etc.

So now its time to do what I like doing and will see if I can figure out all the bad things that have happened to this inline four over the years, hopefully I can resurrect this 70’s iconic machine.

And we begin, it does take a lot of patients but its worth it in the end, I have to see whats up with the Motor first as that at least gives me an idea at the cost involved to turn this into a great looking Custom Motorcycle and it sure warrants that, seeing it was in the Vesco family.

12 interesting facts about land speed racer Don Vesco

Don Vesco doesn’t fit neatly into a specific category of motorcycling, but the one thread that runs through his career is the quest for speed. He became famous for his land speed records in the 1970s and continued racing through the 1990s.

Here are a dozen facts you may not know about Vesco, who was inducted into the AMA Motorcycle Hall of Fame in 1999.

1. Vesco was born in 1939 in Loma Linda, Calif. During his lifetime, he was a dirt tracker, factory road racer, drag racer, motorcycle dealer, race-team owner and land speed record-holder.

2. He was mechanically inclined from a young age, tearing apart model airplane engines and making them faster by the time he was in third grade.

3. As a teenager, Vesco parlayed his mechanical skills into cold hard cash. He would buy old Cushman scooters for $20, fix them up and sell them for $25.

4. In his teens, Vesco fixed up a Triumph twin and entered his first official race, a local drag racing event. Then he took that same Triumph and started racing scrambles, TTs, and eventually road races on an old military airport outside of town.

5. One of Vesco’s riding buddies, and his archrival on the track, was future AMA Motorcycle Hall of Famer Cal Rayborn.

6. Vesco won a lot of local road races in the late 1950s and early 1960s. He caught the attention of Honda, which was just coming into the U.S. market. Honda hired him to race its rare and very expensive RC161, a 250cc, four-cylinder racer, to promote the brand.

7. Vesco’s relationship with Honda lasted until 1963, when he took an offer from Yamaha, which was also just getting started in America, to race at the United States Grand Prix (a non-points-paying international race) at Daytona International Speedway. He rode a works Yamaha RD56 250cc GP bike and won the 500cc class. Also loved his Norton Motorcycles too.

8. By the late 1960s Vesco had already been a factory rider for Honda, Yamaha and BSA. He was even a factory rider for the little-known Japanese maker Bridgestone in the 250 GP class for a short time.

9. In September of 1970, Vesco set the motorcycle land speed record of 251.66 mph at the Bonneville Salt Flats in a streamliner powered by twin Yamaha engines.

10. In 1975, Vesco broke the 300 mph barrier in the Silver Bird Yamaha (powered by twin Yamaha TZ750 motors). Then in 1978 he broke his own record, turning 318.598 mph in a twin Kawasaki turbo rig. That record stood for 12 years.

11. Vesco lost an eye after being hit by a rock while watching a sprint-car race in 1996.


12. He died on Dec. 16, 2002, after a long battle with cancer.

My Triumph Thruxton Daily Ride

My 2013 Triumph Thruxton has served me well over the years, compared to my vintage triumph, this is chalk and cheese in the reliability league and the bike has given me many thousands of miles of fun and still does. it has now had 3 different guises since I acquired the bike from Socal Motorcycles and it certainly gets a lot of attention.

I bought the bike but it was the British Racing Green Color scheme, I’m not a fan of green but, stuck it out as long as I could but, saw so many this color, that I had to do a few things to make it into the bike I really want to ride. I first made a Diamond Upholstered seat for it, long before people were doing it and got a lot of compliments, then I set about designing reverse Cone megaphones in Stainless Steel, and that sure did get people looking.

Next up was to remove the swing arm and weld tubes in to make it look like drilled holes, then re-chrome it, soon as I did that, I fitted New Alloy Rims, wide 5.5 rear from Canyon of the TT range and this really filled the swing arm out nicely.  I repainted the gas tank and made side covers as well as the front fairing and the rear cowl, making the seat fold down to allow access to the storage compartment.

The New rims were such a change in handling for this machine, the fatter tire grabbed the tarmac like glue and this was a fun machine to now take out and enjoy .

I loved slinging my leg over this 900 and tear away up the road with a smile on my face, it was now a machine that was starting to get dialed in to how I wanted it, but there was another look I wanted after a while, I mean I also build and design bikes and parts, this is my business card, so always like to change things up and now its on its way to its third livery.

I removed the fairing and was contemplating a different look, so it came to my mind to fit An Alloy Gas tank and side covers, but, I wanted to make an alloy rear cowl for the bike, so with Egg shape Hammer in Hand I set about and made a rear cowl, then frenched a pocket into the rear cowl to alloy for a Vintage light but have a LED insert in that light, old with new.

Loving the look of this and am glad that i went this route, this time I wanted to change the seat padding and went for a soft Tan leather with Diamond Stitching.

Now this sure is comfortable and feels way better than the old one as I simply wore it out with my fat arse sat upon it all the time and this is now comfortable once more.

I now have my Alloy Gas tanl on the bike and sometimes I fit different seats when I make them to check for fitment and this bolted right up with no issues at all.

Right now here she is sat at home and I really do like the way she looks, Classic styling and its a fun machine, this afternoon I shall change out the grips to go with the New leather seat and give the bike a better flow and color coordination. I shall take some pics later in the week to see how they look and feel first.

The front fender I made from an old BSA mudguard and then welded some brackets to the side and the contour is just how I want it too, came out well and love the look of it. if you look at the lower part of the chassis, you see I have my own hand made Bash plate that I made out of Aluminum and then added a Bottle opener, just in case ya stuck when you are out camping.


The Zard pipes sound great and may polish them to get a mirror finish to accentuate the rear cowl that I made as I love how this has turned out as a one off design.

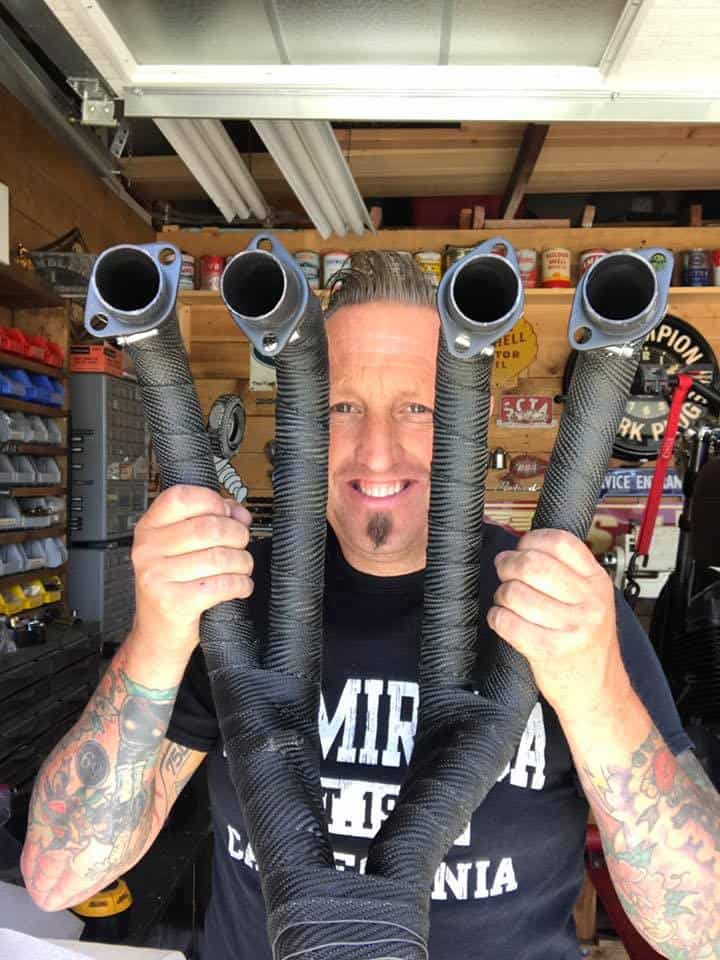
You will also noticed that I wrapped my headers, this was something I wanted to try with an Aircraft application and rather than the old school wrap, I thought that this would look pretty cool as a slip on heat Sock, and sure glad I went this route as these Performance pipes get bloody hot when riding.

I also have a set of Works Performance  piggy back race shocks to soak up the bumps, not cheap but my old shocks I had that were TEC, Blew the Nitros out of them when I was in the Canyons on a few pot holes, so a more expensive and professional set were purchased and I am also a dealer for Works Performance and so glad that I have these now as it is night and day on suspension set up.

I also designed and made the Knuckle Duster Heel guard, and offer that on my website as well, I then blanked off the rear passenger foot peg hangers to tidy that area up a little.

Bike now sits well and I am happy with the look, I will be fitting the grips and will show the pics on here so you can see what they look like.

I went with some Cole Foster grips, looked at many but thought that these would be best to go with my leather seat, and am happy with the choice and are really comfortable too.

Really happy with my choice and my hands will thank me later too.

Sat next to My Hot Rod, the Triumph looks happy in its new set of clothes, looks a different bike too, still a little more I want to do as I go along but, thought that I would share some pics on a Blog and see if you like what I have done.

Here is a list of what is on here.

Motone Alloy Gas Tank

Motone Side Covers

Cole Foster Grips

Custom Clip 1″ on’s

Wide wheel kit from Canyon

Custom Drilled and Chromed Rear Swing Arm

Upsweep Rear Polished Alloy Caliper Bracket

Zard Stainless Steel Exhaust Kit

Titanium Aircraft Heat Shield Sock

Speed merchant Finned Engine Covers

Wave Brake Rotors

Beringer 4 pot Brake Caliper

Hand Made Alloy Mudguard from a BSA

Hand made Seat with Leather Upholstery

LED internal turn signals and 6000 Lumens headlight

4 inch Chromed Fog light

Custom hand Made rear Cowl with LED Rear Light

Works Performance Piggy Back Racer Shock Absorners

Hand made Knuckle Duster Heel Guard

Joker bar End Mirrors

Lithium Ion battery by EarthX

K&N Pod Filters

Fender Elimination kit

Custom Horn

Hand made Alloy bash plate with Bottle Opener

Power Commander

Irridium Spark plugs

LED rear Turn Signals

TEC Front Steering Stabilizer

Custom Machines Foot Pegs

Rear Blank Off Plates On Hangers