Happy 4th Of July everyone

I love having this day off, gives me time to reflect how lucky I am to live in such a great country, I have always loved living here and especially here in Southern California where the weather stays pretty constant and ideal for taking your motorcycle out and about.

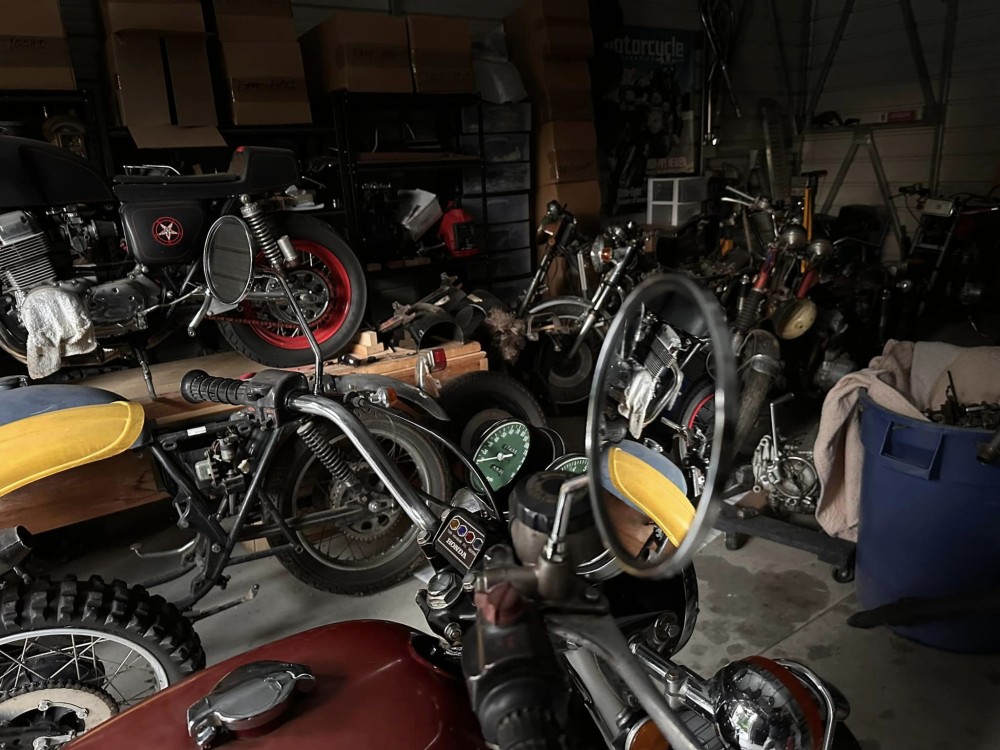
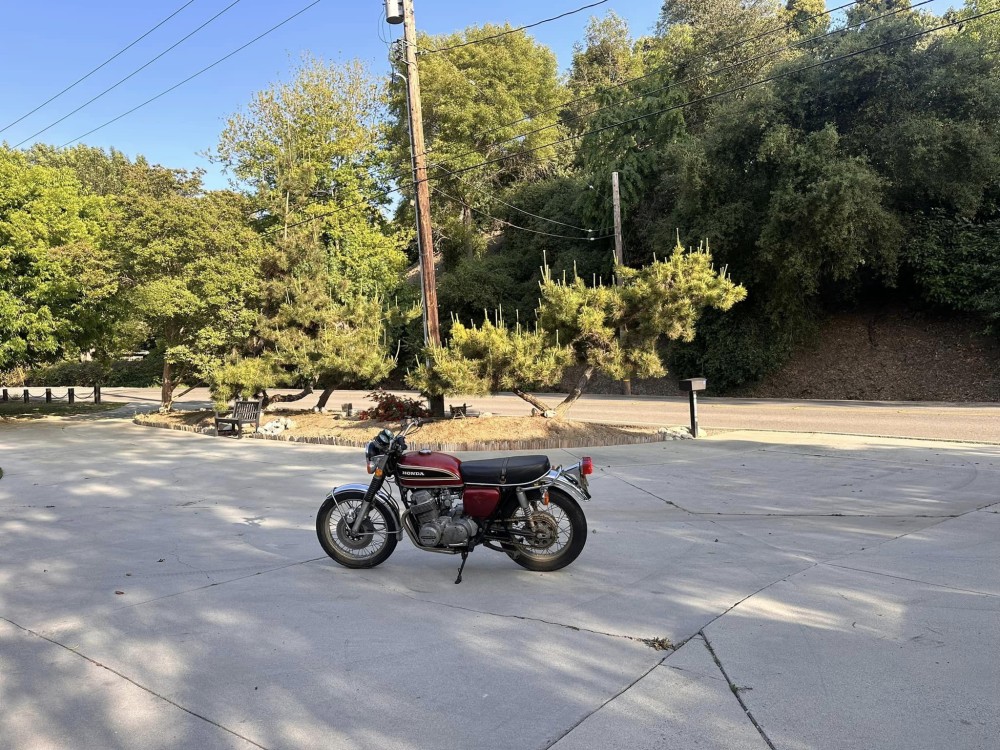
I have much to catch up on and as my girl is heading back from the East coast, it will give me some time to try and sort the workshop out a little as I have way too many bikes in there that need attention, I dragged a few out of gardens and the K6 that I am working on never ran since the 80’s. I was just going to see if there was a chance I could get it running, but it has turned into a project that I should of left alone. But you know how that goes, when you think to yourself that you will just clean this up, change that etc, well I have done so much I should of ripped it down the frame and started fresh. But it should look nice when done and out of the way to give me a little room to start on another one.

The rear wheel I just could not clean up, due to the rust that had accumulated from sitting in a back yard with sprinklers that went off twice a day for years, so I had to pull the rim apart and located a new old stock 18 inch rear rim and purchased new spokes. Polished the hub and fitted new bearings.

Next up was the beaten up rear sprocket carrier, its seen better days but do not have a spare, I have a 78 one but the offset is different, so I will try and clean this up as best I can using my little buffer wheel and some compound, but it wont be too show polish as I am getting too pernickety with this and really just need to get it running well and of course riding well.

As you can see, the poor sprocket carrier has seen better days, bearing is fine and will repack with grease but need to clean it up a little before I attach that to the hub and then the sprocket as well as the Guard, but that is at the chrome shop as I am waiting on that.

Still a little more to do before I am happy with it but at least this is getting back together and I am now waiting on the rear swing arm I took out as I have sent that off to get powder coated as that too was rusty and needed attention from sitting for so many years. But will keep you updated as and when I work on this old girl, it will be fun to ride with all new parts and will be dead stock, I now have Brand New 4 into 4 exhausts for it that I purchased in Japan, so this will look pretty cool once done. I will ride it a little then offer it up for sale.

Have a great day and hope you enjoy what ever you are up to in the world, I thank you for all your orders too and if I can help just drop me a line. carpy@carpyscaferacers.com


Honda CB750K 1976 getting a little more work completed.

I decided that whilst I have some spare time and a few parts etc I shall get into the K6 a little more and clean her up, as she has sat for so many years in a Back Garden, its only fair I revamp her a little and put her to a more Original style as to be honest, the 1976 CB750K Model was probably the best looking bike of them all and ran well.

So, I thought that I would try and clean up the lower front forks, as the factory clear coat has long gone and and as the sprinklers, hot and cold climates happen, the lower forks and anything aluminum takes a beating.

I jacked the bike up and removed the front wheel, I also made sure I used a pair of jack stands too, just to hold the chassis incase we get an earthquake here in Southern California, as 530 pounds is not so easy to pick up if its laying on the floor.

As you can see, the lower stanchions have seen better days, the pitting is caused after the clear coat gets eaten away by heat and moisture then aluminum will break down slowly in cold temperatures causing oxidization, of which you can see on the left fork lower, but I have refurbished so many of these over the years, I was not worried at all about cleaning these up to a more original look, but it does take a bit of dedication and hard work to achieve that goal, like anything else in life really.

After sanding the forks by hand, I start my process of buffing, using Block  compounds you can buy from shops, to my “Special” Secret Sauce that I have used for decades and slowly improved to get it to the standard that I like, yes its messy but that’s the reward afterwards when you see a shiny piece of art.

Its not a 5 minute process that’s for sure and the more effort you put in, the bigger the reward at the end, this is just its early stage and I increase pressure and change cutting compounds as I go along, remembering that this gets bloody Hot as you increase the pressure on the wheel.

As you can see, that is a good comparison with just a little bit of work, more to do but I am happy how this is going and people ask me how I get the finish on my Polishing, so thought I would share this with you lot today.

Yes, I wore gloves as these get super hot and being aluminum, they hold the heat for a long time, I am really happy how the forks are starting to turn out and am glad that I made the decision to pull the front forks and rebuild them.

So, a bit pf scotch pad, sanding block, then polishing will get you to this stage, I can go more but don’t want it too showy chrome looking and will rebuild these now, the upper tubes are total toast, as you can see below.

The forks at the top are always covered by the headlight ears but Honda did not take into consideration that the metal will sweat in hot and cold condition and of course rain etc can get down the forks and sit there, these forks are typical of the many that I have pulled out of the bikes over the years, so a common problem.

I believe Honda went cheaper on the chroming, using less on the forks as you don’t see it and putting money into the Motor, as I have seen hundreds like this and that’s always been the look when you drop the forks at the top. But I have a Replacement set of aftermarket ones ready to go.

I have always liked Polishing,I was taught at a old 17th century Barn when I worked for Rolls Royce as a kid and it always stuck with me and its so rewarding to turn something ugly into quite the jewel.

I use my circlip pliers to fit the snap ring into the lowers, a real life saver these are as you do not want to risk scratching the chrome by using regular pliers etc.

I try to use Genuine Honda parts where ever I can as the parts are top quality and of course guaranteed to fit perfectly, as many aftermarket parts do not.

I refitted the springs and will fill with oil when the wheel is on but still up in the air, that keeps the pressure off the springs and easier to fill the forks that way and not have the springs flying out towards your eyes if you put the bike on the ground.

So there you go, forks back on and they look so much better than before. I will be fitting New speedometer cable and New Tach and speedo gauges to clean it all up at the front, but she is taking shape and will continue to revamp her as I go along.  I will be fitting Brand New 4 into 4 exhausts to the New Honda spigots that you see in the cylinder head, also New footpegs and New kick starter and brake pedal, so keep watching carpyscaferacers.com and see how we go.


Honda CB750K 17,000 Miles 1976 $2500

Well the old 76K is now running, I pulled this out of a back yard, not run since the 80’s but now she runs and rides and all gears work fine too, I love this old inline fours and the tenacity of the CB750 is unsurpassed by any other model I believe.

The 1976 CB750K I think, is the best year, the petcock was changed to the left hand side, that way you did not have to take your hand off the throttle to turn it onto reserve, its a great all round machine and even though this has sat since the 80’s in a back garden, I managed to get the old girl to run and ride once more.

Sure,the old and tired Carbs needed rebuilding and New coils were warranted as the old ones were dried out from the California Sun, but I used OEM coils as I love Genuine Honda parts and not the Chinese rubbish that’s out there.

But, even though this old girl has been sat out in the back garden of a customers for many years, the fact that is only had 17,000 was awesome and internally the motor is fine, but, I still need to do more on this bike and if I do, of course the price will go up, but right now its $2500 and has a few new parts like carbs, coils, Lithium Battery, X ring chain etc, but I took out for a quick ride last night and she pulled pretty hard, had to take it easy though as old tires on it and I may change that out later.

Other than 4 into 1 the bike is all Original but needs a good clean up and I may do that as and when time permits, a great Platform for somebody out there thats for certain as the K6 is a great model to use as stock or a custom design of your very own.

She fires up and she runs through all the gears, only thing that isnt working is the headlight as i think its just the bulb as everything else functions fine, a good solid project that now has a new life and no longer sitting in a sad state not going anywhere, I love getting these old ladies to run again, its a great feeling to hear them bark back into life.

Have a look and it the bike on here, it may stir your mind into getting your leg back over one of these 500 pound inline fours, these a great machines and I continue to be amazed at the Longevity of these 500 pound Motorcycles. They will run with a little clean up after sitting for decades.


Have fun on your machine over the weekend.

It’s Saturday and the weekend always seems to fly by and then by Monday you then remember what you wanted to do and forgot to do it, Right?  It’s always the case for me, I try and do my own stuff on the weekends and I really enjoy it, plus the weather is getting better and the days longer and that’s a blessing for all us Bike enthusiasts.

I have a bunch of bikes in the Brn, many I picked up locally and slowly I have to try and resurrect them to at least, a running condition, but sometime the order is taller than a Yard of ale and I do have my work cut out and huge challenges become a major headache, broken bolts, seized motors, electrical is falling apart and getting more shorts than a Robot made in China.

And then there are the ones that you grab as nobody wants to even look at having a go to clean all the bird shit off and see if the faithful old inline four will come back to life, you would be amazed at how many do, that’s testament to the Japanese engineering and the sturdiness of these 500 pound classic machines.

Just get out there and enjoy life, these are such a great Platform to create your own style of motorbike and still plenty of the models out there around the globe mostly sitting in some dark corner, waiting to be discovered and you will be amazed when you kick the motor in the guts and she fires up, once that happens its all systems go to try and get her back on the tarmac, then go and get plenty of miles of smiles.

Be it stock to a full custom, I know that you will enjoy creating your very own Motorcycle and there is nothing like slinging your leg over and taking on the curves and straight aways that literally await you.

Have a fun weekend with your Big 4 Machine and if I can help, shoot me a line at carpy@carpyscaferacers.com or drop a dime to me at 714-598-8392 and I will do my best to get you back on the road so you can wheelie away with a smile on your face.


Doing some electrical on a K5 CB750 Honda Four in the Garage today

Well, Project Wire harness is the goal this weekend, I have a customer and friends, 1975 CB750K model Honda four in the Garage and it apparently wafted out a bunch of smoke under the seat, so it was bought here on the back of a truck and here it is at my place where I need to take a look at whats going on with this old 500 pounder.

I need to see what has happened the the wire harness and switches as these do look like they have been on there since it was created in late 1974. Just a few vids I did today with my phone, sorry for the quality.

Below, just look at how dry rotted the connectors are for the wiring, this old bugger has got to be all taken out and replaced im afraid and new switches as well.


Bit more video

I wanted to try and at least record what was going on today and I went on facebook and did a few video’s etc, may not be very clear but you get the idea I think?

Motorcycle ‘s built in your garage are still as popular as ever

Well, time seems to fly as of late, been doing a few things and it has been hard to try and blog anything these days, the clock just seems to tick away so many times faster than before, but I thought I might at least start one today and tell you about the old Super Sport I am putting together.

I have had some Hard Bags in my storage for some time, I last fitted some to Jennifer’s Triumph some 5 years ago and they are still holding up well, and as I had this old 500 pounder to play with, I thought I would use these bags and make a Little Dispatch style bike that I had back in the UK as I was a Motorcycle Messenger. Sure i love the cafe bikes, been parts of my life for so long, but- when you need to take a bunch of stuff with you on a journey, what do you do?

So I am making up some brackets to fit to the bike so that I can tale stuff with me, ie to the chrome shop, or powder coaters etc and these bags will undo with a coupe of bolts and the bike is naked again.  love it or hate it, these are part of my life back in the UK and though that I would build a bike that I can blap around on and make it look a little different to the many I see out there these days.

I think that once the Bodywork is all one cohesive color, then these bags may not even be noticed to be honest and am excited to do something that I used to when I lived in Great Britain, you dont see many bikes like this with bags on but its common place if you were a courier and I am going to give it a go, still a long way to go as yet but it is taking shape. So follow me on this little build and we shall see where it takes me.

I grew up with these bikes and even with bags on, you would belt around London, Birmingham or where ever, to get where you needed as fast as possible, it was such a fun yet dangerous job back then and loved every minute of it.

PHOTO BY DAVE GURMAN-https://www.wemoto.com/news/article/1100/motorcycle_couriers_then_and_now


The Harlequin Honda 1975 CB750F Super Sport

Well, here we are with the Harlequin Honda that I have created, its been a long build as originally the Motorcycle was bought down from Washington on November 4th 2015, Edwin Cooper was not well, he had Cancer and wanted to try and revamp his trusty old Steed that he had had for many years, he wanted me to do something cool with it and loaded this Motorcycle up in the back of his pick up and came down with his daughter and dropped the bike off.

I helped him unload the 1975 CB750 F Super Sport, it was heavy, the brakes were sticking and it really did need some love, but- thats what I do and was more than willing to bring this motorcycle back to life and breathe fire once more.

This would prove to be quite a challenging creation, as there was a lot of time and weather that had passed over this machine, I have been there many times but I am amazed at how many Motorcycles that I have built that were all in this condition, some a lot worse too.

He had started to Cafe the bike out a little, many moons ago, hence the Shortened Headlight ears and the Italian Tarozzi rear sets and an old 2 Four seat that dates back to the Mid 1970’s.

Have a look and you can see that there is a lot of stock parts still on the bike, like the chain guard Gas tank gauges etc and of course the old wiring, and that had seen better days for sure, the weather can totally destroy a wiring harness in just a few seasons, especially if the temperature gets hot then col, it dries the wires out and makes them fragile.

This also has an Old Yoshimura 4 into 1 system on it, seen better days but nice to see none the less, that is now fitted onto a AHRMA race bike and gets used all the time.

As you can see, the Birds nest wiring will need to be completely stripped out, soon as I see toggle tops and electrical tape, I know that it needs to be removed right away, else it will be a headache that you do not need.

You can see where Mother nature has taken a firm grip of this Motor, Oxidization is a mean Culprit by the look of it, the Plug caps were so weather beaten, as I tried to remove it, the cap cracked and fell into many pieces.

I wonder what sort of critters over the years had chosen this 1975 inline Four as its home? Nothing really surprises me these days but intrigue always does and if this bike could talk, well, I think we may have a fun movie in the making.

The Carbs were locked up, seemed to have dirt and grit from everywhere and a little wasp nest in the Carb body itself, Mother Nature really took a hold of this one.

I loved the 1960’s Hot Rod Stewart Warner Mechanical Oil pressure Gauge, I am also a Hot Rodder, so this made me smile when I clapped eyes on it, poor motor has a lot of oxidisation on it though and will take time to remove and clean all that up.

We have a multitude of issues here, the rear brake caliper is seized up, piston is stuck and seals are shot, Rear rim is toast, the same goes for the rear shocks too, the swing arm looks like it has come from the bottom of the Baltic Sea, this will be a down to the frame build for sure.

Low miles too but the weather makes it look a lot worse to be honest, nothing that cannot be fixed though and this Super Sport will see a Brand New life and Look forward to sharing the photos when she is completed.

Front Brake caliper is also seized up, the front forks need rebuilding, Rotor needs to be skimmed and New rim built.

Unfortunately the rims had rusted right through, so all that I shall use is the front hub, Rotor and Caliper body and will refurbish all that I possibly can to this grand Old steed.

All the wire harness was Rock hard from being baked in the Sun, the rectifier and the regulator will be discarded, and I shall be using a New Harness, along with a solid state rectifier module, as I use them on ALL the builds that I create, cant trust 40 year old electrical anyway.

I know that this will have a different look by the time I have finished, not sure how just yet but- It will look pretty cool none the less and of course, Function well too.

So there she sits, before getting transformed into a cool Custom Machine and I am looking forward to tearing into this to transform into some cool eye candy.

So it is time to push this 500 pounder, into the garage and start to take this motorcycle apart and figure out what I am going to do to this 1975 CB750F HONDA.

And so we begin, this will be a long Journey with some hiccups along the way , but I know that it will look a lot different by the time this comes back out.

I started to go the route he wanted, to go with his motorcycle, then all of a sudden from out of the blue, I had an awful phone call informing me that he had just been in a Motorcycle accident on his Harley and did not make it, I was gobsmacked, and, the family were too, they didn’t want another Motorcycle in the family and I understood that, so they gave me the bike and said do something cool with it.

Above, I hand bent Raw steel and then Rolled the rear, welded it and then began to do a little more to this seat base as I want it to be able to take a passenger, as all you see are single short seats these days.

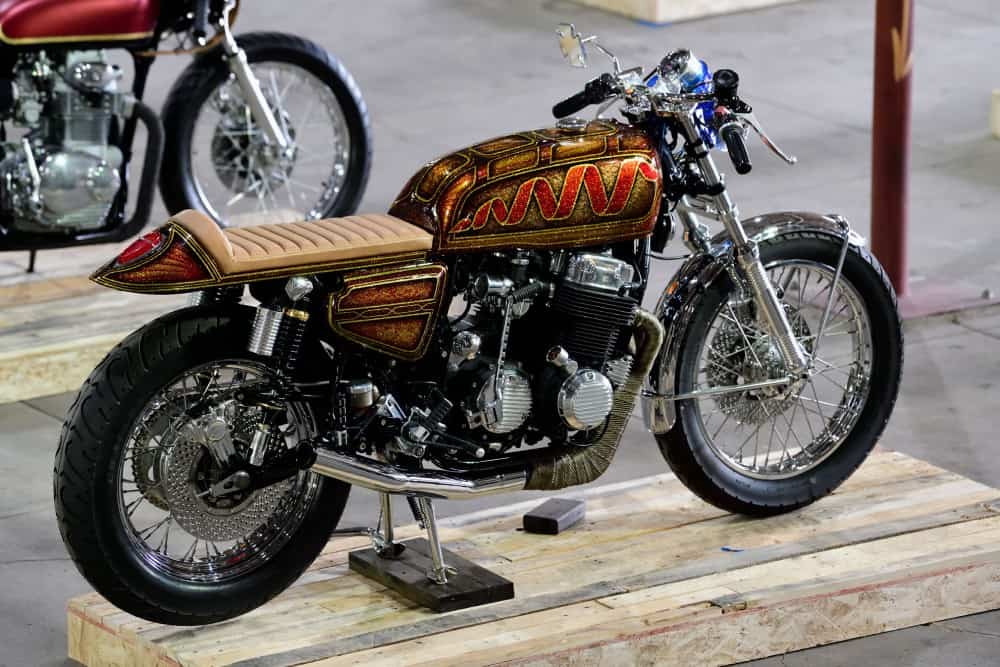
So the transformation began, slowly and I am happy at the end result, I named it the Harlequin as it has so many Colors and my Favorite Candy Bar is TWIX, so you can see that too right?

A lot of flake and detail but wanted that old school Low Rider flake that was about when I was a teenager back in the UK in the 1970s, when the Sun hits the Gallon of Clear coat, you will discover why metal-flake was so popular back in the day, a Kaleidoscope of Candy colors pleases the Cornea.

I have created over 50 Custom HONDA based Motorcycles since moving here in 2000 and every time I start a creation, I have to sit and ponder for quite some time, I am glad that I had no deadline, so the pressure was off and as and when I thought of something cool, I would just do a little bit to the bike and then back to work on other customers parts etc.

I fitted My Sidewinder exhaust system to this build but wanted to try my other sets ups as well, just to get the look and later, hear the different tones of my exhaust systems and decide which one I will like, this is ceramic coated but think I may end up using DEI Titanium Wrap on the header and maybe triple coating the tail pipe in Chrome, we shall see. Below is the Hot Rod tail pipe that fits to the Sidewinder header, a crisp and Velvet bark and as you can hear, very responsive to the throttle.

I have sold many Hot Rod, Side Winder and Razor systems through out the world, all made right here in California, none of that made in china crap.

I fitted a small 5-3/4 Chrome headlight to my Custom Fork Ears, and wanted to create a different look to the front end, so I went with a Biltwell Bubble Visor from their Helmet catalog and this worked out great as a mini nose fairing, even threading the clutch cable through the Plexi Glass.

I wanted to mix Old School with New and decided on using a GPS speedometer but with that old school Smiths looking gauge face and needle that still sweeps, this worked out so well.

Here is the old bucket I used and Tig welded to my custom bracket, just needs polishing and I shall also be fitting small LED Amber display lights for the turn signals to plug into.


I used a old Bucket and welded a bracket I water jet cut and it seemed to go right in and the great thing with this is that it has just a power wire and an anttena wire, you are all set to go, even has a LED red back light too.

This was the right look that i wanted and am glad that I chose to go this particular route, gives the machine just a little more character and style.

Here is the Harlequin outside out Home, so cool to see it in the sunlight and I am super stoked at the way the bike turned out in the end, a long but rewarding Project that really does turn a few heads.

Plenty of eye candy to look at on the bike, the Paint alone is super cool, and as the saying goes, “The Devil is in the Detail”

I am proud of this Build and being a steel tank and seat, this is a sturdy machine that is no light weight for sure, it stands tall too, many do not do that.

The Harlequin sports my Custom 4 into 1 Exhaust system, The Side Winder, I Ceramic coated the header, then wrapped DEI Titanium Heat wrap onto it, to give that Hot Rod styling, then I triple chromed the rear tail pipe and it sits nice and snug and close to the bike, this turned out so well and a system that I offer on the website for all SOHC Models.

A fun machine that was a real joy to create and will be on the show circuit around Southern California this year, hope you can come and check it out some time, be glad to see you.

I removed the old Super Sport Gas Tank Flap that used to hide an old tin cap, I then welded a Harley Bung and fitted a Custom Gas cap, looks so much smoother now.

I also did a few other changes to the bike by machining the forks and making a Brace bar out of 6061 T6, and of course a 1971 Rectangle fog light to show the European Spirit here.

So many New parts, this is like a Brand new Motorcycle now and the more you look, the more you see a little more custom touches throughout the ride.

Photo Credit: #RahoulGhose

This is a cool shot at the Outliers guild show in Down Town LA last week, stoked to see it on Display with other cool machines from around the state.

Photo Credit #RahoulGhose

Here she is sitting loud and of course proud to be representing, at the OG show in LA, a very cool event and I really enjoyed it.

A classic look of the Custom years back in the 1970’s when I was a Teenager, this came out so well and super stoked at the response I received at the Outlier Guild show.

The 1939 Ford Lincoln Mercury tear drop LED tail light set off well in the frenched pocket I created, I also had made the steel cowl and seat base.

Photo Credit #RahoulGhose

It has been an amazing year and to get the Harlequin completed is another notch in the post of creativity, I strive to do the best I can and hope that you liked the build?

Like I said, I had a great response for the bike and even the band that was playing loved it. Band- WOOLY BANDITS- Singer- Christa Collins.

Thanks you for everyone that came up and spoke to me, I was super stoked, this is a great creative family and super glad that I was a part of it, I look forward to attending more.

In Memory Of Edwin Cooper, I am sure he is smiling from above.

Below is  a list of of things done to the Harlequin.

  1. Machined and Polished Front Forks.
  2. Machined Aluminum Fork Brace.
  3. Polished Hubs.
  4. 19X40X1.85 Chrome Front Rim.
  5. 18X3.5×40 Chrome Rear Rim.
  6. Stainless Steel Spokes.
  7. Hand Drilled Rotors.
  8. Custom Piggy Back 14 Inch Shocks.
  9. Polished and Rebuilt Rear Caliper.
  10. Braided Steel Brake lines.
  11. New Chromed front Fender.
  12. 5 3/4 Chrome Headlight.
  13. Biltwell Helmet Visor.
  14. Custom filled and smoothed S.S. Gas tank with Harley Cap.
  15. Hand made Steel Seat with leather Tuck n Roll.
  16. Metalflake paint.
  17. Hand Made Clubman Bars 7/8.
  18. Biltwell Grips.
  19. Rebuilt Motor with Polished Covers and Wrinkle Paint.
  20. Restored Carburetors and synchronized.
  21. Drilled and Chromed Kick starter.
  22. Wrapped Sidewinder 4 into 1 exhaust with Chrome tail pipe.
  23. GPS Speedometer.
  24. New master Cylinder.
  25. New levers.
  26. Tarozzi Rear Sets.
  27. New Challenger tires and Tubes.
  28. 1939 LED Tear Drop Tail Light.
  29. LED RED rear Turn Signals.
  30. LED display lights.
  31. Polished upper triple tree.
  32. Powder Coated frame.
  33. Lithium 12 Volt EarthX Battery.
  34. New side covers.
  35. Chromed Center stand.
  36. Chromed Side Stand.
  37. 530 X Ring CXhain.
  38. New wire Harness.
  39. New handlebar switches.
  40. Oil Pressure Gauge.
  41. Battery Tender.


HONDA CB750 BRAT BIKE

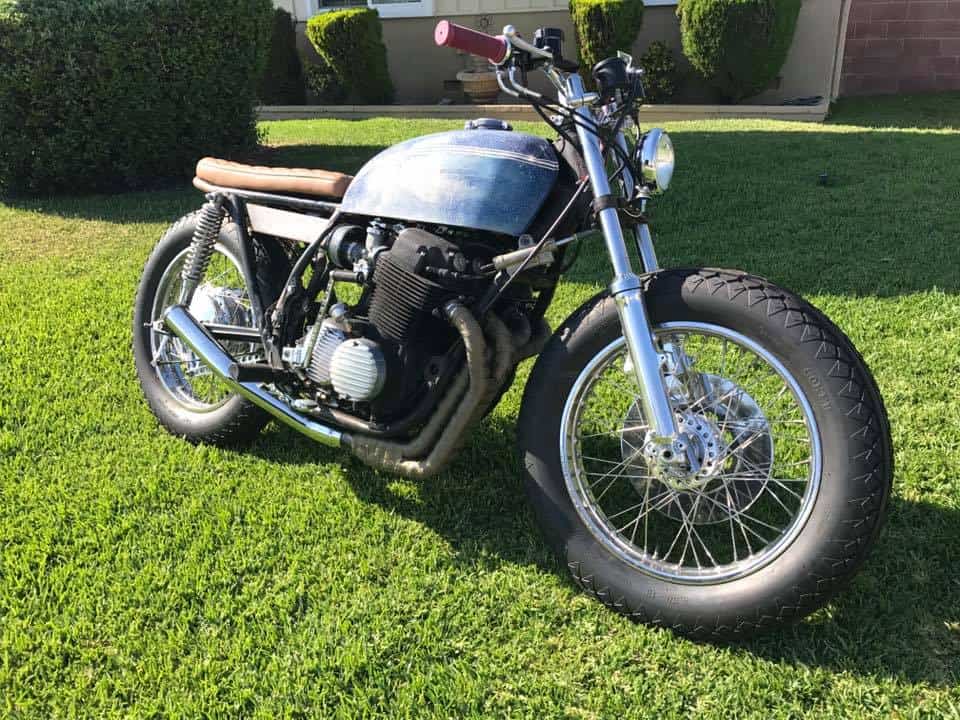
Well, here we are with a 1974 Honda CB750 SOHC model that was turned into an old Land Speed dry lakes Racing bike many many moons ago, but have no real history documentation of what it achieved back in the day etc, but- you can be sure that someone thought long and hard as to what they may do with it.

Last year this was a total mess, it was too dangerous to even attempt to ride, so, it sat for some time in the corner of the shop of mine, until such time as I thought that it needed to have a new lease of life and restyle this inline four 500 pounder into something a little cooler.

As you can see by the photos below, it was not much of a looker but- it did intrigue me to see to what lengths people would go to with these iconic Honda Fours, and I just let this bike sit until I decided it was indeed time to resurrect this sleeping giant. I removed the Old wheel and Built 2 Brand New Rims, with Polished Hubs and Stainless Steel Spokes, Both 18 inch rims.

18

So, time has gone by and over the past few weeks I have changed a number of things and I am sure that you will notice a difference right away, this is NO show point for sure, I just went ahead and changed a few bits and bobs as I pulled the old rusty and non usable parts off and either refurbished, remade or purchased New parts to slowly transform this inline 4 into a cool looking Bar hopper Brat style machine.

Below is the bike with another Gas tank, fitted with a New OEM genuine Honda Petcock, then I have totally rebult the old carbs, vapor blasted and rejetted them to the pipe, the parts taken off were zinc plated, polished and re-assembled.

20

Some of you may not even like what I am creating here, that’s fine as we all have our own tastes, but, if you are reading this, then of course, you must be into seeing what is becoming of this Single Over head cam Motorcycle. I wanted a Brat style machine and every few days at a New part, some of the work I have created has taken many hours and sometimes days to get it right.

22

Just have a look at the front forks compared to the old ones, as I took them apart. cleaned everything internally, then Polished the lowers, fitted New genuine Honda Fork seals and then Brand New Chrome Fork upper tubes, with New springs and caps etc, I also set the pre-load with stainless washers, just like back in the old days of racing.

sling shot1

I also cut the back of the old frame rails as they were not good anyway, and then I made my Own steel Hoop and shortened the chassis to give the bike a lower looking stance, Whilst I was at it, I also fitted a Custom Oil Tank that I sell on my website, this Oil tank holds 3 Quarts and has a battery Compartment where I have fitted an Anti-Gravity 8 cell battery pack and managed to fit some of the electrical in there too.

slingshot 5

Also you can see that I made a seat pan and upholstered it with cool Old School style Diamond Stitching, this looks pretty cool and am surprised how comfortable the seat is, and just have a look at how much this bike has changed since I first acquired it, I have fitted new Diamond Treaded Firestone Tires to match the seat and both Rims are 18 inch and make the bike sit so much better than the stock configuration.

sling shot9

Now, As you can also quite clearly see, this bike has a TON of New or refurbished parts, the carbs alone are like New, has a super cool New polished Air-box that makes this Motor breathe right.The Motor has Black wrinkle High temp paint on it and is embellished with stainless Allen head bolts through out and Brand New Honda valve caps on the cover.

sling shot7


This Brat Bike now has some cool parts, like my Newest Prototype exhaust system, the “Sling Shot” This is a great set up that produces power through all the range of motion and sounds incredible, later I will add a sound byte for you to sample the Motorcycle Running. I have many parts now added to this machine and here is the list below of things that I have either rebuilt, changed or refurbished.

  1. Throttle Cables
  2. Clutch cable
  3. New Rims
  4. Polished hubs
  5. Stainless steel spokes
  6. New Firestone tires
  7. Polished hub
  8. Custom Stabilizer Bar
  9. Drilled and chromed rear brake pedal
  10. Drilled and chromed Kick starter
  11. Custom seat
  12. Hooped frame
  13. My own hand made bars -Chromed
  14. Biltwell grips
  15. New levers
  16. Custom headlight Chrome
  17. Polished Front Rotor
  18. New handlebar control switches
  19. Custom oil tank with internal Battery box
  20. Solid state regulator and rectifier
  21. New wire harness
  22. Finned engine covers
  23. Stainless Allen head bolts through out
  24. Wrinkle painted motor
  25. New master Cylinder
  26. New upper fork tubes
  27. New Fork cap
  28. Polished and rebuilt fork lowers
  29. Custom lower Fork caps
  30. New ignition switch and Bracket
  31. New Honda coils
  32. New spark plugs
  33. New oil and oil filter
  34. Anti gravity Lithium gel battery
  35. New chain
  36. Custom Airbox
  37. Completely rebuilt and vapor blasted carbs
  38. 1974 Gas tank
  39. New OEM Valve caps in valve cover
  40. Custom 4 into 1 exhaust with DEI  Wrap and Chrome


sling shot6

I am still working on this and not sure on a price, No title for it but will come with a Bill of sale when completed, I also will be adding a few videos for you to look around later and also then I will have another Video of the bike running, that way you can hear this amazing exhaust system.

A few months ago I got this running and I loved the sound when I had the raw steel exhaust on, this now has a high performance exhaust system and is look really cool.