The KC Special CB750 Honda inline Four

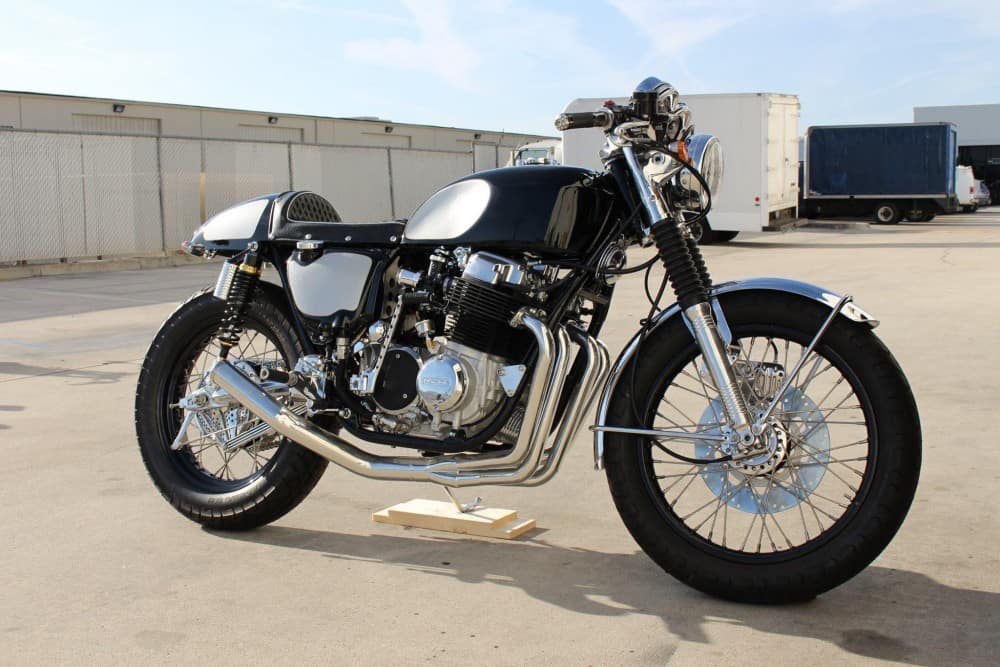
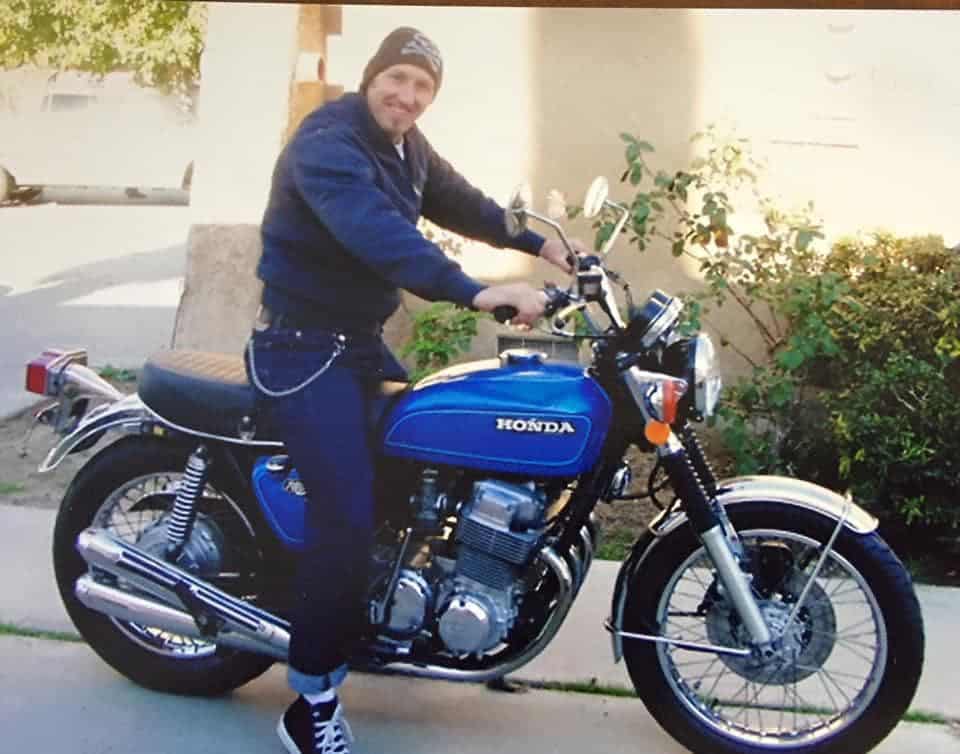
I have always loved creating My style of machine for Customers and this one is no exception, the KC Special turned out to be a great looking ride and the Owner Keith Conrad ( Hence K.C.) lives in Milwaukee and asked if I could revamp his old 1975 CB750 into a Silver and Black Cafe bike, I said sure thing and the deal was done, a build sheet was agreed upon and Keith sent the bike out to me.

I took the bike apart, right down to the frame, as I do all my builds, then I set about cleaning the frame up some what and smoothing some of the old factory welds, as Honda welds are quite rough back then as i guess they were hand welded and not automated as they are today.

As you can see, I took my time as I wanted the frame to really look nice in a Gloss Black on this build, I wanted it better than factory, so I took a long time to make sure that this Chassis came out nice, as i mostly powder coat my frames, unless I am using Candy Paint or Metalflake etc. Above you can see how Glossy the main frame rails are.

I took the stock gas tank and using my Egg Hammer, I pounded the sides to create Knee inserts, so you can tuck your legs in tighter to the bike and get a little more stream lined, just as they did back in the day for racing etc, this is no easy task and you will see how much it takes to do when you have a go your self, but worth the look in the end thats for certain.

The Paint scheme is High Gloss Black with Metalflake Silver panels and racing stripes and I really needed to make sure that this flowed well, and am happy with the result.

Plenty of Detail too, I hand machined out of 6061, a Custom Finned Oil Tank Dip Stick cap, this really did look trick, compared to the stock version.

Its like the saying says, the devil is in the detail and there is plenty to look at on this CB750 Cafe Bike and am stoked how the bike turned out in the end, worth all the hard graft.

The seat is one of my own that I manufacture, called “The Rocket 4” its a sleek sturdy and well rounded seat base that I produce and has the same curve as the gas tank, that way the body work then flows and give the machine the Status Quo.

Keeping in the theme of Old School styling, the seat upholstery was hand machined and small 1 inch Diamonds in white stitching with Silver piping and vintage snaps was completed to really make this stand out from the crowd.

I used an LED Custom Tail light that I offer on my website and this is bright as Einstein, and I think is a nice addition to the back of the Rocket Four seat unit, also the silver flake racing stripes really stand out nicely.

I machined some covers for the rear piggy back shocks as well as making some risers for the lower, to increase the ride height by 2 inches, out of 7071 Military spec Aluminum.

I also Chromed the rear swing-arm and hand made then Chromed a Custom Chain Guard to show the Gold 530 X-Ring chain off, I also polished the Hubs of the rims and painted the centers black to give a nice offset.

The Motor was rebuilt, as well as the carbs and synchronized etc, my Custom Oil lines were added in Black for a nice offset too, I fitted an oil Pressure gauge to keep the rider informed as to what is going on below.

As you can see, there is plenty going on here, I took a lot of time on the front sprocket cover and I even polished the rear set brackets for a more Custom look too.

Rebuilt and polished Carbs with hand machines velocity stacks from Steel Dragon really help the look of this bike and give it that Nostalgia look and it runs really hard too, there is something about hitting 6 grand on a 750, then you know you are starting to pull like a steam train.

People ask me about my gauges that I create on these inline four machines, and this one is no exception, unless I am restoring a bike, I don’t really care for the Honda’s Gauge faces as they are Green or Blue, not my favorite color of choice to be honest, wished they would of gone Black with White numerals like the Classic British machines, but oh well, so what I do is take the gauges apart and then I fit my Custom faces thats an overlay I print out, then repaint the needle and add chrome cups to embellish the bodys and give it a little more Custom look.

I have always liked to do this and it really does personalize your gauges, this time I went with the Cafe Racer Font and crossed Flags of which I think suit this Motorcycle to a Tee.

You may also notice that I have fitted a 2 inch handle Bar riser, to give a more comfortable riding position and easier strain on the wrists too, then fitted my Relocation bracket on top of the handle bar clamps to clean the top end of the bike up, with a BIG oil pressure Display light to match the Needle ends.

This is one tasty ride, the 4 into one system of mine is Ceramic Coated Silver, its a great look, almost a brushed polished Aluminum look to it, and she barks like a scolded dog when you get on the loud button, you will also noticed I machines a Finned Stabilizer Bar at the rear of the bike and did my usual drilling on the brake hub to let brake dust and heat escape under hard braking.

A lot of time and energy went into creating this machine and the owner really digs it, it is just how he wanted it and am glad that i was able to oblige with his demands.

The Customer wanted Gloss Black Rims with stainless spokes and he really did like the way these turned out on the bike and the attention to detail that I am known for on these inline fours.

I always fit an Oil pressure Gauge, as I do not trust the Honda Pressure switch thats behind the Barrels, so these run great and give true pressure as soon as you fir the bike up, as it is connected to the oil galley plug.

As you can see, New Levers, new Control switches, new Handle Bars, polished triple tree, New cables, New master cylinder and stainless nuts and bolts through out this motorcycle.

A great but solid Motorcycle, with aggression when you want it, reliability for everyday riding, and an awesome stance to give it that moving look standing still, sure does sit well in my stable.

I really did enjoy putting this bike together and felt good to know that I had done all and more than the Customer had asked me about, its one fine steed and I enjoyed slinging my leg over it.

I wanted to share it with you guys and Gals and hope you like what I have created too?

Maybe if you are in Milwaukee area, you might come across the KC Special? if you do, take a snap and send it to me, love to see it again.


Another Year awaits, Have Fun Building your Machine

Well, what a bloody tough year we have all had, for me it has been crazy, what with moving to another location as well as catching Covid and then on Christmas day catching an awful cold with the same symptoms of Covid but without the temperatures, its been a long battle throughout.  From having some of my suppliers completely closing down due to the Virus to some retiring early, I have had to come up with some more ideas for parts and apparel to have for the coming year we await.

But, the positive side to this awful dilemma we are all facing right now is, we have some time in our garages. sheds or back yards, to turn a wrench, help a mate or give a whole new project a go and take any frustrations out of what’s going on in the world and turn it into a working machine that is yours and yours alone.

I love making parts or building new rides, its a therapy and an escape from life’s woes to be honest, and also there are many many failure before I find something that fits and works as it should, so for those who are trying it on your own, or building your own machine, Failure is a learning curve, we all do it and not only once. I have almost given up on a particular piece I was trying to make, I left if for a day or two and when I head a fresh brain, it all clicked and worked.

Do not be afraid to fail, I have sat and pondered and even been seen to shout at the parts calling it all sorts of names but in the end we managed to come up with a result that we are happy with, the fun is in the creating at most of course, taking your ride out and stretching its legs for the first time is such a thrill and the Euphoria is un measurable, but what I am trying to say is

Dont Give up”  There are many friends on the internet that can I advise, heck, I even put my phone and text number on my website so people can text me, rather than waiting all weekend for an answer from a company phone, i want to help the best way I can, its not all about sales for me, its Service and the camaraderie of the fellow builder.

I am hoping that this coming 2021, we can all have fun in what we do and maybe even meet at an event or on the tarmac, or at the very least, on the end of the phone of email, there is something self gratifying when you complete something on your own machine and I receive many emails and photos from customers who have really enjoyed creating a unique Motorcycle that they want to personalize for themselves.

Hoping that you can get some time and turn a wrench and have fun with that two wheeled machine of yours and maybe I can help with parts or advice?

Wishing you ALL a very Happy New year that’s almost upon us and thank you from the bottom of my heart for all your orders from around the globe, you all Rock!!!!


Here is a little video I saw on you tube of a guy with minimal tools rebuilding his little Honda Cub.

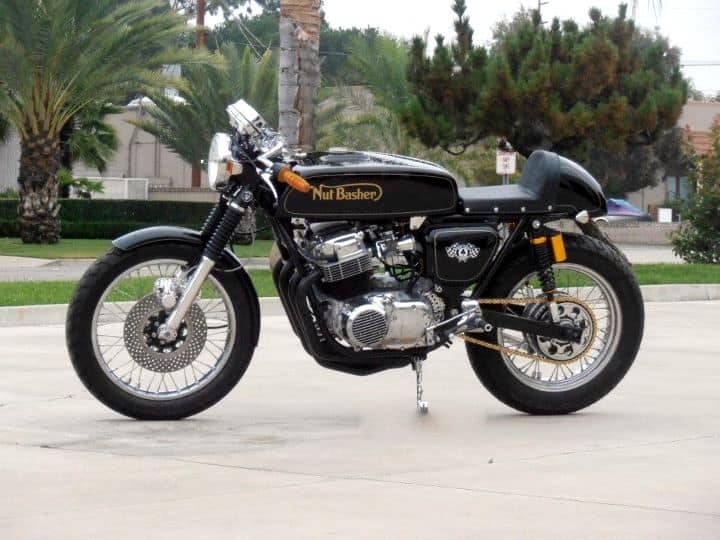
A HONDA CB750K I Aptly Named The NUT BASHER

I forget to add pics of Motorcycles that I have built over the years and some times I kick my self for not posting anything, but today I will overcome my forgetfulness and add some photos of a fun creation I built using parts that I had around the shop.


I wanted to build something that was a cool reference to Cafe Racer styled Motorcycles back in the day but, of course using a later motorcycle but, still early enough to be classes a classic and I started off with a 1971 CB750 Honda four that was just basically a frame, I had a bunch of boxes with parts in them and over time, I started to put a few things together.

I had an old Fiberglass Racing Gas tank that I thought would be just the job, I fitted it to the frame and sat on the bike, immediately crushing my nuts, that’s when the Penny dropped and I thought what an apt name for the bike and thought if I did it in the style of the Norton Logo, this would look pretty Classic.

I chose to go the traditional deep Black Color and then pin line around it in Gold, as that would really give it the 1950’s era British Motorcycle look that went along with Norton, BSA, Triumph and Matchless, as well as the Vincent of course.


Now the Gas tank has a Ton Of clear sprayed on it, I had to test fit it to the frame, as I had powder coated the frame Gloss Black and Built the Motor to an 836cc and wedged her back in the chassis, the bike was looking really good and I was happy about this, but now I had to come up with a Classic styled seat unit for the Nut Basher, so I went the whole hog and built one from scratch.

I tried all sorts of ideas until something clicked, but had to thing of a cool way of mounting a tail light and I wanted to have the light incorporated into the seat hump.  I chose to French the rear Led tail light into the cowl, and although it took a full day, it came out really well indeed and was super stoked that I had gone this route on the NutBasher Machine.

It sat on the frame just right and I attached snaps to the sides of the until so I could pull the cover off and get to any documents I need, or remove the seat if I ever needed to quickly, I also made sure there was a ton of clear coat applied just incase I scratched it and could buff it out on final fit etc.

I was super happy with the way the seat unit fitted and the tail light assembly was Classic looking but in fact was an Led stop light that was as bright as Einstein.

I wanted to put a lot of detail into this creation as I knew it would turn many heads where ever it ended up, this Fuel tank held 5.5 Gallons and that made for some great riding, without worrying about running out of squirt, but it sure was bloody heavy once the tank was filled up to the top.

She was a Long and thin Motorcycle that screamed out Nostalgia, it ran hard as nails and breathed really well as it has a hand made 4 into 1 Racing exhaust that was built in less than 3 hours by a Indy Racing mechanic, this would really exit the gases well and have never heard something so mean in all my life.

This was created by a top Indy exhaust builder and designer and he didnt even need the bike to make it, just an upside down engine, it was so cool to see him knock this out.

A sheer work of art and it fitted like a glove too, this was made in Inconel and a one off like this, nobody in the world will have one like this. The material is as I said Inconel  that refers to a family of trademarked high strength austenitic nickel-chromium-iron alloys that have exceptional anti-corrosion and heat-resistance properties. … Burns Stainless recommends Inconel 625 alloy for exhaust systems due to its excellent strength, corrosion resistance and fabricability. And it sure stood up to my fire breathing 836 motor no problems at all.

This is such a nice system, shame to coat it Black but I want the bike to have a lot of Black parts on it, so ceramic coated it will get and I am sure it will look great.

This Motorcycle will not just look fast, it will haul so much arse, it will leave people scratching their heads as it goes by, and the roar from the exhaust will stay with them for a lifetime I should think.

Another thing that I do and nobody ever did back then was, make my own gauge faces, I have created many over the years and this Ton Up machine needed a great set of gauge faces to give the top end of the bike some class too.  So I went with a Roaring Tiger, Synonymous with the 1950’s Triumphs and colorful to say the least.

These are really easy to apply and give your tired old gauges a brand new lease of life, also very unique and personal to your bike, something that I have been very proud of.

I even repaint the needles and add a longer Red line to the end, so you can clearly see where the needle is pointing at speed, also if you look, I have readjusted the configuration of the gauge faces and they digits start at a different position than the stock factory versions.

Not sure that you will notice but, I also changed the 100 to the word TON, which of course means the magic 100 MPH and a milestone in Café Racers back in the day to reach that Golden triple digit. I also added my own Oil Light warning  display of which has a High Beam and Neutral light, just to keep you informed as to what’s going on up top.

The Motor was totally rebuilt, the head was Ported and polished and has an 836 Yoshi kit inside the jugs, this pulled like a steam train and of course, stainless Allen head bolts throughout the whole engine. I also drilled the starter Motor cover and fitted bronze mesh for a cool Look.

Rear Hub got my Custom drilling and Polishing detail, as well as rear brake arm, I sure loved creating this Motorcycle and always enjoy doing my own thing to it.

I machined my own Motor mount to follow the fins of the engine and on ALL motors, I have always run an Alcohol filled Oil Pressure gauge, to give me a true reading of actual engine oil pressure, through the oil galley.

Cerakoted exhaust system looks great against the Silver and Polished Aluminum of the inline four engine, I used Italian rear sets to give this bike a wee bit more aggressive stance when you are sat upon it. I sell many pairs of these and dead easy to fit, they function so well and smooth, I try and use these on the majority of my creations.

All clean and new, this bike ran so well, it was like a new wrist watch to be honest and sure do miss this Beast of a Motorcycle, but enjoyed every minute building it.

Rear sets look pretty darn cool, I drilled and polished the sprocket cover too, for that Racy look and give it a little more Bling, personal choice but I have fun doing that.

The Grips you may find to be from somewhere else, and you would be right, I used Original 1970’s Schwinn Bicycle grips, put them in Boiling water and then pushed them onto the handlebars, they fitted snug as a bug when they cooled down and look great and flow with the piggy back shock reservoir’s.


A tall drink of water for sure, running on 18 inch rims and Bridgestone tires, a Combination I have used many many times, these have great grip in all weather but of course, have a nice Classic tread pattern too.

I have always been a fan of how this bike has sat, she looks ready to race off down the road from any angle, I also made sure that the front fender sat tightly to the tire.

I also removed the fender stays to clean the look up at front and I think that it works well, I hand drilled the front rotor and you can see much polishing of Aluminum was done to give this bike some class.

There really is a lot of detail that you will not notice at first but hope you like what I have done, we are all different and have many styles we like, but I get a lot of emails about this build and thought that it was time that I shared it with you lot.

I should of made a mold of the gas tank as I really liked that shape, even with the Chin Divot at the front of the tank, that goes back to the early TT days and stream lining.

Everything redone, even machines the Oil Filter Housing to give it some fins, a thoroughly pleasing to the eye motorbike that I am quite proud of creating.

Thanks for looking at The Nut Basher, I hope you liked what I have done to this old inline Four Honda and I continue to build and make parts for these 500 pounders.

Thank you for reading about this bike, if I can help you with Parts, Service or just if you are stuck, you can email or text me. carpy@carpyscaferacers.com carpysgarage@aol.com or TEXT 714-598-8392

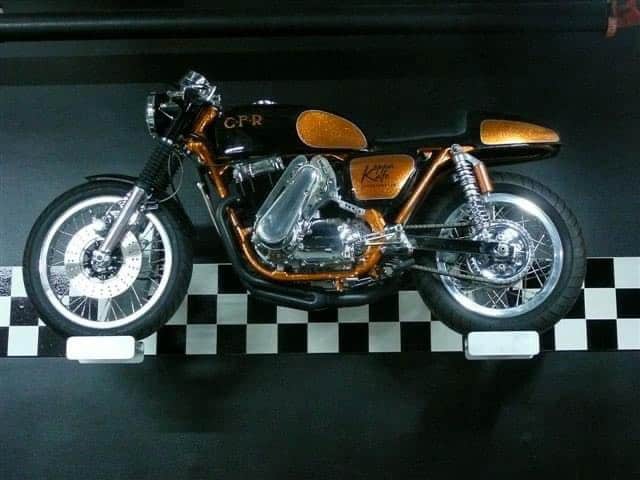
The Old Koppa Kafe was a fun Custom to create in my Garage.

No idea where the time has gone to be honest, but I always loved creating this machine, just because it has so many great Original parts on it that really did make people turn heads.

So I started off with a bunch of parts and already had the idea of how I wanted this, as the KOPPA KART was a famous Barris Kustom Truck that I had loved as a teenager and wanted to have some Copper Influence on this Motorcycle, but I had to do a ton of preparation to the Honda Duplex cradle frame to make sure all looks good when painted.


There was a lot of hand sanding and grinding of old Factory welds to try and make this Chassis as smooth as I possibly could, but also, I cut the neck and added a couple more degree’s to the rake, not too noticeable but I didn’t want it too aggressive, and I think this came out perfect for what I was looking for.

Also made up a Hoop and welded that to the frame, nobody was doing this back then and wanted it to finish of the seat that I was going to fit to it, and welded a bracket at the rear so I could attach the seat cowl and make it sturdy. But the most work that really needed some attentions was how was I going to extend the stock gas tank 5 inches, as I wanted a much longer fuel tank and thought that I may as well use some of my old spare gas tanks to cut up and make the change.

This is no easy task but, I was fortunate to have a bunch of K series Petrol tanks laying about in my garage rafters and thought the best way was to keep the front end and extend the tank backwards using sections from a couple of old gas tanks.

You can see the section cut and of course had the gas tank media blasted to get all the paint off so at least there was clean metal to work with, this will also have hammered knee inserts to give it that touch of Nostalgia of TT racing days and I was glad that I did go this route in the end.

You may not notice the stretch but its way past the original mounting bracket on the frame, you may also notice that I cut the rear exhaust and passenger peg supports down, this was to clean the lines up and allow for the lower part to become a bracket that my Italian rear Sets could attach too, I also braces gusseted the frame under where the gas tank sits just to give the frame a little more rigidity.

Here is the cross bracing that I did and used the pieces I cut off the bike, so it all got re used into this creation and I had not seen anyone do this before too so another added attraction I guess?


Putting this machine together in the garage was pure fun, I really did love the way the old girl was being revamped and as you can see, I did a lot of detail as at the end of the day, I was building bikes for a living now and this would be a great business card bike. many cool Parts and I used a pair of 18 inch Aluminum rims that were for a CB750 Automatic, of course I used to rear rims and then polished them to a chrome finish to give it a little more Bling.

So many hours were put into this and it became quite a challenge at times, but kept pushing on, I had to retap most of the thread holes as metalflake gets everywhere when you paint it and not use a booth, but I kept being persistent and it paid off, I used stainless Allen head Bolts through out the bike too, not cheap at almost a dollar per piece but makes the bike for sure.

Hand polished all the Aluminum and it took me forever to find an intake Plenum, I had one but it just would not fit, found out it was a Suzuki one, so thought to my self, ” Where the hell am I going to locate one of these Plenums for a SOHC?”  Then I got an email from a guy in Sweden who had a Suzuki and was Supercharging his but, his Plenum didnt fit and he thought his may be for a Honda.  So we traded and sure enough, when I tried to fit the Swedish one, it fitted like a glove. What were the chances of finding another eh?

What a piece of art it is too, so happy to be able to fit this to the machine and another tick off the list of things that needed to be accomplished to get the bike to the standard that I was after.

Just look how cool this Copper Metalflake looks, we used 3 pounds of the stuff to get the required depth that i was thinking of and a ton of clear coat was used to smooth it all out, but that Polished Aluminum offsets the Copper really well , what do you think?

I really was happy at the way the bike sat and looked and bit by bit I would get things accomplished, then I would push it onto the driveway to see how it looked in natural light.

I had Machined the front Lower forks and rebuilt them with New uppers, springs and this was a neat and unusual look as I had never seen anyone machine lower forks on a 750 before.

When I had these on the bike at Shows, people would ask about the forks and send me theirs to rebuild and give it that Custom look, it sure added some Custom touches as I painted the grooves Copper to go with the rest of the bike.

Finding someone to drill the correct hole on the stator cover, turned out to be a pain in the arse, I had one so called shop in another state have a go and messed it all up, so I did it my self and under cut the hole then used a drum sander to keep adjusting until the oil seal fitted tightly, and there you go, job done.

I had an Old Drouin Supercharger that was once going to go in an old chopper/drag bike and after I got all the parts I knew what bike I was going to build.  Now, the Motor I had was a fully Blue Printed motor, costing 7000 Dollars many years ago and this was perfect for the bike and thats how this came about.

I had a local company water Jet a bracket out of 7075 Aluminum and gave them a paper template, this worked out and treat and bolted right up to the SOHC motor with exact clearances, I simply Polished the bracket once everything was test fitted and you can see the Crank Pulley at the bottom fitted perfectly too.

All fitted and this Mechanical Washing machine looked Bloody awesome all hanging out of the engine on the Left hand side, it is Belt driven too so pretty quiet to be honest with a neat Polished Aluminum Belt cover for added coolness.

Yeah, it was an intricate bit of Kit to begin with but loved looking at this Motorcycle I looked at it as a piece of art and used as many pieces from a 1969-1978 Honda as possible.

I hand Hammered the knee Inserts using a Tear Drop Hammer from Eastwood Supply and this came out so nice with the Copper paint and boy did it shine when the Sun hit it too.

There is a lot of work here and those who have tried to Polish their Hubs will know what I am talking about, I also added a Double Chain and Sprocket set up as there was a lot of Torque here in that engine, I couldn’t locate one for the longest, but Azusa Chain helped me as this was for an Old Lathe and converted it to the bike and worked really well, ran a slightly wider sprocket carrier for the offset to be right.

I also fitted an Old Lockart Oil Cooler to the bike as it will run 15% cooler with that fitted and as the Oil Filter Housing has some broken fins, I cut them off and polished the body and it looked pretty good to be honest. I ran Braided Aircraft lines to the cooler too some Dash 12’s.

That’s an Original Lockhart Cooling Radiator too, I made a thick Aluminum Bracket to mount it to the Horn bracket and then polished it to look like chrome, it worked really well too.

That tank turned out so well, I used Por15 to seal it before painting and then pressure tested it at a Radiator shop, C.F.R was for Cafe Racer but in the style of the old H.R.D Motorcycles of years gone by.

This was My first attempt at making a Fiberglass front fender, since then I have sold over 500 of these to Customers all over the world, its 22 inches and has a bead all the way around it.

Cant get enough at looking at that, even today, it was a tough Motorcycle with loads of interesting parts and so Glad that I jumped in and had a go at creating this machine, there wasn’t many Café bikes at all about, so many people used to comment on what sort of bike it was and I think i was lucky enough to inspire a few people to have a go their selves and create their own unique ride.


My First attempt at a Custom Gauge, using an original one, I wanted to put BOOM at 140 MPH, got many comments on that and it was a great discussion point at shows etc.

I fitted an Original Series One Yoshimura exhaust of which was the pattern for all the systems I make today, I used a CB750 Connecting Rod for the license Plate holder, I later swapped the plate to the other side as the exhaust gases would tarnish the chrome lol. They are New Old Stock FOX shocks too and they really did give the ride height that I wanted on 18 Inch rims.


Allen bolts all through out the build and I did my drilling style on the sprocket cover just the break up some of the glow of the polishing, I have made many of these covers and sold to customers too over the years.

Rear Hub gets the same treatment and that’s an Original Dresda Boxed Swing arm that I chromed and boy does it look sharp on the bike, it really does accent that rear end.

I used Cow Hyde to upholster the Custom seat and used Gel foam for a comfortable ride and its a nice riding position with that 5 inch stretched gas tank.

Everything I feel on this Motorcycle Flows well, its such a warm color too, I hope that you liked just some of it as I know that you understand how much effort goes into creating a machine such as this.

Time has moved on and this bike now resides somewhere in Australia and hope the owner is having fun with that Custom built CB750 HONDA.

I took this bike to many shows all over the USA and had many great conversations with like minded people.

I think this was Seattle show but ALL the shows were super fun and made so many friends and acquittances etc. it’s a healthy industry now and I am still making many parts for these super fun inline four motorcycles.

I used a headlight from an Old DeSoto Automobile as I think it fitted in between the fork ears really well, I hand drilled the front Rotor using my drill press, I even made the bike stand.

One of the last photos before the bike made her way to the other side of the world but am proud to say I created that Monolith of a Café Racer.

As you can see, on the Right side of the bike, I fitted an old 1974 ARD Magneto, that too is Belt driven and gave the bike its Status Quo, she sure does sit well on the Tarmac too.

I used a Pontiac Taillight for the rear on My Custom Rocket Four seat assembly and I still sell them to this day and send all over the Globe.

Thank you for reading my Blog today, I just wanted to show you a bike that I really did have fun creating and love seeing what you lot are putting together. Below is a before and after shot.

Have fun with what ever you are creating and if I can help, you can call, email or even text me, I am always here to advise Thanks again and keep on building and Riding.

.

New Parts and New projects this year

Hey Everyone

Hope that you are all well and trying to continue doing what you enjoy- This Pandemic is a royal Pain in the proverbial arse, but we have to stay strong and continue masking up, keeping your distance and soon after we all get the Jab, hopefully we can get to some sort of even Keel and enjoy the freedoms that we once all took for granted.

Things will be changing a little with me as I shall be having a steel barn built to keep me close to home, I can make prototype parts and start to create some more motorcycles for Customers and of course my own, I have a few ideas for many things and here I can do all that and much more.  I shall be offering more exhaust systems, that are all made right here in California, none of the China crap will be here and hope that you can pass the word so we can keep our money in the USA as so much money goes to China, but none from me- I tell ya that for free.


I love what I do, I really enjoy making new parts, I also enjoy the many emails and texts that i receive every day, if I can help someone out of their dilemma, even if it does not involve using my parts etc, I am still happy as someone now has got their machine on the tarmac.

Have fun with what you do, its an awesome hobby of ours and everybody wants to help each other out, I get a lot of calls right now as people are of course at home locked down in some cases, so, as to not get bored, people are creating their own style machines and there are some great creative minds working overtime as I type this Blog today.

So get into them Garages, Sheds or back rooms and have fun wrenching, I am here to help anytime, be it phone, Email or text, sure look forward to hearing from you, stay safe and get wrenching.


New Year, let’s hope this one is a fruitful one

Well, 2020 can go and bugger right off, what a shitty year for everybody around the world, and we still have some ways to go before we can all meet up anywhere, so I tend to think I shall be here at home and will put my time and energy into making New parts available for you lot that are building at home right now.

I am so lucky that I find creating parts very therapeutic for me and will make the most of this lockdown scenario to see what I can accomplish and make available for you all in this 2021 year that we have just started on.

I am looking forward to seeing how your creations are going and hopefully you can send me some quality photos with a full description of what you have done, as many people ask about readers rides, so looking forward to some emails of your projects.

So I am wishing you ALL a very Happy New year and lets get building and see some very cool machines on the Tarmac for the Summer.


Looking forward to a more positive Healthy year

A couple of days left in this terrible Pandemic year, good riddens to it and sure hope that 2021 will be great for us all, of course it will take probably half of that year for all of us to get back on an even keel so to speak, but we shall get there and life will change for the better.  Where we can go out and eat, enjoy meeting folk again, even attend shows and Motorcycle meets etc, life is so short and precious and I think that everybody’s attitude will be a tad different now too.

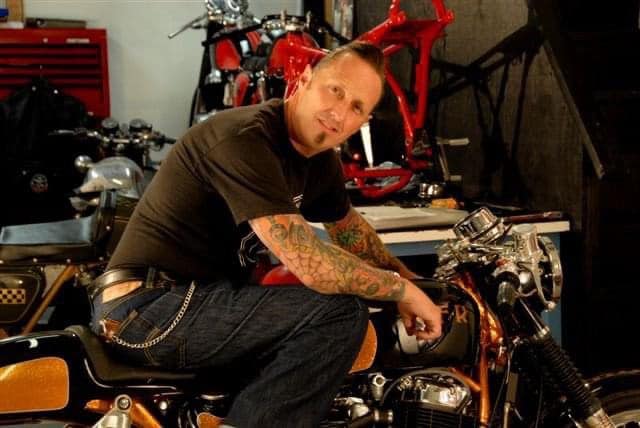
I love making parts or just building bikes, I am no Pro at this, and didn’t go to school to learn how to either but I grew up with 2 wheeled machines and still to this day do not own a Snap On tool, just the old Sears Craftsmen’s lol. The photo above is me about 20 years ago with my Rocket 4 seat base I created and, still sell today. And Below, was when I helped Dennis Roth create a tribute trike to his dad who passed away Ed Roth, and of course, it had to be CB750 Powered. How much fun did we have with this, hope to find photos of the finished product one day when it was on display at the SEMA show in Las Vegas.


Exhausts are going out the door pretty quick these days

Well, a day off at last, albeit I will be catching up on things at home etc, but- I am in my office and for once, it has started to rain.  Something that we do not get much of in Southern California, so I will engulf this as it reminds me of back home in the UK and, it also gives me a little time whilst I have a cup of splosh, to tell you that I have been selling quite a lot of 4 into 1 exhaust systems as of late.

I have not added up the amount of systems I have sold over the years but its a few thousand now and I am so stoked that Customers still like them and, they are made right here in California and not China, I get many emails from customers, letting me know they love the look, fit and of course the sound and performance that these systems make, a very unique and smooth breathing system that I am very proud of and cannot thank you all enough for purchasing.

It is unreal the places that my systems have ventured out to, Russia, Cuba, Brazil, Argentina, etc as well as Australia, New Zealand and the surrounding Islands, from Hawaii to London too, I am amazed when I get the order to see where it is going. So thank you all for that and I shall be looking into some more designs when the New workshop is built, something that will always be enjoyable.

These will fit the CB500 the CB550 and the SOHC CB750 K F models from 69-78 and you will see a big difference from stock, weight for a start, sound and of course the response is way faster and smoother, rev that girl out and watch the RPMs enjoy the free flowing system and the bark as you shift gears.

These come in a variety of finishes, for the Tough look, there is Raw steel, its bare bones and will rust of you dont wither wrap it or clear coat it but it looks killer when fitted and the industrial look in really popular right now.

Also there are Color options for the systems, we get them Professionally Coated with Cerakote.   High temp ceramic coatings act as a ceramic insulation in that they protect your exhaust system from rust and corrosion. Ceramic coating will protect your exhaust from things like road salts, oil and gas, heat from your engine, and exhaust gases that flow through your pipes. Also can improve the performance of your engine’s horsepower. It helps increase the speed and maintain the quality of exhaust gas flow while keeping the temperature of the engine low. When you apply the coating to the exterior, it can make the exhaust flow faster, allowing for a reduced loss of power and temperatures. 

Above is the Burnt Bronze which has a Texture to it and helps dissipate the heat fast. You aren’t going to want to replace the items in your exhaust system very often, and you won’t have to when you use a high temp ceramic coating. The coating reduces the thermal cycle surface temperatures, reducing the exposure to a constant hot-cool cycle. This all means that the coating reduces the risk of the metal arts in your exhaust system weakening.

A stealthy 1978HONDA CB750  SOHC looks Tough as Nails sat outside the owners garage, he loved the fit and sound of his machine and rides it as much as he can, it looks great eh?

The Sidewinder is a good system too and hugs the frame tightly, it also allows for a Main stand to be used if you wanted to.

The Yoshi is my Best Seller and as you can see, it sets this machine of nicely a great Motorcycle and it gets a lot of attention where ever it is ridden to.

Above is the Titanium Color that some people order, its great to be able to offer a few colors as the bike they are building can have a matching system that suits the styling.

We try our best to come up with a great exhaust and I think that we have made many people happy that this is available not just in Raw steel, but in a variety of colors and stainless steel too.

The good thing is that this 2 piece set up comes with a Removable Baffle and you can either pack it with fiberglass to quieten it or leave as supplied for that Velvet tone, as 99% do keep the baffle in with No packing at all.

Which ever way to go, I am here to help, I look after all my customers and over seas I adjust the customs forms so you dont get hammered with Duty fee’s etc, and as the system is a 2 piece, I can get it in a smaller box, which means cheaper shipping as well.

I have always loved working with these machines

Time does indeed fly by and as we now spend a lot of time at home, I thought that I would let you know that what ever I do, there will always be time to turn wrenches and create parts or a cool Custom machine in my workshop, and I continue to do so, next few months will see the beginnings of a new place to work in, my own Barn and its an exciting time. I can redesign older parts or make new ones and of course, continue to create machines and parts to fit them.

Below is just one of my shops that I had a ball creating these 2 wheeled delights and thought that I would share.

The shop below was about 9 years ago but they all look like this at some point and loved being immersed in Motorcycles.

Working on an old CB550 Honda

Well, this Labor day weekend has been Hotter than a bowl of Chilli peppers, right now, as I type this, its 108 Degree’s. Now, I have a lot to do in the garage and I need to move some parts that have been sat in storage for a long time, I looked at what parts I had for this CB550 Honda, and figured I might be able to get it together as a roller over these few days.

I am sure like you, what you plan out, never really does go the the plan you have outlined in your head a hundred times and this weekend was one of them. The frame is pretty much all set, I had ground some Tabs off a while ago and then hopped the rear for a customer, but unfortunately he got into an accident and can no longer ride, so I had the frame in storage, an engine and a few other bits and bobs.

Anyway,I bought that home and cleaned it up a little, sat it on a dolly and thought I would add the triple trees and bearings etc, just to make a start etc. Well, I added the 37 Ball bearings and inserted the triple tree, only to fins that there is a 1/8th inch play gap in the top of the steering.

Upon further investigation, I have observed that these are CB750 Triples not 550, and although they look simular, they are not, obviously the 550 is shorter and the pinch bolts are also in a different location, but- I have searched high and low in my storage and I do not have any CB500 or CB550 triples at all, plenty of CB750 ones though but they wont work.


I am now scrolling through the Dreaded Ebay to buy a set of CB550 tree’s but am now at the mercy of the seller to wait for the goods to turn up, so there you go, my weekend is now buggered to be able to complete the front end.


So, this is the story for all bike builders, you think you have all the parts but you only find out you dont, when you come to assemble the darn thing, you get that ” Wait a minute, that aint right ” Thought.

Even though right now is now 109 degree’s, I managed to find an old swing arm and fitted that to the frame, as well as a set of TEC shocks that I had in a drawer and thought I may as well use these for something. As you can see, I have made a start, not sure if I am going to use an old CB750 gas tank as I am still in the mocking up, but we shall see how it goes. But, until I get the triple Tree set up off Ebay, I cant do much to the front end, but at least got something done on a scorching hot Sunday.