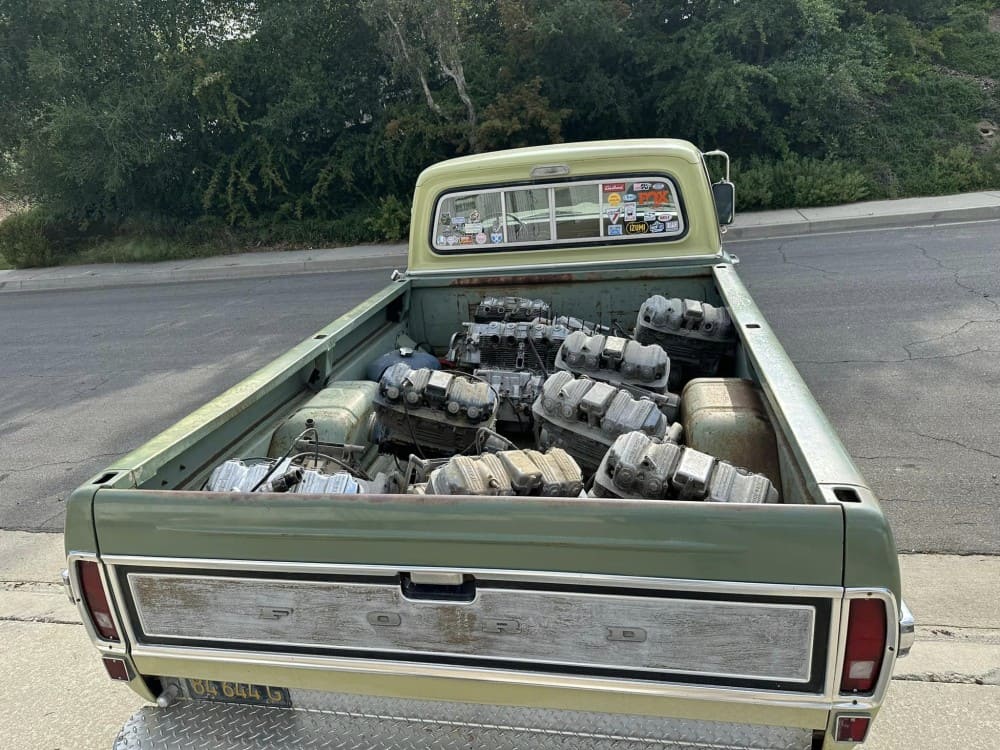
I went out for a Pint of milk, Came back with 10 CB750 Engines

It’s a funny old world, I mean, I initially went out to get a pint of milk and on the way there I came across a stash of SOHC Motors that a buddy of mine needed to off load as he was clearing his place out for renovations etc, what better way of getting rid of them then to let me have them.  And, as I have a Long bed Pick up truck, I thought to myself I should be able to get all 10 engines in the back of the F250.

Lucky for me, it’s only 4 miles from my place, and as my old beast only does 6 Miles to the Gallon, it was well worth taking the turck to go and get these SOHC in line Four Motors, they had been sat outside in the Californian sun for many many years but I can use some of the parts even if some of the motors are locked up etc.

It was no easy task carrying 10 CB750 Motors from a back yard and loading them onto my truck, at 230 pounds each, every one became heavier and heavier, by the time I had dragged the 10th Engine out and up and onto my bed of the F250, i was feeling as weak as watered down beer. But I got them all on and then thought about it, man- That’s just over One Ton of Engines, and the F250 is a 3/4 Ton.

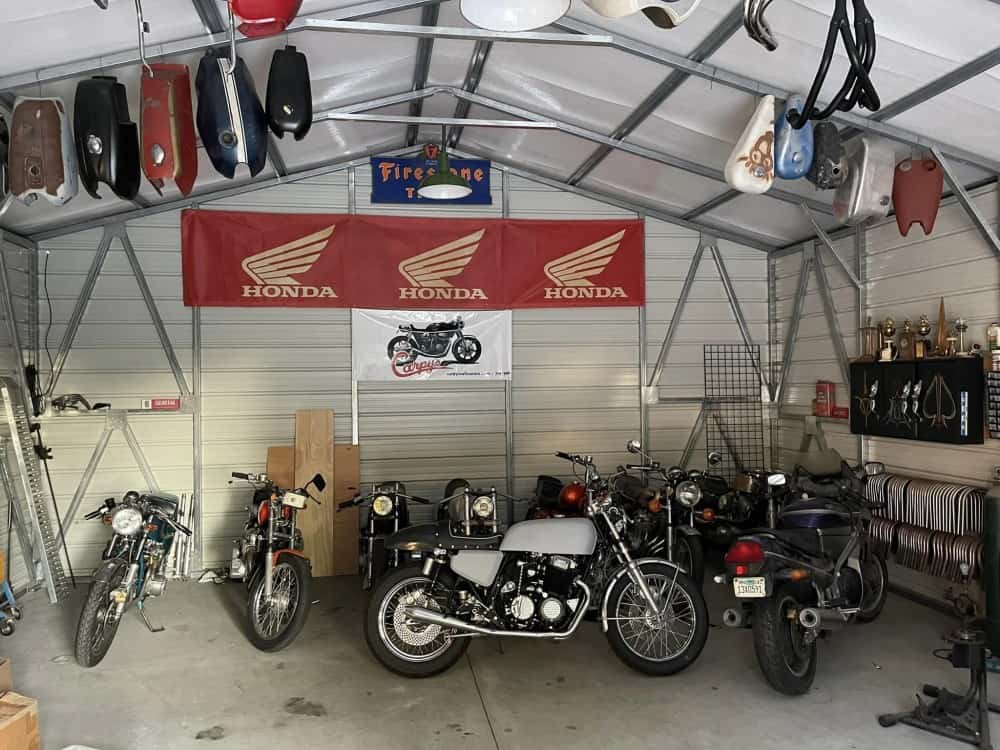
I know I will have use for these, even for parts alone, I have a small collection now that for now I shall place in my barn and wait until later on when I have some free time to see what is what.

These towed home no problem in my pick up and that hardest part was unloading a Ton of engines, as it was only 3 miles from my place and I was already tired from throwing tem up onto the pick up bed, but, not as far to move to the barn.  I sure felt it afterwards as thats 2 ton moved in less than 2 hours.

I have stored them away now in the Barn, but I am still working on New doors for the outside, so will just have to tip toe around for a bit until I am ready to hang the doors up.

Glad to have got them and I know I will be turning to a few when I create some more machines for the tarmac, nice to have spares at your finger tips though.

I have another Motor in a frame you can see and one more on a dolly in the shop that I need to move over, always something to do at my New location, it will take a little time to get it how I want but then it will be icing on the cake as working from Home is always the easiest and more enjoyable way of working i think.

I have a lot of work to try and catch up on since our European visit but refreshed and ready to take on another chapter in the life of Custom Motorcycle creation, I have a few ideas for more exhausts, Handle bars and other parts, so stay tuned to the site if you can.

Oil leaks whilst i was away need to be cleaned and gaskets fitted, Doors painted and hung, and then organise the bikes and where the parts will go is something that is not to be rushed but everyday there is something to mess about with and I enjoy so much.

Thanks for reading my posts, I like to share what I have been up to and its great hearing from you too and seeing what you are building at home, if I can help I always will be it via email carpy@carpyscaferacers.com or call / text at 714-598-8392 as its a pleasure having a chin wag where ever you are in the globe.


Working on Projects in the Barn

Time does not stand still and I now have all sorts of work to do but glad that I still get many emails, Phone Calls and of course texts, asking about builds, parts, service or idea’s etc, I love what I do and even though I really have had not had the time to build cabinets and work benches , I have enough to get by and get a few projects sorted out.

A lot to do and still get some what organized in the Barn, I will move my Model A Roadster out and start to get myself in work mode as quite a few things I have to do in here and its sure nice after 22 years doing this, I am still popular with the Public all across the globe.

You may remember The Red Devil I created about 2006, it got in a wreck when we were out riding about 13 years ago, and now it is time to fully rebuild this Old Caff Machine that has done many miles over the years and to resurrect this to a Tarmac eating two wheeled Monster will be a challenge but I am up for it.

This will be a frame off build and will be taking the old girl completely apart and will remove the paint from the frame and powder coat a Gloss Black, but keep the rims RED as its a great offset for this bike and nobody was really doing it when I did this back in the day.  I’m keep the tank but need to repair it as it has some damage from the crash, there must of been 100 Yards of Oil on the road when she slid on her left side when a Pick Up truck slammed into it on a off ramp from the freeway right in front of me.  Poor lad had a bad leg for a long time but now, years later, he is looking forward to a revamped Red Devil Motorcycle.

But I am looking forward to turning a few wrenches and creating some unique rides, the RED Devil will take some time But I have the Super Sport to finish next and then once I am happy with that, I shall offer it up for sale.

The Milwaukie Special will get a Full RED and White Paint job and will be quite the head turner, with great 4 into 2 exhausts and a fully rebuilt motor, this will scoot along quite happily, anywhere around the USA, as its had tons of work done, from the painted frame to the hand drilled rotors, this is quite a work of art that I really enjoyed creating.

All sorts of motorcycles in the shop now and of course the Mint 550 Supersport is always a lovely sight for sore eyes, as well as the 883 Sportster I am building too that will eventually buzz around here on the twisting roads that we are lucky to have we we live.

A Lot of 750 Bikes too in the stable with more to come, I hope to be creating a few cool rides and then offer them up for sale, I love building Motorcycles and am quite happy when I get to use my creative juices and try and build something interesting.

It will be a busy year here at the workshop and looking forward to building these and making some interesting inline four Custom bikes for people to really have fun with.

This old Girl is an old Drag bike that was built in the mid 1970’s, but may be transplanting it into the RED Devil if the Mill is OK as have no idea if she will run, but this is no ordinary engine, this is a RC COBRA Engine, with extended Cam towers and an RC Engineering Exhaust, along with an ARD Magneto and a set of smooth Bore Mikunis.  So before I get too crazy in stripping this old bike, I will need to get her going, this is a long term build but I hope I can get her to run again.


One of my Old Dunstall 750 Honda machines

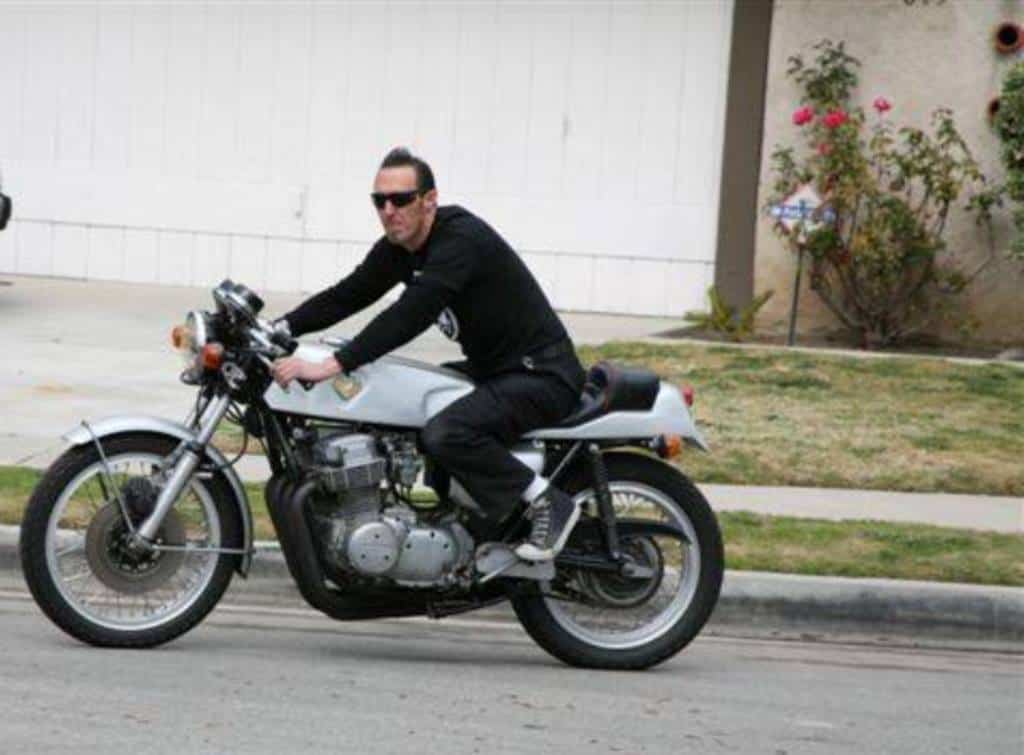
Wow! Where does the time go these days?  I literally forgot about building this bike and found some tiny photos someone took of me, so thought I would try and show them on here, so you can see this Classic machine once again.

Fun times when I lived in the City Of Orange, where I crated so many Motorcycles in my garage and worked everyday from Dusk til Dawn, creating cool crates out of Original old CB750 bikes that had been stored away for years or simply left outside to let the elements tear them up.

As you can see, I managed to rebuild an old Cafe Bike, it had Paul Dunstall 5 gallon Tank and a TT syle Manx Seat assembly, and was such a blast to ride around when I got it to fire up.

I had a set of Borrani rims on it too with Paul Dunstall rear sets, a rare find these days thats for sure, but this was a great little set up that I wanted to blap around town on for a while.

I have owned quite a few Dunstall Machines over these past 20 years or so and never tire of stretching their necks out on the back roads, just pure Nostalgia.

It had Dunstall Clip on’s and an Old Yoshimura 4 into 1 system too, I found it in boxes at a Garage sale in Los Angeles and dragged it all home with me with a big smile on my face.

The old girl ran pretty good once I had sorted out the carb issue, 3 blocked idles jets and a dirty needle base, then she wanted to fly, but- the Tires were rock hard, so decided it was time to revamp this old bike as I had a Customer wanted something on these lines but with more color.

The rear tire got wore out pretty quick and lucky for me, I get on with my neighbors as they got used to my daily shenanigans with Motorcycles etc.

Laying down more smoke than a Beginners BBQ lesson, I wanted to make sure that I had a little fun with this machine before I did some changes to it for a new customer.

I really didnt have any photos of this machine as I was so busy building multiple bikes, but wish I had taken a bunch back then to show others all these years later.

As you can see, I fitted one of my New 5 Gallon Dunstall style TT Tanks and one of my Custom seats too, this Motorcycle with its Candy Tangerine was a head turner in the Sun.

Hope that the Owner still has it and is racing about having a Blast as much as I did with this Classic cafe bike, it was fun to put together and maybe I will see it again one day?

New Stainless Steel Exhaust for the Vesco Honda Creation

Well, the Rains are here again tomorrow, so had to tear into many projects to try and get ahead of the storm, as it will restrict me to many things I need to do to create this Custom Motorcycle, the Exhaust I originally tried out was pretty Bad Arse- But I wanted something really trick, so for a few days I sketched a couple of Idea’s and came up with my Latest design.

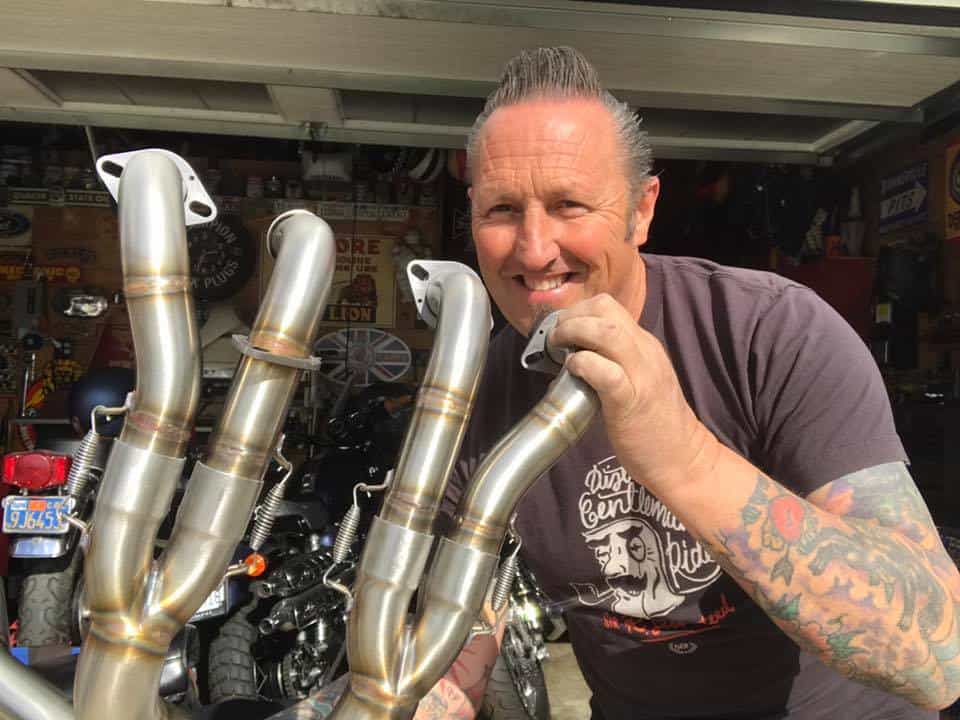
This is my latest system and I have called it the “Y-Block” And this system breathes like a man with Three Lungs.  Seriously, this is a great bit of Kit and hand made from 049 Stainless and not only does it perform, it is light weight yet sturdy. This is so much better in Stainless and wanted to show the Globe that cool stuff does indeed come out of sheds and Garages.

A lot of time and effort went into this system and I am happy at the end result, this will look great on the Vesco Honda and am sure many will ask about all the details that the bike has on it, there is so much to do and have to do all I can in the short amount of time to get this machine back up and running- no easy task and still quite a way away from completing this build.

The system will fit ALL of the 750 Motorcycles from 1969-1978 in the SOHC Range and will fit the CB750K, CB750F and CB750A models too, the design took some time to create how I drew it but it is bang on and I cannot be more happier than how the “Y-Block” free flowing System has turned out.

All quick release springs, this is a slip on system just like the old race bikes and wanted to give a little more Hot Rod look to this set up and I feel that I have accomplished that style and look. This has a Nickel Plated Removable Baffle and sounds just like a deeper version of the Yoshimura style system.

The fit and finish is superb and great ground clearance too, wasn’t sure if this was even possible a few weeks ago but after many drawings of concepts etc this is the end result and it looks so good, I am super happy that I went this way and it sure does look Custom. Sat on the workbench and rwady for it to be fitted to the Custom machine when I get it up to assembly.

This is my design and its a 4 into 2 into 1 set up that really lets the gases flow hard and escapes at the end through a baffle at a faster pace than many out there, and I really wanted a trick looking set up that not only looks and sounds great, but performs pretty well too, and this sure does meet the bill.

Of course I will offer this as a line for the HONDA CB750, CB550 and CB500 a little later on but first i want to see how it performs on the bike and will give a full run down when I have all that completed, but this New System really is a unique set up that I will be happy to offer to all of you soon for your inline Four Motorcycles.

I will weigh it later as its so much lighter than the steel versions and when it is in its brushed Stainless guise, its a real head turner with the welds turning that nice Bronze color.

A fun looking Exhaust that I am proud to put my name on and I am sure will get quite a lot of interest for other peoples rides, so today turned out a great way to bring the week to en end.

This will be easy to fit to your very own inline four, even if you are on your own as it weighs nothing and comes apart easily for assembly etc and the springs are way easier to remove than undoing bolts .

I wanted to have something different out there and to show that I also love Hot Rods too, it’s all a cool lifestyle that I have always been into and now have a great system for the inline Four Honda’s.

When the Vesco Brat bike is completed, I shall take a lot of photos of it, as well as some sound bytes of the exhaust system, I will still use the Yoshi style baffle as I love that tone.

So with that- I shall bid you a fond farewell and get back into the Garage, as I have a million more things to do and as the storm approaches, I need to get in there fast.  Thanks for stopping by and reading my blog, let me know your thoughts, as input is so important from My Customers.


The Vesco Brat Bike Honda CB750 SOHC Rebuild Report

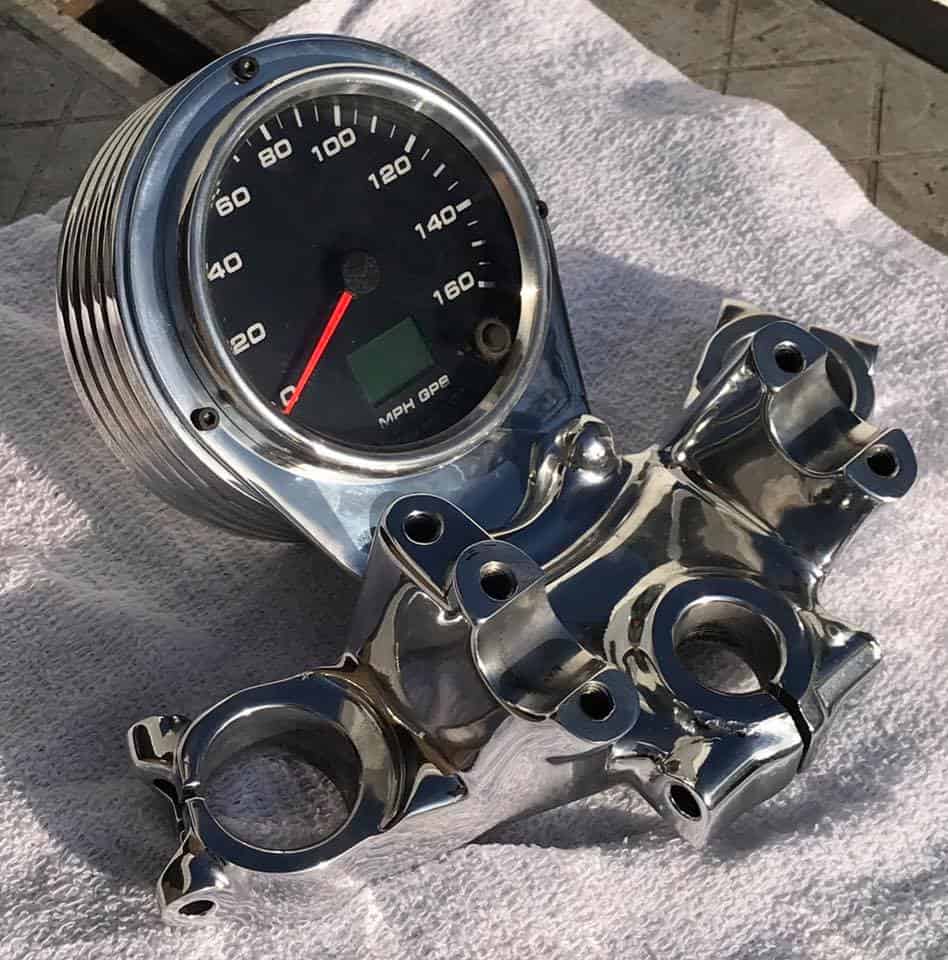
Well, the weather has been fighting me this month, worse Month since 1962 for the amount of H2O we have received and again today as we head to the end of February, we have more Rain coming down this week, so I need to try and use my time wisely and get as much done on this machine as I can.  Lets start off with the Triple Tree on this bike, as I wanted to change the Cable Tach and Speedometer and make something more Custom.

So, have a look above and you will see that I have started to make a start on the fabrication on the triple tree, first off I ground off the Original Factory outer tabs that housed the stock gauges, then I hand cut an Aluminum Holder out of a small sheet of Aluminum and made sure that it would be able to fit the stock location tabs that the Ignition switch used to fit into, and it looks great, if you look to the right, I already made a start on the Speedometer Bucket.

Not an easy task this but a block of 6061 T6 Aluminum was chucked up on the Lathe and turned down to the size I need for the Speedometer to sit snug and tight in the housing, also reliever three areas for the set up to really fit snug as a bug with no rattling about.

I wanted to incorporate fins into the casing as the front forks have this look as well as a few other features on the bike to make the whole concept flow and I am quite a big believer in that, I also need to grind a little more on the top triple tree and then smooth and polish to give the whole set up a look of chrome, no easy task too.


Now I am happy as its all Polished and the GPS Gauge set up looks really Custom, I machined Three 7/64 locator holes to allow the gauge to Clock right in the Location I wanted and have to say I am super stoked at how this now looks on the polished Triple Tree.

The bike I am creating is a 1974 Model Honda CB750 But I am using a later upper and lower tree to allow me to have the small tab brackets in the center and glad I went this route.

I wanted to create something that is different from the norm and I do enjoy what I call ” Newstalgia “, New parts with a feel of Old, and I believe I have created that with this.

I really like the look, the Gauge is 4 inches and the bucket is 5 ” and a strong solid appearence, I think it blends in well with the style of bike I am building.

So just a final clean up and then I need to pick the lower tree up from the Chrome shop, this should really set the whole top end off on the bike and glad I took the extra mile.

I will Clean up once more and add some polished Handlebar clamps that I make and she will be all ready for when I start to bolt all this together again, so in a week or two I can start to assemble the frame, it is still at the painters but not for long and thats going to be Silver Flake, should be a good contrast to the rest of the bike.


Thanks for reading my blog today and hope I have inspired you to get into the Shed, garage or lock up and have a go with your ride?


New Ceramic Coating Colors for the exhausts now available

Wow- hard to believe that I have been selling these systems for over 18 years now and still going strong, so this time I thought that I would offer a new Ceramic Coating Color, as many people ask me about these things.

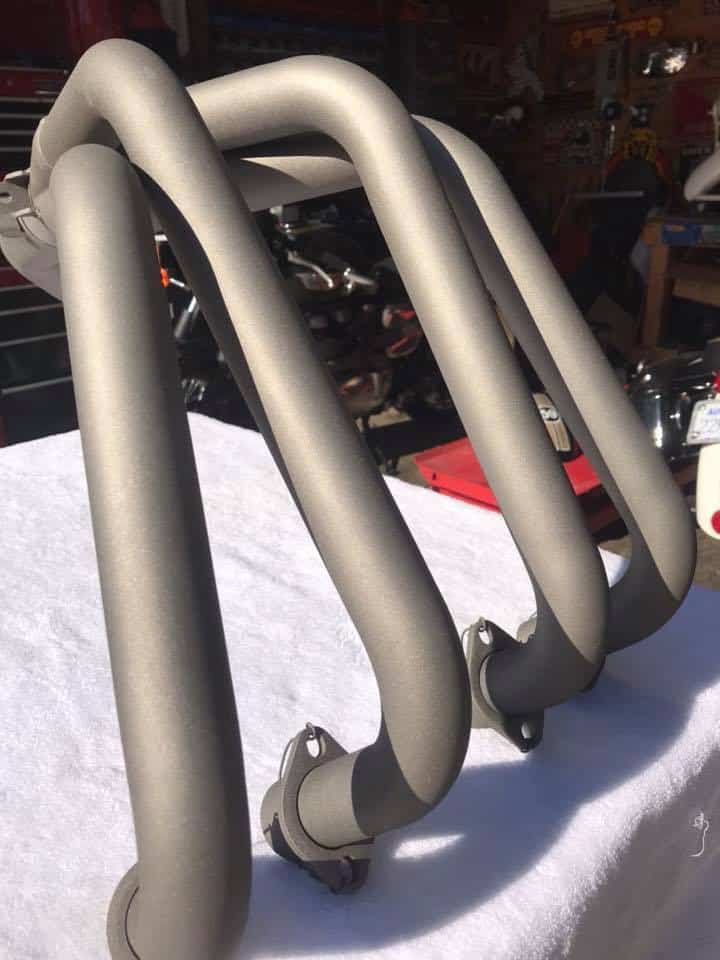
So what I now offer is the New Titanium Coating and it looks really cool, its a Gray but a metallic gray and really covers well.

Here’s how they work—Ceramic Coatings and Exhaust Wraps help contain the gaseous heat within your exhaust pipes. This causes the gasses to heat up and expand. Since the exhaust gas is trapped within the system, it expands the only direction it can—out of the tailpipe. As a result, exhaust flow is boosted, allowing a rush of fresh air to enter the engine’s cylinders, increasing horsepower. Both ceramic coated headers and  Exhaust Wraps improve horsepower, so let’s go over their pros and cons and see which one is best for you.

Ceramic Coated Exhaust Parts

This is a spray-on finish that’s infused with heat-insulating ceramics. It is not a DIY solution, these exhaust parts are coated at the factory, or sent to a facility with the proper equipment.

Pros

The New Titanium which is what you see here.

This is a great look and changes the look of your machine instantly than just the Black you see. But I also offer these colors too.

Black- Silver- Burnt Bronze, with more options coming soon.

Wanted to show the New Titanium as this is a old school look and I really like the way these came out to be honest.

Just go on the exhaust page and on the drop down box, simply choose the color that you would prefer for your system, its as easy as that.

If I can help you with any of these options you can simply email me at carpy@carpyscaferacers.com or drop a Dime in the slot at 714-598-8392 and if you need answers fast, then Text them to 714-598-8392 and I will get right back to you.

The Harlequin Honda 1975 CB750F Super Sport

Well, here we are with the Harlequin Honda that I have created, its been a long build as originally the Motorcycle was bought down from Washington on November 4th 2015, Edwin Cooper was not well, he had Cancer and wanted to try and revamp his trusty old Steed that he had had for many years, he wanted me to do something cool with it and loaded this Motorcycle up in the back of his pick up and came down with his daughter and dropped the bike off.

I helped him unload the 1975 CB750 F Super Sport, it was heavy, the brakes were sticking and it really did need some love, but- thats what I do and was more than willing to bring this motorcycle back to life and breathe fire once more.

This would prove to be quite a challenging creation, as there was a lot of time and weather that had passed over this machine, I have been there many times but I am amazed at how many Motorcycles that I have built that were all in this condition, some a lot worse too.

He had started to Cafe the bike out a little, many moons ago, hence the Shortened Headlight ears and the Italian Tarozzi rear sets and an old 2 Four seat that dates back to the Mid 1970’s.

Have a look and you can see that there is a lot of stock parts still on the bike, like the chain guard Gas tank gauges etc and of course the old wiring, and that had seen better days for sure, the weather can totally destroy a wiring harness in just a few seasons, especially if the temperature gets hot then col, it dries the wires out and makes them fragile.

This also has an Old Yoshimura 4 into 1 system on it, seen better days but nice to see none the less, that is now fitted onto a AHRMA race bike and gets used all the time.

As you can see, the Birds nest wiring will need to be completely stripped out, soon as I see toggle tops and electrical tape, I know that it needs to be removed right away, else it will be a headache that you do not need.

You can see where Mother nature has taken a firm grip of this Motor, Oxidization is a mean Culprit by the look of it, the Plug caps were so weather beaten, as I tried to remove it, the cap cracked and fell into many pieces.

I wonder what sort of critters over the years had chosen this 1975 inline Four as its home? Nothing really surprises me these days but intrigue always does and if this bike could talk, well, I think we may have a fun movie in the making.

The Carbs were locked up, seemed to have dirt and grit from everywhere and a little wasp nest in the Carb body itself, Mother Nature really took a hold of this one.

I loved the 1960’s Hot Rod Stewart Warner Mechanical Oil pressure Gauge, I am also a Hot Rodder, so this made me smile when I clapped eyes on it, poor motor has a lot of oxidisation on it though and will take time to remove and clean all that up.

We have a multitude of issues here, the rear brake caliper is seized up, piston is stuck and seals are shot, Rear rim is toast, the same goes for the rear shocks too, the swing arm looks like it has come from the bottom of the Baltic Sea, this will be a down to the frame build for sure.

Low miles too but the weather makes it look a lot worse to be honest, nothing that cannot be fixed though and this Super Sport will see a Brand New life and Look forward to sharing the photos when she is completed.

Front Brake caliper is also seized up, the front forks need rebuilding, Rotor needs to be skimmed and New rim built.

Unfortunately the rims had rusted right through, so all that I shall use is the front hub, Rotor and Caliper body and will refurbish all that I possibly can to this grand Old steed.

All the wire harness was Rock hard from being baked in the Sun, the rectifier and the regulator will be discarded, and I shall be using a New Harness, along with a solid state rectifier module, as I use them on ALL the builds that I create, cant trust 40 year old electrical anyway.

I know that this will have a different look by the time I have finished, not sure how just yet but- It will look pretty cool none the less and of course, Function well too.

So there she sits, before getting transformed into a cool Custom Machine and I am looking forward to tearing into this to transform into some cool eye candy.

So it is time to push this 500 pounder, into the garage and start to take this motorcycle apart and figure out what I am going to do to this 1975 CB750F HONDA.

And so we begin, this will be a long Journey with some hiccups along the way , but I know that it will look a lot different by the time this comes back out.

I started to go the route he wanted, to go with his motorcycle, then all of a sudden from out of the blue, I had an awful phone call informing me that he had just been in a Motorcycle accident on his Harley and did not make it, I was gobsmacked, and, the family were too, they didn’t want another Motorcycle in the family and I understood that, so they gave me the bike and said do something cool with it.

Above, I hand bent Raw steel and then Rolled the rear, welded it and then began to do a little more to this seat base as I want it to be able to take a passenger, as all you see are single short seats these days.

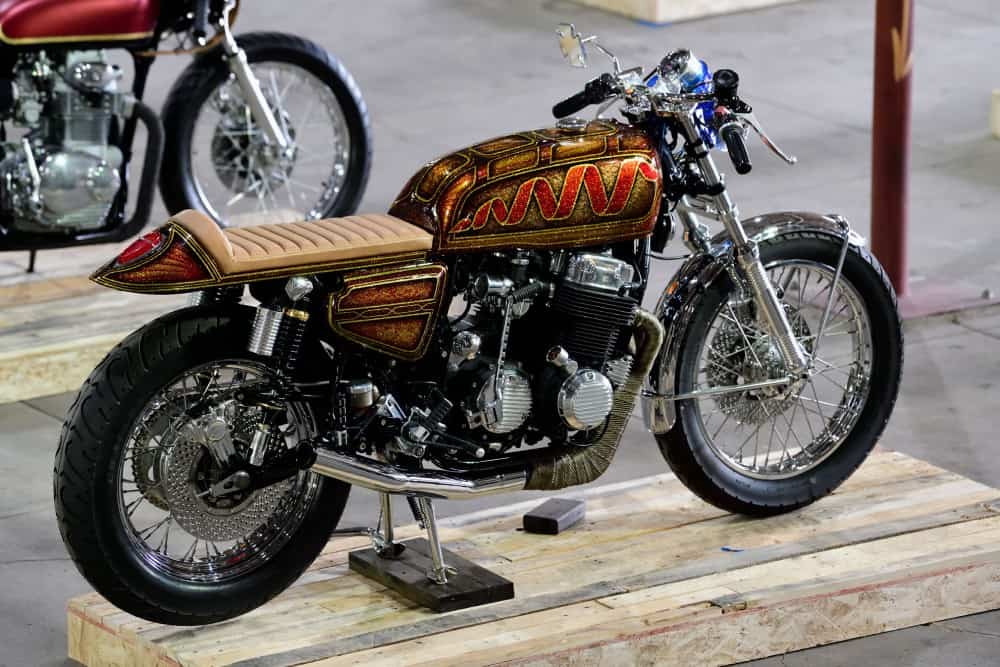
So the transformation began, slowly and I am happy at the end result, I named it the Harlequin as it has so many Colors and my Favorite Candy Bar is TWIX, so you can see that too right?

A lot of flake and detail but wanted that old school Low Rider flake that was about when I was a teenager back in the UK in the 1970s, when the Sun hits the Gallon of Clear coat, you will discover why metal-flake was so popular back in the day, a Kaleidoscope of Candy colors pleases the Cornea.

I have created over 50 Custom HONDA based Motorcycles since moving here in 2000 and every time I start a creation, I have to sit and ponder for quite some time, I am glad that I had no deadline, so the pressure was off and as and when I thought of something cool, I would just do a little bit to the bike and then back to work on other customers parts etc.

I fitted My Sidewinder exhaust system to this build but wanted to try my other sets ups as well, just to get the look and later, hear the different tones of my exhaust systems and decide which one I will like, this is ceramic coated but think I may end up using DEI Titanium Wrap on the header and maybe triple coating the tail pipe in Chrome, we shall see. Below is the Hot Rod tail pipe that fits to the Sidewinder header, a crisp and Velvet bark and as you can hear, very responsive to the throttle.

I have sold many Hot Rod, Side Winder and Razor systems through out the world, all made right here in California, none of that made in china crap.

I fitted a small 5-3/4 Chrome headlight to my Custom Fork Ears, and wanted to create a different look to the front end, so I went with a Biltwell Bubble Visor from their Helmet catalog and this worked out great as a mini nose fairing, even threading the clutch cable through the Plexi Glass.

I wanted to mix Old School with New and decided on using a GPS speedometer but with that old school Smiths looking gauge face and needle that still sweeps, this worked out so well.

Here is the old bucket I used and Tig welded to my custom bracket, just needs polishing and I shall also be fitting small LED Amber display lights for the turn signals to plug into.


I used a old Bucket and welded a bracket I water jet cut and it seemed to go right in and the great thing with this is that it has just a power wire and an anttena wire, you are all set to go, even has a LED red back light too.

This was the right look that i wanted and am glad that I chose to go this particular route, gives the machine just a little more character and style.

Here is the Harlequin outside out Home, so cool to see it in the sunlight and I am super stoked at the way the bike turned out in the end, a long but rewarding Project that really does turn a few heads.

Plenty of eye candy to look at on the bike, the Paint alone is super cool, and as the saying goes, “The Devil is in the Detail”

I am proud of this Build and being a steel tank and seat, this is a sturdy machine that is no light weight for sure, it stands tall too, many do not do that.

The Harlequin sports my Custom 4 into 1 Exhaust system, The Side Winder, I Ceramic coated the header, then wrapped DEI Titanium Heat wrap onto it, to give that Hot Rod styling, then I triple chromed the rear tail pipe and it sits nice and snug and close to the bike, this turned out so well and a system that I offer on the website for all SOHC Models.

A fun machine that was a real joy to create and will be on the show circuit around Southern California this year, hope you can come and check it out some time, be glad to see you.

I removed the old Super Sport Gas Tank Flap that used to hide an old tin cap, I then welded a Harley Bung and fitted a Custom Gas cap, looks so much smoother now.

I also did a few other changes to the bike by machining the forks and making a Brace bar out of 6061 T6, and of course a 1971 Rectangle fog light to show the European Spirit here.

So many New parts, this is like a Brand new Motorcycle now and the more you look, the more you see a little more custom touches throughout the ride.

Photo Credit: #RahoulGhose

This is a cool shot at the Outliers guild show in Down Town LA last week, stoked to see it on Display with other cool machines from around the state.

Photo Credit #RahoulGhose

Here she is sitting loud and of course proud to be representing, at the OG show in LA, a very cool event and I really enjoyed it.

A classic look of the Custom years back in the 1970’s when I was a Teenager, this came out so well and super stoked at the response I received at the Outlier Guild show.

The 1939 Ford Lincoln Mercury tear drop LED tail light set off well in the frenched pocket I created, I also had made the steel cowl and seat base.

Photo Credit #RahoulGhose

It has been an amazing year and to get the Harlequin completed is another notch in the post of creativity, I strive to do the best I can and hope that you liked the build?

Like I said, I had a great response for the bike and even the band that was playing loved it. Band- WOOLY BANDITS- Singer- Christa Collins.

Thanks you for everyone that came up and spoke to me, I was super stoked, this is a great creative family and super glad that I was a part of it, I look forward to attending more.

In Memory Of Edwin Cooper, I am sure he is smiling from above.

Below is  a list of of things done to the Harlequin.

  1. Machined and Polished Front Forks.
  2. Machined Aluminum Fork Brace.
  3. Polished Hubs.
  4. 19X40X1.85 Chrome Front Rim.
  5. 18X3.5×40 Chrome Rear Rim.
  6. Stainless Steel Spokes.
  7. Hand Drilled Rotors.
  8. Custom Piggy Back 14 Inch Shocks.
  9. Polished and Rebuilt Rear Caliper.
  10. Braided Steel Brake lines.
  11. New Chromed front Fender.
  12. 5 3/4 Chrome Headlight.
  13. Biltwell Helmet Visor.
  14. Custom filled and smoothed S.S. Gas tank with Harley Cap.
  15. Hand made Steel Seat with leather Tuck n Roll.
  16. Metalflake paint.
  17. Hand Made Clubman Bars 7/8.
  18. Biltwell Grips.
  19. Rebuilt Motor with Polished Covers and Wrinkle Paint.
  20. Restored Carburetors and synchronized.
  21. Drilled and Chromed Kick starter.
  22. Wrapped Sidewinder 4 into 1 exhaust with Chrome tail pipe.
  23. GPS Speedometer.
  24. New master Cylinder.
  25. New levers.
  26. Tarozzi Rear Sets.
  27. New Challenger tires and Tubes.
  28. 1939 LED Tear Drop Tail Light.
  29. LED RED rear Turn Signals.
  30. LED display lights.
  31. Polished upper triple tree.
  32. Powder Coated frame.
  33. Lithium 12 Volt EarthX Battery.
  34. New side covers.
  35. Chromed Center stand.
  36. Chromed Side Stand.
  37. 530 X Ring CXhain.
  38. New wire Harness.
  39. New handlebar switches.
  40. Oil Pressure Gauge.
  41. Battery Tender.


ELECTRICAL SYSTEM BASICS

Many emails over the years ask about electrical issues on their Honda’s, I thought that today I would try and add some information on here today to try and help you out a little.

The vintage bikes from the 1970’s, such as the HONDA CB550, have a simple electrical system consisting of approximately 40 components altogether making it possible for anyone with some basic skills and tools to build their own electrical harness.

Here are all of HONDA CB550’s electrical components:

HONDA-CB550-ELECTRICAL-COMPONENTS

Even though such a set-up may be as basic as they come, to be able to work on any electrical system and/or to make a new harness, a clear understanding of the essence of the electrical system is a must.  For me, anyway.  I am not very good at simply following instructions like purchase these components and then do this and that.

I like to know how things work.

So, here is my take on what is going on in any electrical system that is employed in any motorized vehicle.

The heart of the electrical system is the battery.  It powers everything.  But its power diminishes with use and so it must be replenished.  Exactly like the battery in your phone or the battery in any of your power tools. To recharge a battery, we need a source of electricity.  At home, it is easy.  Plug your phone into the wall outlet and it all happens automatically.  In a vehicle, a different source of “battery recharging power” is needed.

Enter the alternator.  The alternator (and all electricity generating devices that send power to your home) operates on the same principle as the one first, reportedly, employed by Michael Faraday nearly 200 years ago in the 1820’s when he observed that rotating a magnet inside a stationary coil of wires (or moving a “magnetized” coil in and out of a stationary coil to be precise) produces pulses of electricity.  The electrical current so induced alternates from + to – and for this reason it is called alternating current, and hence the name of the device that produces it.

The take-home lesson here is “a magnetic field rotating inside a coil induces electricity in the coil”.

In the HONDA CB550 engine, the “rotating magnet” is a combination of a rotor bolted to the crankshaft and a coil called a“field coil”.  The stationary coil is called a “stator coil”.

Neither the rotor nor the field coil are magnets themselves and so they cannot generate a magnetic field.  In order for the alternator to work, the field coil must be magnetized.  When electricity from the battery is sent to the field coil, a magnetic field is generated, which, through the rotor, is effectively rotating inside the stator coil.  This induces electricity.  (Like the old adage “you have to spend money to make money”. ) Exactly the same kind of electricity that Michael Faraday observed in his experiments mentioned above.  The electricity produced in this way is then used to recharge the battery.

Fair enough.  But, there is a problem.  An alternating current cannot charge a battery.   We need direct (a constant + and a constant –) current for that.  So, a way must be found to turn the alternating current (AC) into direct current (DC).

Enter the rectifier. The rectifier is essentially a bunch of diodes inside a housing.  Diodes are “filters”.  They allow only positive or negative charges to go through.  So, the AC goes into the rectifier, the positive charges go through one set of diodes, the negative charges go through another set of diodes and as a result DC comes out.  Job done.

But, now, there is another problem. What happens when the load on the battery is low (you are riding on the highway in daylight and the only electrical current consumed from the battery is going to the coils, which fire the spark plugs and that is not much at all)?  The DC current coming from the rectifier will charge the battery completely and if that current is uncontrolled, the battery will eventually become overcharged.  That’s not good.

Enter the voltage regulator.  This gizmo is placed between the battery and the field coil.  When the battery is low, the voltage regulator sends plenty of the battery’s electrical current to the filed coil, which produces a strong magnetic field and consequently a strong current is induced in the stator coil, which then goes through the rectifier into the battery.  When the battery is fully charged, the voltage regulator reduces the electrical current going to the field coil consequently reducing the current that goes to the battery.

Lets’ put this into numbers to make it a little clearer.  When the battery’s voltage is below 12V, the voltage regulator sends plenty of the battery’s power to the field coil.  When the battery’s voltage is around 14.5V or so, the voltage regulator sends very little power to the field coil and the induced electricity is essentially like you battery charger at home going into battery maintenance mode.

Here is a very basic schematics showing how the alternator, voltage regulator and rectifier are connected.

Basic-Electrical-Schematics


Looking at that, a seemingly obvious question is, “Why are there three yellow wires going from the alternator to the rectifier?” That is because the alternator is designed to produce three separate “pulses” of alternating current called phases.  All 3 go into the rectifier and all 3 are turned into DC.

The two thick black vertical lines to the right of the alternator represent a connector.

Now, let’s find out what these things actually look like.  Once the left side cover is removed, here is what we are going to see.

Electricla-box-with-rectifier-and-starter-relay-identified

The labeled connector in the photo is where the harness coming out of the engine is connected to (i.e. the connector mentioned above).  The three yellow wires coming out of that connector carry AC from the alternator.  That AC goes into the rectifier and DC comes out via the red (+) and green (-) wires.  The red wire is directly connected to the battery.

Taking a look at the back of the electrical components box, we can see the voltage regulator.


Voltage-regulator-identified cb550f

Power to it comes down the black wire once the ignition is switched on.  Power to the field coil is sent via the white wire.  The green is ground.

That’s all there is to it.

Let’s recap: When the ignition switch is turned on, power from the battery arrives at the ignition coils and the voltage regulator.  The ignition coils are energized.  The field coil is magnetized. Kick the kick start and the engine fires, the alternator starts producing electricity (AC), the rectifier turns it into DC, which goes to charge the battery.  Once the battery is fully charged, the voltage regulator makes the alternator produce less electricity so the battery is always optimally charged.  Cycle complete.  And we are back to where we started when we said, “The battery is the heart of the electrical system.  It powers everything”.

What this teaches us is that all that is needed for the machine to run is: ignition switch, battery, voltage regulator, alternator, rectifier, ignition coils and points.  None of these components can be eliminated without negative impact on performance.

Everything else is, more or less, optional.  A fuse or fuses are a prudent addition.  A headlight, tail light(s), brake light(s) and turn signals (as well as their associated switches and relay) may be required by law. If the electric start is to be retained, then the starter relay and a start switch will be needed.

And then come the “conveniences and luxuries” such as neutral gear switch, neutral gear light, oil pressure sensor and associated light, etc.

With this in mind, a brand new harness can easily be put together.  If the original components are not available or desired, many quality aftermarket parts can be used.  These days the rectifier and voltage regulator come in a single unit, which is the preferred solution for café racer and custom builders since it saves a little bit of space.

Thanks to: Kyril of Black Square Motorcycles, very informative.

Below are some Schematics I have added to help you on your Honda CB750 Models. First is a KO-K1-K2

CB750k1

Then a CB750 Automatic Schematic.

CB750auto

Below a CB750F 1977-1978 Diagram.

Honda Cb750 Wiring Diagram Honda Ca95 Wiring Diagram • Wiring Articles and Images - Automotive Wiring Diagram
Honda Cb750 Wiring Diagram Honda Ca95 Wiring Diagram • Wiring Articles and Images – Automotive Wiring Diagram

A different take on the Old inline Four Boxing Day Blog

Well, Christmas has gone and today for me is known as Boxing Day, a tradition that goes back further than the invention of the inline Four Honda, and today as I sit at home and reflect on the last 12 months, I thought that I would type up a blog on the good old CB750 Honda, as some of you may know, I have built so many of these since coming to California that I should have shares in the Japanese Iconic Company.

The Custom scene has come on so strong here in the USA and of course Globally, it wasn’t that long ago people would literally stop and stare then eventually get the courage to ask what style of Motorcycle it was that I was riding. it is amazing how far we have come in such a small amount of time.

OK, I understand, we haven’t made a significant impact on the world Like Space X or when Super Glue was first invented, but now I feel we have a Mechanical Camaraderie, where there was just a distance nod from other creators in the same country.

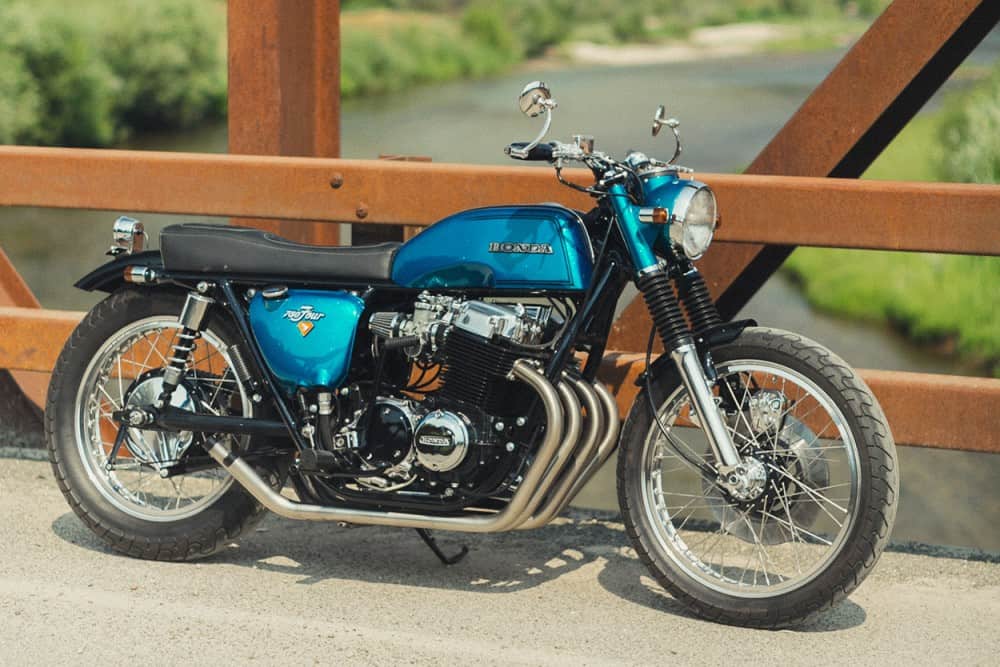
Today I wanted to blog about this inline Four that a company over in Nampa, Idaho named Rawhide, the owner Branden Wurtz. And as you can see they have created a CB750 thats a K5 era and gone a slightly different route and something I think needs to be shared. I enjoy looking at other builds too and it means we all have a simular interest and we show the same bike in different guises, how cool is that to see?

honda-cb750-restomod-1

Branden had a bike listed called the golden Goose but, it had already been purchased, but offered the customer a slightly similar build if he was still interested, the Customer was 700 miles south of him in my part of the country in California.. His Name was Tom and knew what he wanted, Branden listened and came up with a pretty good compromise, offering something custom but could of existed back in 1975 if Honda had enough run with the design team in Tokyo. This takes a little time and a lot of effort but the crew at Rawhide were up for the challenge and the gauntlet was thrown down.

honda-cb750-restomod-2

The Motor seemed a little tired and like you always should do, it was torn apart and Hopped up. “We used a Wiseco 836cc kit, with the most aggressive street profile WebCam Racing recommends with their billet camshafts,” says Brandon. The Honda now has new valves, seats and valve guides, new primary chains and tensioner, and a new cam chain, tensioner and guide. Rawhide cleaned and inspected every single part, rebuilding the transmission along the way too. A strong motor is imperative in these long, fast highways of life and as the speeds of Modern day traffic increase, we need to do the same with these old 500 pounders, and its nice to know that if there is trouble coming up behind you, a quick twist of the proverbial wrist, will make sure you are way out of that issue.

honda-cb750-restomod-3

Tom being 6’3 needed a long seat and wanted a shorter looking tank, so an old CB200 gas tank was Located, then the sides were scalloped to allow for the 2 outer carbs to be able to slide freely and not hit the tank, the tunnel was cut out and refabbed to allow it to sit on the Duplex Cradle frame and made sure it sat level and looked like a factory fitting.

They then epoxied the Petrol tank using  GTL Advantage to make sure there was no delamination or horrible leaks, as this was going to get an expensive paint job and had to be right on the money.  Branden used the Factory side covers but trimmed them back to give a cleaner and tighter look and pulled that job off very well.

honda-cb750-restomod-4

Meanwhile the front end needed some work, so with Deep Dish and high shoulder Borrani Rims, these were laced with spokes from Buchanan, who are not far from me in California, the hubs were cleaned, degreased and bearing removed and then powder coated Black and assembled once more with polished embellishments.

They chose to go with a smaller but neater set up for the headlight and upper fork stanchions but re-fabbing an old Honda CL77 headlight shroud (1967) as that model had a recessed speedometer and cleaned the top of the triple tree up for sure.

honda-cb750-restomod-5

The front fender got a thorough trim, taking off a good chunk of the original but a shorter fender does make the front tire look bigger, they also lowered the fender, rebuilt the caliper and polished the Body, New gators and polished Lowers on the forks complimented the bike.

A set of 12.5 inch Sprung shocks at the rear from Hagon were applied but chromed covers fitted to give it that old style CB750 look, of which I have done too and love that styling .

honda-cb750-restomod-6

The bars are low-rise CB400F units, kitted with controls from a 1965 Superhawk. Complementing those are Halcyon bar-end mirrors, a Kustomtech master cylinder, and scalloped clutch and brake levers. A neat and custom look that many Builders leave stock, so always refreshing to see the extra yard made on builds such as this.

A reconfigured wire harness was made from scratch but using the stock Honda wiring colors to make things more understandable for later on in life if things need to be changed or updated etc, it makes sense I tell you.honda-cb750-restomod-7

Upgrades include a Charlie’s Place electronic ignition, Dynatek coils, a regulator/rectifier from Rick’s, and an Antigravity Lithium-ion battery. A Posh Japan taillight and turn signals round out the lighting. Giving the bike a more Traditional look and it flows vert well to cover the square end of that seat assembly off, the Devil is in the detail remember.

Finishing things off is a customized four-into-four stainless steel exhaust system, with each header terminating in a custom-made end tip. Rawhide designed the slip-in tips with baffles, and then had them machined and coated in a high-temp semi-gloss black finish.

honda-cb750-restomod-8

The bike’s been shot in a House of Kolor ‘Oriental Blue Kandy’ with a green micro flake, and adorned with original Honda badges. The bike turned out well and Tom is a Happy Chappy, he likes the low end torque of this old 500 pounder and with all the little hop ups, it does not hang about and you may often see the tire spin as it gallops down the tarmac with the bark of the hand formed exhausts. There is way more here than meets the eye and all the nuts and bolts were either zinc plated or chromed, and that does indeed show on a much closer inspection.

honda-cb750-restomod-9

A cool and different approach and something I like to see, well done mate and I hope to maybe see this at a show down our way at sometime. And what a superb location to take a photo of this Japananese machine, what an epic barn and an epic Honda that I believe no matter what guise it takes on, will always turn heads.

Let me take this opportunity to Wish you ALL a very Merry Christmas and hope you enjoy this festive time with Family and friends, many thanks for supporting me, small businesses need support and I am Blessed to have such loyal customers. Enjoy.

Peace & Grease to you ALL!


christmas cardaa1

banner6


CB750 Creation ” The BRATSTER”

Over the years I have built a number of inline Four machines as you may well know, I have always liked these Motorcycles because I used them as a Courier Bike back in the UK, they were Affordable and reliable and lastly they were an awesome Platform to be able to adapt to how you wanted the machine to look.

1

Beauty is indeed in the eyes of the beholder, but with this bike when I first picked it up, it was in a bad way and needed help, but, trying to change something on a shoe string budget is some times almost impossible, so when I pushed this bike onto the Concrete and saw the potential, well I had to at least give a go eh.?

2

This old Girl was a 1974 CB750 and many many Moons ago it was Created to be a Land Speed Racer, I have a little or know information on if it ran, where it ran or what speeds, it was very poorly made and to be honest, too Bloody dangerous for me to sling my leg over and have a go up on the dry lakes for any record.

6

It had no title and was leaking oil and looking very sorry for itself when I parked this 500 pounder up, but once I had made a Brew, sat back and thought for a bit, I knew I could at least resurrect this CB750K Model in to some sort of head turner.

9

So, with pen and paper in hand I jotted down a few ideas and came up with the idea of building a fun little Brat style Bike that would have a Chunky look and feel but real fun to ride.

7

After a day of Mulling around , I decided that I would get the Motor running first and if that runs I will then go from there as this may take some time as it was not a commission for a build but a cry of help as I bought a few bikes off a buddy who needed space in his Garage, so this would be an on going bike and Not at all a show bike, just a tough Motorcycle that would probably suprise a few motorcycles at the lights as it buggered off into the sun set whilst you are watching it disappear into the distance..

8

The bike had a terrible set of gas tanks made from old alloy Cylinders that were Bolted to some old Nuts that were welded to the frame, there were parts hanging off that shouldn’t even be on there, so I decided that this would be a Brat style and I am going to change oil and plugs, add some coils and Battery and rebuild a set Carbs to see what we have hear, as there are no carburetors on this bike at all. So off I went in search of some carbs, and took an old blocked up set I had as spares apart, cleaned, re-jeted and fitted to the old Dry lakes Bike.


Below I have fitted Carbs and a exhaust to see how she runs and it is now tuned and am happy about the sound and crisp response that my 4 into 1 systems make.

My ears were ringing and actually Blew the Sub-woofer out in the workshop because the bass not was so strong, but a minor price to pay to now know this motor runs hard and true.

20e

So, as the rear end of the bike was missing, I thought I would massage one of my rear Hoops I make onto this frame and create a Brat style bike that will be so much fun to ride around on.

20h

An easy job and looks great, so I can later make a Flat seat with New Foam and Diamond stitching to give it that Brat look that is so popular right now over here.

10

The old 16 inch rim had a massive sprocket, I think 170 or 200 teeth, erm, not for the street for sure , else it would wheelie everywhere ha ha, so removed the rims and rebuilt a new set but Polished the Hubs from this bike and laced with stainless spokes.

19

Now that looks a lot better and now ready for the Rubber to go onto the outside, this time I thought I would spare no expense on the tires as they are an important part to make sure these keep you on the tarmac, so opted for a Set Of Cokers Tires and I am going to make a Diamond stitched seat later so wanted tires to match in a way.

20d

I also removed the forks, rebuilt and fitted New upper tubes, as well as Rebuild brake caliper and refurbishing the old rusty brake rotor too.

20a

A lot cleaner that it was when it first limped into my hands and am real happy at the way this is coming along, as I said, no show bike so not removing the motor and painting a frame, this will be a fun bike with a few new parts or refurbished ones at the very least.

112

Above, I repainted the Motor and detailed it with Stainless steel Allen bolts and I wanted wrinkle paint this time to help dissipate the heat when riding.

99

Getting there, Rebuilt Carbs, new boots and a cool Aluminum Airbox made this Motor breath and respond so well, its the devil in the detail or carboration that wins the race.

20ab

Now the job of fitting Headers and so many choices from the styles that I have created for these 500 pounder machines, but the bike is taking shape now and I really like the way it is going.

20aa

The Motor looks great, I also added a cool Oil tank with a Battery Box already inside it, so this will really look trick and can hide some of the electrical in it too and clean the frame up some more.

26

I wanted to use my Newest design exhaust system, the Side Winder, this breathes like a New Nose and wanted to also Hot Rod it out by wrapping the headers in Titanium Heat wrap, it sure came out well and this will look great perched in front of that inline four engine.

27

Now, that is a lot better and glad that I went this route, I have sold lots of this heat wrap and this is the first time that I have used it and as its Titanium it doesn’t fall apart like that cheap fiberglass stuff thats out there does.

28

On the Arse end of the header I wanted to fit my New Sidewinder tail pipe with the Yoshi style Baffle, and boy does it look great and super stoked that I did go in this direction.

24

Next up I need to make a seat pan to cover the Battery tray and oil tank up and will go simple with some 18 Gage steel and then will add foam and upholster in a Light Tan Naugahyde material with Diamond stitching.

25

Simplicity is the name of the game for this machine and I am now cutting the foam to fit the seat pan that I just made, this is almost there, maybe another half an inch of foam then upholster.

22

I am now happy with the thickness of the Foam and am looking forward to seeing this with a Light Tan seat ontop of the frame, I feel it will be a good contrast. so lets go and see.

53

Way better now, I also added a Blue frame to go with the old 1970’s painted gas tank i found and think its a good combination for this creation, it is a tough machine for sure.

49

The Brat sits well and with the Custom Oil tank that I now offer on the website, it runs well and uncluttered like man I see.

Added some NEW Handle Bar switches to make sure that all works well and stays like that, no faded grey crap like you see on so many on the internet these days.

37

My Custom made license plate frame with Hot Rod stop tail light assembly looks great and another thing I produce and sell on the website.

Tail light tells you when you need to stop too, neat eh?

81

This bike runs hard and strong and was so good to see it back up and running again, after years and years of neglect, if she had a face she would be smiling, that I am certain of.

52

The Bike also has my Own Handlebars that I designed and had mandrel bent and chromed, and gives that bike that Period look of the day, it sits well and rides so comfortably too.

59

A strong machine and this has already been sold to a customer and is now residing in Canada, my fruits of labor paid off and the new owner is super stoked to get this bike from me.

90

My Bulldog Bailey standing guard as I get some snaps, before it heads of to Maple Country.

82

Hope you liked this little resurrection? I sure had fun creating this Motorcycle and Glad somebody is enjoying it right now.

96

Added a Fog light for that European look and something the New owner is going to need up there in Canada, so just another cool touch to show this motorcycle Bratster off a little more.

DSC_0056

A tough little Machine with plenty of swag, and I am sure that it will get many looks in the warmer months.

110

Big transformation and I did more work than I thought I would do and sold it way too cheaply but hey, its all fun at the end of the day and I enjoyed creating this bike.

DSC_0005

If you want a Motorcycle created, or just parts etc, drop me a line carpy@carpyscaferacers.com I am always glad to help or just advise, and you can also call or text me with questions on 714-598-8392 and I will do my very best at helping you with your own creation.

DSC_0030

Thanks for reading my Blog on building this machine , and many others I have created and still continue to.

DSC_0040


I fitted 2.5 Analog gauges and also made a Neutral light that is fitted into the steering stem nut, plus New master cylinder, New levers cables and Grips.

DSC_0020

Another thing I did was add my headlight ears that I sell on here as well as the cool headlight with the internal LED Turn Signals, as that cleans the front end up, I fitted my Fork Brace too to stiffen the frnt end as I removed the fender, many dont do this and have floppy forks.

DSC_0049

The heat Wrap I now sell on the website too, in Black or Tan, both look great and clean up your old headers to revamp them, 50 feet is enough for your headers and I used two inch wrap.

DSC_0042

Thanks again and another Build leaves my place and I am now looking at another creation, appreciate all the cool comments whilst i was building this, have a great week.

DSC_0071