Friday at last, the weekend begins

Its that time at last, Friday evening, its nice to know that the weekend is now here, I have many orders to try and get out the door and tomorrow I shall be up early so i can pack a bunch more orders to send to my Customers.  It’s my Birthday Monday and although i have to work, I am blessed to have another year of doing what I love and I shall be churning more parts out this week for sure.

Have a Great weekend all of you and hope you get some time to work on your steed or even get to ride it.

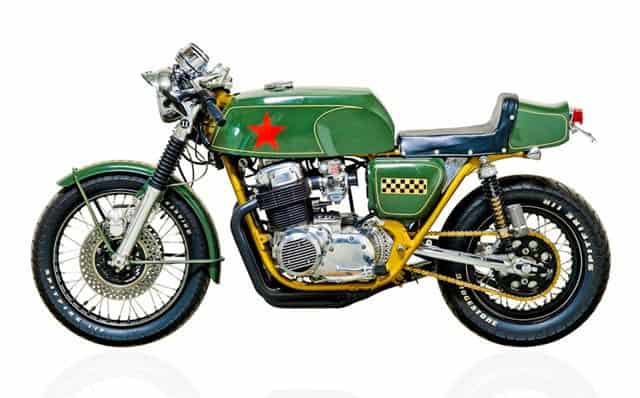
Working on Greenday HONDA CAFE BIKE today

Well, time and tide wait for no man whats that about?

One must not procrastinate or delay, as in Let’s get on with the voting; time and tide won’t wait, you know. This proverbial phrase, alluding to the fact that human events or concerns cannot stop the passage of time or the movement of the tides, first appeared about 1395 in Chaucer’s Prologue to the Clerk’s Tale.

I’m stoked to still be invited to such big shows with many cool long term Motorcycles builders and the Greenday Bike should hopefully get some attention even after all this time.

Hope some of you may be able to see this old girl at some point, there really wasn’t anything around when I moved here 20 years ago in this style, many Choppers but No Cafe Bikes, and am proud that this is still around 14 years after I created it.

I love looking at this Thoroughbred, it handles well and is super responsive on the throttle.

I have a bit to do this weekend before the bike gets picked up and gets delivered 1300 Miles up in South Dakota.

 So, I have to get on with some more work on the GD Machine but wanted to at least show you how this Motorcycle is looking, Fourteen years after I had completed it.

My Old Thruxton was a Fun Machine

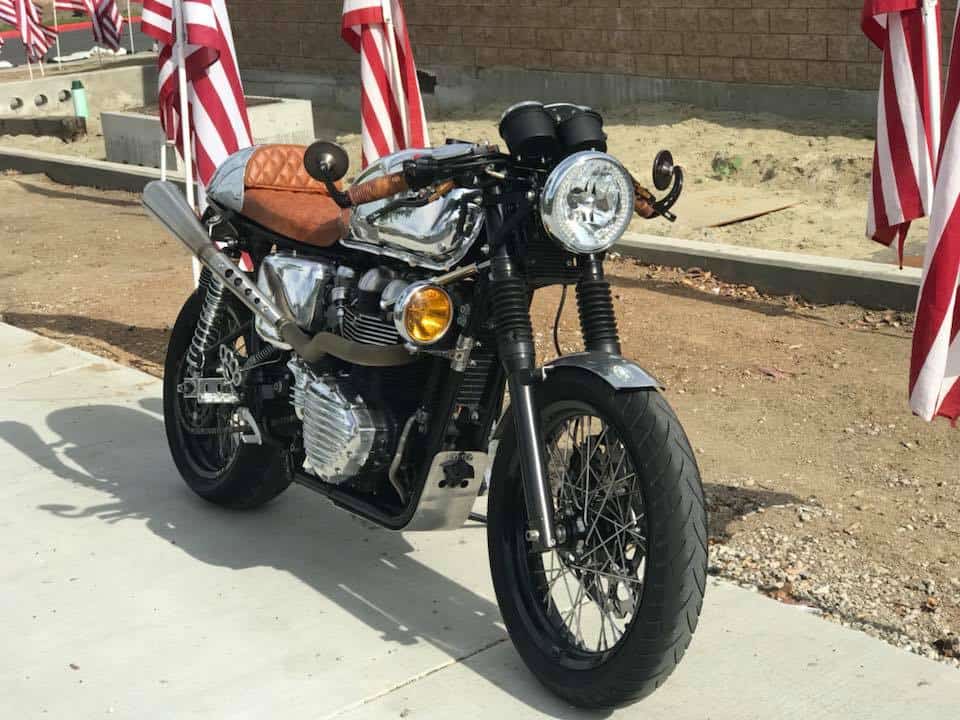
Having a day to remember this afternoon, remembering my 2013 Triumph Thruxton that I bought as stock as the Proverbial Rock in Brea and then set about changing a few things as I went along and get it to the style and menacing Gnarly Growl of the mufflers as I hit the apex of a curve somewhere in Southern California. Below, even after a couple of weeks of owning this Thruxton, I hadmade some Monarch Megaphons out of stainless steel and changed the Shocks to a set of TEC piggy backs.

Although the stock Thruxton is so much fun to ride, I just cannot leave stuff alone, I have always tinkered with anything I have owned to try and make it look different and this Thruxton was going to get some sort of make over, but, I didnt want it off the road for long as I use it all the time. Thus a long timed transformation begun and boy what a Fun time I had with this little 900 machine.

Well, by the time came for me to enter the DGR, the bikes Livery had already changed and many modifications had gone by, but this was a great look that I came up with that reminded me of the old JPS formula 1 days and I rode the heck out of the twinline in this guise.

Now this was still ongoing and was not happy until I had changed a few more things but, I still kept this girl on the road, she loved to be ridden and ridden hard, and I got all the moneys worth out of this Thruxton and it was just a fun motorcycle to jump on and go.

I rode this machine in all sorts of conditions and Triumph did a superb job designing this 900 engine as it took what ever I threw at it and more.

It would be nice to keep every bike you owned but I am no Jay Leno, but at least I have some photos that I took to remember some of the fun machines I was lucky enough to own and ride a lot.

I have ridden this to many places and in the Boiling Sun or pouring Rain, the bike only ever failed a couple of times and that was a Puncture and a set of Blown Shocks, other than that, this just ran and ran.

Many a time I took the back Canyon twisty roads out to the Chino Air Museum, as I love ww2 Aircraft, its always fun riding out here and gets the cobwebs of the week blown cleanly out as you hit the curves on Carbon Canyon Road.

But a fun machine and something i wanted to share with you lot today as I sit at home ans catch up on orders for people bikes that they are completing in this Pandemic time we are all in.

I made a rear Cowl from Aluminum and set a Lincoln Zephyr style tear drop LED tail Light in the back, as this Cowl would also store my gloves, Goggles and documents inside.

I loved this set up and was finally happy at the final guise, it did turn many heads I must admit and never got pulled by Mr Plod either funnily enough.

This time Soft Tanned and aged leather was used with 2 inches of High Density Memory Foam to make sure my Arse did not get numb on our long rides that Jennifer and I took.

This bike sat well now, big 5.5 rear tire made sure that this stuck to the tarmac and a set of Berringer brakes up front on a wave rotor made sure I stopped in time.

The Full Stainless Steel Italian Zards Barked well and I wrapped the front in Space EX sleeves that kept my legs from burning and it really worked well to be honest.

I needed that Fog light on many occasions and it gave my Trumpy that European look, I sell the fog light kit still today to people all over the globe, as well as the headlight with internal LED signals, I hand made the fender from an old BSA model.

Another one of My Products that I designed and manufactured, was the Knuckle Duster Heel guard, I had sold many of these and they really do add some cool detail to the bike, many of which people forget about. I also drilled and welded tubes in the swing arm and chromed for that Custom look.

This was a nice ride height for me and took some time to dial in to how I wanted it but now in this guise it would whip into the corners like a Go kart.

I hoped you liked a little insight into my Triumph Thruxton EFi 900 Cafe Racer machine? I sure had a Blast getting this to how it is now.

Hope that you lot get some time in the saddle this Summer and enjoy what we are so lucky to have and share the commeraderie of the road with other like minded people.

Sure be nice to see some of you when we are out on our travels, we have made so many friends in this industry and always glad to meet other enthusiasts such as your selves.

It is always good to get out and when I get back, my mind is clear and I am ready to design and make new parts once again, this has been a fun 20 years doing what I do.

If there is anything I can do to help you along with your machine, just drop us a line at carpy@carpyscaferacers.com or text on 714-598-8392 as I am here to help.

Thanks for reading my Blog today, its fun to do, takes a bit of time but always worth it if I cheer your day up a little bit.

Peace N Grease to Each and Every one of You!


Exhaust Orders going super strong right now

Hey you lot, wow! Is all I can say, so many exhaust orders plus tons of parts going out the door, trying to keep up all the demand for parts for you to complete your Motorcycle Projects, so you can get out on the tarmac and blow all of lifes cobwebs out of the New Exhaust system I am supplying you all with.

So many Negative things going on in the world right now and as many of you are locked down in your place, you are getting positive things done like completing your Custom machine, and once you get out of your dwelling, you can enjoy the freedom of the roads and breathe in fresh air at 100 mph.

I have sold so many over the years and continue to offer a super fun system thats easy to install and made right here in Southern California, many people ask about my systems and then they email me after to say how wickedly cool these sound.

I really enjoy my job and seeing people happy, I have been doing this for over 20 years and still ride every single day of the week, and I want to Thank You All for supporting me in what I love to do.

Thank you all for your Patience, it is so nice to know that you like my parts and, I continue to push the envelope with new products coming out all the time, I push hard at pleasing everyone but must admit I have been over whelmed with orders these last few weeks and thank you for all understanding that some of these things take time as only now are suppliers opening their doors.

Its always fun designing new parts and I will be bringing some New systems out soon for you to try on your inline four Honda  machines.

The exhaust systems are affordable but function so well, you will love the Tone and over run and the mid range really comes into its own compared to others out there in the market.

If you want something that Fits, and works very well, and- Getting value for money, Look no further, I ride, many other companies dont even own a Motorcycle, what does that say about them? They are just in it for the money, to me this is my Passion and Lifestyle and I continue to push that proverbial envelope.

Have a Great week and look forward to hearing from you about your inline Four Motorcycle at carpy@carpyscaferacers.com

Peace and Grease to you all.


Built a set of Custom forks for a Customer, thought I would share.

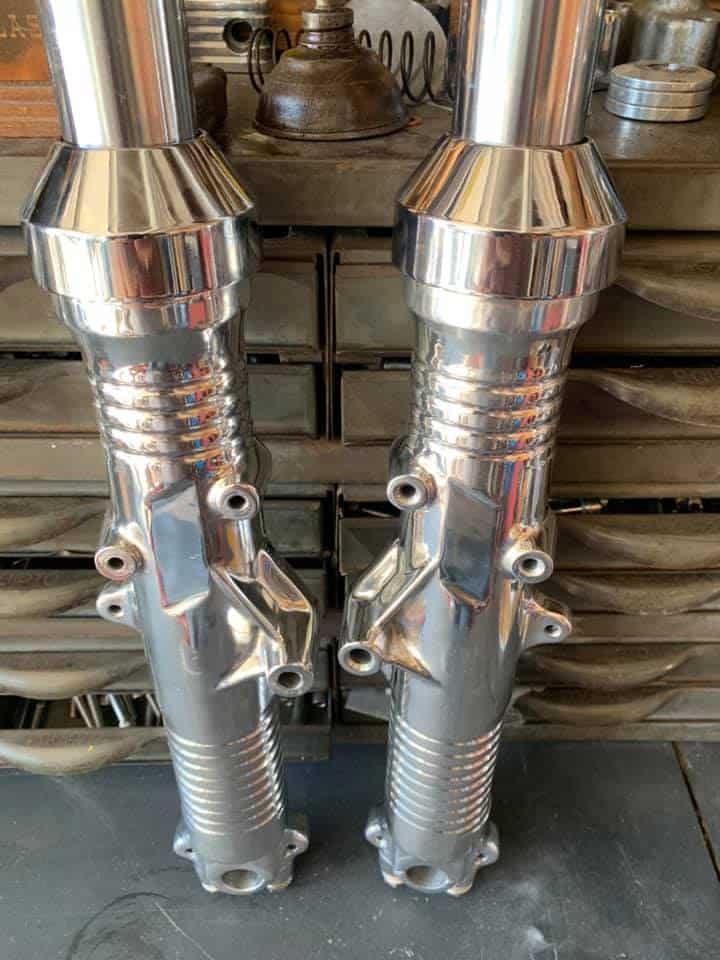
Many people have sent me their forks over the years to rebuild, polish or just hop up a bit as they get tired after 40 years of taking punishment from all road surfaces over time.

As the photo shows above, this is the old set that I am going to be working with, I strip these down, clean up and then what I do is machine some cool looking ribs into the stanchions to have that Custom look and then magnaflux it to make sure all is ok.  Once that is done I polish the lowers and then get brand new fork tubes made for the uppers.

I like to use as much Genuine HONDA parts as I possibly can and these will look so clean when everything is put back together and then you fit to your inline four machine.

As you may be able to see, I have New Hard Chromes fork tubes fitted and I have just put the OEM Honda Fork seal in place, here is the trick that I use to fit these seals, also- Remember, make sure the lettering faces upwards not down.

I use a piece of UPVC tubing that I bought from Home depot for about $2.00, this slides down the tubing and sits snug on the seal, but it fits inside the aluminum stanchion perfectly.

I simply tap the Plastic tubing with a Rubber Mallet until the seal bottoms out on the shoulder and there you go, no press needed and no damage at all, I have been doing this method for over 20 years now and never ever have I had a fork that has leaked by using this tubing.

I use some Harbor Freight Circlip pliers to snap the Original 2 hole clip back into the recess inside the fork leg, you will feel it seat when you let the pressure off the pliers.

I use as much genuine Factory parts where ever possible, and in this case I use New old stock Dampner Bolt and Copper crush washer, just to make sure all is new and fits as it is supposed to.

I use genuine Honda Dust caps to make sure all the crap stays away from the forks, then- Just to add some super cool Custom finishing, I like the way these complete that Custom styling on the front end.

See what I mean? Its a nice Custom finished look that really does not cost a lot of money and it is chrome, no plastic crap.

I have always used ATF for forks, the old Pro Racers mechanics used it and I still do today, I also used stainless washers on top of the springs to set the pre-load.

That’s is how much I pour into rebuilt forks and people ask me “How do you know how much to pour in”?

This is one of my Bibles that I use on things like fluids, point gap, timing and the like, always served me well.

I also make sure that ALL the threaded holes are chased through with a tap, this makes sure that the refit goes smoothly and you dont scratch the lovely polishing I have done.

I make sure that I hand polish the lower clamps and use stainless nuts and lock washers, this set up is really a thing of beauty and I am so stoked when I complete a set for a customer, a lot of work and time, but boy is it worth it and changes the look of the front end.

A great looking set of Lowers that will turn heads where ever you go, not a five minute job and not made in China either, all done from right here in California.

These are now ready to ship out to the Customer, so he can easily fit them in to his triple tree’s.

Just take a look at them, what a cool set up these are and all New hardware, Hope that you enjoyed this blog about that what I do with the good old inline fours.

Let me know if I can help you with your Honda, I have been doing it here in California for 20 years and never tire of it, it is a passion of mine that I hope shows in my work?

Thanks for taking your time to read my Blog and hope it may of inspired you to work on your machine?

Carburetor Restoration Services

Well, for many years I have been rebuilding carbs on the SOHC 750 Honda, as well as the smaller 500 and 550 models, and I am still getting these sent to me to get the old crap and grime off of them and totally get then revamped to a Clean and smooth running set.

Many people have a go at sorting their rack of 4 out and get it to run, albeit out of sync etc but the people that do have a go, really know what is entailed in taking these carbs apart.

You need a lot of patience and plastic sandwich bags, to take these all apart and inspect where the blockages may be, as the journals are quite small , and even though you have cleaned the main jet and idle jet, you might of forgotten about the internal journals in the bodies.

Most of the ones I receive still stink of old gas and when you take them apart, the gooey remains of old fuel give that lovely aroma of bad petrol and that sticks to you for days, no matter what you use as hand soap to get it off of yourself.

The trick to these, if you want to call it a trick, is to strip apart, and then vapor blast these so everything is super clean, then air line it, then once that is done, ultrasonic clean them and slowly put back together, but, I like to have the parts zinc plates and the aluminum bodies powder coated, then the bowls and tops highly polished.

Above is a set of CB550 carbs that have seen better days and they run but very badly, these need to be taken apart and put back together only once they are cleaned and polished and these will look so different when they come back to you.

As you can see, its a huge change and of course for the better, the other thing is that these have all new jets and needles as well as gaskets etc, just take your time and have a look at what you get for your money, a lot of work and time spent on these.

Every thing gets taken apart, many do not and that will show up if everything else is spotless, but these are rebuilt and then bench synchronized and after that, they are run on a motor and synchronized with a mercury stick for smoother running.

Take a look at the photos I took, you can see what a difference this is, not just a can or carb cleaner and a quick wipe down, these are fully refurbished and ready to go on your inline four.

You can see the Detail here and notice New gaskets as well as hardware, the carb bodies look way better now they are coated and you have a choice of Silver stock or Black too.

Send me yours or I can sell you a set already built etc, the choice is yours to be honest, you can also have the piece of mind that these will run on your motorcycle, right out of the box and let you get on with other things, just remember to tell me what exhaust and air filter you are running to allow for jet adjustment for tuning.

You can choose a stock style, with polished bowls and top rings like the ones you see right here for the CB750K model Honda Four.

Or a wrinkle Black and polished set up thats a lovely combination for Custom builders, I like them all to be honest and I am sure that you will be stoked with these.

Send me your dirty snotty old carbs for a full tune up and a brand new lease of life, your Honda will thank you for it and no more of that choke throttle choke throttle hassle.

These will get all pulled apart and then be cleaner than a cats arse, I have rebuilt quite a few hundred of these in the 19 years and plan to continue to do this for another 20 years or so, thanks for looking and hope I can help you out.

You can call or text on 714-598-8392 for more information.


Steel Hand Bent Hoops for your frame

Happy Friday and hope that this Blog finds you well, happy and ready to tackle fitting a hoop to your frame .

I have been manufacturing these hoops for about 6 years now and sold over 500 of these flat ones and I also offer a 22 degree Kick up version too, these are for the Honda CB750 SOHC but will fit the CB500 right up to the DOHC cb750 frames, look on my parts pages and you will see both style of frame hoops.

Real easy to do too, simply cut off where you want the frame shortened but allowing for the length of hoop you require, cut frame tubes off and then hog inside of tubing to allow for my inserts to fit, then lay the hoop flush against the frame and determine how long or short you want the hoop, I make them 12 inches long to allow many different choices to cut off.


Cut hoop to required size and simply tap onto the insert until it butt joins, then simply weld the seam and for me I usually drill a small hole other side of the frame so I can see the insert and then spot weld that, and you are done.

I did it to this bike that I purchased from the Vesco family and the hoop suited this 1974 CB750K and was so easy to fit and weld up .

I chose to weld the tail light and license plate assembly to the back of the hoop for a more Custom look and clean the rear end up and have no clutter.

Looking good now and I am glad that I went this route on the bike, it was a fun build that I created at home in my garage.

The frame is more rigid than it was stock with the hoop welded in place and give the chassis a more refined look I think.

I was super pleased at the speed I could create this Custom Honda 750 and many people comment on this special build that I did for the OG show in LA earlier in the year.

I actually drilled a hole on the tubing to allow me to feed the wires of the light into the frame and come out on the side rails near to the harness, so a neater, cleaner look all around.

I enjoy using these frame hoops and there are 2 style to choose from and by me, not some oversea’s nasty stuff that you see on ebay etc, that is not made by Motorcycle enthusiasts.

So there you go, if you need frame hoops for your project, you know where to go now, these work great and designed by me right here in Southern California. Thanks for looking.

I also ship same day and Globally too, all of them come with a pair of inserts too.

Paignton Sea Front weekly Bike show by BMAD back home where I lived for a while and shows still going.

Well, back in my old seaside town where I resided for a few years in the south of the country, started a great Motorcycle fraternity up called BMAD, (Bikers, Make A Difference).

First founded By Kelvin and Jane Halloran in 2003, this event and meetings have continued to grow and function as a very successful meeting in Paignton Seafront, attracting many of the public to come and look at these great two wheeled machines and also the main objective is that it raises money to help sick, disabled and disadvantaged children, also other worthy causes and charities within the TQ postcode area.


Funds are raised by hosting a three day festival on Paignton Esplanade over the May Day Bank Holiday (fri-sun), this includes live music, traders and of course bikes, Trikes and scooters!
We host 18 bike nights also on the Esplanade, these take place every Wednesday evening at 6:00 pm from the beginning of June through to the end of September, we are fully supported by bikers who make a donation on the gate for themselves and a pillion if applicable. Collection buckets are available for pedestrians to donate should they wish.


All monies raised by BMAD are used for charitable causes and all volunteers are unpaid.

General Information
We hold bike nights every Wednesday evening between the start of June and the end of September. Bikers donate £1:00 per person at the gate to park on the Esplanade and enjoy our bike night event.

In addition we hold a Bike Festival over the first May Bank Holiday weekend (fri-sun) and I have been to that a few years ago when I took a trip home as our MUM was dying from Cancer, that place was so cool, people remembered me from 30 years ago and it was like I had never left the Torbay area.

This bike meeting is always popular come rain or shine, the time I went , the weather was blowing hard, the air was colder than an Eskimo’s fridge and the H2o was starting to get stronger, but- everyone just enjoyed their-selves and rightly so, you cant let weather stop you from enjoying what you have a passion for.
What I love about it is that there is Old and New, so like Forrest Gump saying that life is like a Box of chocolates, Paignton sea front BMAD show is the same, as you just never know what you are going to get and as we look here a Cool Kawasaki 400 and the ring and ding ding of the RD400 and in restored condition, I can almost smell the Castrol R from here in California.
Road bikes, Classics and Customs, like this Bobber, there is always something for everyone and no attitudes either, a bang on meet up that others should learn from to be honest.
Mission
Our mission is to raise funds for sick, disabled and disadvantaged children within the TQ postcode area, to support local charities and other worthy causes.
This show is maybe 5 minutes walk from my old apartment and I used to love to walk along the seafront, buy a bag of fish and chips ans check all the bikes out along Paignton green.
Like I said, there is something for everyone, even this Lambretta got plenty of attention, mind you, many will not know what this model is, unless you are into Hair dryer Motors.
Good ole Motor Morini with Megaphones, as a teenager I loved to hear the sound of these V twins belting a long with their distinct roar.
So, a section for the Scooters were available, making this meet up a super friendly event and some rare ones at that.
The good Old 500. I had one of these in Blue, my first BIG bike, I traded it for a SL125 Honda and Ran a muck around East Anglia on it for a long time, those expansion chambers still ringing in my ears today!
Perfect pre unit that I would love to own too, hats off to the fella for bringing such a tasty treat along to this event, see if you can make the next one?
The meet up on the seafront is July 17th at 6pm Paignton seafront, hope you can make it and send me some cool pics.

New Stainless Steel Exhaust for the Vesco Honda Creation

Well, the Rains are here again tomorrow, so had to tear into many projects to try and get ahead of the storm, as it will restrict me to many things I need to do to create this Custom Motorcycle, the Exhaust I originally tried out was pretty Bad Arse- But I wanted something really trick, so for a few days I sketched a couple of Idea’s and came up with my Latest design.

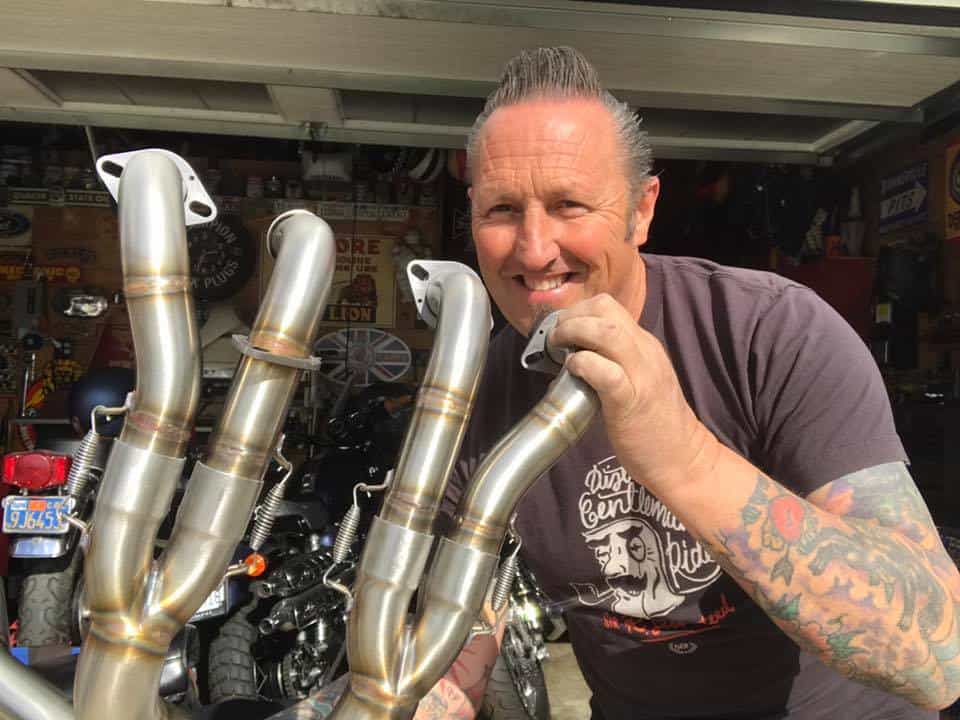
This is my latest system and I have called it the “Y-Block” And this system breathes like a man with Three Lungs.  Seriously, this is a great bit of Kit and hand made from 049 Stainless and not only does it perform, it is light weight yet sturdy. This is so much better in Stainless and wanted to show the Globe that cool stuff does indeed come out of sheds and Garages.

A lot of time and effort went into this system and I am happy at the end result, this will look great on the Vesco Honda and am sure many will ask about all the details that the bike has on it, there is so much to do and have to do all I can in the short amount of time to get this machine back up and running- no easy task and still quite a way away from completing this build.

The system will fit ALL of the 750 Motorcycles from 1969-1978 in the SOHC Range and will fit the CB750K, CB750F and CB750A models too, the design took some time to create how I drew it but it is bang on and I cannot be more happier than how the “Y-Block” free flowing System has turned out.

All quick release springs, this is a slip on system just like the old race bikes and wanted to give a little more Hot Rod look to this set up and I feel that I have accomplished that style and look. This has a Nickel Plated Removable Baffle and sounds just like a deeper version of the Yoshimura style system.

The fit and finish is superb and great ground clearance too, wasn’t sure if this was even possible a few weeks ago but after many drawings of concepts etc this is the end result and it looks so good, I am super happy that I went this way and it sure does look Custom. Sat on the workbench and rwady for it to be fitted to the Custom machine when I get it up to assembly.

This is my design and its a 4 into 2 into 1 set up that really lets the gases flow hard and escapes at the end through a baffle at a faster pace than many out there, and I really wanted a trick looking set up that not only looks and sounds great, but performs pretty well too, and this sure does meet the bill.

Of course I will offer this as a line for the HONDA CB750, CB550 and CB500 a little later on but first i want to see how it performs on the bike and will give a full run down when I have all that completed, but this New System really is a unique set up that I will be happy to offer to all of you soon for your inline Four Motorcycles.

I will weigh it later as its so much lighter than the steel versions and when it is in its brushed Stainless guise, its a real head turner with the welds turning that nice Bronze color.

A fun looking Exhaust that I am proud to put my name on and I am sure will get quite a lot of interest for other peoples rides, so today turned out a great way to bring the week to en end.

This will be easy to fit to your very own inline four, even if you are on your own as it weighs nothing and comes apart easily for assembly etc and the springs are way easier to remove than undoing bolts .

I wanted to have something different out there and to show that I also love Hot Rods too, it’s all a cool lifestyle that I have always been into and now have a great system for the inline Four Honda’s.

When the Vesco Brat bike is completed, I shall take a lot of photos of it, as well as some sound bytes of the exhaust system, I will still use the Yoshi style baffle as I love that tone.

So with that- I shall bid you a fond farewell and get back into the Garage, as I have a million more things to do and as the storm approaches, I need to get in there fast.  Thanks for stopping by and reading my blog, let me know your thoughts, as input is so important from My Customers.


The Vesco Brat Bike Honda CB750 SOHC Rebuild Report

Well, the weather has been fighting me this month, worse Month since 1962 for the amount of H2O we have received and again today as we head to the end of February, we have more Rain coming down this week, so I need to try and use my time wisely and get as much done on this machine as I can.  Lets start off with the Triple Tree on this bike, as I wanted to change the Cable Tach and Speedometer and make something more Custom.

So, have a look above and you will see that I have started to make a start on the fabrication on the triple tree, first off I ground off the Original Factory outer tabs that housed the stock gauges, then I hand cut an Aluminum Holder out of a small sheet of Aluminum and made sure that it would be able to fit the stock location tabs that the Ignition switch used to fit into, and it looks great, if you look to the right, I already made a start on the Speedometer Bucket.

Not an easy task this but a block of 6061 T6 Aluminum was chucked up on the Lathe and turned down to the size I need for the Speedometer to sit snug and tight in the housing, also reliever three areas for the set up to really fit snug as a bug with no rattling about.

I wanted to incorporate fins into the casing as the front forks have this look as well as a few other features on the bike to make the whole concept flow and I am quite a big believer in that, I also need to grind a little more on the top triple tree and then smooth and polish to give the whole set up a look of chrome, no easy task too.


Now I am happy as its all Polished and the GPS Gauge set up looks really Custom, I machined Three 7/64 locator holes to allow the gauge to Clock right in the Location I wanted and have to say I am super stoked at how this now looks on the polished Triple Tree.

The bike I am creating is a 1974 Model Honda CB750 But I am using a later upper and lower tree to allow me to have the small tab brackets in the center and glad I went this route.

I wanted to create something that is different from the norm and I do enjoy what I call ” Newstalgia “, New parts with a feel of Old, and I believe I have created that with this.

I really like the look, the Gauge is 4 inches and the bucket is 5 ” and a strong solid appearence, I think it blends in well with the style of bike I am building.

So just a final clean up and then I need to pick the lower tree up from the Chrome shop, this should really set the whole top end off on the bike and glad I took the extra mile.

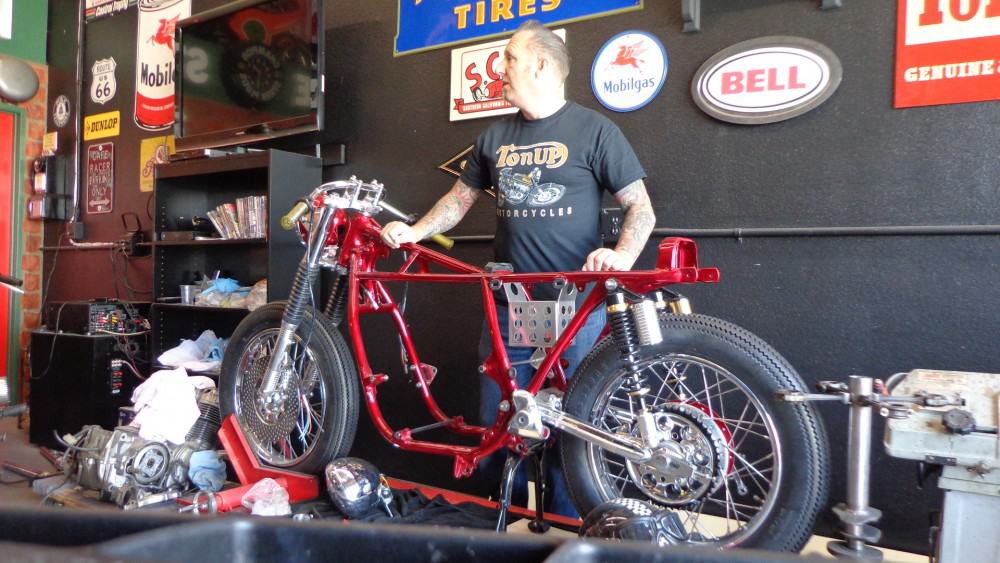
I will Clean up once more and add some polished Handlebar clamps that I make and she will be all ready for when I start to bolt all this together again, so in a week or two I can start to assemble the frame, it is still at the painters but not for long and thats going to be Silver Flake, should be a good contrast to the rest of the bike.


Thanks for reading my blog today and hope I have inspired you to get into the Shed, garage or lock up and have a go with your ride?