Douglas Board Tracker by Sabotage Motorcycles.

I am always impressed by machines that are created down under, I was lucky enough to Live in Victoria and in New South Wales for 4 years and their passion for anything with two or four wheels is breathtaking at times.

Here is a write up pipeburn came up with I wanted top share with you lot.:

Over the years we’ve noticed a common trend here at pipeburn some of the best workshops around the globe, large and small, have their origins in friendships formed over a love of motorcycles. Australia’s Sabotage Motorcycles is one such story, it began in the car park of a hardware store when two men met on their ’70s Honda’s and have gone on to produce some show stopping custom rides. Now they’re back with a truly unique creation, artistically formed by the pairs talented hands and lucid imaginations. It’s a 1926 Douglas EW with power from a little engine by the big H, to deliver one beautiful board tracker.

If you don’t know the Douglas name, don’t worry, they sadly closed their doors more than sixty years ago. But over a 50 year stretch beginning in 1907 the British company was one of the most innovative motorcycle manufacturers of their time. Indian, Harley and others copied their creations to produce their own lightweight machines, Douglas was the first to focus on a low centre of gravity for handling and were running a flat twin in the first decade of the 20th century.
The men behind Sabotage, Andy and Giles, would begin to uncover more of the rich Douglas history during the build, but it all started with a late night eBay parts search. “We stumbled across a guy in Adelaide selling a bare frame of a 1926 Douglas EW350. Just the frame, nothing else. But what we loved about it was the shape. It had the classic ‘in-frame tank’ shape [as opposed to the tank sitting on top of the frame]. The frame resonated well with Giles as Douglas is British, as is he, and also his father’s name is Douglas. It was fate!”
So they had to have it. But they also discovered the seller had another Douglas frame, this one a 1936 with a glorious girder fork and of course they bought that too. Over the next few years they collected a part here and a part there as they built other bikes like they’re incredible Yamaha RD125. That bike competed in the 2018 Machine Show and when organiser Matt put the call out for bikes for the 2019 event, the two Douglas frames drew the boys immediate attention.
If building the RD for the show was a challenge, starting with a bare century old frame was taking stress and hard work to the next level. But that’s when Andy and Giles do their best work and wanting to build a Boardy their other loves proved a vital inspiration. “We’re big fans of vintage Honda’s, so this is perhaps the board track racer that Soichiro might have been racing, if he was around in America in the early 1910s!” With a Douglas engine near impossible to source, a Honda CB125 was purchased complete with spares.
The single hoop CB frame was surprisingly similar to that of the 1926 Douglas, but try as they might there would be no way to fit the engine without cutting the frame. But cleverly they managed to only remove a small section at the bottom and then made new mounting brackets and the motor was securely attached. It might be ‘just’ a Honda single, but hours of elbow grease and clever thinking has it looking a treat. From the snarling low cut pipe, to the bespoke bellmouth and vintage plug lead it now looks like it was always meant to be.
To turn the bike into a roller that gorgeous girder front end was given a full makeover before being bolted up to the frame. A process that required slight adjustment to the steering stem, and fabrication of a new top piece from scratch but that mix of black, chrome and magnificent mechanical moving parts makes it more than worth the time and effort.
The handlebars were collected along the way and then cut and reshaped before receiving their leather wrap grips and machined bar ends. A set of 21in rims had been sourced early and look a treat wrapped in Avon historic rubber, but while the front was an easy fit, the rear posed a challenge!
“A lot of time was spent on the rear wheel. It’s a Honda C90 hub with a CT110 brake plate, but we had to work out all the spacing and get the sprocket lined up. A new brake stay was made, chain tension adjusters, and hub spacers.” To keep things clean the bars were left lever free, with an internal throttle adapted to fit. So controlling gear and brake operation is left largely to the feet, with a twin cable system and a hell of a lot of clever thinking. More machine time and the boys had the suicide shift working perfectly, topped with a VW GTI knob, Giles owned three and Andy’s German!

The bodywork is minimal, but brilliantly built; the tank is a hand-formed, in-frame unit, shaped just like they did a century ago. While the stylish front cowl and old bicycle seat wrapped in Saint denim adds a little glamour to the Brit. In their day Douglas was successful at building TT and Dirt Track winning machines and now Sabotage Motocycles allows us to imagine them on the timber boards. The flake paint is one of the only things not tackled in house, but ensures that the punters will be drawn in to truly admire the incredible detail Andy and Giles have crafted into the entire bike.

New beginnings for 2022, Looking forward to it.

The New Year is here, still a crazy world out there and I am not taking any risks to get ill again, I got all my shots, I then caught Covid and then at Christmas got a cold almost as bad as the New Omicron, what a shit start to the year for sure, but- I have got the cold just about beat, still coughing like a badly tuned motor, but I am on the road once more.

For over 20 years I have rented a building for what I do, we all throw away good money on rent and the Landlord is the only person that makes anything out of that, but- this year is all different, about 7 months ago we put in plans for a barn to be built on the 1 acre we have here in La Habra heights. We had to jump through the many hoops and have many inspections, but at last we are now making some great progress.

Once the Concrete slab was laid and left to cure for a whole month, we started to get the Barn ready to go together on Wednesday, the sun was out and the rain storm we had for a week before had gone, this is a really excited time for Carpys Garage and wanted to share some of the build with you.

A great Company that makes steel Barns for many years was the choice that we went for, robust and affordable, a steel skeleton is constructed and bolted with high grade bolts to the Concrete floor, this is a sturdy set up and am glad that we went this route.

I have no idea how I am going to decorate as yet, that all takes time and of course money, but the main thing is to get the workshop put together and then see what I can do to make it my own and have fun creating what I do from the comfort of home. And not a drive to work either.


This will indeed be the perfect place for inspiration and dont have to worry about parking, or the street sweeper etc or the Land lord coming by to increase their rent, this is a bitchin set up and super stoked to be doing this.

It is the perfect size for me and although will take a little time to dial in, it will be such a relief to jump out of bed and stroll up the yard to the Barn and begin to make parts or create builds to offer the Customers all over the globe.

I wanted a Red Old style Color Barn as the area we are in has many Ranches etc. And we thought this color will fit right in, hope to find an old Cart Wheel later to add to the side and of course old industrial Lights to mount outside, along with a Cow or Bull skull with Horns.

Lots t do but making great headway and will be a fun project as we go along, some might not understand the importance of your own workshop, but those who do, will really get how stoked I am to be in this situation.


Eventually I shall decide on a cool Barn door, as I don’t want just a regular roll up, they are noisy too, so I am looking into a few styles with Jennifer to see what would look good on the front.

It is also a nice wide opening, so I can get my bikes and Hot Rod in there with no issues, the run off is super good if we do get any more of the wet stuff.

Just wanted to share the news with all you lot, I know that a lot of you will be stoked for me and I look forward to making brand new parts here from the countryside of ideas.

Its Bulldog approved now and she will enjoy hanging out again in the garage as she was in many of my shops and loved hanging around in the workshop all day.

So, thanks for reading my little Blog and I will show more of when I have got other stuff finished in the Barn, but good things are happening and many thanks for sticking by me.


Thought I would show the New Little CB350RS HONDA that’s out and about, very Nostalgic looking, what do you think?

Happy New Year Everyone

Here we are 2022 at last, man – What a crappy 2020 and glad to see the back of it and start a fresh and hope that we all have some good health and enjoy life as much as we can.

I somehow caught the Flu over Christmas and it Royaly buggered me up, Only about 80% right now but at least I am up on my feet, and I wanted to make sure that I did a bit of work at the house and get a few things ready for when My Barn arrives for assembly on Wednesday.

I have a few Projects I would like to finish this season and I hope my health gets a lot stronger as I took quite a whooping last year with Covid and the Flu, so lets all keep our pinkies crossed that we are all fine and can go and wrench on our machines to our hearts content.

There are many things that I hope to make and offer on my website for all the avid Motorcycle builders out there, I receive so many emails and texts about what you lot are up to, it drives me to help get your machine completed, and sure hope that you can complete yours this year to get on the tarmac for the new season when it eventually arrives where ever you are located.

Just wanted to wish you all a Very Happy New year and thank you for all of your orders, emails, phone calls and texts, I love chatting to you all and look forward to continuing great communication with you in this New year we have all started.

Look Forward to seeing what you are all creating and maybe see you on the road one of these days?


Here is something to have a laugh at at days gone by back home 1965.

Another Year awaits, Have Fun Building your Machine

Well, what a bloody tough year we have all had, for me it has been crazy, what with moving to another location as well as catching Covid and then on Christmas day catching an awful cold with the same symptoms of Covid but without the temperatures, its been a long battle throughout.  From having some of my suppliers completely closing down due to the Virus to some retiring early, I have had to come up with some more ideas for parts and apparel to have for the coming year we await.

But, the positive side to this awful dilemma we are all facing right now is, we have some time in our garages. sheds or back yards, to turn a wrench, help a mate or give a whole new project a go and take any frustrations out of what’s going on in the world and turn it into a working machine that is yours and yours alone.

I love making parts or building new rides, its a therapy and an escape from life’s woes to be honest, and also there are many many failure before I find something that fits and works as it should, so for those who are trying it on your own, or building your own machine, Failure is a learning curve, we all do it and not only once. I have almost given up on a particular piece I was trying to make, I left if for a day or two and when I head a fresh brain, it all clicked and worked.

Do not be afraid to fail, I have sat and pondered and even been seen to shout at the parts calling it all sorts of names but in the end we managed to come up with a result that we are happy with, the fun is in the creating at most of course, taking your ride out and stretching its legs for the first time is such a thrill and the Euphoria is un measurable, but what I am trying to say is

Dont Give up”  There are many friends on the internet that can I advise, heck, I even put my phone and text number on my website so people can text me, rather than waiting all weekend for an answer from a company phone, i want to help the best way I can, its not all about sales for me, its Service and the camaraderie of the fellow builder.

I am hoping that this coming 2021, we can all have fun in what we do and maybe even meet at an event or on the tarmac, or at the very least, on the end of the phone of email, there is something self gratifying when you complete something on your own machine and I receive many emails and photos from customers who have really enjoyed creating a unique Motorcycle that they want to personalize for themselves.

Hoping that you can get some time and turn a wrench and have fun with that two wheeled machine of yours and maybe I can help with parts or advice?

Wishing you ALL a very Happy New year that’s almost upon us and thank you from the bottom of my heart for all your orders from around the globe, you all Rock!!!!


Here is a little video I saw on you tube of a guy with minimal tools rebuilding his little Honda Cub.

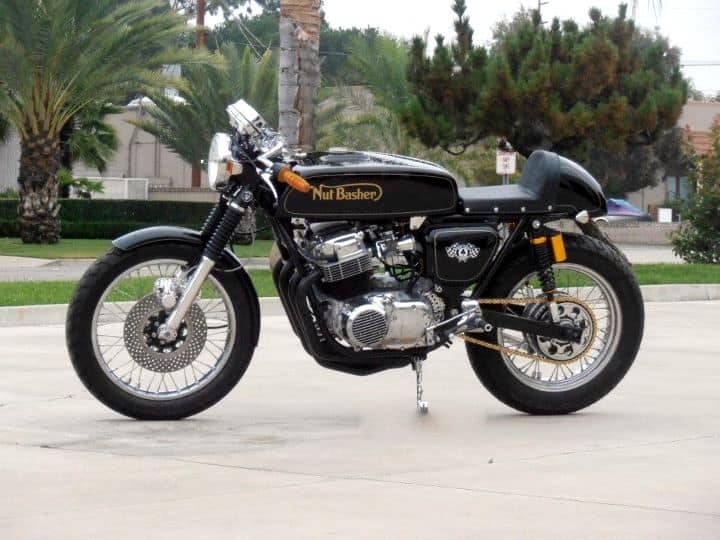
A HONDA CB750K I Aptly Named The NUT BASHER

I forget to add pics of Motorcycles that I have built over the years and some times I kick my self for not posting anything, but today I will overcome my forgetfulness and add some photos of a fun creation I built using parts that I had around the shop.


I wanted to build something that was a cool reference to Cafe Racer styled Motorcycles back in the day but, of course using a later motorcycle but, still early enough to be classes a classic and I started off with a 1971 CB750 Honda four that was just basically a frame, I had a bunch of boxes with parts in them and over time, I started to put a few things together.

I had an old Fiberglass Racing Gas tank that I thought would be just the job, I fitted it to the frame and sat on the bike, immediately crushing my nuts, that’s when the Penny dropped and I thought what an apt name for the bike and thought if I did it in the style of the Norton Logo, this would look pretty Classic.

I chose to go the traditional deep Black Color and then pin line around it in Gold, as that would really give it the 1950’s era British Motorcycle look that went along with Norton, BSA, Triumph and Matchless, as well as the Vincent of course.


Now the Gas tank has a Ton Of clear sprayed on it, I had to test fit it to the frame, as I had powder coated the frame Gloss Black and Built the Motor to an 836cc and wedged her back in the chassis, the bike was looking really good and I was happy about this, but now I had to come up with a Classic styled seat unit for the Nut Basher, so I went the whole hog and built one from scratch.

I tried all sorts of ideas until something clicked, but had to thing of a cool way of mounting a tail light and I wanted to have the light incorporated into the seat hump.  I chose to French the rear Led tail light into the cowl, and although it took a full day, it came out really well indeed and was super stoked that I had gone this route on the NutBasher Machine.

It sat on the frame just right and I attached snaps to the sides of the until so I could pull the cover off and get to any documents I need, or remove the seat if I ever needed to quickly, I also made sure there was a ton of clear coat applied just incase I scratched it and could buff it out on final fit etc.

I was super happy with the way the seat unit fitted and the tail light assembly was Classic looking but in fact was an Led stop light that was as bright as Einstein.

I wanted to put a lot of detail into this creation as I knew it would turn many heads where ever it ended up, this Fuel tank held 5.5 Gallons and that made for some great riding, without worrying about running out of squirt, but it sure was bloody heavy once the tank was filled up to the top.

She was a Long and thin Motorcycle that screamed out Nostalgia, it ran hard as nails and breathed really well as it has a hand made 4 into 1 Racing exhaust that was built in less than 3 hours by a Indy Racing mechanic, this would really exit the gases well and have never heard something so mean in all my life.

This was created by a top Indy exhaust builder and designer and he didnt even need the bike to make it, just an upside down engine, it was so cool to see him knock this out.

A sheer work of art and it fitted like a glove too, this was made in Inconel and a one off like this, nobody in the world will have one like this. The material is as I said Inconel  that refers to a family of trademarked high strength austenitic nickel-chromium-iron alloys that have exceptional anti-corrosion and heat-resistance properties. … Burns Stainless recommends Inconel 625 alloy for exhaust systems due to its excellent strength, corrosion resistance and fabricability. And it sure stood up to my fire breathing 836 motor no problems at all.

This is such a nice system, shame to coat it Black but I want the bike to have a lot of Black parts on it, so ceramic coated it will get and I am sure it will look great.

This Motorcycle will not just look fast, it will haul so much arse, it will leave people scratching their heads as it goes by, and the roar from the exhaust will stay with them for a lifetime I should think.

Another thing that I do and nobody ever did back then was, make my own gauge faces, I have created many over the years and this Ton Up machine needed a great set of gauge faces to give the top end of the bike some class too.  So I went with a Roaring Tiger, Synonymous with the 1950’s Triumphs and colorful to say the least.

These are really easy to apply and give your tired old gauges a brand new lease of life, also very unique and personal to your bike, something that I have been very proud of.

I even repaint the needles and add a longer Red line to the end, so you can clearly see where the needle is pointing at speed, also if you look, I have readjusted the configuration of the gauge faces and they digits start at a different position than the stock factory versions.

Not sure that you will notice but, I also changed the 100 to the word TON, which of course means the magic 100 MPH and a milestone in Café Racers back in the day to reach that Golden triple digit. I also added my own Oil Light warning  display of which has a High Beam and Neutral light, just to keep you informed as to what’s going on up top.

The Motor was totally rebuilt, the head was Ported and polished and has an 836 Yoshi kit inside the jugs, this pulled like a steam train and of course, stainless Allen head bolts throughout the whole engine. I also drilled the starter Motor cover and fitted bronze mesh for a cool Look.

Rear Hub got my Custom drilling and Polishing detail, as well as rear brake arm, I sure loved creating this Motorcycle and always enjoy doing my own thing to it.

I machined my own Motor mount to follow the fins of the engine and on ALL motors, I have always run an Alcohol filled Oil Pressure gauge, to give me a true reading of actual engine oil pressure, through the oil galley.

Cerakoted exhaust system looks great against the Silver and Polished Aluminum of the inline four engine, I used Italian rear sets to give this bike a wee bit more aggressive stance when you are sat upon it. I sell many pairs of these and dead easy to fit, they function so well and smooth, I try and use these on the majority of my creations.

All clean and new, this bike ran so well, it was like a new wrist watch to be honest and sure do miss this Beast of a Motorcycle, but enjoyed every minute building it.

Rear sets look pretty darn cool, I drilled and polished the sprocket cover too, for that Racy look and give it a little more Bling, personal choice but I have fun doing that.

The Grips you may find to be from somewhere else, and you would be right, I used Original 1970’s Schwinn Bicycle grips, put them in Boiling water and then pushed them onto the handlebars, they fitted snug as a bug when they cooled down and look great and flow with the piggy back shock reservoir’s.


A tall drink of water for sure, running on 18 inch rims and Bridgestone tires, a Combination I have used many many times, these have great grip in all weather but of course, have a nice Classic tread pattern too.

I have always been a fan of how this bike has sat, she looks ready to race off down the road from any angle, I also made sure that the front fender sat tightly to the tire.

I also removed the fender stays to clean the look up at front and I think that it works well, I hand drilled the front rotor and you can see much polishing of Aluminum was done to give this bike some class.

There really is a lot of detail that you will not notice at first but hope you like what I have done, we are all different and have many styles we like, but I get a lot of emails about this build and thought that it was time that I shared it with you lot.

I should of made a mold of the gas tank as I really liked that shape, even with the Chin Divot at the front of the tank, that goes back to the early TT days and stream lining.

Everything redone, even machines the Oil Filter Housing to give it some fins, a thoroughly pleasing to the eye motorbike that I am quite proud of creating.

Thanks for looking at The Nut Basher, I hope you liked what I have done to this old inline Four Honda and I continue to build and make parts for these 500 pounders.

Thank you for reading about this bike, if I can help you with Parts, Service or just if you are stuck, you can email or text me. carpy@carpyscaferacers.com carpysgarage@aol.com or TEXT 714-598-8392

Time and Tide wait for no Man or Woman

No matter what is going on in the world, one thing remands the same, and that is the ticking Clock, she will always continue to grind away 24-7 and I am vert aware at times of that as deadlines come up real fast when yo are a small business, but, there is nothing better than being your own boss, so that out weighs the stress and difficulties that we all endure at times in the trade that we are in. Time to get on my Bike and start to design some New parts for you all.

Things are changing for me and not long to go until I get my Own Brand New Workshop/Barn, exciting times for sure and look forward to spending some quality time in there and banging away at some projects that I must get completed my self. Sometimes I need to Police my self to get things finished, but a New Workshop is something to keep you Motivated that’s for sure.

I have just made up a bunch of Braided Hose Oil Lines and Braided brake lines, one piece and 2 piece front brake lines to cover any of your builds and continue to make and design more parts for the inline four, as well as other makes too. Have fun on your Machines this weekend everybody.


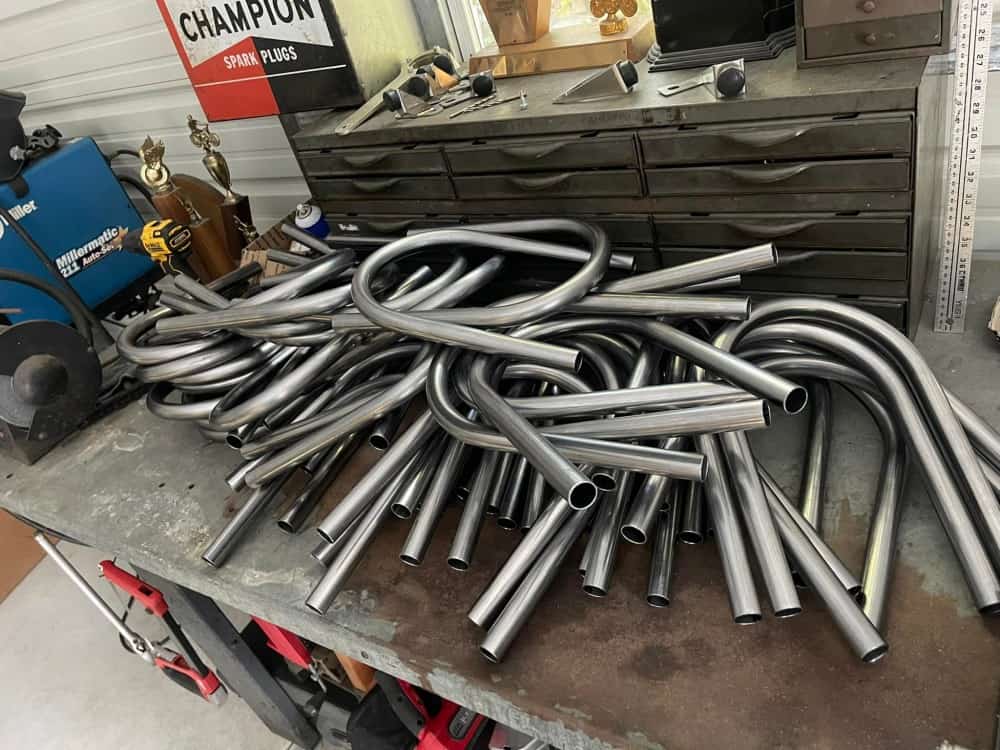
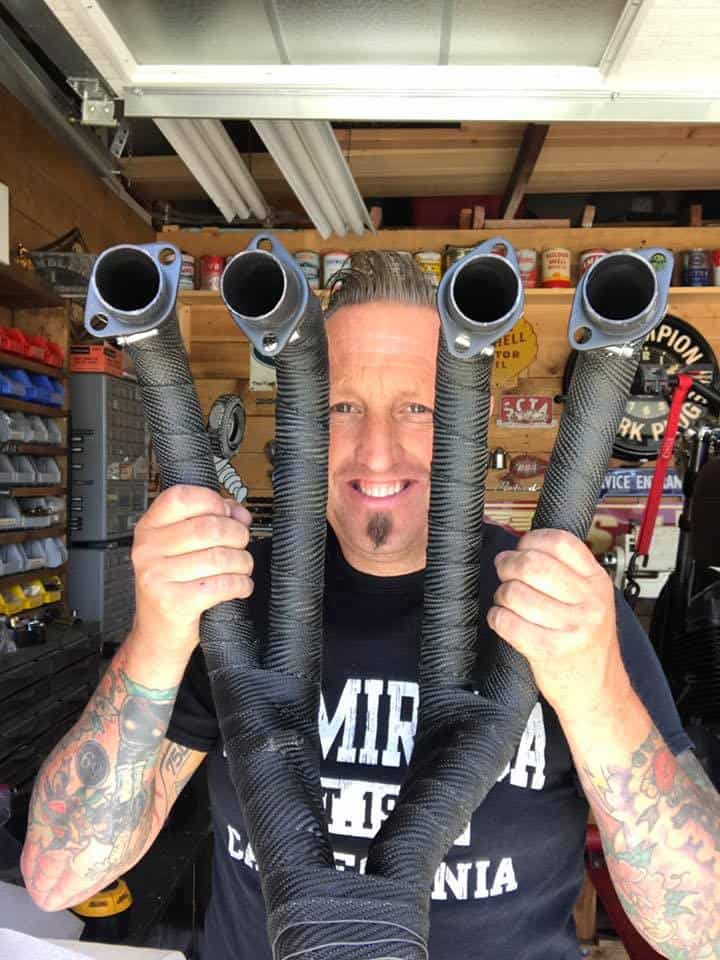
4 into 1 exhaust systems for CB750 and CB550 still selling strong

Well Howdy Everyone

Hard to believe that almost 22 years ago I started making parts available for these and other machines and continue to do so today, I try and help everybody out where I can, and I really do enjoy what I do for a living.

None of these parts are made in China and I make all the Prototypes right here in California, with more parts I am designing right now for our machines and a few more brands too is in the works, but right now I am getting ready to build a Brand New Barn/Workshop and all the plans have been approved by the city , so not long until I can work from home once more.  I think you get more attentive to the detail and of course, can save any frustrations about driving to and from work.

Below is a shot of a 4 into 1 Ceramic Coated Exhaust system that I have sent to a Customer back home in the UK, and the system looks awesome on his 750-4 Honda.

Peter Hch Harrison In the UK has one of my 4 into 1 exhaust systems on his 750-four Honda.

I really enjoy what I do and thank you for sticking with me and not using Chinese Parts.

Paint scheme I did almost 15 years ago

Well, it is almost the 4th July, the weekend is almost here, I was looking through my Computer and happened to come across this body work that I did back at home in my garage in the City Of Orange, some 15 years ago.  I didnt use it in the end and sold it on Ebay, never did see it again, I did a similar paint scheme to the HTML bike 8 years later but forgot I had even done something similar.

I had an old K4 Gas tank that was pretty beaten up and not wanting it to go to waste, I hammered the sides to give them Knee inserts a certain pop when you look at it, these take a while and I hand hammer them, but the end result is always cool to see.  They came out great and then I decided That I would have a play around with some paint, as I received some sample Candy Paint from a friend of mine.

I used a Candy Aztec Gold Base and added the flake with it and sprayed the whole tank and seat I had as a spare, then wet sanded it and masked it ready for the Candy Apple Red candy paint and laid that on super think, wet sanded and then a liter of Clear Coat to make sure it seals the color in good.

This was all experimental and was super glad at the way she turned out and, all in a garage at home, make sure you put a tarp on the floor and water everywhere as Metalflake gets everywhere.

I wanted to share this with you as to be honest, I had totally forgotten about this bodywork and now on reflection, how could I have forgotten about such a great color scheme for a motorcycle?

The Seat base is my own Dunstall assembly that I still sell many of on the website and it held the paint really well with no issues at all and was a breeze to prepare and spray.

I have always loved Metalflake and the likes of Roth, Barris, Watson, Starbird and Von Franco all loved to incorporate on their rides back in the day and when the Sun hits the color it really does Pop!

Wished I kept that now but I am sure we have all done that and I needed the money for electricity bill or something back then so it helped me out of a jam at the time.

Its a nice combination and very MV Augusta of the day, sure hope that you lot like it too?

So, I thought  that today would be a good day to show some old photographs of this tank and seat set up for a CB750 Honda and maybe it will inspire you to get out in the shed, garage or Porchway for that matter and have a go on your bodywork?

There are tons of color options that you can use and the end result will always wow you with Candy paint.

I think I have made over 100 pounded gas tanks over the years and never tire of it, albeit its a lot of hard work, but the end result is worth all that sweat.

I test fitted this on the bike I had just started, the Tenacuois Ton Alloy bike, so shows you how long ago that was.

A sharp set of Bodywork thats for certain, and glad that I took a risk on it, and all them years ago too, just makes me smile when I see this photograph.

I am building a few bikes this year and have some different Custom designs that I hope to incorporate into the bodywork, so stay tuned on my website for that.

Thank you for taking your time to read my Blog today, hope it at least made you smile, this is a very cool paint scheme that I am truly proud of putting out there in Cafe Racer Land.

Have a Super 4th of July weekend everybody.


How to build a cool set of forks for your CB500-CB550 or CB750 Honda SOHC Motorcycle.

I get so many emails asking about certain things that I create on the bikes and parts that I build here at my place, so- I thought I would do a little Blog on my Custom Fork service that I have been doing for many years and shipping these set ups all over the Globe. So below is what they start off like, just a bog stock set of worn out, tired, telescopic front forks.

These came off a bike that was parked up many years ago and the Customer purchased the complete bike for a decent price and wanted to take the machine apart and create his own cool Custom ride, he wanted my fork service and this is a Blog on what I did.

Looks like Dogs or cats or something Hairy had been crawling across this bike for some time, also if you look, you can see the tubes are toast as there are many pits in the tubing and hard chroming these days has got so expensive to do.

The Caliper will need to be completely torn apart and I will Blog that a little later on, this is not an uncommon thing to have sent to me to fix and rebuild and hope you enjoy this little journey of what I did to get these set of forks into a really Custom looking piece.

The main goal is to take everything off, then clean up on the outside and then once happy with that, the fun begins in the transformation of these fork tubes.

There is an array of parts that I need to rebuild these and as you can see I have everything for this to fix and get the guy a really nice set up for his Motorcycle. If you look, you can see I machined the lower Fork Stanchions and put grooves in the legs for a great Custom Finished set.

Above, you can see I am about to fit brand new Honda Fork seals to the stanchions and what I personally use is some Home Depot PVC pipe that fits perfectly over the fork tube and allows me to use the tube as a Press to get the seal to slide into the recess inside the fork and not damage the rubber of the seal.

I sat the forks on a small pad and then used my Rubber Mallet and gently tapped the pvc tubing until you feel the seal come to an abrupt stop, that means its into its seating and no more tapping required.

Once the seal is in, I plop the snap ring into its place using some circlip pliers, this holds everything in snuggly and no scratches on the fork tube. You can buy these at Harbor freight Cheap.

I use Brand New genuine Honda Dampener Bolts and crush washers, I like using the real deal and not the Chinese crap that’s out there, and this will have longevity compared to China’s inferior quality.

I also fit Brand New OEM Rubber Fork Dust Caps and to really give it that Custom touch, I fit Chromed steel Dust Covers to finish off the polished Finned Lower Stanchion.

See what I mean?  It really does complete the front fork in dressing the part to show you this is no run of the mill ride, it has attention to detail.

I finish the lowers off by Polishing the clamps and adding stainless Lock washers and stainless flanged nuts, this is a great look and easy to get a wrench on to remove the front wheel at anytime.

I cleaned up the dampeners and spring and set a pre load using 4 stainless washers, an old Motorcycling Racing trick, I also do not ever use standard fork oil, I do like the old guys did and use ATF and that’s so much cheaper to purchase too.

How do I know how much to put in forks? As many of the years of the CB750 have different lengths of lower stanchions, so the volume of fluid changes.

As you can see, I have the Factory specs for the Honda CB750s right at hand and actually sell a book with all the settings in , so I can easily look up year and model to get the capacity required.

Bang on the money and now this is all ready to button up and get the forks completed for the Customer.

See, they sure do look Custom now and am happy with the way these look and the preload is right on the money too, I also use Brand new fork Caps to give the top to bottom New Parts finished look.

So there you go, a Custom rebuilt set of forks that I offer and boy do they look sharp, not cheap but add the parts up yourself, and you will see this is a good deal.

I sure hope that you liked this little Blog, thank you for following me and purchasing my parts, its my passion and Career.

Little OLD 350 I made Scream and boy did it yell and Loved it.

Allo Allo Allo!  Just thought I would add an old CB350 I sorted out and it ran like crap for many moons, it had been to numerous shops and nobody could get it to run, let alone rev, I took a look and came to the conclusion the carbs and exhaust needed sorting, so took his old set off and got rid of that and fitted my own set up with the secret sauce added to pep this baby up.

You may have to turn your volume down as its fecking loud but it revs well and not red lining either. it pulled strong through all the gears too.

This little machine would scare a few of the big brothers versions for sure, I like loud pipes and want people to know that you are coming up on them, but I did fit a baffle too.

I sold quite a few of these systems and may manufacture them again at some point, the good thing with my system is that it really did produce power and the sound was just killer.

This was a big challenge, as the bike had been to Numerous shops and garages and nobody could get it to run, I saw the issue right away and once the carbs were rebuilt and a good battery with my exhaust system, this little 4 Banger screamed back into life.

My exhaust system hugged the frame super tightly and fitted up so easily, and as soon as you hot that Loud button, you knew right there and then, you were in business.

I shortened the muffler, as I wanted an aggressive look and then the baffle with endcap simply slipped back in and dressed the rear of the exhaust up, a very cool Custom approach.

This bike really pulled like a Steam train when you got it out on the tarmac, I sold many of these and will be producing some more later when i locate another 350-4 I can use as a donor bike for parts.

She was a super loud machine now and the power curve was all the way through, and, this machine loved to be revved, even though I gave her plenty of beans, it did not Red line.

Fun times playing with this 350- Four and hope to get into another one and share it on the website.