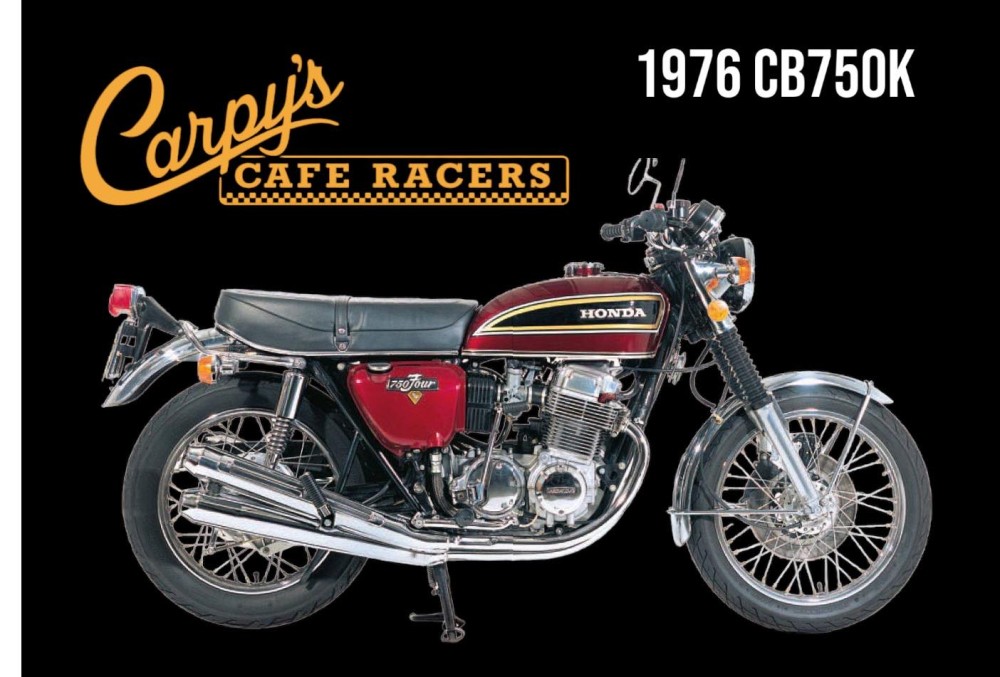
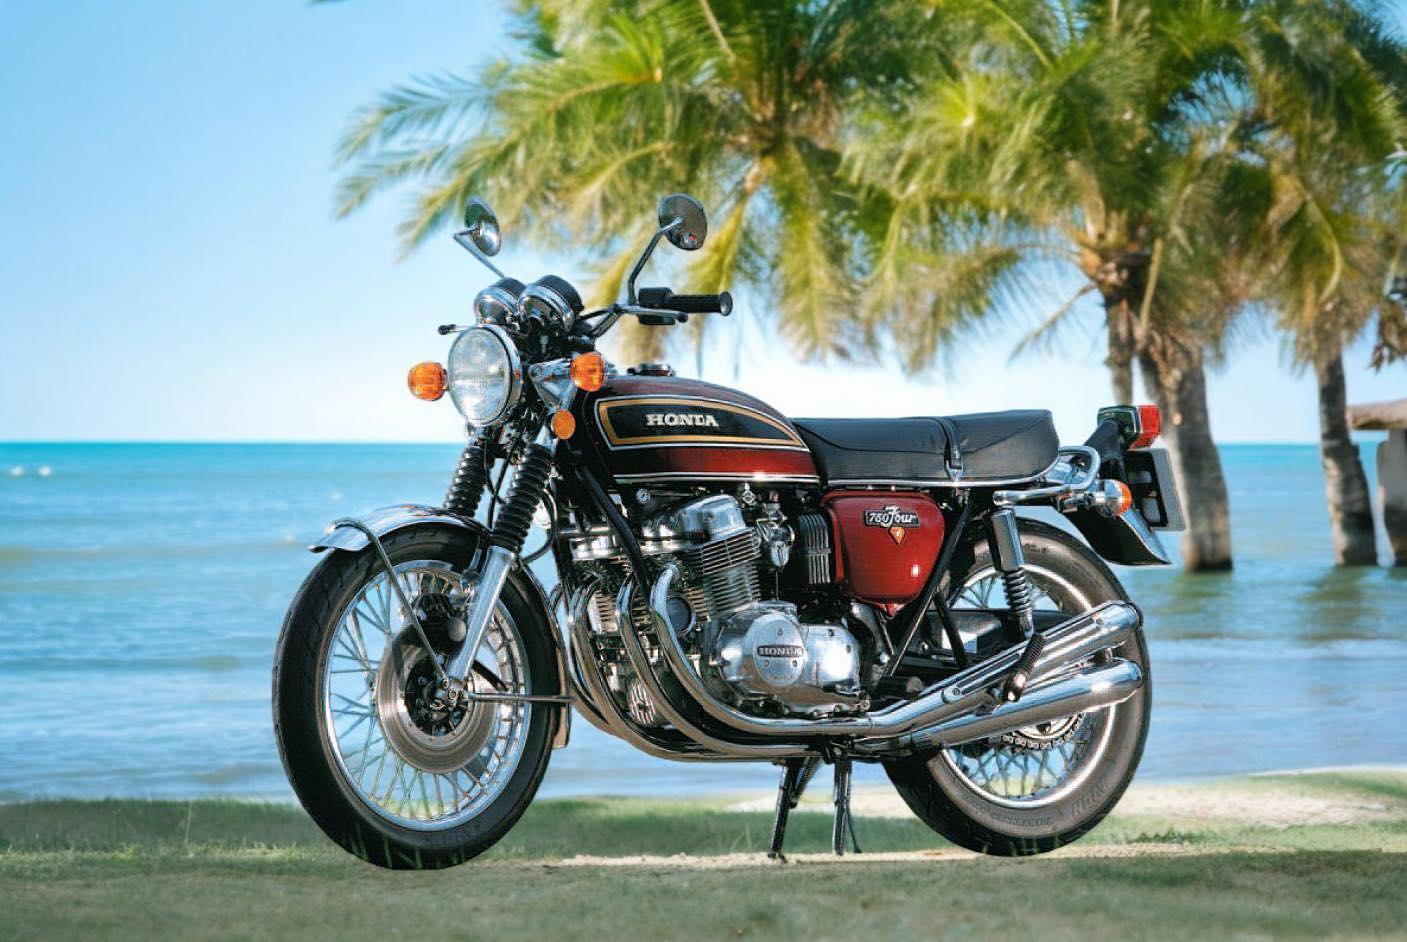
Honda cb750K 1976 Gets a work over

Well, the weather is now Hot as the inside of Gandhi’s Boxers, but I have been doing some work on the K6 Honda, I started to clean a few bits up as she had sat for many years in a back yard.  So I thought I would clean her up more before selling this inline four machine.

The bike had low miles but obviously the condition had deteriorated due to being sat out in California weather for many many years, but the more I cleaned up, the more I put into this 500 pound of Japanese machinery.

I removed the rear wheel and swingarm as the swingarm was in need of having the paint stripped off of it and then have it powder coated, so I just got it back from the coating company I use and fitted it right away, I had to drum sand where the shock bushings go and fitted new Genuine Honda steel Bushings. You can see the rusty main stand in the picture, Once I have this back on the floor, I shall remove it and powder coat that Black too.

So much to do, the wheel is all rebuilt and I polished the hub and fitted new bearings etc, new spokes and new tire, I fitted the Cush drives this afternoon and its now ready for the brake hub to be fitted as it was in a sorry state too.

As you can see from the photo, she is all there but I stripped it and polished the outer carrier and fitted new shoes and actuator etc as I want this to look nice, not restored from frame up, as I don’t have time and space right now, but just a nice looking K6.

As you can see, this is now taking shape, I wanted a fresh clean look on the rear end and I believe I shall achieve that with a few more hours work on this classic inline four bike

The safety guard for the rear sprocket has seen better days and as you cannot find nice ones anymore, I had to get the hammer out and clean the dents up from where the chain has caught etc, these always get abused but wanted to make sure I got this as nice as I could and then send it off to the chrome shop.

A really nice job and am more than happy with the finish as this was pretty torn up when I removed it from the rear wheel, so not time to start bolting it all back together.

You can see I took my time and also used Genuine Honda parts where ever I could, the Bushings for the shocks are factory ones and I also used a New rear brake rod as the old one was really bent up and rusty to repair, I also purchased new chain adjusters to clean the rear end up and set the wheel off.

It is coming together and took my time as it was so hot today and of course I was on my own and do not want to scratch anything, but as you can see this bike is looking nice, and even though not a show winning restoration, it will be all there and I shall be fitting brand new 4 into 4 exhausts to give it the factory look it had when it left the factory all them years ago,.

I chromed the rear brake Stabilizer bar as that was rusty and new hardware through out, looking so much better than when I dragged it home, fitted New shocks and put the new chain on and set the tension right.

It is missing the chain guard and hope to purchase a New one soon to finish that area off right but I am sure I can get on with many more things before I need to attach that part.

I did buy a repro rear guard as mine had rust on it, but, it was so far out of wack I bit the bullet and paid a few hundred dollars to chrome the original rear fender and sent the copy one back in disgust. I prefer Original parts anyway and the list goes on of what I am refurbishing to get this bike right.

I fitted the original back into the frame and a new Old stock inner fender to clean the underside up. I have chromed the rear light assembly and that is going on right now.

To keep with the clean look I splashed out on a New seat for this K6 and glad I did to be honest as the original had seen better days, this really is a good seat and fits super well.

I put the light assembly together, using New light and chroming bracket, this is now all together and will wire tomorrow as its getting late but thought I would share with you today to show you how I am getting on.

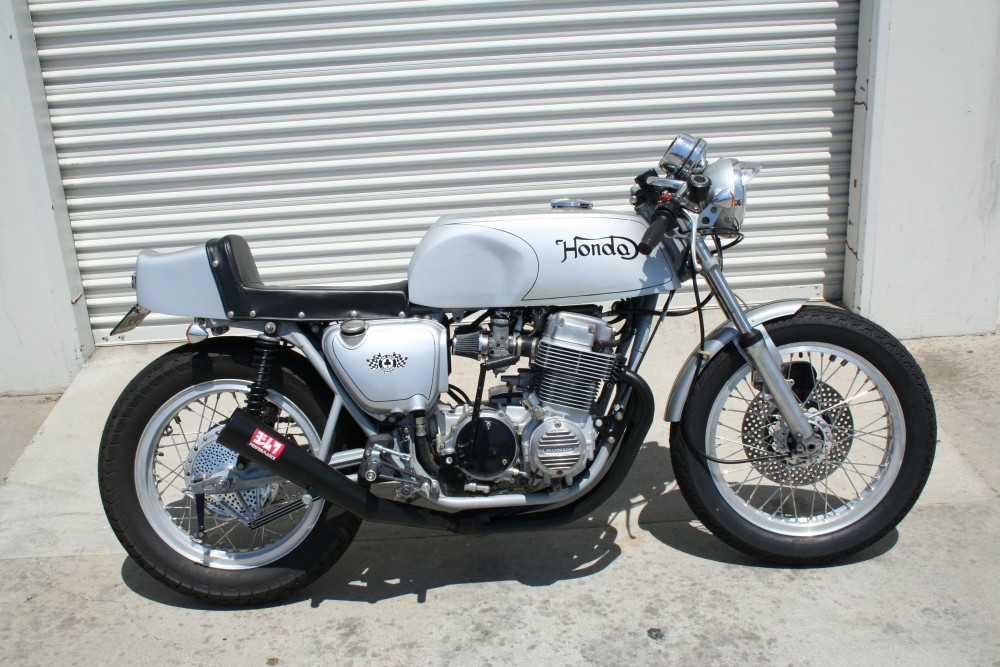
CB750 Silver Cafe Bike The Silver Manx

I have built so many Motorcycles over the years and its hard to keep track as to what I have turned out over these 24 years here in Southern California, but every now and again I will be reminded of a unique machine that I created and today is no different.

I created this machines from a bunch of parts that I had in my garage and I purchased about 15 bikes up in the desert 20 years ago and sored them in my garage, back garden and next doors garden, as the deal came up and I had to jump on it, so always had a few platform frames to use for future creations and this is just one of them that I came across on an old CD that I had discovered in the drawer of an old cupboard.

So, this was a conglomerate of parts ranginging from 1971 to 1976 and I just went ahead and built this as a fun homage to the Isle of man machines that I grew up watching and reading about as a teenager, this was something I wanted to be like my Black bike but a different color and exhaust etc, so with a head full of crazy ideas and a box full of old parts, I began my creation.

I had a New Old stock Paul Dunstall Fuel tank, in fact I did have 4 of them to be honest, I had already used one on my Black machine and I used one for the greenday bike and I wanted to use one on this creation to keep in that guise that had started to become popular a few years later.

I wanted to have this machine in a style very reminiscent of the Nortons of the day, hence me designing the Honda logo in a Norton font, but I was happy how this looked and so glad that I went with that idea, some 20 years later I am still selling that logo design, over 500 of them I have sold in numerous colors.

This bike had a lot of mixed up years parts and I knew this would be a fun machines to ride, it was big and bulky and fitted the Motor well as that inline four powerhouse always looked great hanging out of the frame, this was a Muscle style Motorcycle that would turn heads where ever it stood.

A fun bike to ride and plenty of zip, I did fit a lightened fly wheel to this so the motor would spin over faster and this would really pull hard through the gears as i used a set of old Kerker headers that had been sat in the rafters for a long time and I had picked up at a swap meet in Pomona many moons ago, I mated that to an old Action four megaphone muffler and kicked it up 20 degree’s for a more aggressive look and boy did it growl when you got on it.

This sat well on a set of 18 inch Vintage Borrani rims of which a I had 4 of and wanted to use them up, so re-laced to Honda Hubs and threw on some Bridgestone tires and these filled the chassis out nicely. I rebuilt and painted the Caliper and drilled the front rotor and painted middle and used stainless Hoses to make sure this machine would stop quickly when you needed to.

I also ditched the stock factory footpegs as I had Ace Bars on and wanted my feet further back, and chose some Tarozzi rear sets to give me the leg room that I needed for that leaning forward stance.

I used a Kawasaki H2 Race seat that I actually made a mold from my first one and that was then upholstered in Black Naugahyde and snaps fitted for that vintage look and, I could keep all my documents underneath that.

I also wanted to use some Vintage parts up I had and I had a few sets of Original Koni rear shocks, so cleaned them up and fitted them to the rear to give it that road race look of the day, and also polished and drilled the rear brake cover to dissipate heat and get rid of brake dust, you can see the rear brake stabilizer that I machined out of 6061 and suits the bike well.

A really fun bike that I enjoyed creating, I took some old original 1974 gauges apart and revamped them with new custom faces, painted the needles, re-chromed the lowers and tops.

This was a tall bike and even I was tippy toe and im 5’11 but I liked it that way as you got to respect the bike for what it was, it was not for the faint hearted that’s for sure and gave that late 60’s look even though its a 70’s bike.

Motor Cycle News from back home in the UK sent a journalist over to come and see the bike and test ride it and they did a smashing write up on what I do out here, to me that was so cool as I have read that Newspaper since 1973 and to have made it in there a few times was just a head spinning time for myself.

A professional stunt rider too, he did not hang about on that bike and was quite amazed at the powerband compared to most of the Modern machines he usually rides and was smiling all the time whilst perched high upon the pegs.

It was quite a responsive engine and soon got up to the magic ton with no problems at all and way more there but we kept running out of road lol, we both raced up and down Miraloma road where people like Robbie Gordon would thrash his Nascar rides or Baja trucks by my shop, so only fitting that we gave it some beans here too.

All in all I was super stoked at the way the bike turned out and glad to have found some old photos of it to show on the website.

I have no idea where it is now or who owns it but just another machine in my style that I really loved to create and enjoy, it may not be your cup of tea but you may appreciate the time and effort creating motorcycles just out of parts laying about?

Thanks for reading.


Refurbishing the 1976 CB750K Honda Four

Here we are with another episode of tweaking that old 1976 CB750K Model Honda, she has been sat for so many years, I was initially just going to get her running and sell her, but I have grown attached to this machine and its my best year personally, so thought I would remove worn out parts and fit brand new ones. Still a ways to go and I shall blog as I go along but – Eventually this will start to look like it did when it came out from the factory. Except the paint as that’s a really expensive process these days but I may even have a go at that later who knows, so stay tuned….

I didnt like the patina on the footpegs, even though this particular machine only has 17,000 Original miles on her, she has sat many decades in a Back yard and the eliments have taken a toll on any of the parts and brightwork, you can actually see that the foot peg rubber has no wear at all, which is more validation of the low milage, but I wanted to fit some OEM parts and here is a set of New pegs that I will fit to the bike.

The same thing goes for the rear brake, it had heavy rust pits that even I could not be able to polish out, so I thought I would buy an OEM genuine Honda one and that will help clean up that area that does get neglected over the years on these machines.  Not cheap but rechroming would of been even more expensive, so this was the lesser of two evils.


The Original Kick starter also has pitting, so I managed to track down an original New Old Stock one and later on I shall probably get the original one stripped and chromed again but not right now.

The Honda should start to look like it originally did when it rolled out the door all them years ago and I am enjoying the time and effort to get this to where it really needs to be.

I removed the old clutch lever and thought I may as well address that issue with a New version and that will clean up the handlebar area somewhat as many people leave that part of the bike and I always notice that.

Now that looks a million times better and with NOS grips too I am more than happy to get on with another part of the bike now, I am in no rush at all with this k6 and when completed will offer it up for sale.

The poor headstock always gets left out, the steering stem nut and washer was begging to be replaced as well as the steering pinch bolt, I could not leave the bike with these parts like that.

I try to use as much Genuine Honda stuff as I can lay my hands on and this is the case right here, it is fantastic quality and you know not only will it fit, it will last many years too.

So, another job done and if I find anything I feel that needs sorting out I shall of course do it as I am on a roll now, although this is by means no restoration, just a revamp of tired parts.

The starter motor covers always rust as they are easily open to the elements, so I ordered a new one as this has seen better days, what do you think?

A big improvement and I could go on forever on the bike, just a few of the fundamentals needed to be addressed but I still need to rebuild a rear wheel as the original one is just too rusty to strip and re-use as its too dangerous to mess with stuff like that.  Next up is to fit the footpegs, a New old stock brake pedal and kickstarter to at least clean that side of the bike up and look more original now.

Looking very much like the bike it was originally at the factory and am pleased I went this route on this one, although still many more things I have to replace to get it to the standard I will be happy with, but each week that goes by I give this a nod of approval.

So, I will be working on removing the center stand and painting it as its looking a little weather beaten, its a big heavy part but I want to get that looking good, I may Powder coat it for long lasting life in all honesty, so stay tuned……


Honda CB750K 1976 getting a little more work completed.

I decided that whilst I have some spare time and a few parts etc I shall get into the K6 a little more and clean her up, as she has sat for so many years in a Back Garden, its only fair I revamp her a little and put her to a more Original style as to be honest, the 1976 CB750K Model was probably the best looking bike of them all and ran well.

So, I thought that I would try and clean up the lower front forks, as the factory clear coat has long gone and and as the sprinklers, hot and cold climates happen, the lower forks and anything aluminum takes a beating.

I jacked the bike up and removed the front wheel, I also made sure I used a pair of jack stands too, just to hold the chassis incase we get an earthquake here in Southern California, as 530 pounds is not so easy to pick up if its laying on the floor.

As you can see, the lower stanchions have seen better days, the pitting is caused after the clear coat gets eaten away by heat and moisture then aluminum will break down slowly in cold temperatures causing oxidization, of which you can see on the left fork lower, but I have refurbished so many of these over the years, I was not worried at all about cleaning these up to a more original look, but it does take a bit of dedication and hard work to achieve that goal, like anything else in life really.

After sanding the forks by hand, I start my process of buffing, using Block  compounds you can buy from shops, to my “Special” Secret Sauce that I have used for decades and slowly improved to get it to the standard that I like, yes its messy but that’s the reward afterwards when you see a shiny piece of art.

Its not a 5 minute process that’s for sure and the more effort you put in, the bigger the reward at the end, this is just its early stage and I increase pressure and change cutting compounds as I go along, remembering that this gets bloody Hot as you increase the pressure on the wheel.

As you can see, that is a good comparison with just a little bit of work, more to do but I am happy how this is going and people ask me how I get the finish on my Polishing, so thought I would share this with you lot today.

Yes, I wore gloves as these get super hot and being aluminum, they hold the heat for a long time, I am really happy how the forks are starting to turn out and am glad that I made the decision to pull the front forks and rebuild them.

So, a bit pf scotch pad, sanding block, then polishing will get you to this stage, I can go more but don’t want it too showy chrome looking and will rebuild these now, the upper tubes are total toast, as you can see below.

The forks at the top are always covered by the headlight ears but Honda did not take into consideration that the metal will sweat in hot and cold condition and of course rain etc can get down the forks and sit there, these forks are typical of the many that I have pulled out of the bikes over the years, so a common problem.

I believe Honda went cheaper on the chroming, using less on the forks as you don’t see it and putting money into the Motor, as I have seen hundreds like this and that’s always been the look when you drop the forks at the top. But I have a Replacement set of aftermarket ones ready to go.

I have always liked Polishing,I was taught at a old 17th century Barn when I worked for Rolls Royce as a kid and it always stuck with me and its so rewarding to turn something ugly into quite the jewel.

I use my circlip pliers to fit the snap ring into the lowers, a real life saver these are as you do not want to risk scratching the chrome by using regular pliers etc.

I try to use Genuine Honda parts where ever I can as the parts are top quality and of course guaranteed to fit perfectly, as many aftermarket parts do not.

I refitted the springs and will fill with oil when the wheel is on but still up in the air, that keeps the pressure off the springs and easier to fill the forks that way and not have the springs flying out towards your eyes if you put the bike on the ground.

So there you go, forks back on and they look so much better than before. I will be fitting New speedometer cable and New Tach and speedo gauges to clean it all up at the front, but she is taking shape and will continue to revamp her as I go along.  I will be fitting Brand New 4 into 4 exhausts to the New Honda spigots that you see in the cylinder head, also New footpegs and New kick starter and brake pedal, so keep watching carpyscaferacers.com and see how we go.


Honda CB750K 1976 gets a little more cleaned up.

Well, I have decided to continue playing around with this old Original inline four CB750K series Motorcycle, and I think what I shall do now is strip a few parts off and refurbish them to a nice condition.

I think that this 48 year old girl needs to have some good cosmetics, so my plan is to clean a few bits up like: Remove the forks and polish the lowers etc, maybe new gators and hardware, after that I may fit the New 4 into 4 Chrome Japanese Made 341 style exhausts, that way you get to see how the fit and sound. I have a temporary 4 into 1 set up on the bike right now but think having a Brand New set of 341 style exhausts will set the bike off and show how good the pipes fit and of course look with a sound byte or two added for your pleasure.

Also I will refurbish the rear swing arm too seeing as I fitted New rear shock absorbers and a bunch of miscellaneous parts to many to mention as I go along, but- These parts are not cheap and this will be reflective on the new price too, I am not bothered if it sells as I can use it as a great parts getter and have fun on a low milage CB750.

So stay tuned and I will of course document this as I go along, I may have some more bikes coming up for sale so keep checking back with me on the website, this will be a fun adventure, not a show bike as I don’t want to strip to the frame right now but maybe later but I do have a few K0 bikes I will try and get back on the road.  So thanks for looking and hope the K6 will look somewhat factory when I have completed it.

Once that is done I shall get a few miles on it and ride it down to the beach etc and just enjoy the good old CB750K series inline Big Four Japanese Classic machine.


Have fun on your machine over the weekend.

It’s Saturday and the weekend always seems to fly by and then by Monday you then remember what you wanted to do and forgot to do it, Right?  It’s always the case for me, I try and do my own stuff on the weekends and I really enjoy it, plus the weather is getting better and the days longer and that’s a blessing for all us Bike enthusiasts.

I have a bunch of bikes in the Brn, many I picked up locally and slowly I have to try and resurrect them to at least, a running condition, but sometime the order is taller than a Yard of ale and I do have my work cut out and huge challenges become a major headache, broken bolts, seized motors, electrical is falling apart and getting more shorts than a Robot made in China.

And then there are the ones that you grab as nobody wants to even look at having a go to clean all the bird shit off and see if the faithful old inline four will come back to life, you would be amazed at how many do, that’s testament to the Japanese engineering and the sturdiness of these 500 pound classic machines.

Just get out there and enjoy life, these are such a great Platform to create your own style of motorbike and still plenty of the models out there around the globe mostly sitting in some dark corner, waiting to be discovered and you will be amazed when you kick the motor in the guts and she fires up, once that happens its all systems go to try and get her back on the tarmac, then go and get plenty of miles of smiles.

Be it stock to a full custom, I know that you will enjoy creating your very own Motorcycle and there is nothing like slinging your leg over and taking on the curves and straight aways that literally await you.

Have a fun weekend with your Big 4 Machine and if I can help, shoot me a line at carpy@carpyscaferacers.com or drop a dime to me at 714-598-8392 and I will do my best to get you back on the road so you can wheelie away with a smile on your face.


Formula 1 Livery CB750 SS Honda Project

Well, I have been playing about with the F1 project and have decided to fit the good old Rocket 4 seat assembly and then upholster the seat with traditional style snaps, just to show the times of yesteryear and the old school seat set ups of the day.

I am happy with the way it looks and it feels super comfy.plus your legs do not foul the air induction side scoops of which I really like now and want to try and represent some of the Ferrari’s styling, I still need to get all the body work wrapped but locating a company that knows what I am on about is not easy, my guy I use has flaked so its off to find someone who wants my money.

I will be looking forward to firing this old girl up and taking her for a spin about where I live as it was made for Motorcycles as we have miles of winding roads with off cambered corners and chicanes etc, this will be a blast to ride.

I went with a 17 LED stop tail light to give people lots of warning that this machine is there and again, give an old look with modern internals and this really does suit the bike, I still have to fashion a license plate bracket under it but thats later on.

Starting to look like a Classic Motorbike again and got plenty of hand waves and beeps from people driving by over the weekend, so that’s something positive eh?

I’m getting closer each time I do something and I believe the only hang up will be down to the graphic company, if I can’t find one that can do the job them I will have to paint it and letter it by hand and thats a time consuming job but we shall see.

Just thought I would do a little blog to let you know what I have been doing lately and hope you are enjoying the build????

Scuderia Ferrari F1 styled CB750 Creation

I have been a fan of F1 Formula race cars since I was a teenager, regularly watching the races on our 3 channel television, I loved watching these guys in the JPS Renault Lotus and my First Motorcycle that adorned the Motorcycle world was based on Emerson Fittipaldi’s Black and Gold F1.

Now, over half a Century later, not only did I create a fun Cafe bike representing the JPS styling, I am now going to create another F1 livery Motorcycle for my Brother, but this time in the Ferrari F1 colors.  This will not be a replica of that machine but will have the accents of the Italian Stallion beast that runs the circuits today.

I still have a long way to go but as long as I get the look, I shall be more than happy, this has lots of work to be done still like seat set up and some accessories as well as the color scheme but this time I shall not be painting the bodywork as ferrari and all F1 race cars are wrapped, so this will get a new skin and hope I can pull that look off?

I am incorporating Airduct’s into the side covers and will make a custom seat and this time will have removable Pannier bags that hang onto the outside of the machine to give it a wider look from the rear.

The other thing is i like to mix old with New, so I shall have a Satellite GPS speedometer with a digital Tach built inside, set inside an old Vintage Race Car Alloy Cup that was attached to the steering column many years ago and had a Tach inside it.

I am making stuff up as I go along, some I shall keep and some I shall redesign most probably, but want this to be a cool ride that I will personally ride upo where I live as its a winding set of roads with many turns and off cambered switch backs.

This will have a new exhaust system as I hope to make in stainless and am using BSA silencers to give a little British feel and sound to the machine, that’s the cool thing with Custom machines, the sky is the limit and you can change to what ever you feel is to your personal liking.

As you can see, to keep with the Italian feel, I am using Tarozzi rear sets that came directly from Italy and will make this so much more comfortable to ride and change gear quickly.

Still a long way yo go right now but its taking shape and quite excited at the form that she is making right this minute and wanted to share with you guys and gals, I shall keep you updated on this creation and hopefully not too far away I shall be cranking gears in my area and grinning from ear to ear.  Stay tuned……………………..

25th Anniversary Edition Ton UP Machine CB750K

Well, next year will be my 25th Anniversary of creating machines over on this side of the pond, many people have asked would I replicate the infamous K5 with Cafe on the tank to celebrate a quarter of a Century building Motorcycles, and I thought, I may go along the similar lines to that very Bike that kind of put me on the map so to speak.

But what should I do?  On reflection I think it is indeed a cool idea to do something like that very machine but, with some extra cool parts and exhaust system etc but I do have a NOS Paul Dunstall 5 Gallon Manx Tank in my Barn and will probably use that, so, I have a few old parts laying about and have been to and throw in coming up with that popular concept bike I created all them years back.

I have an empty Motor that I will use as a mock up for the time being. Then build something that will have a bit of oomph, but we shall see how things go, but the amount of messages I get about the old Cafe Bike I created all them years ago, still causes a stir and I think it will be fitting to do something in that style, maybe different color etc and wheels too.

So I will use old snotty spare parts to mock it up, as well as some New stuff to see if it will fit and as you see, I think I may go with my Infamous Sidewinder Exhaust system as it hugs the frame and, you can still use a main stand. I am putting my Vortex Baffle in for that crisp response and crackle when you open and shut the throttle.

Simply slide the baffle in all the way and the endcap finishes the system off just like the old days and I like ceramic Black end to give a good contrast to the system.

Please remember, this is all a Mock up, I will strip the frame and then either paint or Chrome it, not decided what yet but will add info as and when I do more to the bike, I am just getting a feel right now but love the way it will sit and of course will use shorter fork tubes in the steering.

See how close the Sidewinder is to the frame, but, not touching it, and- If you look, you can see that if you wanted, you can still use the Main stand, even if you were changing a rear tire or fitting a new chain, it makes it easier to slip the main stand on and not have to remove the exhaust system.

Still so Much to do and see where I am going, but I do like my Sidewinder Exhaust system as on the 75K I created a quarter a century ago I went with a different 4 into 1 system, plus this system allows for super easy access to the Oil filter Housing too.

I love the look of the tromboning headers and they flow so well, a crisp note that will get you noticed every time you twist the throttle, the bike will get a complete strip down and then I shall bead blast the paint down to bare metal, grind any welds off that are ugly and add some brackets for New tank and seat combo etc, this will take time but don’t want to rush either.

This is my own design and I like to Ceramic coat these , this time I chose the Brushed Aluminum look and I think it will set the bike off great once everything is tied together and have that Cohesiveness that will draw a crowd.

Of course stopping power is paramount on these machines and with a little extra Horsepower, these inline fours need some good surface area to be able for the brake pads to grab onto and bring you to a safe stop, so I chose to go with Beringer and have the floating Rotor and Custom Caliper set up to give me that punchy braking that many lack on their builds.

Of course, you need a good strong Master Cylinder to push all that brake fluid down to the Caliper as quick as possible and I thought I may as well go for the trifecta and get a Bringer Master Cylinder set up and very cool it looks too.

As you can see, this is a rough mock up, no painting will be going on until I have completed the whole build up and then once I am happy I shall do the tear down, rebuild a Motor and then slowly assemble the machine, but right now I am trying all sorts of concepts, I had an old set of 1977 Lester Rims that came off an old Chopper bike that was parted out many moons ago.  It is a 19″ front and a 16′ rear, the shock absorbers that I have fitted are not tall enough for what I want, these are about 13 inches from center to center, I want at least 14 inch centers to raise the rear end for a more level stance.

I have had this old frame for years and its weather beaten, but that makes it for an interesting build as I love resurrecting 50 years old Motorcycles from parts, I believe this will be a fun bike to ride, I shall incorporate rear sets and maybe a Custom swing arm with adjustable shock mounts for changing rear Geometry etc.

So, although the frame is Rusty and some corrosion, I have always started with frames like this, I am media blasting it anyway so it will be all fresh metal again when I start the build up after I am happy with the overall look when I am done fitting parts.

I have other things to do like all my orders today, so I had better get the exhaust orders done and ready for the UPS driver as exhausts always sell well and weather will be warming up all over the globe soon and that means- Riding weather.


So, with that I had better get these orders packed and labeled for exhausts and get them done as light will be fading soon, but thanks for follwing me on the 25th Anniversary build and of course, I shall keep you all posted via here.

Few More Exhaust systems available for your CB500, CB550 and CB750 SOHC

Well, the old year is almost up, a New year just around the corner and to be honest, I am looking forward to it, new challenges but new idea’s and New parts to be offered for a number of machines, something that I do like to do and offer to everybody.

So, literally a Truckload of exhaust systems finished and some will be Ceramic coated and some will be Raw steel, as many like to paint or wrap them for them selves.

I ship all over the world and continue to help my Customers, I of course build the Motorcycles too, I make sure they fit and these do not leave my place until I am happy with them.

These systems are made right here in good old CALIFORNIA and I have been offering these for 23 years, affordable and work and sound awesome, a tried and tested formula that I have had many repeat customers.