SONNY’S Oh So Sweet – Alloy SOHC Machine

Welcome to Readers Rides, I started to do these about 15 Years ago and think I should return to these, so people can get inspired from many peoples own creations, they can see their machine and what it consists of parts wise and many have my parts on their Motorcycle, so if you have time, drop me a line with as many cool photos with good angles and maybe some great back drops, ie- Bridges, River, castle, Pub, Water fall, Bricks etc and lets feature your Machine. Show the world that we have very similar tastes and look forward to opening the Global book of our readers Rides.

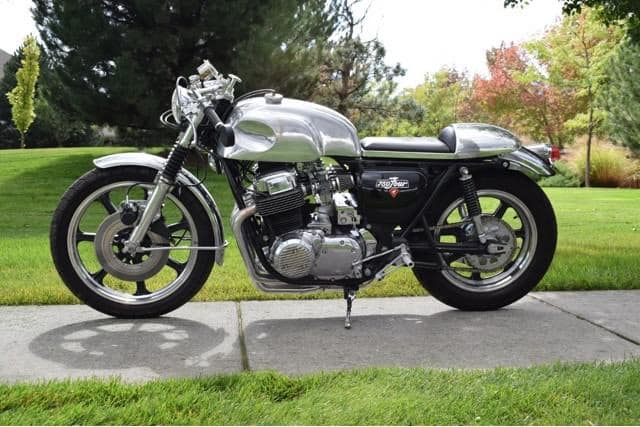
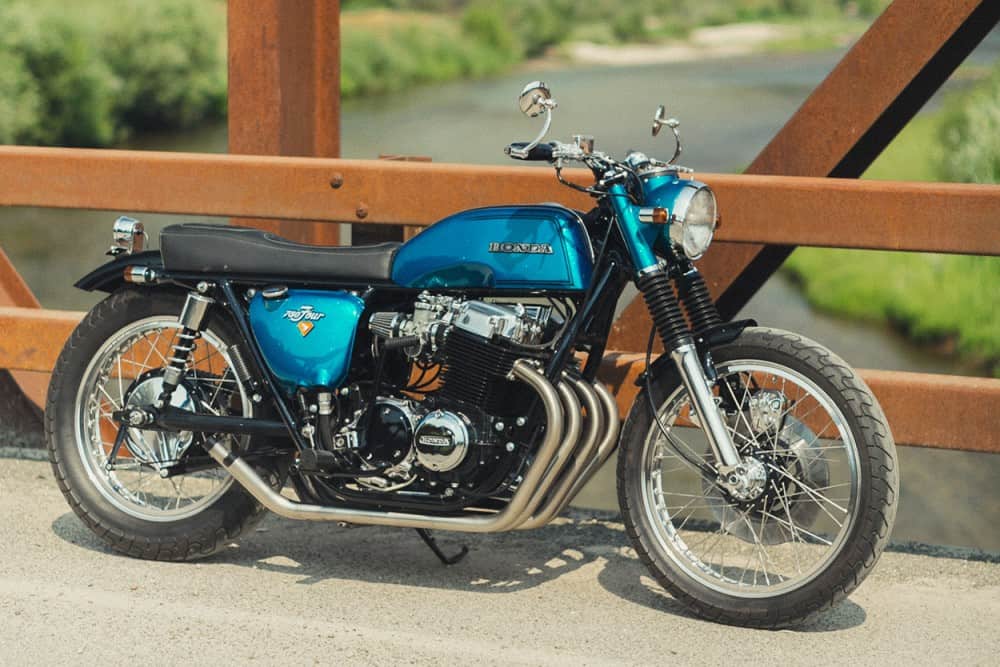
Below is the first cool bike that I hope to receive more pics but- a Good taster to get you lot going, how about Sonny Morrisons CB750K Model Cafe Racer, Sonny is from Rancho Cucamonga in California and about an hour from me.

OK, I am still awaiting some more information on this build but will feature it and add when I get more input from the owner, above is Sonny Morrison’s SOHC Honda and its a Cracker.


What a great looking Cafe Racer Machine, right up my alley, or as you look at this photo, right next to a Rock wall, this machine is tough and and enjoying the 19 inch front Lester Rim and either a 16 or 17 inch rear.

Sonny used one of My Custom 2.5 Speedometer gauge Brackets that I manufacture and it certainly looks at home on top of that Polished triple tree, love the dampener set up on-top too.


Hand Rolled Alloy Gas Tank and Seat really suits the bike, not sure where he found this set up but will let you know when I have a build or spec sheet from him but it sure looks nice.

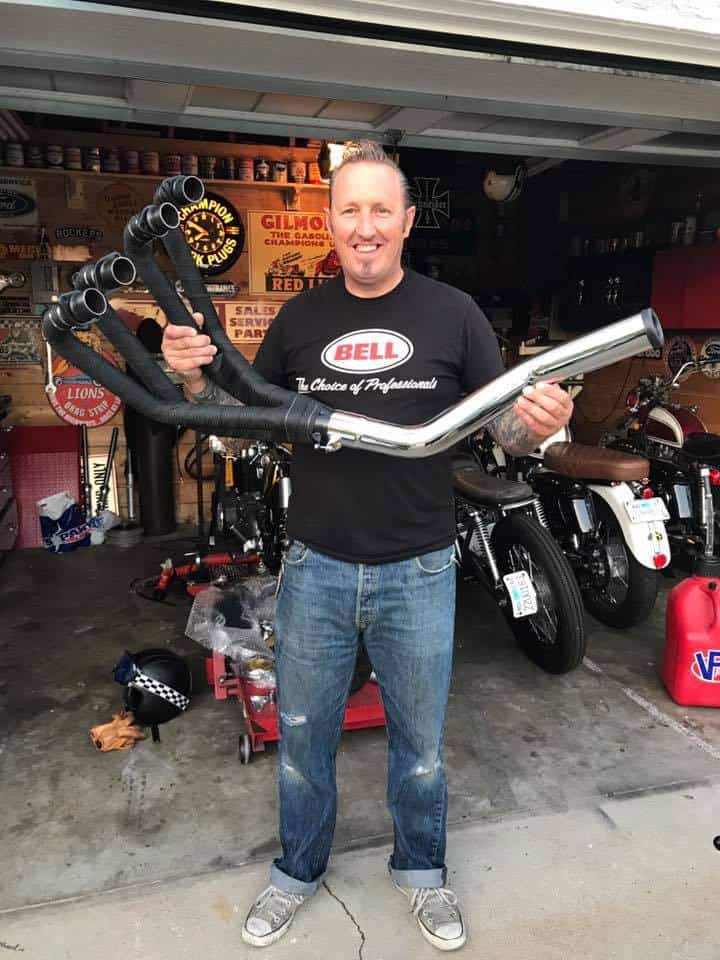
Has my 4 into 1 Exhausts system and the Rear Sets I sell, this CB750 is built for getting around the twisties on any day of the week.

Loving the Manx Tank, I am guessing its from India, the front forks look to have been rebuilt and polished, that 5 Gallon Tank will get him a long way too and love the fact he used hos original rear Mudguard for that Classic look.  Clip one and minimal controls really does make this SOHC stand out.

Thought I would share today and hopefully will be receiving more photos and spec sheet soon. get out in the shed and start building your two wheeled Machine and hope to see some photos of your garage soon.

You can send photos and Spec sheet to: carpy@carpyscaferacers.com and i will feature on the website for all to see, spread the word, lets see your Rides.


Sonny Just sent me this, so thought I would add it on here.


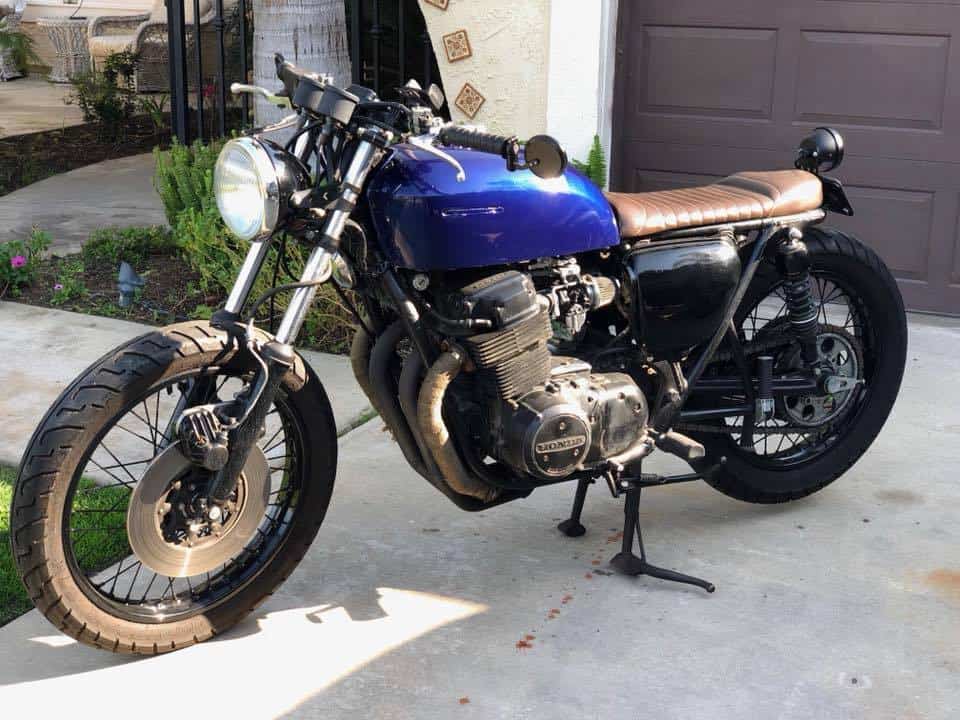
Up here in the Great Northwest Territory of Idaho one has to be creative when building a motorcycle. Finding parts locally is like finding gold. This is my story on my 1973 Honda CB750 SOHC Café Racer build.

After finding Carpys Café Racers online and drooling over his incredible builds I decided to give it a go. I purchased my bike as an old 70’s chopper, I had to drive 140 miles round trip but once I got the bike home I started the stripping process, everything I couldn’t or didn’t want to use came off the bike,

First to come off was the rusty chopper forks and the 21inch brakeless front wheel, I then found a new fork assembly with the inner parts I needed to bring the bike back to where I wanted it,  the donor bike was half buried in the dirt and had been there for decades, the old guy wouldn’t sell it to me unless I took the whole thing, no rear wheel, gas tank, seat, controls or gauges, it was just the frame that was cut up, the forks and a crusty frozen motor.

I pulled the forks and carbs off then placed an ad on Craigslist advertising it for free, a guy came and hauled the sickly thing away! after polishing the fork tubes and triple tree upper I started the rebuild, new seals were installed as well as new fork boots, I bought some progressive lowering springs for the front and I then purchased a set of short shocks for the rear, this completed the lowered stance I was looking for.

I met a chap online who lived quite a distance from me but he not only had the front brake caliper and front fender I needed, but also a set of New Old Stock Lester wheels, So off I went to pick them up, when I got there he offered me a better price on everything seeing that I drove so far, he also threw in a rear fender and some misc parts for free, A really nice guy!

I ordered a new stainless shorter café front brake line from Carpy’s Café Racers which made the install a breeze, I had the front brakes stopping on a dime in no time!, I then moved onto the controls and speedo, since everything stock was missing I bought aftermarket clutch, brake and throttle mechanisms along with all new cables, I then ordered Carpy’s Café Racers lowering bracket for the Drag Specialties Speedometer.

I installed a set of clubman bars and bar end mirrors and the whole front end finally came together, from there I moved onto the engine, I installed new Dynatec electronic ignition along with new matching Dynatec coils and wires, it made a huge difference when starting the bike, just a slight push of the button and it starts immediately. Then I ordered a set of Carpy’s Café Racers Yoshimura style Ceramic coated 4 into one exhaust, although it came with a baffle, I decided not to use it, I like the raw open exhaust sound and wouldn’t change it for a thing.

By the way, it’s been a couple years now and the Ceramic coating has held up great, they still look new! I just love rolling on the throttle and listening to her ROAR ; )… I found a place in India selling the aluminum Manx style tank for the CB750 Sohc, HOWEVER… it did not fit and the fuel petcock mount was an odd thread and I could not find a pipe thread type to fit, I basically ground it down and made an aluminum block, I drilled and tapped it to fit an original factory Honda dual outlet petcock, then I had to cut off the tank mounts, reconfigure everything and have an aluminum welder fix me up, it added some coin to the price of a tank that was supposed to be bolt on and go!

{P.P.S.}  That Singh guy from India has made some good parts but many parts do not fit, just be aware.

Buyer beware of anything from India!.

I decided to get an aluminum café seat pan and seat, but this time from a maker in Florida, this to was an issue as I waited months to receive it, seems they lost my order! the quality and polish was excellent though once I received it. I then bobbed the rear fender and added a Triumph tail light. I ordered new aftermarket side covers, mounting rubbers and factory emblems then painted the side covers gloss black with a clear coat.

I ordered Carpy’s Café Racers Billet Aluminum Rear Sets for the CB750 and love the fit and finish, the bike shifts like a champ and is comfortable to ride even on extended journeys, one of the best purchase’s I made, well other than the Yoshimura exhaust!, I rebuilt the carbs and jetted them to what Carpy runs on all his bikes running the Yoshimura exhaust, I started with Pod filters but have now changed out to a custom made one piece billet aluminum air cleaner. I’m sure I am forgetting a lot of stuff I did during the build but it has been a couple of years now. Having multiple bikes means the Café Racer doesn’t get ridden as much as I would like but I have to share my time among them or the other bikes will get jealous…LOL.

One thing about using Carpy’s Café Racers web store is the parts are tested and always excellent quality, shipping is fast and if you have any questions, Carpy himself will answer them. It was a fun time building the Café Racer and it draws attention everywhere I go.  It’s fun to come out of a store and have 2 or 3 guys standing around the bike admiring it. All I can say is….I don’t have a witness and I can’t prove it, but this is my story and I’m stickin to it…..


The Harlequin Honda 1975 CB750F Super Sport

Well, here we are with the Harlequin Honda that I have created, its been a long build as originally the Motorcycle was bought down from Washington on November 4th 2015, Edwin Cooper was not well, he had Cancer and wanted to try and revamp his trusty old Steed that he had had for many years, he wanted me to do something cool with it and loaded this Motorcycle up in the back of his pick up and came down with his daughter and dropped the bike off.

I helped him unload the 1975 CB750 F Super Sport, it was heavy, the brakes were sticking and it really did need some love, but- thats what I do and was more than willing to bring this motorcycle back to life and breathe fire once more.

This would prove to be quite a challenging creation, as there was a lot of time and weather that had passed over this machine, I have been there many times but I am amazed at how many Motorcycles that I have built that were all in this condition, some a lot worse too.

He had started to Cafe the bike out a little, many moons ago, hence the Shortened Headlight ears and the Italian Tarozzi rear sets and an old 2 Four seat that dates back to the Mid 1970’s.

Have a look and you can see that there is a lot of stock parts still on the bike, like the chain guard Gas tank gauges etc and of course the old wiring, and that had seen better days for sure, the weather can totally destroy a wiring harness in just a few seasons, especially if the temperature gets hot then col, it dries the wires out and makes them fragile.

This also has an Old Yoshimura 4 into 1 system on it, seen better days but nice to see none the less, that is now fitted onto a AHRMA race bike and gets used all the time.

As you can see, the Birds nest wiring will need to be completely stripped out, soon as I see toggle tops and electrical tape, I know that it needs to be removed right away, else it will be a headache that you do not need.

You can see where Mother nature has taken a firm grip of this Motor, Oxidization is a mean Culprit by the look of it, the Plug caps were so weather beaten, as I tried to remove it, the cap cracked and fell into many pieces.

I wonder what sort of critters over the years had chosen this 1975 inline Four as its home? Nothing really surprises me these days but intrigue always does and if this bike could talk, well, I think we may have a fun movie in the making.

The Carbs were locked up, seemed to have dirt and grit from everywhere and a little wasp nest in the Carb body itself, Mother Nature really took a hold of this one.

I loved the 1960’s Hot Rod Stewart Warner Mechanical Oil pressure Gauge, I am also a Hot Rodder, so this made me smile when I clapped eyes on it, poor motor has a lot of oxidisation on it though and will take time to remove and clean all that up.

We have a multitude of issues here, the rear brake caliper is seized up, piston is stuck and seals are shot, Rear rim is toast, the same goes for the rear shocks too, the swing arm looks like it has come from the bottom of the Baltic Sea, this will be a down to the frame build for sure.

Low miles too but the weather makes it look a lot worse to be honest, nothing that cannot be fixed though and this Super Sport will see a Brand New life and Look forward to sharing the photos when she is completed.

Front Brake caliper is also seized up, the front forks need rebuilding, Rotor needs to be skimmed and New rim built.

Unfortunately the rims had rusted right through, so all that I shall use is the front hub, Rotor and Caliper body and will refurbish all that I possibly can to this grand Old steed.

All the wire harness was Rock hard from being baked in the Sun, the rectifier and the regulator will be discarded, and I shall be using a New Harness, along with a solid state rectifier module, as I use them on ALL the builds that I create, cant trust 40 year old electrical anyway.

I know that this will have a different look by the time I have finished, not sure how just yet but- It will look pretty cool none the less and of course, Function well too.

So there she sits, before getting transformed into a cool Custom Machine and I am looking forward to tearing into this to transform into some cool eye candy.

So it is time to push this 500 pounder, into the garage and start to take this motorcycle apart and figure out what I am going to do to this 1975 CB750F HONDA.

And so we begin, this will be a long Journey with some hiccups along the way , but I know that it will look a lot different by the time this comes back out.

I started to go the route he wanted, to go with his motorcycle, then all of a sudden from out of the blue, I had an awful phone call informing me that he had just been in a Motorcycle accident on his Harley and did not make it, I was gobsmacked, and, the family were too, they didn’t want another Motorcycle in the family and I understood that, so they gave me the bike and said do something cool with it.

Above, I hand bent Raw steel and then Rolled the rear, welded it and then began to do a little more to this seat base as I want it to be able to take a passenger, as all you see are single short seats these days.

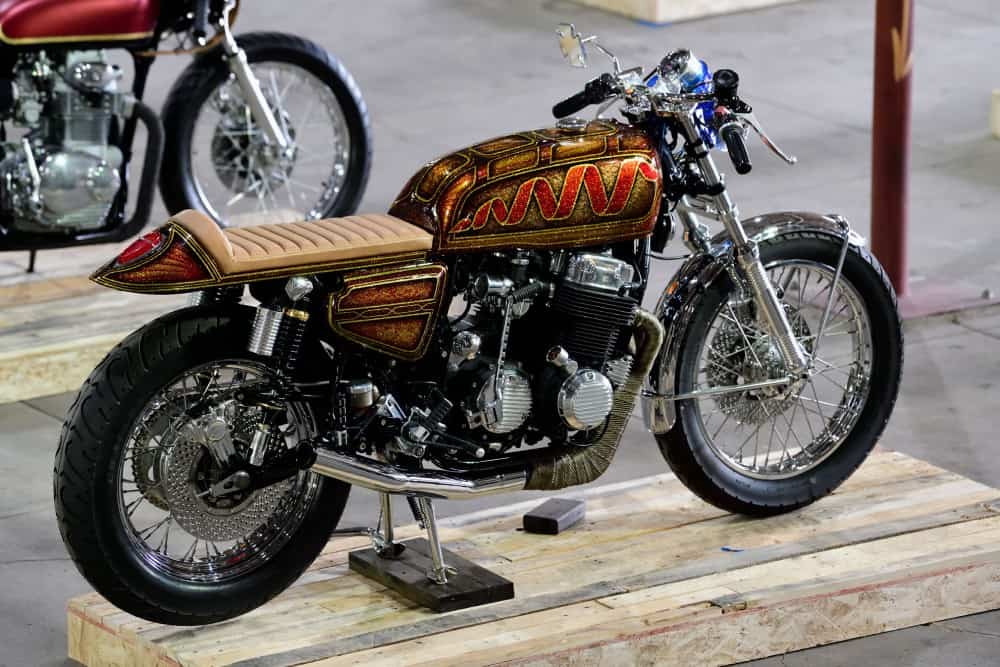
So the transformation began, slowly and I am happy at the end result, I named it the Harlequin as it has so many Colors and my Favorite Candy Bar is TWIX, so you can see that too right?

A lot of flake and detail but wanted that old school Low Rider flake that was about when I was a teenager back in the UK in the 1970s, when the Sun hits the Gallon of Clear coat, you will discover why metal-flake was so popular back in the day, a Kaleidoscope of Candy colors pleases the Cornea.

I have created over 50 Custom HONDA based Motorcycles since moving here in 2000 and every time I start a creation, I have to sit and ponder for quite some time, I am glad that I had no deadline, so the pressure was off and as and when I thought of something cool, I would just do a little bit to the bike and then back to work on other customers parts etc.

I fitted My Sidewinder exhaust system to this build but wanted to try my other sets ups as well, just to get the look and later, hear the different tones of my exhaust systems and decide which one I will like, this is ceramic coated but think I may end up using DEI Titanium Wrap on the header and maybe triple coating the tail pipe in Chrome, we shall see. Below is the Hot Rod tail pipe that fits to the Sidewinder header, a crisp and Velvet bark and as you can hear, very responsive to the throttle.

I have sold many Hot Rod, Side Winder and Razor systems through out the world, all made right here in California, none of that made in china crap.

I fitted a small 5-3/4 Chrome headlight to my Custom Fork Ears, and wanted to create a different look to the front end, so I went with a Biltwell Bubble Visor from their Helmet catalog and this worked out great as a mini nose fairing, even threading the clutch cable through the Plexi Glass.

I wanted to mix Old School with New and decided on using a GPS speedometer but with that old school Smiths looking gauge face and needle that still sweeps, this worked out so well.

Here is the old bucket I used and Tig welded to my custom bracket, just needs polishing and I shall also be fitting small LED Amber display lights for the turn signals to plug into.


I used a old Bucket and welded a bracket I water jet cut and it seemed to go right in and the great thing with this is that it has just a power wire and an anttena wire, you are all set to go, even has a LED red back light too.

This was the right look that i wanted and am glad that I chose to go this particular route, gives the machine just a little more character and style.

Here is the Harlequin outside out Home, so cool to see it in the sunlight and I am super stoked at the way the bike turned out in the end, a long but rewarding Project that really does turn a few heads.

Plenty of eye candy to look at on the bike, the Paint alone is super cool, and as the saying goes, “The Devil is in the Detail”

I am proud of this Build and being a steel tank and seat, this is a sturdy machine that is no light weight for sure, it stands tall too, many do not do that.

The Harlequin sports my Custom 4 into 1 Exhaust system, The Side Winder, I Ceramic coated the header, then wrapped DEI Titanium Heat wrap onto it, to give that Hot Rod styling, then I triple chromed the rear tail pipe and it sits nice and snug and close to the bike, this turned out so well and a system that I offer on the website for all SOHC Models.

A fun machine that was a real joy to create and will be on the show circuit around Southern California this year, hope you can come and check it out some time, be glad to see you.

I removed the old Super Sport Gas Tank Flap that used to hide an old tin cap, I then welded a Harley Bung and fitted a Custom Gas cap, looks so much smoother now.

I also did a few other changes to the bike by machining the forks and making a Brace bar out of 6061 T6, and of course a 1971 Rectangle fog light to show the European Spirit here.

So many New parts, this is like a Brand new Motorcycle now and the more you look, the more you see a little more custom touches throughout the ride.

Photo Credit: #RahoulGhose

This is a cool shot at the Outliers guild show in Down Town LA last week, stoked to see it on Display with other cool machines from around the state.

Photo Credit #RahoulGhose

Here she is sitting loud and of course proud to be representing, at the OG show in LA, a very cool event and I really enjoyed it.

A classic look of the Custom years back in the 1970’s when I was a Teenager, this came out so well and super stoked at the response I received at the Outlier Guild show.

The 1939 Ford Lincoln Mercury tear drop LED tail light set off well in the frenched pocket I created, I also had made the steel cowl and seat base.

Photo Credit #RahoulGhose

It has been an amazing year and to get the Harlequin completed is another notch in the post of creativity, I strive to do the best I can and hope that you liked the build?

Like I said, I had a great response for the bike and even the band that was playing loved it. Band- WOOLY BANDITS- Singer- Christa Collins.

Thanks you for everyone that came up and spoke to me, I was super stoked, this is a great creative family and super glad that I was a part of it, I look forward to attending more.

In Memory Of Edwin Cooper, I am sure he is smiling from above.

Below is  a list of of things done to the Harlequin.

  1. Machined and Polished Front Forks.
  2. Machined Aluminum Fork Brace.
  3. Polished Hubs.
  4. 19X40X1.85 Chrome Front Rim.
  5. 18X3.5×40 Chrome Rear Rim.
  6. Stainless Steel Spokes.
  7. Hand Drilled Rotors.
  8. Custom Piggy Back 14 Inch Shocks.
  9. Polished and Rebuilt Rear Caliper.
  10. Braided Steel Brake lines.
  11. New Chromed front Fender.
  12. 5 3/4 Chrome Headlight.
  13. Biltwell Helmet Visor.
  14. Custom filled and smoothed S.S. Gas tank with Harley Cap.
  15. Hand made Steel Seat with leather Tuck n Roll.
  16. Metalflake paint.
  17. Hand Made Clubman Bars 7/8.
  18. Biltwell Grips.
  19. Rebuilt Motor with Polished Covers and Wrinkle Paint.
  20. Restored Carburetors and synchronized.
  21. Drilled and Chromed Kick starter.
  22. Wrapped Sidewinder 4 into 1 exhaust with Chrome tail pipe.
  23. GPS Speedometer.
  24. New master Cylinder.
  25. New levers.
  26. Tarozzi Rear Sets.
  27. New Challenger tires and Tubes.
  28. 1939 LED Tear Drop Tail Light.
  29. LED RED rear Turn Signals.
  30. LED display lights.
  31. Polished upper triple tree.
  32. Powder Coated frame.
  33. Lithium 12 Volt EarthX Battery.
  34. New side covers.
  35. Chromed Center stand.
  36. Chromed Side Stand.
  37. 530 X Ring CXhain.
  38. New wire Harness.
  39. New handlebar switches.
  40. Oil Pressure Gauge.
  41. Battery Tender.


Get the parts you need for your Build this season

Well, for many the weather is just starting to ease of a little, Spring is almost here and I know a few of you will already be in the garage or shed, with the heater on, trying to figure out what to create with your two wheeled machine.  Spring mostly brings great weather and I am sure that by now, you are ready to jump in head first to build your Custom Motorcycle and get the bike out on the tarmac as quick as you can.

banner7


Be it a Cafe Racer, A Cool Brat style, a Full on Custom or a wicked Tracker style, we have the parts that you are looking for, and with over 4 decades of building Motorcycles, I do my utter best to help you create your machine and get the parts out to you as fast as I possibly can.

book

Many people email me about their machines and ask for ideas or just inspiration, I have been there many times and you eventually hit a wall in the design process, but many hands make light work and many ideas from people certainly help mold that design into a more solid Concrete build and then, you are off and working like crazy to get the idea out onto the road.

I too have a few long projects that need to be completed, I also offer Servicing to full builds and, have enjoyed doing this in Southern California for over 18 years.

exhaust and parts

If I can help with anything, even if its advise, call 714-598-8392 or even text and I will do my very best to help you out, this industry is a fun and creative one and I hope that I can be of some assistance to you, this is not just a job for me, its my life and I continue to push the envelope on parts where I can.

hoops

HONDA BRAT 1976K FOR SALE $5000

Here we have a 1976 HONDA CB750K Model for sale, this Brat style machine runs really well and is a strong machine for sure, Located in La Mirada, this 500 pounder is not a show bike but a bike that is meant to be ridden.

1976A


This bike has had some work done to it and it a fun Motorcycle to ride, a linear power machine too.

  1. Rebuilt CARBS.
  2. Rebuilt Top end
  3. 4 into 1 Mac wrapped.
  4. New solid state Rectifier
  5. New Lithium Battery
  6. 2.5 Speedometer and Tachometer
  7. 7/8 Black Drag bars
  8. Black rims
  9. Brat seat
  10.  Custom rear tail lights
  11. New intake manifolds.

This is a fun machine thats pretty reliable and is an ideal platform to take on and do what ever you like to it. $5000 Takes it home.

1976g


Fires right up and runs pretty hard too.

1976b
If you are looking for a solid machine that you can ride right out of the gate, then this is a good ride right here.

1976c

These are getting harder to locate these days and to fond a decent running one is even harder, so this may be just the ticket for you.

1976e

I will be selling a few bikes on here and it is always great to see new owners have a CB750 and enjoy their power and reliability.

1976f

This runs strong and had great tires that hold the Tarmac very well indeed, brakes work really well and is fun to ride. Thats actual mileage since the top end rebuild.

1976i

Also it has recently had New shocks fitted too and still has the passenger pegs attached if you want to go ride 2 up.

1976j

So easy to change about and make it your own style with a paint job and a few different accessories, but by it and have fun on it this year and maybe make changes after the Summer?

1976k

New headlight as well and functions admirably, have a look and see what you think of this inline Four Motorcycle.

1976l

It has a hooped rear end and is pretty comfortable to ride, Rims and Hubs were powder-coated and re-laced too.

1976n

So there you go, a great runner and you can own this and change it to your style and color pretty darn easy.

1976m

If I can help with more photos or a video, let me know on 714-598-8392 and I can text you or email you, my email is carpy@carpyscaferacers.com

bannera1

Many thanks for taking your time to have a look at this 1976 CB750K model Honda.

Rice Boiler


Have a great week and I appreciate your time.


18 Years has Flown by.

18 years has flown by since I first started building bikes here in California and people remember the Black K5 Honda Cafe I created and for quite some time I had emails from customers informing me that they have had my bike as their screen saver at home or at work.  I will never forget that and my passion has always been with Motorcycles and parts.  I strive to continue is offering more parts for the bikes I create as well as a few other brands too.

Below is the old K5 I had from bits and pieces and wanted to create a cool Caff bike to ride around on whilst I built other bikes and my Hot Rod.


carpyk

Below: As you can see it turned out so different than the bikes that were out on the road at that time and boy did it turn heads.

carpy K5

This was a fun bike, I rode it to many places and took it to over 30 shows, later on making the cover of Motorcycle Classics Magazine, I still love that bike. It sure was a blast to ride.

canyon Carpy

So thank you for supporting me for all these years, I am thinking of building something similar for my 20th anniversary, so will start to collect parts as the Original is in Canada.

I shall continue to make parts like Exhausts and seats etc as well as offering bars, mirrors, lights and all the other goodies that you may want for your project.


I love what I do and enjoy helping customers out with their builds, this is a fun time in my life and I look forward to designing more Custom parts to offer.

Cannot believe that this time has gone so fast, over 1000 exhausts sold, 4000 turn signals, 200 Swing arms, 600 headlights, 2000 handlebars and continue selling.

Rice Boiler


I have always helped people and enjoy talking on the phone or by email etc and offering everything from parts to complete builds.

The Cyclone was a fun CB750 Honda I created for a gentleman in Texas, and still has it today.


Another old video I did at the shop with the GCR cafe Bike I created.

poster honda


How I tune the Carbs on sohc 750- 4 models.

Here is one of my Razor exhaust systems.

book2

Here is the 550 I built and has my side winder on it.

Little Brat bike, motor had not run in over 30 years, this was the first time it had started up.

So drop me a line or a Dime and I will help all that I can.

book

Another of my exhausts.

Thank you so much for supporting me, even if it is just to read the blogs.

Queen

Just to wake you up, an 8 CB750 I built into a fun Brat bike.

The HTML bike with one off exhausts, have a Great week everyone.

Enjoy your two wheeled machine and have fun with your build.

exhaust bird2

Below are a few of my favorite machines I have created.

anvil

The Anvil was a tough Motorcycle that ran really hard and what ever you did to it, the bike just carried on and on.

Road Warrior

The Road Warrior was a great bike I created for Captain jack Schuller who was on the USS Nimitz, I got to go out twice on that aircraft carrier and will never forget that experience.

Road warrior1

Next up is, My Royal Enfield, that was a tough little 535cc bike that had a great sound with my unique exhaust.


RE9

Below is the Tenacious Ton Alloy Honda cafe that took me many years to get it how I wanted and boy the hand made 4 into 2 Dunstall style cans sounded awesome.teardrop1a

Next is the Revolver, this was a wicked machine that had all the Bells and Whistles and I sent to a Customer in Australia, she owned a Hair Salon and sure loved Motorcycles.

inline4b

Another is the Brushed Steel 550 Brat Bike with my Side winder exhaust system, this ran hard and true.

CB550 exhaust Yohi 4

I could put more but I have a bike to work on this morning, but thanks again for ALL your support, and look forward to helping you again.

I will finish off with the Bike I built for MIKE DIRNT of the Band GREENDAY he saw my Black and Gold bike and came to see me and he still has the bike to this day.

51

Peace and Grease to you all.

22

Custom Exhausts for your Motorcycle

Hey there you lot

Here we are on a Monday, been busy lately and wanted to show you another exhaust I make, this time I sell this Kit for the SOHC Model, Chrome tail section thats triple chromed and a choice of a Tan or a Black DEI heat Wrap kit to give that system the Hot Rod style thats very popular.

predator2


I have been making these exhausts here for almost 18 years and things are going well, selling over 1000 units of the SOHC model to date and to all over the globe.

predator15

All made here in California, keep the Made in America Flag waving , this has been a fun journey with more things in the making too, stay with us for this great ride in the two wheeled fraternity.

sohc chrome1

These exhausts fit as they are made and checked in a Fixture, not like others, these also perform to and the way the New baffle is designed it flows so smoothly.

sohc chrome6

Available for 1969-1978 SOHC Honda Motorcycles, you will love the look, the fit, the sound and of course the power, we love these set ups and so does many other builders of my products.

sohc chrome2

Thanks for looking, I ship worldwide and help with all the Custom forms so you do not get hammered with Silly Duty bills, I have been here since Feb 2000 doing this and love what I do.

poster honda

So if you are looking for parts, service or a complete Build, you know where to come, with great sales, Customer Service, I really get things done in a timely manner. Thanks for looking and if you need anything just drop me a line or a Dime, I am here to help.

Rice Boiler

Parts for CB500-CB550-CB650-CB750 SOHC & DOHC


For all your Motorcycle needs

Happy Tuesday Everyone

Rice Boiler


Fast approaching the 18 year Milestone here at Carpy’s Cafe Racers and have always enjoyed what I do here in Sunny California, and today is another great day and seeing as its Blog Tuesday, just wanted to than you all for purchasing from me and all the great emails and phone calls that I receive from you.

book


Trying to make New parts as well as sell the Classic ones too, I listen and if I get enough interest then I try and make the parts happen and so far it has worked out well.

Queen

So if you need Handle bars, to seats, to great Exhaust systems, I am here for you and once again thank everyone for all your support I really appreciate it.

Have a Great day and look forward to maybe one day meeting you at some of the shows we shall e attending this year, off to New Jersey in March, should be a Blast.

banner1a


A different take on the Old inline Four Boxing Day Blog

Well, Christmas has gone and today for me is known as Boxing Day, a tradition that goes back further than the invention of the inline Four Honda, and today as I sit at home and reflect on the last 12 months, I thought that I would type up a blog on the good old CB750 Honda, as some of you may know, I have built so many of these since coming to California that I should have shares in the Japanese Iconic Company.

The Custom scene has come on so strong here in the USA and of course Globally, it wasn’t that long ago people would literally stop and stare then eventually get the courage to ask what style of Motorcycle it was that I was riding. it is amazing how far we have come in such a small amount of time.

OK, I understand, we haven’t made a significant impact on the world Like Space X or when Super Glue was first invented, but now I feel we have a Mechanical Camaraderie, where there was just a distance nod from other creators in the same country.

Today I wanted to blog about this inline Four that a company over in Nampa, Idaho named Rawhide, the owner Branden Wurtz. And as you can see they have created a CB750 thats a K5 era and gone a slightly different route and something I think needs to be shared. I enjoy looking at other builds too and it means we all have a simular interest and we show the same bike in different guises, how cool is that to see?

honda-cb750-restomod-1

Branden had a bike listed called the golden Goose but, it had already been purchased, but offered the customer a slightly similar build if he was still interested, the Customer was 700 miles south of him in my part of the country in California.. His Name was Tom and knew what he wanted, Branden listened and came up with a pretty good compromise, offering something custom but could of existed back in 1975 if Honda had enough run with the design team in Tokyo. This takes a little time and a lot of effort but the crew at Rawhide were up for the challenge and the gauntlet was thrown down.

honda-cb750-restomod-2

The Motor seemed a little tired and like you always should do, it was torn apart and Hopped up. “We used a Wiseco 836cc kit, with the most aggressive street profile WebCam Racing recommends with their billet camshafts,” says Brandon. The Honda now has new valves, seats and valve guides, new primary chains and tensioner, and a new cam chain, tensioner and guide. Rawhide cleaned and inspected every single part, rebuilding the transmission along the way too. A strong motor is imperative in these long, fast highways of life and as the speeds of Modern day traffic increase, we need to do the same with these old 500 pounders, and its nice to know that if there is trouble coming up behind you, a quick twist of the proverbial wrist, will make sure you are way out of that issue.

honda-cb750-restomod-3

Tom being 6’3 needed a long seat and wanted a shorter looking tank, so an old CB200 gas tank was Located, then the sides were scalloped to allow for the 2 outer carbs to be able to slide freely and not hit the tank, the tunnel was cut out and refabbed to allow it to sit on the Duplex Cradle frame and made sure it sat level and looked like a factory fitting.

They then epoxied the Petrol tank using  GTL Advantage to make sure there was no delamination or horrible leaks, as this was going to get an expensive paint job and had to be right on the money.  Branden used the Factory side covers but trimmed them back to give a cleaner and tighter look and pulled that job off very well.

honda-cb750-restomod-4

Meanwhile the front end needed some work, so with Deep Dish and high shoulder Borrani Rims, these were laced with spokes from Buchanan, who are not far from me in California, the hubs were cleaned, degreased and bearing removed and then powder coated Black and assembled once more with polished embellishments.

They chose to go with a smaller but neater set up for the headlight and upper fork stanchions but re-fabbing an old Honda CL77 headlight shroud (1967) as that model had a recessed speedometer and cleaned the top of the triple tree up for sure.

honda-cb750-restomod-5

The front fender got a thorough trim, taking off a good chunk of the original but a shorter fender does make the front tire look bigger, they also lowered the fender, rebuilt the caliper and polished the Body, New gators and polished Lowers on the forks complimented the bike.

A set of 12.5 inch Sprung shocks at the rear from Hagon were applied but chromed covers fitted to give it that old style CB750 look, of which I have done too and love that styling .

honda-cb750-restomod-6

The bars are low-rise CB400F units, kitted with controls from a 1965 Superhawk. Complementing those are Halcyon bar-end mirrors, a Kustomtech master cylinder, and scalloped clutch and brake levers. A neat and custom look that many Builders leave stock, so always refreshing to see the extra yard made on builds such as this.

A reconfigured wire harness was made from scratch but using the stock Honda wiring colors to make things more understandable for later on in life if things need to be changed or updated etc, it makes sense I tell you.honda-cb750-restomod-7

Upgrades include a Charlie’s Place electronic ignition, Dynatek coils, a regulator/rectifier from Rick’s, and an Antigravity Lithium-ion battery. A Posh Japan taillight and turn signals round out the lighting. Giving the bike a more Traditional look and it flows vert well to cover the square end of that seat assembly off, the Devil is in the detail remember.

Finishing things off is a customized four-into-four stainless steel exhaust system, with each header terminating in a custom-made end tip. Rawhide designed the slip-in tips with baffles, and then had them machined and coated in a high-temp semi-gloss black finish.

honda-cb750-restomod-8

The bike’s been shot in a House of Kolor ‘Oriental Blue Kandy’ with a green micro flake, and adorned with original Honda badges. The bike turned out well and Tom is a Happy Chappy, he likes the low end torque of this old 500 pounder and with all the little hop ups, it does not hang about and you may often see the tire spin as it gallops down the tarmac with the bark of the hand formed exhausts. There is way more here than meets the eye and all the nuts and bolts were either zinc plated or chromed, and that does indeed show on a much closer inspection.

honda-cb750-restomod-9

A cool and different approach and something I like to see, well done mate and I hope to maybe see this at a show down our way at sometime. And what a superb location to take a photo of this Japananese machine, what an epic barn and an epic Honda that I believe no matter what guise it takes on, will always turn heads.

Let me take this opportunity to Wish you ALL a very Merry Christmas and hope you enjoy this festive time with Family and friends, many thanks for supporting me, small businesses need support and I am Blessed to have such loyal customers. Enjoy.

Peace & Grease to you ALL!


christmas cardaa1

banner6


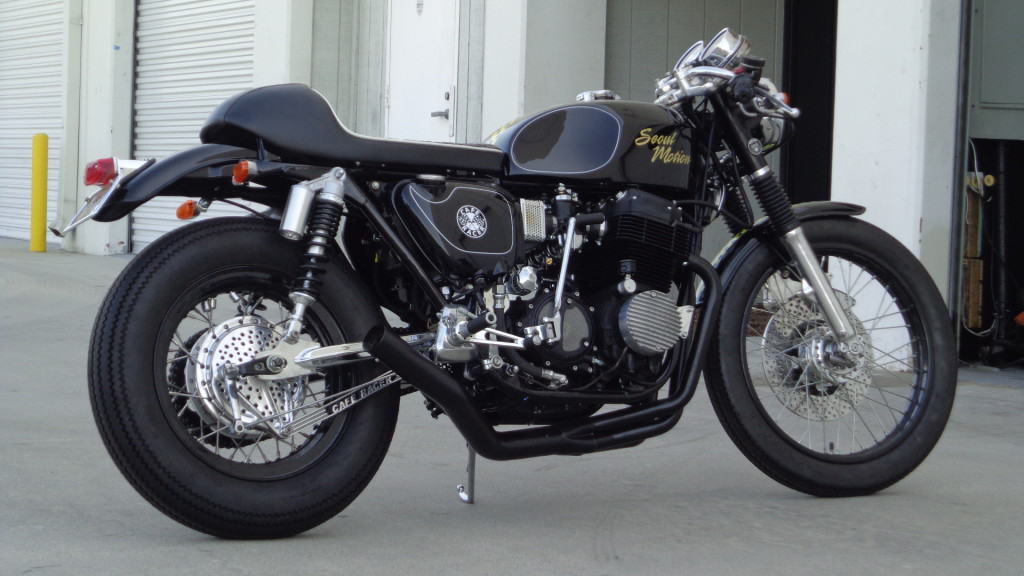
Seoul Motion – CB750 Cafe Racer

Here we are with another Build of mine, this time we are shipping it to Seoul in Korea.

This machine has taken some time to get right and she fought me every which way but loose, but I prevailed and became the victor in the end, but- this was a long battle and many a night I have been sat there, scratching my noggin, trying to figure out what happened etc., although, if you build a machine yourself, you will understand that at times, the build will sometimes, give you a right royal swift kick in the knackers, just to get you back.

 photo 087_zpsca79de2b.jpg

This was just a roller that needed some love, so what I did was take the bike down to the chassis, removed the wiring and anything else that what bolted onto this 530 pounds of rusting Hulk!

 photo 085_zps631cd040.jpg

I cleaned the gas tank out and then took all the paint off, after that, I put the tank on my special frame and then hammered the knee inserts as I do on the majority of the rides that I create.

 photo 083_zps8fc81614.jpg

This bike kept giving me the worst grief of my life, like it was trying to tell me to stop what I was doing and leave her alone, even so as much as to burst into flames one night when an Argentinian rectifier decided to let go and fill the shop with more smoke than a Hippies BBQ at Stonehenge.

 photo 082_zpsb1165655.jpg

The engine was stripped down and gone through and has a new 900cc Engine, and I thought whilst I was at it I would paint this a Wrinkle Black and then polish some stainless Allen headed bolts to offset the black, and to be honest, I really love the way this bike looks.

 photo 081_zpsa1babd0f.jpg

The original seat was toast, so I used one of my aftermarket seat bases and re-foamed and upholstered the pan to the Guilerri that was popular back home in the UK in the 1970’s and 80’s.

So the seat works perfectly and has the original hinges and seat lock mechanism, and I am happy with the outcome of this task.


 photo 080_zpsf4505df4.jpg

So much work, its hard to remember everything, but- the frame was taken down to the barest of metal and powder coated, but as I said earlier, the bike caught fire as I was 98% completed and had to completely strip the bike down the frame and bead blast to bare metal and start all over again, it was such a downer, but these things happen and I made a positive out of a negative.

 photo 079_zps68cc7f6a.jpg


The guy that commissioned me to create this beast is a famous Jazz singer in Korea and I wanted to give the bike a name to bring it to life and give it some character.  So I aptly named it Seoul Motion, and I am shipping it to Seoul this week.

 photo 078_zps54a61f3d.jpg

I have New side covers and they are a deep Gloss black with my pin lines to show off a little detail, even New Rubber Grommets were used so the covers fit nice and snug.

 photo 077_zps4acedad8.jpg

Yes- this time I wanted to try a 17 inch rear wheel and used a Firestone set up on the tire and also polished the hubs with Stainless spokes, then I drilled and polished the rear brake cover and fitted new brake shoes and actuator, this bike is like brand new I tell ya.

 photo 075_zps95019f59.jpg

I bobbed the rear fender and fitted the Beeza tail light, with a Brand new set of Alloy Turn signals to make sure people see him out there in Korea.


 photo 074_zpse26d6593.jpg

I chromed the swing arm and fitted new bushes etc., and then fitted one of my custom made finned stabilizer arms to set the lower end of the bike off, complete with new brake rod, spring and adjuster.

 photo 073_zps27950e4f.jpg

I had to shorten the right height on this machine as the chap is shorter than me, so used some piggy backs on the rear and I got Franks Forks to make me some 2 inch under fork tubes and rebuilt them with a polished set of lowers, new seals and new gators, as well as new clamps and bushings etc.

 photo 072_zps80533317.jpg

I fitted one of my ceramic coated 4 into 1 exhaust systems, as this will sound awesome when he gets on the loud throttle and lets people know he is in town, then tuned and synchronized the carbs to make sure all was well.


 photo 070_zps633e593d.jpg

I used a Brand new set of Tarrozi rear sets, but I stripped the anodizing off and polished to a chrome finish and these really do set the tone of the Motorcycle off.

 photo 069_zpsdde0040a.jpg

Up front, you will notice that I have fitted a brand new Chrome headlight and inside that is a new harness, as well as brand new Alloy turn signals, this is a cool machine. I also stripped the old gauges apart and rebuilt them, giving them a Custom feel and look, as well as chroming the lower buckets to add a little more bling.

 photo 068_zps5671fe59.jpg

Another great touch to this bike is that it has a bobbed front fender of mine that matches the paint, right down to the checkers as that means you’re a winner, but also, this has a number of cool things done to it.

If you look closely, you will see I drilled and polished the front brake Rotor, and then had a custom bracket machined for the forks, why is that I hear you ask.

Well simply, the old brakes are well, OLD- so we thought we would try a brand new set up on this machine by making a Wilwood Four pot caliper sit on the fork and see if this helps stopping.

Stopping is increased about 500%, it almost pops your eyes out when you grab a handful of brake lever all of a sudden.

 photo 067_zps7a2ecc7c.jpg

New Chrome 7’8 Clubman bars are fitted, along with brand new Honda Cables and polished levers, this is also expensive but a needs must with such a build like this.

 photo 066_zps5a1c3318.jpg

New tire, new brakes, and new everything, adorn this Black and Silver Café Racer and I know the owner will just dig this like a shovel does dirt.

 photo 065_zpsfaa360eb.jpg

The finned stabilizer bar is one of my own designs that just says it all.

 photo 063_zpsc2de095e.jpg

Hand diamond stitched seat base adds some more coolness to this tarmac eating machine and am sure will turn many heads in Korea.

 photo 062_zps253f13c9.jpg

I purchased brand new handlebar controls for this build and used Original 1974 GT waffle grips to add some Nostalgia to the bike.

 photo 060_zps89557291.jpg

Of course, this needed a New master cylinder and New throttle and cables, so everything was changed to New and this will benefit the owner immensely.

 photo 060_zps89557291.jpg

 photo 058_zpsf9e009d4.jpg

Here you can see that I have made Custom gauge faces to show the world what this bike is and also I fitted one of my special display set ups that has a Large WW2 Neutral light and then a high beam and Oil light, these are all stainless steel and function very well indeed.

 photo 057_zps0ca54673.jpg

New paint, gas tank sealed, New petcock as well as New Gas cap and locking latch just enhances this machine.

 photo 056_zpsede658f2.jpg

Yes, I even cleaned up the kickstand and chromed it to give it a nice offset against the stealthy Black everywhere.

 photo 055_zpsc19085f4.jpg

I chromed the ignition switch bracket and used a New ignition switch too, along with a brand New genuine Honda set of coils and caps.

 photo 054_zps3ba04bcb.jpg

New fork ears were painted Black and badges added where the old reflectors used to be back in the day, as well as new Chrome clips and new gators.

 photo 053_zpsc7e63256.jpg

The Four pot Caliper works so well, this would stop a woman’s period.

 photo 052_zps1f46f750.jpg

I had to come up with a name for the bike, as I always name the machines I have created and I am happy that I conjured up this and think the owner digs it too.

 photo 051_zpsb44c02bc.jpg

I had an original airbox that Henry Abe sold in the 1970’s, so stripped it and then re-chromed it and now it looks bloody awesome.

 photo 050_zpsd6b5a48e.jpg

This bike sits well, and you will notice that I drilled and polished the gearshift cover, this also has brand new 530 chain and sprockets to make it go down the road ok.

 photo 049_zps237c2b19.jpg

I even chromed the old safety carrier on the rear sprocket to offset the black as I powder coated the rear sprocket Black.


I hope that you like this machine that I created and this can now fly to Korea and another build completed from Carpys Café Racers.


I will show you how I did the tank.

I, first of all, washed the tank out with simple green and solvent to make sure that there was no gas residue in the tank, then I turned the gas tank upside down and cut the old trim tabs off, as I do not need these.


Then with my homemade frame, I slowly start to hammer the tank to get the depth of inserts I require, trying to massage the steel to form in the shape I want, this does take time and makes your arms pump like Popeye afterward.


Also, to get the paint off is a real pain if you do not bead blast it, I used to do this with the good old Jasco, but man is it a mess to use and clean up afterward.


After this is all done I bead blast the gas tank so it is all clean metal and can see if there is any issues, and also for my own insurance and a cost of $100, I take the tank to a radiator shop and they seal the inside and pressure test it, that way I know that all is well inside the gas tank and no leaks.


Next, I do all the body work and get it ready for the paint shop, as I no longer spray paint but will do the graphics, whether it is a decal or hand lettering as I like to use my sable pinstripe brush that’s a triple O size or a number 1 line brush.

If I am using the checkered tape, I simply rub the gas tank down with 600 and then wet the tank and apply the checkered tape to where I need it.


The soapy water helps the tape to float to where you need to position it, once you are happy with the location, I use a credit card and a microfiber cloth and squeeze all the air bubbles out, once this is done to all the decals, I clean it with prep wash and she is ready for pin-striping and then once that is all completed, leave for 2 hours as I use House of Kolor these days and it dries super fast, and then its ready for clear coating and buffing.


This is when the tank and fenders etc really start to pop after clear-coating.


Many other things people really do not get to see is when I have to take the gauges apart, sometimes these can end in tears if the needle breaks and is stuck in the drive unit, but this time all was well and i wanted to use some of my own designs again on this machine and am glad at the way that they turned out.


I painted the needles with good old One-Shot enamel and then put my decals on the original faces, and slowly put these back together.

Now, these really do look way better than the Originals and with the New display set up in the middle of the bars, this completes the top end.


These kind of finish the top end of the bike off very well and the owner is pretty stoked about them as well.  All I had to do now was simply shorten all the wiring as with club-man bars, these sit lower and I don’t want loads of wires all bunched up and rammed inside the headlight.


CAFE RACER 1970 CB1000 RUSS COLLINS SPECIAL

This is the Old Russ Collins Bike I created from parts.

Below is a Video but hard to hear as the old Powder coating shop behind us is loud as hell, but it was a tight motor and loved to ride it, hard to hear but this is the only video I have of it.

This machine was just a frame sat in the garage at home and boxes of old parts, and I wasn’t sure how i was going to go about this build but, as I had a russ collins Magneto I thought, what the heck I will be a traditional Cafe bike for fun.

This bike has so much work but for me it is fun and I enjoy every bike I create, sure, people say why not restore but heck, its not a sand-cast and plenty of these later K models around, I had a bucket load of parts and wanted to put something together and here it is at long last.

I started with a stock 1970 KO frame that had been sitting for many years in the back yard with 15 other CB750 Honda’s that I had acquired from an old guy out in the desert some years ago.


Then I started to get a few parts together and the light bulb came on and that was it, lets build a great looking Caff bike with a 1000cc Russ Collins Motor, what a Hot Rod that would be.

Motor was really good and came out of a running bike, compression was 185 all the way through so no point on a full rebuild, just a freshen up on gaskets and get her running.


New Chrome rims and used stainless spokes to Polished hubs I did, along with the frame being powder coated, the swing arm was too, New bridgestone Spitfires give the bike a more traditional look and really hold the road well.

Original 1970’s finned speed equip covers adorn this motorcycle and gives it the unique richness that shines from afar, I chromed the cases this time andwent throught the Whole bike with Allen headed stainless bolts.

I machined a Custom Finned Engine Bracket up to flow with the rest of the finned speed equipment that is on this bike..

This has an Original never used and out of the BOX, Paul Dunstall header set up from 1974 and this is the genuine article too. I have the trick Tri-Bar set up at the front to show you which way you are heading. Brand New OEM Fender, and I polished the fork lowers, fitted new uppers and resealed, also added the old school OEM Ribbed Gators too.

CI made my own seat, of which I made a mold from an old steel seat and then fitted the steel plates to allow for the stock Hinges to be used, then refoamed and Diamond stitched the seat for the old cafe racer look with the proverbial hump on the back, but also I made a Bobbed rear fender and fitted a old style Lucas Tail light, all of which I sell on my website www.carpyscaferacers.com and have sold many too.

I hammered and painted the tank- New side covers and new paint and has the 1000 logo on the side covers to show them what she really is. I loved the whole concept and with New petcock and Gas cap, this really looks factory to many, until they see the numbers on the side cover.

I used a set of TEC rear piggy back shocks that are 14 inches eye to eye and the rear tire is a Bridgestone Spitfire 130/90 to give it that beefy look and handles so well.

Oh yes, it has a Brand New Guilerri style diamond stitched seat base and that is a new base and foam too and I believe enhances the look of this machine.

Also- Lots of polished Aluminum, like the valve cover and caps, the clutch cover and stator and gear shift cover too.  With Braided oil hoses as well. I even chromed the kick stand, but look at the front Rotor, I drilled that, rebuilt the Caliper and polished that to a Chrome look and the front rim is new with stainless spokes and a bigger front tire to fill that fender out nicely.

Brand New Non maintenance  battery, Solid state rectifier, makes sure this fires up and of course with the original RC Magneto, this has so much spark, I fitted iridium spark plugs too. You will also notice that I made New oil Lines from Braided steel hose and Drilled and chromed Kick starter for a Custom look.

You want detail? Well she has loads of it, just check out the kick starter I drilled and re-chromed and the clutch cover set up. As well as the Italian Tarrozi rear sets added for a real comfortable ride as these set your feet back about 7 inches from the stock position and perfect for the Clubman handlebars up front.

New cables help this puppy along and I rebuilt the Carbs, bench synchronized them and then once running synchronized with a Mercury stick and it purrs now.

I have hours and hours and hours into this machine, I even chromed the kick stand as it looked to dull before.

Oh yeah- Do you like my Oil tank Dip stick? I machined this from a solid piece of 6061 T6 Aluminum to dress the cap up as thats always missed on builds so wanted to cover all the bases.

This is a really cool head turning machine, as where ever you loom there is cool stuff. like polished rear brake hub, with new brake shoes and actuator. Yes new brake shoes as well.

Yes, these New tires, on the back there is what I use most of the time, the Bridgestone 130x90x16 and at the front I use a 110x90x19. Custom RED X-Ring Chain, flows with the red on the gas tank and side covers etc and this bike sits so well, them Original Dunstall exhausts are a real piece of History as they were still in the original box when I had them as they were sat in my loft for many years.

Such a period looking Caff from back home and I remember as a kid, and I am glad that I went this route, its truly a fun machine and with 1000cc it does not hang about and is really Torquey.

I love the way the bike sits, it is a good, tough looking machine and with Brand new wire harness and handlebar switches, this is reliable as hell, I am very proud of this machine and it styling.

It has a New rear brake rod, spring and adjuster to make sure this thing stops at the rear, and a New 530 Chain and new sprockets 48 rear,17 tooth front.

The RC Special is a one off and I loved doing the build, I also made up stainless braided Brake hoses for the front brake and added a 14mm Master cylinder too.

The front brake caliper is rebuilt and polished to a chrome finish and I fitted a Brand New $400 genuine HONDA front fender.

To help this bad boy stop at the front end, I fitted a New BREMBO master cylinder to the Clubman bars.

Other col parts that you will notice, unlike many others out there is that I have used genuine NOS handlebar controls, over $220 each side.

The carbs are all rebuilt with new throttle cables and custom air filters.

The New headlight has a New bucket and insides too. And a 65 watt halogen Bulb to make sure you are seen on the road at night.

This has a cool display set up with the ignition relocated at the top of the tree, I wanted to move the ignition switch away from the motor as these get hot.

Also I polished the top triple tree to look like chrome, the steering has all new bearings and brand new chrome Honda steering Nut and washer.

All the bolts are Stainless Allen heads and this has had so many hours of work done to it. A new Clutch cable and Custom Adjuster.

This is clean and under the seat will be a brand new battery, the frame is powder coated and you can see how great she looks from these photo’s.

This has a new solid State rectifier and a battery tender too.

Also the shocks are brand new TEC models and I made custom lowers to lift the rear end a little higher by 50mm.

The bike just is cool to look at and with a RC1000 Motor it really does turn heads FAST!

This has Original New Old stock Superior Waffle GT grips from 1974 and were still in Original packaging on the shelf for years and years.

I may put some more little touches to her before someone buys her but I do hope it does get a great home.

Thanks for looking at this machine, it has now gone to a New owner and sure hope they ride the hell out of it,

I doubt I will locate another Russ Collins Built Motor any more and so glad I happened across the engine over 10 years ago,

2 of my Classic machines that I have built from just old bits and pieces that were literally in the garage and all in boxes or on shelves, love what I do and hope you do too, thanks so much for looking. If you want a bike built, serviced or just parts, drop me a line carpy@carpyscaferacers.com or you can call or even text me on 714-598-8392 as I am always happy to help, been building over 17 years here in California.