Honda Santee Chopper, replacing worn out engine covers

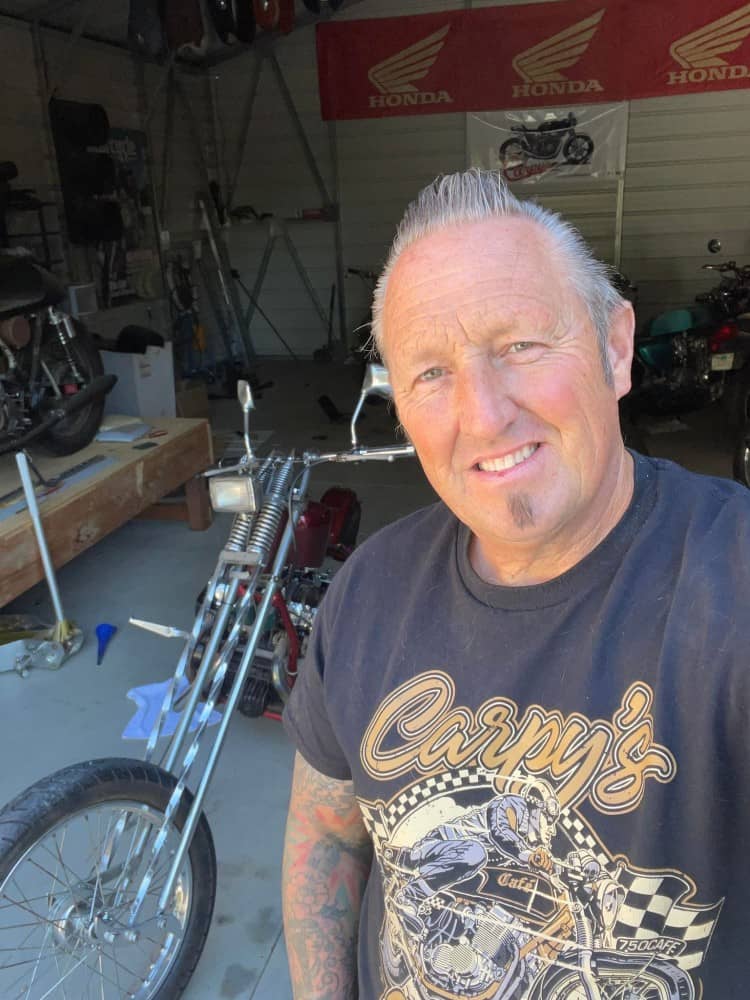
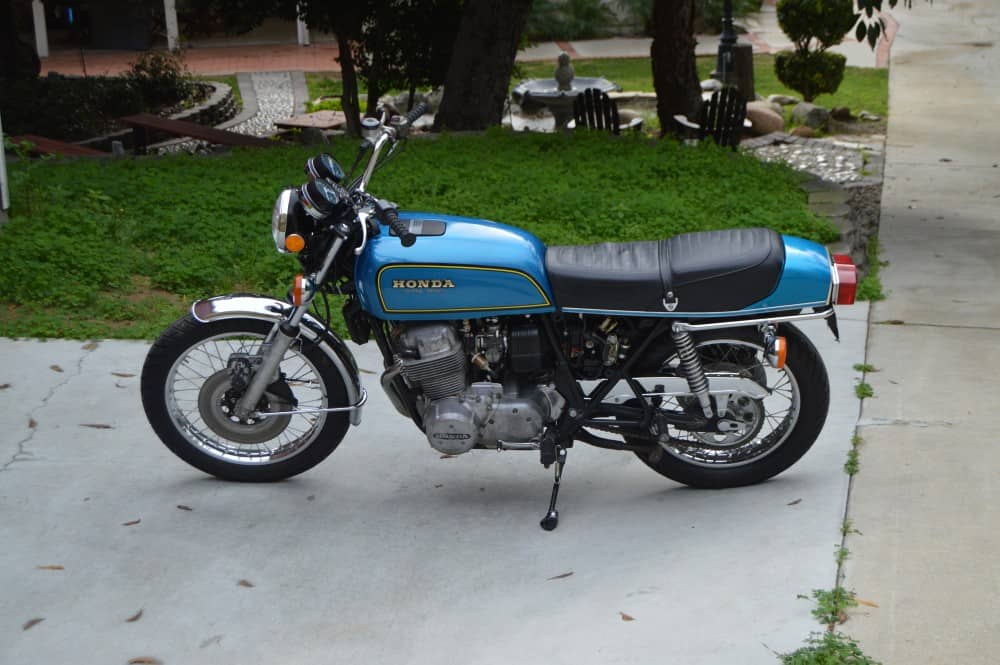
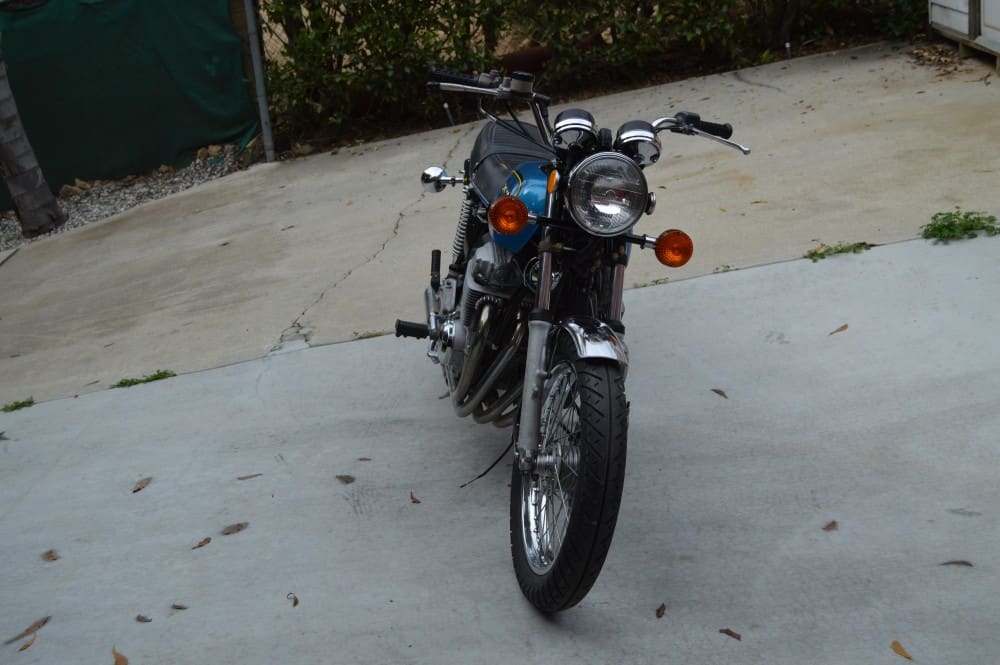
As you may know, I picked up an old Santee framed Honda Chopper in a Local Garage a while back, progress has been slow as I am making parts for it to offer to the Chopper builders that are all around the globe, but i noticed that the engine case covers were looking bad.

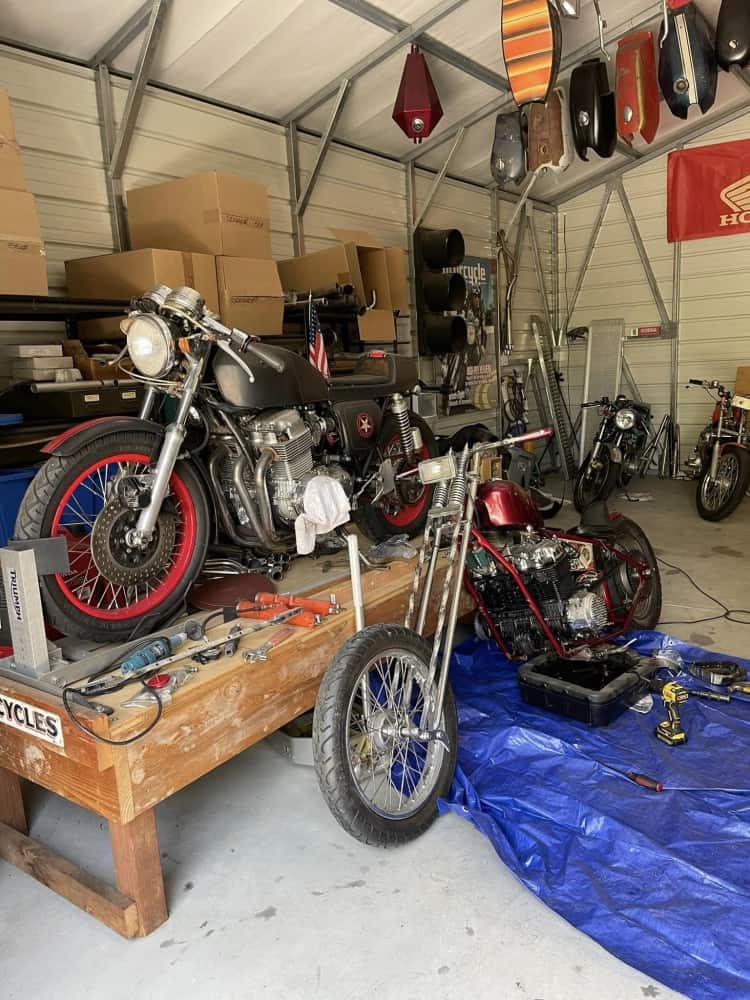
The covers had been chromed, and as these are aluminum, the material gets hot and then cold and sweats, causing the chrome to bubble as it can’t expand like aluminum does, so it had bubbled, peeled and then started to corrode the aluminum, so I thought I would try and repurpose some old spare covers I had by polishing them to a chrome finish . As you can see from the photo above, the transmission cover was removed and the old gasket was toast, so luckily I had a New one in my cupboard as well as other parts needed to refurbish this area of the bike.

I removed the stator cover, but it took me a while to get this sorted as that round dark blue plate that is on the starter collar, fell off and hid behind the crank sprocket, took me a bit to fish that puppy out but never lost hope and now it’s time to remove the coil winding and the infield coil that are screwed into the case, I also leant the bike over and placed a blue tarp on the floor, as I did not want to drain the New oil that’s in the bike that I put in when I got the bike running for the first time, I knew I would lose a little bit of oil, so placed a catch tray under the chassis to save any catastrophes that could occur on jobs like this.

Make sure that when you remove any Factory Phillips shaped screws on your Honda- That the screwdrivers are JIS models. ( Japanese Industrial Standard) as regular Phillips screwdrivers will most like round the screw heads off.

What is the difference between JIS and Phillips?
JIS, or Japanese Industry Standard screws are just different enough in shape that Phillips drivers will not fit well and slip/strip them. The difference is in the leading angle of the point of the driver. Phillips bits have a larger angle and therefore don’t bottom out in the JIS screws, causing slippage.
Also, make sure that you use OEM Factory Gaskets, as the aftermarket versions not only fit badly, usually the holes do not all line up and the gasket seems to be inconsistent in thickness, I did learn the hard way, thinking I would save a few bucks on the cheaper brand, only to find I had to take the case all apart and fit OEM ones to stop the leaks.
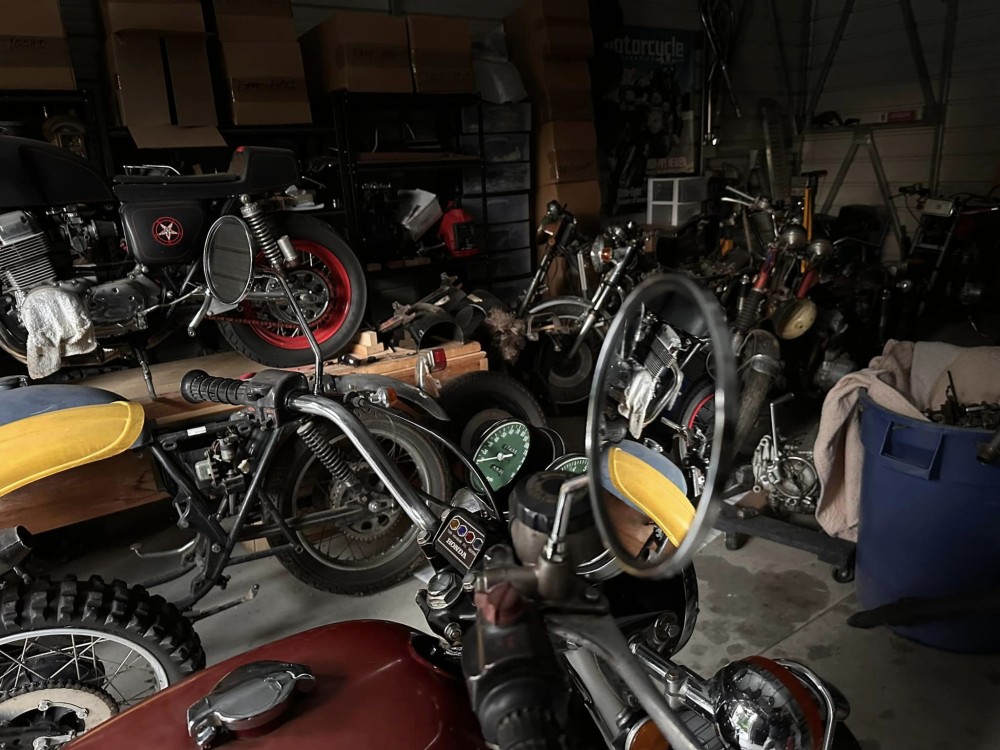
Glad that I managed to get some time to work on this old girl today, she was left in an old garage in La Mirada for many years, sat on a pile of dirt and then covered with years of hoarding, so I will be happy to have it running and use it for a bit, before I put her up for sale, its a good looking rig now and I am sure when I have the New Stainless exhaust system on, it will find a new home ok.
I have lost count of how many SOHC motorcycles I have built, let alone worked on but in the hundreds for sure and always something different to find on some, I love what I do and continue to offer service for customers all over the world.These inline four Motors are fantastic machines and have given me many miles of smiles once they are tuned right.
Covers are on now on this side of the bike, still got to add a finned cover on the stator and fit another gear shifter as the old one is a horrible welded thing that I do not want to use, then I need to turn the bike around and remove the clutch cover and give that the same treatment.
On closer inspection of the front drive sprocket, I see a couple of issues here, the offset is out a little as the sprocket is wearing against the side of the chain and secondly, the sprocket that is fitted is an earlier version 530 and 77 and 78 Motors had 650 chains, I will fit a 540 but will address the issue here and have a sprocket on the way as I do not want any dramas of the chain breaking and destroying the cases.  Also, Chops have super long chains so need to count the links so that I can buy a custom one to replace this tired version.
The Old girl was looking tired, dirty and in need of a good clean up before any polishing can take place on this part, I always like to vapor hone these, that way the material is super clean and ready for some serious polishing, using some good old Jewelers Rouge.
Time to change the look of this 40 year old girl and turn it into something fresh and clean and to be honest, look like a brand New factory part, now I could refit the part in its OEM look but want to polish the piece to a chrome finish seeing this is a Chopper and not a restoration bike.
Now you can see how different that the Clutch cover looks after a process of vapor cleaning and now this part is ready for another transformation and get it polished up for that Custom styling that is so popular.
I am going to try and vapor many parts before I polish, as it makes everything so much easier to buff with no oil residue or grime in the way when I begin the Polishing stage, I am sure that you agree that this way is way better than the old school way? Now, the stator cover that’s on the bike is chromed and all peeling off, I want to use a spare old Stator cover I have and will vapor hone it to make it clean before trying to polish it.
This  spare old stator cover was just as tired as the other parts on the inline Four, and I am sure that yours looks in the same way too???? This Chopper will not be a show winning machine but a traditional Custom bike that was created back in the day and want to try and show what was in the magazines in the 70’s and 80’s when these were seen all over the place.
There is a bunch of old dings and scratches in the stator cover but many will buff out luckily and then it will have an old Finned cover going on the outside to embellish the engine as I have other finned covers on the bike, also these parts are getting harder to locate and finding some parts in my boxes of old stash came in handy but of course, still needed a lot of work, but the other one on the bike had been chromed and was peeling off and oxidizing badly, so this is the better way to replace it i think?
There is still a ton of stuff to do on the bike but wanted to share this with you today as it’s almost the weekend. Here are a couple of little videos that I took with my phone to show you what I am doing as the weather was raining outside, hope you enjoy?

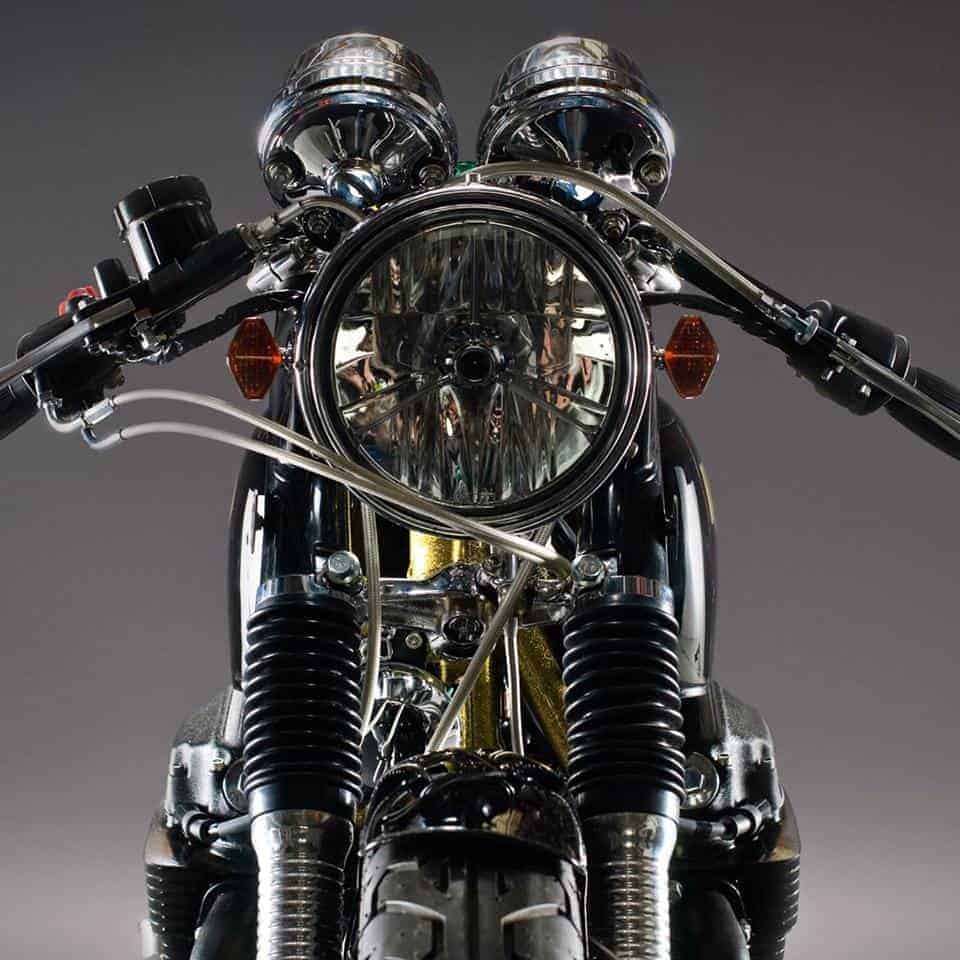
The REVOLVER CB750 HONDA Custom Cafe Motorcycle I created and now resides in Australia

Every Motorcycle that I have built from the ground up is always tough to let it go, but- that’s what I do, create and build motorcycles as well as parts etc, this was fun creation that I put together for a Girl out in Australia, she wanted it gold flake and I did my very best to give her a Creation that had all the bells and whistles too.


It took me a while to get this machine to how I wanted it and I really enjoyed completing this project for the customer, using an old rusted out drag bike that I had sitting in the yard for years, it was so nice to recreate something and for the owner to be super stoked about it to.

I put my heart and soul into this build and I still supply these parts to my Customers today, a very cool head turning machine that not only looks great, it has a built motor and of course my Performance 4 into 1 exhaust system on it too.

So much Metalflake was used and Gallons of clear to give it that depth, braided cables throughout and am super proud of this build.

I hope that you like the way the bike sits and of course looks, more tricks than a Magicians coat to be honest and it was a blast to put together for Jess.

Custom Gauges, Display lights and a Ton of other Modifications throughout this bike made this one of my favorite rides of all time it sure was a piece of art.

I have sold hundreds of these 4 into 1 exhaust systems of mine, they sound and perform so well and have that 1970’s superbike reverb when you get on it.

Just thought I would share a fun memory that was so enjoyable to create and it resides on the other side of the Globe.

Here it is in Australia with the Owner, a one off machine that came out the way that she wanted it to look , thanks for having a look today.


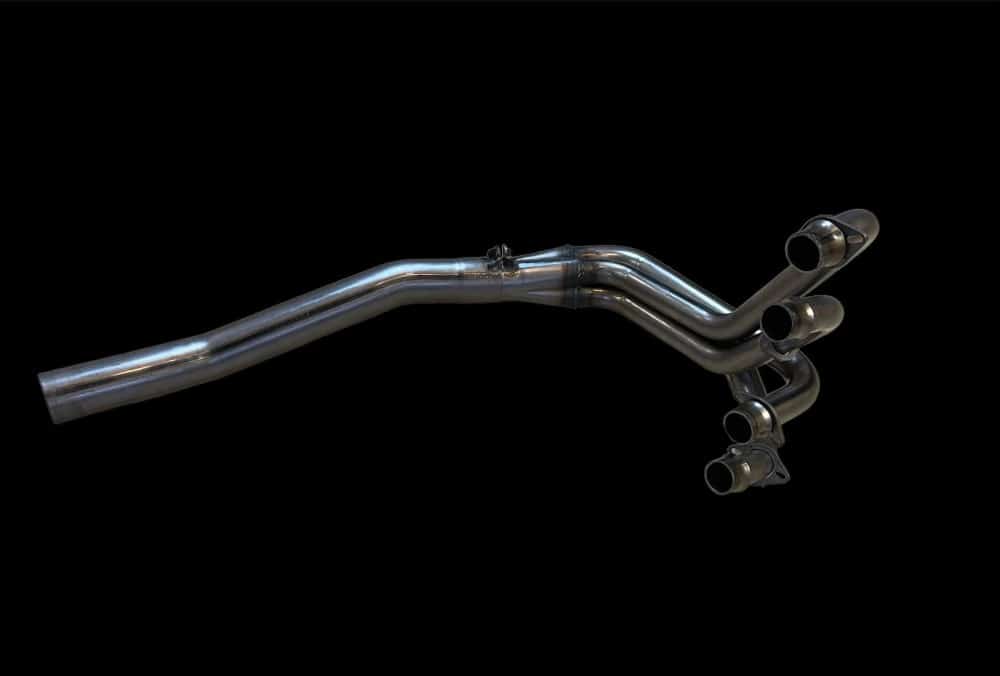
Exhaust for SOHC Honda’s 1969-1978 The SIDEWINDER

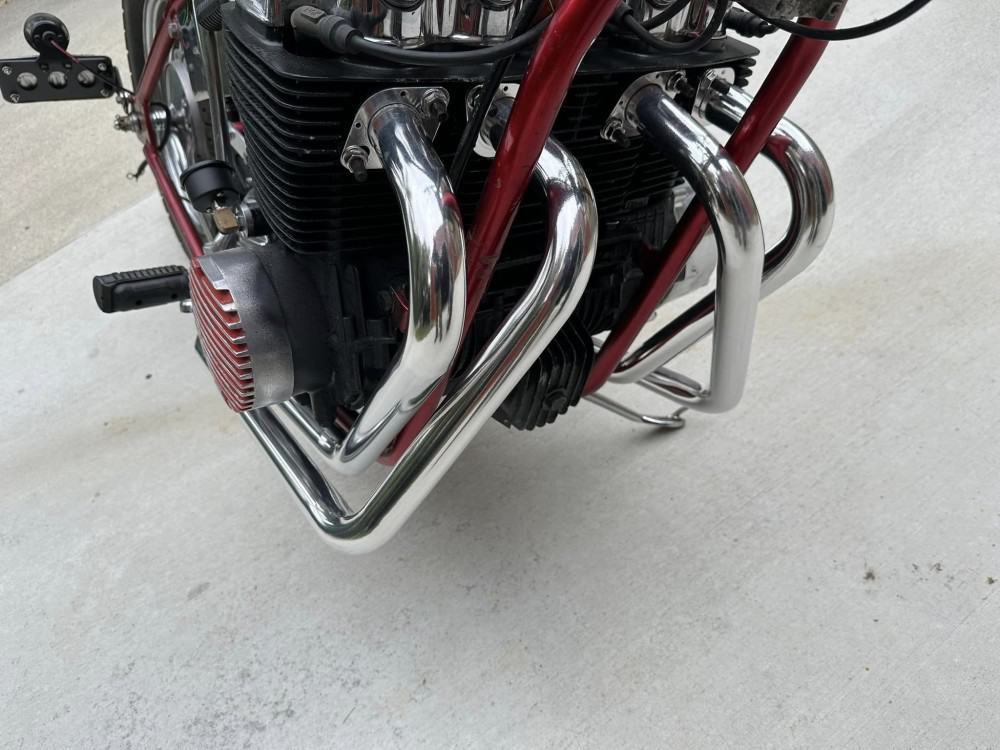
I have been getting a lot of compliments on the 4 into 1 Exhaust I manufacture called The Sidewinder, this really is a great performing system that not only fits well, it sounds crisp and is a true Performance pipe.

These power houses are available in Raw steel, for that Industrial Look, or you can wrap them with Heat wrap for your Custom look, but also I get these Cerakoted in Ceramic and have a Choice of Colors of Black, Silver, Titanium and Burnt Bronze.  These are designed to fit the HONDA CB750K CB750F inline Four Models of the SOHC size, that’s from 1969 up to 1978.

Also , the advantage of this system is that you can still run with your center stand attached as these pipes wrap to the right hand side of your engine and clear the oil pain, the second thing is you have a totally clear access area to your Oil filter housing, which makes for easy oil changes and filter swaps etc.  A really well made system that is affordable and pretty easy to fit, even on your own.  I have done this many times and so glad I went this route, the whole system itself is about 13 pounds so easily lighter than the stock version.

These are all made right here in California and ready to fit to your bike and get you back on the tarmac, these are held into the Cylinder head by floating Flanges, so no more messing around with either half shims or them finned pinch clamps, simply bolt on with 8X35mm Bolts or if your head has studs, then these just slide right on into the ports and simply tighten sequentially.  I use a Stainless Bolt to attach the tail pipe to the header, as springs tend to jump off over bumps, mostly made for the track, so a tried and tested method is a high quality stainless bolt that I supply with the system.

Yes these do come with a Baffle and I do not add any packing to it, I like the 95 Decibel output but if you feel it is a tad loud for your area, then any local Motorcycle shop sells the fiberglass packing or use some steel wool and wrap around the baffle and refit until required sound is found.  No other sound like this, other than a 30 year old Yoshi.

The Photos I have shown are Raw steel, but Ceramic coating is available but takes 10 from order as I take it out to the company to do their coating but worth the wait, I do not store any in house coated, only because we get the odd Earthquake and don’t want to scratch anything if they moved when we get a shaker here.

I personally Pack these systems and send them out to you, I help Over sea’s Customers on the duty form, so you don’t get any silly fee’s, remember, I have been doing this almost 23 years, so know my way around the shipping forms. I packed these in a 16x16x21 double walled box and make sure that it doesn’t move when in transit.

Let me know if I can help you with one of these systems for your Machine, be it Stock, Custom, Café Racer. Brat. Tracker or a Dailey parts Runner, this exhaust will give you more pep and looks pretty cool too.  It breathes so well you will be stoked at the velvet tone that it emits at the rear end.  Looks Great and value for money, way better than the Chinese stuff that’s out there.

I am super stoked at these systems and have many repeat Customers from all over the states and the globe, I love to hear from customers that really do enjoy the burble that these 4 into 1 exhausts make and the throttle response is second to none. All would suggest you up jet 2 sizes on the main, but that’s it, these run so good.

If you need any more information, please drop me a line at carpy@carpyscaferacers.com or call or even text me on 714-598-8392, thanks for checking in and hope that you enjoyed this page on the Sidewinder Exhaust.

Raw Steel System : $380

Cerakote Coated :    $480

CB750 Honda Super Sport getting some work done to get her going again


\Here at the shop I always have things to do, but I always help customers out and when he bought the 1976 CB750F here I could see it needed just a little tlc, many people think they will just need a charged battery and some new fuel and away they go?  In some cases you do get lucky but this old girl does need a little bit more work before I can get her to run again.

This will be a nice machine as super low miles but as she has sat for a long while, the Carbs really do need some work, so first off they are removed and will get stripped, cleaned, vapor honed, polished and put all back together, after that they will be jetted and synchronized so they run great once more.  Not a cheap job but if customer looks after and rides regularly, no reason why these wont last another 40 years.

Intakes were solid as a proverbial rock, I do not want to refit the carbs and find out these have hair line cracks allowing air to leak into the manifolds, so I shall remove these and fit new ones that are nice and pliable and of course I sell on my website.

At least now I have a fighting chance at fitting the carburetors without having to push harder than a steam train to get the things to slide into the manifolds’ etc. Also a good tip on yours is, just add a little axle grease to the inside of the intakes to make the carbs easier to Plop, back into the rubber, makes a world of difference.

Still quite a bit to do as the front brake was binding so hard when we unloaded it from the trailer, this is always due to the steel piston inside the front caliper, as over the years when they sit in all weather and temperatures, the body of the caliper is alloy and the piston steel, aluminum will sweat and leave a rust deposit on the steel piston over time.  When they happens, altough only a small mark, the piston will not reseat when you let go of the brake lever as the O ring is catching that rust spot.  I always tap the caliper body with a rubber mallet to free the piston and that will stop the binding for a sec.

So, as I now move onto working on the front caliper, I will need a few tools, I will need an 8mm wrench for the brake line and the bleed nipple, as well as a 14mm socket to be able to undo the two steel bolts that hold the caliper to the hanger.  Also Dot 3 brake fluid and a bleeder bottle.

I will be fitting a New caliper body, I do not have a New feed line, so will have to be careful undoing the 8mm nut as it looks like its already chewed up from many years of abuse , but I will put a wrench with some tape on it and tap the wrench with a rubber mallet to shock the nut loose and not round the damn thing off.

This is the original caliper and I have no idea where originally this machine had been sitting or what sort of life it has had, even though its low miles, the weather does take its toll on them when sat for years doing nothing.

The Bolts were really tight on this front caliper, so I soaked them with WD40 and then used a socket with extension and go them to undo, but they were really on there tightly.

I replaced the front Caliper completely with the Kit that I sell on here and it worked a treat, really easy to put together and fitted like a glove.

I will advise the customer that on the next service, we should fit new brake lines, but for now we want to make sure that this Super Sport runs well and of course, stops safely.

Fitted the caliper and made sure the bolts were greased so nothing ceazes up like the original bolts and now just need to bleed the brake system to get all the air out.

All the air is bled out, bleeder nipple has the rubber cap placed on top and she is all good on the front end once more and he can rest assured the front brake will work as it should, and now I have to spend a few days stripping the carbs and getting them cleaned like new once more, stay tuned…………….

HONDA Super Sport Comes to shop to get running again

I never know what may turn up at the workshop these days and this time I was surprised to unload a pretty clean 1975 Honda CB750F Super Sport , this has only 8000 miles on the odometer and is a one owner machine that a Customer just purchased locally and then bought it along to me to see if I can get the motorcycle to run and ride once more.

This Honda SS had been sored away for a while so the normal things will need to be addressed to be able to get the old girl to function once more and give the new owner miles of smiles.

The bike is pretty much as stock as a rock, the only thing missing is the big Cannon tailpipe and the side covers, I make the side covers so that will not be a problem but the tail pipe may be another story, but the bike has a tiny battery that is dead, I will need to order a New one for her to be able to get this girl cranking over, but I shall take one off one of my own projects to see if I can get the old girl to fire up again after a long slumber.

It really is in good condition for its age, remember , she is now 47 years old, and I expect her to be a little stiff in places and get stuck from standing in a garage all that time.

On inspection the Gas Petcock had a lot of Brown sticky old fuel around the lever, so knew that the carburetor would be in dire need of stripping and completely overhauling to give her a brand new life once more, as the gas in California is awful, and in less a month, fuel will start to go bad and tarnish the carburetors and also the gas tank inside, causing blockages inside the fuel journals and then I have to vapor blast them to get it all clean and look like a factory finish.

I had quite a task of pushing the inline four into the workshop, as the front brake was sticking like an egg in a pan with no oil, so to free the piston in the front caliper, you have to tap it with a rubber mallet, it tells me right away that the piston has rust spots from years of sitting in hot and cold temperatures and this stops the piston from letting the brake pads fully release.

So a full strip and rebuild will be necessary to get the old girl to move freely once more, I have no worries fixing this as its a common issue due to the caliper body being an aluminum composite and the Piston is made of polished steel, the piston gets small rust deposits on the outer part and catches the O Ring and wont retract unless you bang the caliper body with a Rubber Mallet, so all New parts soon and I can get that all taken care of.

The Carbs will be pulled but may try to run the old girl using a Lawnmower gas tank I rig up and run Fresh fuel through the tank of the the auxiliary jig I made and right through the carbs, as I fear the petrol tank has some rust in it and will need to clean that out too, but I will run the bike through the auxiliary just to make sure that the engine is running ok and no issues with gearbox, clutch and maybe check for any oil leaks from the cases or cylinder head etc.

Once I remove the carburetors, I can take apart, vapor hone, Polish and synchronize to get this inline four 500 pounder purring once more, these are great engines.

The airbox is always a royal pain to remove and refit but I have done it many times, just have to be patient to be honest and plenty of WD40 at hand to ease the parts out.

Eight Thousand Miles on the bike, that’s super low, just was not ridden much by the original owner and a great find to the new person that found it by chance, stoked for them, the display cluster is in really good condition and gauges are not broken or scratched either.


The year 1975 saw the introduction of three F models, the 400F, the 550F and the 750F. That 400F was truly trick, with mildly set-back footpegs, a flat handlebar and a lovely megaphone-styled exhaust. However, the company decided to go the conservative route with the 750, apparently more concerned with bringing four-piper types into the sporting world than with luring crossover owners from the Ducati realm.

This is partially a retelling of the making of the most significant motorcycle of the last 50 years, but it is a story worth hearing again. There was nothing new about disc brakes, electric starters and overhead camshaft, transverse-mounted, four-cylinder engines in 1969—just that Soichiro Honda had made them cheap and reliable. The CB750K was a winner from when it left the starting gate, but everybody knew that winners get old.

Which is when the styling artists got their orders. The K was OK, and would remain the mainstay of the lineup, but something snappier needed to be on the showroom floor. Not too snappy, mind you, not like a Laverda 750SF nor an MV Agusta 750S, but something to provide at least the image of snappiness.

Call down to the muffler department and tell them to make a four-into-one exhaust system. Have the sheet-metal guys stretch that gas tank out a little, not much, just a smidge to give it a slightly elongated, racy appearance; and hide the gas cap. Then tell the seat people to make a little fiberglass extension to fit the back of the saddle, sort of a faux bum-stop that some single-seaters had. The fast look was born.

Of course the frame and engine departments were given their chores. The chassis mathematicians figured that Super Sport riders would go a little faster than those on the standard K, so they gave the fork an extra degree of rake, to 28 degrees. Along with 3⁄4-inch more trail. And left those ugly gaiters off. Built a slightly longer swingarm, which added up to a 57.9-inch wheelbase, 6⁄10-inch longer than on the K. This meant that when the F rider was trickling along U.S. 2 in North Dakota at a modest 100 mph, the bike was reasonably steady.

Power was another matter. Honda did not necessarily like to advertise horsepower ratings, but dynamometers don’t lie—unless they are hopelessly miscalibrated, in which case it is not lying. The F put out a good 10 percent more ponies than the K, and while some of those 58 horsepower, at 8,000 rpm, could be attributed to the freer flowing qualities of the four-into-one exhaust, the rest came from a slight boost in compression ratio, using domed pistons, up from 9:1 to 9.2:1. And the timing specs on the valves had been altered to adjust to the new exhaust. Also the carburetion was cleaned up a tad, in those halcyon days before the EPA, with the best of intentions, made a botch of things.

The F, with a full 4.8 gallons of high test in the tank, registered slightly over 535 pounds on the scale. Which was 10 pounds heavier than a K, although the F had three less mufflers. Possibly a little extra metal had been included in order to strengthen the double-cradle frame, with triple tubes, a main and two auxiliaries, running under the tank.

Put the leg over the saddle, and the rider sat pretty high at 32 inches. Pull the choke on those four 28mm Keihins, turn the key, and choose between pushing the button or kicking the starter; 999 times out of a thousand, the button won. Vrooom! The muffler had a mellow, unobtrusive sound, the engine warmed quickly, and the rider was away.

Twenty miles down the road, the Bridgestone Super Speeds were heated appropriately, and the twisties began. Tire technology was still pretty basic 40 years ago, but the 18-inch rear and 19-inch front spoked wheels each had a disc. Hit that first sharp left hander at a rapid speed, and the F felt really good. However, coming back at the same speed, the corner now a right hander, there would be a Grounch! as the collector box located beneath the right footpeg touched down. A little help could be had by getting out the toolkit and maximizing the preload on the shocks, but even then, a 200-pound rider was going to mar the chrome. The owner of this CB750F has changed the shocks to S&W, a distinct improvement.

Other than that minor drawback, the F did live up to its sporty intent. It probably was the best-handling of the Japanese 750-plus fours of the time. And got better.


Christmas time almost here

Tick Tick Tick is all I can hear right now, but its all cool, I have managed to get my Customers parts in the mail to them and in time for the big day too.

I thought this week I would add a video of stuff that interests me and this time it is an Indian Factory making the little 70cc 4 stroke Motors for their Impress bikes, looks like a Honda to be honest but great to watch.

If I can help with your orders, drop me a line or a text on 714-598-8392  email is carpy@carpyscaferacers.com

December is now here

Well, December has already arrived, this year seems to be flying along and now that the temperatures are dropping, many people will be in their Garage, shed or barn, working on their Motorcycles to try and get it completed for the warmer months.

Its a Friday afternoon and I have to go up to the barn and work on a bunch of exhaust orders, I have a special deal on these systems and have temporarily knock off $100 on each system, what a great time to purchase a performance 4 into 1 exhaust from me.

Well, to get your Nostalgia in full swing here is a great old Video of the Yamaha RD350LC Pro Am race back in 1983, something to help pass the time whilst you are wrenching away, have a great Friday everyone.


Getting closer to Spiral Ham time

Jeez, time is flying by and I have many projects to get wrenching on, bikes to build and engines to strip but I do make fun Gift idea’s like Mechanical Lamps and also I am coning with new affordable parts for your machines, so be sure to check the website regularly as there may be some stuff that appeals to you.

From seats to handle bars, from Mirrors to signals, I hope to try and offer a bigger variety of products to help you get on the road, I mean, I am now coming up to 23 years doing this and never do tire of making parts available and, at a affordable price.

I hope to make more Gauge faces , so you can change out your faded, cracked or boring stock faces, I first did this about 35 years ago, nobody was making anything like this, so keep ya eyes peeled for cool sets.

I am always here to help, if you cant find something, Call, email or even text me on 714-598-8392 and I will do my best to get you covered, its what I do.


Rebuilding Old Set of CB750K forks 1974 HONDA

For many years I have rebuilt my own forks, and the transformation is so abundant, I wanted to share what I do in the Barn with you lot and maybe you can have a go at resurrecting your own set?

These tired front forks came off a 1974 CB750 K and Customer wanted Rebuilt and Polished suspension, so this is what I did to these old girls you see here.

The Lowers needed to be stripped apart and then sanded and cleaned then I will polish them to a Chrome finish for that Custom look, lucky Honda cast these quite thick so plenty of meat to polish by hand.

The upper tubes are toast, this is a common issue with the forks as originally Honda fitted fork covers and the  condensation in different heat simply left water droplets sit here and slowly rust the chrome away and into the tubing, you would not notice at all until you took the fork ears off the bike.

I have taken these apart and bought replacement Chrome tubes, then I sanded and buffed the lowers to a mirror finish, I covered in cling wrap to keep clean whilst I assemble these so as to not scratch the surface.

I slid the dampner into the fork tube and then inserted the upper tube into the lower stanchion, this is secure by a Bolt with a Copper washer right under the fork leg, secured with allen wrench and began the rest of the rebuild of these forks.

I have fitted so many of these Fork seals over the years and people always ask me, which way up do you fit these, I tell everybody that when you fit Honda seals, the ID Numbers should be facing you when you look at the seal seated in the fork lower.

Also, many people ask me how I fit my seals into forks, I have seen people use scary tools or hit with a screw driver, usually ending up tearing or making a hole in the seal, so what I have always used is a piece of PVC that I bought 20 years ago from Home Depot, this is the perfect size to insert oil seals .

I simply slide the PVC tubing down the fork leg until it sits on the seal, it fits perfectly and will not bind up as this makes sure that it is level when you tap the seal into the fork leg.

Personally, I use a Rubber Mallet and tap the tubing until I feel the seal bottom out on the inner shelf the fork has and then I know she is all the way home as you will feel the resistance right away and you can see the recess in the fork where the snap ring goes.

Some Honda’s have these snap rings, or as we call them in England ( Circlip ). But some early models had a spring clamp, but this is a snap ring that sits in the bottom of the cup of lower fork and secures the seal into the stanchion.

I use a set of Circlip Pliers but long nose pliers will do as you need to squeeze these together to slip into fork lower then release to lock seal in place.

I then slide the New Dust cap that I sell many off from the website, over the tube and down to the lower, it simply pushes on and sits tightly over the end of the fork and dresses it well.


There you go, nice and snug over the lower fork and easy to fit to be honest, and this job can be done pretty much by anyone with minimal tools.

I used New Stainless Lock Washers and Stainless Flange nuts for the bottom cups to finish them off nicely and its ready for Fork oil which is 5 ounces, I use Automatic Transmission fluid, always have and I throw in a couple of stainless washers on top of the spring to set the preload that I like.

And there you go, ready for the customer to fit back onto his Motorcycle and have fun on the tarmac, just thought I would do a little blog on what I do from time to time as many ask me for tips etc, thanks for watching.

The transformation is so cool to see, I often stop and look at what I have accomplished and you will do the same thing for sure.

So have a go at your ones, you may surprise yourself and save some money at the end of the day too.

Any info you may need about anything bike related, email me on carpy@carpyscaferacers.com or text me on 714-598-8392 I am here to help.


Thanksgiving Special on Exhausts, $100 OFF

Well, to celebrate Thanksgiving I thought that I would help you all out by reducing the Exhaust Price by $100. how cool is that?

Thank you all for supporting me, I value each and every one of you, these exhausts Perform and sound bloody awesome, making these over 20 years now and ship all around the globe.