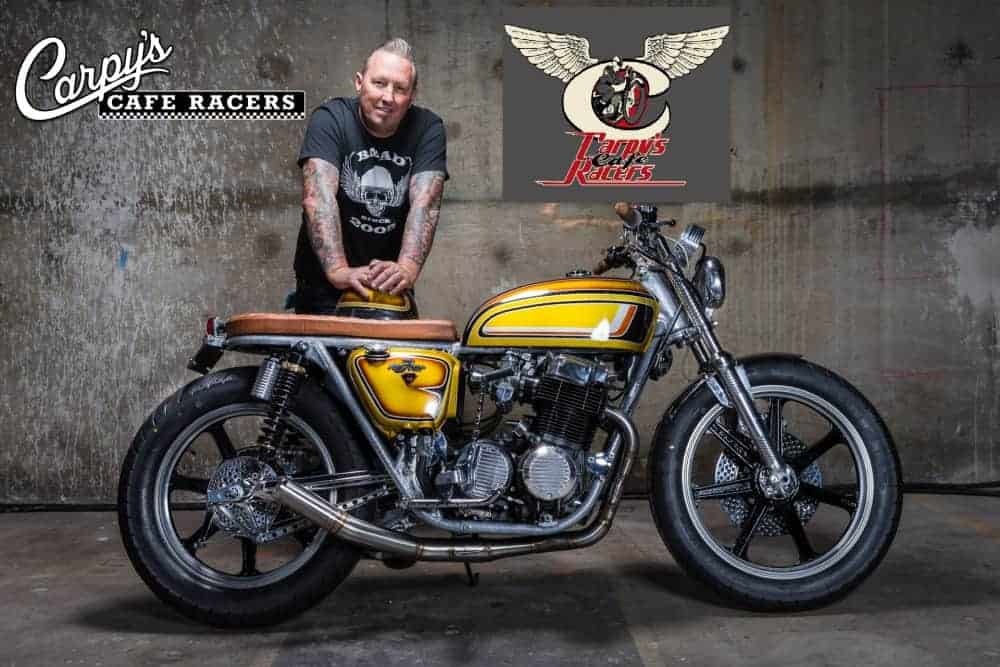
The Vesco Honda SOHC 1974 CB750K Custom Built Brat Bike

Well, this was a super fun build that I did and it is not often that I purchase an old snotter and then, after building it, sell it back to the owner I purchased it from, but this was how it was, I saw that there was a SOHC 750 in a garage in the City of orange for sale and made arrangements to drive down and take a look at it.  once I got there and the garage door was lifted, I could see this sorry arsed looking inline four that was parked up, leaking a little oil and looking worse for wear.

I mean, it had everything there to make it look cool, but- it had not run for many many years and the young lad who owned it said he tried a few ties to get the bike to run but he lost interest and its been sat in the garage just collecting dust, so- we stood and kicked the tires for a while and eventually came up with a figure, shook hands and it took the three of us to push the old girl into the back of my van, but at last I had this old 750 in the Transit and had already worked out what I wanted to do with this 500 pounder machine.

The old girl is in my van and getting ready to drive home, I looked at the title and noticed his last name was Vesco- Your not related the the famous Don Vesco are you? I inquired.

Yes, he was my Grandfather, That is so cool as Don Vesco held many Land Speed records and had tons of 750 Honda’s back in the day, so I was super stoked to be able to own something with Vesco’s name to it, so, I drove home with a smile and half an hour later I pulled the old girl out and took a look at what I have to play with..

The Old girl was tired but, this is not my first 750 and as I have been creating Custom Motorcycles out of these here in the USA for over 20 years, I was quite eager to see what I had to work with but knew I had my work cut out if I was going to make a Custom creation out of this 1974 Honda.

Motor needs some love and had no idea if it would even turn over but I love these inline four engines and was going to see what it took to at least get to run and see where I can do with a full build on this 500 pounder.

The carburetors had seen rain, wind and snow by the look of it and the slides were stuck solid and as I have have rebuilt many of these rack of four set ups, I wasn’t too worried and thought I would strip the bike to where I need it to be and see where I am at.


I wanted to try and get this running, so I pilled carbs off and cleaned them up, fitted new jets etc and fitted new intake manifolds , as well as putting an old set of handlebars on as the clips on’s didnt fit right, I also hooped the frame as it was cut already and thought I would add my own style seat and see if I can at least fire it up, I had a 4 into 1 exhaust that I make that was in the rafters, so pulled the old rusty Kerker off and fitted mine, added an oil Pressure gauge so I can see where we are at if the old girl fires up.

The rims were too rusty, and was lucky to have an Original set of Lester wheels in storage that I could use on this bike, so fitted them and added some new Bridgestone tires and fitted one of my drilled brake rotors to the front end too. This bike went together really quickly and in the space of a week I was ready to fire this puppy up and see if it would even be able to move under its own power, I had spare parts in my garage or in my storage so it was a zero cost other than the tires to put this Honda together.

With rebuilt carbs and my 4 into 1 system cut down to a more aggressive loo, I was eager to see if this will fire up, it had compression and spark so I kicked her in the guts and she fired up right away with a nice brak from my exhaust system, I knew this would be a fun bike.

I made the handlebars and the seat too and this was probably the most comfortable bike I have ever ridden, I was so suprised how much fun this bike was and it had linear power too.

Well, I was happy at the way this bike was looking but the gas tank looked horrible just black and wanted a cool Custom 70’s flake look set of tins on this bike now.


So, I thought I would use the original tank that was on the bike, but wanted to get rid of the factory gas tank fuel cap and make a custom set up, just to be different.

I cut the old neck off and then ground it all down to make sure this was flat to the tank, I made sure there was no gas left in this tank before but it had been empty for about 7 years lol.

I make a gas cap kit now and this is how I did the conversion on this tank, as you can see, I fit the weld in Gas Cap Bung into the opening on the top of the petrol tank.

It sits in the original location really well, I simply ground all around the gas tank to make sure I have a good ground and then simply tig weld the bung in place, for a neat smooth Custom look.

All welded and to be honest, I do not need to grind the welds as I shall be doing a little body work on this to smooth everything out, so this will be covered up anyway.

I used a Harley screw in Gas cap and this really gave it a custom but Classic look, I was really happy at the end result of this and glad that I went this route on the bike.

Now that looks a lot better with the Custom 70’s style paint and am happy I went this route in the end, the 750 looks pretty tough like this.

This bike turned out great and even though I wasn’t finished with it, I wanted to get a few miles on this bike before I finally completed the other bits that I wanted to do. As you can see, the Vesco bike is on the Dry Lake at El Mirage where Don Vesco himself races bikes and broke records and the day this was fired up, Team Vesco did over 400 mph at Bonneville, so I thought this was fitting that i was at a SCTA meet in El Mirage with my Girlfriend Jennifer.

This has a great stance and is so comfortable to ride, the drive train works smoothly and my aggressive 4 into 1 barks like a scolded dog, I fitted an Led headlight that is 5-3/4 inches with internel led turn signals to make it all legal for the road. She sure looks swell out there in the Desert.

I like the meaty Bridgestone tires that were shoe horned onto the Lester Rims, those rims came of a CR750 Race bike and I had them in storage for almost 20 years.

I love it out here at El Mirage dry lake, if you can get a chance to get here for the SCTA racing, you should, I loved taking the Honda out here and I think it felt at home to be honest.

So there she is, the Vesco Honda Four, a brute of a bike and it looks pretty tough out there in the So Cal desert, I am so glad I went ahead and built this machine.

Now it was time to take the bike back home to Las Mirada but what a great time we had out on the dry lake, watching the Hot Rods and Motorcycles race on the Lake bed.

My Girl Jennifer takes the reins as I help a broken down Motorcyclist on the race track at El Mirage SCTA event.

So, I now get ready to put the Vesco bike in my Van and take it back home to my garage and figure out what I am going to do with this Motorcycle.

So, I sit the bike on the drive way and I am think of what else I might do to it, and I have to write a few emails to customers etc, it was when I got on the computer I see I got a message that I had been invited to the OG Bike Build show in LA and its in about 4 weeks, heck! I could maybe strip this bike and redo it to how I want to and show the bike, of which is a tall order but heck, why not eh?

So, even though it is a tall order, I had to come to the decision to take this bike and strip it to the bare frame and begin a cool build for the OG show, I shall still keep the Gas tank and side covers the same and the Handle bars etc but the rest will get some rework.

The strip down begins, I want this to be a trick frame when I am done and now is the time to take the bull by the horns and remove everything from this 500 pounder and make this a head turner.

I am taping the frame where I will be cutting and making quick release Custom Pieces that make engine removal and cylinder head removal way easier as the stock frame is so difficult to remove the motor when in the cradle.

Top frame removed and I shall be fitting my New  Steel tubing Frame kit that I now offer on my website for the 69-78 CB750 Chassis.

Heave ho and away we go, I have removed so many engines on my own over the years, there are many ways people do it, some lay the frame down etc, but I like the old school brute strength of removing the 230 pound behemoth, I always go this way and then put the motor on a milk crate as its about the same height as the lower frame rails, I am always knackered afterwards though.


Well she is out at long last, time for a cuppa and an Ibuprofen lol- But seriously, the Motor is out and now the hard work begins, you too will notice how dirty and grimy a frame becomes after being used for 40 years and this thing has more oil on it than the Tin mans Elbows.

I Have welded the New removable top Rails in the chassis, now time to cut the right Lower side of the frame, so I can make a removable side for the 750 Four.

As ypu can see, the top rails and side rails are now in place, looks bloody awesome and not seen this EVER done before, I wanted to really push the boat out in the short amount of build time that i have on the Vesco Honda, I bet people wont even notice it when I am done.

Make sure all the weld area’s are clean and my Kit that I sell will work great for all of your machines from 1969-1978 and glad I have made these kits to be honest.

See, all nice and shiny, and soon to be ready to media blast all the paint on, prep and paint for a Custom Color and this time I think I shall go with a metalflake Silver, to keep with the Custom 70’s paint style.

All media blasted, she is now ready for the start of paint, this will take some time as i want the thick flakes but this will look great in the Sun against the Gold of the tank etc.

The race is on, and as you can see, I have the Silver Flake paint on the Chassis and I went ahead and chromed the rear swing arm, just for that added Custom look.

I have to rebuild some front forks, I went ahead and machined the fins in the lowers and polished them, then I needed to add new seals to the old girl for new life.

I use a piece of Plastic tubing and gently tap the tubing onto the seal and this easily presses the fork seal into the stanchion with no damage at all, so easy to do like this.

Custom look and even have chrome topper caps on the Original black covers, just to give it some nice bling and look a little different from the rest out there.

New tubes, springs and I set the pre-load using 4 stainless washers, as I dont like using that Plastic shit that many fork places offer, washers is the old school way and I also use Automatic Transmission Fluid instead of gear oil, another old school way.

Time to work on a custom rear brake Hub Assembly and I shall strip these, clean it drill the holes for aeration and cooling the hub and then polish it and fit new brake shoes and actuator arm to it.

All done and am happy at the look I was after, a nice custom touch that I do and offer this service to many people and is available on the website.

Front brake rotor gets the same treatment, I do all this at home and use my old drill press to make all the holes and then countersink both sides, for me, its therapeutic to be honest and boy does it look good when finished.

Now I just need to clean it up, paint the center and I shall be ready to mount on the Original 1977 Lester mag wheel, now for the cool pics below.

You can see the Custom paint nicely, all seems to flow really nicely and am super stoked I got the job done in time and it runs like a top, this sure is a stunning Custom bike and am proud to have completed such a creation, I just went for it and there you go, I have never built a bike twice but it was well worth all the hard graft.

Rebuilt and polished Caliper, Rotor is polished and painted and braided brake lines too, I did all I could think of on this machine, it really is a head turner.

Vintage style metalflake Candy paint with fish fad aways, captures the spirit of the build and hope that you like the direction I took on this SOHC bike.

Custom master cylinder, new switches, hand made and triple chromed handlebars really do set this build apart from many but- I hope I have inspired you to have a go at your machine now?

I wanted something a little different on the exhaust set up and thats why I thought I would go with a stainless steel 4 into 2 into 1 performance set up and boy does it sound sweet.

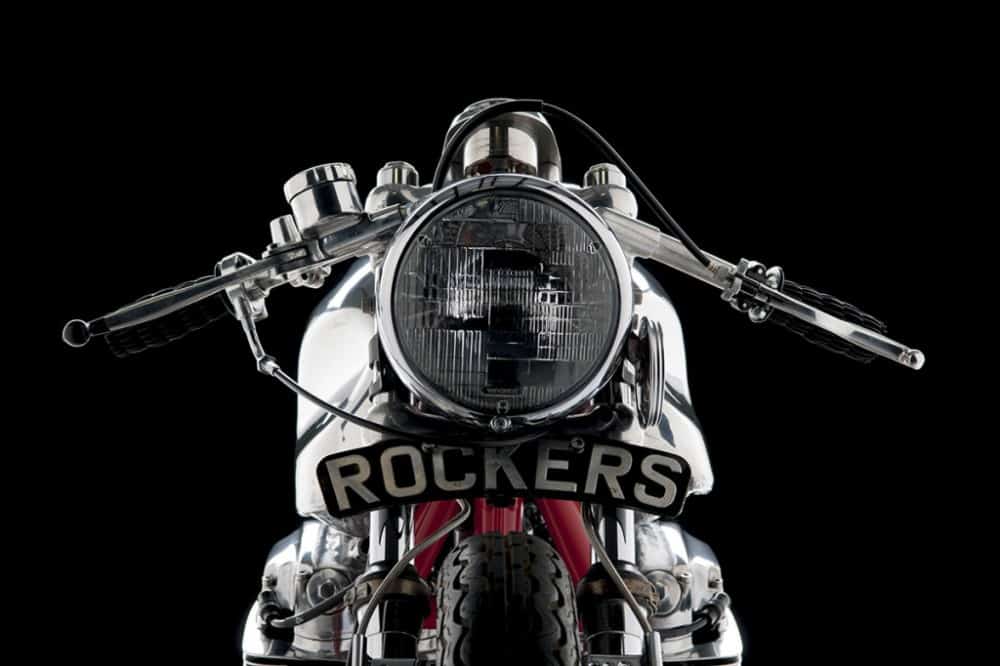
I did so many tricks to this bike, I machines some upper fork covers to match the lowers and this time I went with a Custom headlight that is so different than the others that you see, it is pleasing to the eye and I just cannot stop looking at this bike.

You can see the detail and the quick release chassis rail too, hope you like what I achieved in such a short amount of time?

Custom drilled levers, hand made front fender and a machined bucket out of 6061 Alloy to house the GPS speedometer, all flows together on this 74 CB750 Honda.

The Devil is in the detail they say, I did as much as I could in the short amount of weeks I had, but so stoked the way she turned out in the end, well worth the hard work.

Riders view, thats a GPS speedometer and I had to hand make the housing , this really is so cool to look at from any angle, so many tricks on this ride.

Re-charged shocks with Custom machines finned covers and 2 inch allot risers,make this Brat bike sit to the height I needed to sit my fat ass on top of.

Oh yeah- I even painted a Vintage Skid lid to match the paint scheme of the bike and think it worked out pretty good.

The stainless exhaust systems has a deep bellow that gets your attention, and this breathes so well it gives you Linear power all the way through the band.

This has been a fun adventure, not sure I could warrant another build so fast but this was a fun challenge and the cool thing is that the original owner that I puchased it from loved it so much, he bought it back off me.

So many cool little Custom touches I did on this bike, I would have to take a long hard look to remember what I actually did.

Sitting in the parking lot in Downtown LA, I got many cool remarks about the Vesco Honda and so glad that I made it in time to show people what this bike is about.

Hard to top this build but, I love creating them and hope I can continue having fun with this old 750 Honda bikes of the Nineteen Seventies.

Just goes to show that with a little imagination, there is a lot that you can accomplish on something, I was certain I would get this completed for the show too.

Plenty of eye candy and color, hope that you like what I have managed to create.? The good old SOHC Honda Four.

Took me some time to figure out the finned aesthetics etc  but the long process worked out really well and all seems to flow very well on this Custom Build.

This bike does look really well in the sunshine too, all the nuts and bolts are stainless steel too so no rust ever.

The Vesco Honda sits pretty level and you will be surprised how comfortable this Motorcycle is, I sure miss it already. LOL.

A tough bike, super strong Motor and sits well, this will last many many miles and hope to see it again one day.

Thanks for taking your time to read about this Vesco Honda build, I hope you have enjoyed what I have created?

Sat in my driveway before I took it to the Original owner in the City Of Orange.

Well I guess its onto another build, hard to top this one though.

At the OG show in LA where the Vesco Honda made its Debut and many people gave me the thumbs up.


Sturgis Honda still in the planning, but making some headway.

Rome was not built in a day and the same goes with this old inline four Honda CB750 machine, it is a wee bit of a head scratcher as so many things I am trying out, some work, some do not, but I guess that is the adventure in stepping into the unknown, when it comes to fitting non stock parts to a well known brand.

Well, the 230 pound inline 4 Motor is finally in and I tell ya, having a girlfriend that drops everything and gives you a hand, manipulate this arse grape giving engine into its cradle, well, its a blessing I tell ya, what a girl. We managed to get this motor in the frame area as I cut the old rails out and am making them removable.

The Lump is in place, it will be taken out later when I get to strip it all down and work on the frame for welding and I think I shall paint it, but right now I have no clue on color yet and am glad we got the motor to sit in this old Duplex cradle chassis, but so much more to do now.

This is an old KO Die cast Motor and this time we have lightened the flywheel and will not be using a starter Motor, it will be kick only, but should save some weight on the starter alone.

You can see the frame rail that is removable, I will strip the bike later and paint but I wanted to show you my own Custom oil tank that I want to use, instead of the ugly factory version.

This is roughly where I will fit the Oil tank, it also has a Battery box in the rear, this will house an 8 cell anti gravity battery and open the frame up, as I didn’t want to have stock oil tank and side covers on this build. This oil tank will fit snugly under the frame and I am stoked to be able to incorporate this set up . And so, we plod along, trying this and that, until I am happy with the way the build is going, no idea on color yet or rims etc but will sit down on the weekend and try and write up some sort of game plan for this Sturgis Bound Motorcycle.


Playing about in the garage with an old snotty frame

Well, I need to clean some of my old storage out and thought I would have a bit of a play about today, being its Sunday , and see if I can at least come up with some sort of rolling frame.


So a few bits and bobs were put together to see where this may go, not sure what style or Caff or Brat style but just having a dig around out of my old parts to see where we end up.

I had about 3 hours to spare today and wanted to try and at least collate some parts that have been getting in the way in storage and this would be a fun project to start on today in the garage.

So, a fun afternoon just playing with an old neglected frame that had been butchered up many many years ago and to save it from the junk yard, I took it off a friends hands and thought that I could at least do something with it and save another inline four from the scrap pile.

Well its all about there, not sure if I like it or not, the Alloy 5 Gallon hand Made gas tank is fun but not sure on the seat and I do not like the handlebars at all, but thats all I had kicking around the garage, either needs Clip on’s or a set of Ace Bars.

Not sure on the smaller LED headlight right now but I had these old parts laying about here in my garage, so its a mock up and I am sure this bike will go through a few guises until I am happy with the look and the style that I want to try and create.

Up in my Rafters, I had a coupe of old Dresda swing arms, this one is a NOS CB750 version, so I thought I may as well use the thenig and am happy that I have, of course I shall run a wider rim later too as I want to fill that void up.

I had some old Tarrozzi rear sets brackets so if I go the Caff route, then the ends of the brackets of the frame will get nipped off and sealed up with weld for a clean look.

The whole point of me mocking the bike up , is to see if there is any parts that I really like and may help the bikes lines flow nicely, I am not sure on this old CR750 seat, its ok but I am just not feeling it to be honest, so I may put this one back in the storage and think again.


The 5 Gallon Manx tank is cool but I am not feeling it on this frame at all right now, mainly because I am not a fan of the handlebars I fitted, but as its a Sunday and I am using parts from the garage, it will do for a while but am sure this will change its look as time goes on here.

But I have it all mocked up and I may go with my Custom gauges, just for that Classic look and will refurbish the left speedo to match the Skull and cross bones tachometer.

Just want to show that I do use old knackered parts and I can change the look and style right here in the garage, as this build goes along you will see some progress shots but I need to have a rolling frame that I am happy with, before I tear it all apart and start to the tiresome hours of welding, grinding, sanding and refurbishing, until i am happy with the way it is looking.

it looks ok but just not turning my crank, so i think I will try another petrol tank as some times that alone can change the lines and flow of a bike, so i have an old k3 gas tank I can plop on and see what that looks like compared to this Manx Alloy version.

Well, I do like the Original tanks of the K series, but not sure I like the seat at all now, thats all part of the mock up, just keep going unto you are happy with the look that you are after, this may take some time, but its all worth it in the end, you just cant rush this stuff.

Well, the Handlebars are now doing my head in and as the light is starting to go I may pull the plug for this afternoon and re-charge myself once more and see where we go on this old girl.

The main objective today was just to piece together a bunch of old parts that have been collecting dust in my storage and around the garage, so at least I have made some progress to some extent.

I am glad that I used the Dresda swing arm and hope to be banging out my own version of these again, but stay tuned to how this old K model is going as i hope to make a cool, head turning machine that will belt along the highways and byways of Southern California, stay tuned……………………………..


Doing some electrical on a K5 CB750 Honda Four in the Garage today

Well, Project Wire harness is the goal this weekend, I have a customer and friends, 1975 CB750K model Honda four in the Garage and it apparently wafted out a bunch of smoke under the seat, so it was bought here on the back of a truck and here it is at my place where I need to take a look at whats going on with this old 500 pounder.

I need to see what has happened the the wire harness and switches as these do look like they have been on there since it was created in late 1974. Just a few vids I did today with my phone, sorry for the quality.

Below, just look at how dry rotted the connectors are for the wiring, this old bugger has got to be all taken out and replaced im afraid and new switches as well.


Bit more video

I wanted to try and at least record what was going on today and I went on facebook and did a few video’s etc, may not be very clear but you get the idea I think?

Summer is here and time to get back on 2 wheels

We are so lucky here in Southern California, we are blessed with Sunny days most of the year round, albeit the price we pay is we get Earthquakes and we got a couple of big buggers on July 4th and 5th, with a few aftershocks on their way.

But other than that, we are fortunate to have year round riding weather, but thats not the case for most of the other parts of the USA and the world etc, especially places like Canada etr.  They have a very short riding season and its this time of year that many riders are slinging their legs over the two wheeled creations and pounding the tarmac.

If you need parts, well I am here for you all, as well as any enquiries as to how to hopefully come up with an answer to a frustrating system on the bike, maybe Carburettor issue ? Bad coils? or what oil and plugs do you recommend etc.


My job is to help you get your machione on the road for the first time or, for the millionth time again, its all good and this really is the best time of year for the two wheeled industry.

I love what I do and if I can help you get you back on the road, then I am a happy Bloke, I can help you with many parts, I have been doing these cool Vintage Stke Tuck n Roll seat assemblys for the K series Honda’s for many years and they turn our great, fit well and are comfortable, but more than anything, made by me right here in California USA!

So, have a great Tuesday and if you need help you can email me at carpy@carpyscaferacers.com or even Text me on the same number for a faster response. I ship out the same day if I have the part in stock too.

I make parts for Triumphs too, so stay tuned to the website if you have a Twinline Motorcycle and need help with that as well, this seat style I make for the HONDA and the TRIUMPH and was the first to do this style many years ago and continue to push the enevelope in making new parts for the bikes out there .

Thanks for reading my Blog today, I try and keep you up to date with whats going on, if you have a 350 to a 1000 I can usually accomidate you and get you back on the road fast, but i also have a passion for Motorcycles, been into these bkes for decades and thats where I get a lot of experience from as I have ridden them for so long.

Have a fun Tuesday and hopefully you get some time to wrench or ride on your favorite machine out there.


Love what I do here in my Garage

Been doing this for close to 20 years now here in Southern California, always fun and challenging to say the least- I have lost count of the thousands of orders I have managed to be lucky enough to generate, through you people, I am stoked that you enjoy my blogs and my parts, as well as builds and my reply to emails when you are stuck with your bike.

I continue to push the proverbial envelope in this great and very competitive market that has now emerged in the two wheeled lifestyle, and its great to receive word from well known companies that let me know that I in some way have inspired them not to give up and keep trying.

I am trying to make more parts and stay tuned to my website as as soon as they are ready i shall do a quick Blog to show you have they fit and look etc and then put on the website to make available to you right away.

Thanks for all the great emails and texts etc, I am busy with a number of things, from Vapor Honing parts, to polishing and chroming, as well as making new parts, drilling hubs and working on my Vintage Hot rod too, never a dull life here in La Mirada thats for sure. Thank you again and as we enter into the 243rd year of this Great Country- I wish you all the very best and look forward to helping you any time.  Have a super week everyone.


Weekend is here already, working on a New braided brake line set up, and a Custom Headlight Assembly.

Well, Saturday soon came around, I have been pretty busy as of late at the shop here in La Mirada, it is always a busy time of year as many people need pars for their bikes and I help all that I can to make sure they can complete their Motorcycle in time for some great riding.

Now, I am bringing out many more new products that will be available for you to use on your machines and I do all the prototype work to make sure it not only fits easier, but that it performs better than what you have right now.

The 2 parts I want to feature today are my Custom European headlight, which is a really Custom look and comes with a Stone guard and a Yellow Lens, to get you noticed.

So right now, today I have been working on a Project motorcycle, a CB750 F Super Sport and the stock brake line set up just wasn’t cutting it, so I removed that and used my brand new Braided hose stainless brake line that has Stainless Steel adapters and is so easy to fit to your machine too.

So, above you can see the Braided hose, this is Top Quality all the way, even the Formula One Race cars you see use this brand of hose, so you know these are a great deal.


These Braided hoses will fit the CB750K and the CB750f but- this is for removing your front brake switch, I dont like them and remove them from the triple tree and fit a single one piece brake hose, and this will give you 40% more braking and so easy to fit too, but- if you want to have your brake switch, I offer a 2 piece brake line kit on the website, so check that out at your leisure.

I use a straight fitting that simply screws into the caliper, then you use the crush washer I supply, then route the braided line down to the caliper, going behind the lower triple tree and then into the caliper, simply screw the adapter in place, undo the bleeder, fill the reservoir on your mater cylinder and bleed it into a bottle with a clear pipe so you can see the air bubbles exiting the bleeder.

These are such great quality and gives your brake more power but also a more Custom look as well.

You will find this so easy to bleed and the brake will feel way more positive when you grab the lever and thats a good thing.

This literally took me 5 minutes to fit and bleed and now functions so well and gives me more confidence in stopping when i am out on the tarmac next and now available to you lot.


The Brake hose is fitted and now I have fitted the Euro style headlight and made a special bracket to house it, this allows you to use the stock location of the lower triple tree bolts, i will chrome the bracket when completed and that too will be available on the website .

The Stone Guard will protect your lens from any stones or projectiles that are sometimes left on the highway or byways when you are riding to an event or a job etc.

Also, the strong Yellow lens, gives it a European style but will grab more attention from drivers but with out blinding them, look how cool this front end is now.

So, I am off to the garage to do a wee bit more but wanted to show you what i got up to today, have fun with your Motorcycle and thanks for checking my Blog and my parts out, I am here to help, call or text 714-598-8392 and I will do my best to get you sorted out.

I love my job and love to promote Custom parts too.

The Vesco Honda Custom Machine fires into Life

For many years this bike was left dormant and looking in a sorry state, I completely stripped this old 74 Honda and Custom worked on the frame to give it the opportunity to remove parts of the chassis if you need to get to the motor.

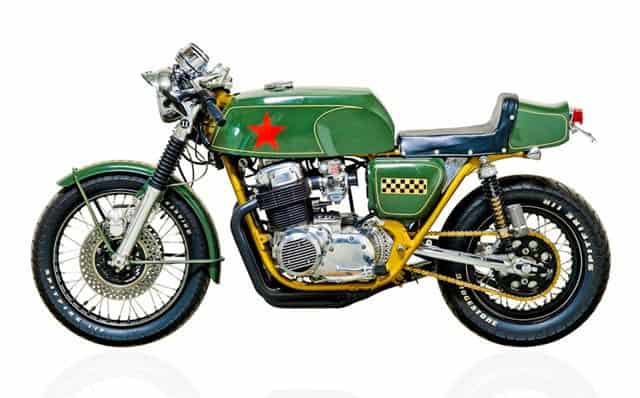
This bike is kind of a 1970’s Street Muscle Machine for the want of a better description and I am so happy I went the way of a Metalflake Silver frame and a Candy Pearl bodywork design, this screams mid 70’s and the ole 750 sounds tough as old boots.

I have custom welded the gas tank and now it uses a screw in Harley cap and is smoothed over and the seat is one of the most comfortable I have made, using memory foam and expensive Quality Leather, I hand bent the handlebars and triple chromed them and the stance is bang on and really nice to ride around on , and Love this bike and am so happy at the end result.

Obviously, originally belonging to the infamous Vesco Family and now they have a 428 MPG record with their Streamliner, they have shown interest in the machine once more and love the way it has turned out.

The 4 into 2 into 1 Stainless Exhaust system Growls nicely and suits the bike as the headers hug the inline four motor, it now has that old school Gold tint to the headers now she has been fired and it is a tough looking Motorcycle which ever way you look at it.

From every angle you can see detail and I am happy that I put a lot of hard work in detailing this inline Four, these sure are good solid bikes to use as a Platform for any guise of style.

The Original Lester Spoked Rims I removed from a CR750 Race bike that was being parted out and glad I got to use them, as I have had these in storage for about 15 years and nice to re-use parts from back in the day.

Here are just a couple of lists of some of the things I have done to this motorcycle.

Finally I am ready to take the Vesco Honda to the OG show in LA

Been hard work getting this bike to the stage it s now in, but- All that hard work is well worth it as I am really happy with the look of the machine right now.

A lot of hard work and time has gone into this machine and I wasnt sure if I would makew the deadline of four weeks as we had 3 weeks of rain, but somehow I managed and I got it on solid ground for the first time last night, so stoked about it.

I will leave this at the OG show until Saturday evening but its a great show and look forward to seeing some of you there in LA.

Thanks for all the cool support and emails encouraging me to get it done, couldn’t of done it without your motivational words.

What a crazy month, but some how I managed to pull a few tricks out of the hat and get this ready for the OG show.

Honda SOHC Sandcast Cafe Racer up on the Auction Blocks from Sweden

Not always you see too many Sandast’s these day, I’ve owned about 9 over the years and sold many parts for them back in about 2003 but harder to locate for sure these days- So, when you see a Cafe Racer creation that was built in 1969 and sent to Sweden, then it is quite a rare sight. The bike was on the Auction Block but have yet to find out the closing bid price on this rare steed- but the title said it all here below:

ESTIMATE

$32,000 – $40,000

HIGHLIGHTS

  • Part of the MC Collection of Stockholm
  • Originally sold in in Sweden
  • 750cc engine
  • Keys
  • Photos and previous Swedish registrations included

This beautifully preserved Honda café racer is exactly the sort of machine every rider dreamed of in the early 1970s: a Hot Rod 4-cylinder in flamboyant style. The custom motorcycle trend was ramping up dramatically after the 1969 release of “Easy Rider,” with the wild paint jobs of the chopper scene spilling over into the world of café racers as well. Gone were the days—at least temporarily—of ultra-simple, pared-down street racers. If you went to the trouble of building something special in the 1970s, it made no sense at all not to paint it up with eye-catching metal-flake paint, stripes and graphics.

This Honda is a perfect example with its four-into-one exhaust system, white seat, double disc brakes, Lester mag wheels and large half-fairing with twin headlamps, á lá the endurance racing style of the time. Best of all, this is a genuine 1969 first-series Honda CB750 K0 with sandcast engine cases, one of the first models built in 1969 before the factory switched to mass-produced die-cast crankcases.

The sandcast CB750 K0 models are the most collectible of all the 750 street fours, and second only to a genuine factory CR750 in desirability. Of course, the Honda CB750 is legendary for transforming the motorcycle industry and changing what kind of motorcycles people rode. The old days of vertical-twin dominance were over, and now, fours were king.

This amazing 1969 Honda CB750KO “Sandcast” Café Racer was imported to Sweden in 1969 and retains its Swedish title dated January 1, 1970. This bike has had three private owners, and while it was originally a green model, it was built as a custom machine sometime in the 1970s. The MC Collection acquired it in this state and has wisely chosen to preserve this remarkable period piece as it was constructed in the day.

If I find out any more information as to what it fetched, maybe some more History and where it went to, I will of course add it to this blog.

Also- if any of you know, please email me on carpy@carpyscaferacers.com as I would like to know where it went to as well.